Repository
https://github.com/Vitusc
What Will I Learn?
You will learn how to properly install the cs: go server on your vps (virtual private server).
Requirements
Difficulty
Tutorial Contents
In the first place we have to log in to your vps machine using PuTTy.
In the next step, we execute the server update with a few commands. The first command we will use is:
sudo apt-get update
with this command there should be no problems, so let's go to the next one, which is:
sudo apt-get upgrade
Some people may have problems here. At some point, we get a question from putty. In response, we must enter "y" and confirm with the enter.
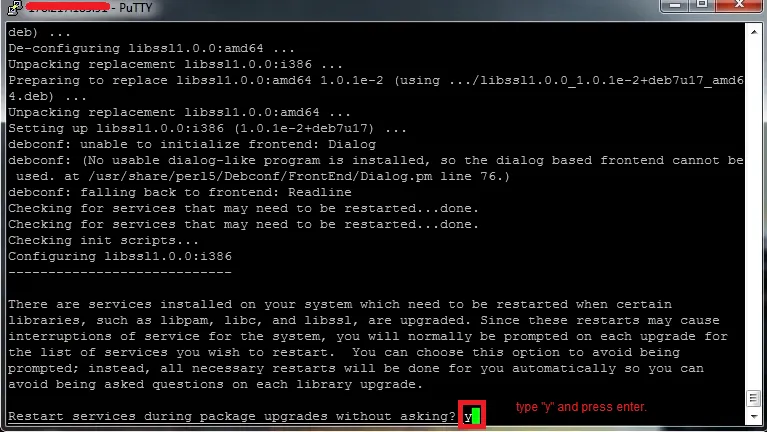
It may take a few moments.
The time has come to install libraries (a very important step in the installation of the server).
Attention! In this step, you must use the appropriate command. There is another command for each system.
Debian and derivatives (Ubuntu, Mint)
sudo apt-get install lib32gcc1 libc6-i386
RedHat and derivatives (RHEL, Fedora, CentOS)
yum install glibc.i686 libstdc ++. i686
Arch Linux
pacman -S lib32-gcc-libs
I use the Debian system in the example, so I used the command: sudo apt-get install lib32gcc1 libc6-i386
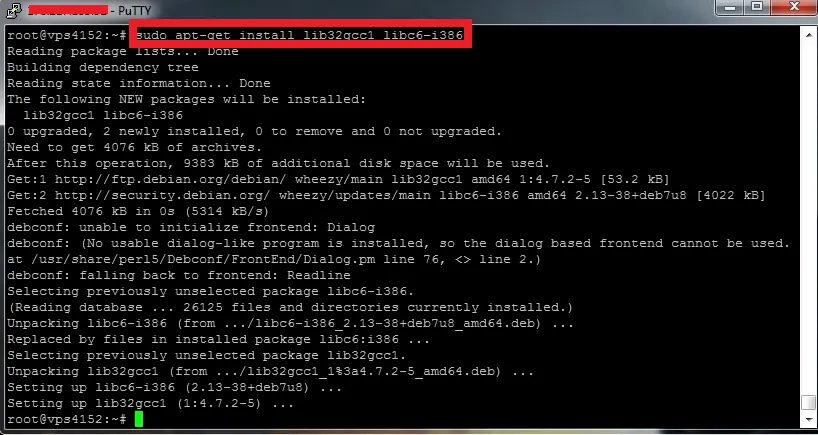
this step, fortunately, should take just a few seconds.
Now also very important information.
We will create a new user on which we will be able to carry out further instructions. Many of you (beginners) may not know this, but we should not continue to work on the administrator's account (root), because when things do not go our way, in the worst case, we may be able to destroy the vps server in the worst case.
for this purpose we will use the command:
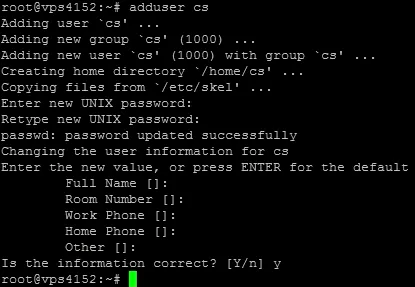
adduser user
then we give the password to the account.
We will be asked to fill in such data as "Full Name", "Room Number", and similar, but we are not interested in it. We can leave them without any entry. At the end, we approve everything with the letter "y".
Now we will use the command to log on to the user (in my case, the user is "cs").
Command: su cs (You give your username instead of "cs").
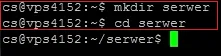
Now that we are on a regular user, we create a folder where our game server will be.
To do this, we'll use the mkdir command: mkdir (folder name)
we go to our folder using the cd (folder name) command
now, with the wget command, we will download the steam console, which will support both steam and our server.
wget http://media.steampowered.com/installer/steamcmd_linux.tar.gz
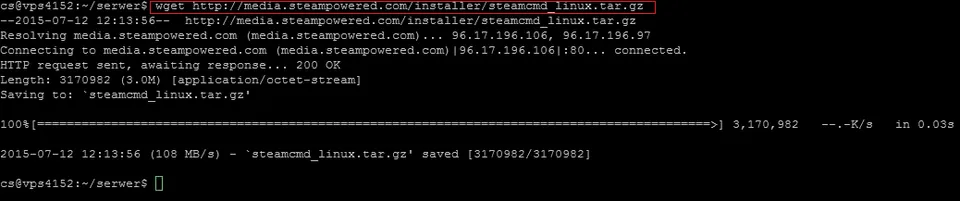
this task should be done very quickly, because the content was packed.
Now we extract the contents using the tar command.
tar -xvzf steamcmd_linux.tar.gz
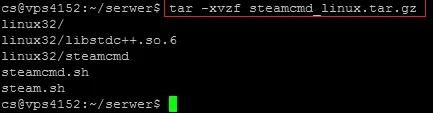
this activity should also be done quickly.
now a few steps that are not required.
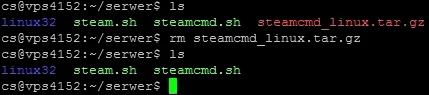
To verify that everything has been done correctly, we should use the "ls" command.
Thanks to this command we will check the contents of our game folder.
You should find files like:
linux32 steam.sh steamcmd.sh and you no longer need steamcmd_linux.tar.gz .
If we want to be decent and keep it clean, we can use the command rm steamcmd_linux.tar.gz to delete the unnecessary file.
Now we're starting to play.
We connect to the steam console using the command
./steamcmd.sh
When you first start up on a regular basis, but are not suitable for take too long.
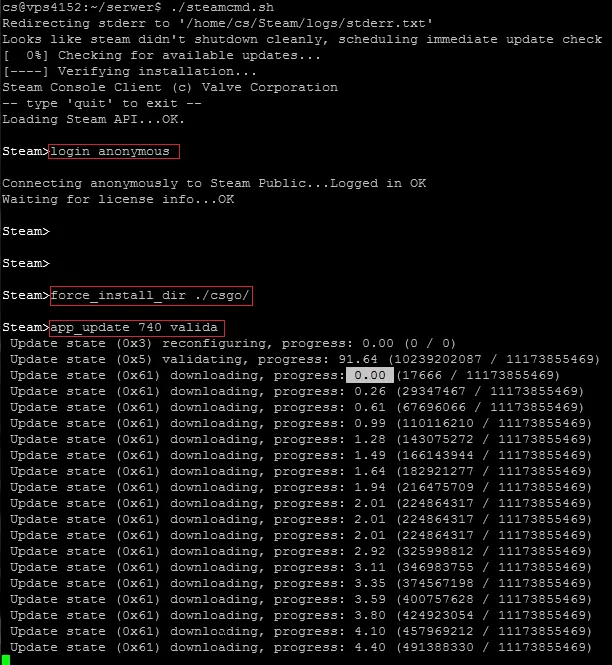
at this point, we log in anonymously, using the command login anonymous , then install the game directory with the command force_install_dir ./csgo/
and using the command app_update 740 validate we will start installing the game server.
This process can take a long time, it all depends on the parameters of our vps.
The installation process in percent is shown after the inscription "progress: x.xx"
For example, "progress: 4.40" means that the installation performed at 4.40% at 100%.
If the installation succeeds, we should receive the following information at the end:
"Success! App '740' fully installed."
When we receive such a message, we know that everything is okay and our server is starting to crawl.
When the installation fails, we must start the step from the beginning again by executing the command app_update.
Now, to exit the installation process, click "ctrl + z" and run the command of our server.
To start the server, we first need to type cd csgo command to go to the folder where this server was installed.
Here the choice of the command depends on you and on what type of server you want to create. I leave you the choice:
Classic Casual:
./srcds_run -game csgo -console -usercon +game_type 0 +game_mode 0 +mapgroup mg_active +map de_dust2
Classic Competitive:
./srcds_run -game csgo -console -usercon +game_type 0 +game_mode 1 +mapgroup mg_active +map de_dust2
Arms Race:
./srcds_run -game csgo -console -usercon +game_type 1 +game_mode 0 +mapgroup mg_armsrace +map ar_shoots
Demolition:
./srcds_run -game csgo -console -usercon +game_type 1 +game_mode 1 +mapgroup mg_demolition +map de_lake
Deathmatch:
./srcds_run -game csgo -console -usercon +game_type 1 +game_mode 2 +mapgroup mg_allclassic +map de_dust
Starting the server may take a while, but if it starts, we should receive a message and the IP of our server.
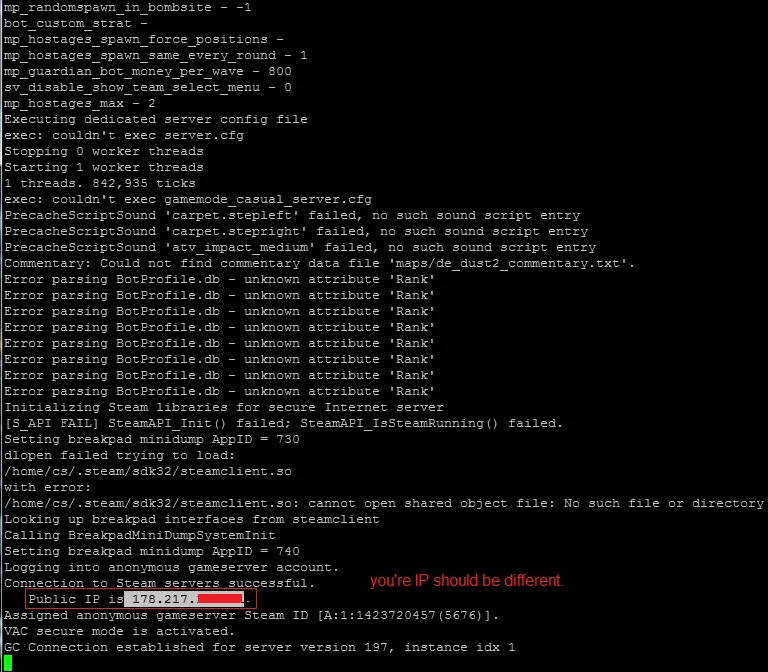
we can assume that the server is already working, but unfortunately it is not.
We still have to download the server "sourcemode".
To this end, we have to go to the website: https://www.sourcemod.net/downloads.php
After clicking the "Linux" icon, the required package will be downloaded to us.
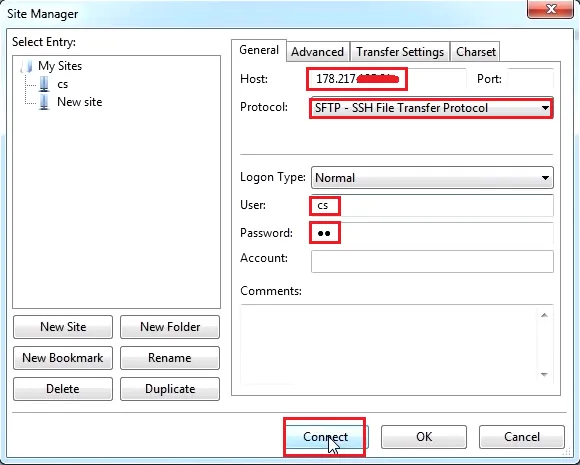
We need to transfer this package to the server, but we must use the appropriate program. I recommend Total Commander or FileZilla (I will use FileZilla for the purpose of the movie).
We connect via SFTP protocol, and provide server data.
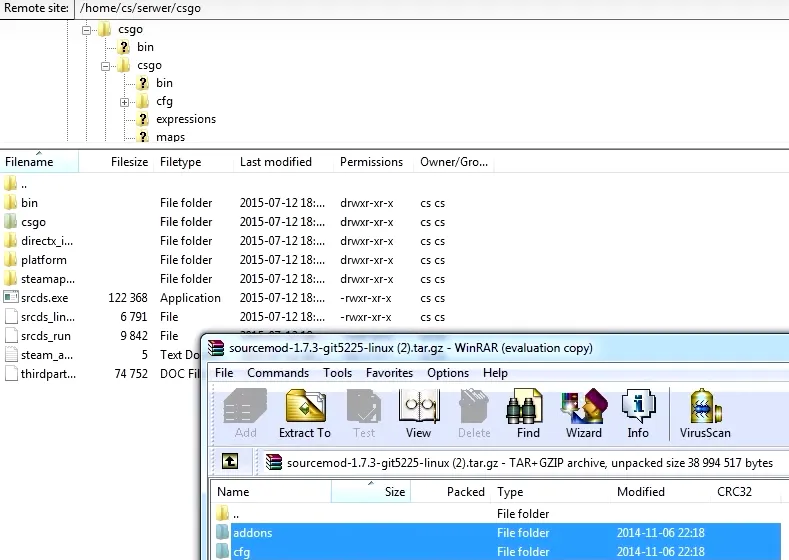
Now in the FileZilla program, once we've connected, go to the "csgo" folder and move the "sourcemode" content, ie the "addons" folder and the "cfg" folder to the "csgo" folder.
If we have completed all of the above steps, now we return to the PuTTy program, we re-use
Classic Casual:

./srcds_run -game csgo -console -usercon +game_type 0 +game_mode 0 +mapgroup mg_active +map de_dust2

or

Classic Competitive:

./srcds_run -game csgo -console -usercon +game_type 0 +game_mode 1 +mapgroup mg_active +map de_dust2

or

Arms Race:

./srcds_run -game csgo -console -usercon +game_type 1 +game_mode 0 +mapgroup mg_armsrace +map ar_shoots

or

Demolition:

./srcds_run -game csgo -console -usercon +game_type 1 +game_mode 1 +mapgroup mg_demolition +map de_lake

or

Deathmatch:

./srcds_run -game csgo -console -usercon +game_type 1 +game_mode 2 +mapgroup mg_allclassic +map de_dust
command.
At this point, our server is already working.
Beneficiaries
This post has as beneficiaries
@utopian.pay with 5%
using the Steeditor beneficiary tool