[Custom Thumbnail]
All the Code of the series can be found at the Github repository:
https://github.com/drifter1/compiler
Introduction
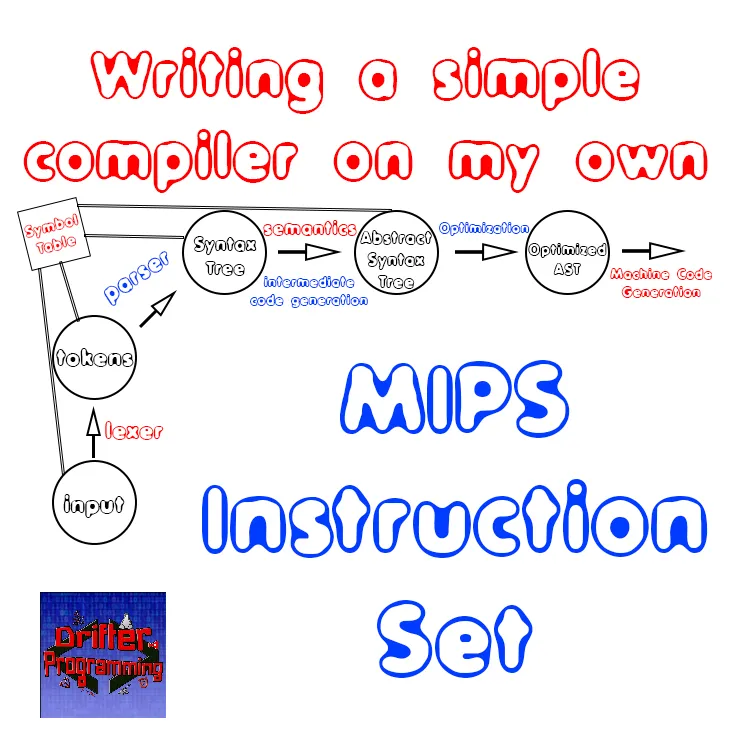
Hello it's a me again @drifter1! Today we continue with my Compiler Series, a series where we implement a complete compiler for a simple C-like language by using the C-tools Flex and Bison. In this article we will cover the target machine's instruction set, where the target is of course the MIPS CPU. Let's also not forget that MIPS Assembly has already been covered as a Programming Language under the Programming Category, but still an exact connection to our Simple C-like language has not been done yet!The topics that we will cover today are:
- MIPS Architecture
- Coding Structure
- Variable and Array Declaration
- System Calls
- Arithmetic and Logical Instructions
- Memory Instructions
- Jumps and Branches
- Functions and Stack
Requirements:
Actually you need to read and understand all the topics that I covered in the series as a whole, as these articles will give you access to knowledge about:- What Compiler Design is (mainly the steps)
- For which exact Language the Compiler is build for (Tokens and Grammar)
- How to use Flex and Bison
- How to implement a lexer and parser for the language using those tools
- What the Symbol Table is and how we implement it
- How we combine Flex and Bison together
- How we can pass information from the Lexer to the Parser
- How we define operator priorities, precedencies and associativity
- What Semantic Analysis is (Attributes, SDT etc.)
- How we do the so called "Scope Resolution"
- How we declare types and check the type inter-compatibility for different cases that include function parameters and assignments
- How we check function calls later on using a "Revisit queue", as function declarations mostly happen after functions get used (in our Language)
- Intermediate Code Representations, including AST's
- How we implement an AST (structure and management)
- Action Rules for AST nodes and more
Difficulty:
Talking about the series in general this series can be rated:- Intermediate to Advanced
- Medium
Actual Tutorial Content
MIPS Architecture
Talking about the MIPS architecture, all instructions and general-purpose registers in this architecture are 32 bits long. Each byte represents 8 bits, whilst 2 bytes (16 bits) represent a so called half-word and 4 bytes (32 bits) represent a word. Thus, the data types that we have access to are characters which require 1 byte of storage, and integers which require 4 bytes of storage. In Assembly, literals represent numbers (e.g. 15), characters are enclosed in single quotes (e.g. 'c') and strings are enclosed in double quotes (e.g. "Utopian").General-purpose Registers
We have access to 32 general-purpose registers. Each register's name is preceded by '$' and followed by the register's number ($0 to $31) or by the register's name as following:- $0 or $zero that has a value of 0 always
- $1 that is reserved by the assembler
- $2, $3 or $v0, $v1 that will return function results
- $4-7 or $a0-3 that are used as function parameters
- $8-15 or $t0-7 that are caller saved temporaries (more in functions)
- $16-23 or $s0-7 that are callee saved values (more in functions)
- $24-25 or $t8-9 that are temporaries if more are needed
- $26-27 or $k0-1 that are reserved for the interrupt handler
- $28 or $gp that is the global program pointer
- $29 or $sp that points to the last position of the stack pointer
- $30 or $s8 or $fp that is a saved value or a frame pointer
- $31 or $ra that contains the return address (more in functions)
Floating Point Co-processor
Because the simple C-like language that we want to compile into Assembly contains floats and so floating point operations, we also have to use the MIPS co-processor for such operations. This co-processor has its own 32 FP registers that are again 32-bits long and numbered as $f0-$f31. Thinking about floating point operations we know that those can be single and double precision (floats and doubles respectively). So, the co-processor allows the usage of two adjacent FP registers to allow double-precision (64-bit long) operations. In such cases we are only allowed to use the even-numbered registers.Coding Structure
Each typical MIPS Assembly program is split into two parts:- Data declaration section - where we define the variables, arrays, string literals
- Coding section - where we write the instructions that are to be executed
So, we basically have:
.data
# data declarations

.text
main:
# instructions
Here I should mention that any function needs to start by a label, and that "main" is reserved by the main function. Also, note that comments in MIPS Assembly start with the hashtag symbol: "#".
Variable and Array Declaration
Declaring variables or arrays/vectors in the ".data" section of any MIPS Assembly file is quite simple. We just have to use the following format:name: .storage_type value(s)- name is the identifier of this variable/array
- storage_type the storage type, which can be one of the following:
- .byte for characters
- .word for integers
- .asciiz for strings (for output)
- .space for memory allocation of specific byte size (can be used for arrays)
- The value(s) part is the initialization value of integers, characters and strings, and by putting more than one value we basically create an array. When talking about "spaces" we specify the number of bytes that we want to allocate for that "space".
Examples
To define one integer with name "val" and initial value 5 we write:val: .word 5To define an integer array with name "ints" and values: 1, 2, 3 and 4 we write:
ints: .word 1, 2, 3, 4The string prompt "Hello, world!\n" can be written as following:
prompt: .asciiz "Hello, world!\n"System Calls
Hardware-related tasks like accessing hard drives, getting keyboard input or printing into the console, are things that we can't do directly through instructions. Those tasks are executed by the kernel of the operating system (Windows, Unix, Mac etc.). So, to let the kernel know that we want to execute such a task, we send a request, which is basically a software-interrupt signal. Such requests are also called system calls. To distinguish the various requests, each of those system calls has a specific code, that both the hardware (CPU) and software (OS Kernel) know about.In MIPS Assembly for example, some of those System Call Codes are:
- 1, for printing integers
- 2, for printing floats
- 3, for printing doubles
- 4, for printing strings
- 5, for reading integers
- 6, for reading floats
- 7, for reading doubles
- 8, for reading strings
- 9, for dynamic memory allocation
- 10, for terminating the program
- 11, for printing characters
- 12, for reading characters
- 13, to open a file
- 14, to read from a file
- 15, to write into a file
- 16, to close a file
- 17, for terminating the program with a specific return value
To execute a system call we have to specify the system call, loading the code value of this system call into the $v0 register and additional arguments into the $a0 or $f12 (integer/string or float/double) registers. The system call gets executed using the "syscall" line of code. After that, the result of the system call (e.g. input from keyboard or file) will be stored inside of $v0 or $f0 (integer/string or float/double).
Examples
For example, to read an integer we write:li $v0, 5 # get integer code
syscallli $a0, $v0 # $v0 contains the input from the previous syscall
li $v0, 1 # print integer code
syscallArithmetic and Logical Instructions
The MIPS ALU allows for the following instructions:-
Addition:
- add $t0, $t1, $t2 # t0 = t1 + t2
- addi $t0, $t1, integer # t0 = t1 + integer (immediate operator)
- addu $t0, $t1, $t2 # same as add but for unsigned values
- addiu $t0, $t1, integer # same as add but for unsigned and immediate operation
-
Substraction:
- sub $t0, $t1, $t2 # t0 = t1 - t2
- subu $t0, $t1, $t2 # same as sub but for unsigned values
- Multiplication: mul $t0, $t1, $t2 # $t0 = $t1 * $t2 (pseudo-instruction)
- Division: div $t0, $t1, $t2 # $t0 = $t1 / $t2 (pseudo-instruction)
- Remain: rem $t0, $t1, integer # $t0 = $t1 % integer (pseudo-instruction)
- Shifts: sra, srl, sll # shifting right arithmetic, right logical, left logical
- Boolean: not, and, andi, or, ori, xor, xori # bitwise not, and, and immediate, or, or immediate, xor, xor immediate
To execute floating point operations, we basically add a ".s" (single precision) or .d (double precision) to the already known instruction. So, some of the single-precision instructions are:
- add.s fd ,fs, ft # $fd = $fs + $ft
- sub.s fd, fs, ft # $fd = $fs - $ft
- mul.s fd, fs, ft # $fd = $fs * $ft
- div.s fd, fs, ft # $fd = $fs / $ft
Comparison Instructions
MIPS includes the following comparison instructions:- Set If Less Than: slt $d, $s, $t
- Unsigned Set If Less Than: uslt $d, $s, $t
- Set If Less Than Immediate: slti $d, $s, i
- Unsigned Set If Less Than Immediate: slti $d, $s, i
Memory Instructions
In the arithmetic and logical operations, the "parameters" are registers, and so we need a way to load values from the memory into registers. Similarly, we also need a way to write-back into the memory. That's exactly what the memory instructions will do.So, to load from memory we use either of the following instructions:
lb $rt, Address ($rs) # load byte from Address + $rs value
lw $rt, Address ($rs) # load word from Address + $rs value
On the other hand, to write/store into memory we use:
sb $rt, Address ($rs) # store byte into Address + $rs value
sw $rt, Address ($rs) # store word into Address + $rs value
Examples
The index of the first element of an array is stored inside of the address of the "name" of the array. That's why to access the first element of integer array A and store it inside of register $t0 we have to use the following:lw $t0, A($0)li $t1, 8
lw $t0, A($t1)Jumps and Branches
MIPS allows for the following jump operations:- Jump: j Label
- Jump Register: jr $s
- Jump and Link: jal Label
- Jump and Link Register: jalr $s
To allow the creation of If-Else statements and Loops (for and while), MIPS Assembly comes with the following branch instructions:
- beq $t0, $t1, Label -> Jump to Label when $t0 == $t1
- bne $t0, $t1, Label -> Jump to Label when $t0 < $t1
- blt $t0, $t1, Label -> Jump to Label when $t0 < $t1
- ble $t0, $t1, Label -> Jump to Label when $t0 <= $t1
- bgt $t0, $t1, Label -> Jump to Label when $t0 > $t1
- bge $t0, $t1, Label -> Jump to Label when $t0 >= $t1
- beqz $t0, Label -> Jump to Label when $t0 == 0
Functions and Stack
I explained the basic stuff around Functions in the article:Assembly Functions and Pseudodynamic Arrays
The more complicated Recursive Functions and Stack where explained here:
Assembly Stack and Recursive Algorithms
If you need even more knowledge, then you can check out Reference [5]
RESOURCES
References:
- https://sweetcode.io/building-first-simple-program-mips-assembly-language/
- http://www.mrc.uidaho.edu/mrc/people/jff/digital/MIPSir.html
- https://www.assemblylanguagetuts.com/mips-instruction-set-opcodes-reference-sheet/
- https://www.doc.ic.ac.uk/lab/secondyear/spim/node20.html
- http://people.cs.pitt.edu/~xujie/cs447/Mips/sub.html
Images:
All of the images are custom-made!Previous parts of the series
General Knowledge and Lexical Analysis
- Introduction
- A simple C Language
- Lexical Analysis using Flex
- Symbol Table (basic structure)
- Using Symbol Table in the Lexer
Syntax Analysis
Semantic Analysis (1)
Intermediate Code Generation (AST)
Semantic Analysis (2)
Machine Code Generation
Final words | Next up on the project
And this is actually it for today's post! I hope that I explained everything as much as I needed to. Next time we will write the examples of the series in MIPS Assembly!Next up on this series, in general, are:
- Machine Code generation (MIPS Assembly)
- Various Optimizations in the Compiler's Code
Which are all topics for which we will need more than one article to complete them. Also, note that we might also get into AST Code Optimizations later on, or that we could even extend the Language by adding complex datatypes (structs and unions), more rules etc.
So, see ya next time!
GitHub Account:
https://github.com/drifter1
Keep on drifting! ;)