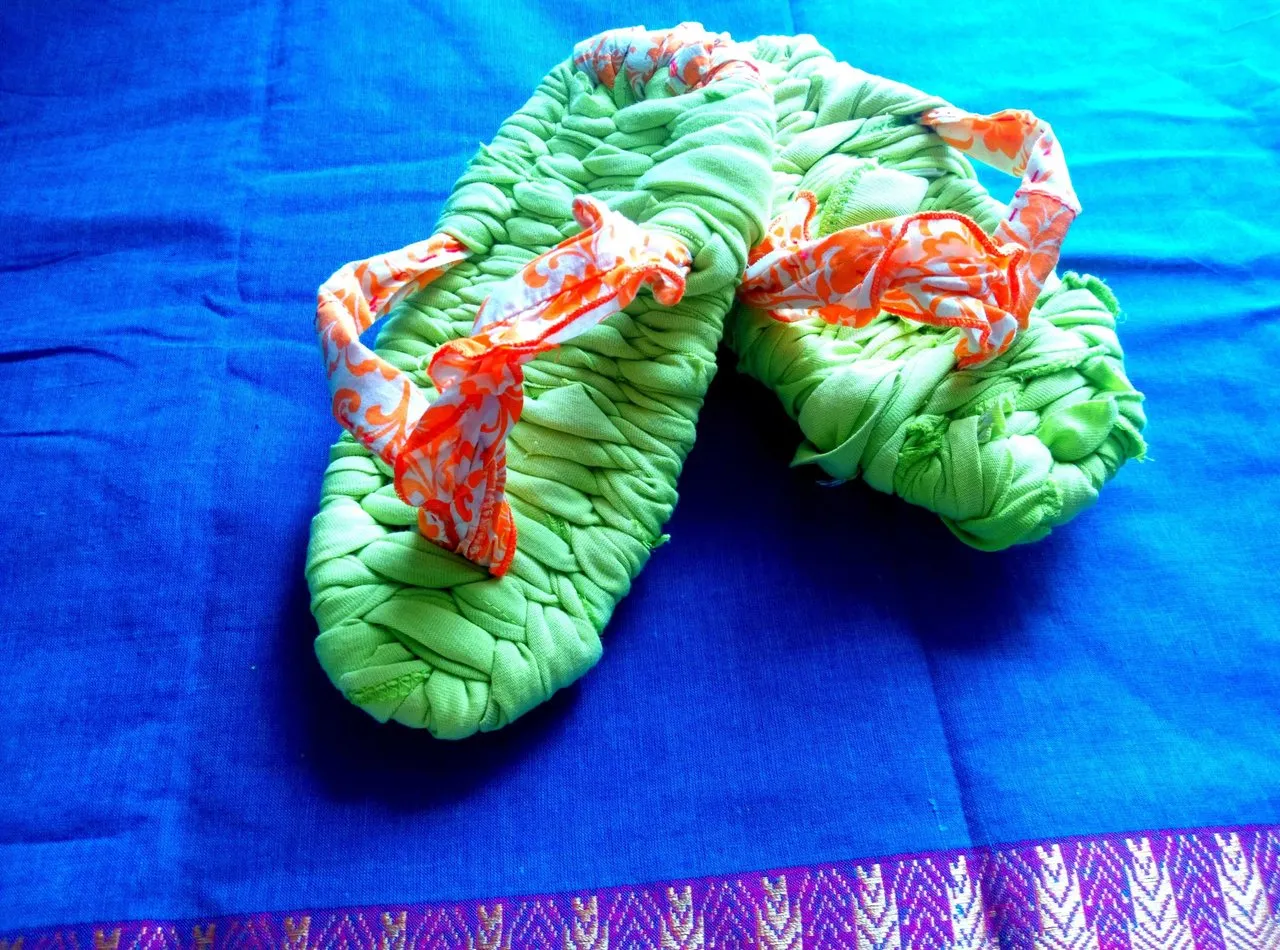
Hi! If you have your place with wood flooring or tiles, this fabric flipflops will be so good for you because it could clean while you wear and roam around your house! After that, you could machine wash!!
If you stand long hours daily, this slippler will give your feet a nice gentle massage too!!
[Brief background history]
The flip flop that I am introducing is a traditional Japanese stlye with weaving. Trace back to centuries ago!

source
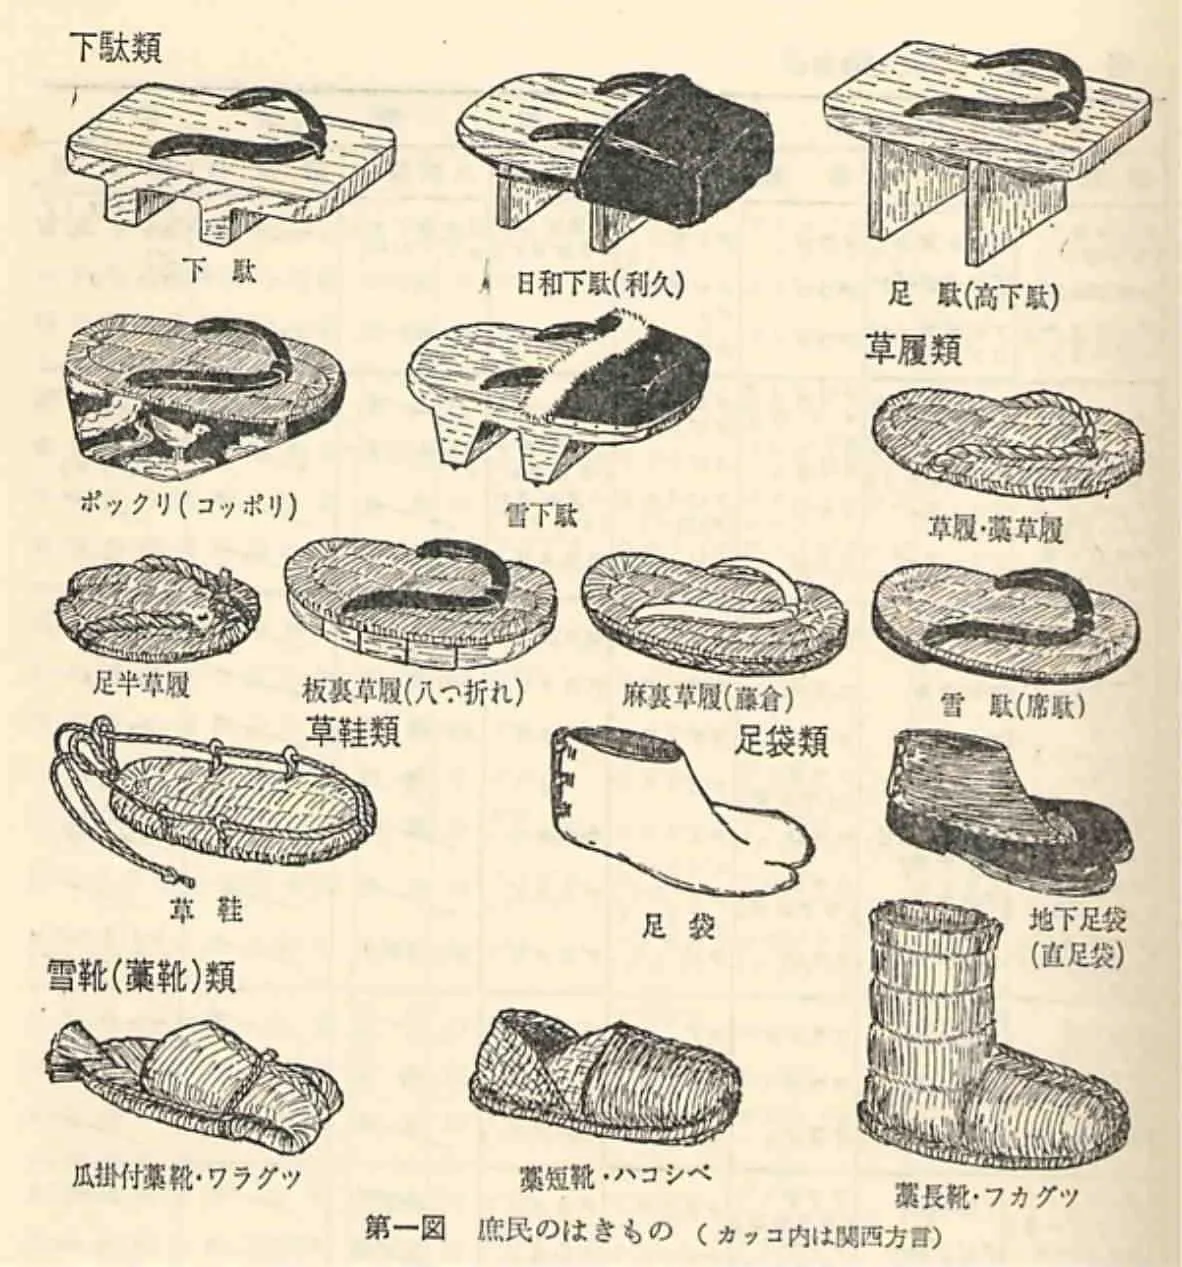
In the old days, footwear made of leather were available, but majority of peasants and samurais wore footwear made of wood, straw or leaves.
source
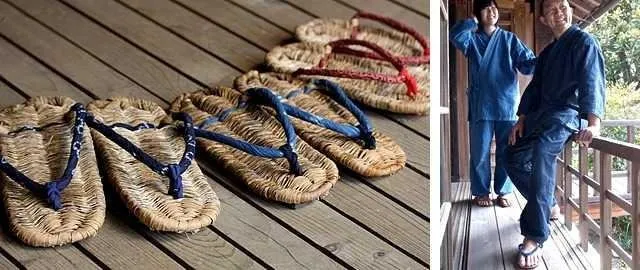
And still today, there's a traditional bamboo leaves sandals made by craftsmen. Click on the source to visit their store!!
source
And creative Japanese people today, make them DIY with towels, fabrics and other materials for at home use!!
[Materials]
So!
Here are the things you need!
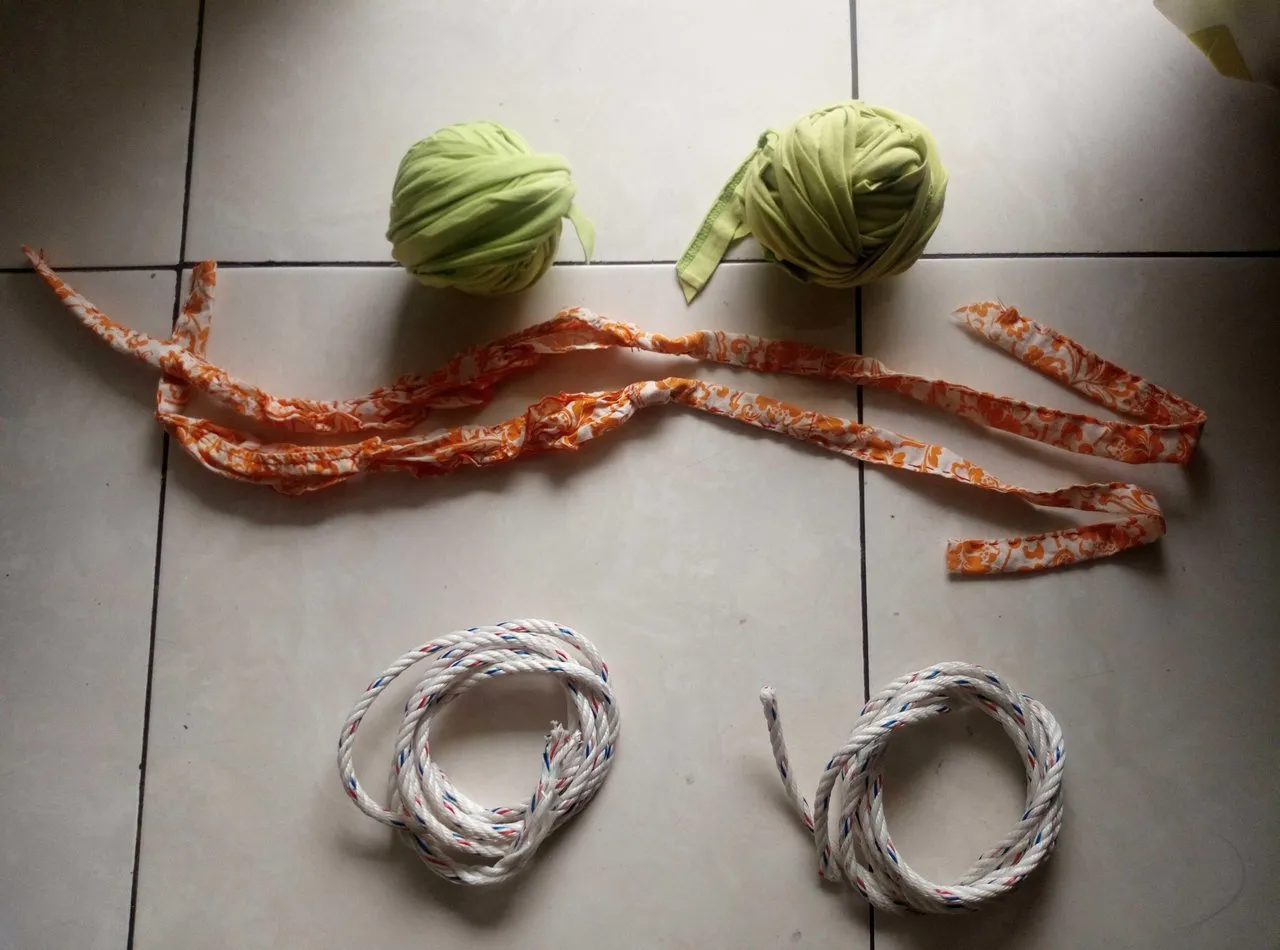
For the base, 2 ropes (around 5~8mm thick) for 2m. If you don't have rope, you could replace with non-stretching fabric. And if your height is more than 160cm, make it 2.5m.
For the straps, 2 tubed tapes for 60cm. I cut out from my shirt.
For the body, I used my kids old T-shirts cut into 8cm width strips. Good thing about t-shirt is that the cut edge will always be intact!
[Weaving]

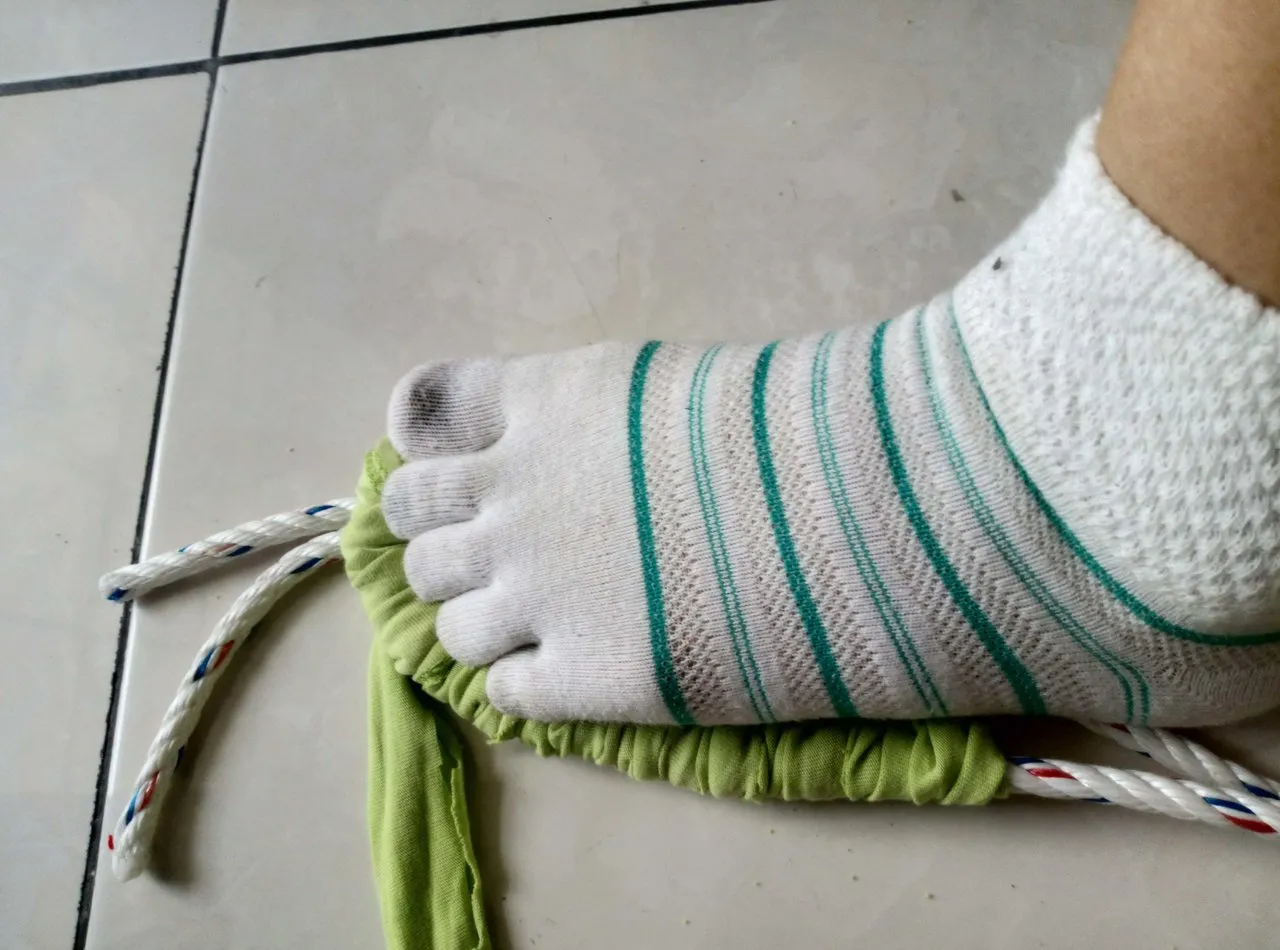
Hold the edges of ropes with your toes like me.
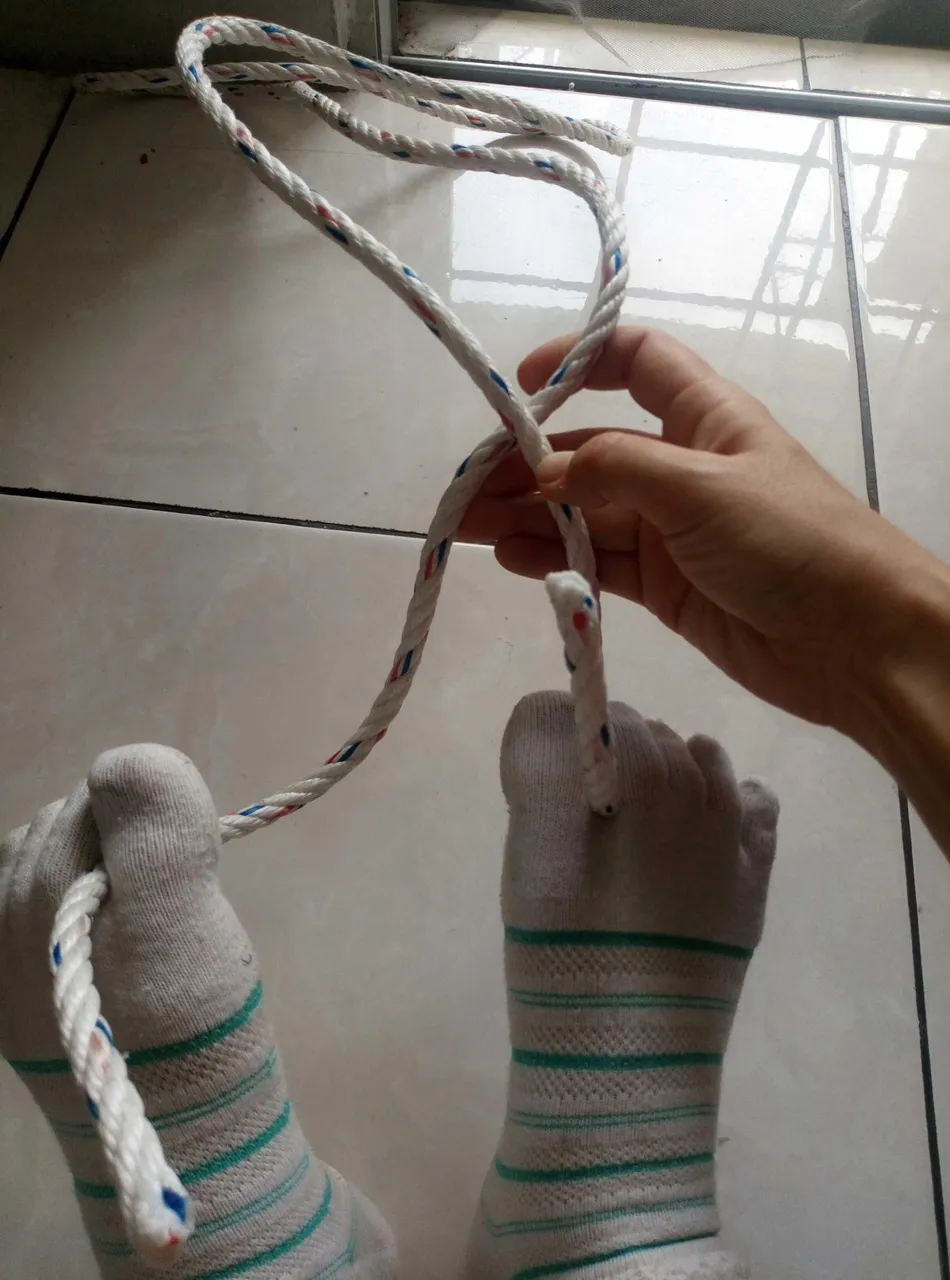
Then, cross the rope.
Bring the loop to you, with grabbing it with your little toes.
And gently pull the edges so it will be like this.
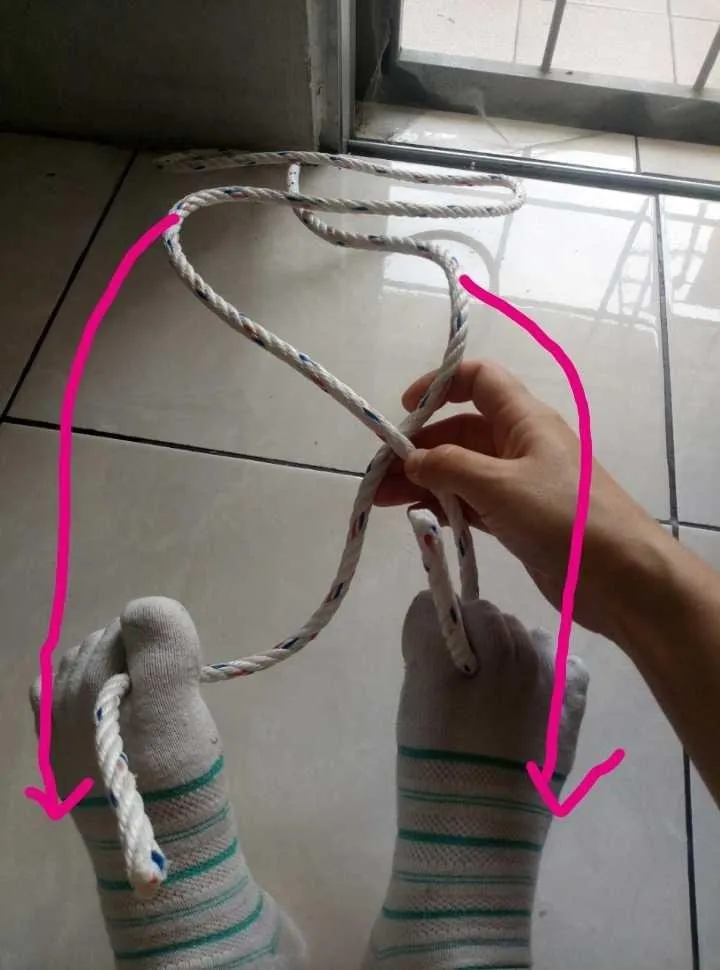
Clip ropes where it's in between your big toes so it will be set.

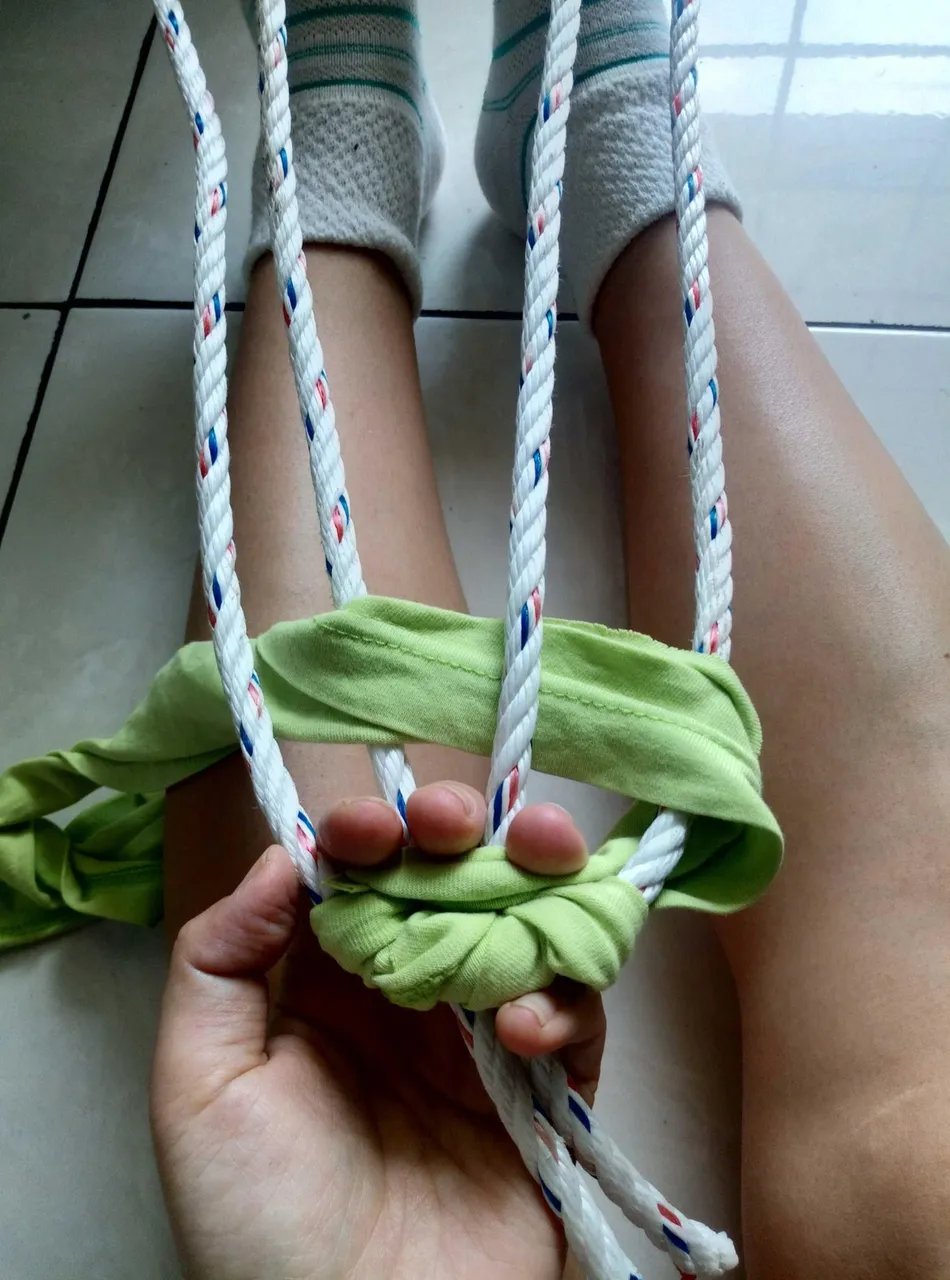
Wrap the stip twice.
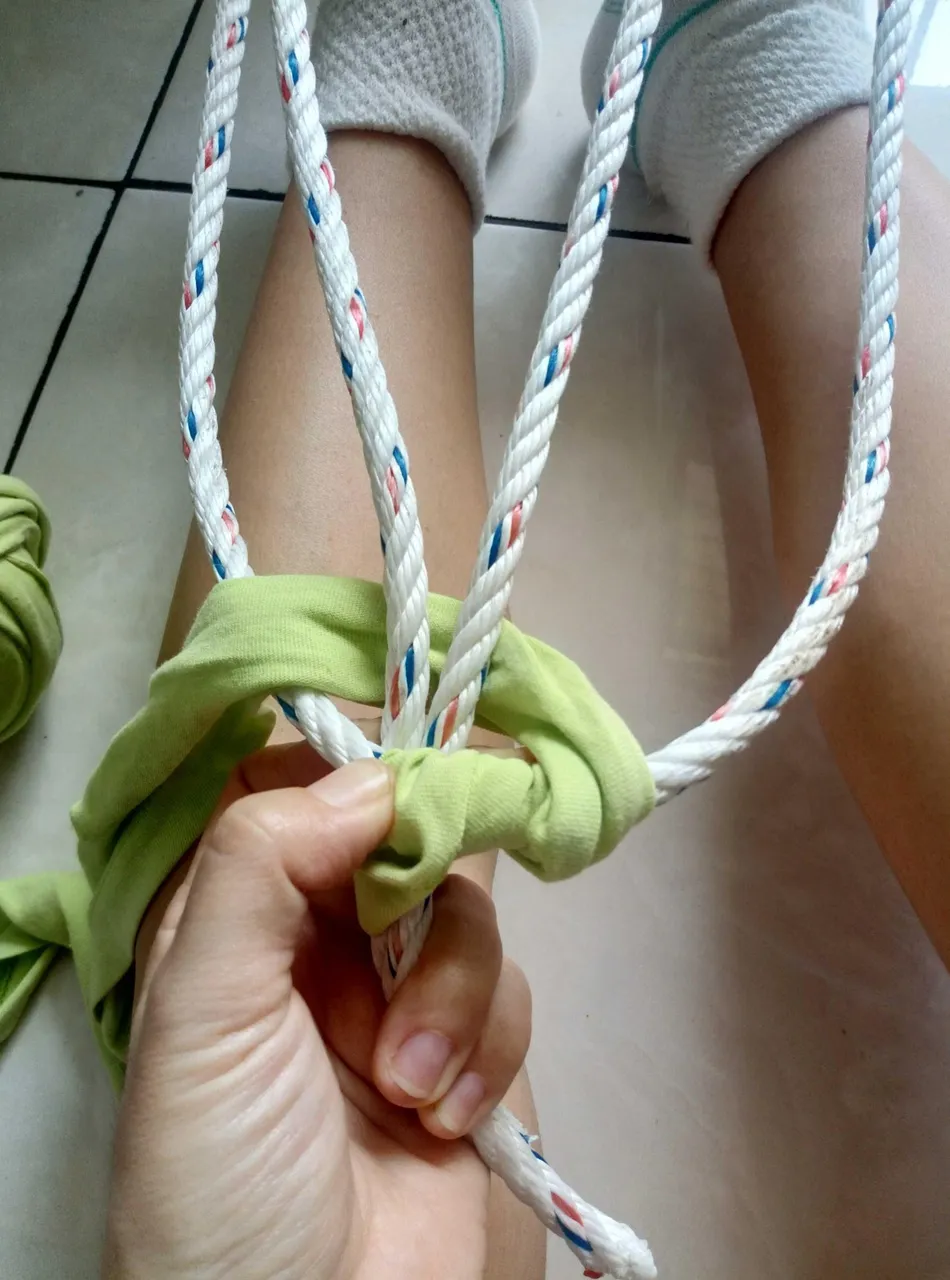
Then go under 2 middle ropes and come over.
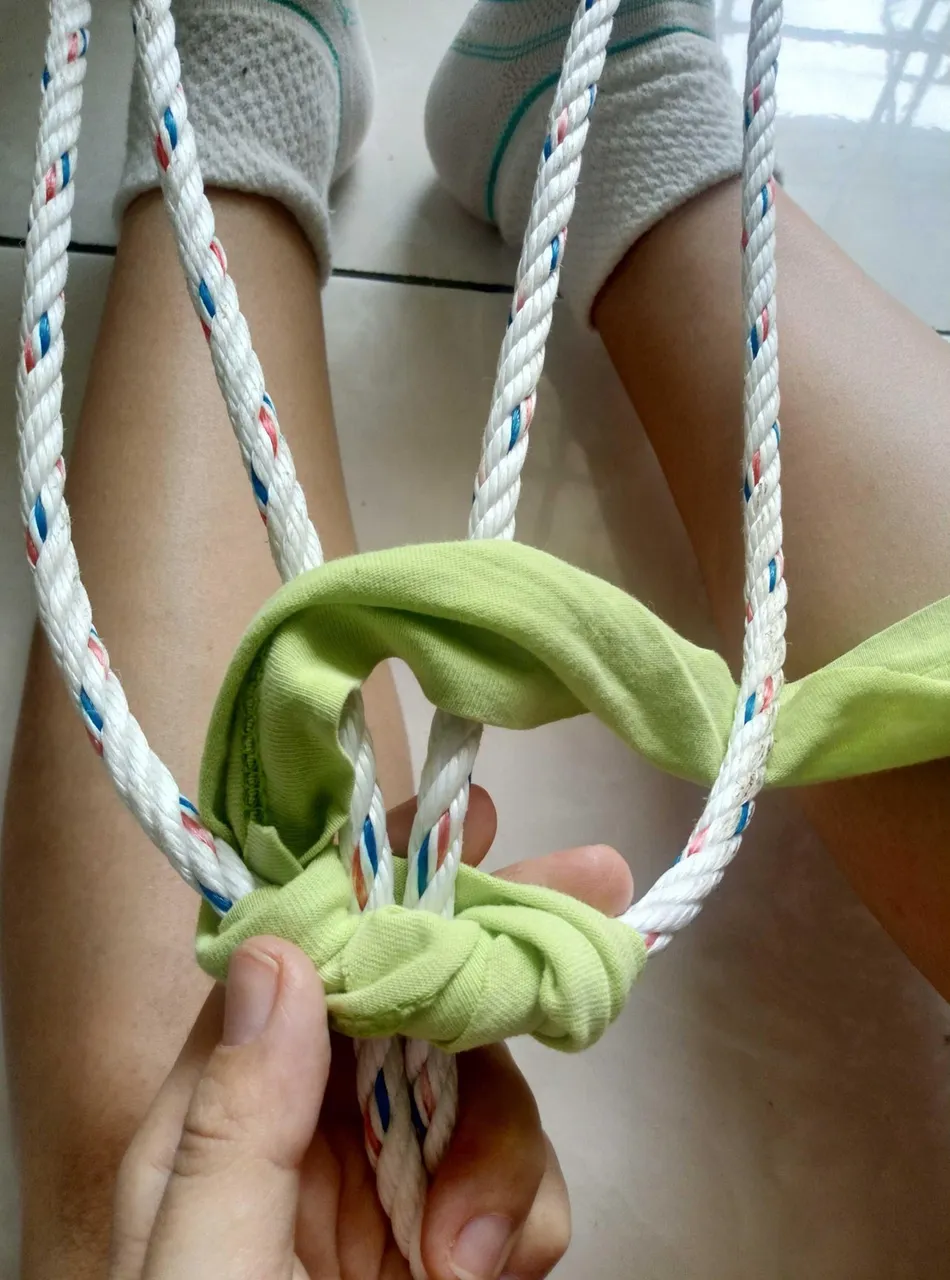
Go around and over 2 middle ropes and come under.
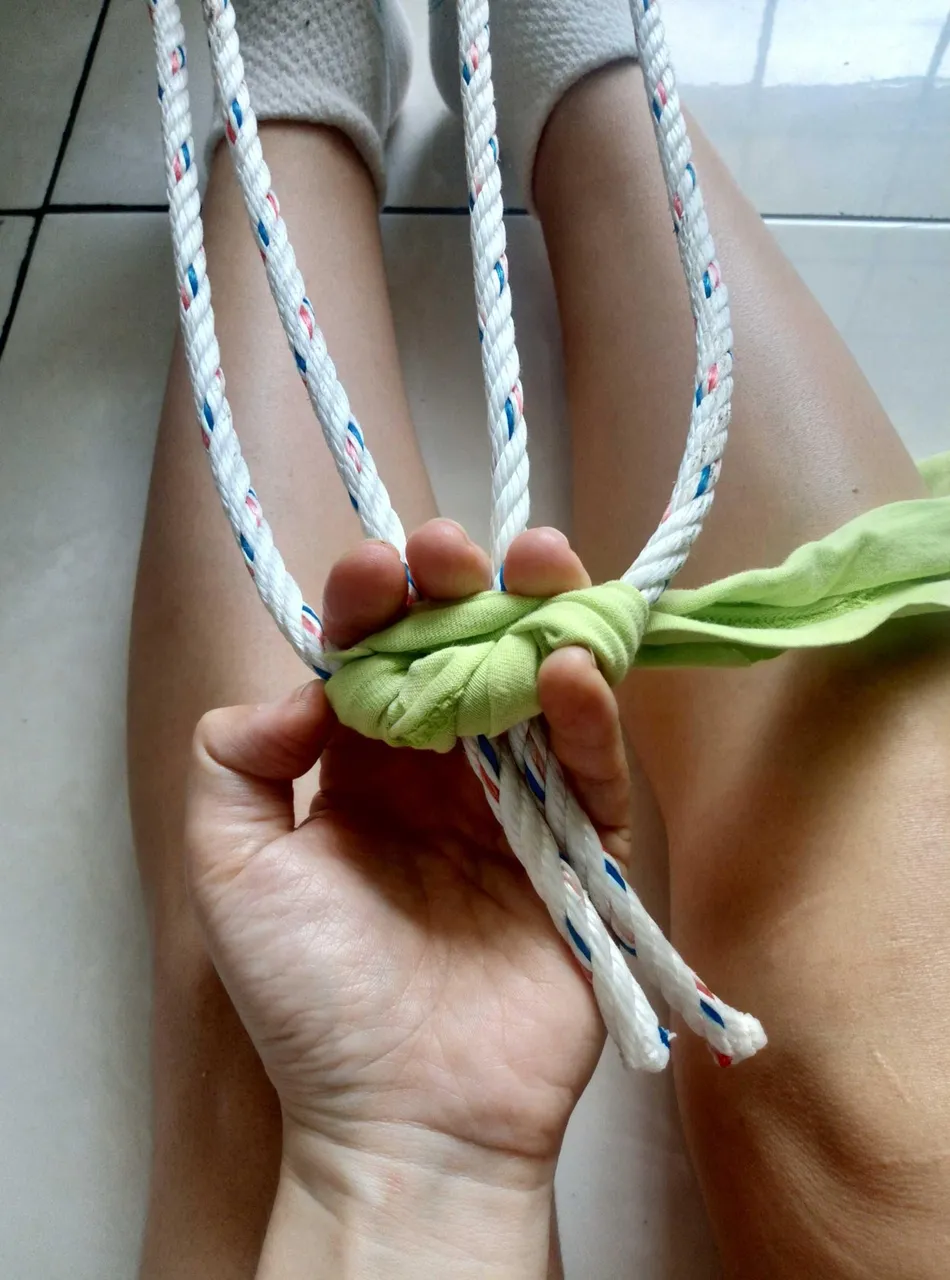
Use your fingers to press hard. Always press after one weave done!
[Adding the strap]
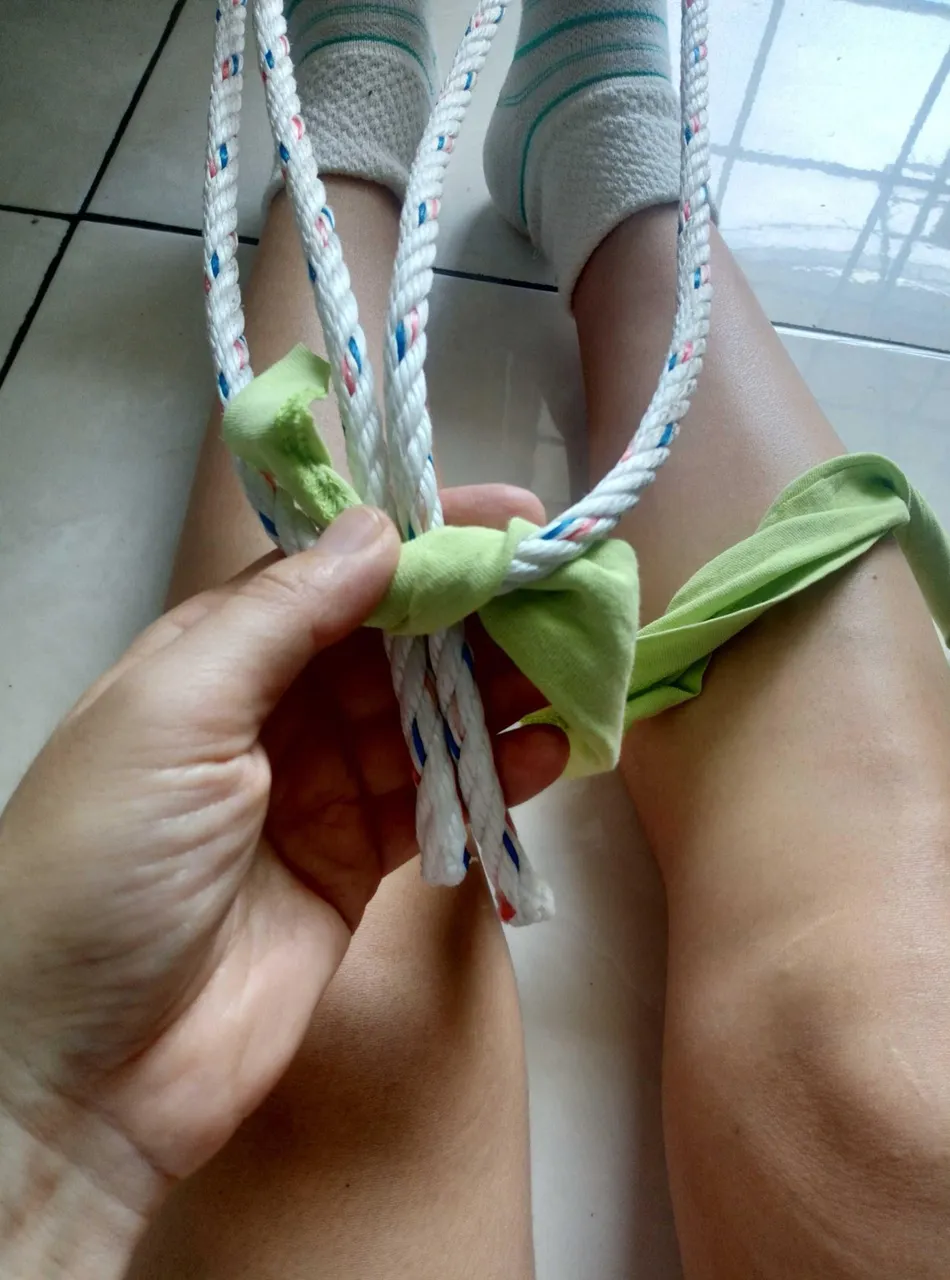
When the weaving gets near to your ankle, we could add the strap.
Place and match the center of your strap with your half completed flip-flop.
Wrap it like this. Tighten it.
Then wrap only the rope once more.
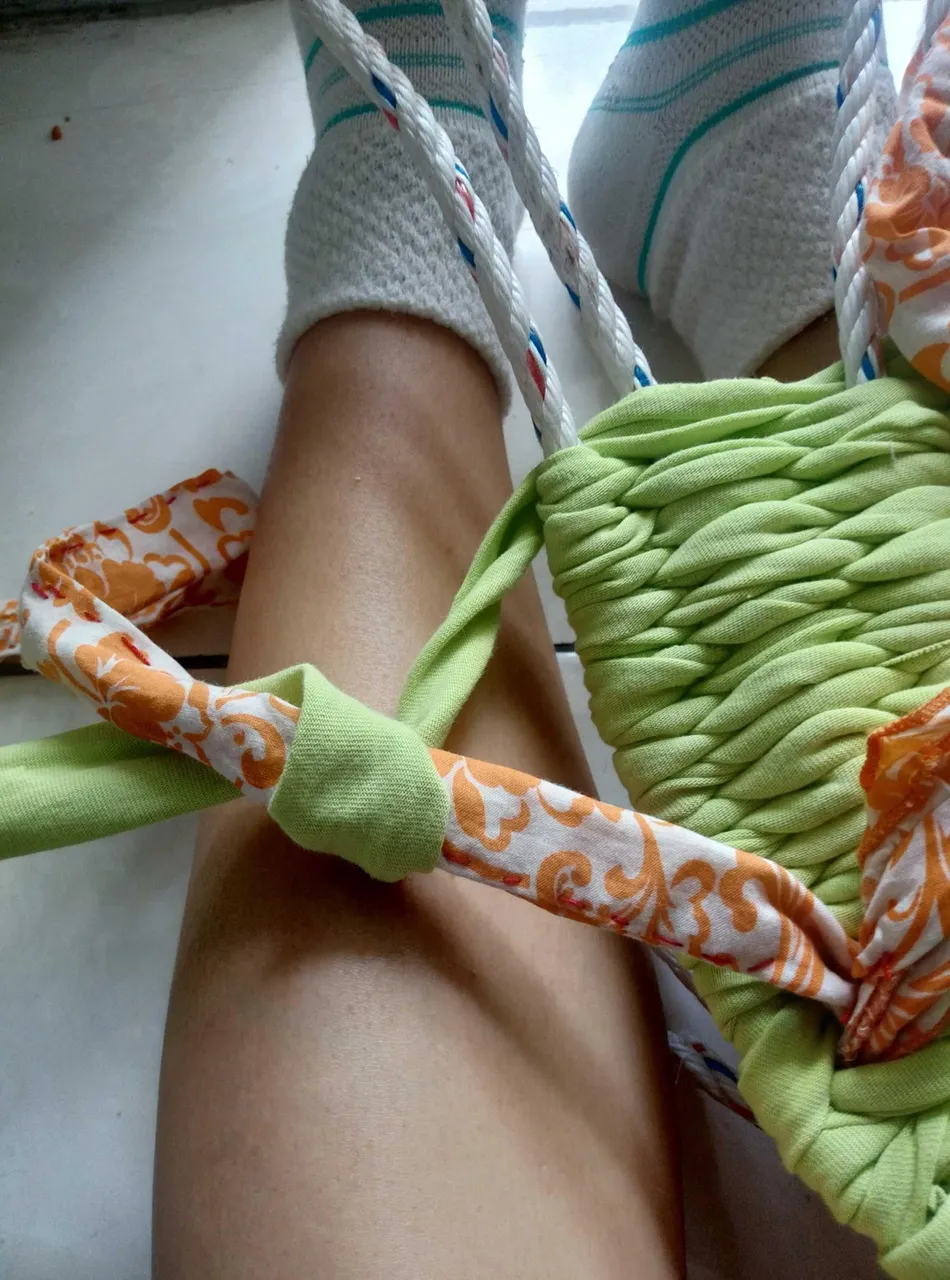
Over, under, over, under. Then wrap once the strap, then rope once, too.
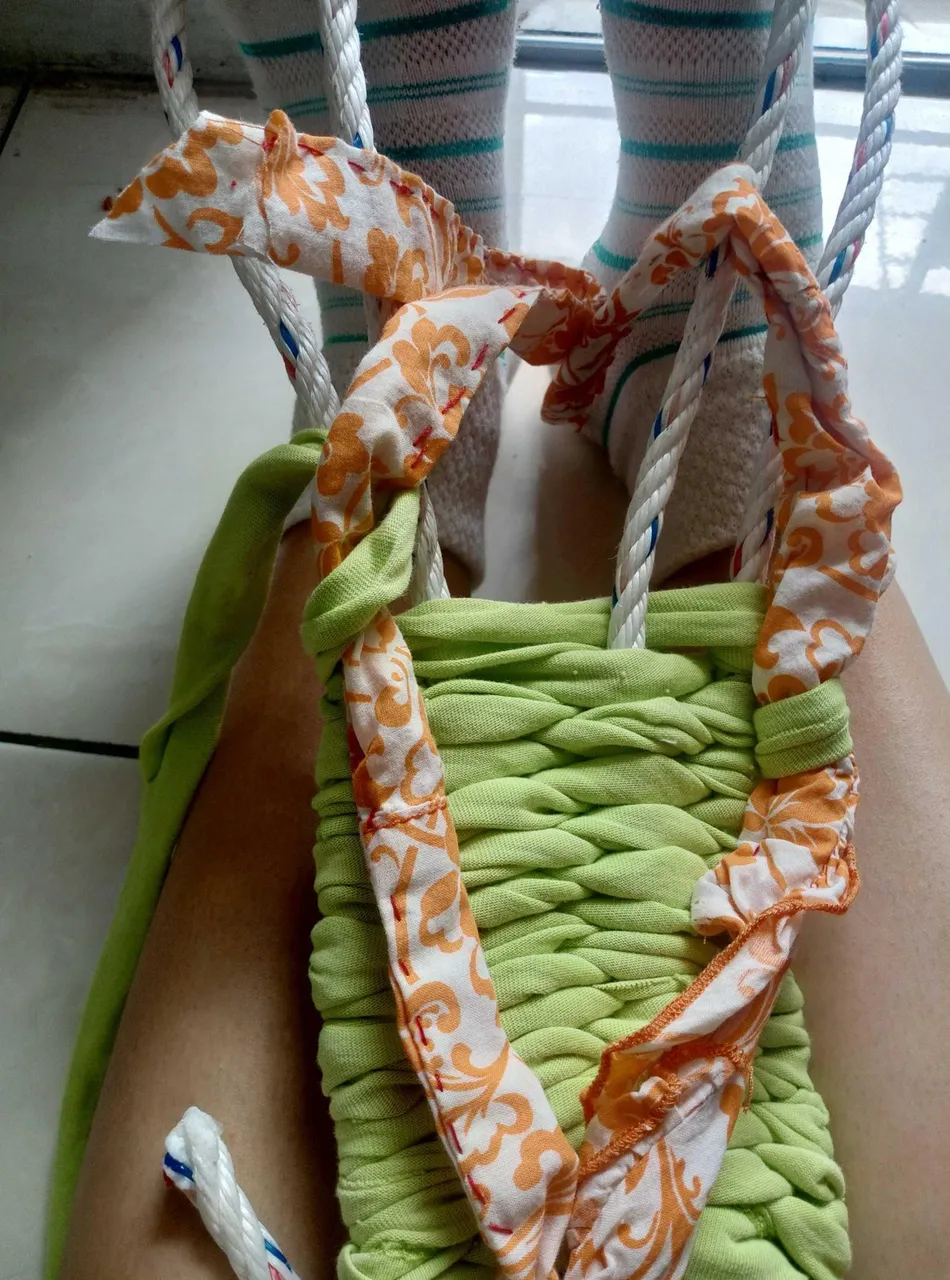
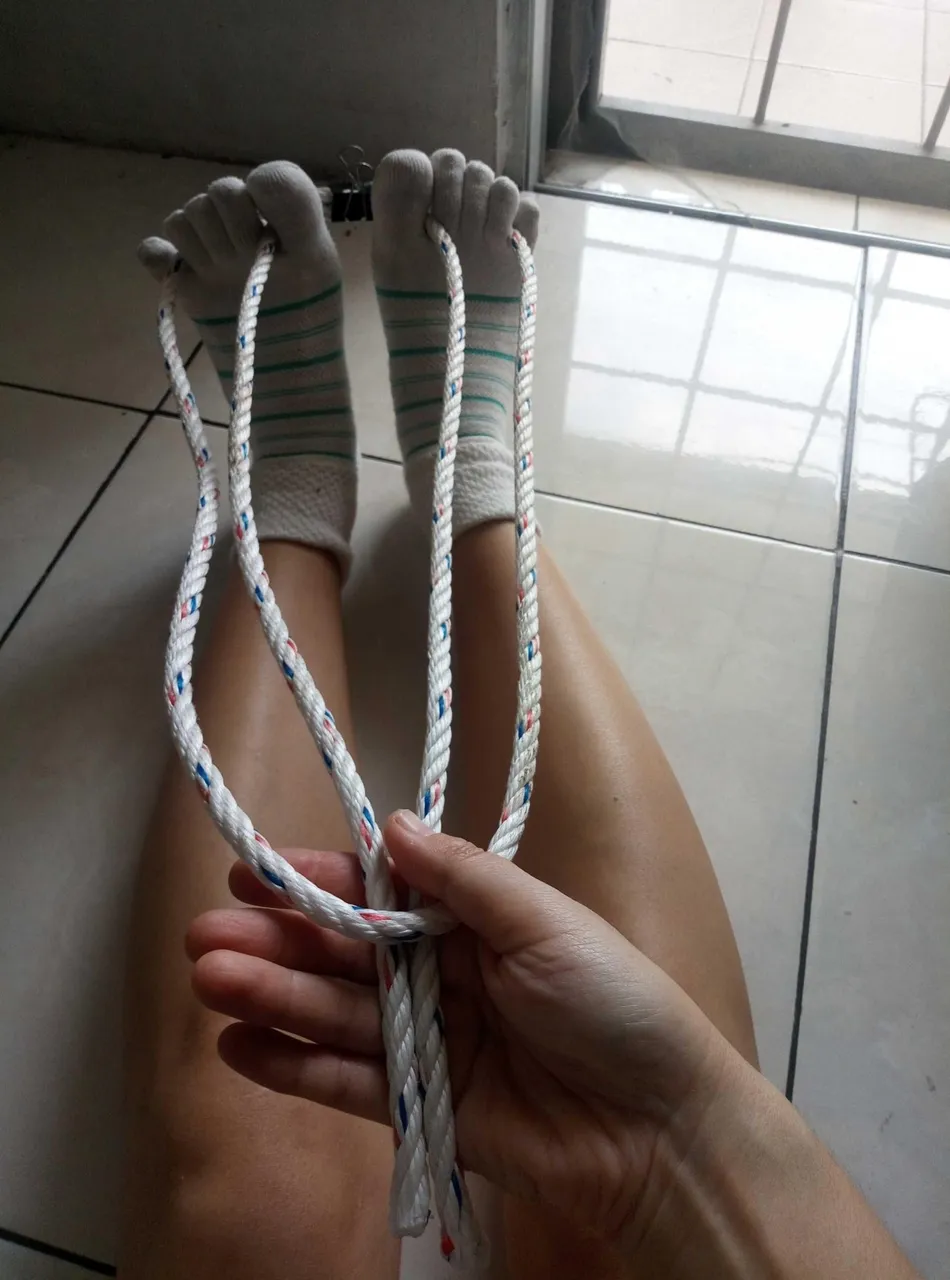
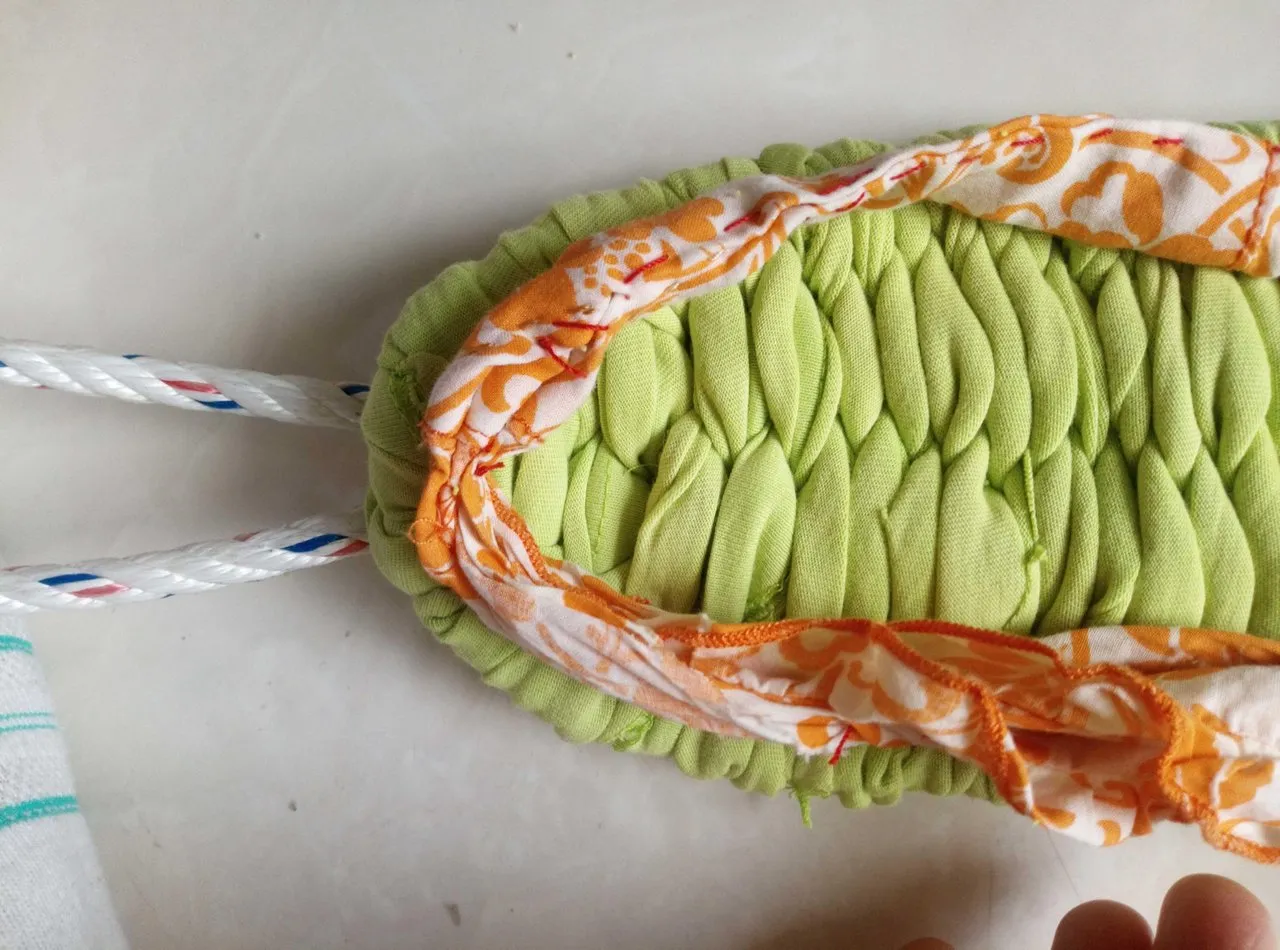
Continue the weaving until it comes a little longer than your foot.
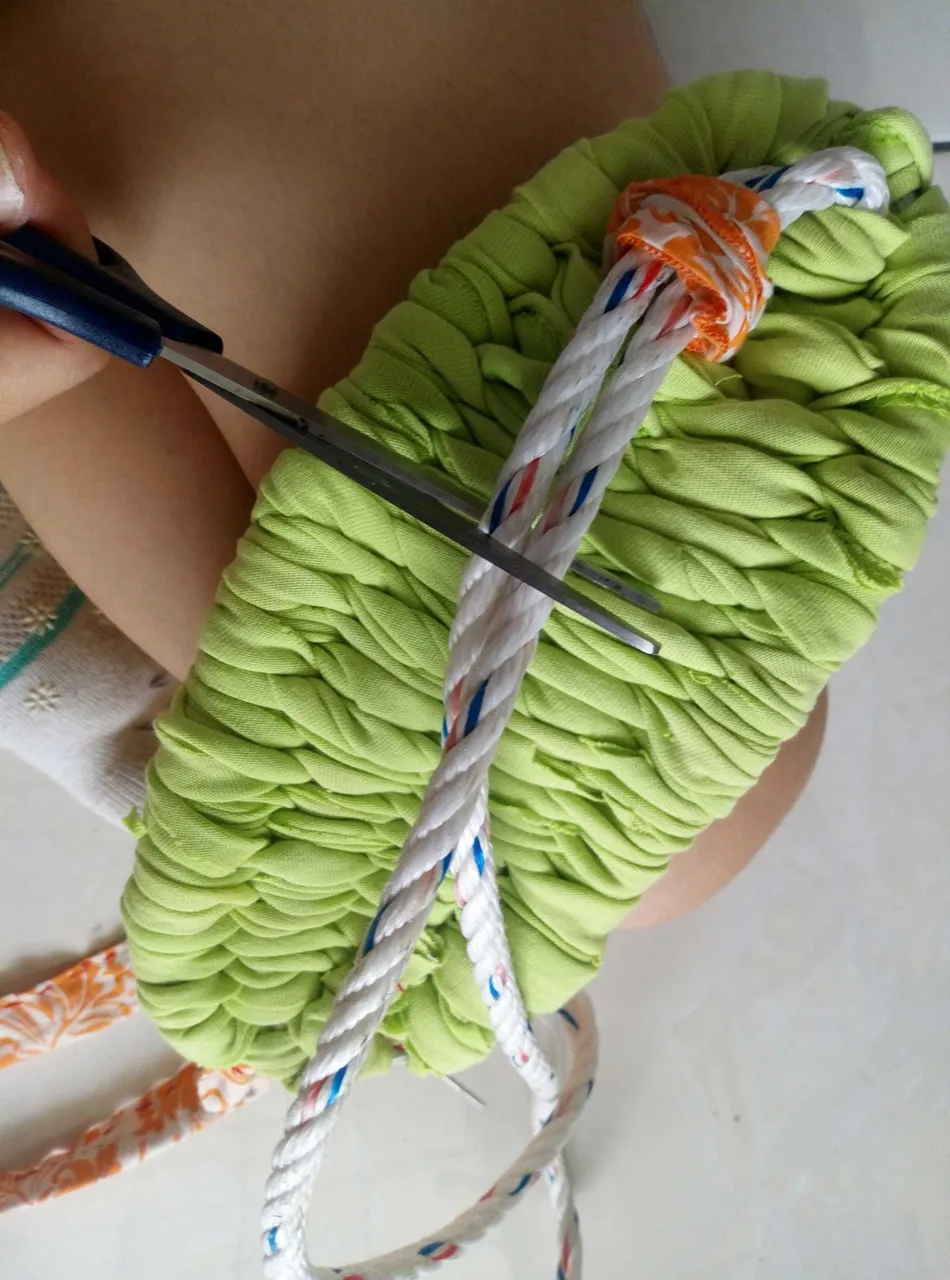
[Finishing]
Take it off from your toes now!
We are almost done!
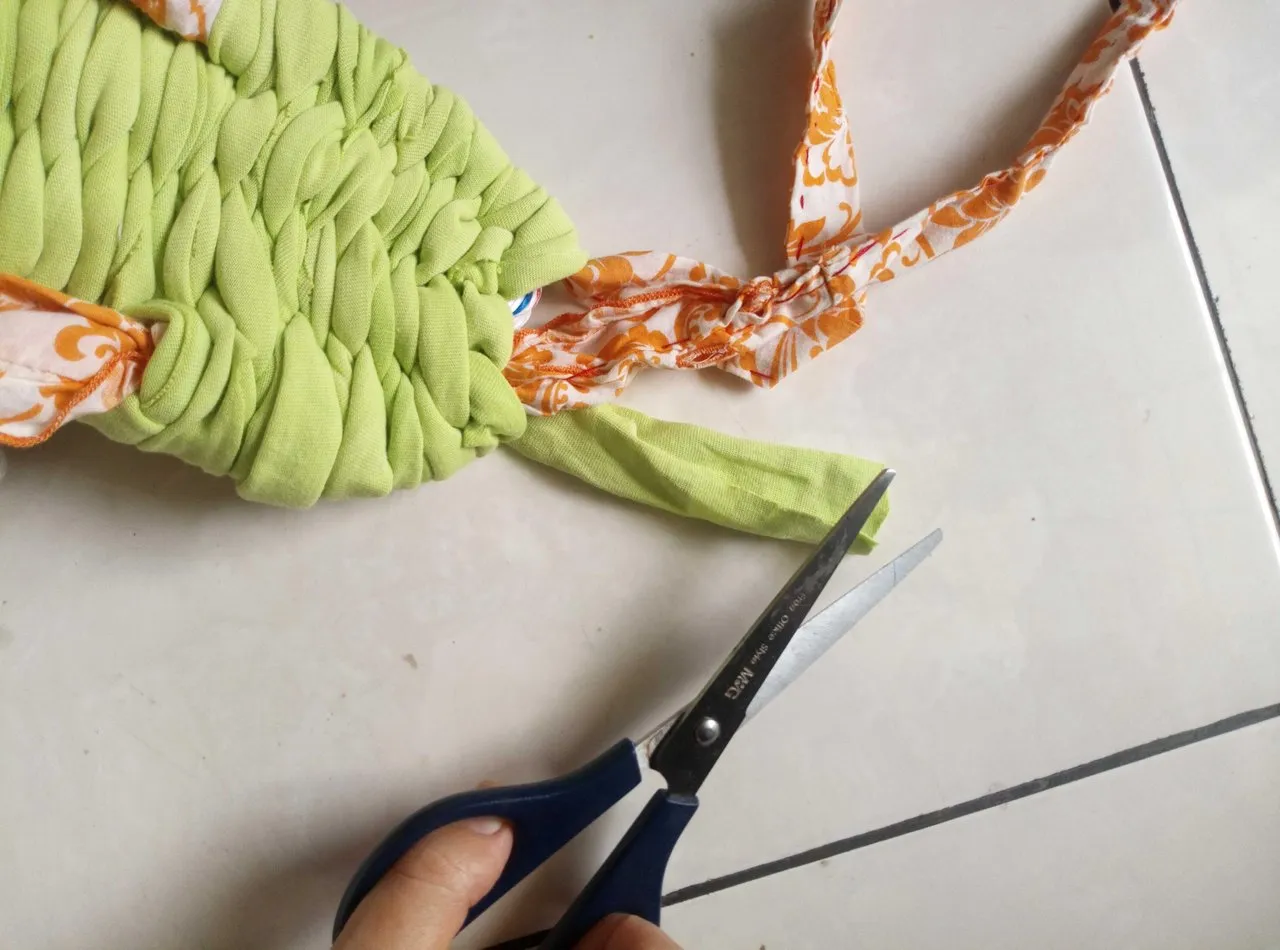
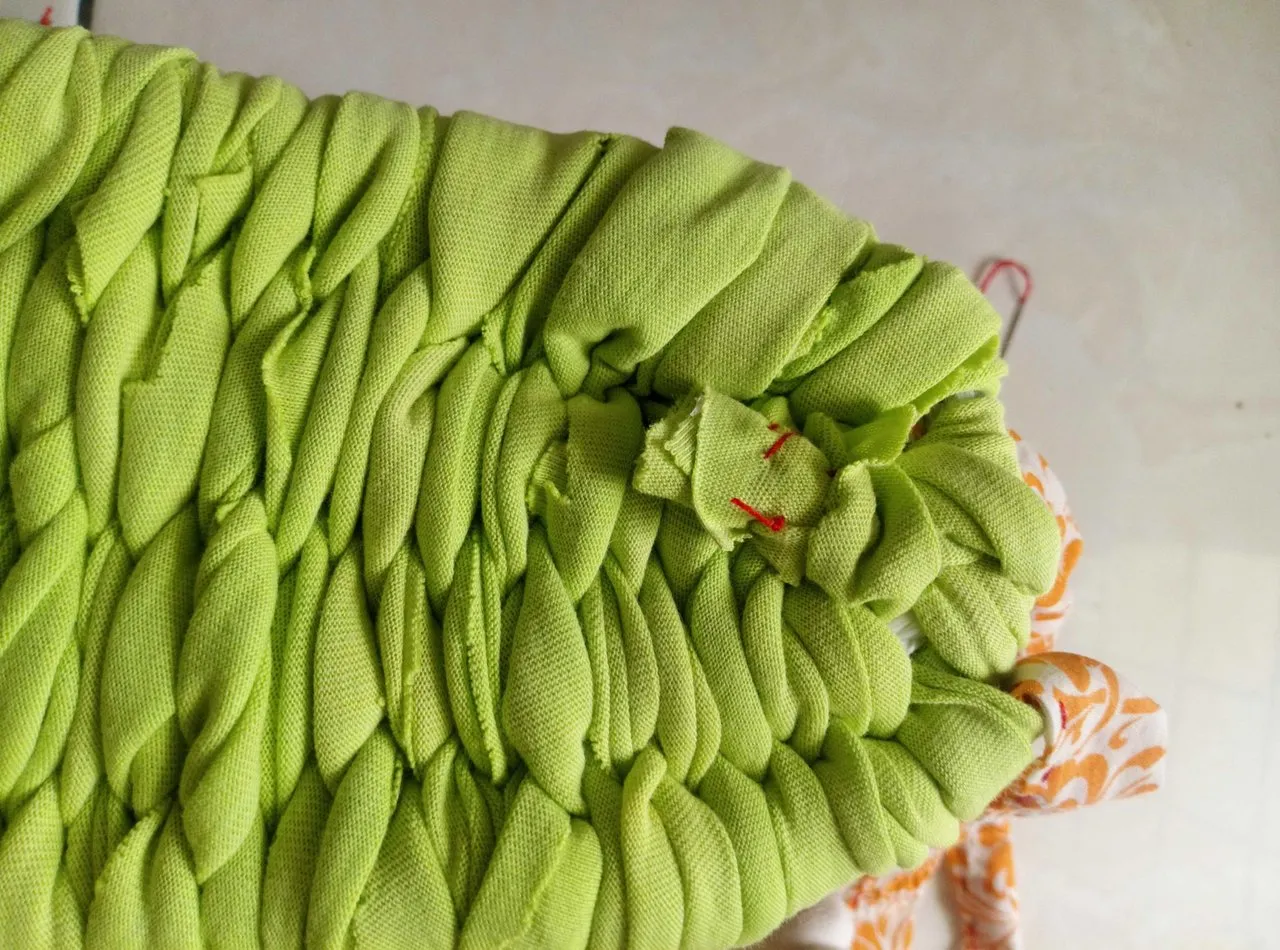
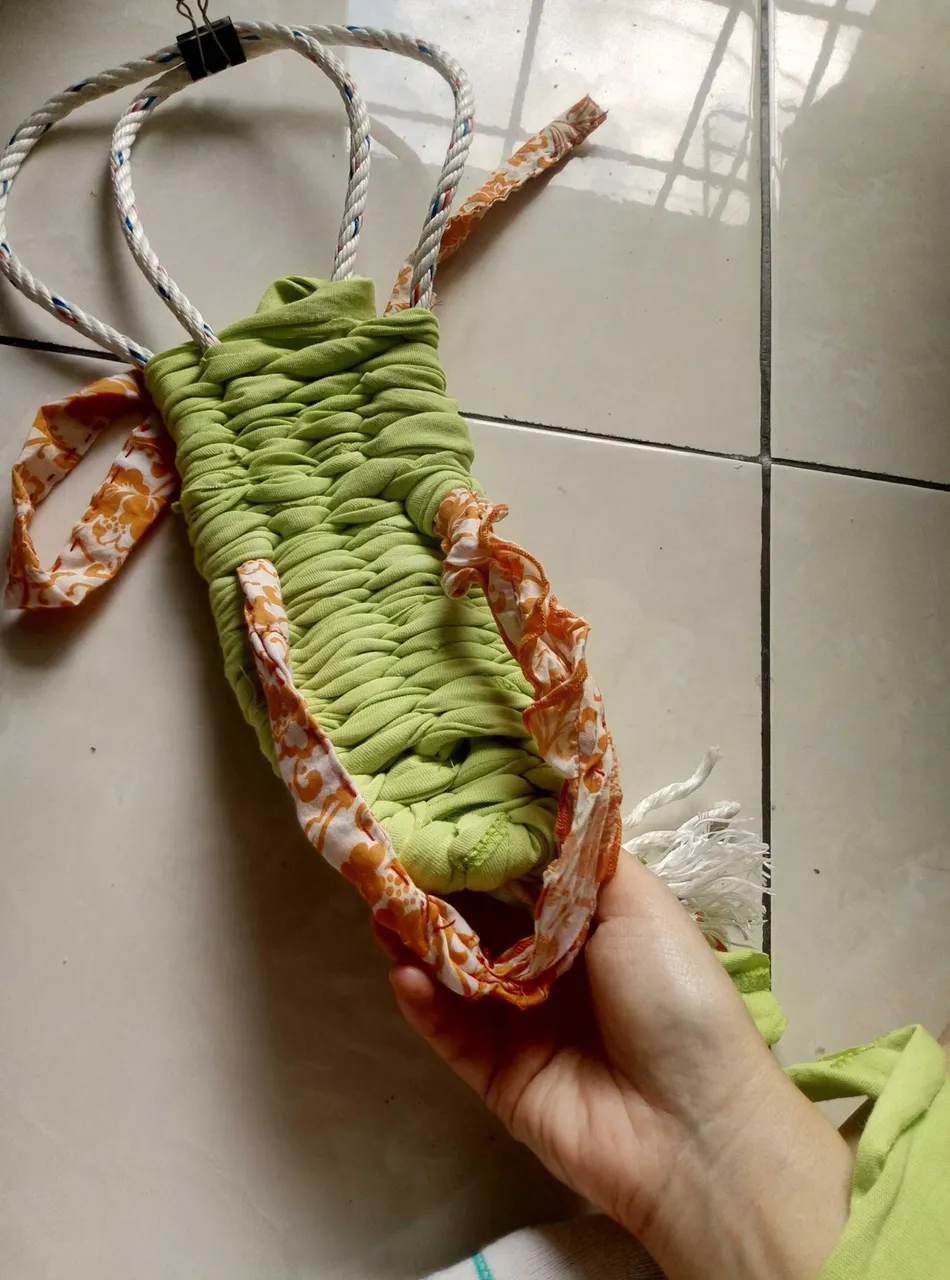
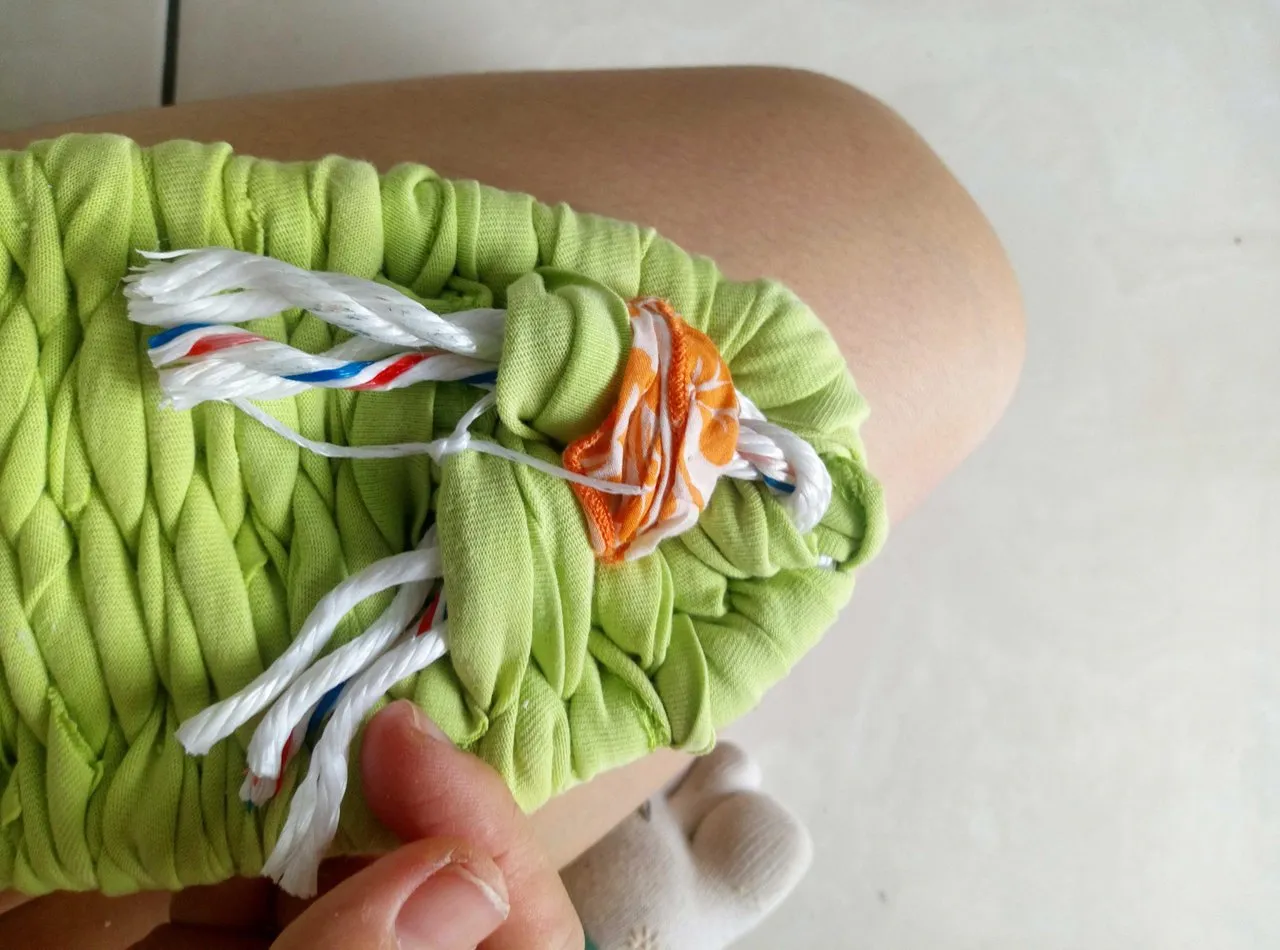
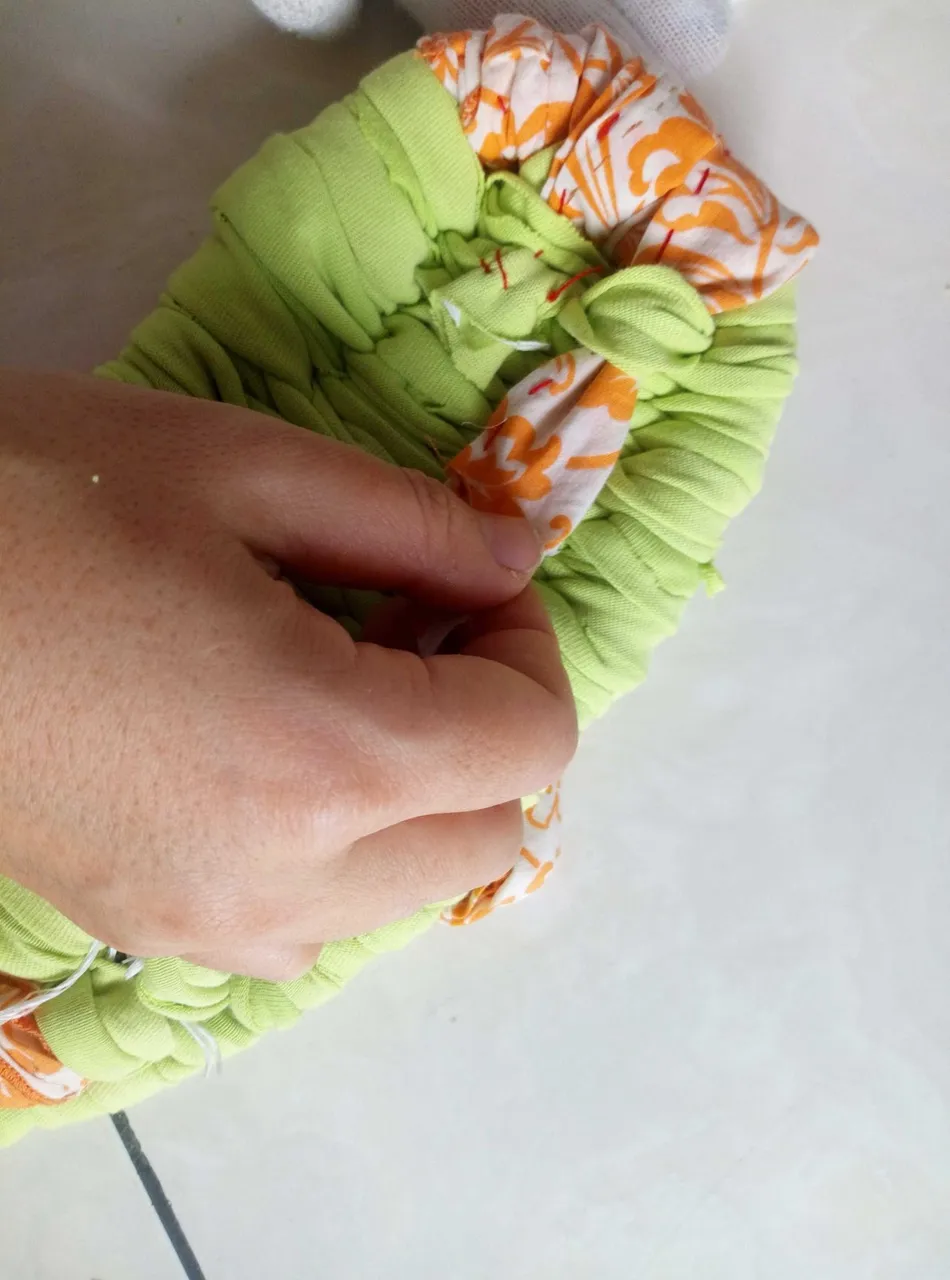
Cut the material with extra length so you could wrap and hide the rope if it is still showing. Then push in the edge in between to hide. I sew it to be sure it won't get undone.
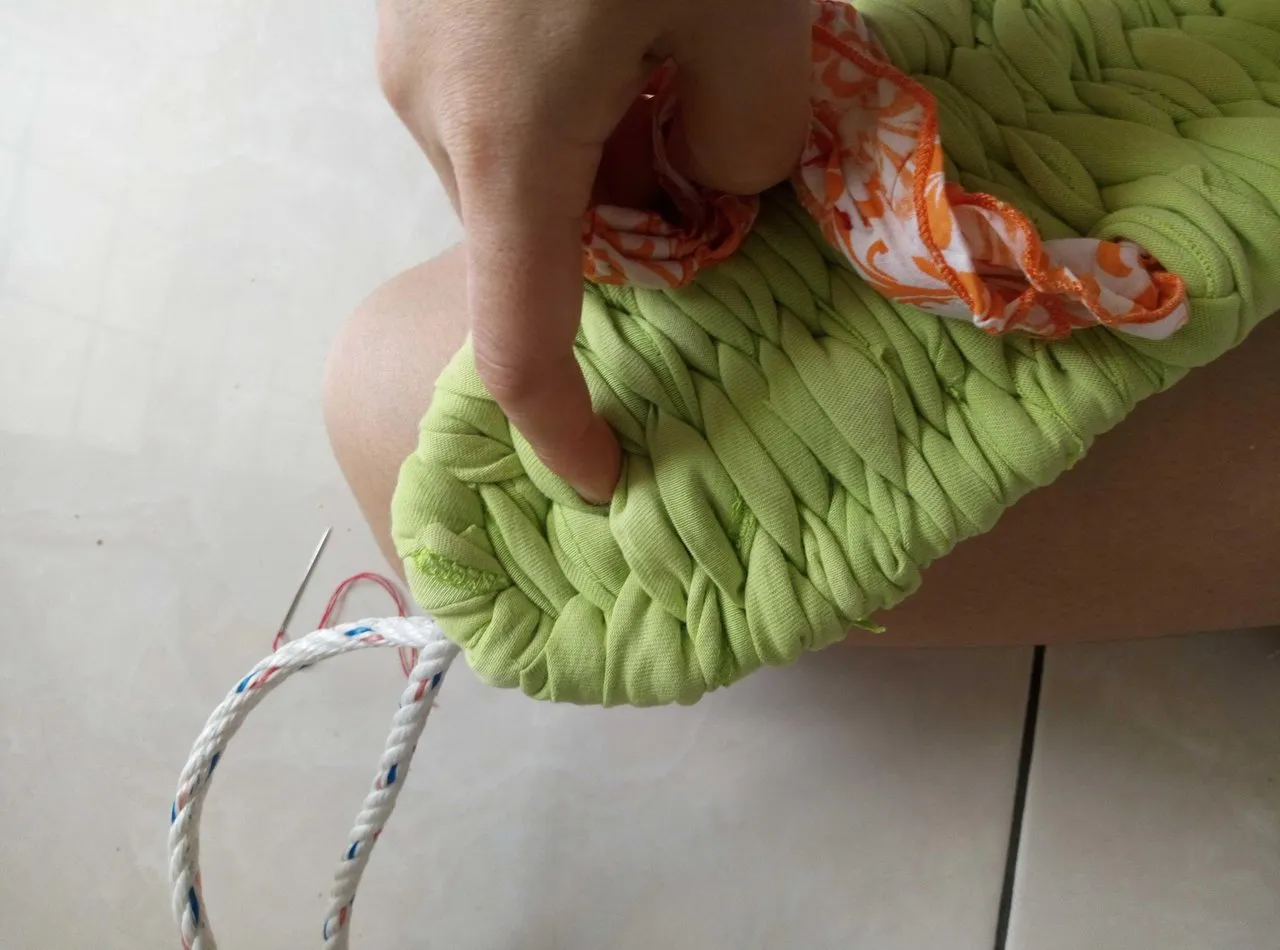
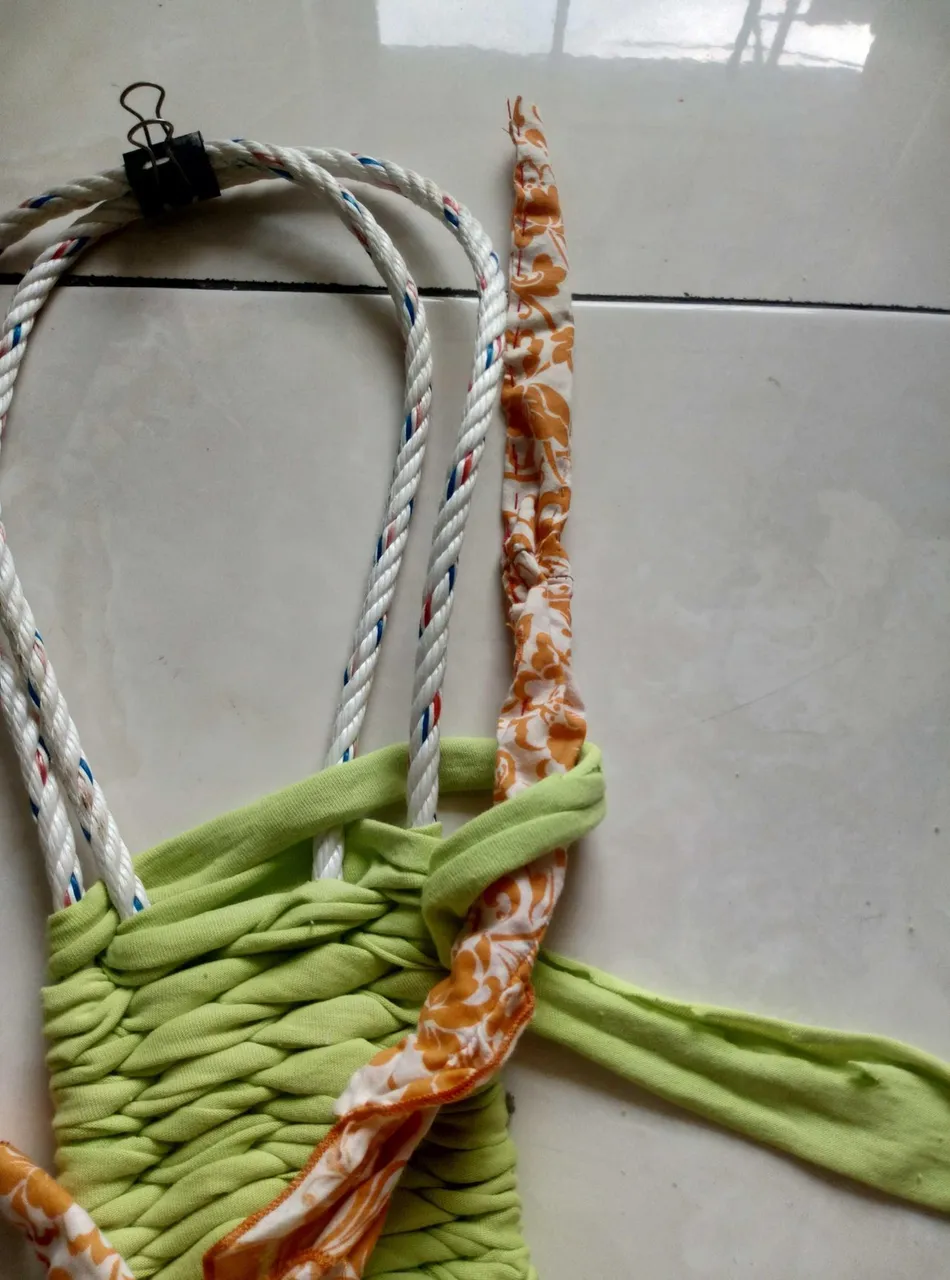
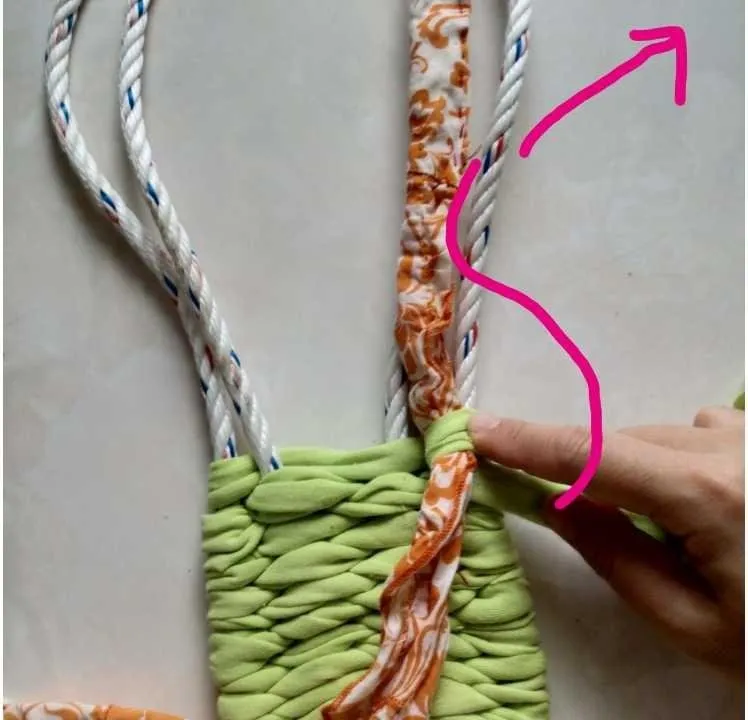
2.The strap needs to squeeze it through.

Get the loop come out to the other side.
Grab the edge of ropes and make it through the loop. This makes the strap secured!
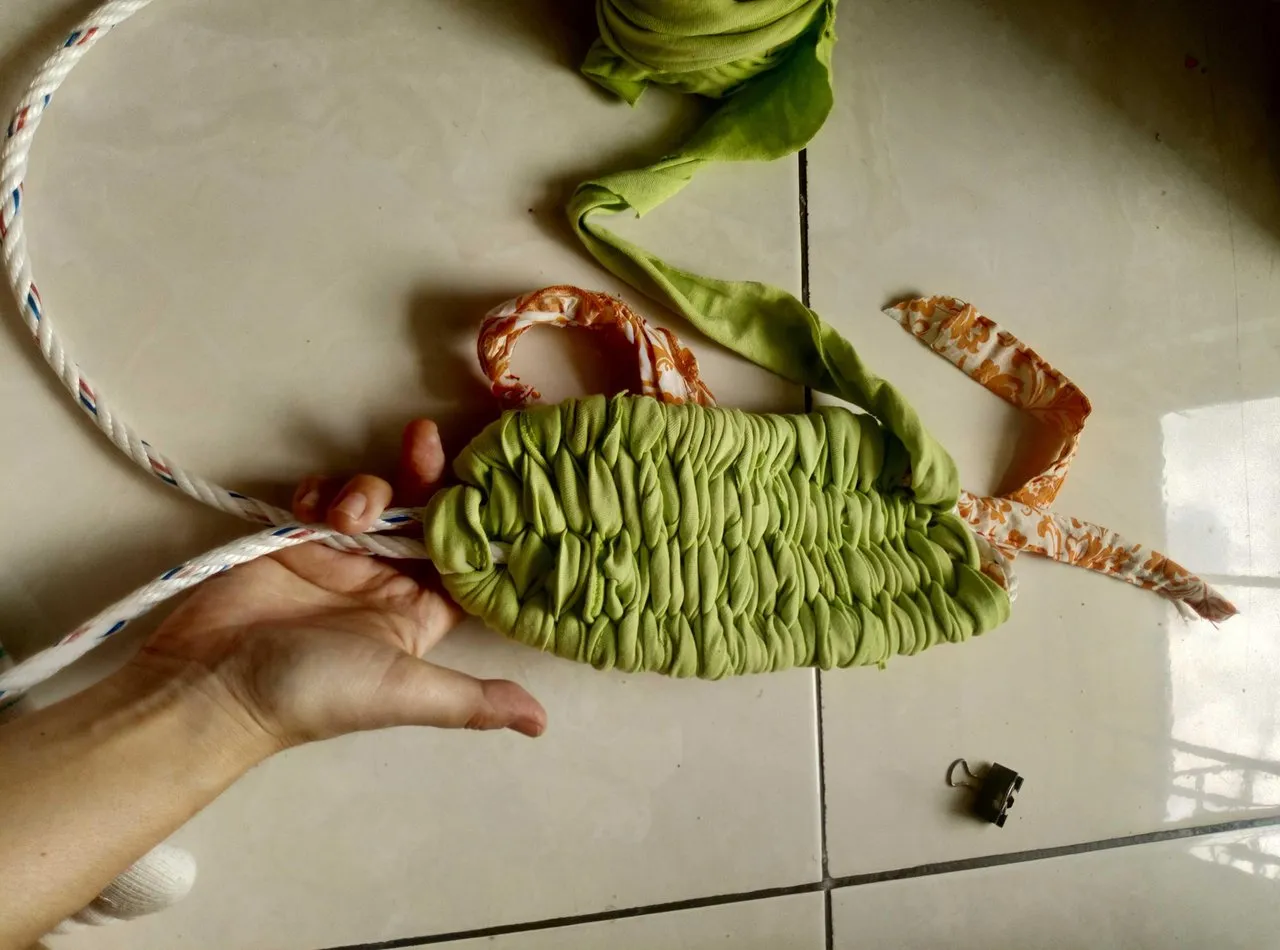
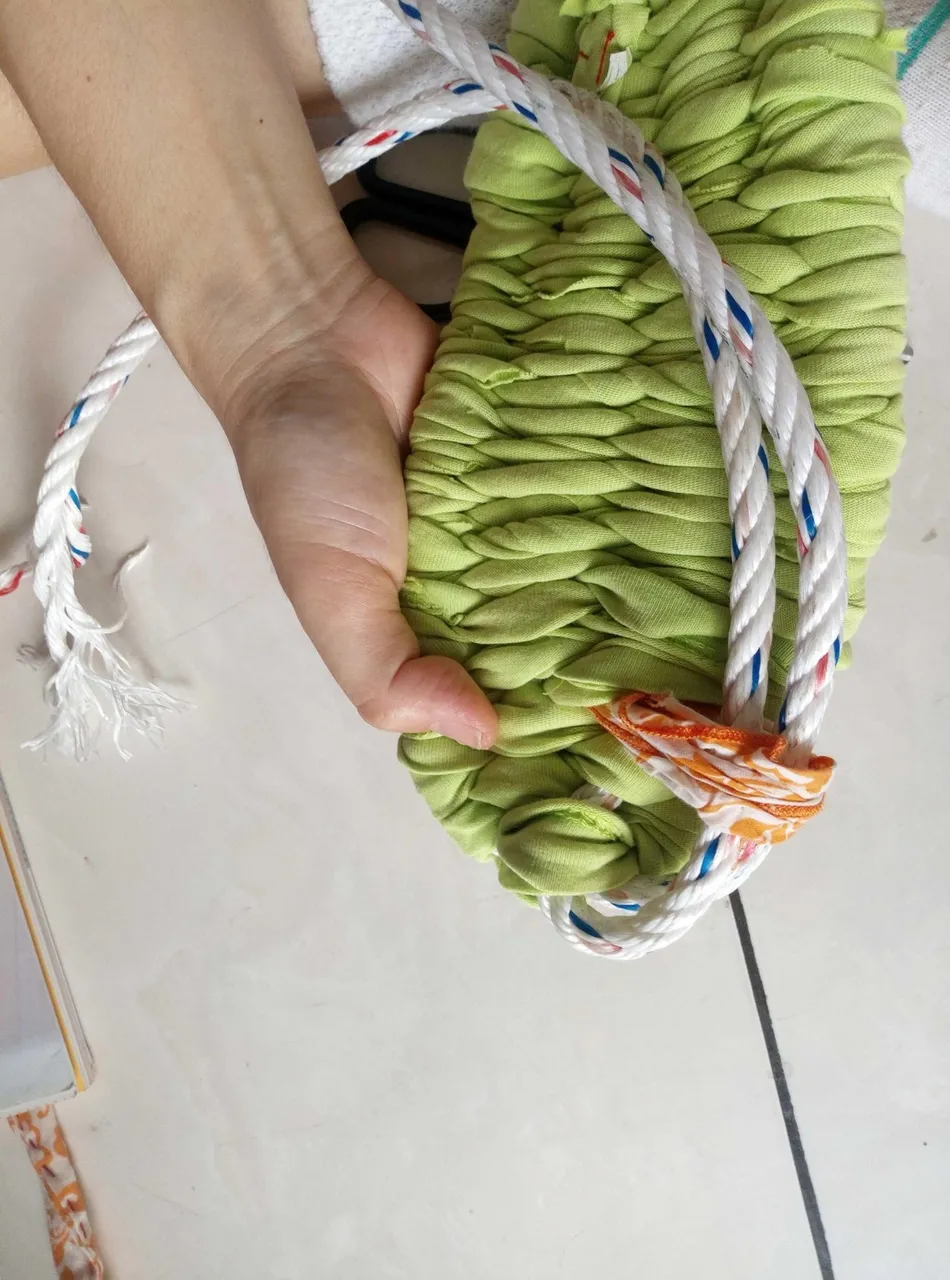
Go under and undone the rope. Tie them and stitch them if you can.
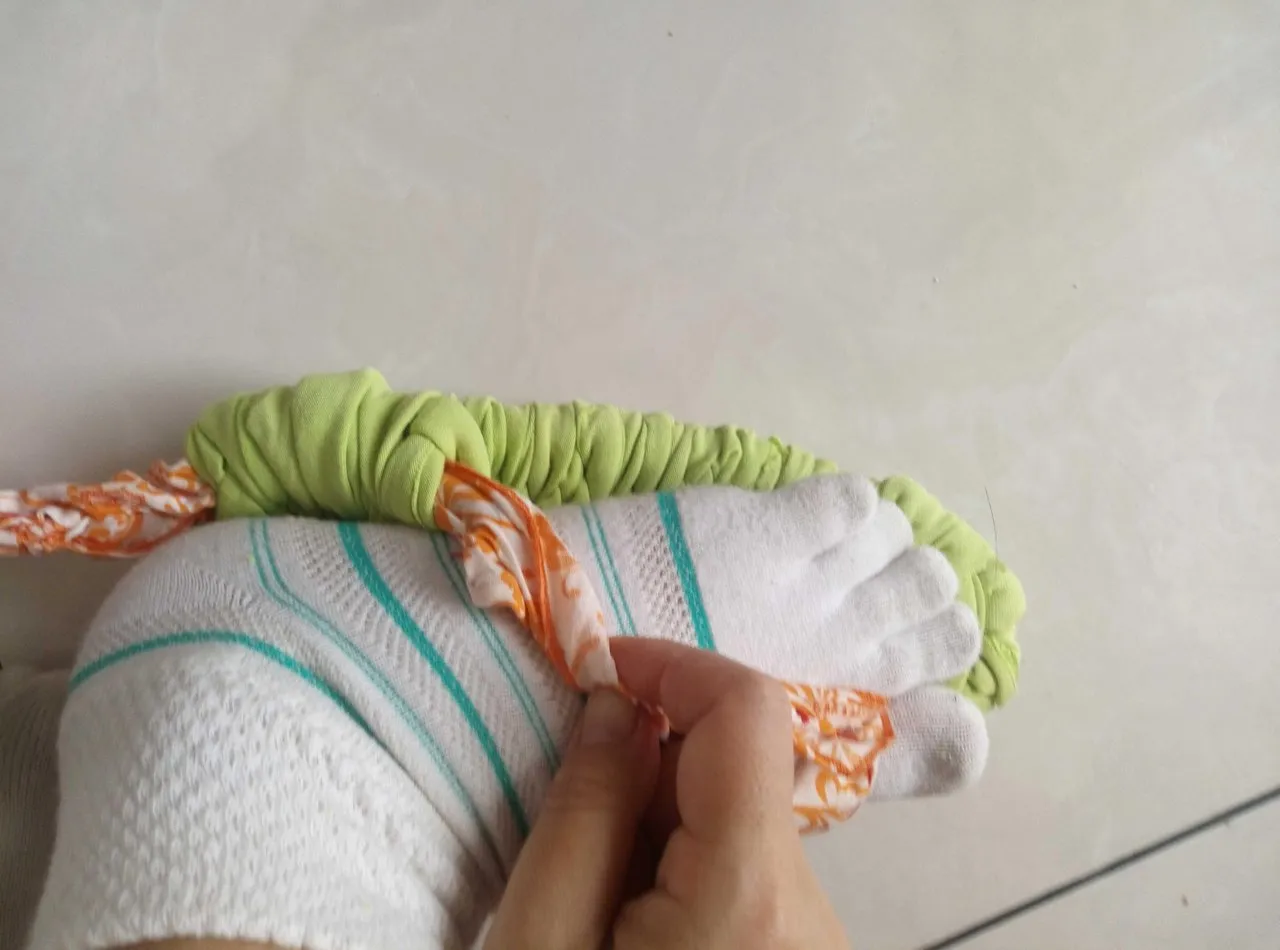
Wrap around it to make it secured and hide the edge.
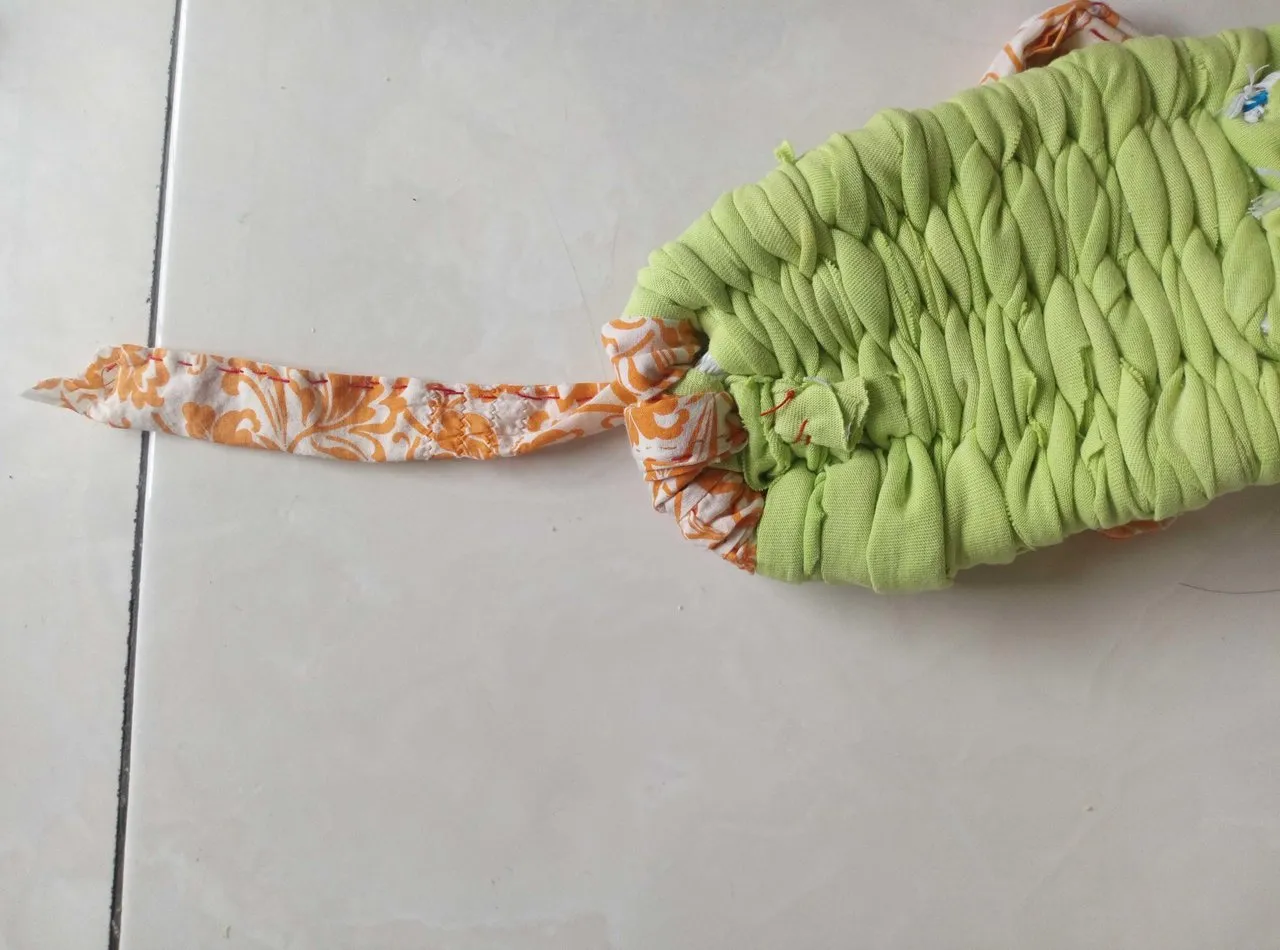
And you are done...!!.... with one of the flipflop.
Make one more for the pair and you are done!!!
Thank you for reading!
I refered and added few alterations from this book.

The author is introducing so many variations!!!
ISBN978-4-309-28076-9
All the images are taken by me if not stated its source.