Hello, hivers! Welcome to my page!
It's time for the next part of my series about working on my little "canned ham" travel trailer. In my last post about the trailer, I talked about putting some insulation in the floor in the back end of the trailer. Starting with this part, I'll be talking about repairing the front structure of the trailer.
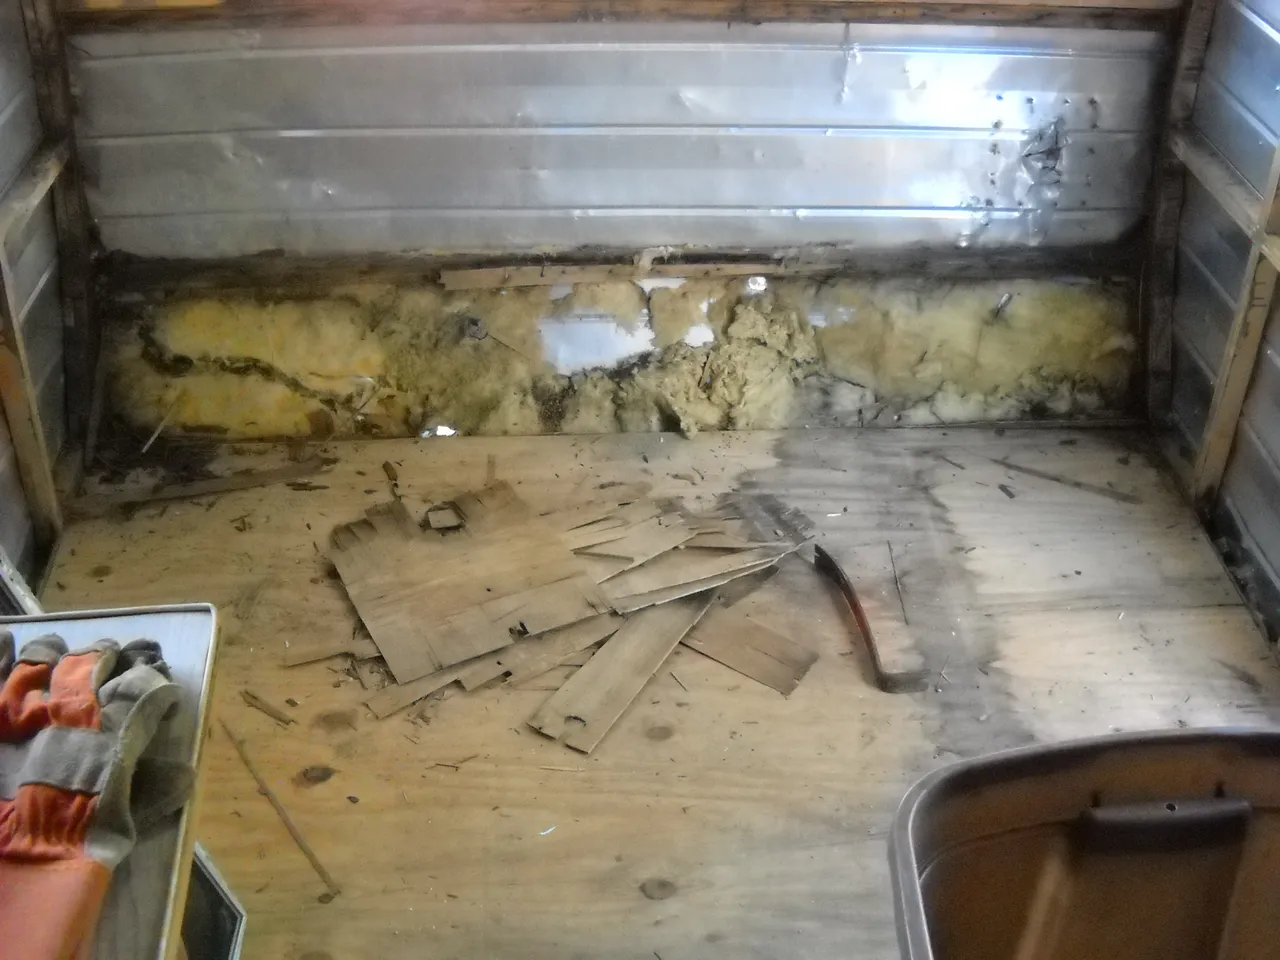
I don't have any pictures of the inside front of the trailer before I started working on it, so I can't show you what the plywood paneling looked like before I tore it off the front wall. It was water stained in several places, and starting to de-laminate, it needed to be replaced. I suspected that there would be water damage to the wood structure behind the plywood, and I was right. Also, there were old mouse nests in the fiberglass insulation behind the plywood.
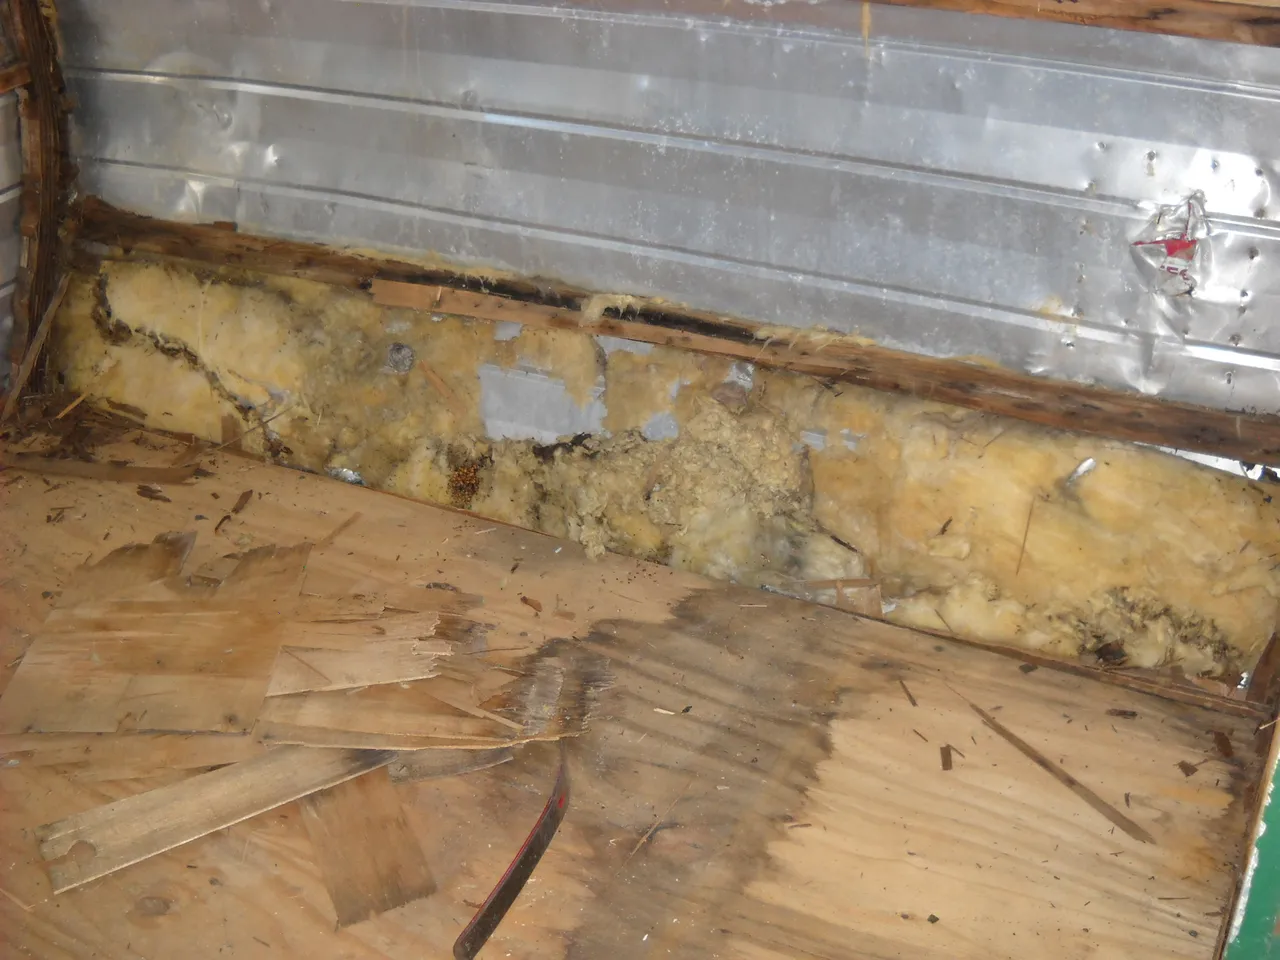
It was quite the mess.
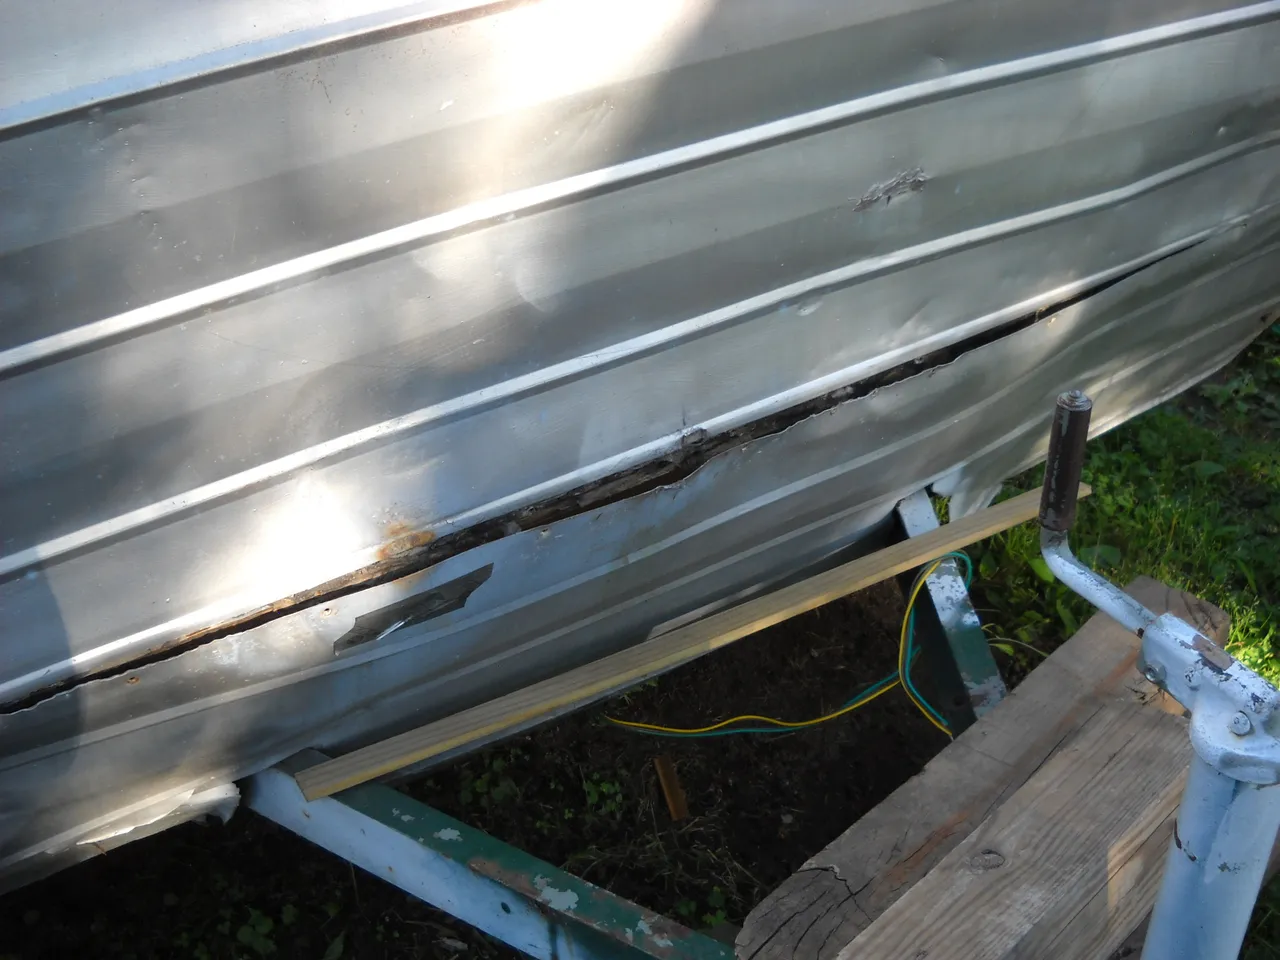
The wood structure at the edge of the lower front and side walls was in bad shape also. The curved wood structure that defines the outer edge of the sides was made by laminating multiple layers of thin wood and gluing them into the shape in a form of some kind. The glue is starting to let loose on the lamination, and the water got into the bottom part of the structure, causing quite a bit of rot.
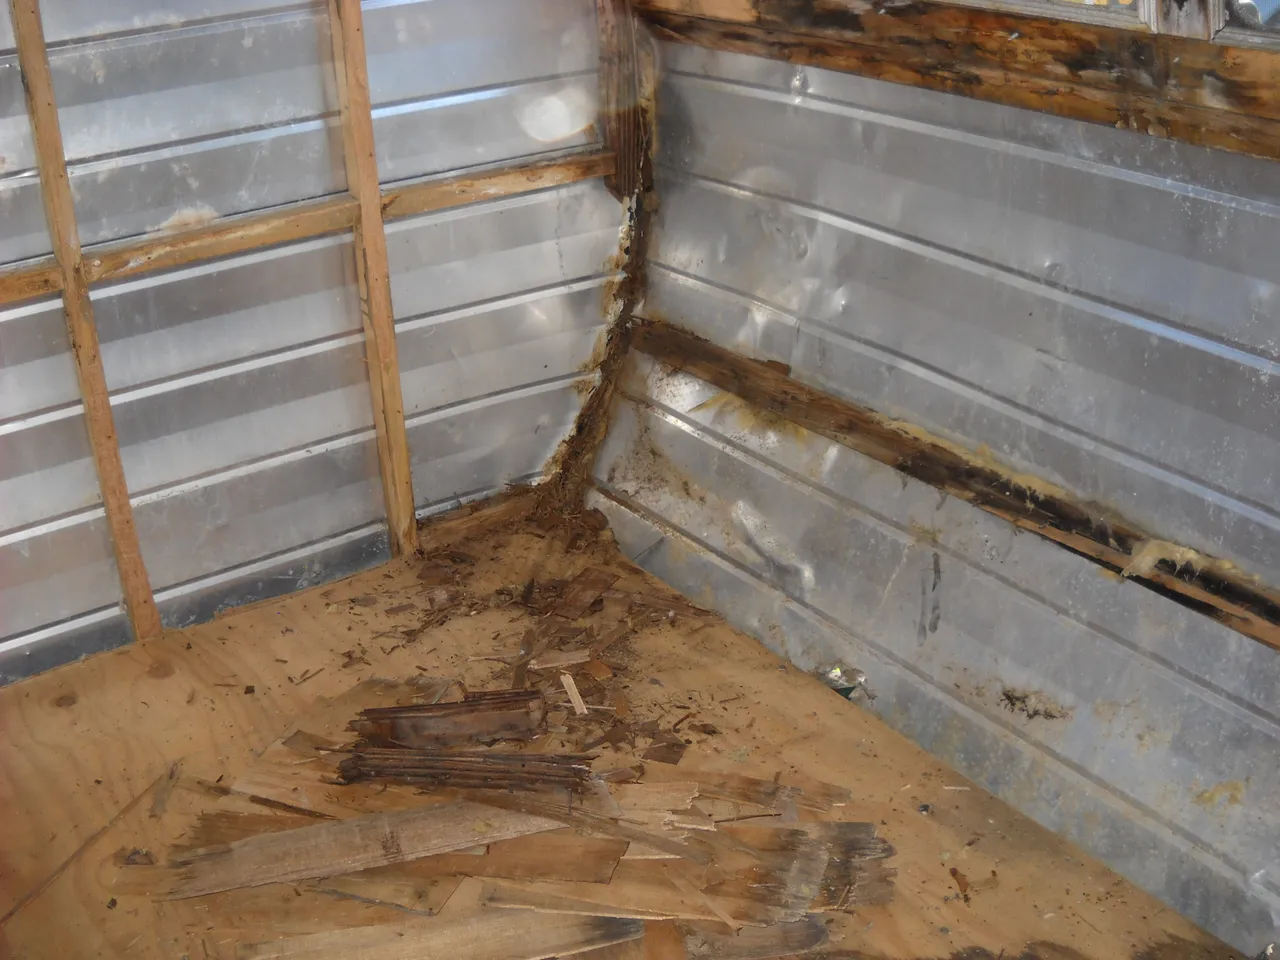
The right hand side wasn't as bad as the left hand side (looking to the front), but it still needed to be replaced.
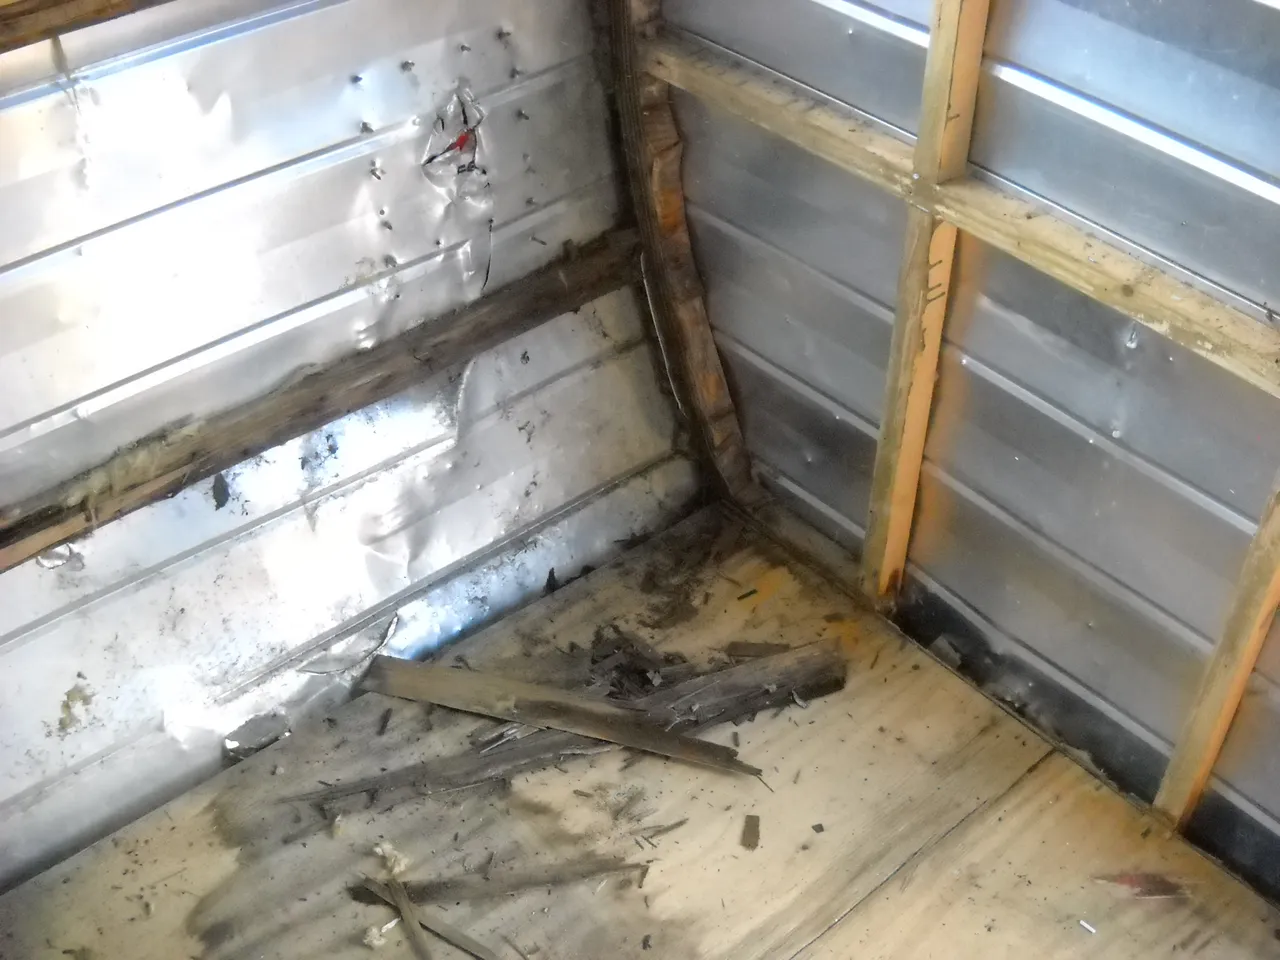
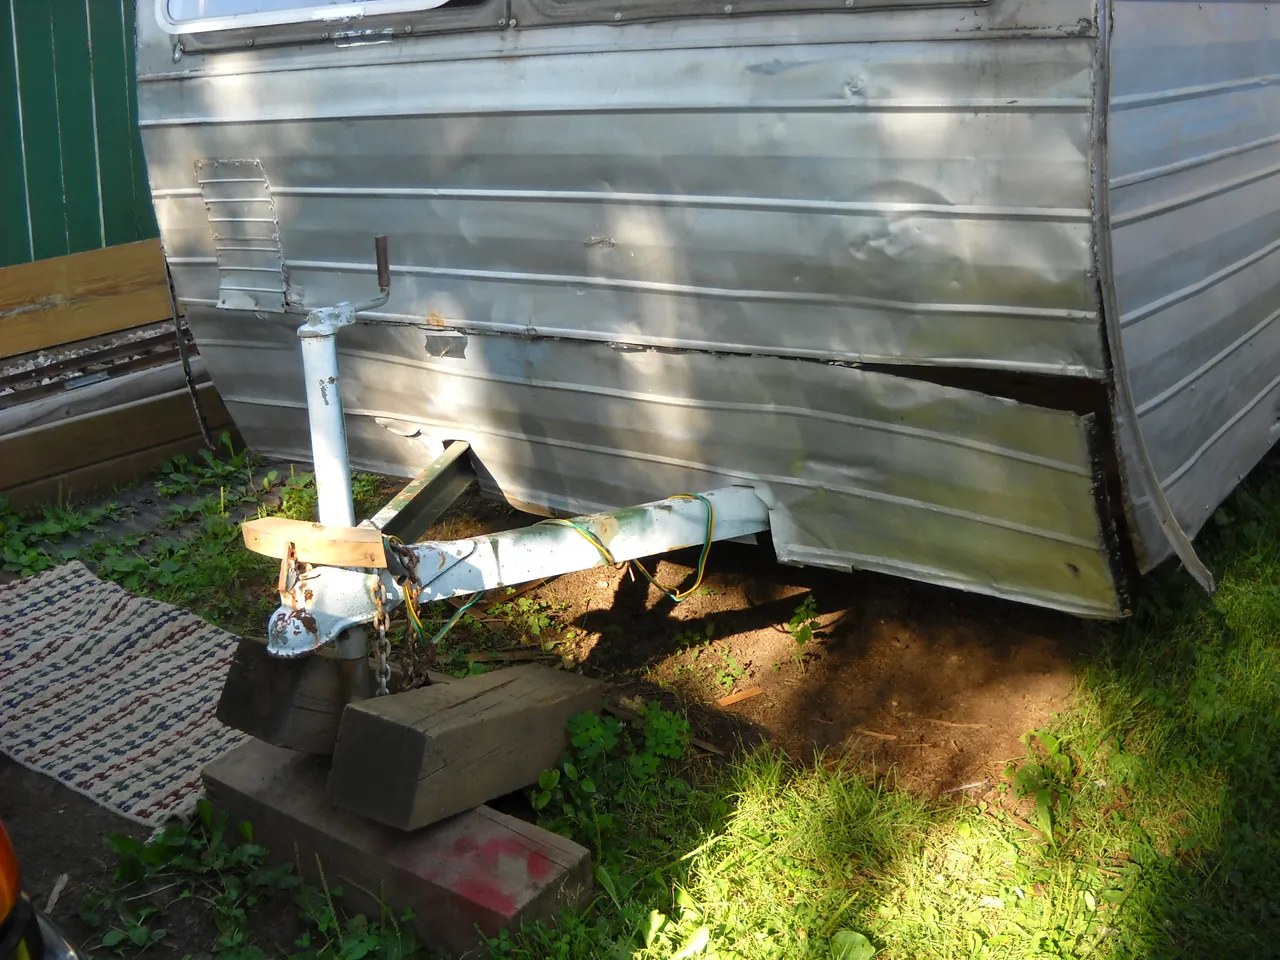
That meant that I would have to remove the outside skin of the front of the trailer to be able to replace the wood properly. I started with the lower panel. It was already partly separated from the seam and held in place with screws, so I started by pulling the screws.
The edges of the front panels wrap around the edge of the side walls, and are held in place by small nails and an aluminum drip cap that's held in place with screws. That meant that I had to pull the drip cap away from the side walls to get at the corners of the panel. I didn't have to pull very many nails to get the panel loose because of the rotten wood. The panel came loose fairly easily.
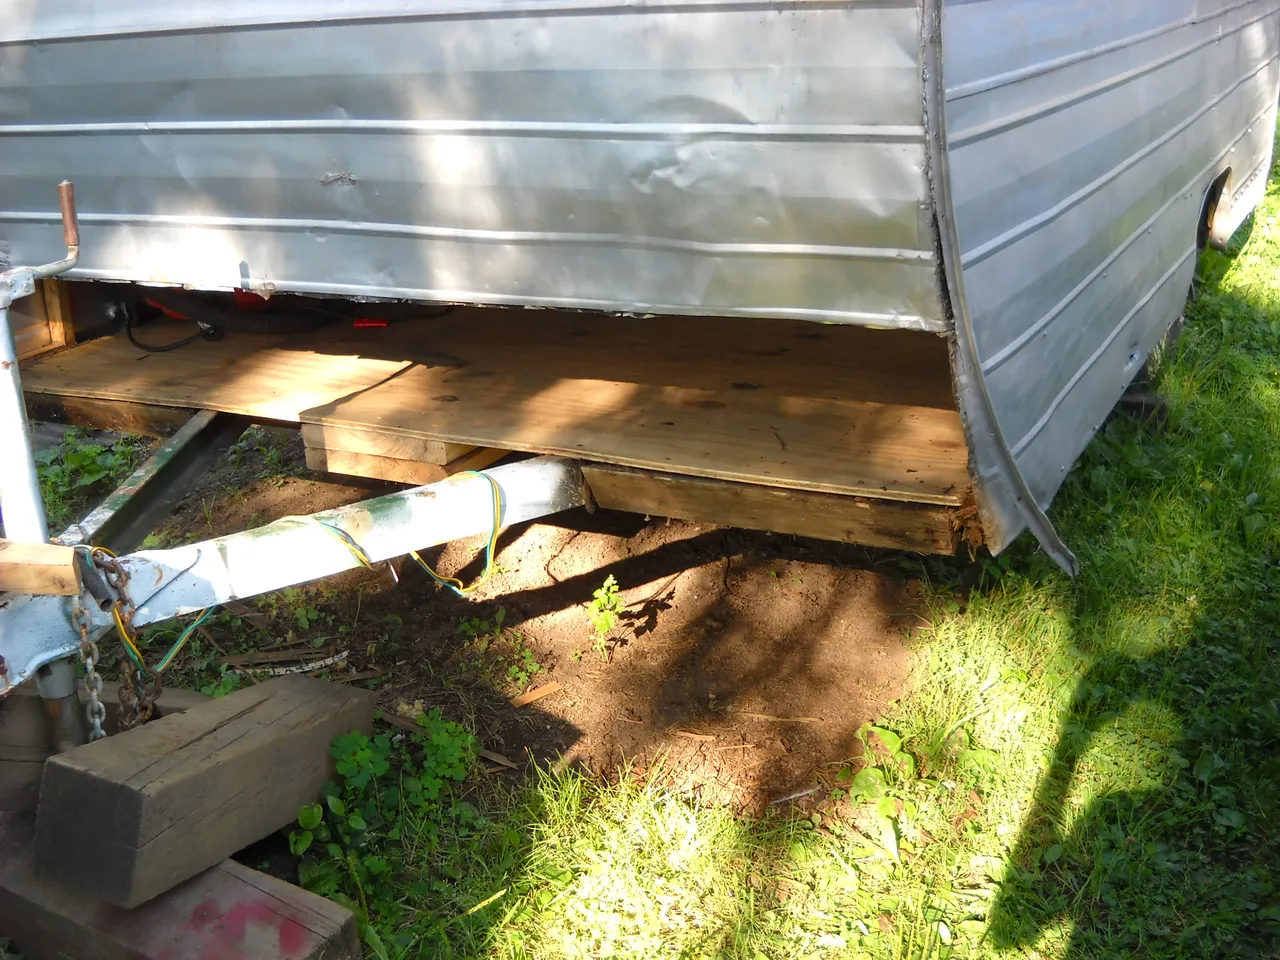
And, of course, there was more rotted wood under the panel than I had expected to find. I had to remove those short 2X4s just under the edge of the front of the floor.
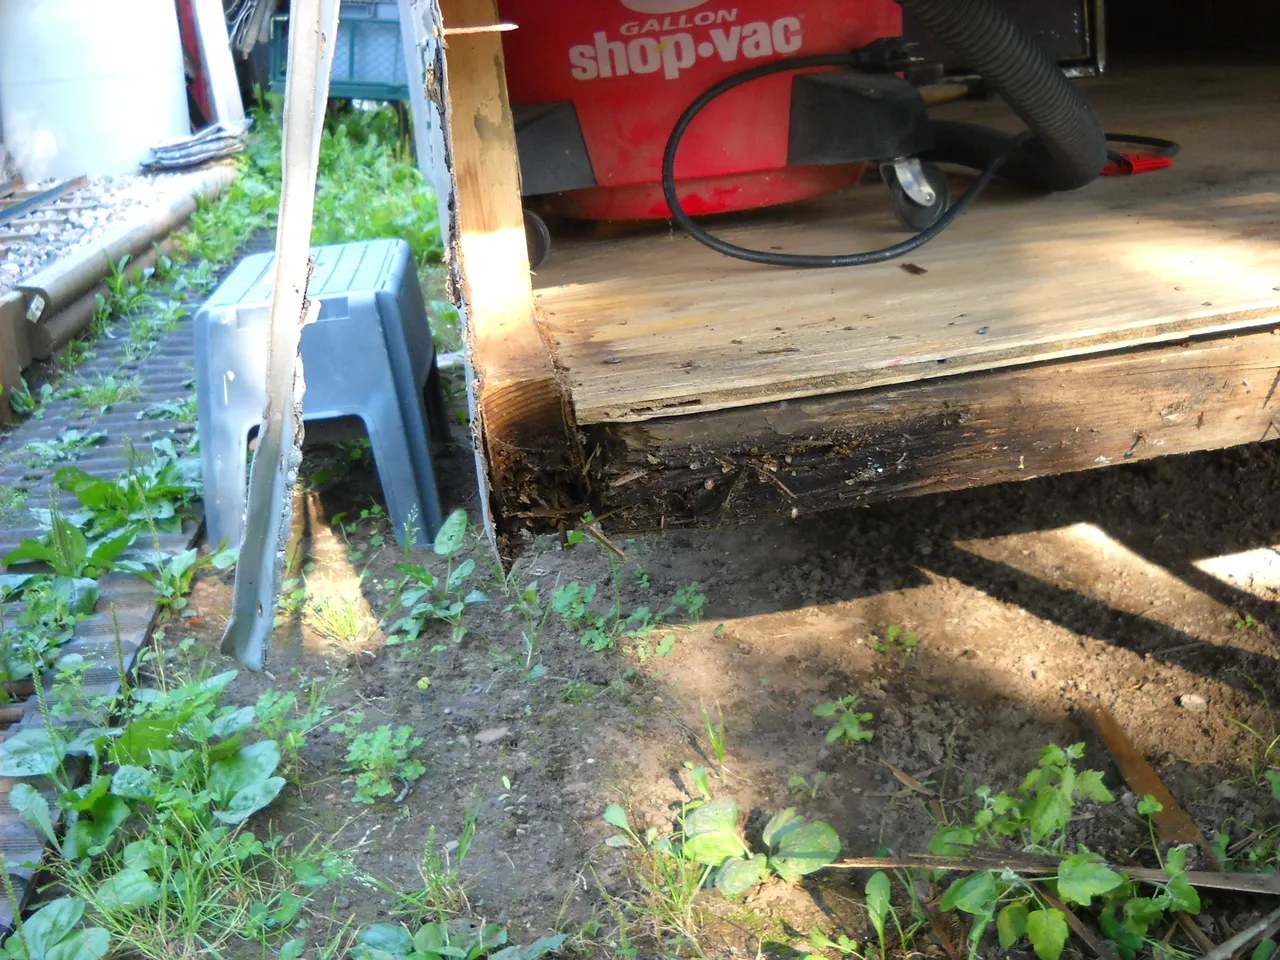
That kind of rot damage meant that I was going to have to pull up the floor plywood in the front to see what else I needed to replace. The front piece of floor plywood is about 4 feet wide, and is a single piece across from one side to the other. It extends back just about as far back as the front of the wheel wells.
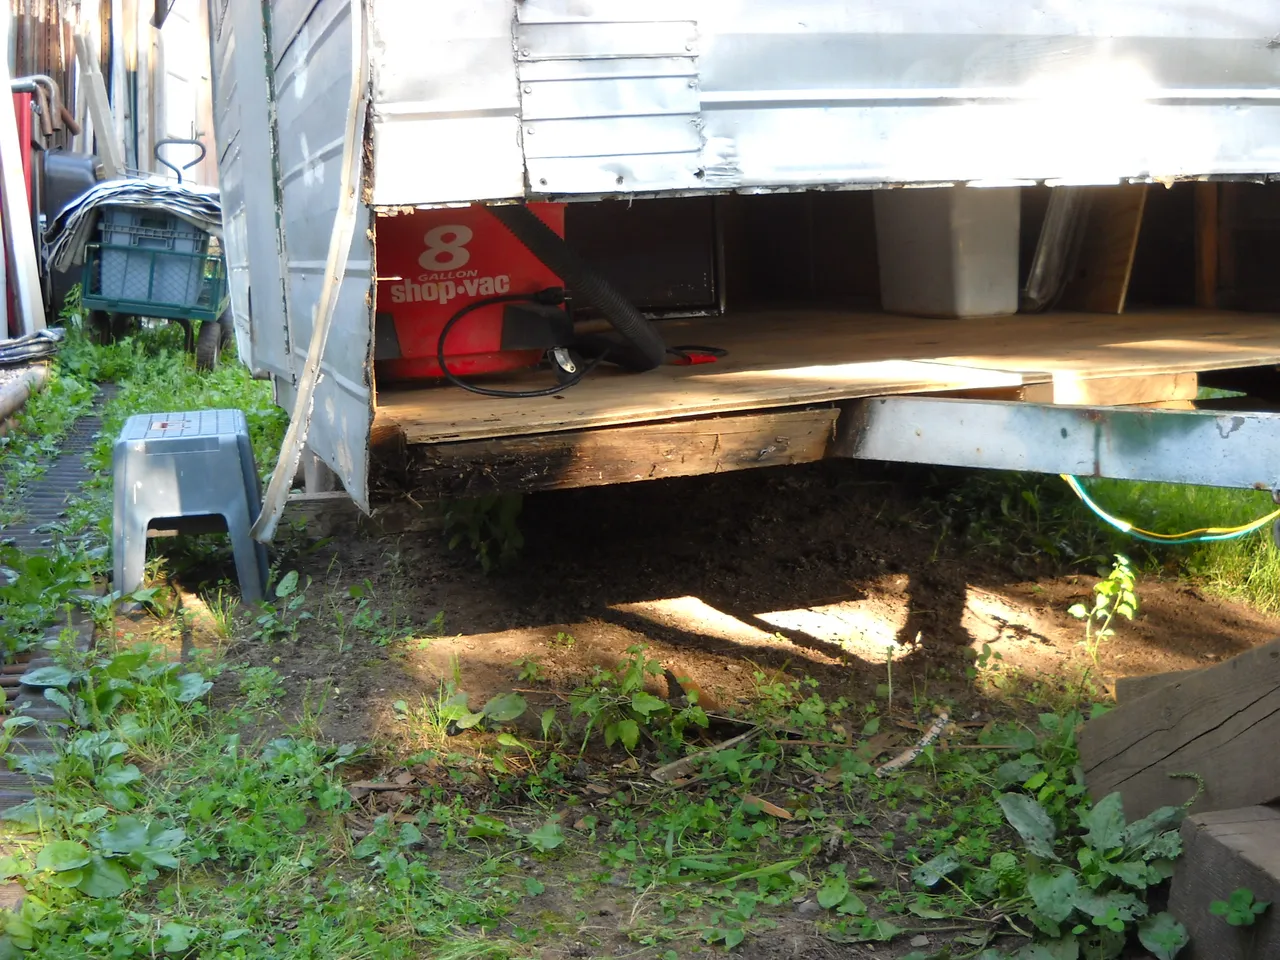
There was lots of screws to remove to get the plywood out, but I managed to get it out in 1 piece. That gave me a good look at all the wood I would have to replace. It turned out that the rotted wood wasn't quite as bad as I was thinking it might be.
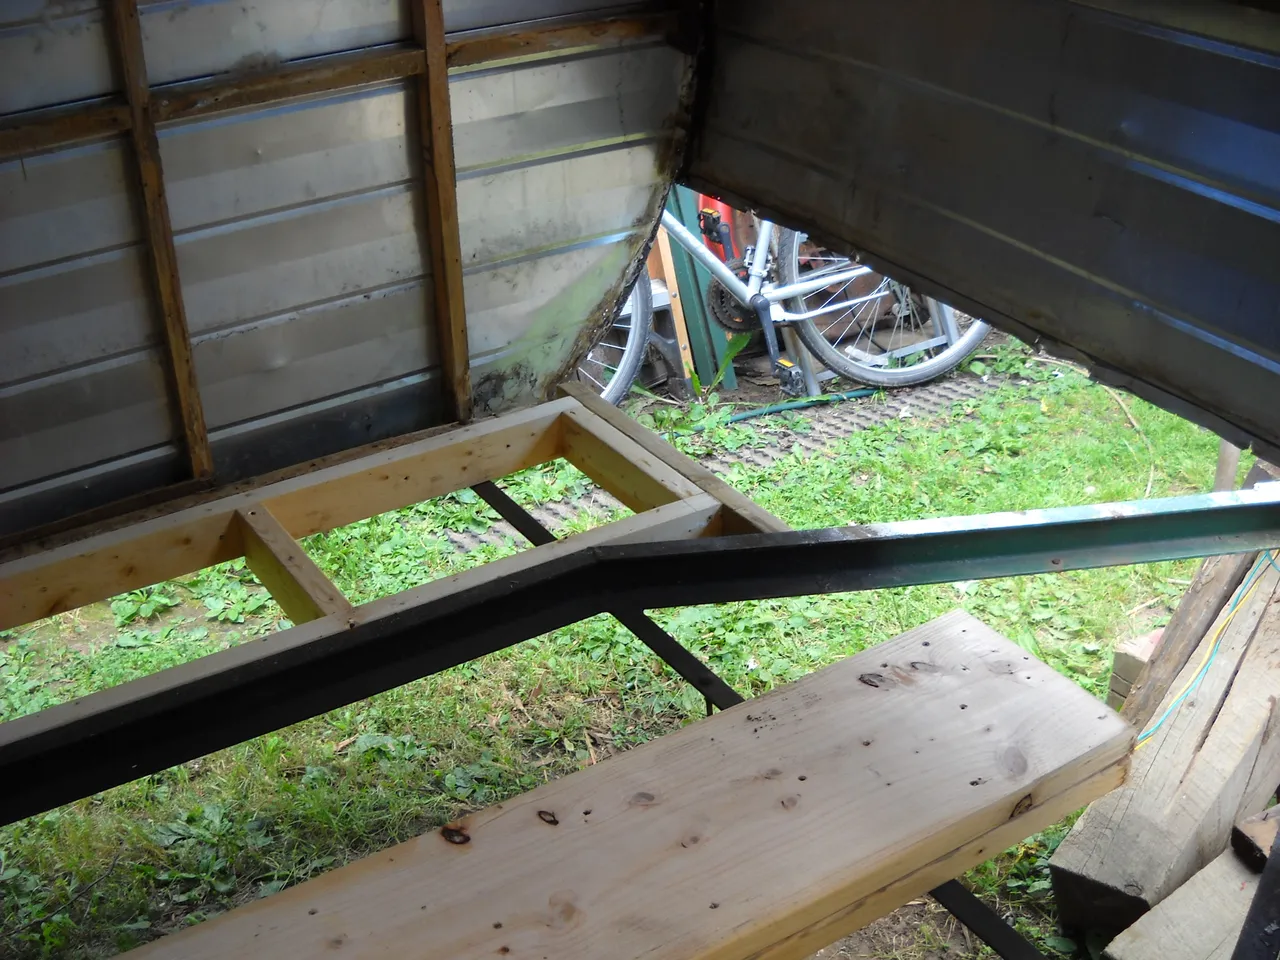
For some reason, I didn't take any more pictures until I had already started replacing the bad wood sections. Most of the wood floor structure that you see here was already in the trailer and didn't need to be replaced. It turned out that the rotted wood was just on the corners and the outside frame boards in the front. I'm sure that the newer wood in the frame in this picture was put in by the person that I bought the trailer from, it's not original to the trailer.
This seems like as good of a place as any to end this post. I don't want the post to be too long. In my next post about this project, I'll take up where I left off here.
If you would like to read the previous parts of this series, follow these links.
@amberyooper/rebuilding-my-travel-trailer-part-3
@amberyooper/rebuilding-my-travel-trailer-part-2
@amberyooper/rebuilding-my-travel-trailer-part-1
In part 1, there are links to the posts that I wrote about repairing the back of the trailer in 2019.
Thanks for stopping my page to check out this post!
I hope you found it interesting!