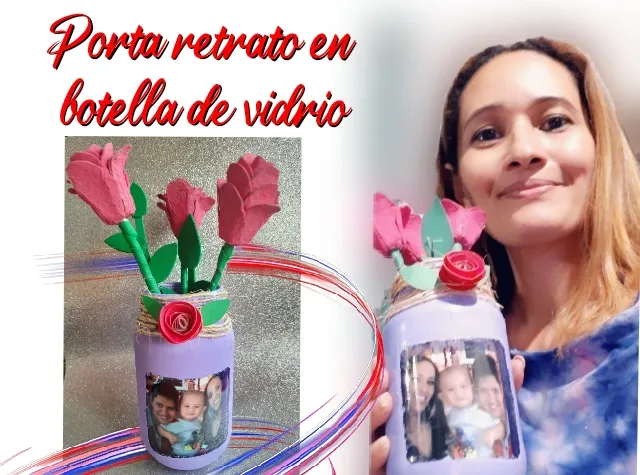


Bienvenidos a mi blog, que bueno poder compartir con ustedes una nueva manualidad, quiero decir que está es una de mis favoritas, les he traído un reciclaje creativo para participar en el concurso de la amiga @jennyzer increíble que ya vamos por el #14.
Para ello hoy he preparado un lindo "porta retrato en botella de vidrio"

Welcome to my blog, how nice to share with you a new craft, I want to say that this is one of my favorites, I have brought you a creative recycling to participate in the contest of the friend @jennyzer incredible that we are already on #14.
For this today I have prepared a nice "portrait holder in glass bottle".
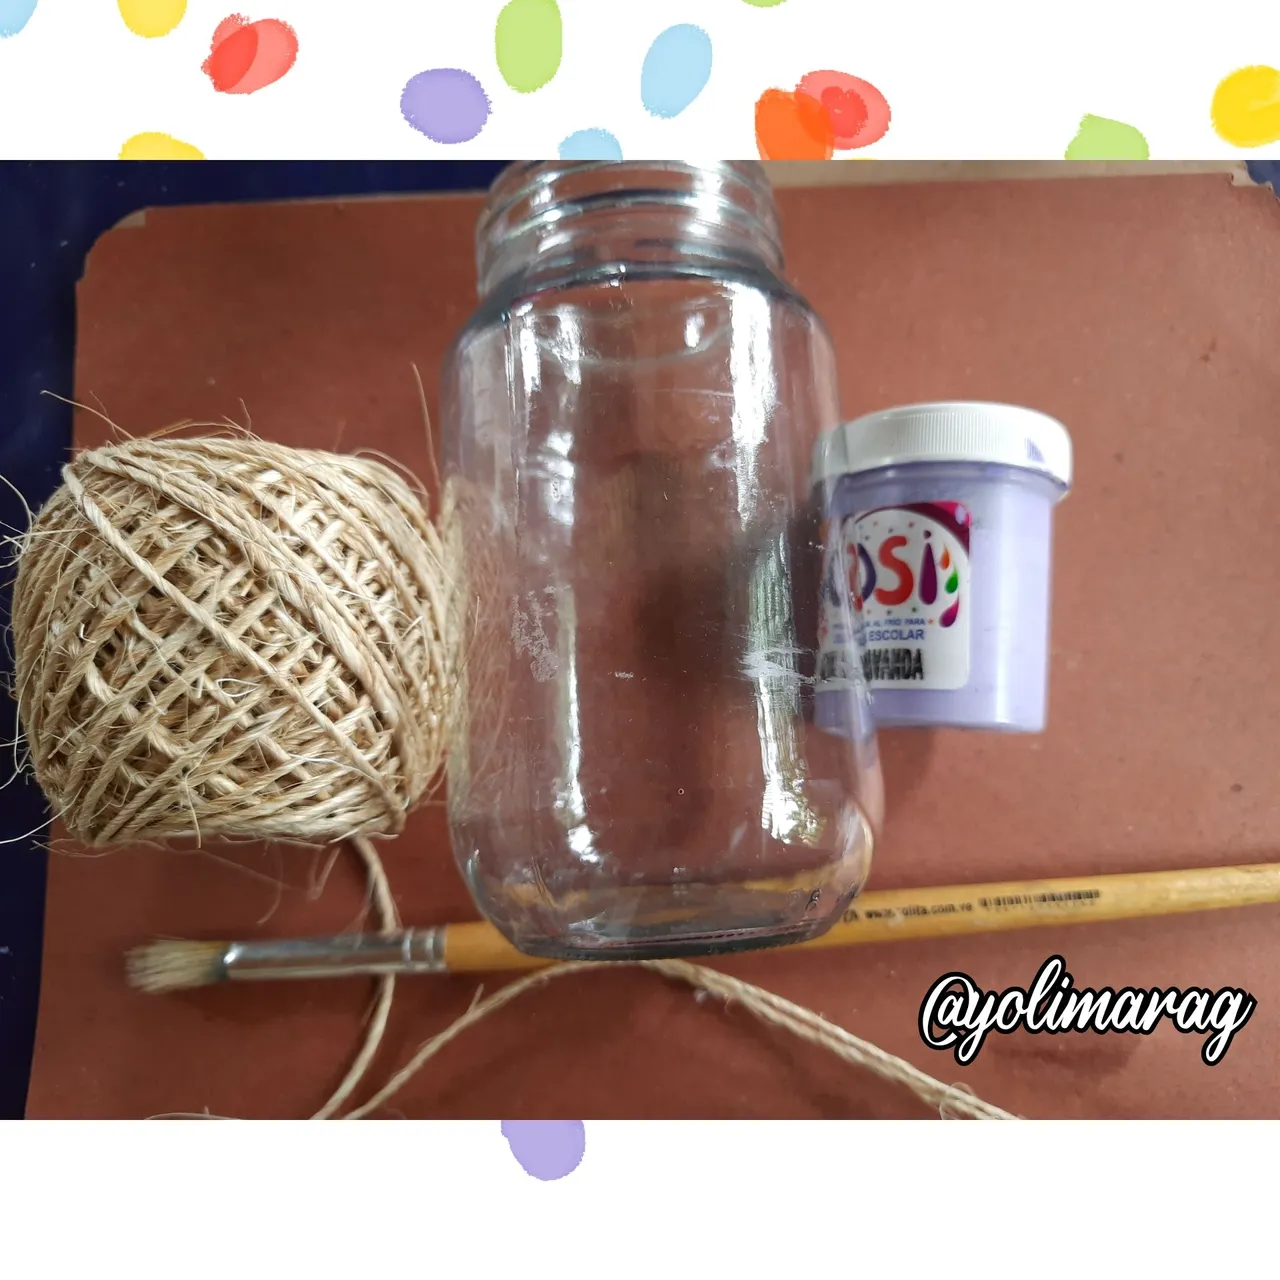
Materiales:
🌸 Botella de vidrio
🌸 Pintura Acrílica
🌸 Pega escolar
🌸 Yute
🌸 Cartulina verde y roja
🌸 Tijera
Materials:
🌸 Glass bottle.
🌸 Acrylic paint
🌸 School glue
🌸 Jute
🌸 Green and red poster board
🌸 Scissors
Paso a Paso / Step by Step
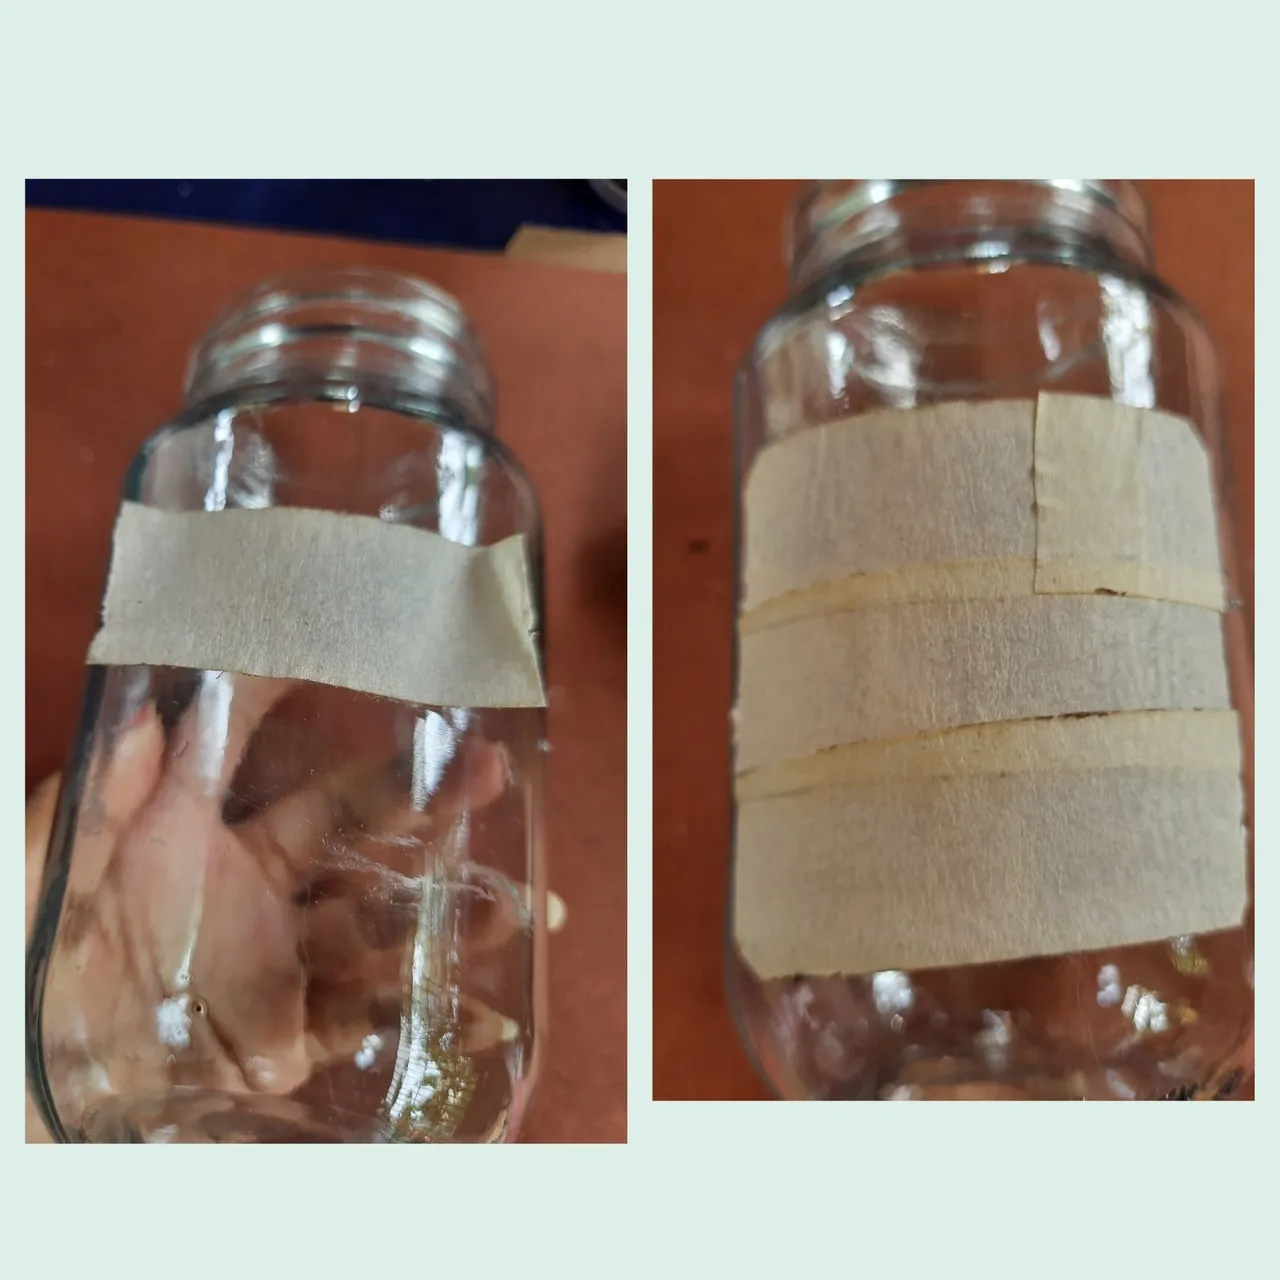
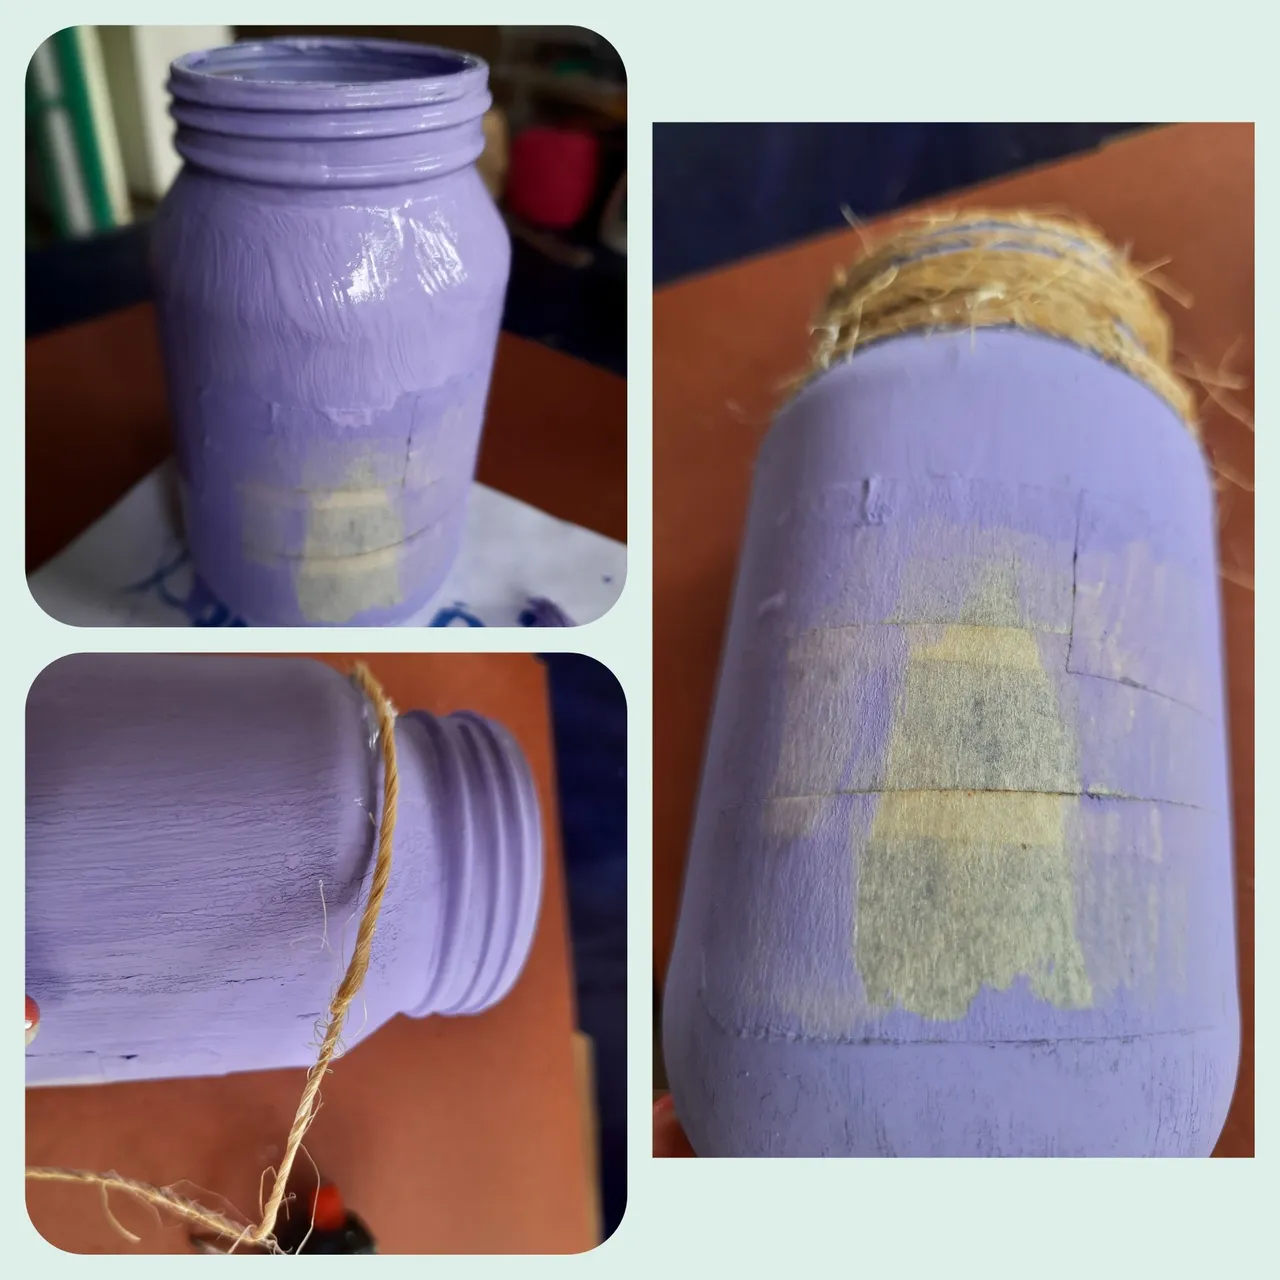
Lo primero que haremos será tener limpia nuestra botella, vamos a tomar un tiro y vamos a colocarlo en la parte que queremos se vea transparente, donde estará nuestra foto.
The first thing we will do is to have our bottle clean, we will take a shot and we will place it in the part we want to see transparent, where our photo will be.
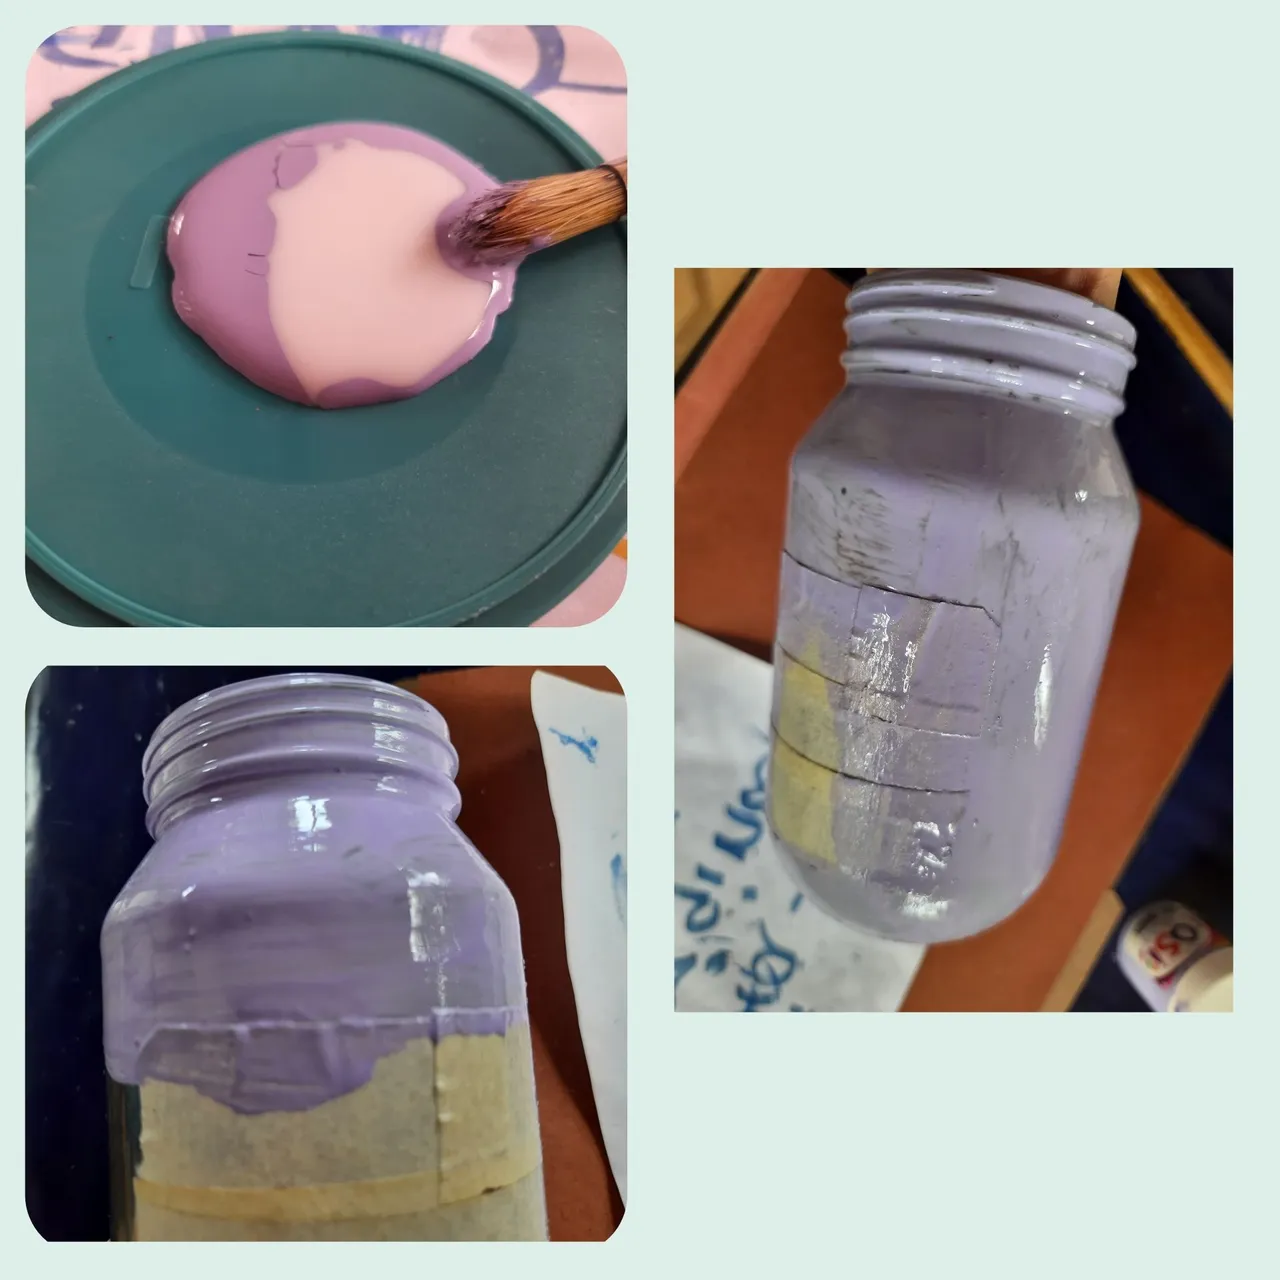
Vamos a ligar pintura acrílica con pega escolar, y vamos a pintar nuestra botella, para ello yo necesite 3 manos de pintura.
We are going to combine acrylic paint with school glue, and we are going to paint our bottle, for this I need 3 coats of paint.
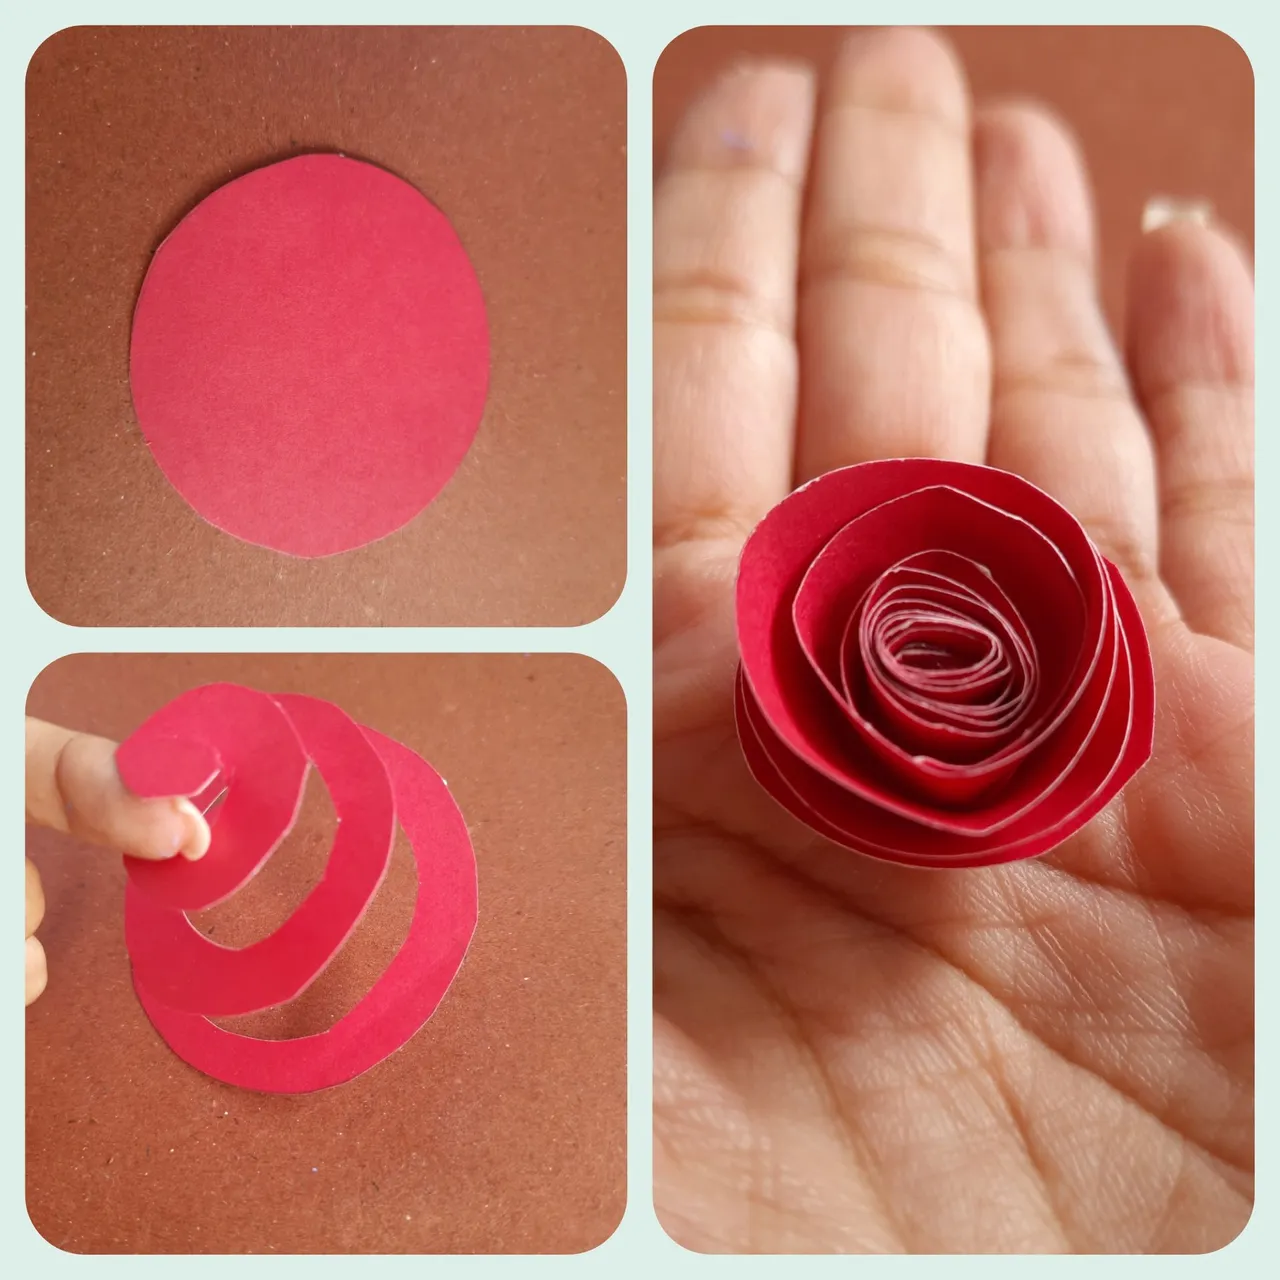
En una cartulina roja, vamos hacer un círculo se aproximadamente 8cm, cortamos en forma de espiral y vamos pegando dando vueltas para formar la flor.
In a red cardboard, we will make a circle of approximately 8cm, cut in a spiral shape and glue around to form the flower.
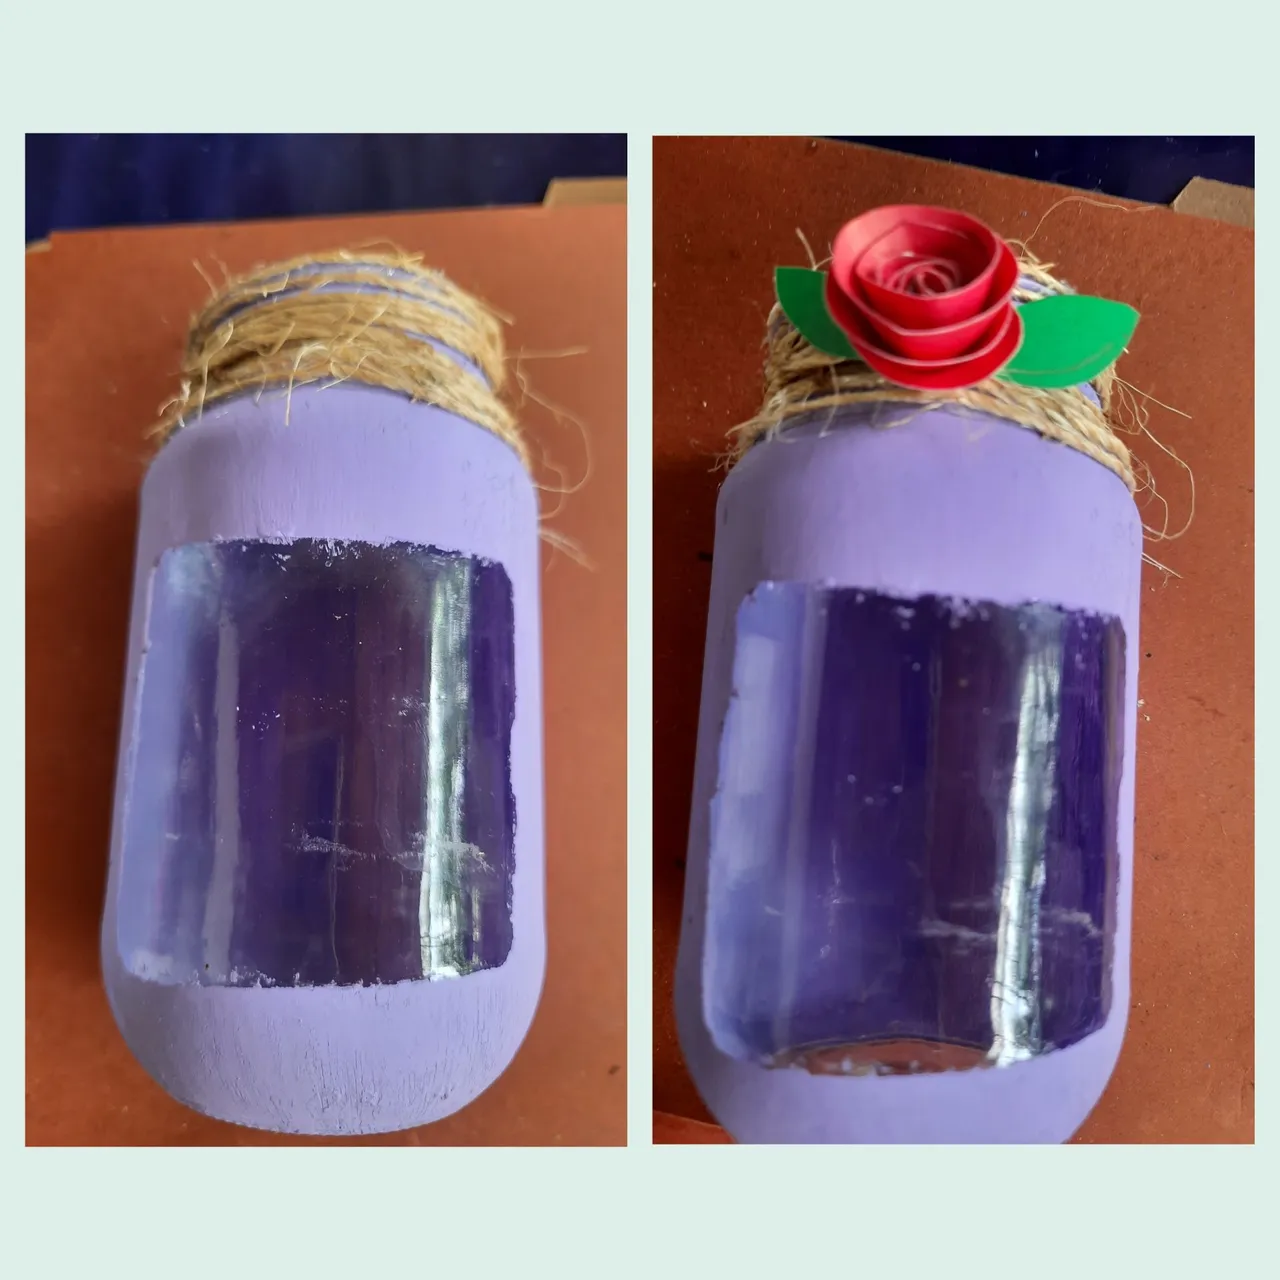

We will look for a horizontal photo and we will place it in the jar as shown in the photo, finally we will decorate it with some roses to make it look more beautiful.

Y así ha quedado este hermoso tutorial, y he dejado mi participación en el concurso de reciclaje creativo,espero les gustará.
Gracias por estar aquí y ser parte de mi blog, nos vemos en una próxima publicación, muchas bendiciones 😘 para todos.
And so has been this beautiful tutorial, and I have left my participation in the creative recycling contest,I hope you will like it.
Thank you for being here and being part of my blog, see you in a next post, many blessings 😘 to all.
Fotos principal editada con Canva.
Fotos de mi Autoría derechos reservados
Separadores Link
Cámara: Samsung A20S
Banner por @danelvehe
Traducido con www.DeepL.com/Translator (versión gratuita)
Photos edited with Canva
Photos by me Author's rights reserved
Banner by @danelvehe
Separators Link
Quote> Camera: Samsung A20S
Translated with www.DeepL.com/Translator (free version)


