Hola. Espero que estén muy bien hoy. Atendiendo la invitación que nos hace una vez más la amiga @jennyzer, paso a compartir con ustedes mi proyecto de reciclaje creativo.
Hello, I hope you are doing well today. Attending the invitation that once again makes us the friend @jennyzer, I share with you my creative recycling project.
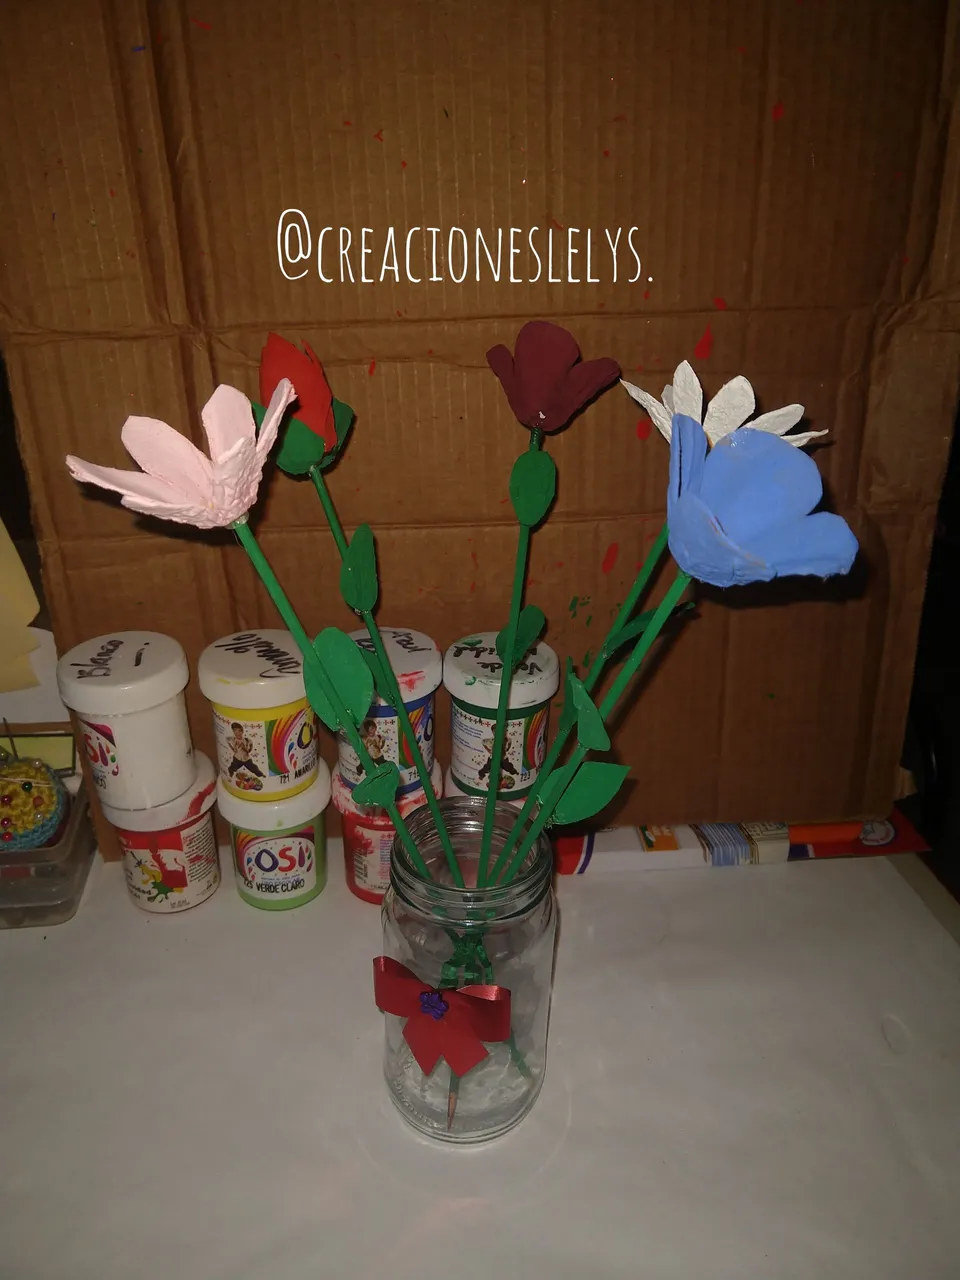
Es la primera vez que trabajo una manualidad con este tipo de material. He visto que muchas personas desestiman las creaciones realizadas con cartón de huevos o hueveras, sin embargo puedo decirles que manipularlo no ha sido tan sencillo. En el caso particular lo usé para hacer flores muy sencillas.
La intención es prolongar la vida de estos recursos para evitar que sean desechados e incluidos en la basura. Todos sabemos que al reciclar evitamos que el ambiente se contamine aún más. El cartón es uno de los materiales menos contaminantes para el ambiente, pero de igual manera mientras más tiempo de utilidad tenga será más beneficioso para el planeta.
This is the first time I have made a craft with this type of material. I have seen that many people dismiss the creations made with eggs or egg cartons, however I can tell you that manipulating it has not been so easy. In this particular case I used it to make very simple flowers.
The intention is to prolong the life of these resources to prevent them from being discarded and included in the garbage. We all know that by recycling we avoid polluting the environment even more. Cardboard is one of the least polluting materials for the environment, but the longer it is useful, the more beneficial it will be for the planet.
- Cartón de huevos.
- Pinturas al frío.
- Palitos de altura.
- Pegamento.
- Tijeras.
MATERIALS FOR MAKING FLOWERS. .
- Egg carton.
- Cold paints.
- Sticks of height.
- Glue.
- Scissors.
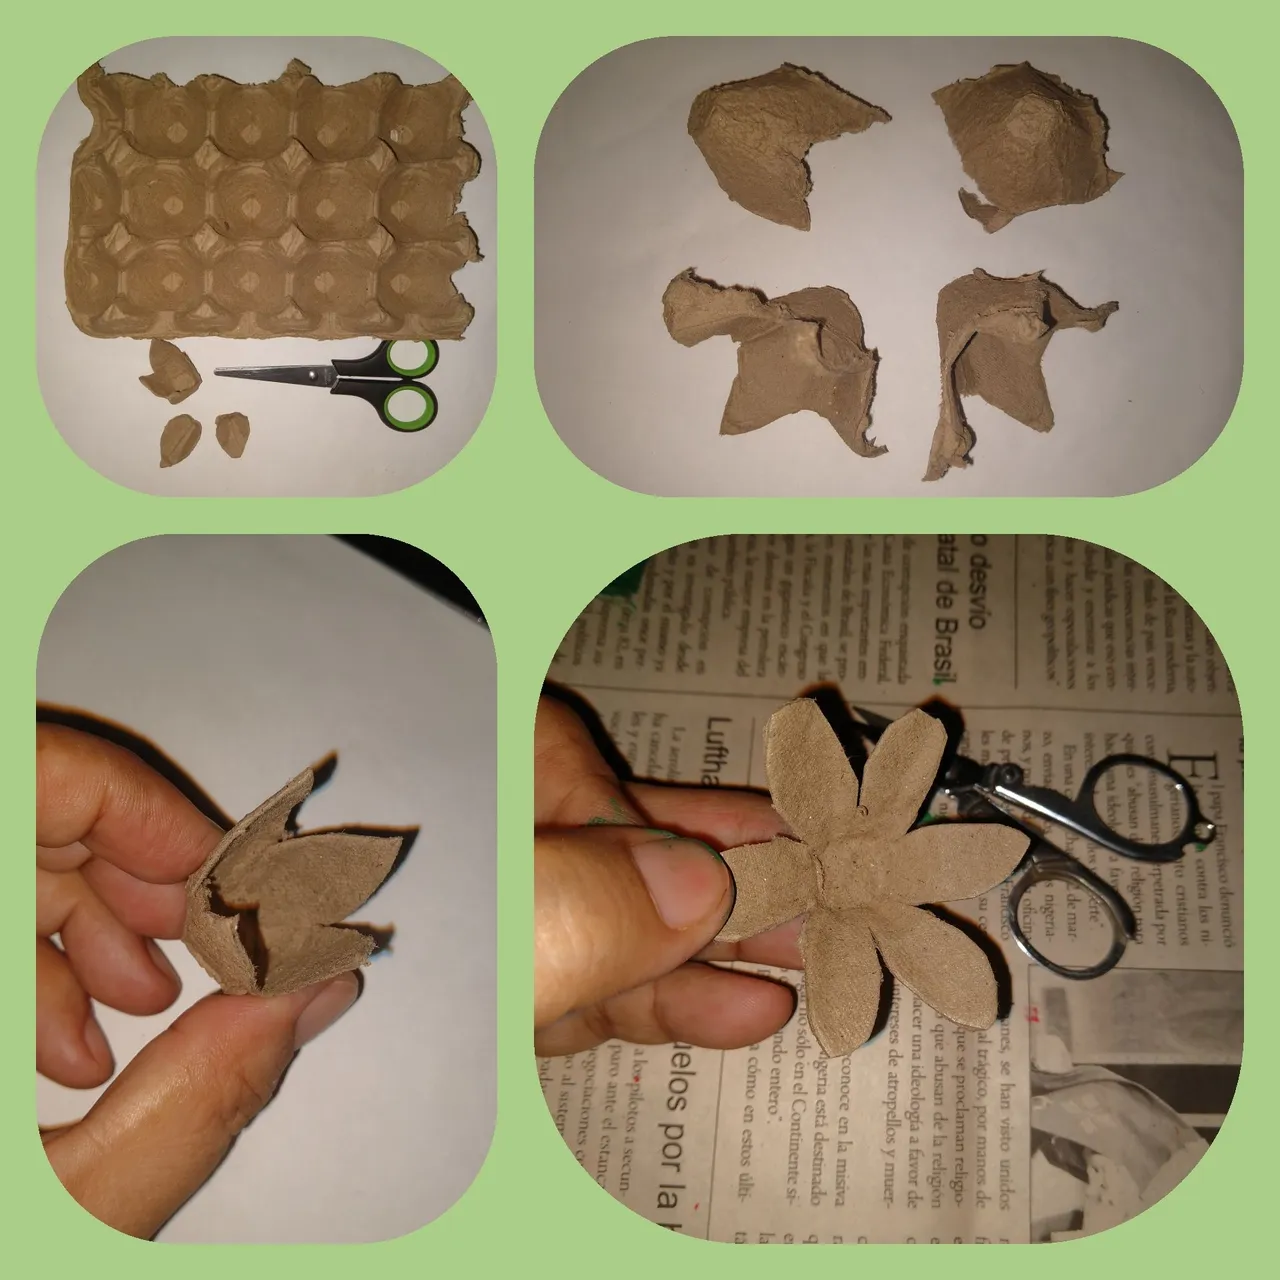
PASO 1.
- Separar cada uno de los espacios donde se depositan los huevos en el cartón.
- Cortar con la tijera cada una de las formas de flores que deseamos hacer. Para esto debes utilizar unas tijeras que corten muy bien sobre todo en las puntas.
- Podemos encontrar cartones lisos y unos muy corrugados, estos últimos son más duros para cortar.
STEP 1.
- Separate each of the spaces where the eggs are deposited in the carton.
- Cut with the scissors each of the flower shapes we want to make. For this you must use scissors that cut very well especially at the tips.
- We can find smooth cardboard and corrugated cardboard, the latter are harder to cut.
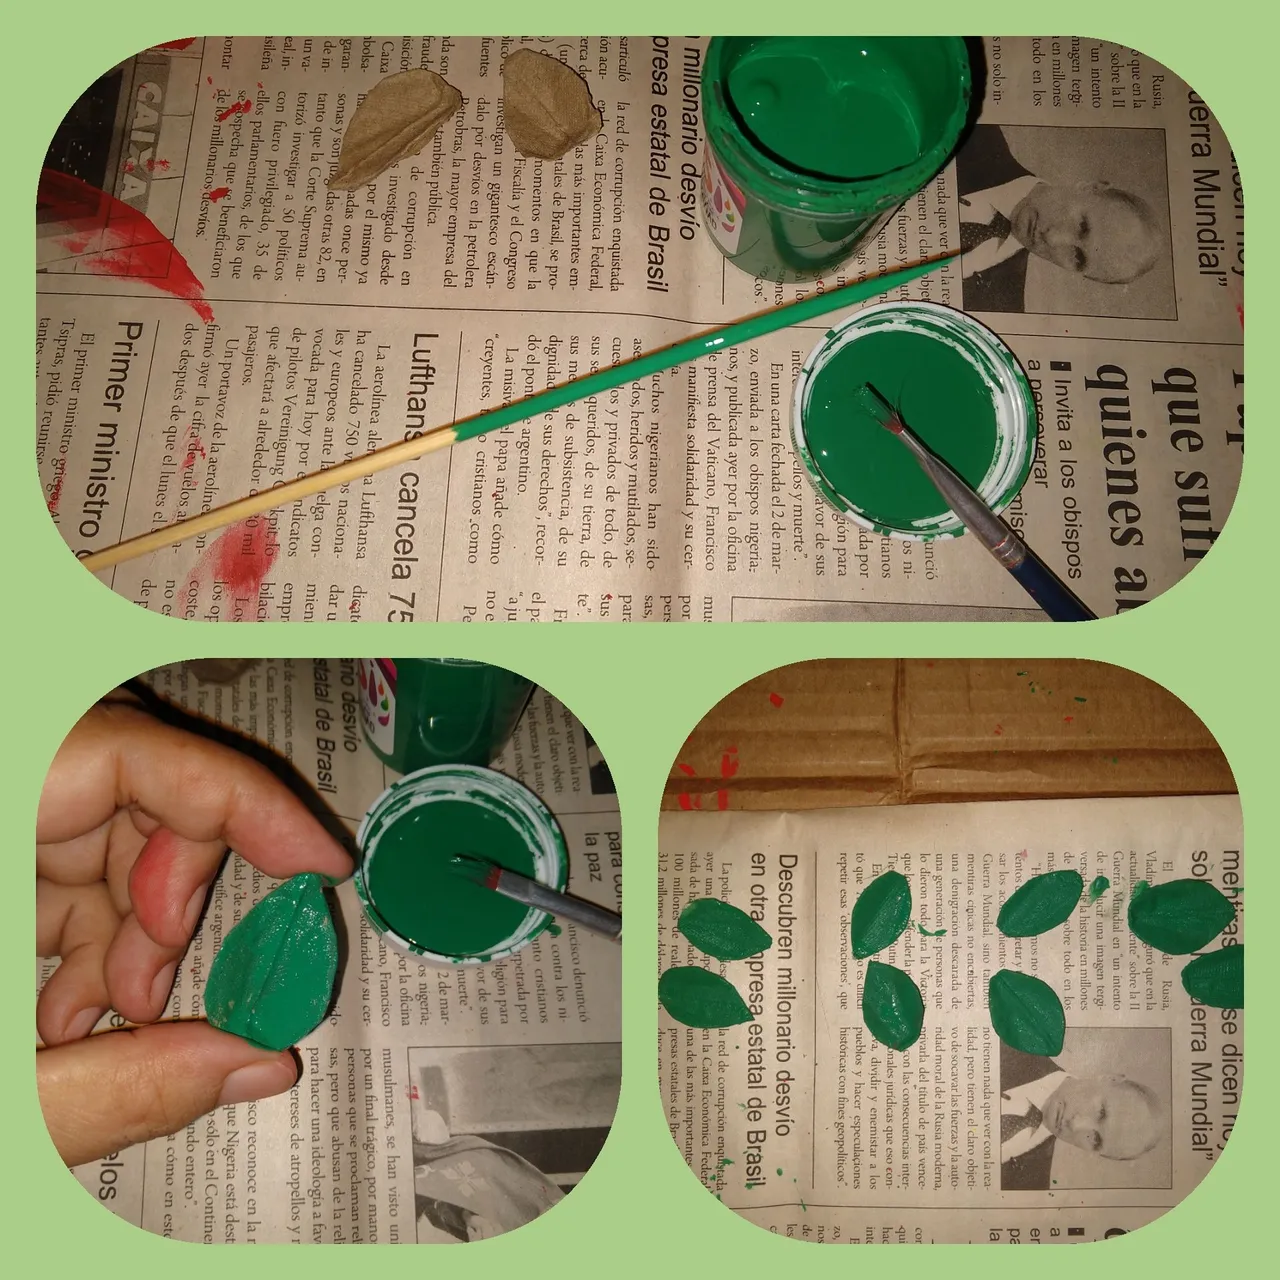
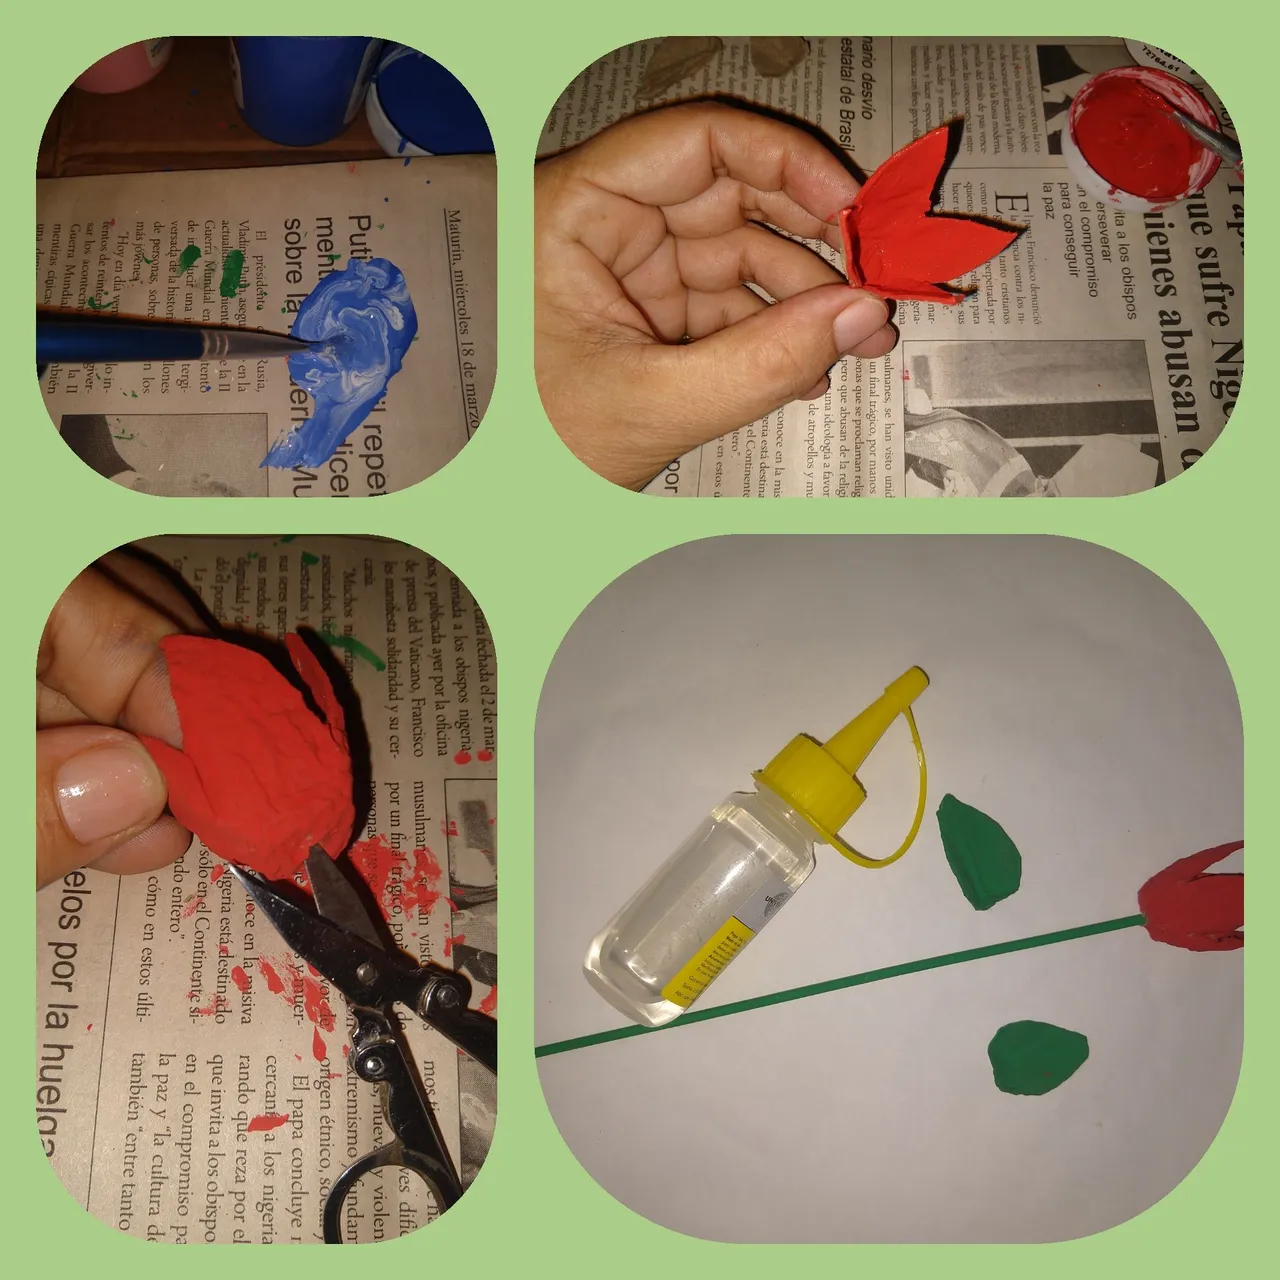
PASO 2.
- Una vez cortadas las flores y las hojas correspondientes a cada una las vamos a pintar del color que deseemos.
- Necesitaremos dejarlas bastante tiempo para que sequen.
- Igualmente pintaremos en color verde todos los palitos de altura, usaremos uno para cada flor.
- Para cada flor debes hacer los cortes desde la parte superior del espacio hasta el centro o base, esta es la parte mas dura y gruesa del cartón. Después de hacer el corte le das la forma a cada pétalo.
- Dibuja y recorta las hojas de variados tamaños y las pintas todas en color verde.
STEP 2.
- Once cut the flowers and the leaves corresponding to each one we are going to paint them in the color we want.
- We will need to leave them enough time to dry.
- We will also paint in green color all the sticks of height, we will use one for each flower.
- For each flower you must make the cuts from the top of the space to the center or base, this is the hardest and thickest part of the cardboard. After making the cut you give the shape to each petal.🌹
- Draw and cut out the leaves of various sizes and paint them all in green.
PASO 3.
- Una vez secas las partes para formar la flor procedemos a armarlas.
- Haz un orificio en la parte inferior y en el centro de cada flor.
- Introduce desde adentro de la flor el palito de altura.
- Coloca un punto de pegamento entre el palito y la flor por la parte externa. Espera que seque bien.
- Coloca con pegamento dos hojas para cada flor.
- Para la flor roja, aún en capullo vas a necesitar cuatro hojas, Visualiza la imagen.
STEP 3.
- Once the parts to form the flower are dry, proceed to assemble them.
- Make a hole in the bottom and in the center of each flower.
- Insert from the inside of the flower the height stick.
- Place a dot of glue between the stick and the flower on the outside. Wait for it to dry well.
- Place two leaves for each flower with glue.
- For the red flower, still in bud you will need four leaves, Visualize the image.
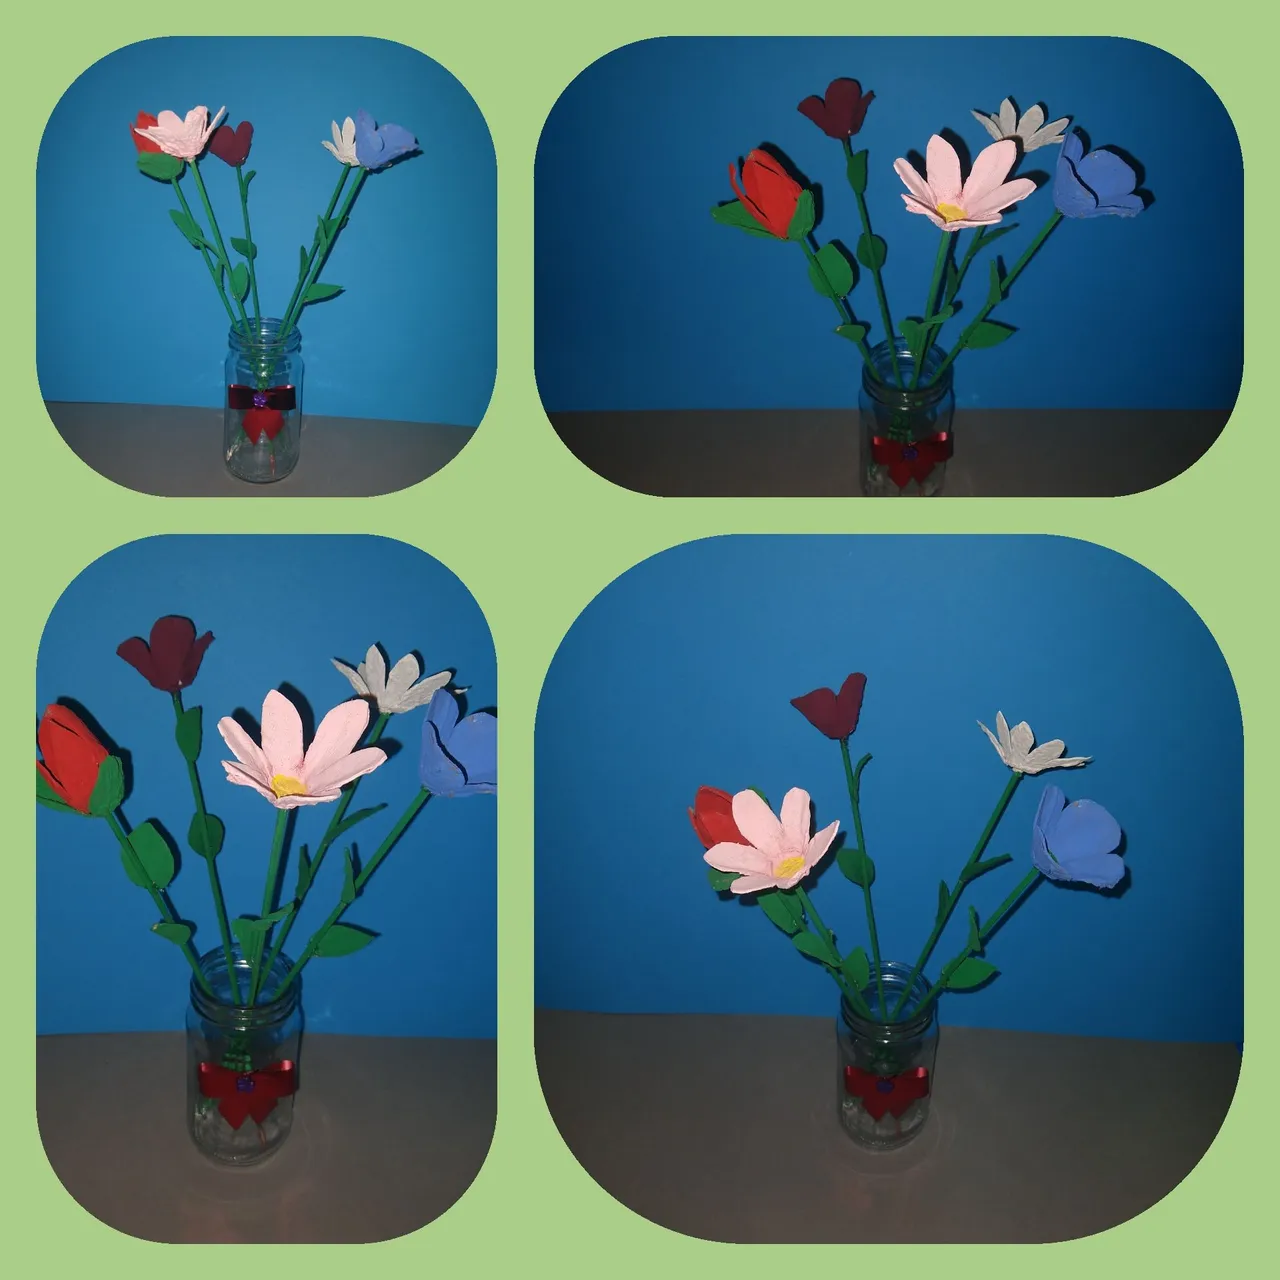
- Al secarse muy bien cada flor ya las tendremos lista para decorar cualquier ambiente. Me ha encantado hacerlas. Este proyecto amerita de tiempo, precisión en el corte y mucha dedicación. Trabajar con este material (cartón de huevo corrugado) es ardúo y laborioso.
- When each flower dries very well, they are ready to decorate any environment. I have loved making them. This project requires time, precision cutting and a lot of dedication. Working with this material (corrugated egg carton) is hard and laborious.
Si deseas participar en este nuevo concurso puedes leer por aquí los detalles: concurso
Invito a @vicmito74 @maria1835 @linita @kattycrochet a mostrar sus proyectos en beneficio del cuidado del ambiente.
Mil gracias por continuar promocionando estos retos. Todas las fotos son de mi propiedad. Edité con Polish. Usé el traductor de DeepL.
If you want to participate in this new contest you can read about the details here: contest.
I invite @vicmito74 @maria1835 @linita @kattycrochet to showcase their projects to benefit environmental stewardship.
Thank you so much for continuing to promote these challenges. All photos are my property. I edited with Polish. I used DeepL translator.