
If you are running a witness, full node, web server, or any Linux box the very first thing you should do is to stop using root to login, and set up SSH key authentication and disable root logins.
This process is surprisingly easy once you have done it a few times, but this guide will make it absolutely painless even for the non-admin types. The post looks overwhelming, but it isn't a long process, I can do it inside of five minutes on new servers.
When you first get a Linux server you will most likely receive a root password and sign in with that. Continuing to log in using this account is very insecure and not recommend. Not only does this allow anyone who breaks your password access to everything on your system, it means you are doing every command with full admin access even when you don't need it.
These steps are what I do with every server I own or work with. All my servers are Debian based (mostly all Ubuntu at this point) so these commands will be for Ubuntu. They should be the same for most versions of Linux except for the Update Packages section, which will use yum on RedHat flavors like CentOS.
To properly secure a new (or current) server, you want to do these steps, all of which I will cover in detail below.
- Change root password
- Update Packages
- Create New User
- Add new user to
sudogroup - Create SSH Key
- Install SSH Key for new user
- Test SSH Key authentication
- Disable root login & password authentication
Change Root Password
The first thing you should do is change your root password. Most service providers will give you a short 8-16 character password to get you started. This is also usually displayed in clear text in their control panel.
You are going to want to change this password immediately, I recommend a secure password like this:
jsEwnxFr3Dj]%&-K}i_}zU:R,oz=3=86a7A*.jD9tz8Aq*Y7-fM%FkQw_.:UWM#n
As ridiculous as it looks, you will never need this password except in extreme emergencies. Using a good password manager will make this an easy process. Going forward you will only need your custom user password to do anything as root, so this password won't typically be used. Be sure to keep this password safe.

To change your password in Linux just issue the following command and follow the prompts.
passwd
Update Packages
This is the only thing I recommend doing before the next steps, but even this can be done later. I like to do it first just to get it over with and make sure I am dealing with an up to date system. Each provider will provide the server in different states.
The first step is to download an updated list of packages. You do this with the sudo apt update command.

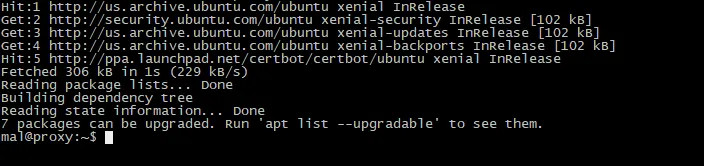
This will update the operating systems package manager (apt or apt-get) has the most current list of packages that can be installed.
This does not upgrade any packages, it just updates the database that tells apt what packages can be installed.
We next want to tell apt to update all packages that are installed.
To upgrade all packages to the latest version and resolve any dependencies properly, you use sudo apt dist-upgrade.


You may already be familiar with apt upgrade and not apt dist-upgrade.
You can see the difference here:

tl;dr Unless you are using advanced apt features like freezing versions and running personal package archives (PPA) then you should use apt dist-upgrade to resolve all dependencies automatically.
Create New User
Now that we know the system is up to date, you need to create a user account of yourself. Logging in as root is insecure as it exposes root to the public but it also means you will use root for every task regardless if you require it.
Create a user is very easy, let's make a user hoban
sudo adduser hoban
It will ask you for a password, for this password you want something long, complex, but something you can remember as you will type it everytime you want to do something as root.

I like to have a Full Name but I don't fill in the rest of the options, just hit enter and then Y to confirm.
From this point on, you will only login as this user, but don't logout yet. Let's do one more thing, and then we will switch users.
Add new user to sudo group
Now that we have a new user, we are going to want to give that user sudo access. To do this, you add the user to do the sudo group.
usermod -aG sudo hoban
You will not receive any feedback from this command unless you did something wrong.
If you don't know what sudo is, sudo allows you to run commands as an unprivledged user with root power while properly logging who executed the command. This last feature is critical for multi-admin systems.
Basically, if you want to do something that requires root permissions, prefix the command with sudo.
You will notice I used sudo above, even though I was root. I did this for two reasons. To prevent any issues if you were doing the commands on an account other than root, but also to get you in the mindset of using it.
At this point, login to SSH again using your new credentials. You can test to make sure you got everything correct at this point by doing the following command:
sudo apt update
You will be promopted for your password and then should see the package list update. If you get a permission denied after doing the password correctly, make sure you have executed sudo usermod -aG sudo hoban, replacing hoban with whatever user you created. You will need to do this as root, and relogin as your user when adding a group.
Create SSH Key
At this point, we want to create our SSH key pair, this is a public and private key you will use as a what you have type of security. Using a passphrase on your key is optional, but I highly recommend using a passphrase. Once you use an SSH key for authentication, that is all that is required to get into any server you add your key to. Without a passphrase, they don't need to know anything, they only need access to your private key.
A good SSH client like SecureCRT or using SSHAgent will make using a passphrase less painful.
I highly recommend using ed25519 algorithm for your SSH key, most system support this algorithm but keep in mind some older software will not. If you use an SSH client on your mobile phone or some older clients, you want to confirm support. I would opt to upgrade your software over resorting to using the current standard RSA key.
The difference between rsa and ed25519 is minor but significant. rsa uses elliptical curves that many believe have been compromised by the NSA. ed25519 uses new algorithms that are much more secure. You can read the differences in detail here if you have the stomach for it.
There is two popular ways to create an SSH key. Using your SSH Client (Putty, SecureCRT, or whatever you use) or using ssh-keygen on Linux. If you use Linux, you will need to download the private key off the server and delete it. This is not as secure as doing it all on your private workstation.
If you have local Linux/Mac machine, you can run the following command to make an ssh key using ed25519.
ssh-keygen -t ed25519

You will be prompted where to save the files, and if you want a passphrase (Yes, yes you do!). By default this will create two files, id_ed25519 and id_25519.pub. The first is your private key, and is what you use on your workstation to confirm your identity, the second is what you put on any server that you want to be able to login into.
It is safe to share your public SSH key, but your private ssh key you shoudl treat like your Bitcoin private key.
PuttyGen is the easiest way to create an SSH Key on Windows. Make sure you choose ed25519 and follow the prompts and save the public and private key some where safe.
You will need to configure your SSH client to point to your private key, and you will need to install your public key on your server [next step].
Install SSH Key for new user
To install your public key on your server involves a couple of steps. First login as your personal user account, you will not need root for any of these commands, so do not use sudo as we are only changing your local user files.
make sure you are in your home folder
cd ~
make .ssh directory
mkdir .ssh
lock down permissions on .ssh
chmod 700 .ssh
add your key
vim .ssh/authorized_keys
Paste the one-line of text from your public key file and hit escape to go into command mode then write & exit.
Hit escape
:wq # Write & Exit
Change permission of your public key
chmod 644 .ssh/authorized_keys
At this point, you should be all set. If you did everything correctly you should be able to login with just your SSH key and passphrase.
Test SSH Key authentication
Add your private key to your SSH client, and make sure you disable password authentication and only leave public key authentication enabled.
For the most popular SSH client (Putty) you will want to add your private key here:

Once you have confirmed you can log in via your SSH key and hopefully a passphrase, you will want to disable root login and password authentication.
Disable root login & password authentication
WARNING DO NOT DO THIS STEP UNTIL YOU HAVE CONFIRMED YOU CAN LOGIN WITH YOUR SSH KEY
You will lose access to your server if you have not first confirmed you can log in with only your SSH Key and passphrase.
If you have confirmed you can log in, we will now edit the SSH server files to prevent anyone from being able to log in as root or with a password.
sudo vim /etc/ssh/sshd_config
Look for the two lines:
PermitRootLogin yes
PasswordAuthentication yes
You want to make both of these no, and his escape :wq to save and exit. You will then need to restart the ssh daemon with the following command.
sudo systemctl restart ssh
It will warn you of losing connections if things are not set up properly. Hit yes, and do not log out!.
Immediately open a new SSH connection and confirm you can log in before closing this session. This is your only last ditch effort to save yourself if you didn't do all the steps properly.
That's it, the post was really long, but the actual steps are quite quick and easy.