Using the Markdown editor is now easier than ever with these tools, simply copy and paste. Make your blog look way better by using Markdown Editing.
Many of my followers have asked me how to edit in Markdown.well, here you go guys! The only guide you will ever need! Steemit offers two ways of posting a new story. With the Editor and Markdown Editor. The Editor is simple and easy but lack some features that might make your blog look more professional and neat.
To get to the Markdown Editor, go to Submit a Story and click on Markdown:

Using the Markdown editor might be daunting at first but once you get used to it you will notice your posts looking so much better! Take some time, test the commands. I also had to go through some practice to finally get it right. Take some time and practice. You will get it in no time!
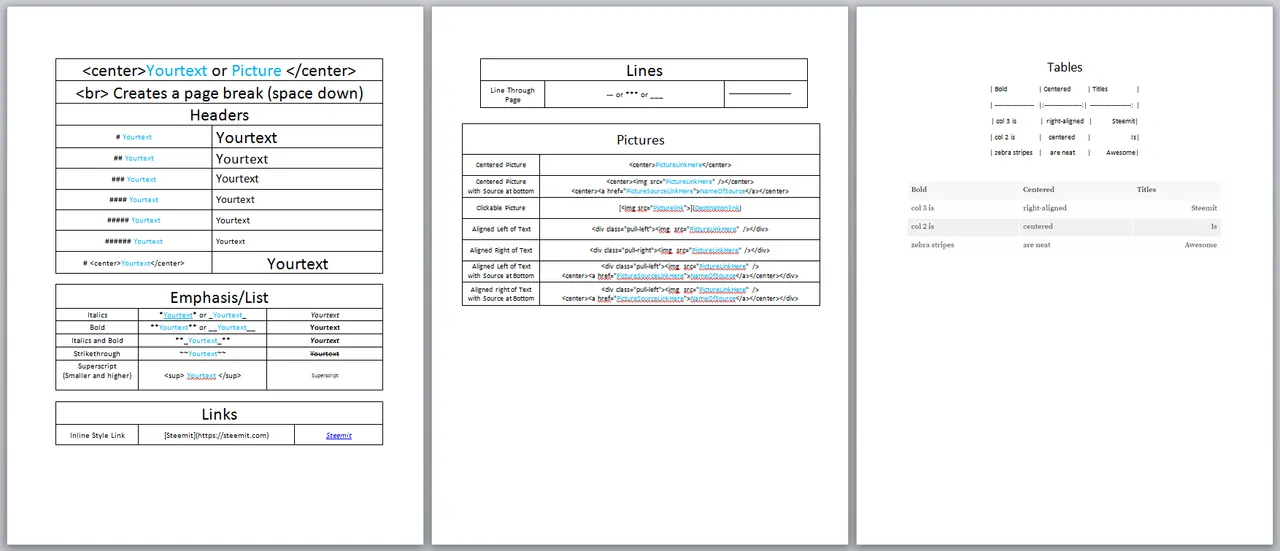
In this post you will find all the codes to make you editing easier. The best of all is you can simply COPY and PASTE whatever you may need. From there just insert your links and you are on your way to make an awesome looking blog!
At the end of the post I will make a downloadable Word Document so you can just copy and paste all the commands while editing! Let's get started!

I prefer centered pictures. Just feels easier and cleaner when reading. Might not be everyone's cup of tea but here is the commands for those who want them.
The page break is just to create some space downwards, experiment with this, after a while you will know exactly what it's for!
<center>your text or picture here</center><br>So this one is pretty self explanatory. Simply use the hashtags and watch the size of your text change. One Tag being the biggest header and five being the smallest header.
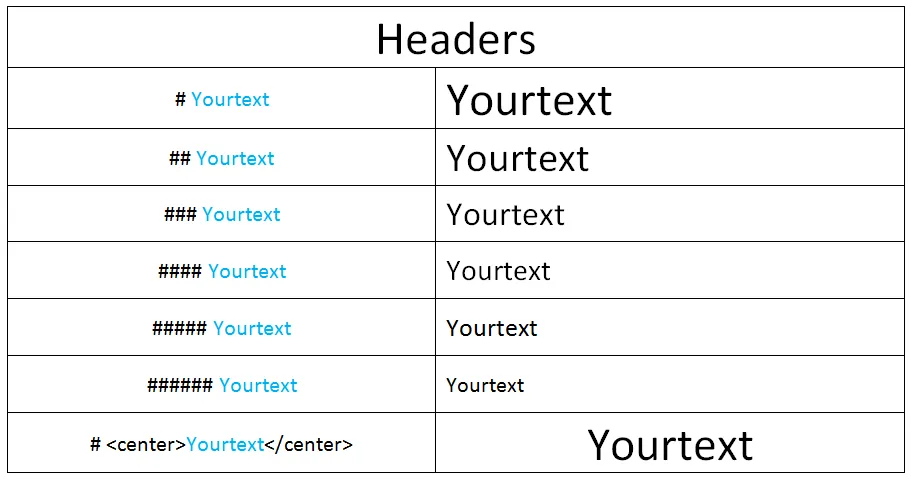
# <center></center>
| MARKDOWN | FORMAT |
|---|---|
*Yourtext* or _Yourtext_ | Italics |
**Yourtext** or __Yourtext__ | Bold |
**_Yourtext_** | Italics and Bold |
~~Yourtext~~ | |
<sup> Yourtext </sup> | Superscript |
3<sup>2</sup> | 3 2 |
If you want to add code like above use `` with your code in between the `

Using this you don't have to paste long ugly links, instead just give your link a name and then paste the link after the name. This will take you to your desired source!
[Steemit](https://steemit.com)Steemit

This will put a line through your page similar to the ones you can see in this post, nifty right?
--- or *** or ___If you would rather prefer text divider like the one below, go to THIS POST for some links to dividers. (Remember to center them)

Not Centered VS Centered

VS

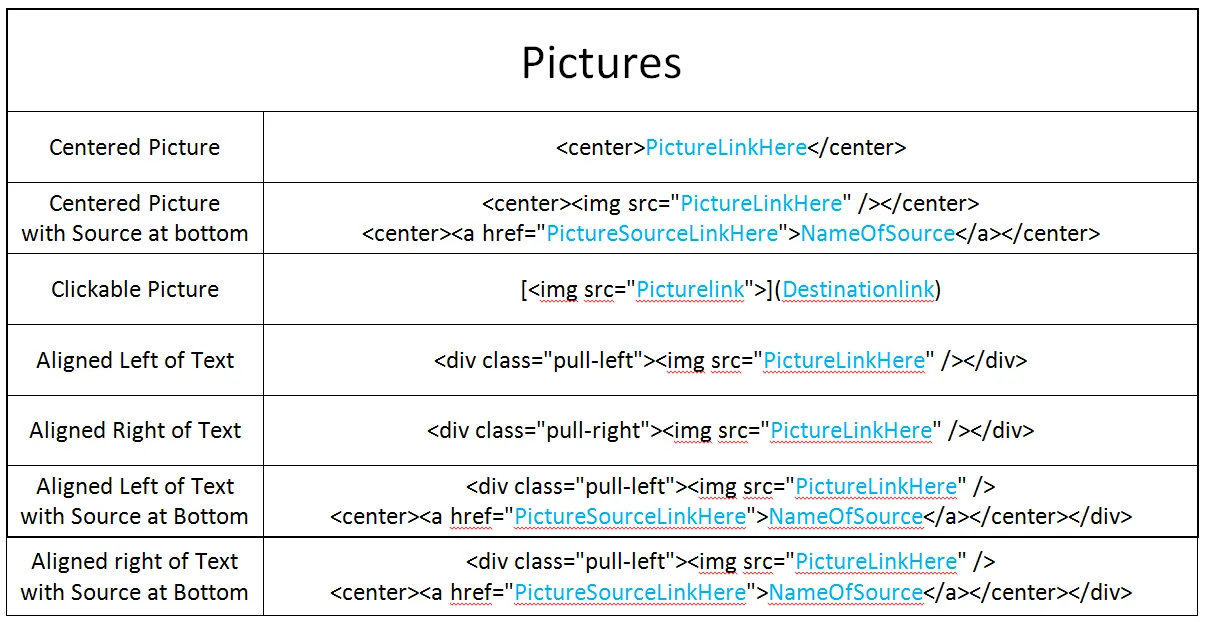
<center>picturelink</center>Places the picture in the center of your post.
Centered Picture with Source at bottom

<center><img src="http://imgur.com/eHI22wC" /></center><center><a href="PictureSourceLinkHere">NameOfSource</a></center>
Places the picture in the center of your post with a clickable source link at the bottom of your picture. You can give the little button any name you want and it will take you to the link you provided.
Clickable Pictures (nest your link in your picture)
To make a picture that will take you to a desired link when clicked use:
[<img src="http://imgur.com/eHI22wC">](Destinationlink)
This picture is centered.
<center>[<img src="http://imgur.com/eHI22wC">](Destinationlink)</center?

Aligned Left of Text

Places the picture to the left of your text.
<div class="pull-left"><img src="http://imgur.com/eHI22wC" /></div>
Whatever you write after this command will go to the right of the picture.
If you want to stop writing next to the picture and move down add as many <br> commands as needed.
Aligned Right of Text

Places the picture to the left of your text.
<div class="pull-right"><img src="http://imgur.com/eHI22wC" /></div>
Whatever you write after this command will go to the left of the picture.
If you want to stop writing next to the picture and move down add as many <br> commands as needed.
Aligned Left of Text with Source at Bottom

Here the picture is on your left, the same as the above examples, only difference is you now have the source of the picture. The source of the picture is a link, but since long links are so ugly we can simply rename it. Clicking on the name will then take us to the link.
--<div class="pull-left"><center><img src="http://imgur.com/eHI22wC" /> <a href="PictureSourceLinkHere">NameOfSource</a></center></div>
Aligned Right of Text with Source at Bottom
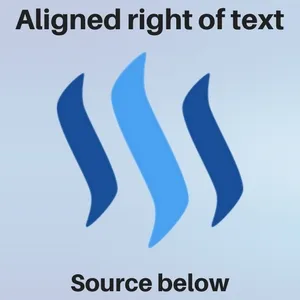
Here the picture is on your right, the same as the above examples, only difference is you now have the source of the picture. The source of the picture is a link, but since long links are so ugly we can simply rename it. Clicking on the name will then take us to the link.
<div class="pull-right"><center><img src="http://imgur.com/eHI22wC" /> <a href="PictureSourceLinkHere">NameOfSource</a></center></div>

Honestly, will be faster to use excel, take a screenshot and paste it here.
Just included this if anyone was interested. It's a nifty trick and will really make your post stand out.
So there it is! Everything you need to make a beautiful and professional post here on Steemit. Using Markdown might not be easy at first but trust me it get's a lot easier and you will appreciate the extra things you can do. I simply shared what I have learned and made a Word Document so it will be easier for me and fellow Steemians to make better posts.
If you liked this post you might also like this one:
Thank you so much for reading! Now go out and post awesome stuff!
Resteem? Only if you found this useful and think other Steemians will too.

Thank you for reading! Steem on Steemians!