BIENVENIDOS A MI BLOG | WELCOME TO MY BLOG
Muy buen día a toda la colmena, espero se encuentren muy bien. El día de hoy quisiera mostrarles el proceso de cómo realicé un lindo Sketchbook a mano con material reciclado. Esta forma de encuadernar es bastante simple y se hace en poco tiempo, hasta lo veo como algo terapéutico jajaja. Espero les guste mucho y se animen a intentarlo!
Good morning to all the hive, I hope you are doing well. Today I would like to show you the process of how I made a nice handmade Sketchbook with recycled material. This way of binding is quite simple and is done in a short time, I even see it as something therapeutic hahaha. I hope you like it a lot and I encourage you to try it!

Materiales | Materials:
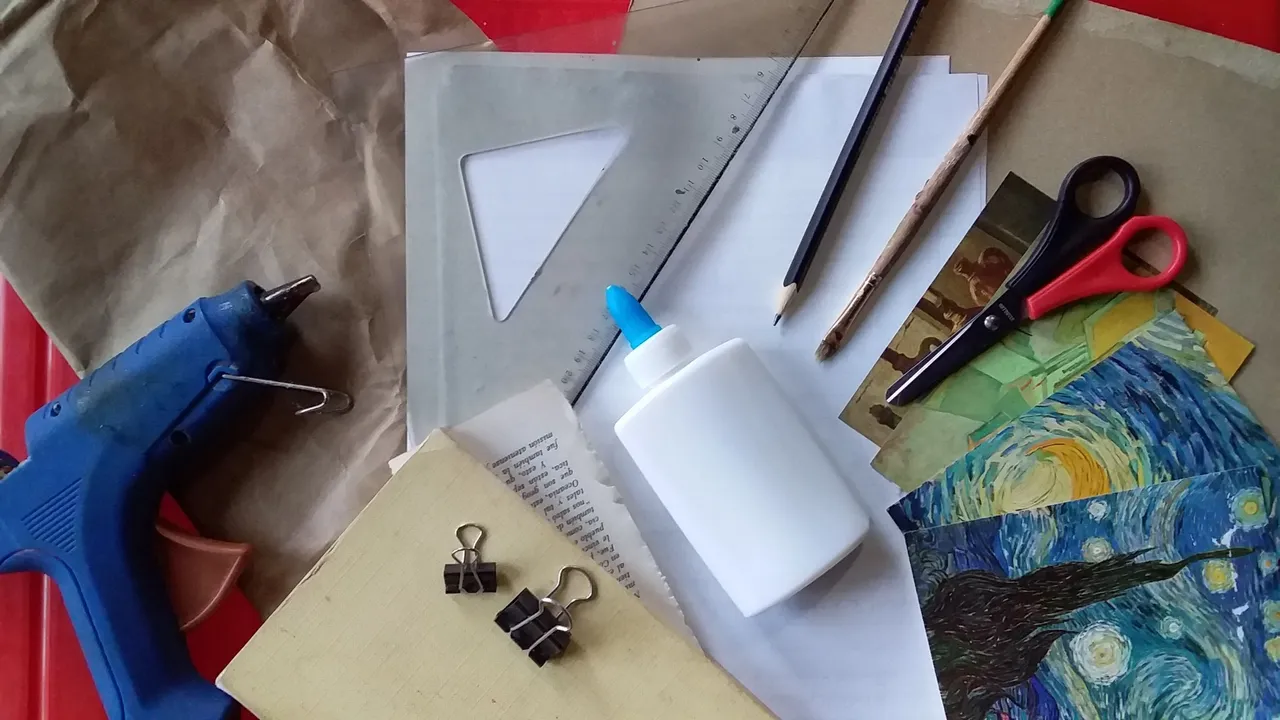
✨ ESP ✨
| Tijeras | Hojas de papel reutilizables | Pega escolar |
|---|---|---|
| Lápiz | Cartón | Silicón |
| Regla | Papel marrón/Kraft (pueden ser de una bolsa usada como en mi caso) | Clips |
| Pincel | Recortes de revista, libros viejos (cualquier material de tu preferencia para decorar) |
✨ ENG ✨
| Scissors | Reusable sheets of paper | School glue |
|---|---|---|
| Pencil | Cardboard | Silicone |
| Ruler | Brown/Kraft paper (can be from a used bag as in my case) | Paper clips |
| Brush | Magazine clippings, old books (any material of your choice for decorating) |
Proceso | Process
Paso 1 | Step 1
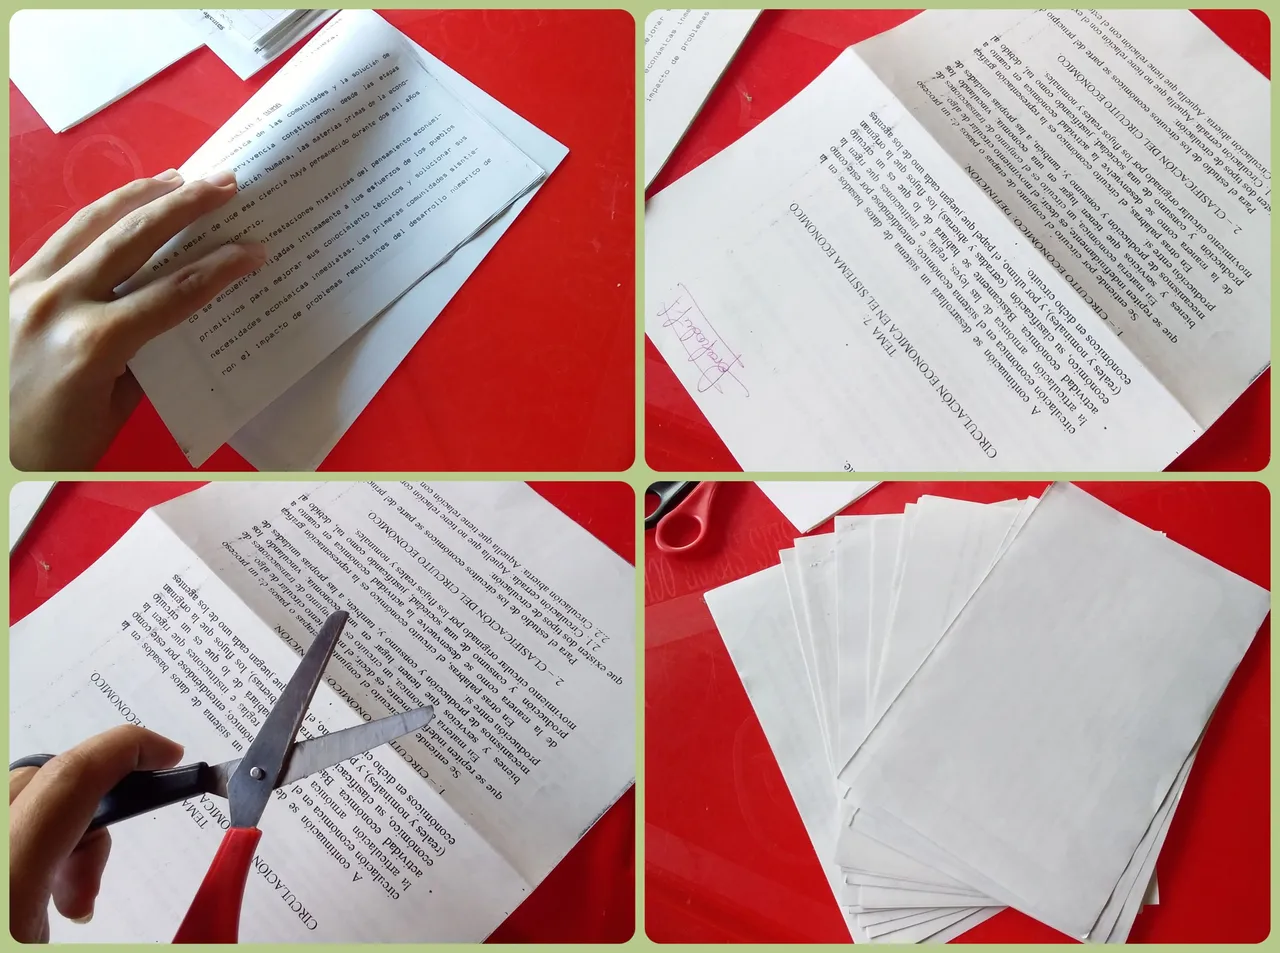
Lo primero que haremos será doblar y cortar las hojas a la mitad.
The first thing to do is to fold and cut the leaves in half.
Paso 2 | Step 2
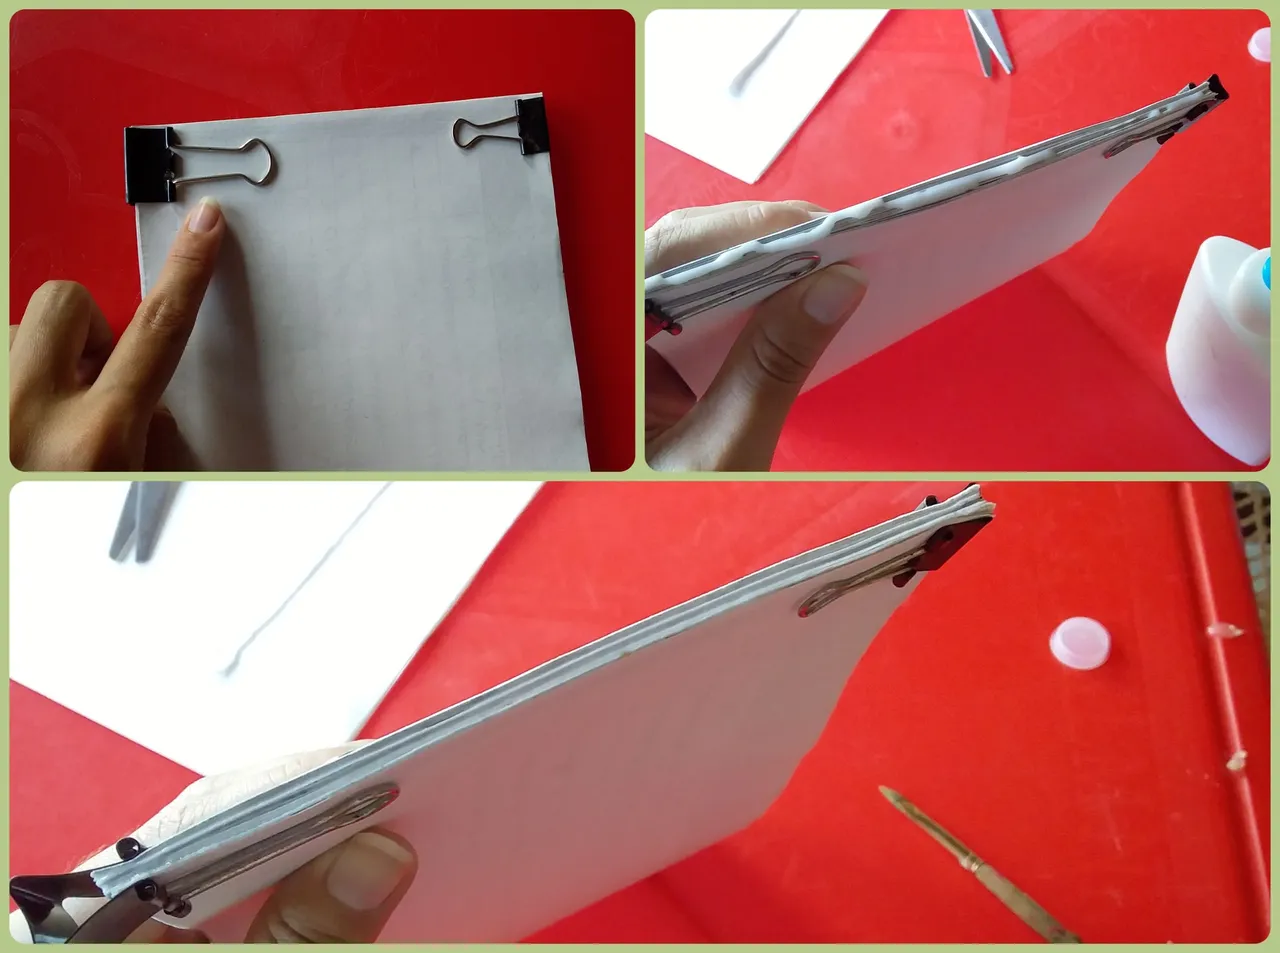
Luego las juntamos, aseguramos con clips por ambos lados (como se ve en las fotos) y aplicamos una capa de pega en el borde.
Then we put them together, secure with clips on both sides (as shown in the photos) and apply a layer of glue on the edge.
Paso 3 | Step 3
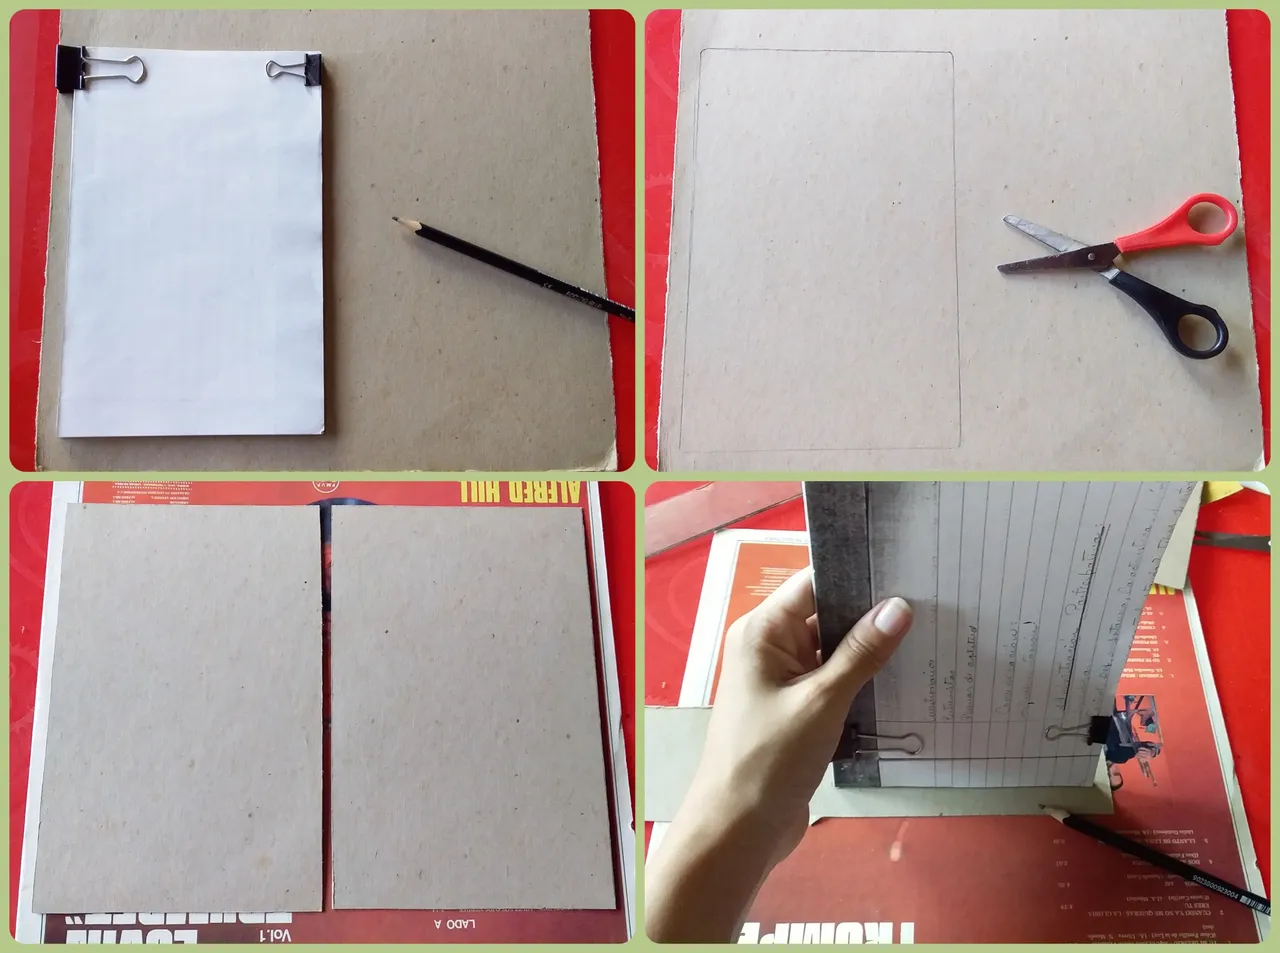
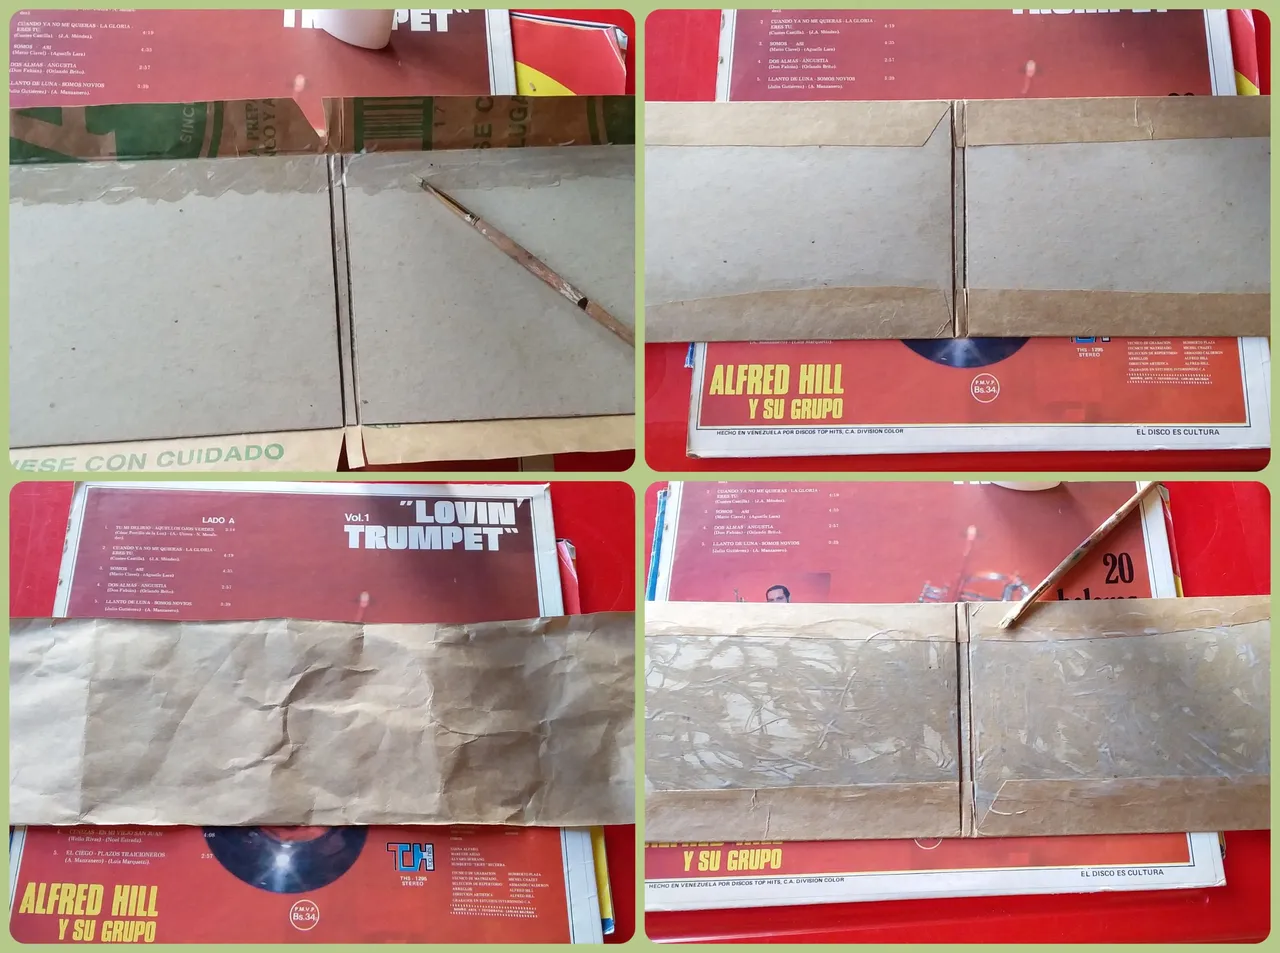
Ya cuando estén secas, pondremos las hojas sobre el cartón y marcaremos su silueta, cortamos y luego repetimos el proceso para tener dos piezas iguales. Para el lomo haremos lo mismo, solo que marcaremos el grosor.
Once they are dry, we will put the leaves on the cardboard and mark their silhouette, cut and then repeat the process to have two equal pieces. For the back we will do the same, only we will mark the thickness.
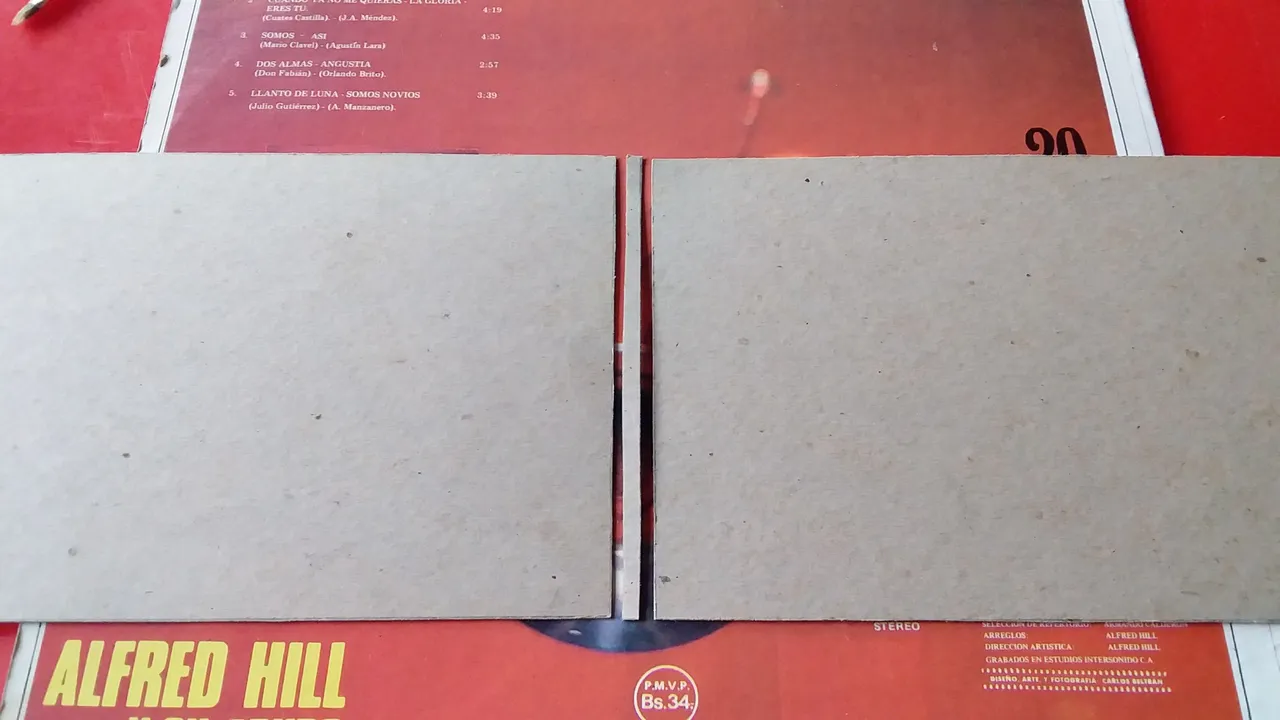
Deben verse algo así.
They should look something like this.
Paso 4 | Step 4
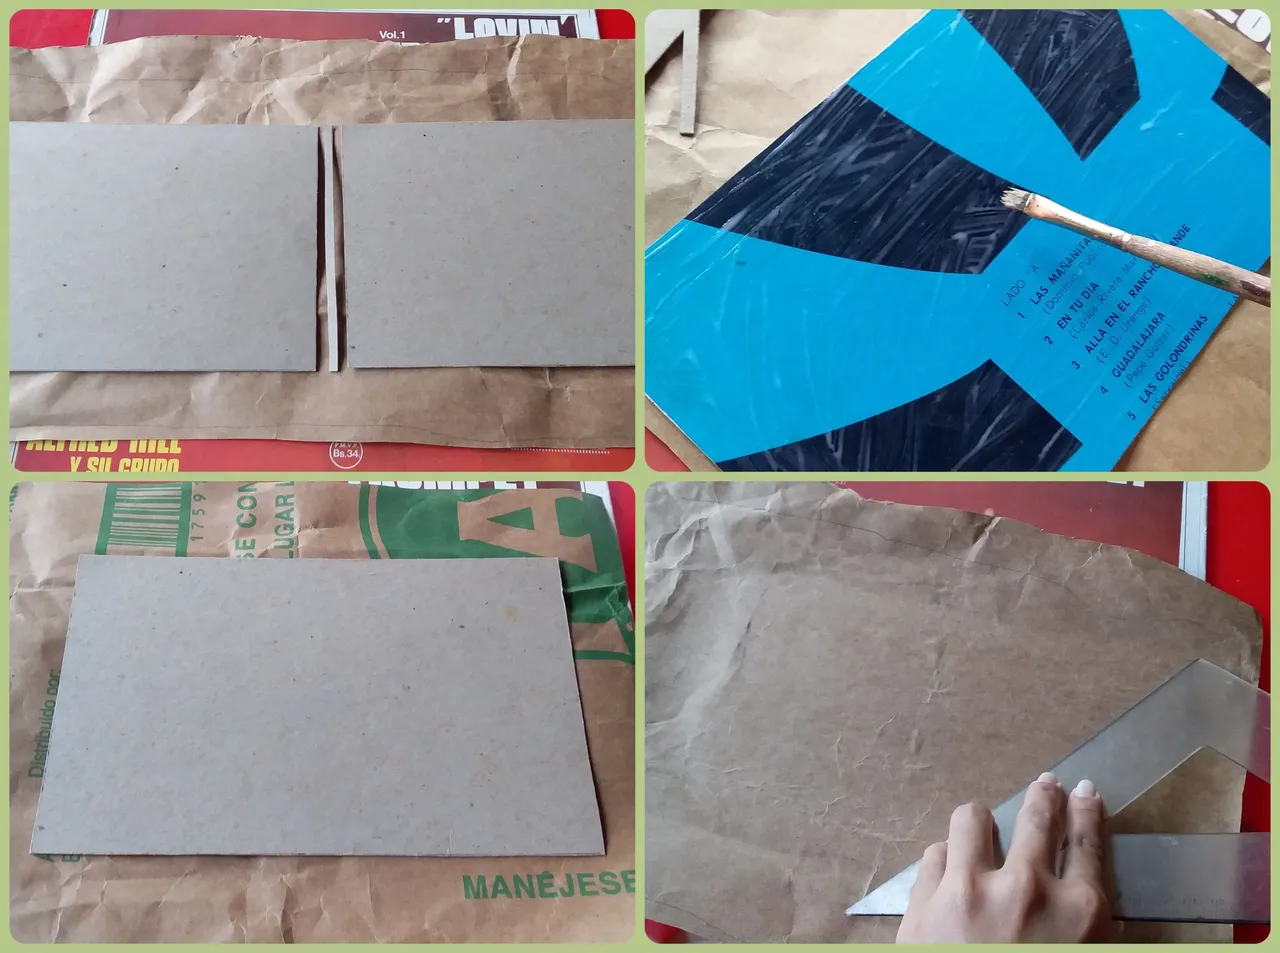
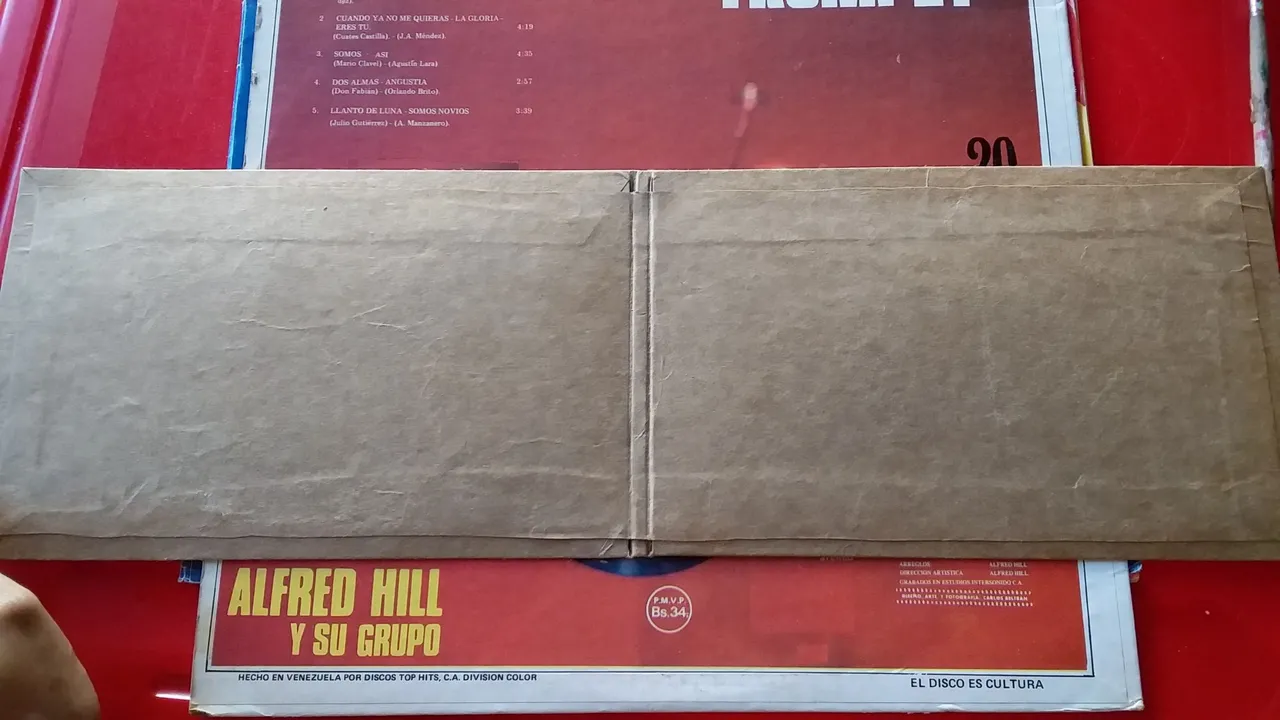
Sobre un trozo de papel kraft, ubicaremos muy bien nuestras piezas y las pegaremos con una capa delgada de pega escolar. Para evitar burbujas de aire o arrugas, pasaremos una regla a modo de plancha, presionando y arrastrando para eliminar imperfecciones.
Nota: Las piezas deben tener una leve separación entre si para que la libreta pueda tener un poco de movilidad.
On a piece of kraft paper, we will place our pieces very well and glue them with a thin layer of school glue. To avoid air bubbles or wrinkles, we will use a ruler as an iron, pressing and dragging to eliminate imperfections.
Note: The pieces should have a slight separation between them so that the notebook can have some mobility.
Al terminar de pegar, haremos unos cortes en las esquinas y en medio del papel sobrante.
When we finish gluing, we will make some cuts in the corners and in the middle of the excess paper.
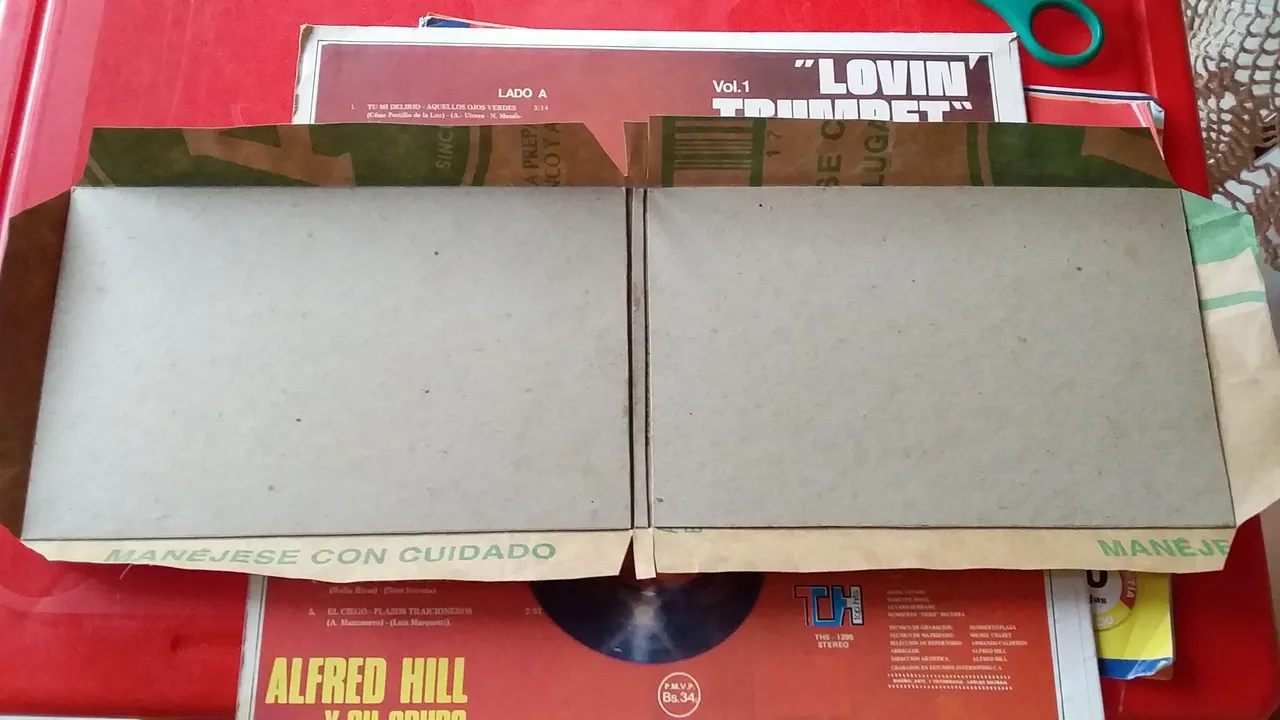
Paso 5 | Step 5
Doblamos, pegamos hacia adentro y con otro trozo de papel cubrimos lo que falta.
Fold, glue inside and cover with another piece of paper what is missing.
Paso 6 | Step 6
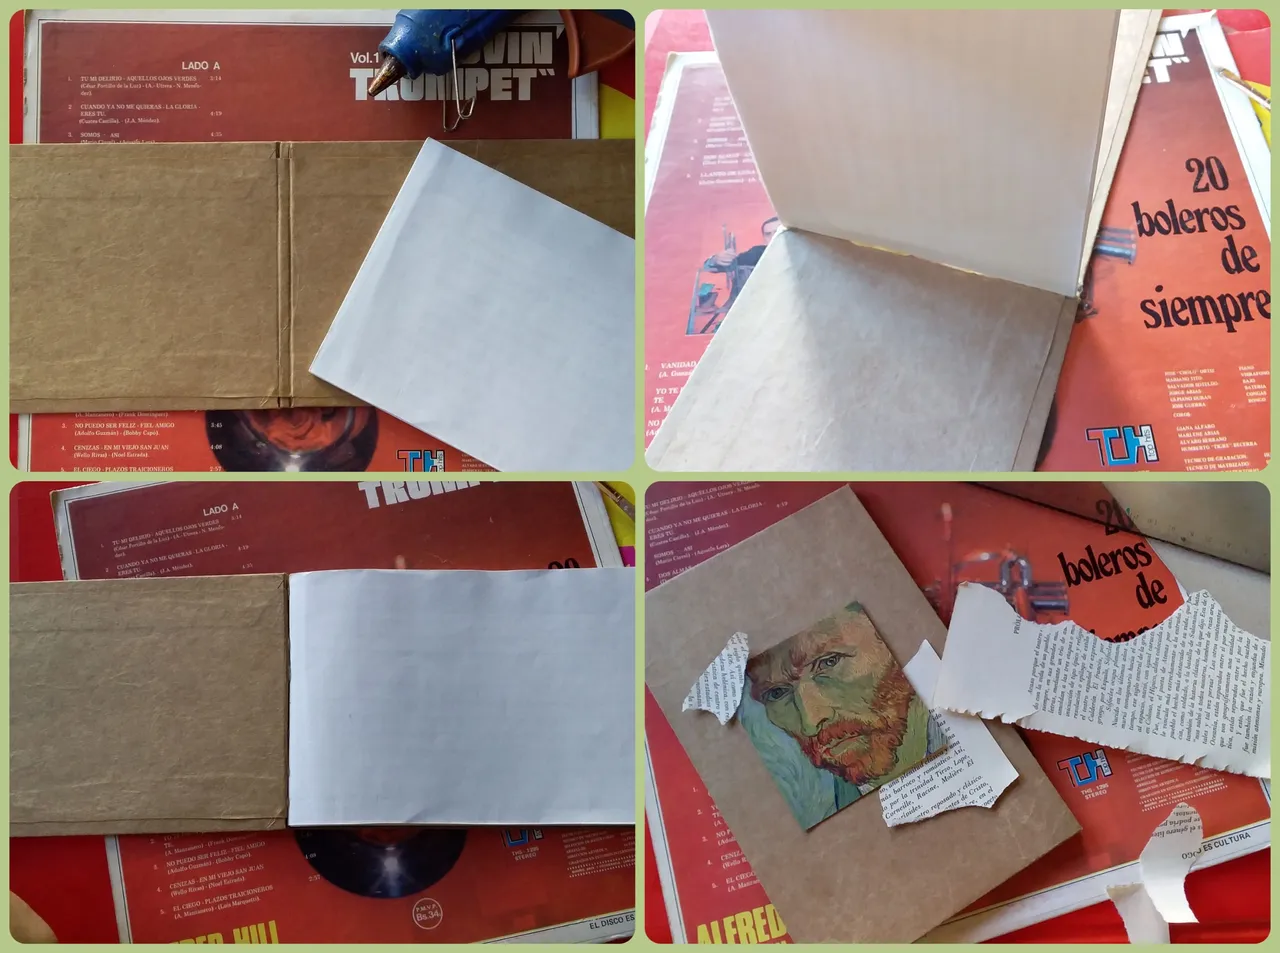
Finalmente, con un poco de silicón unimos la cubierta con las hojas y decoramos a nuestro gusto.
Finally, with a little silicone we join the cover with the leaves and decorate to our liking.
RESULTADO | RESULT
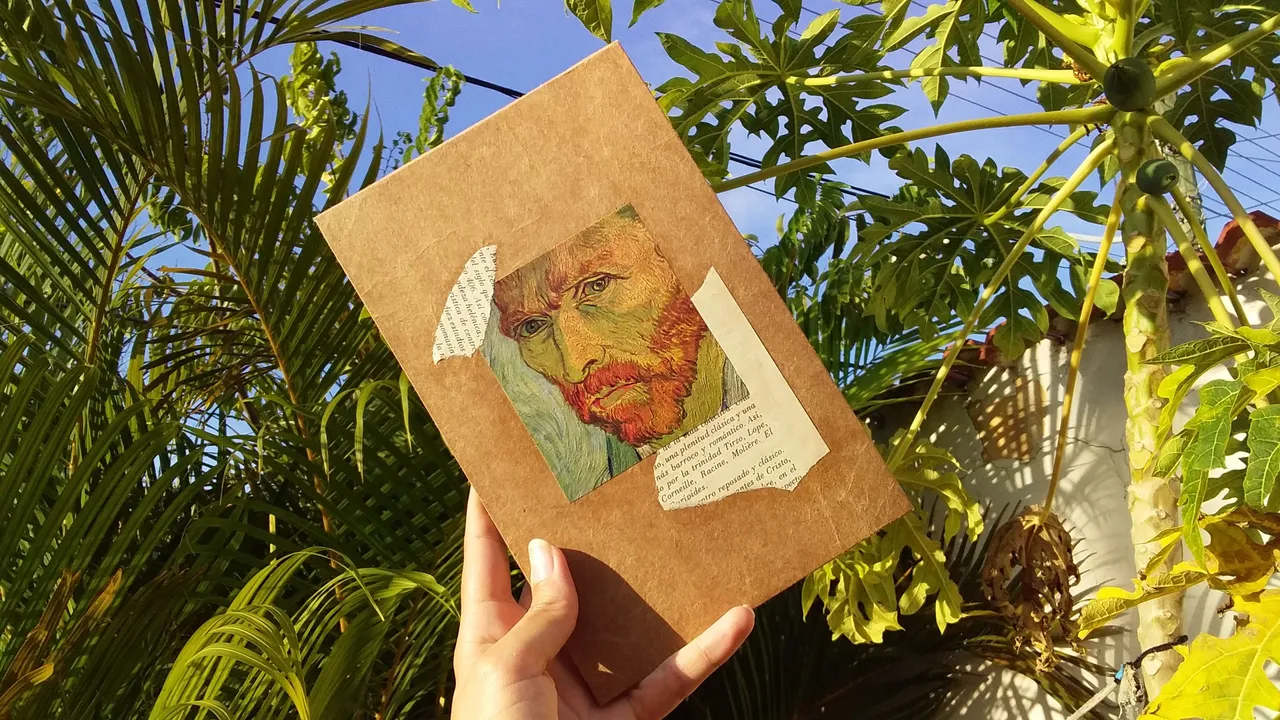
Y listo! este fue el resultado.
Me gustó más de esta forma con el color original del papel, pero tu puedes hacerlo como quieras. Puedes usar papel estampado, unicolor e incluso tela y jugar con los tamaños, no hay límites!
Espero les haya gustado.
And ready! this was the result.
I liked it better this way with the original color of the paper, but you can do it any way you want. You can use patterned paper, unicolor and even fabric and play with the sizes, there are no limits!
I hope you liked it.