Hello friends of Steemit. Today I will show you how to make a Lamp Remove Fear for the children's room. It is ideal to give peace of mind to the children of the house when the night comes and at the same time it is very decorative.
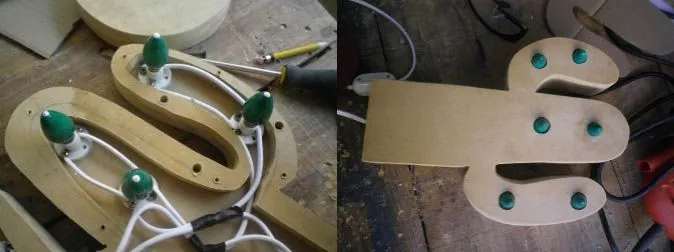
As a first step we draw on a piece of cardboard or paper a cactus of approximately 38 x 28 cm, which will be the pattern to create the body of the lamp, once we have the design we cut it out and mark it on the rectangles of MDF. With the jigsaw we proceed to cut the pieces, to two of those cactus we will cut the internal part leaving an edge of approximately 1 cm thick, to place the electric circuit of the lamp.

With the pieces already cut (02 whole and 02 without center), we began to glue with white glue a piece without center on top of an entire one. At this point you should check that the pieces without center are placed on the right side, because if we make mistakes and put both on the same side, we can not assemble the lamp correctly. After they are well dried we sanding the edges and edges of the pieces very well; first with the sandpaper number 80 and then with the number 120

Here I will stop to explain how to do the electrical installation and not die trying.
The current we have in our homes is alternating. That is why when making an electrical circuit we must take into account whether it will be in series or parallel. If we connect it in series the bulbs will light but the intensity of the current will be distributed among all the bulbs causing them to illuminate little. If we do it in parallel, the intensity will be the same for all the bulbs and they will light up to their full capacity. For this project I decided to do it in parallel. You can click here for more detailed information on electrical circuits.


Now we fix the two parts with the 1 ½ "screws on the non-perforated side and we take advantage of this to sand the differences that may exist in the union of the parts.
For the base of the lamp, stick the two mfd circles with white glue, sand the edges and edge to eliminate imperfections. Drill with ½ "wick the hole through which the electric power cable will pass. We assemble the whole assembly by fixing the lamp to the base with screws and we prove that the circuit works correctly.
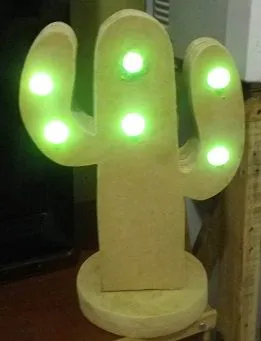
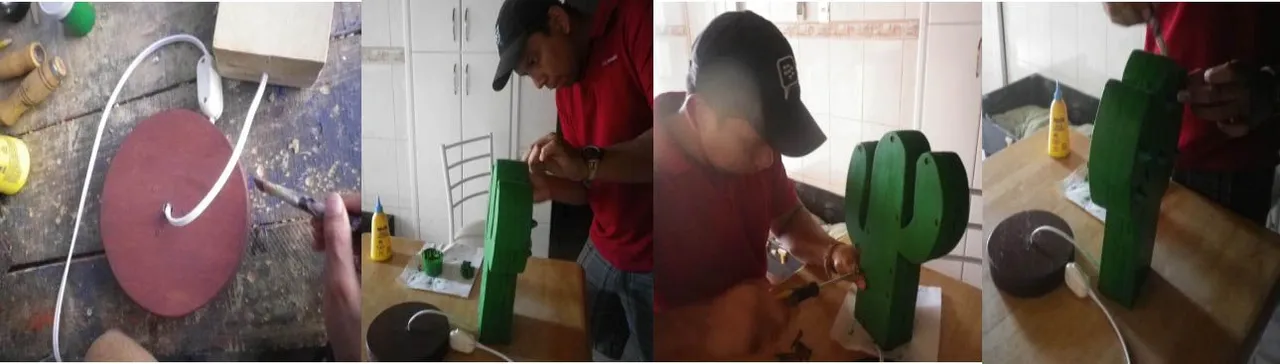
Once painted and dried, the pieces are united and that's it!
Our lamp is finished. You can do this lamp in many ways, you just need a little creativity and above all leave the fear behind.
For this project I used the following image as a reference