Part 4 includes how to define a Python function, how to send messages to Discord channels, how to use the dotenv module to store and load secrets.
Part 4 requires some knowledge from parts 1,2,3. If you already know how to install Python modules, import Python modules, and run Python scripts from your terminal, you are good to go.
Set Up - Install Two Modules
First, we need to install a few modules using pip. For a quick refresher on using pip (python package manager) see Part 2.
List of required modules to install with pip:
- python-dotenv
- requests
Today’s example uses dotenv for storage or secrets, and requests for sending data to Discord.
Setting up a Webhook and Storing it Safely
Webhooks are an easy way to send data to Discord. All we need to do is generate a unique URL, and then make an HTTP request to the URL. The payload of the request contains the message content.
To generate a Webhook URL, you need to be a Discord server admin, or need to ask a friend who is an admin. For the channel of interest, go to “Edit Channel”, switch to the “Integrations” tab, and click “Create Webhook”. Optionally, change the avatar and the name of the Webhook.
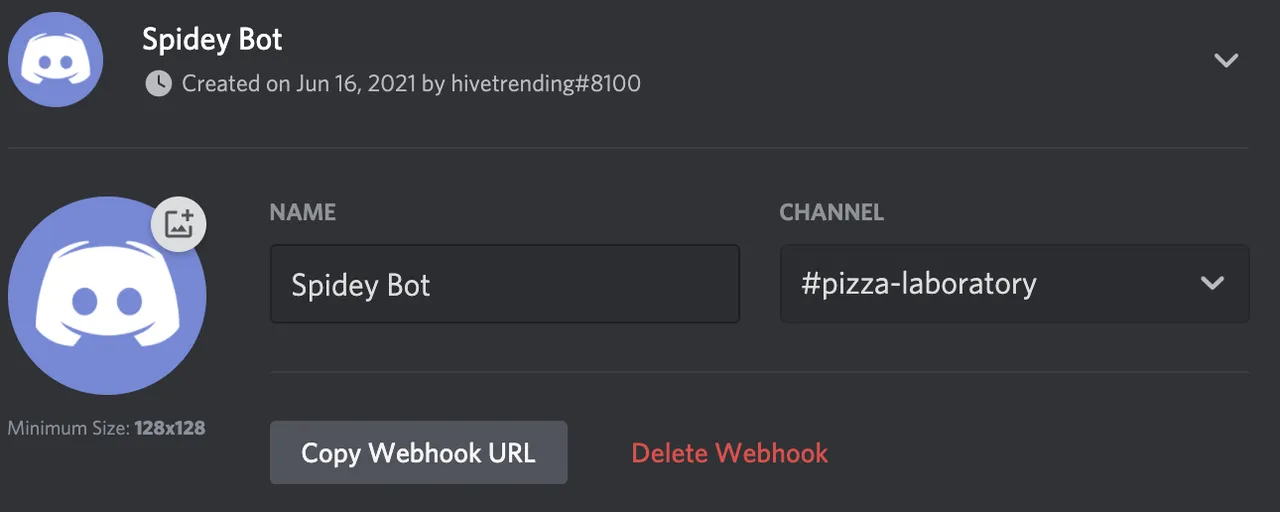
Next, we need to copy the Webhook URL and save it somewhere. We could save it directly in a python script. Then anyone who gets a copy of the script can use the same webhook and send messages to discord. Instead, we will save it in a .env. folder, so our python script can be shared freely without fear of leaking the secret URL.
To do this all we need to do is create a file called .env in the project folder where our python script will be run from.
For example:
DISCORD_WEBHOOK_URL=https://discord.com/api/webhooks/854752330439065601/ei19hfobnLw7fLMmyxYNSqifm4gHre9P7yUeuQ12DUYiNJOprTH66h5oWfdYIySExuAT
Loading the Webhook URL Using dotenv()
With a few lines of code, the DISCORD_WEBHOOK_URL value is loaded from our .env file.
import dotenv
import os
dotenv.load_dotenv()
DISCORD_WEBHOOK_URL = os.getenv('DISCORD_WEBHOOK_URL')
First, we import the dotenv and os modules. Then, call into dotenv’s load_dotenv() to read the .env file and make the variables accessible in the current operating environment. Finally copy the environment variable’s value to a local python variable called DISCORD_WEBHOOK_URL for convenience. The example uses this variable later on.
Defining a Function - send_discord_message()
The next thing to do is define our first function. This is done using the def keyword, followed by the function name, and a list of parameters in parens, concluded with a colon.
The inner code blocks of the function must be single-indented. Python’s interpreter is sensitive to whitespace/indentation, which is a neat way to make the code look clean while reducing the amount of punctation characters.
def send_discord_message(username, message_body):

    payload = {
        "username": username,
        "content": message_body
    }

    try:
        requests.post(DISCORD_WEBHOOK_URL, data=payload)
    except:
        print('Error while sending discord message. Check configuration.')
We create a function called send_discord_message() with 2 named parameters. The parameters are named username and message_body. Unlike other programming languages, we don’t need to declare the parameter types. Python interpreter will infer the types from the data. Another neat way to make the code more concise.
The function will take the two parameters and pack them into a dictionary named ‘payload’. Then, the requests module’s post() function is called to send the payload to the DISCORD_WEBHOOK_URL. If anything goes wrong, such as an invalid URL being set, an exception is thrown and an error message printed.
Calling the send_discord_message() Function
The last step is to call the function we defined.
send_discord_message(‘MyBot’, ‘Hello World!’)
If all goes well, the message shows up in Discord!
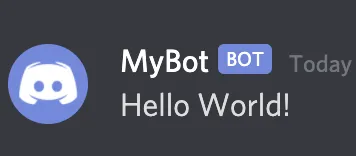
From here, ‘Hello World!’ can be replaced with any string. Using beem like Part 2 and 3, some interesting Hive data can be fetched and forwarded to your Discord channel.
Putting it all together - The Whole Script
import dotenv
import requests
import os

dotenv.load_dotenv()
DISCORD_WEBHOOK_URL = os.getenv('DISCORD_WEBHOOK_URL')

def send_discord_message(username, message_body):

    payload = {
        "username": username,
        "content": message_body
    }

    try:
        requests.post(DISCORD_WEBHOOK_URL, data=payload)
    except:
        print('Error while sending discord message. Check configuration.')


send_discord_message('MyBot', 'Hello World!')
Conclusion
In this example we first created a Discord Webhook. Then we stored it’s URL in a .env file, and loaded it from there into our Python script.
A function was defined for sending messages to discord using the requests module. This function can be copy-pasted and reused in other scripts.
Finally, the function is called and a message pops up in the Discord channel.
Thanks for reading! Please let me know if anything is unclear or incorrect. This is intended to be a living document to be improved and maintained over time.
A channel for #learn-code is set up in the Hive.pizza discord for discussing these lessons.
This blog is brought to you by the Hive.Pizza team.