For Otago anniversary day, I thought i'd share some ideas on bug-out bags. For those who don't know the term, it's basically a pack filled with carefully selected essentials needed for extended outdoor survival, that must also be light enough to be carried with mobility for when emergency strikes. The point is to use it when 'bugging-out' or sheltering in a pre-planned safe and somewhat remote location until you are able to return home.

I have really only started learning about these over the last 6 months but have learned a lot from many sources. I've put together my own pack from things i can buy locally in NZ and also got a few chances to use the pack and it was awesome. Today I will cover the 5 C's of the pack, then go into other components in the next blog.
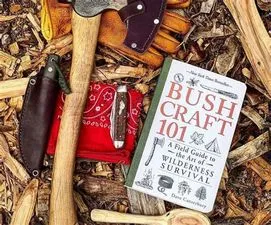
In chapter one of Bushcraft 101, Dave Canterbury covers the 5 C's of survival that everyone should have in their pack.
It's my view with all types of equipment these days, that its quality over quantity. You can only carry so much, and if you need the pack at some point in the future you'll be glad you can rely on the gear, especially if you can't replace it easily.
This is an expensive bug-out bag, but I decided to think of it more like a portable house. Better gear usually has a lower weight to durability ratio, superior quality and effectiveness. I would rather buy things once and repair where needed. Cheap, Light, Durable. Pick 2.
The backpack itself is a Helikon-tex Summit from bushlifenz.com. It is very well made and comfortable. It's large enough for what I need but not so big that I can't bike comfortably with it when its full.

Cutting Tools:
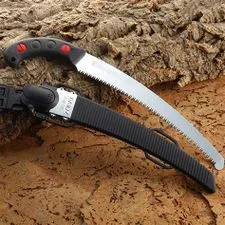
I went with a Silky Nata and Silky Zubat on the front of my pack.
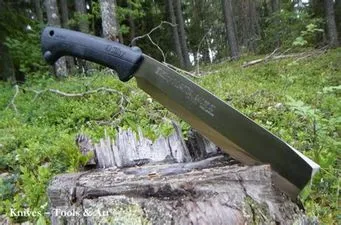
The nata is a machete/hatchet and the zubat a curved handsaw. These are really great quality tools from Japan. I highly reccomend them from silkystore.co.nz.
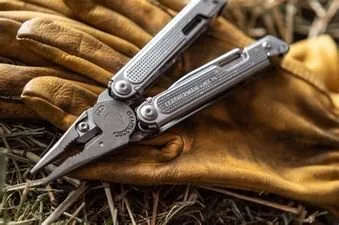
I also have a Leatherman free P4 which I think is also a fantastic tool. I am going to be trying to get a proper bush knife soon aswell.
I take a slansky portable blade multi sharpener in the pack to maintain the tools.
Cover Elements:
I went again with Helikon-tex. They make really good gear. I believe their quality to price ratio is much better than most.
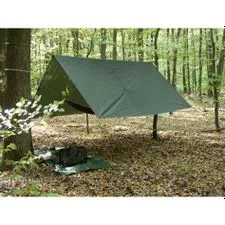
Supertarp: Ripstop nylon with plenty of points to tie. This is a great shelter. Look up the rapid-ridgeline system to learn how to pre-make your cordage for setting up the tarp. This allows the shelter to be set up and taken down in a couple of minutes.
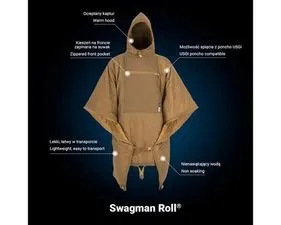
Swagman roll: Another from Helikon-tex. This is a poncho liner, summer sleeping bag, hammock underblanket, and semi-waterproof raincoat/ blanket. It has a special insulation called climashield apex. A wool blanket can also work well.
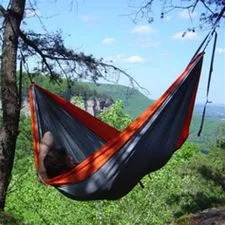
Hammock: These are really interesting. They fold up into a small pouch, but if you hang them on a tree (make sure you follow safety instructions) you can lie in there protected from the cold ground and bugs. Its also very relaxing and fun. You can get these at furtherfaster.co.nz.
Newzealand has a very hospitable climate and I have only used this pack in the summer. A bigger sleeping bag or wool blanket would be a good addition in winter. I also have a tyvek sheet with mosquito net. I have not used that much but it is good. A down jacket is also good for if it gets cold.
Combustion devices:
A genuine BIC is a good way to good, they are affordable and work well. They won't work if its freezing of they get wet. Dave reckons getting orange ones so you don't loose them and having at least 3-4 in your pack, pockets, pouches etc. You can get special camping lighters that are expensive but are water-proof and tough. Waterproof matches are a cheap easy backup.
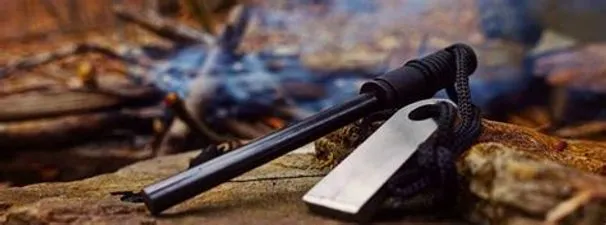
Then you have ferrorods and fire kits. They have a striker with them that you can use to light tinder and/or various fire starting materials. I have some beeswax ones that I find need a lighter. There is much more in the book about techniques for starting fires. There is more information to consider about combustion and fires for safety.
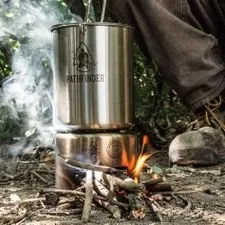
They are good for a range of things like heating, cooking, keeping bugs at bay and more. Having a firebox or portable stove with canteen is good. I got a pathfinder school kit which all fits neatly together, also from bushlifenz.
Containers:
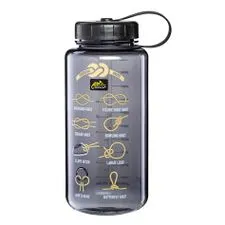
Drink bottles, collapse-able water holders, plastic bags, food containers. Dave also thinks having a shoe polish tin to make char is a great idea for the fire kit. If you have a drink bottle with a sediment filter on it, it makes it easier to collect water for further filtration and treatment.
Cordage:
There are different gauges of cordage. Each have different uses.
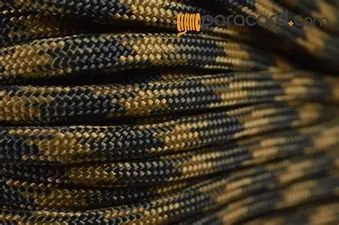
Paracord: is the most common. It is good for a range of things in both making larger rope by braiding it together, or by cutting it open and using the smaller nylon threads that make it up as strong strings. Paracord is very strong and I plan on making a paracord belt soon.
Tactical cord: is a smaller paracord. you can fit longer amounts in a smaller space. It can be used as laces and things like that and to tie up smaller tighter knots.
Microcord: is usually a black, super strong string. It can be used as fishing line, repairing gear and things like that.
Its good to have some of each, I use paracord for the ridgeline. The other ones I haven't used yet.
Conclusion:
That's an overview of the 5 C's but there are a lot more things to consider in this chapter. I'm no expert but was really surprised to find out how good this stuff is so if you didn't know either I highly recommend looking into it further. I will be covering some more customised things in my next blog.
I would also recommend https://goodtohave.co.nz/blog for some great information about self-sufficiency and survival relevant to the Otago region, including this blog on the overnight bag checklist https://goodtohave.co.nz/overnight-backpack-checklist/