✨🌙¡Hola amigos amantes de la creatividad! Espero que hayan pasado un muy buen comienzo de semana.🌙✨
Estoy muy contenta de mostrarles el paso a paso de mi participación para este gran concurso del mes, en una de mis comunidades favoritas #diyhub. Me alegro de llegar a tiempo, después de tantas semanas no estaba segura de si iba a poder participar. Aun así, después de tantas semanas dando vueltas a la cabeza, pensando en qué hacer, se me ocurrió una gran idea, elaborar una decoración de casita en forma de luna. Diría que este tipo de creación es la que más me gusta, la que tiene pequeños detalles, pero al final es un gran resultado.
Cuando leí sobre el concurso me sentí muy feliz porque desde pequeña siempre he tenido un poco de pánico por la oscuridad, cuando apago las luces me siento encerrada, siento que no me puedo mover, pero gracias a la luz de la luna, que es esa lámpara natural que se cuela por mi ventana y sus rayos de luz iluminando un poco mi habitación, me da mucha tranquilidad.
🔸Sin más que añadir, a continuación los dejo con el paso a paso:
✨🌙¡Hello friends who love creativity! I hope you had a very good start to the week.🌙✨
I am super happy to show you the step by step of my participation for this great contest of the month, in one of my favorite communities #diyhub. I am glad to arrive on time, after so many weeks I was not sure if I would be able to participate. Still, after so many weeks thinking about what to do and a great idea came to me, I made a decoration for a house in the shape of the moon. I would say that this type of creation is the one I like the most, the one with small details, but in the end it is a great result.
When I read about the contest I felt very happy, because since I was little I have always had a bit of a panic due to the dark, when I turn off the lights I feel locked in, I feel like I can't move, but thanks to the moonlight, which is that natural lamp that slips through my window and its rays of light illuminating my room a little, gives me a lot of peace of mind.
🔸Without more to add, then I leave you with the step by step:

♥️ESPERO QUE TE GUSTE,
¡Empecemos!
♥️I HOPE YOU LIKE IT,
Let's start!

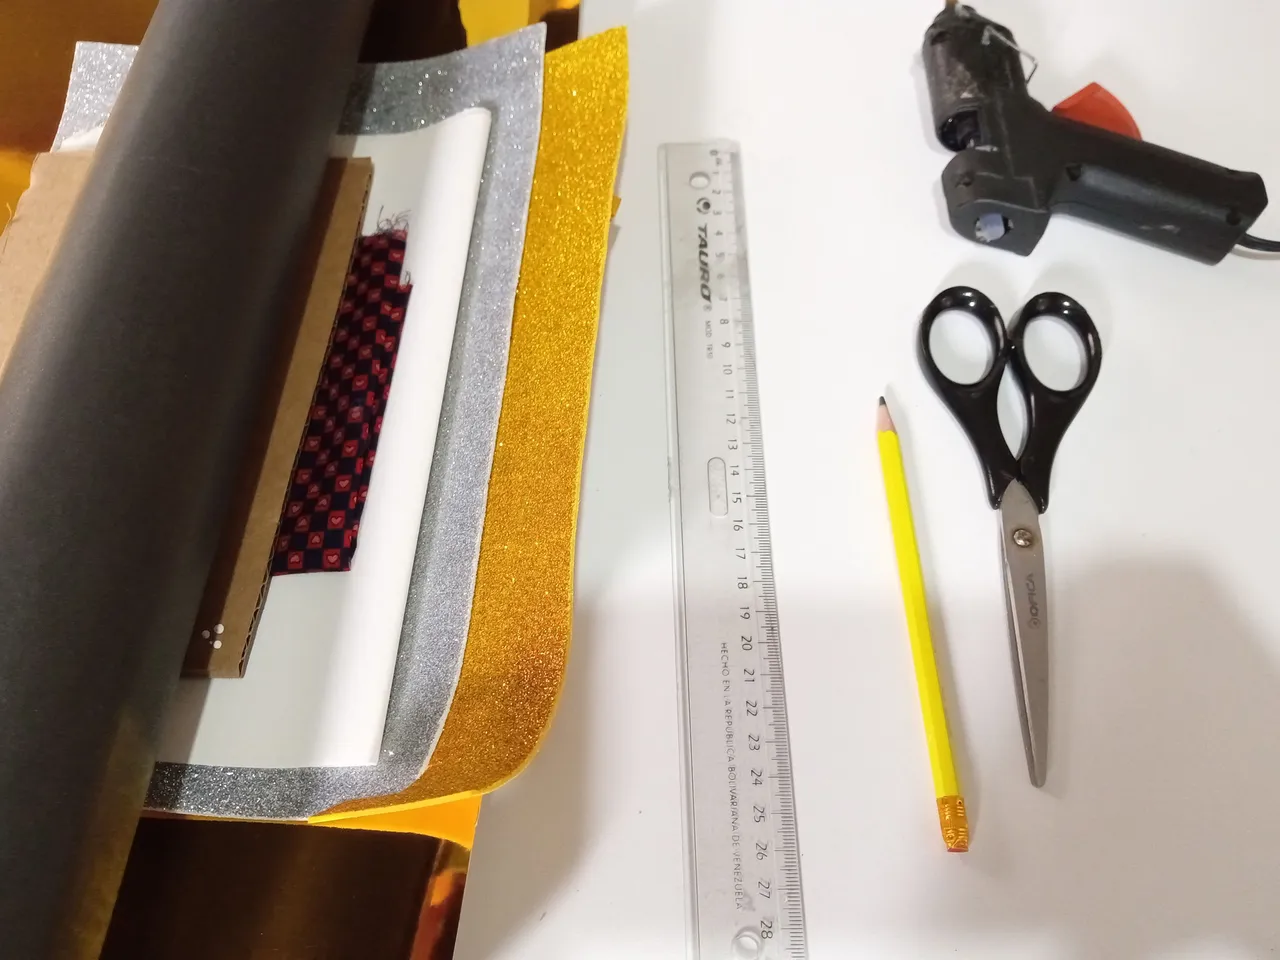
🌟 MATERIALES | 🌟 MATERIALS
- Cartón grueso.
- Foami escarchado plateado.
- Foami escarchado dorado.
- Foami escarchado verde.
- Foami escarchado fucsia.
- Cartulina metalizada dorada.
- Cartulina escolar negra.
- Retazo de tela.
- Pegamento.
- Tijeras.
- Lápiz.
- Regla.
- Thick cardboard
- Frosted silver foami.
- Gold ice cream foami.
- Green frosty foami.
- Fuchsia frosted foami.
- Gold metallic cardboard.
- Black school cardboard.
- Piece of clothing.
- Glue.
- Scissors.
- Pencil.
- Ruler.
🌙 PROCEDIMIENTO | 🌙 PROCESS
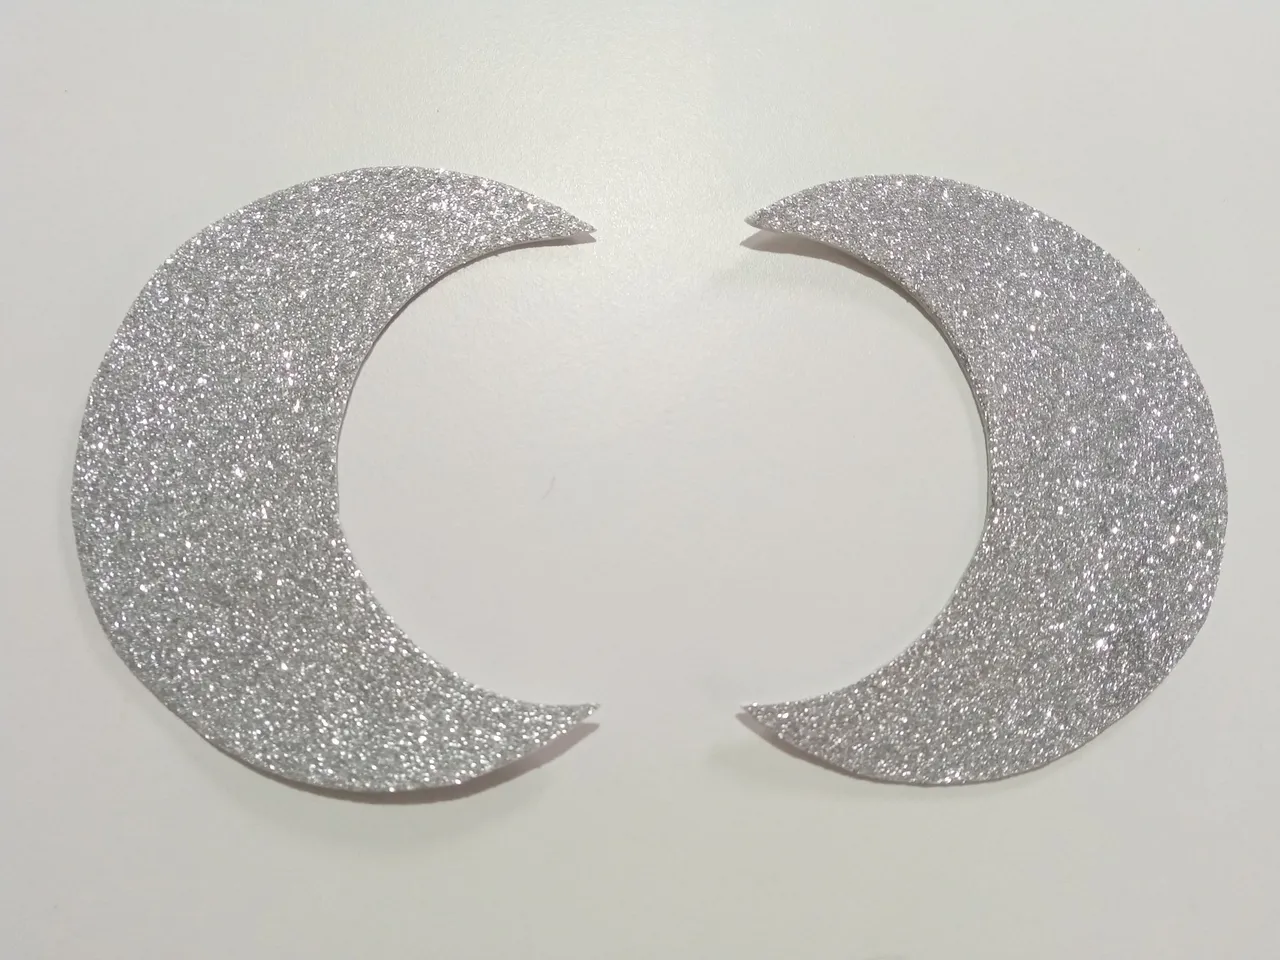
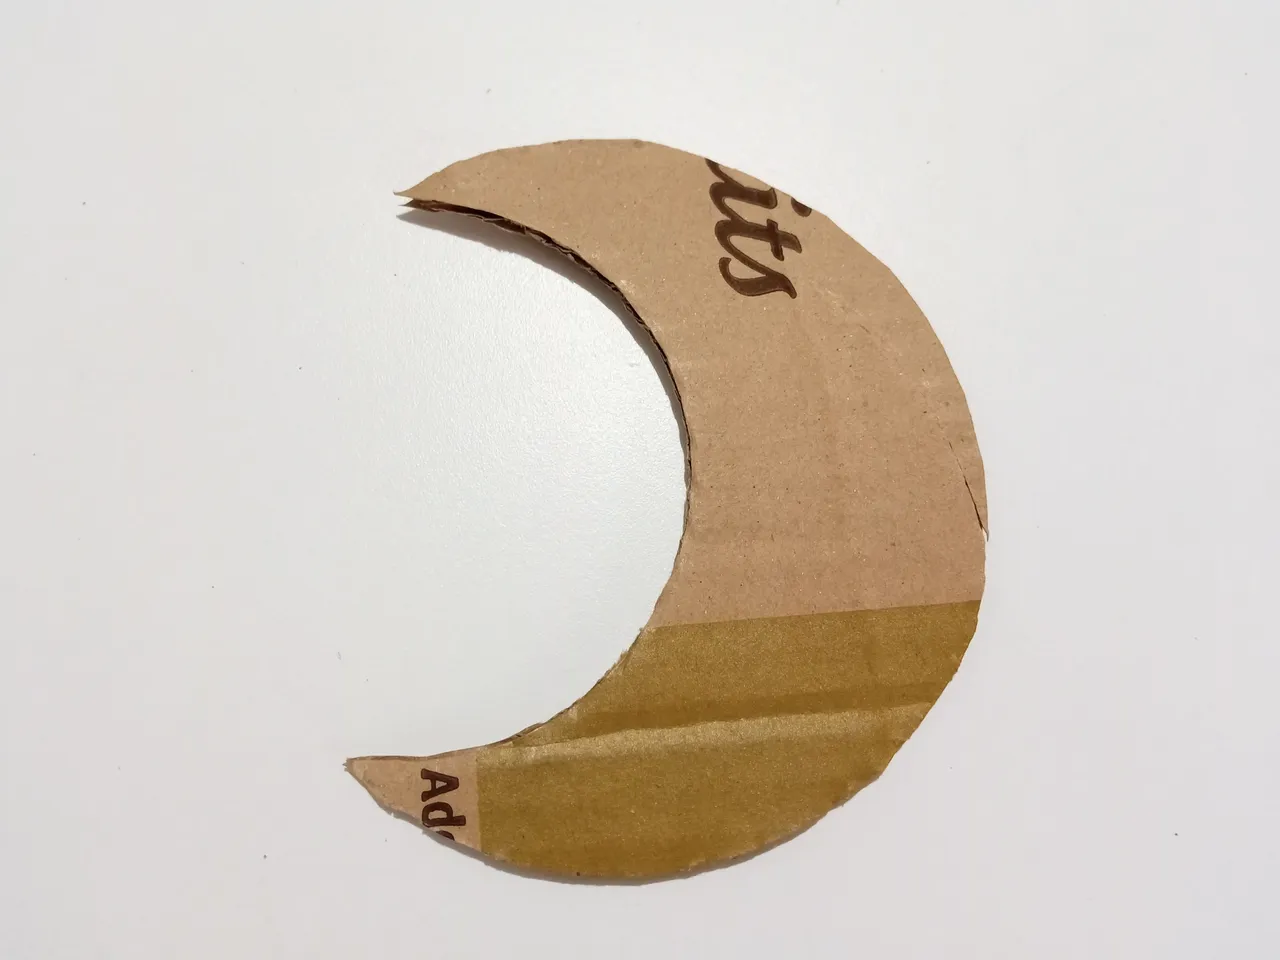
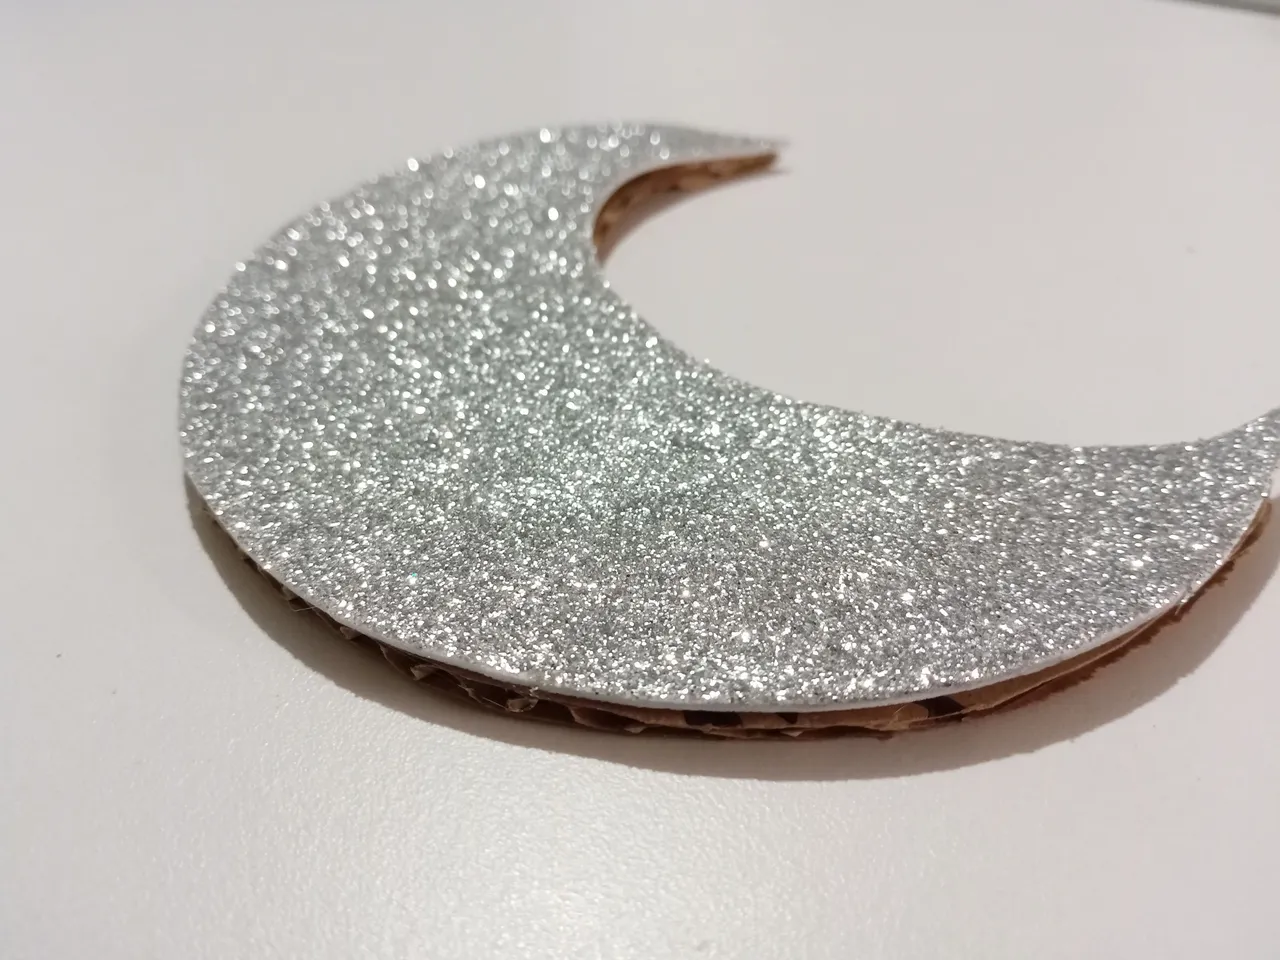
- PASO 1:
Lo primero que debemos hacer es dibujar y recortar en foami escarchado dorado, dos lunas de 13.5 cm por 12.5 cm. Luego, en cartón grueso dibujar una luna 0.5 cm más pequeña que la luna de foami. Una vez nuestras piezas estén recortadas, vamos a pegar el cartón en medio de las dos piezas de foami, es decir; foami plateado, cartón grueso y foami plateado.
- STEP 1:
The first thing we must do is draw and cut out two 13.5 cm by 12.5 cm moons in golden frosted foami. Then, on thick cardboard, draw a moon 0.5 cm smaller than the foami moon. Once our pieces have been cut, we are going to glue the cardboard in the middle of the two pieces of foami, that is; silver foami, thick cardboard and silver foami.
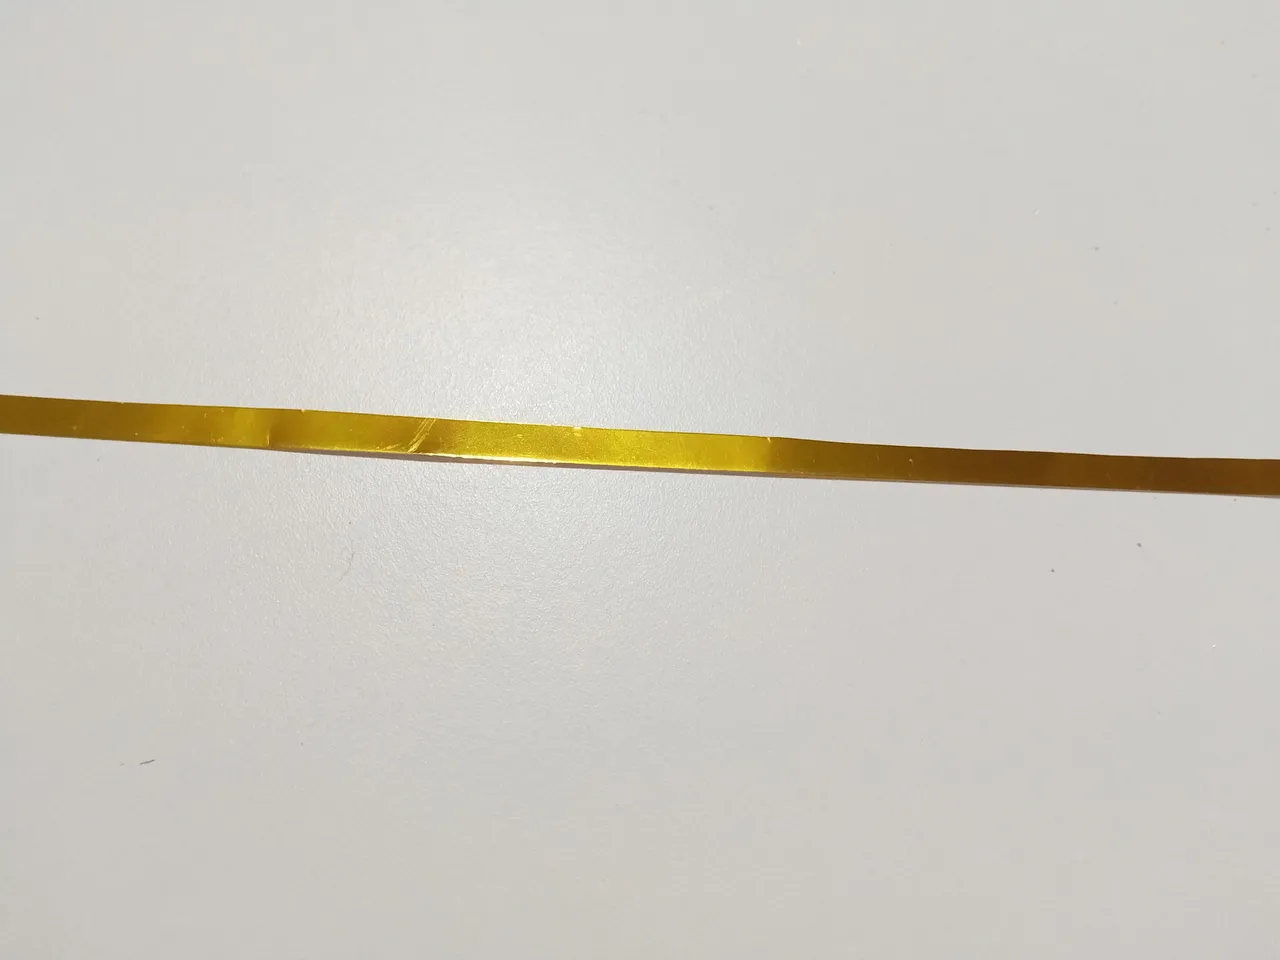
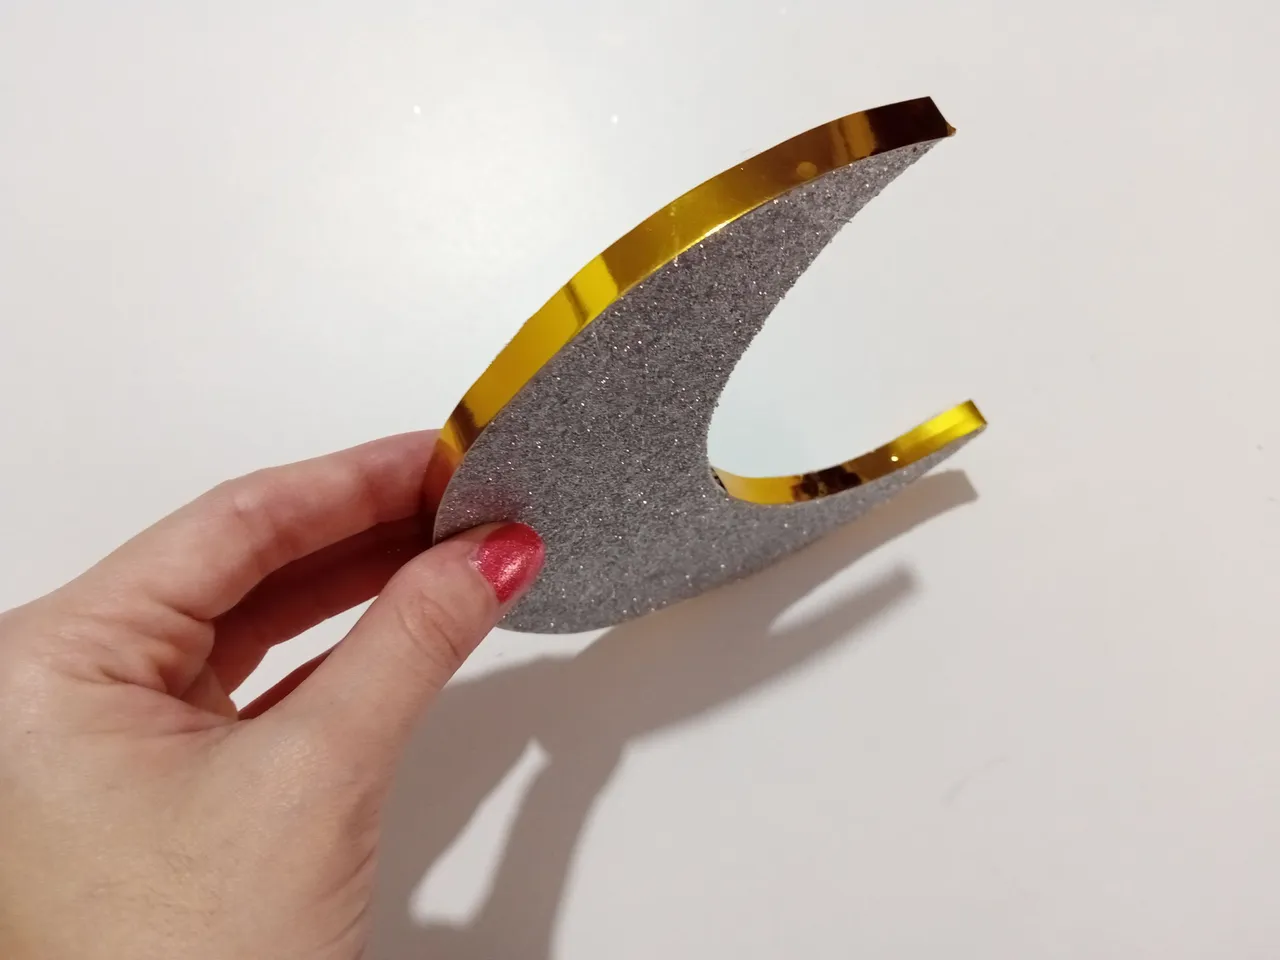
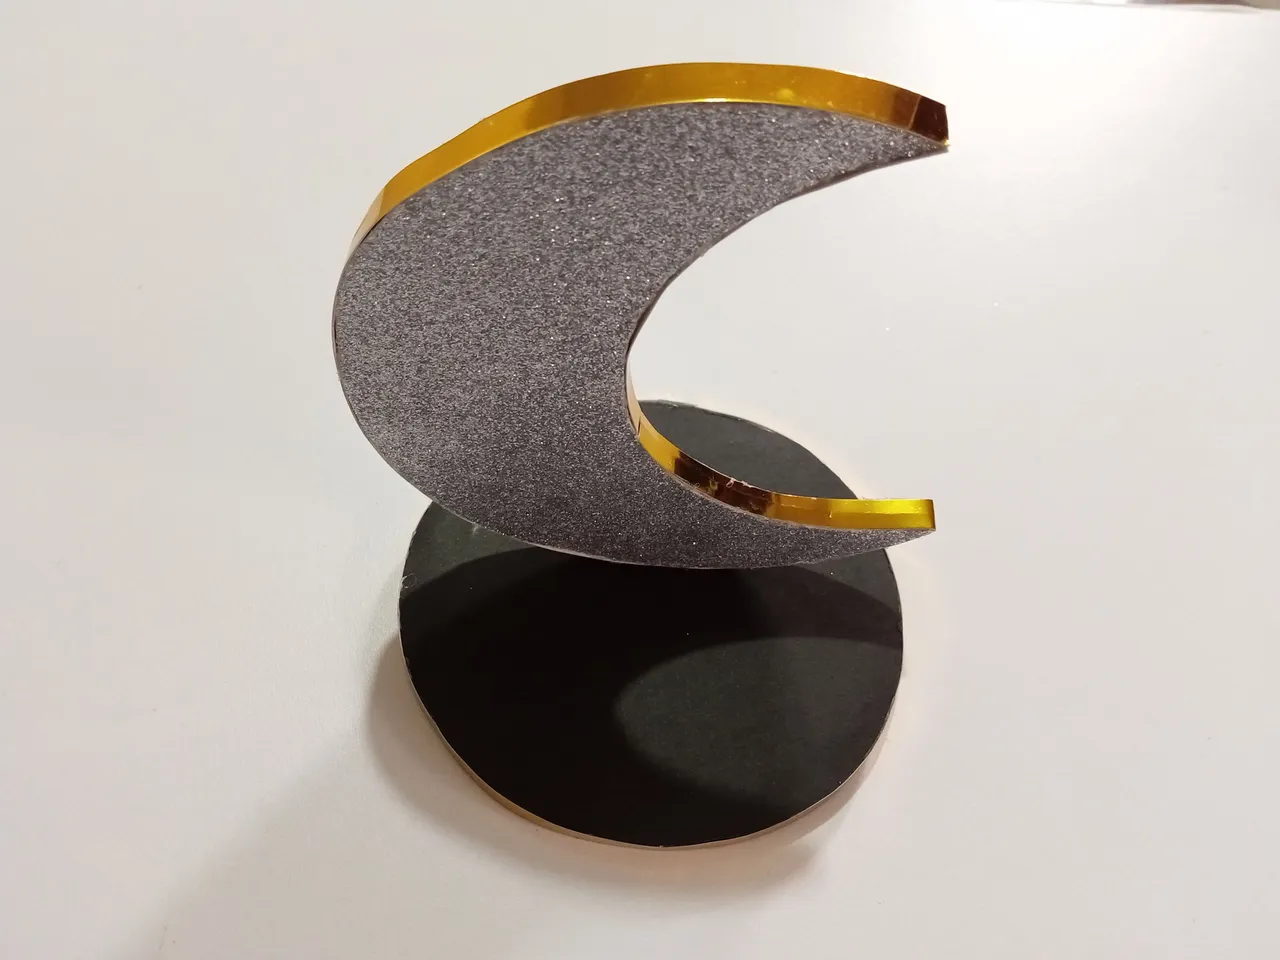
- PASO 2:
Para cubrir todo el borde, cortar una tira larga en cartulina metalizada dorada, de aproximadamente 0.7 cm y pegar por todo el borde donde se ven las uniones de cada material.
- STEP 2:
To cover the entire edge, cut a long strip of gold metallic cardboard, about 0.7 cm, and glue it all the way around the edge where the seams of each material show.
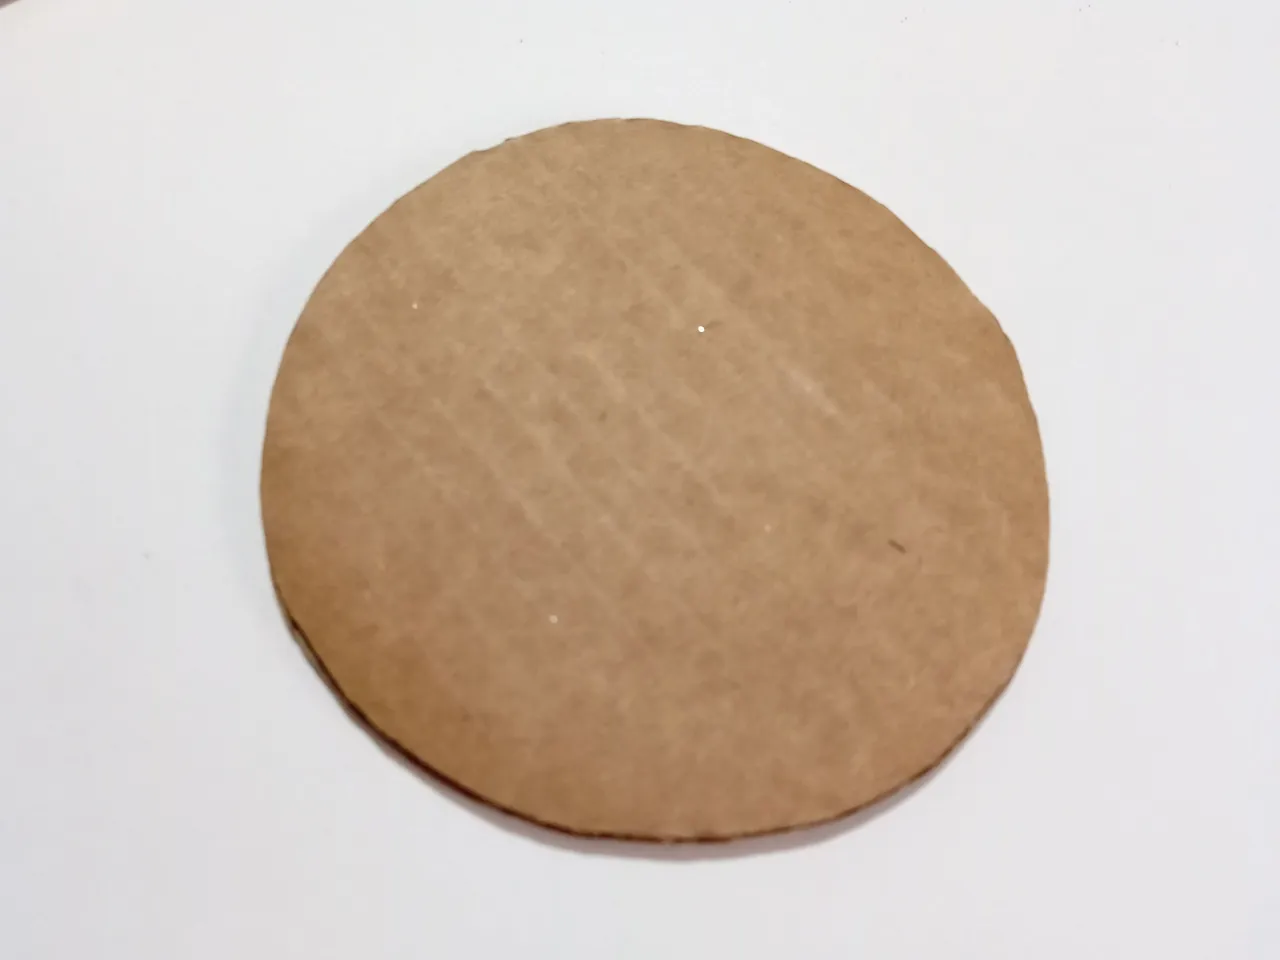
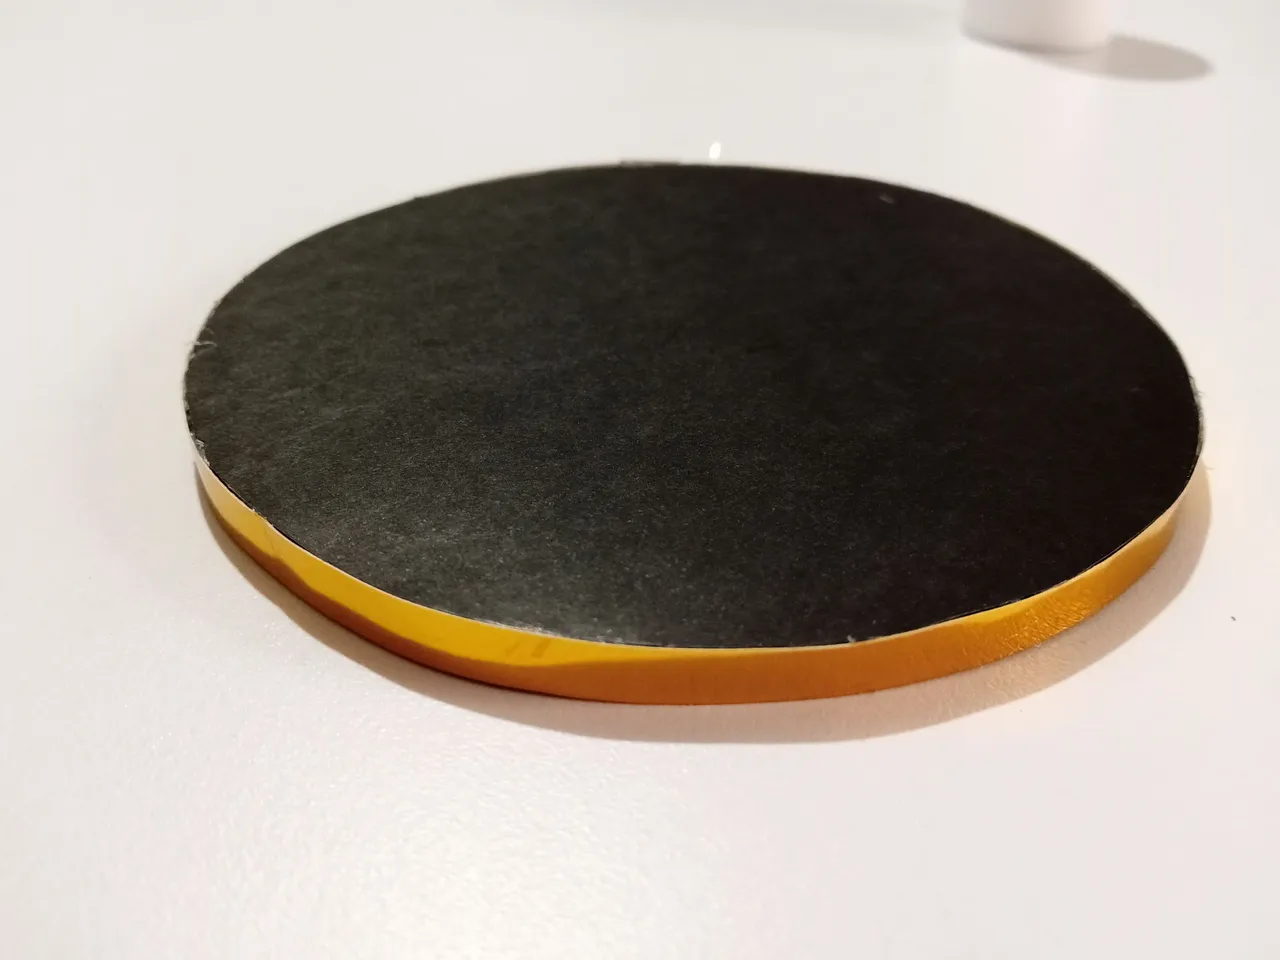
- PASO 3:
Por otro lado, traza y recorta, en cartulina gruesa, un círculo de 12 cm de circunferencia. Luego, encima del círculo, pega otro círculo de cartulina negra con las mismas medidas y alrededor del borde, vuelve a pegar una tira de cartulina dorada de 0,5 cm. A continuación, pega el trozo de luna casi en la mitad de la circunferencia.
- STEP 3:
On the other hand, trace and cut, in thick cardboard, a circle of 12 cm in circumference. Then, on top of the circle, paste another circle of black cardboard with the same measurements and around the edge, paste a 0.5 cm strip of golden cardboard again. Next, glue the piece of the moon almost in the middle of the circumference.
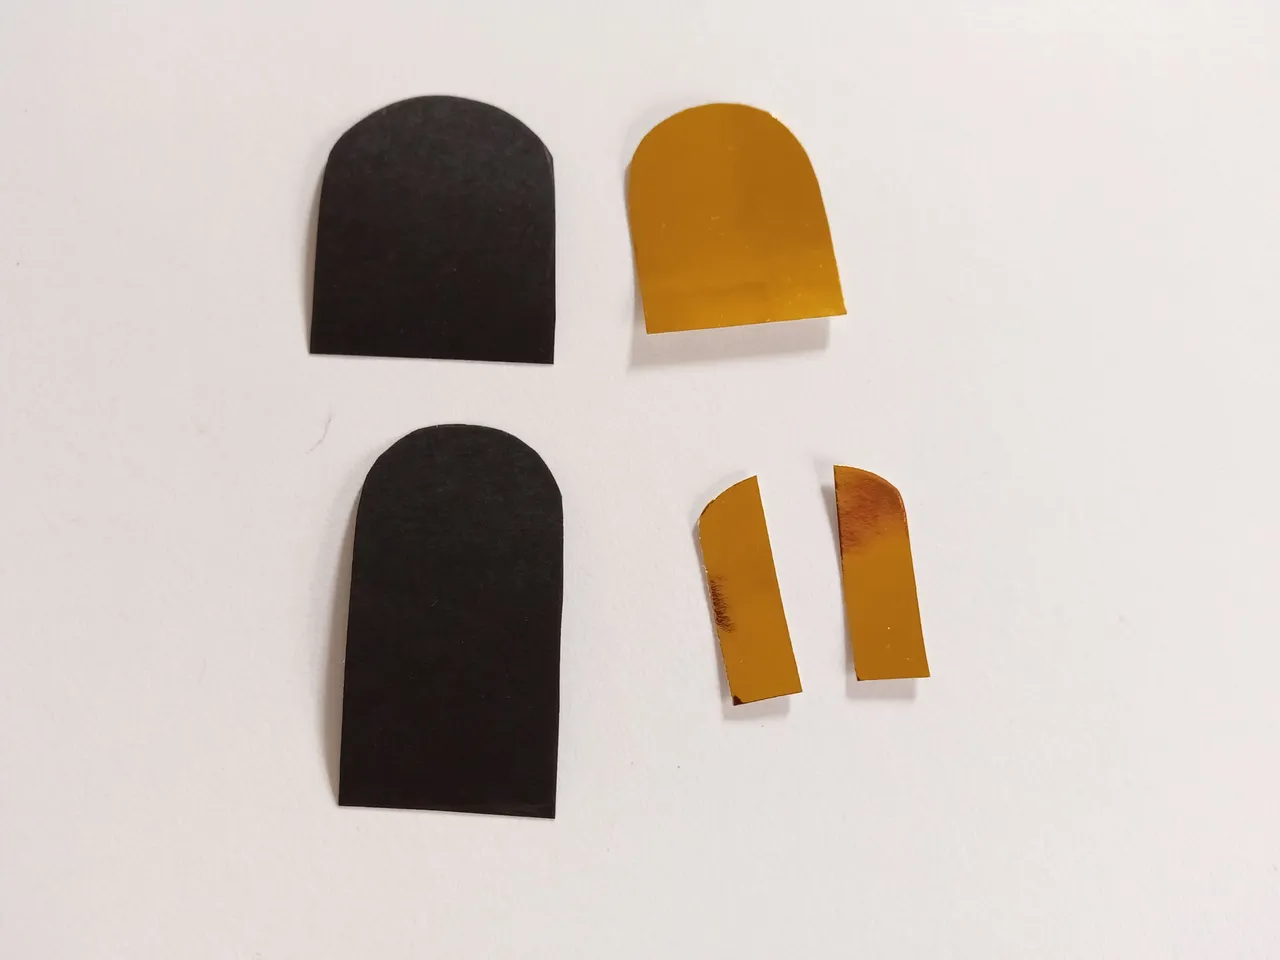
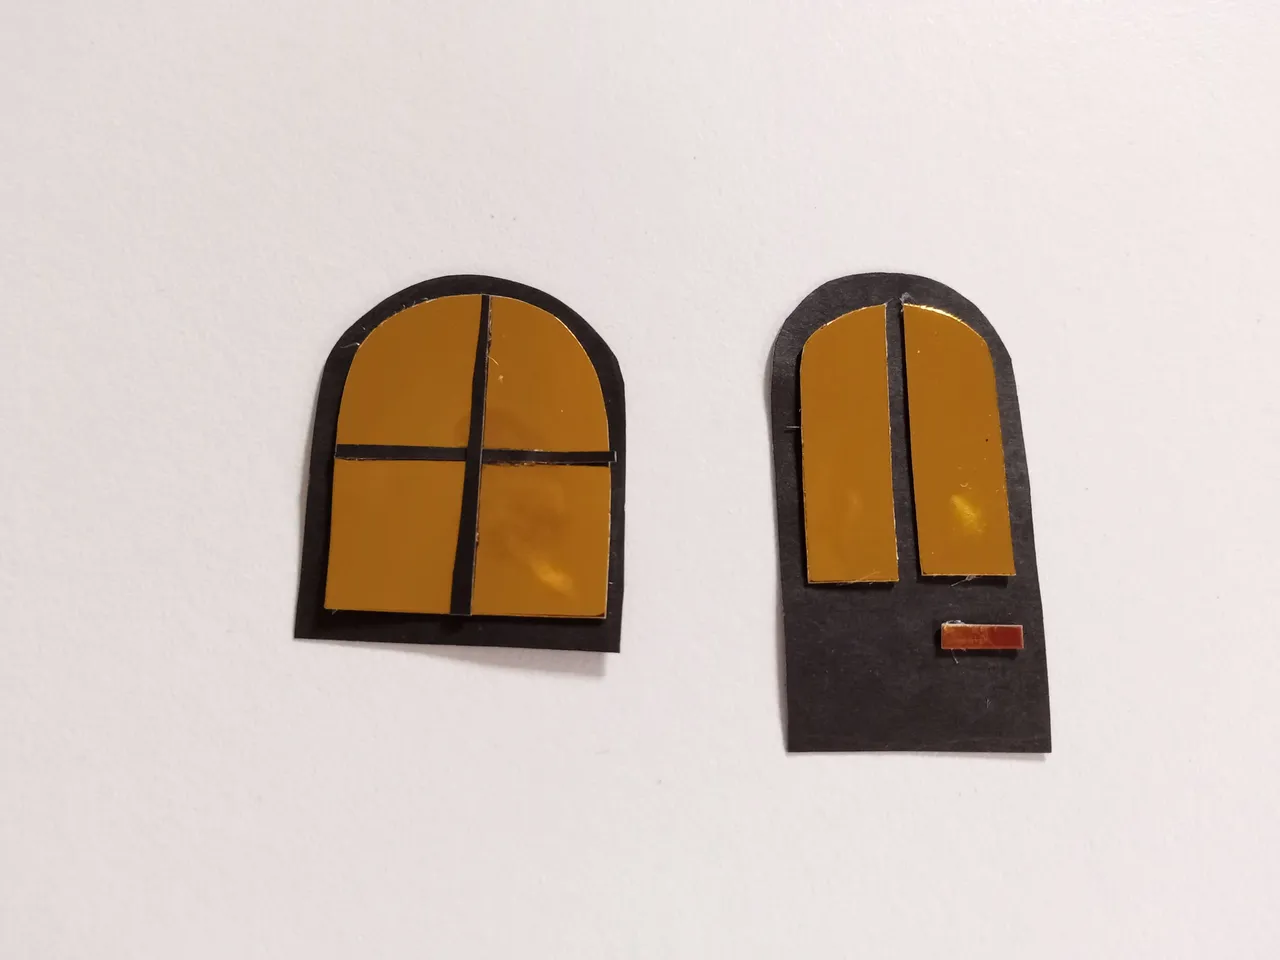
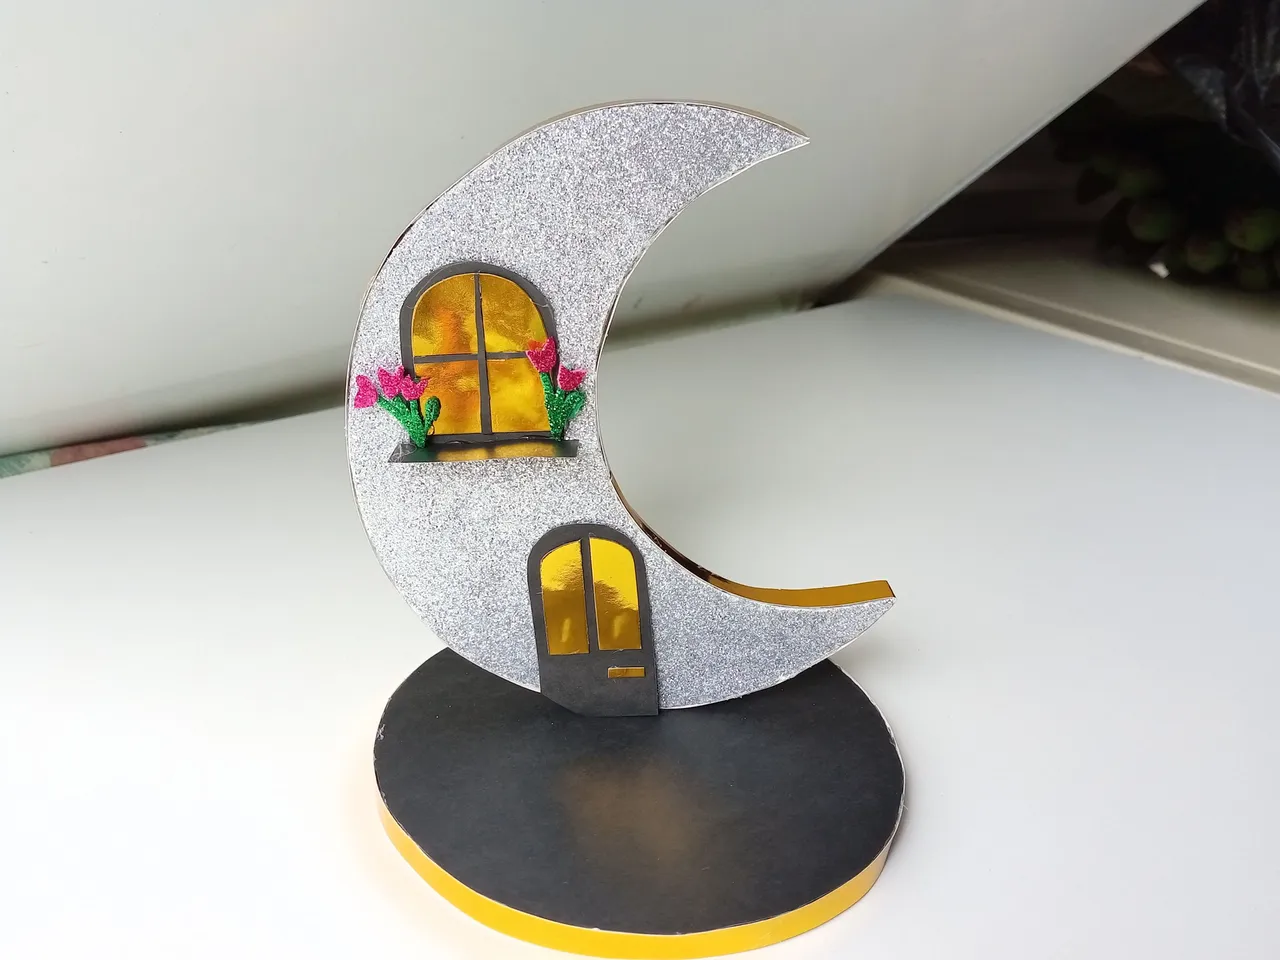
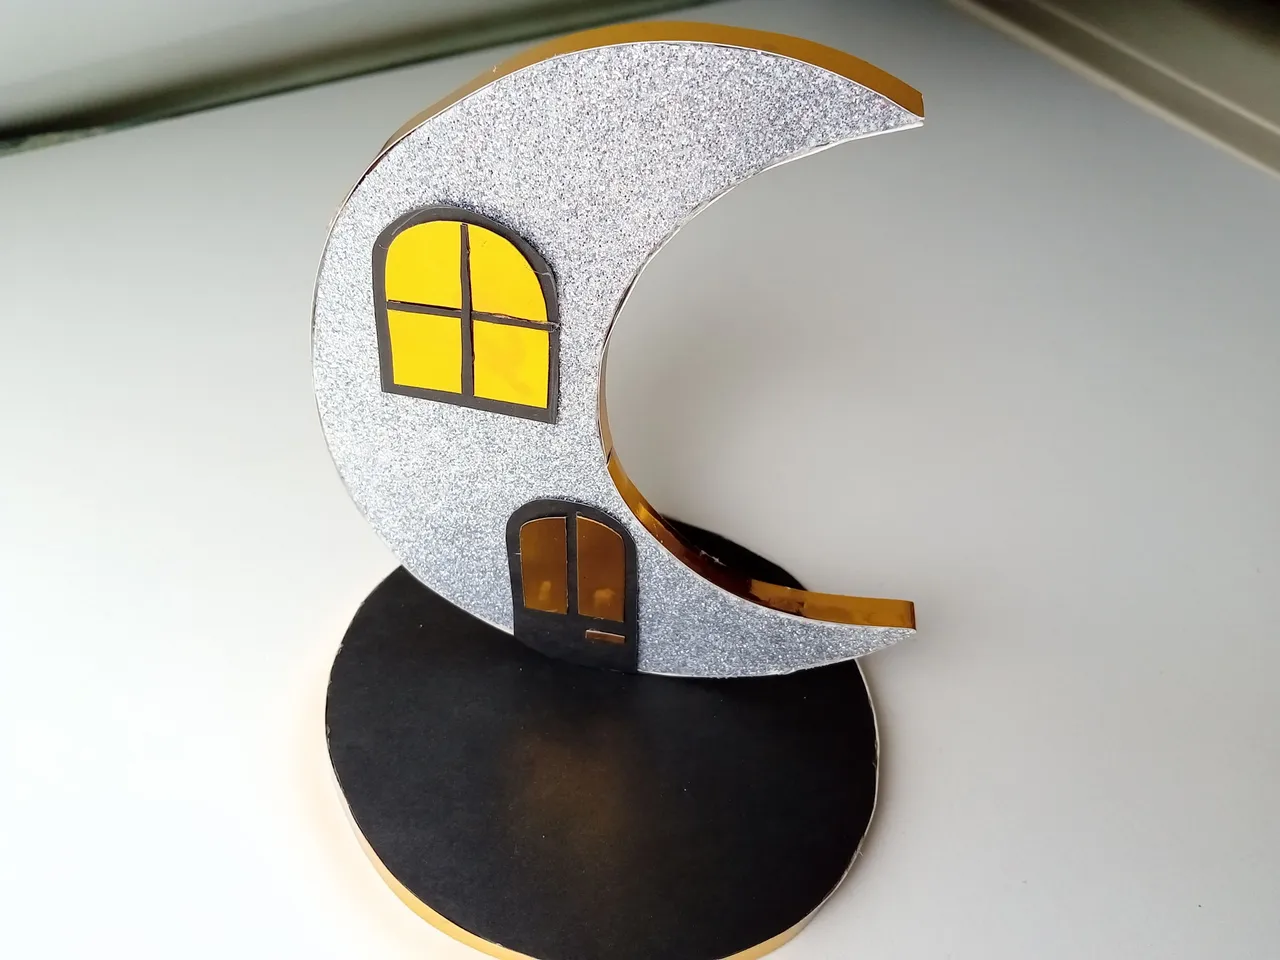
- PASO 4:
Ahora sí, es hora de decorar; Vamos a dibujar y recortar el estilo de puerta y ventana que queramos en cartulina negra y para simular el vidrio usaremos cartulina dorada. Una vez listo, monta todas las piezas. También añade una manilla en la puerta. Y procedemos a pegar las piezas en la luna.
- STEP 4:
Now yes, it's time to decorate; We are going to draw and cut out the style of door and window that we want in black cardboard and to simulate the glass we will use gold cardboard. Once ready, assemble all the pieces. It also adds a small handle on the door. And we proceed to stick the pieces on the moon.
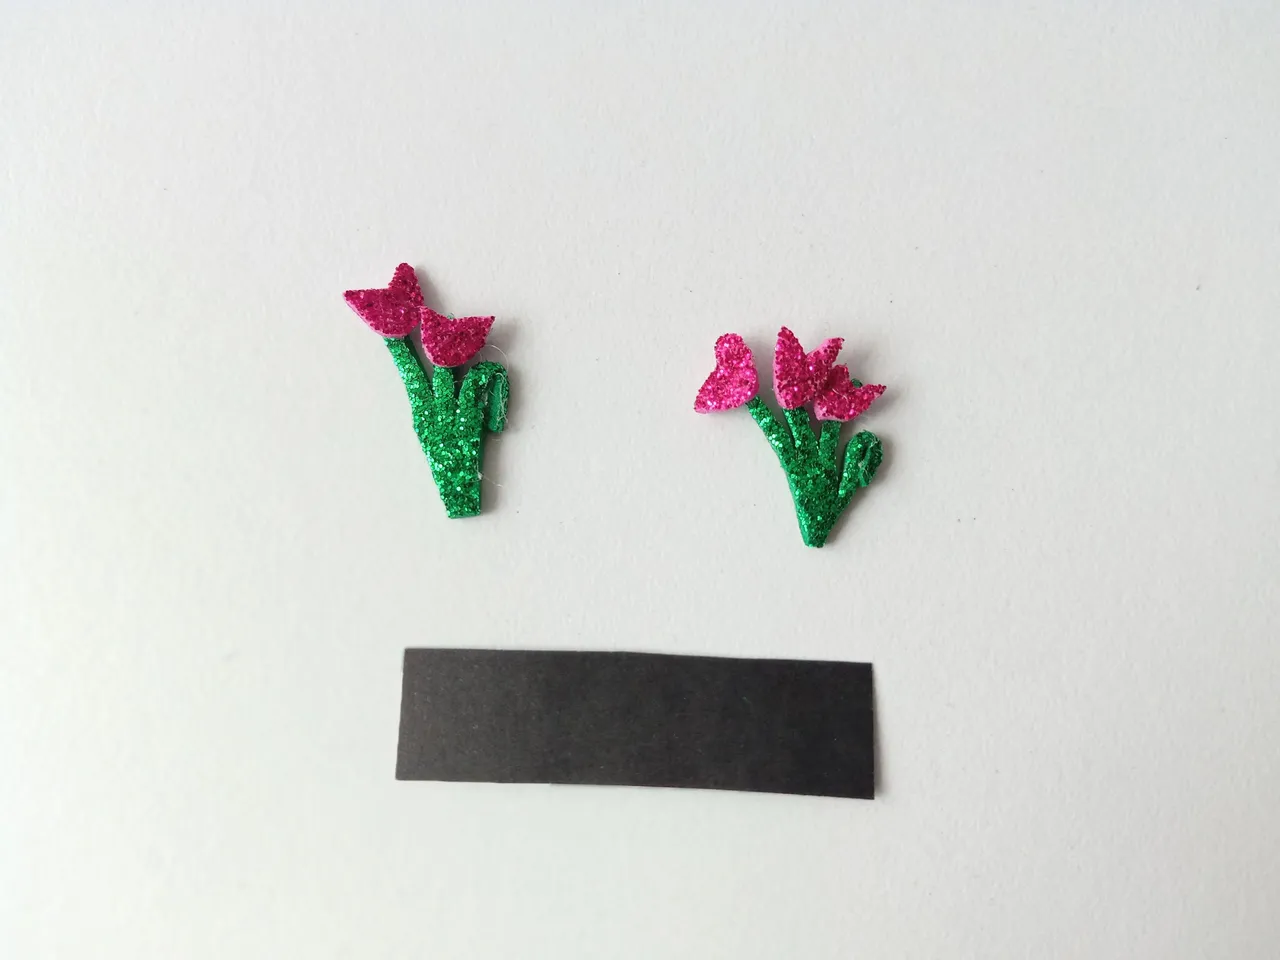
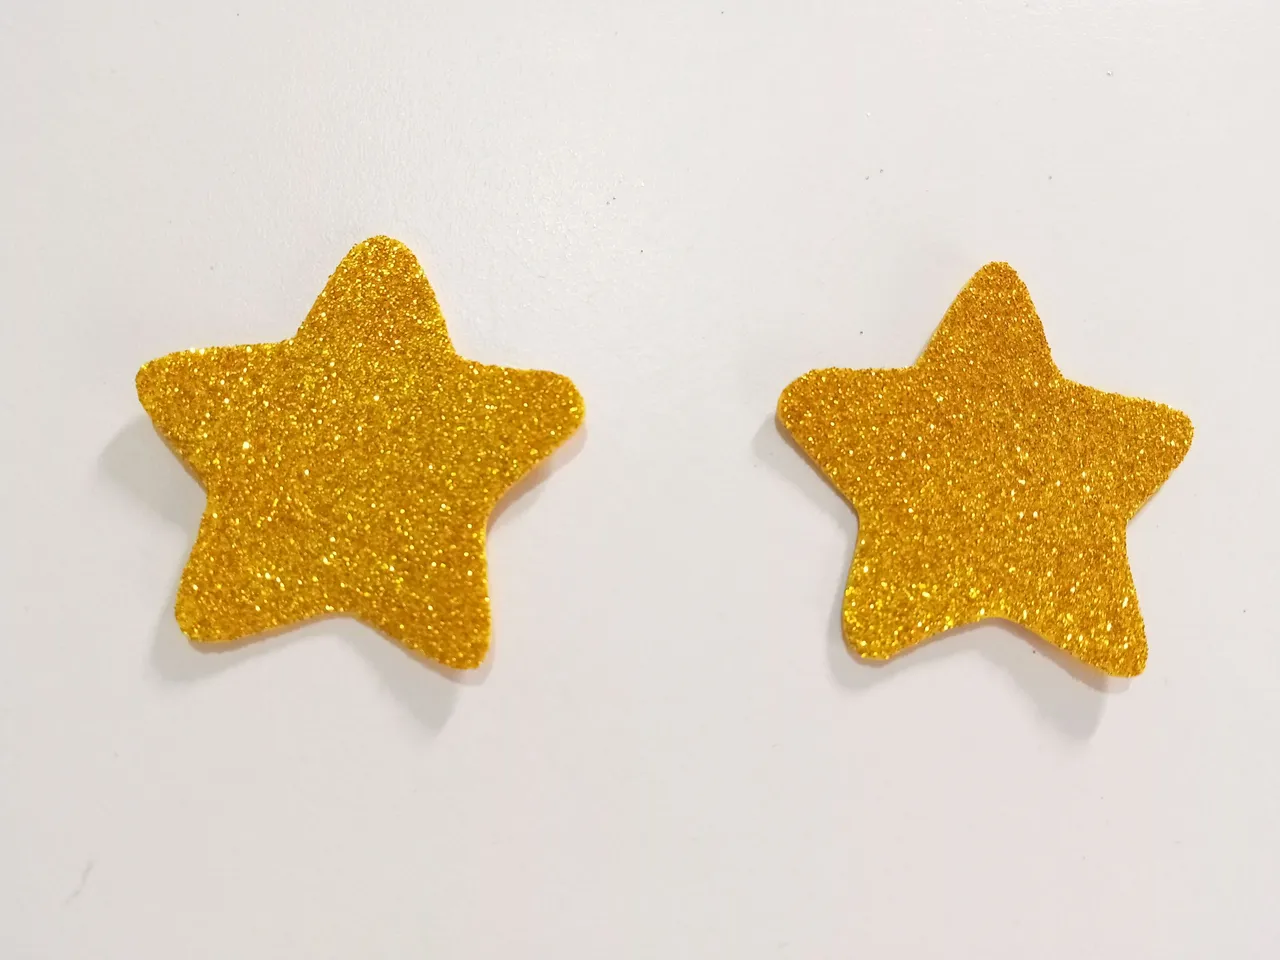
- PASO 5:
Para darle más detalle a la ventana, como extra; pega un pequeño rectángulo horizontalmente y haz pequeñas rosas usando el foami escarchado verde para el tallo y el foami fucsia para las rosas. Luego, haz dos estrellas doradas escarchadas de 5 cm por 5 cm, pégalas espalda con espalda y pégalas en la parte superior izquierda de la luna, justo en la parte curva.
- STEP 5:
To give more detail to the window, as an extra; Glue a small rectangle horizontally and make small roses using the green frosted foam for the stem and the fuchsia foam for the roses. Then, make two 5 cm by 5 cm golden frosted stars, glue back to back and glue to the upper left side of the moon, just in the curved part.
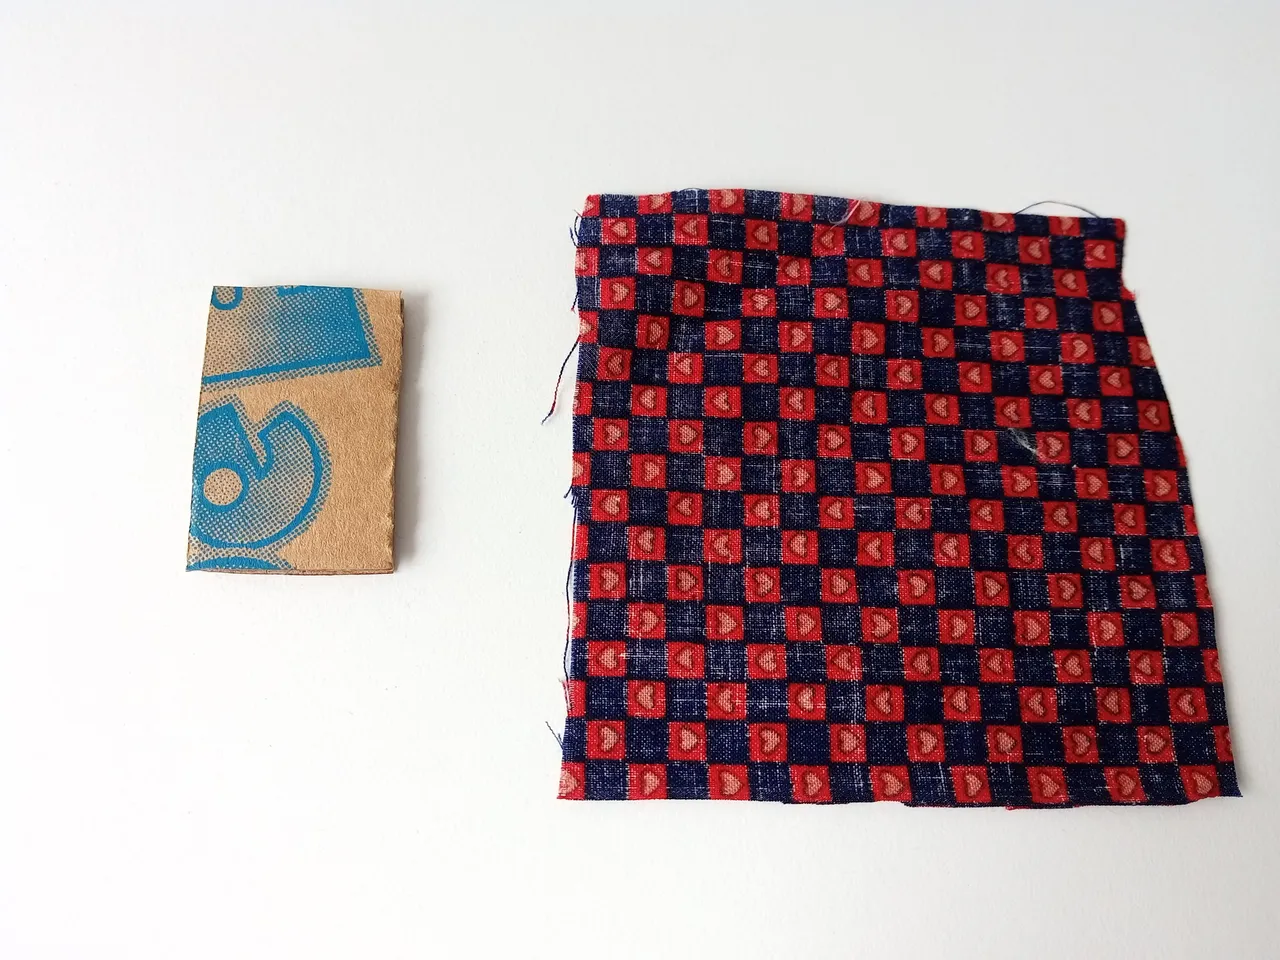
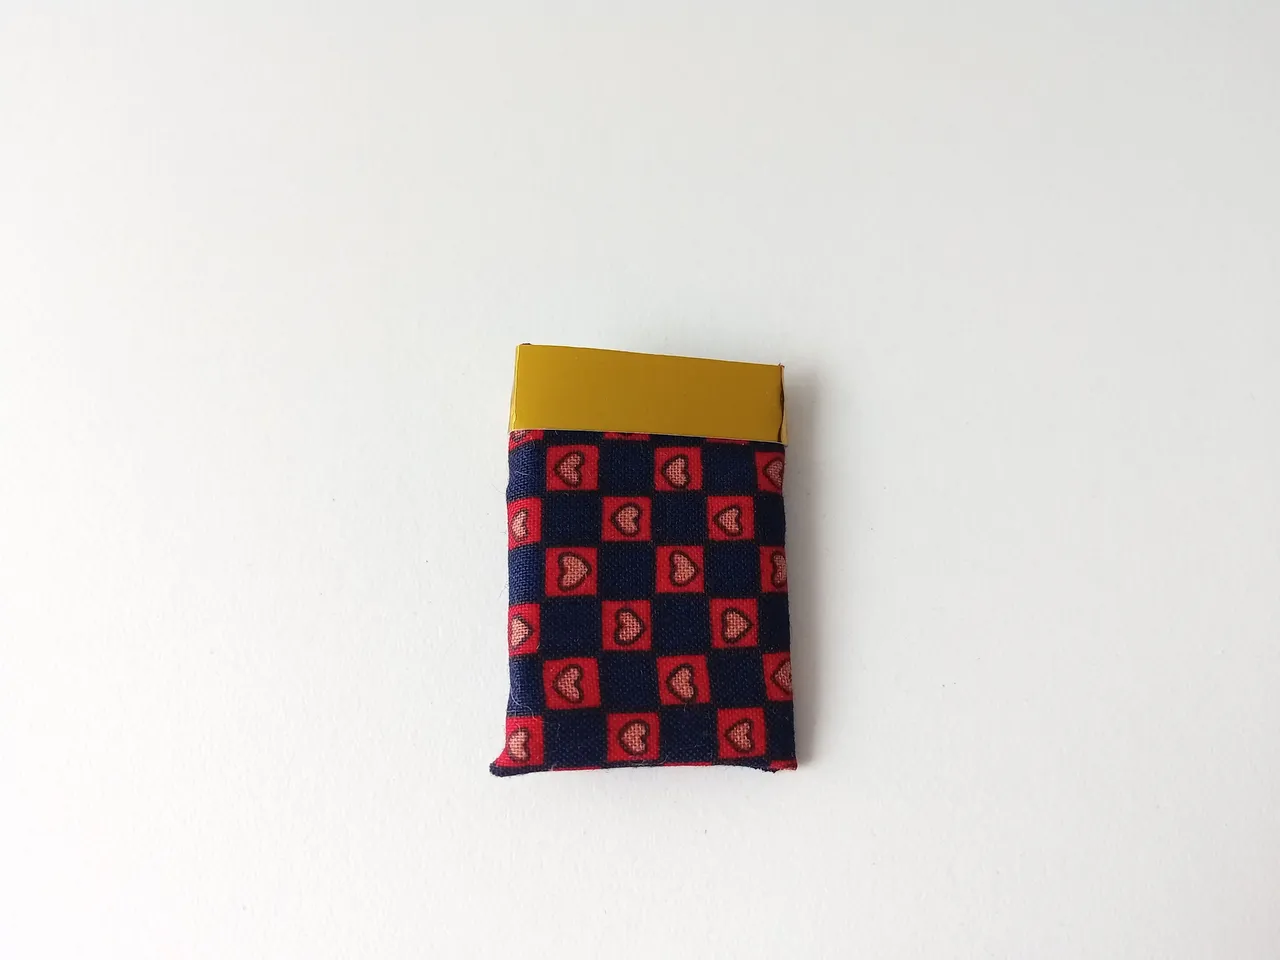
- PASO 6:
Para la chimenea: corta un rectángulo de cartón grueso de 4,5 cm por 3 cm, cúbrelo con un trozo de tela del diseño o color que desees y pega encima una tira de cartón dorado de 1 cm. Para terminar, pegar en la parte trasera, a la distancia deseada.
- STEP 6:
For the fireplace: cut a 4.5 cm by 3 cm rectangle out of thick cardboard, cover it with a piece of fabric with the design or color of your choice and glue a 1 cm strip of gold cardboard to the top. to finish, glue on the back, at the desired distance.
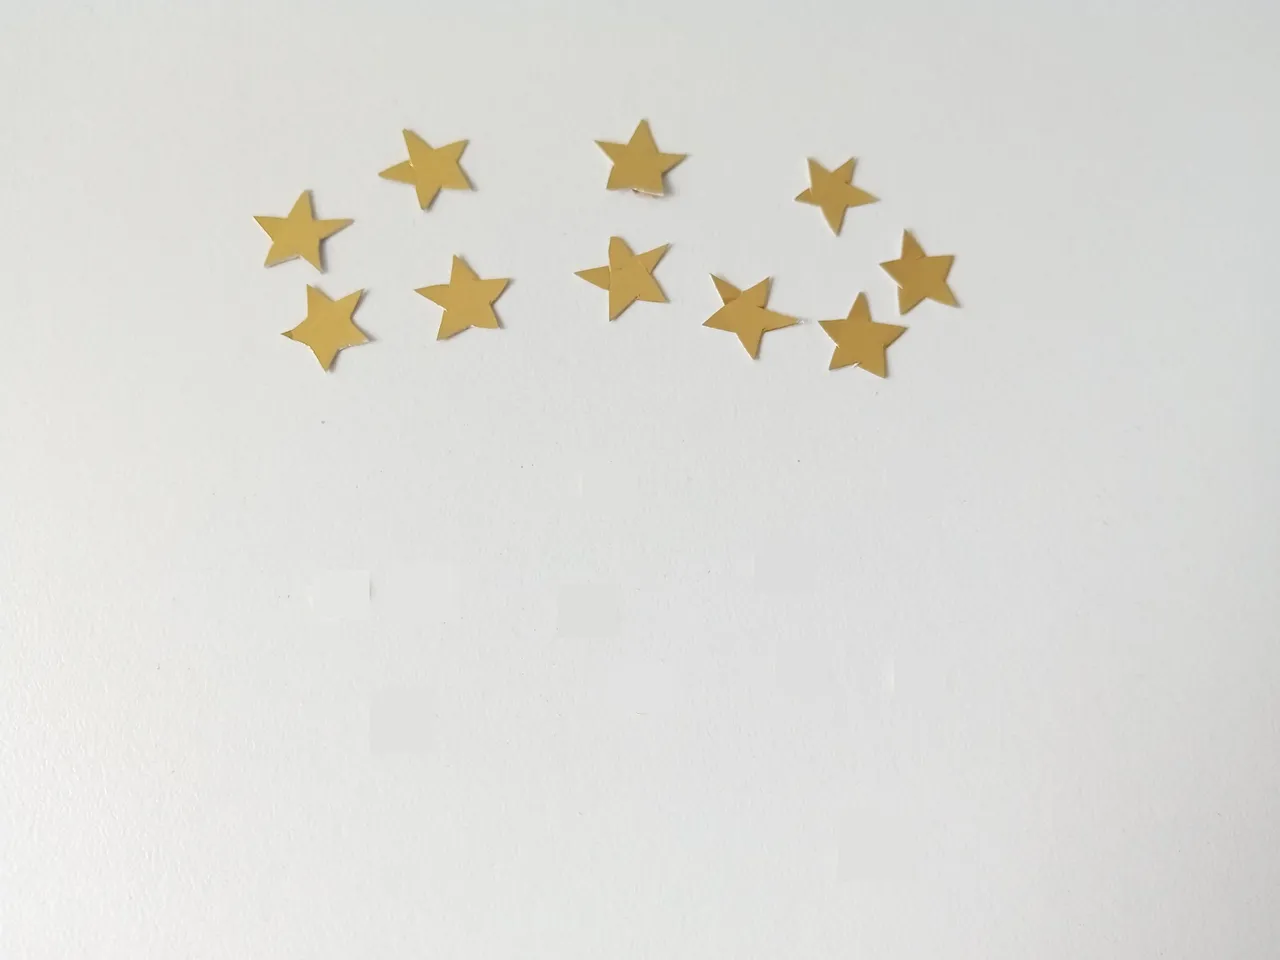
- PASO 7:
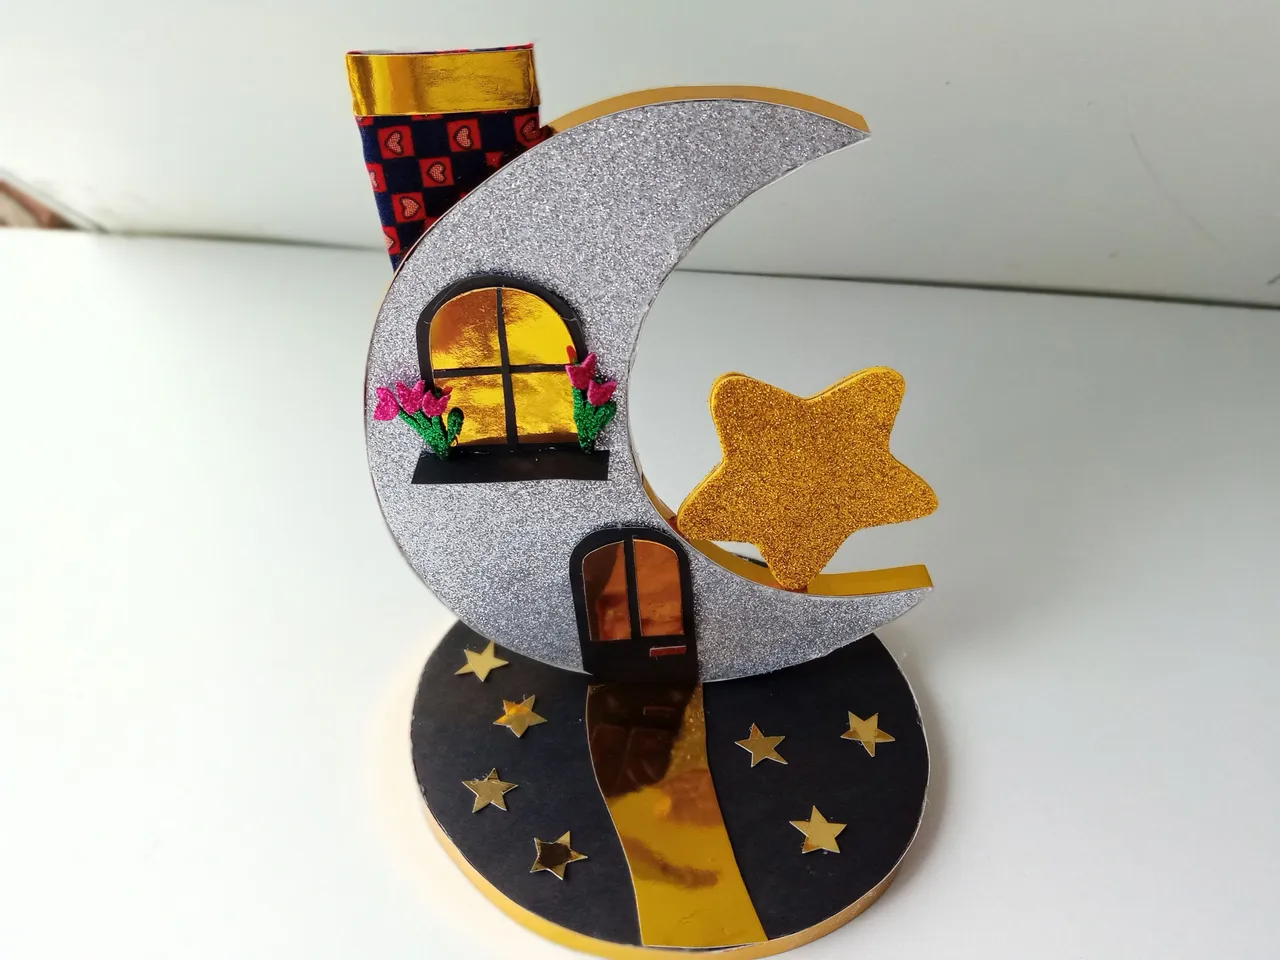
Para la base, quise hacer una especie de galaxia, así que solo dibujé, corté y pegué unas estrellas e hice un caminito, que pegué frente a la puerta.
- STEP 7:
For the base, I wanted to make a kind of galaxy, so I just drew, cut and pasted some stars and made a little path, which I glued in front of the door.
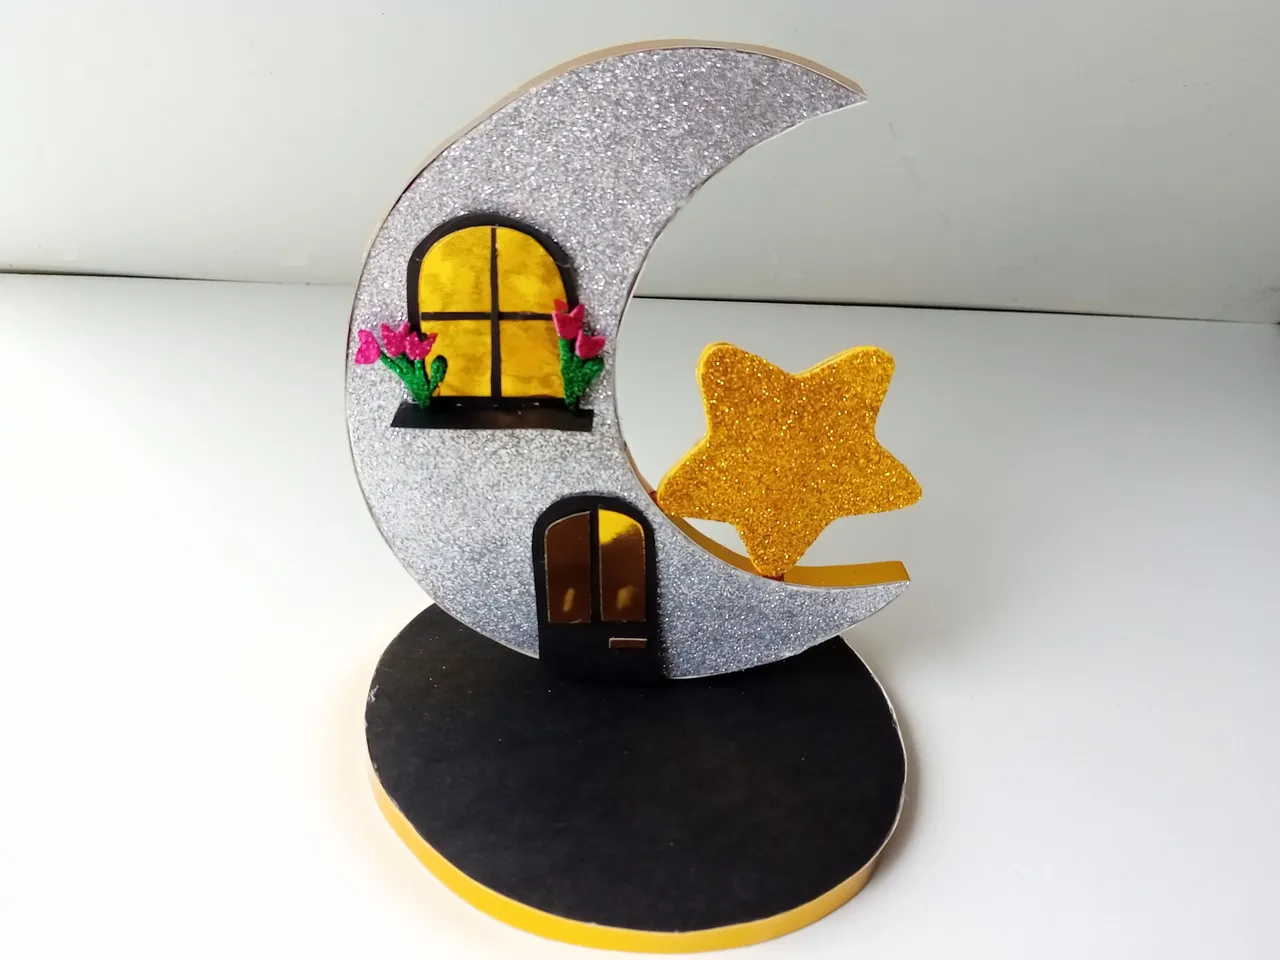
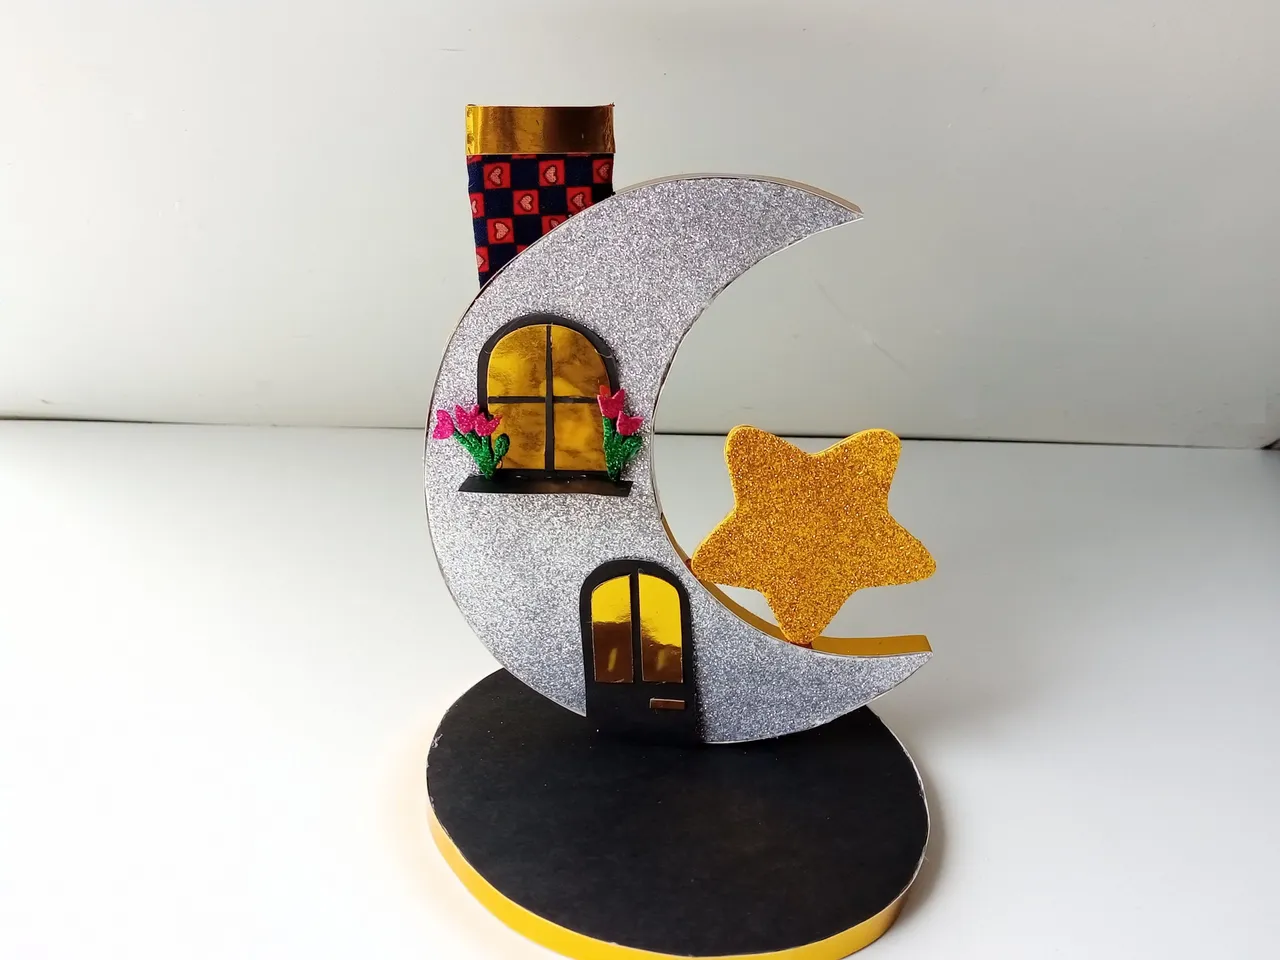
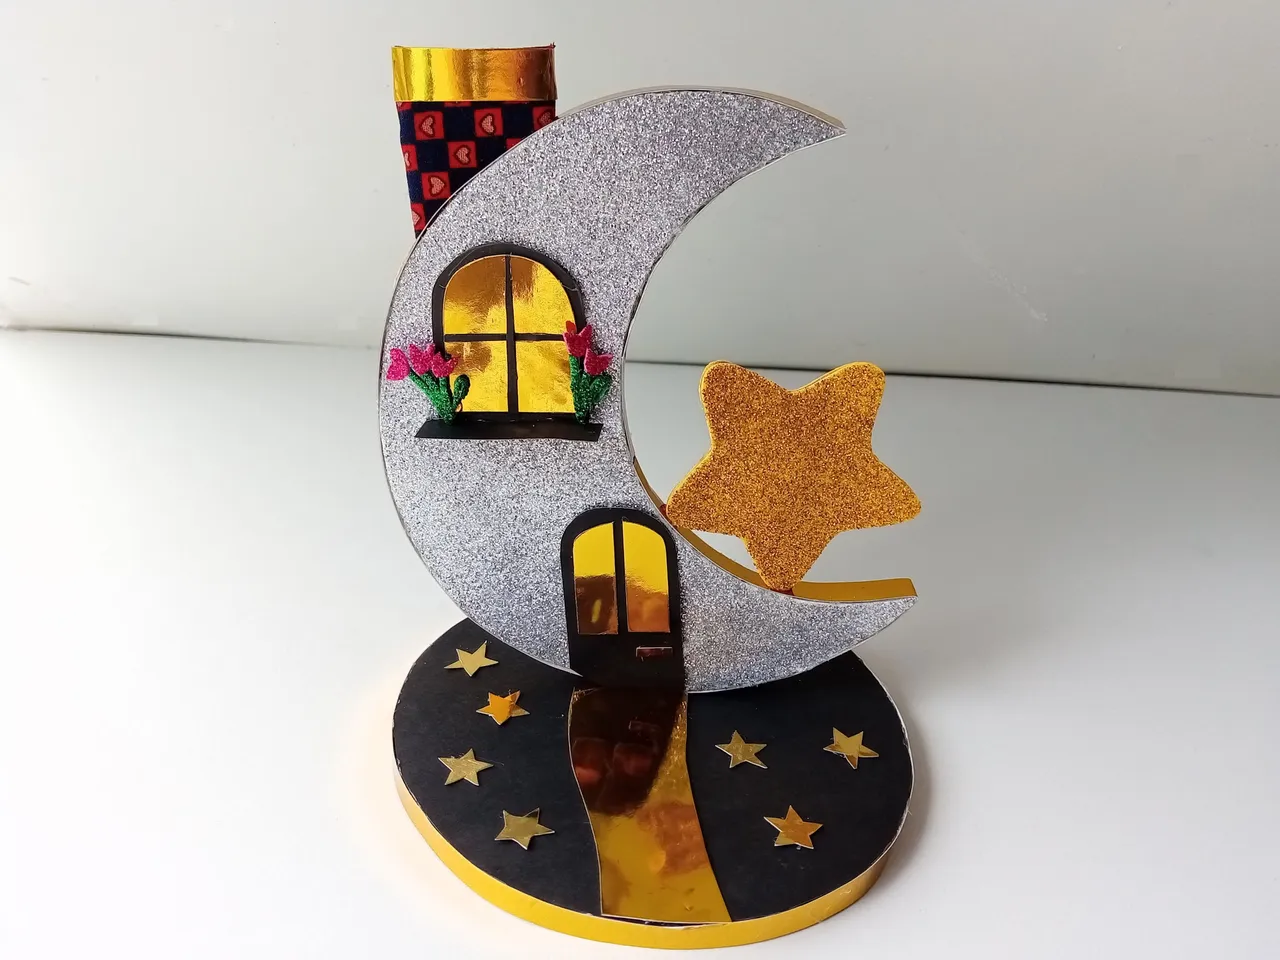
✨🌙¡Y listo!🌙✨ Esta fue mi entrada para el concurso del mes en la comunidad #diyhub. La verdad que quedé fascinada, me encanta trabajar en este tipo de manualidades con pequeños detalles que le dan un aspecto bonito. Me parece una gran idea para decorar la habitación de un niño, como adorno para la mesa o simplemente donde más te guste colocarlo. Espero que les haya gustado mi participación y se animen a desarrollar esta pequeña idea.
❤️Hasta la próxima publicación.
✨🌙¡And ready!🌙✨ This was my entry for the contest of the month in the #diyhub community. The truth is that I was fascinated, I love working on this type of craft with small details that give a nice look. I think it's a great idea to decorate a child's room, as an ornament for the table or simply where you like to place it. I hope you liked my participation and are encouraged to develop this little idea.
❤️Until the next post.
✨RESULTADO: | ✨RESULT:
🐦 Twitter
!TE DESEO UN GRAN DÏA¡
Todas las fotografías son de mi propiedad.
Separador y Fotos editadas en Canva
!I WISH YOU A GOOD DAY
All photographs are my property.
Photos edited in Canva