Hola, holaaa!! Artistas Creativos de la comunidad hivediana, como se sienten cuando apenas faltan ochenta y un día para navidad? Seguro que están muy bien, bueno ustedes pensaran que es muy pronto para andar hablando de navidad, pero les puedo decir que por esta comunidad hay mucho entusiasmo al respecto. Fíjense hoy fue el Día Internacional De La Niña y a pesar que lo festejamos para beneplácito de todas nuestras chiquitas, tenía un ambiente navideño las comidas fueron hallacas, bollitos pelones, pasticho y el postre dulce de lechoza y torta negra entre otras cosas.
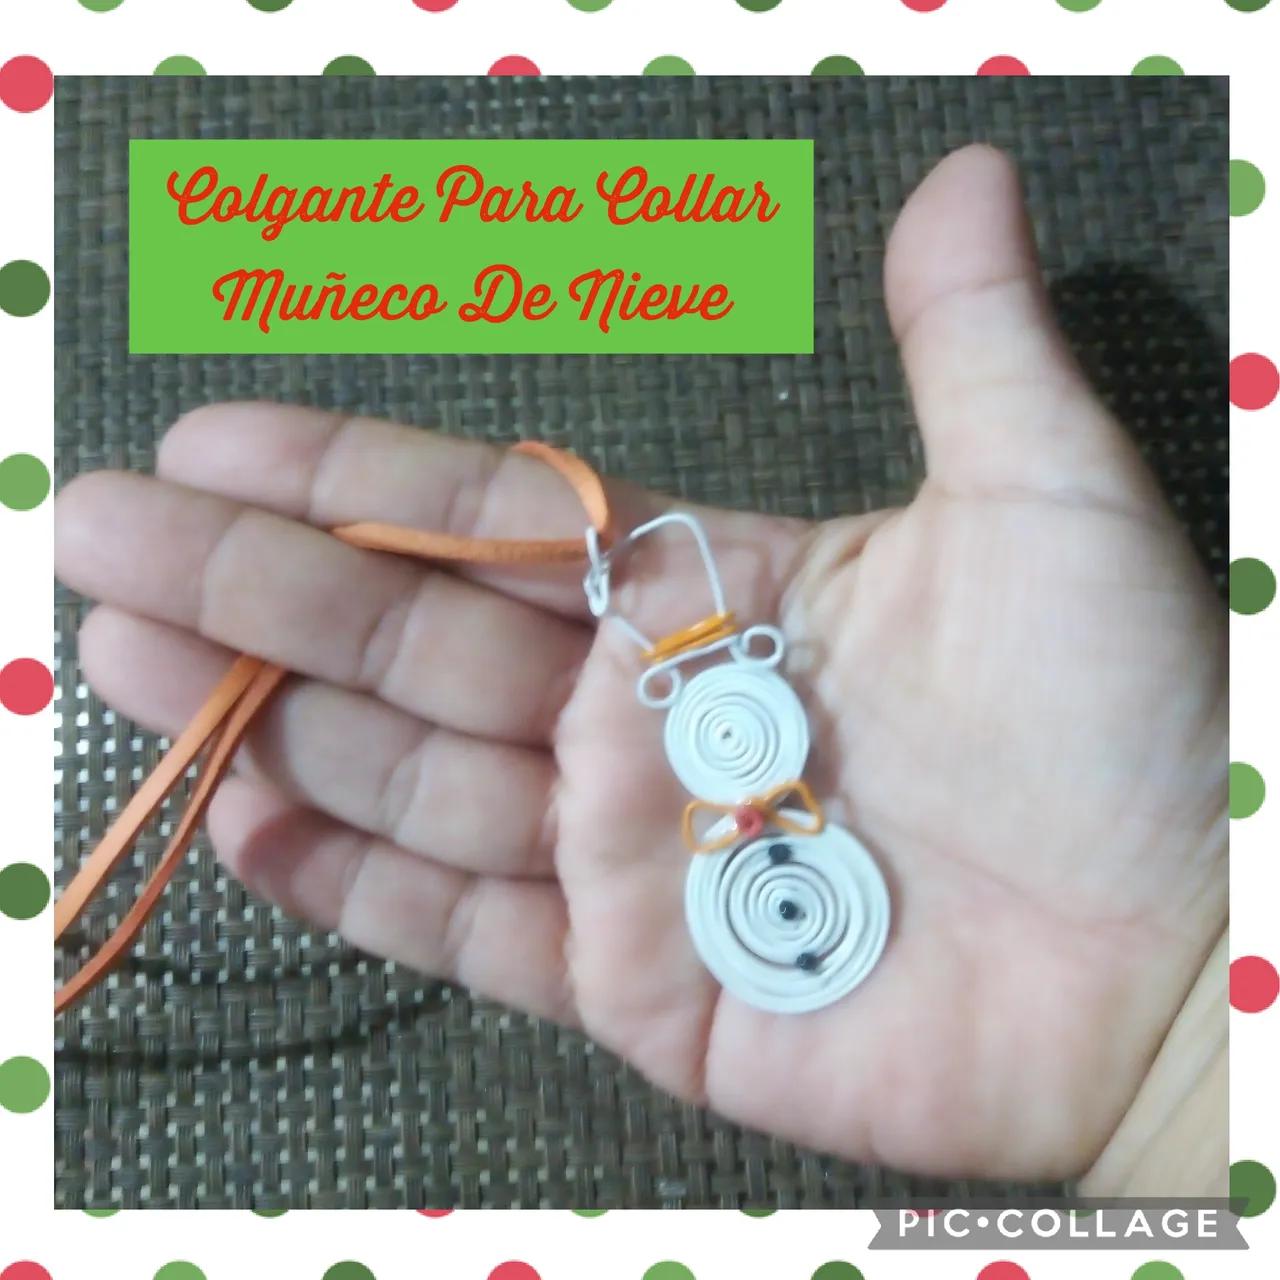
Lo más cumbre de todo es que estamos haciendo bisutería y adornos con motivos de navidad, en mi caso la mayoría son encargos, es por eso que hoy les traigo un Colgante con temática del Muñeco de Nieve, pues es uno de los favoritos cuando de navidad se trata; no podía dejar de compartirlo; aquí les dejo el paso a paso, los convido a seguir leyendo para que se enteren de cómo lo hice:
Hello, hello!! Creative Artists of the Hivedian community, how do you feel when there are barely eighty-one days left until Christmas? I'm sure they're very good, well you may think that it's too early to talk about Christmas, but I can tell you that there is a lot of enthusiasm in this community about it. Look today was the International Day of the Girl and although we celebrated it to the delight of all our little girls, it had a Christmas atmosphere, the meals were hallacas, bald buns, pasticho and the sweet dessert of papaya and black cake among other things.
The most important thing of all is that we are making jewelry and decorations with Christmas motifs, in my case most of them are commissions, that is why today I bring you a Snowman-themed Pendant, because it is one of the favorites when Christmas it is about; I couldn't stop sharing it; Here I leave the step by step, I invite you to continue reading so you can find out how I did it:
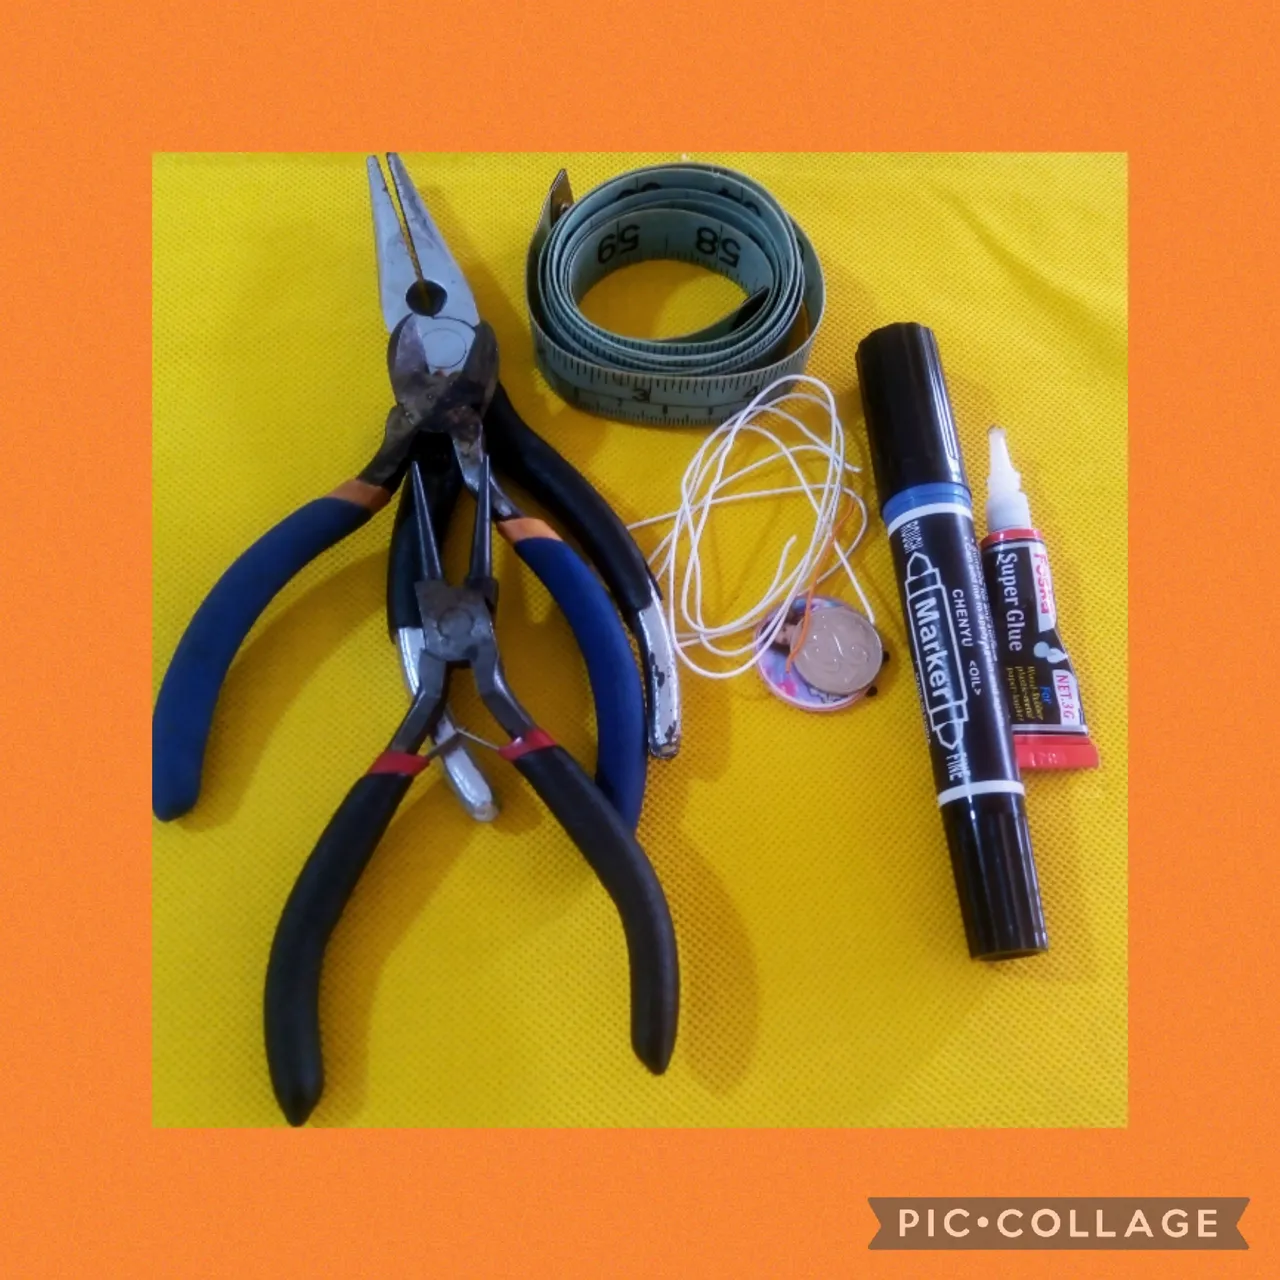
PARA LA ELABORACIÓN DE ESTE MUÑECO DE NIEVE USÉ LOS SIGUIENTES MATERIALES
*Alambre blanco que saque de un pedazo de cable de fibra óptica que ya no se usaba.
*Alambre naranja, que lo obtuve de la misma manera.
*Una chaquira roja.
*Tres mostacillas negras
*Cuero naranja cuadrado.
*Pega instantánea.
*Cinta métrica.
*Pinza de corte.
*Pinza redonda.
*Pinza plana.
FOR THE DEVELOPMENT OF THIS SNOWMAN I USED THE FOLLOWING MATERIALS:
*White wire taken from a piece of fiber optic cable that was no longer in use.
*Orange wire, which I got the same way.
*A red bead.
*Three black beads
*Square orange leather.
*Instant paste.
*Measuring tape.
*Cutting pliers.
*Round clamp.
*Flat clamp.
PARA ELABORAR ESTE MUÑECO DE NIEVE USÉ LOS PASOS QUÉ DETALLO A CONTINUACIÓN:
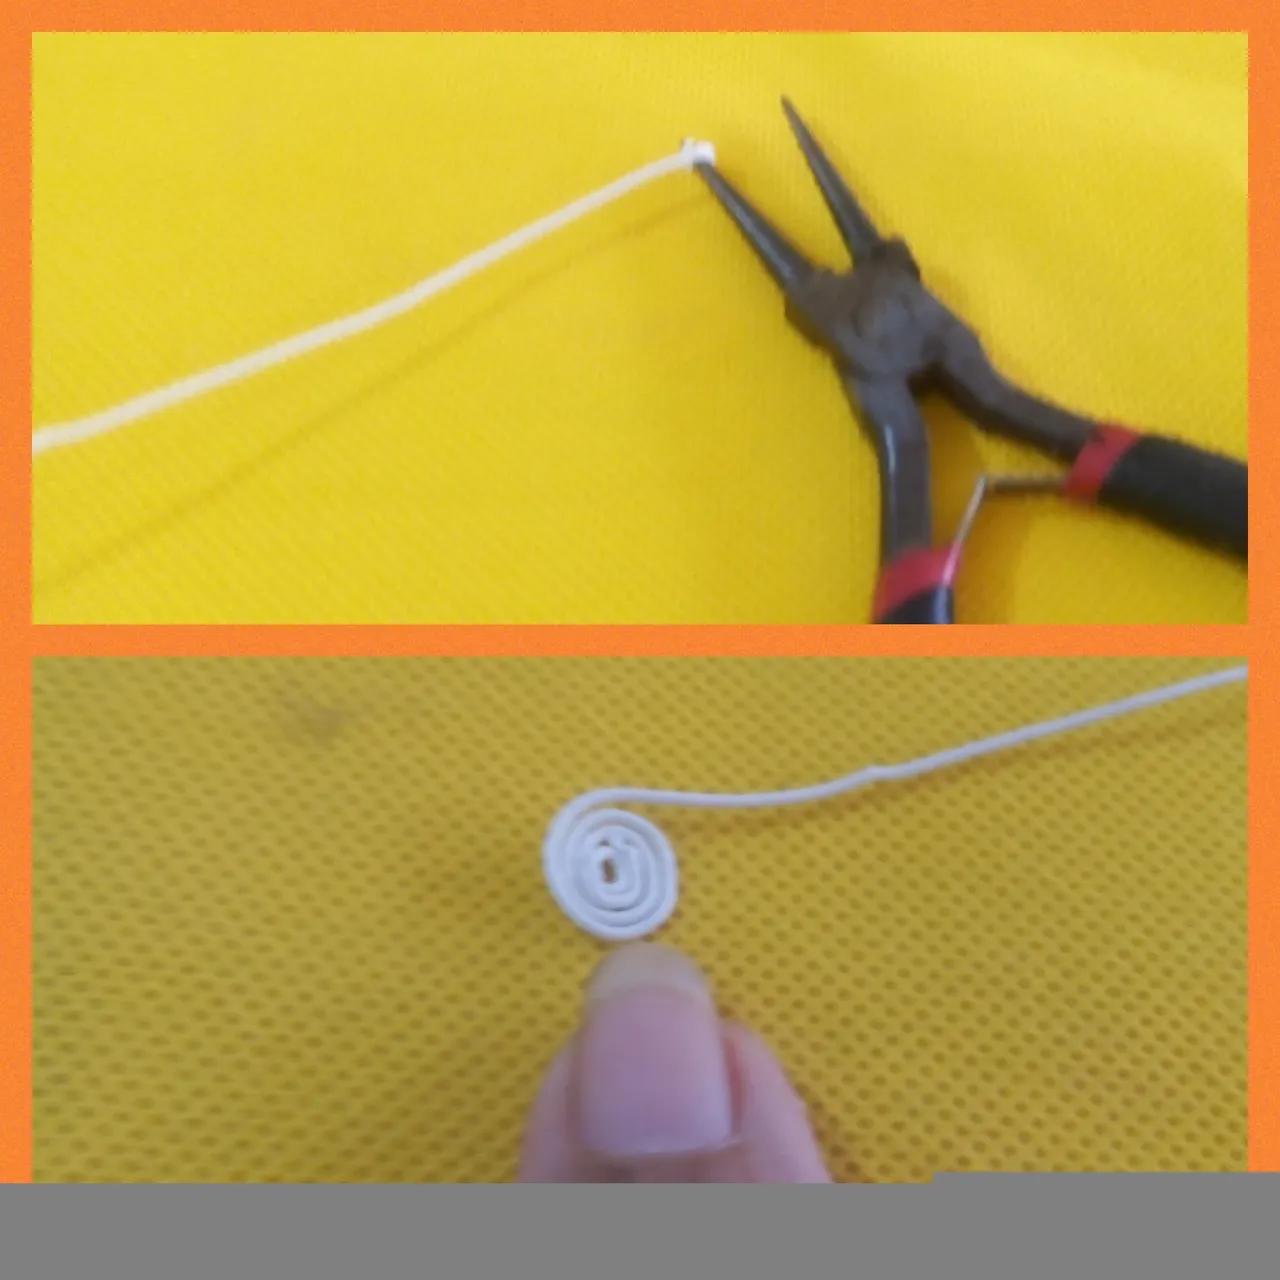
PRIMER PASO:
Para la elaboración del primer paso; usando el alambre blanco corto dos trozos que mido con la cinta métrica, uno de cincuenta centímetros y el otro de veinticinco centímetros (ver fotos).
TO MAKE THIS SNOWMAN I USE THE STEPS WHICH I DETAIL BELOW:
FIRST STEP:
For the elaboration of the first step; Using the white wire, I cut two pieces that I measure with the tape measure, one fifty centimeters and the other twenty-five centimeters (see photos).

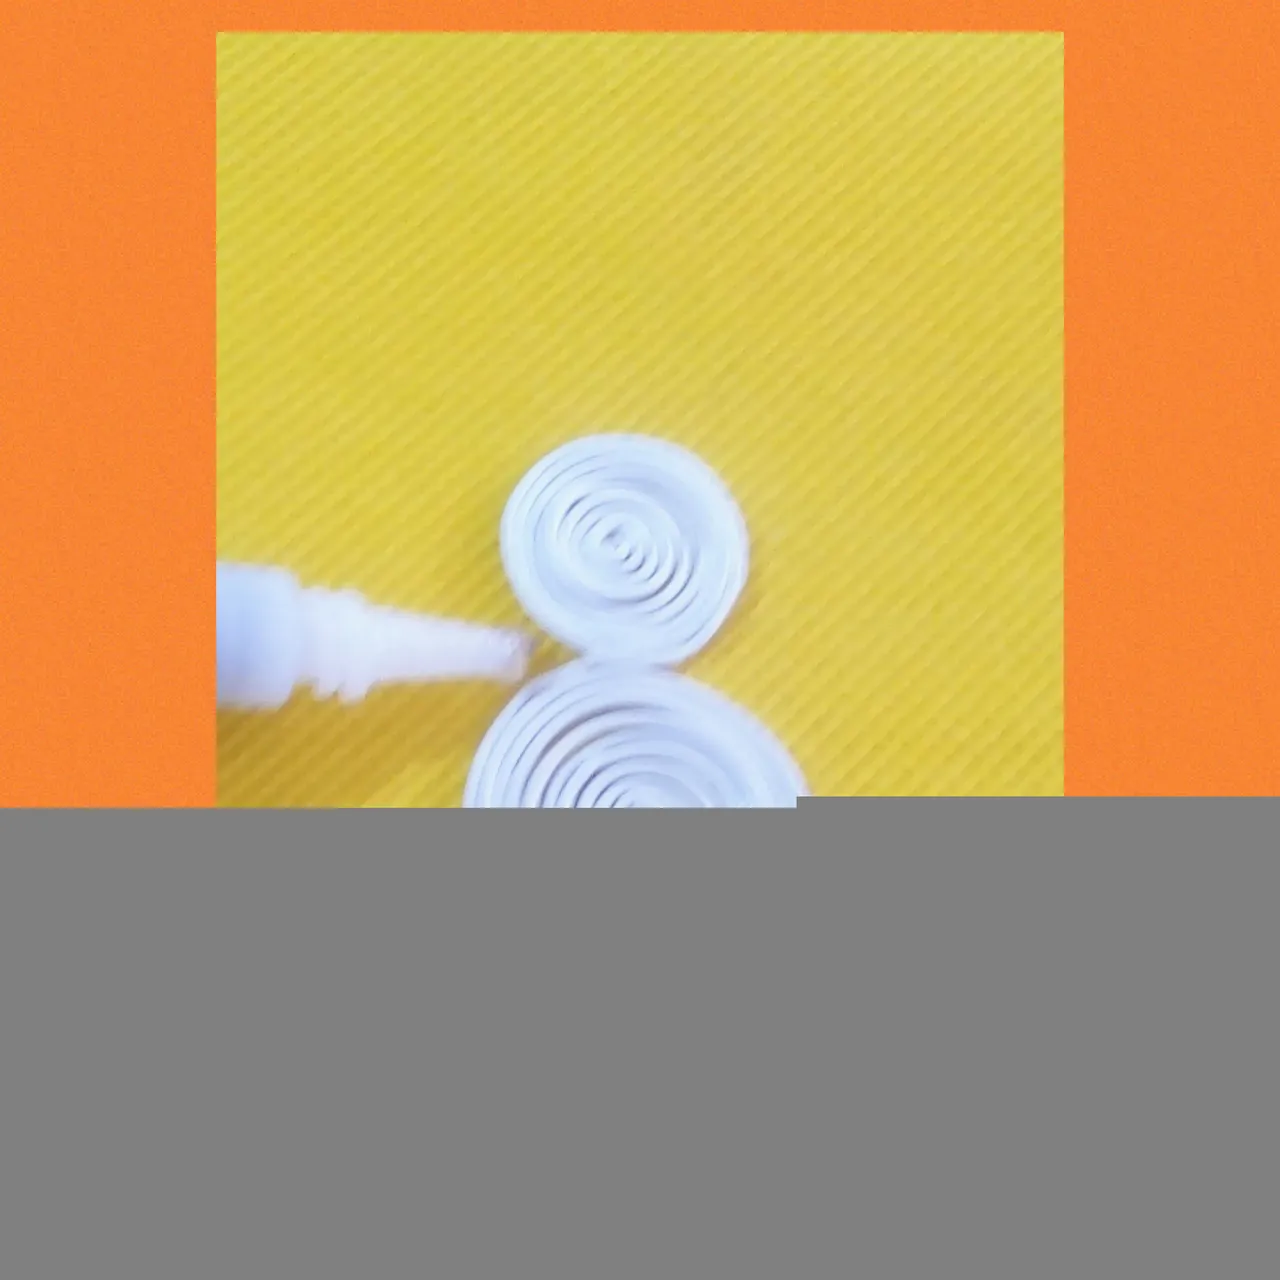
SEGUNDO PASO:
En este paso voy a usar la pinza redonda, con el alambre de cincuenta centímetros hago un círculo pequeño, que luego voy haciendo un espiral moldeandolo con las manos hasta llegar al tamaño dedeseado, en este caso usé como molde un botón, luego con el otro trozo de alambre blanco de veinticinco centímetros repito igual operación, únicamente que el molde que utilice es una moneda más pequeña que el botón.
Así quedan dos piezas con las cuales formaré el muñeco de nieve (ver fotos).
SECOND STEP:
In this step I am going to use the round clamp, with the fifty centimeter wire I make a small circle, which I then make a spiral molding with my hands until I reach the desired size, in this case I used a button as a mold, then with the other piece of white wire of twenty-five centimeters I repeat the same operation, only that the mold I use is a coin smaller than the button.
So there are two pieces left with which I will form the snowman (see photos).
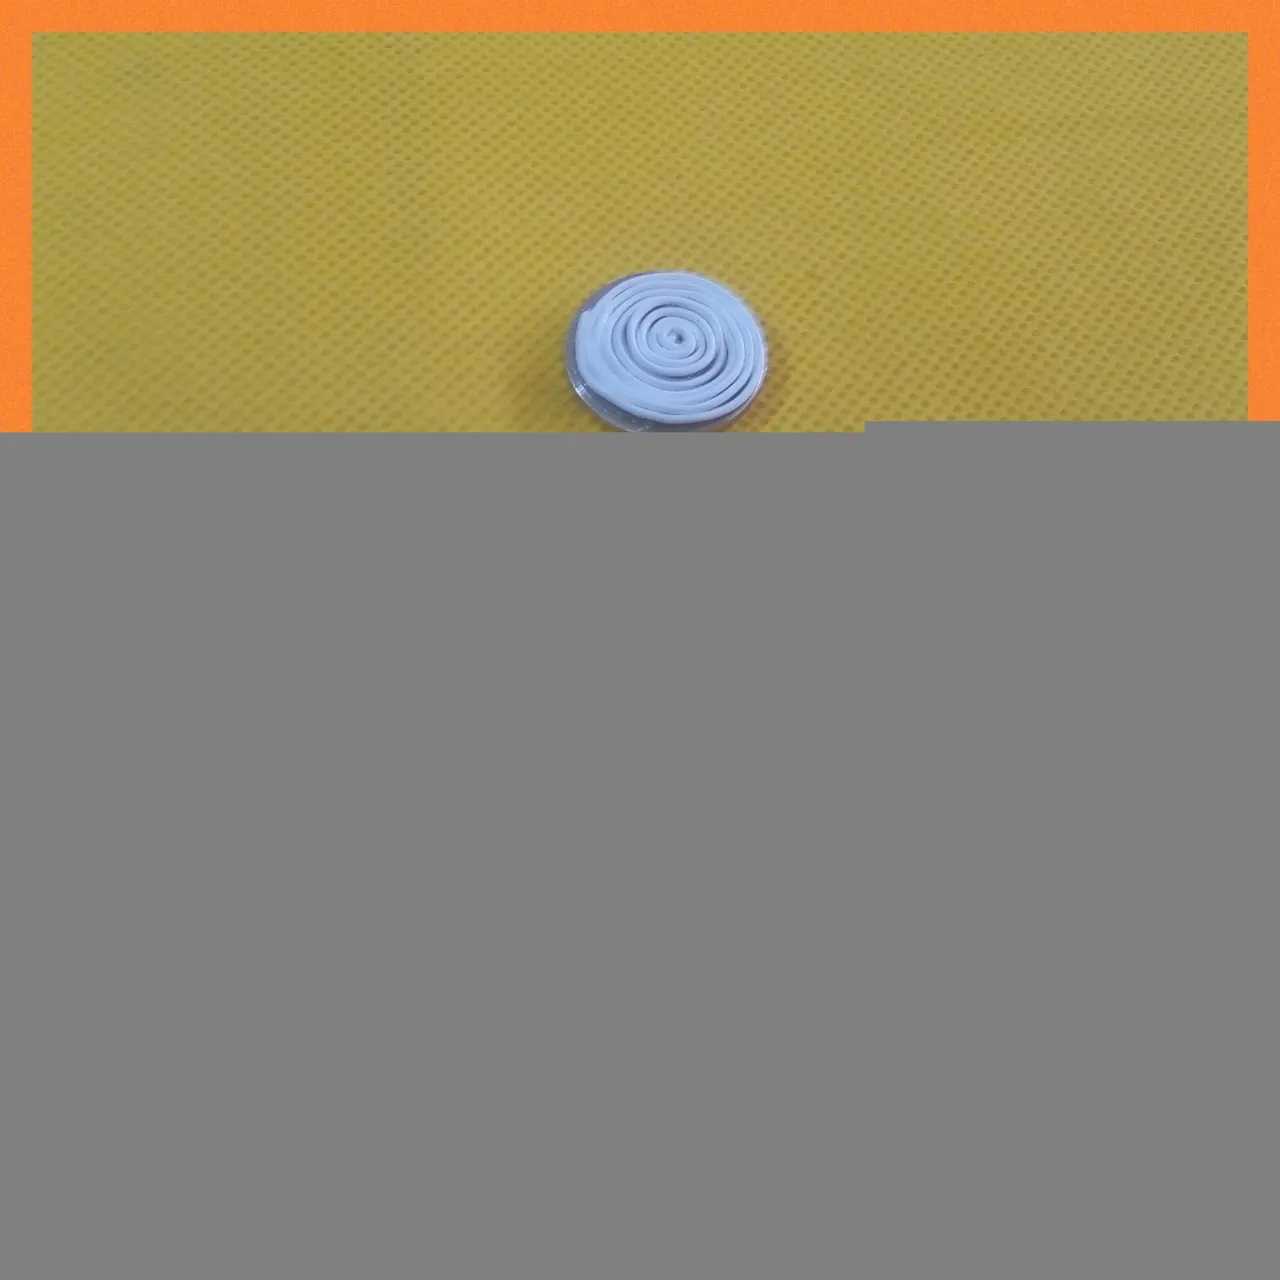
TERCER PASO:
Ahora voy a tomar las dos piezas de alambre blanco en forma de espiral y usando la pega instantánea las voy a unir como se ve en las fotos
THIRD STEP:
Now I am going to take the two pieces of white wire in the form of a spiral and using the instant glue I am going to join them as seen in the photos
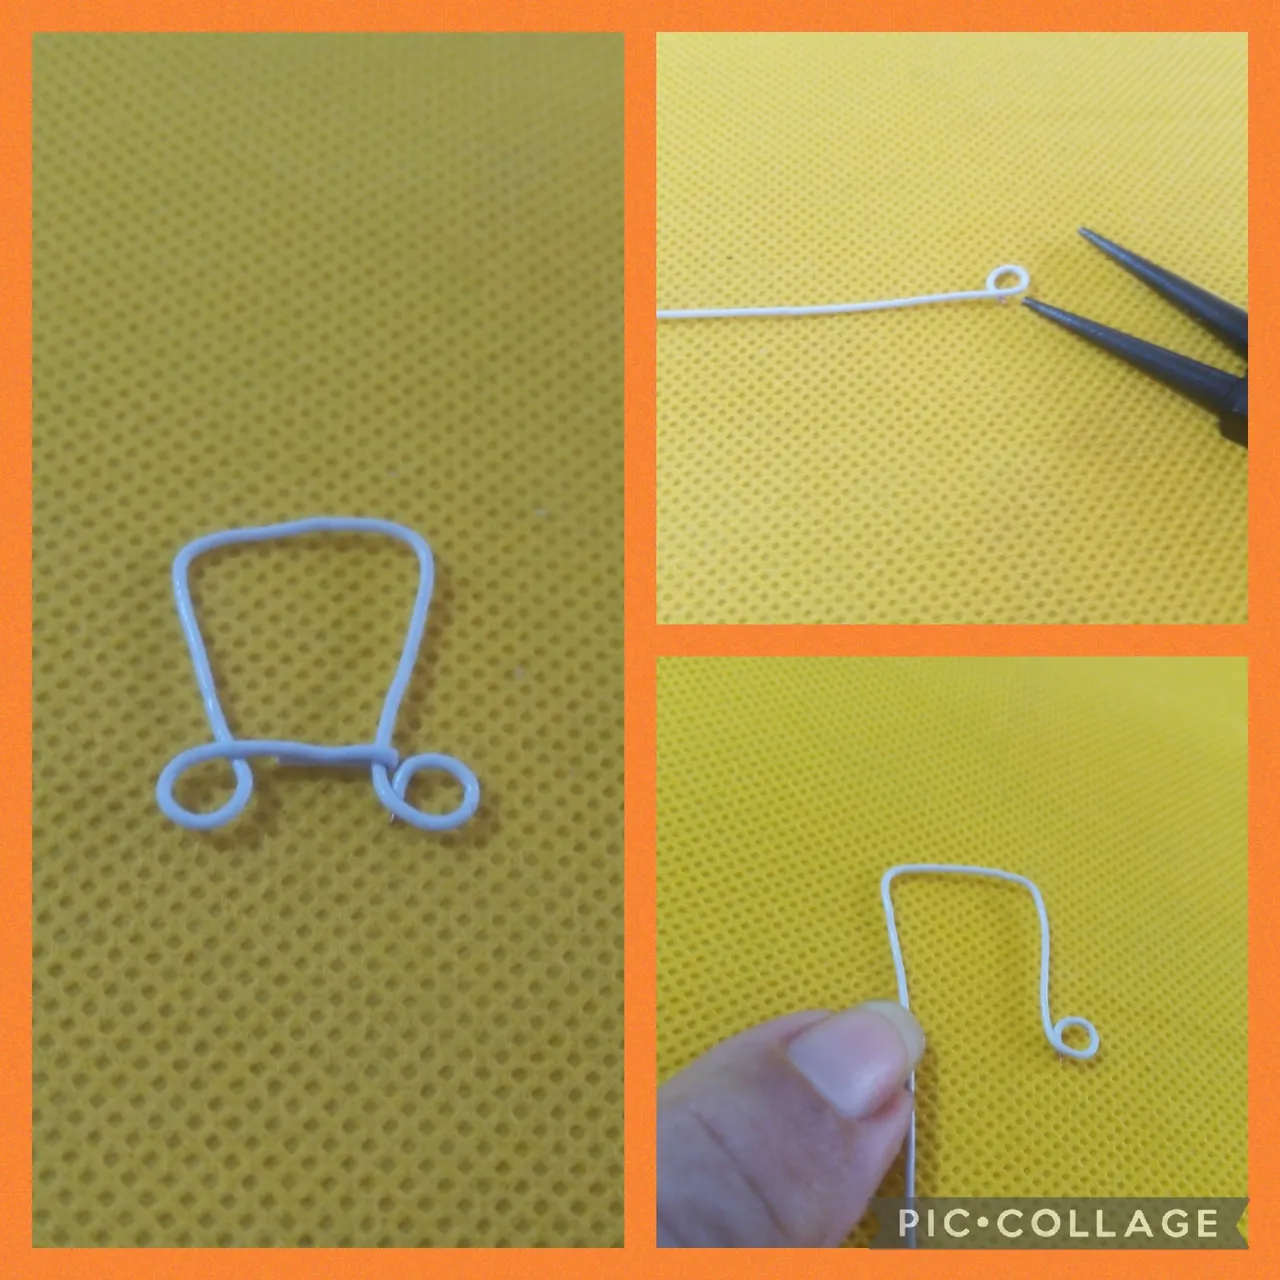
CUARTO PASO:
En este paso voy a elaborar el sombrero del muñeco de nieve, para ello tomo un pedazo de alambre blanco de 8 centímetros; empiezo con la pinza redonda y realizamos un anillo luego subo dos centímetros y medio y hago un doblez hacia la izquierda, doblo de nuevo y bajo de nuevo dos centímetros y medio, ahora realizó otro anillo como el anterior paso el alambre y uno con el anillo anterior. Con la pinza de corte remato, ya forme mi sombrero (ver fotos)
FOURTH STEP:
In this step I am going to make the snowman's hat, for this I take a piece of white wire of 8 centimeters; I start with the round clamp and we make a ring, then I go up two and a half centimeters and make a fold to the left, bend again and go down again two and a half centimeters, now I made another ring like the previous one, I pass the wire and one with the ring previous. With the cutting clamp, I finished my hat (see photos)
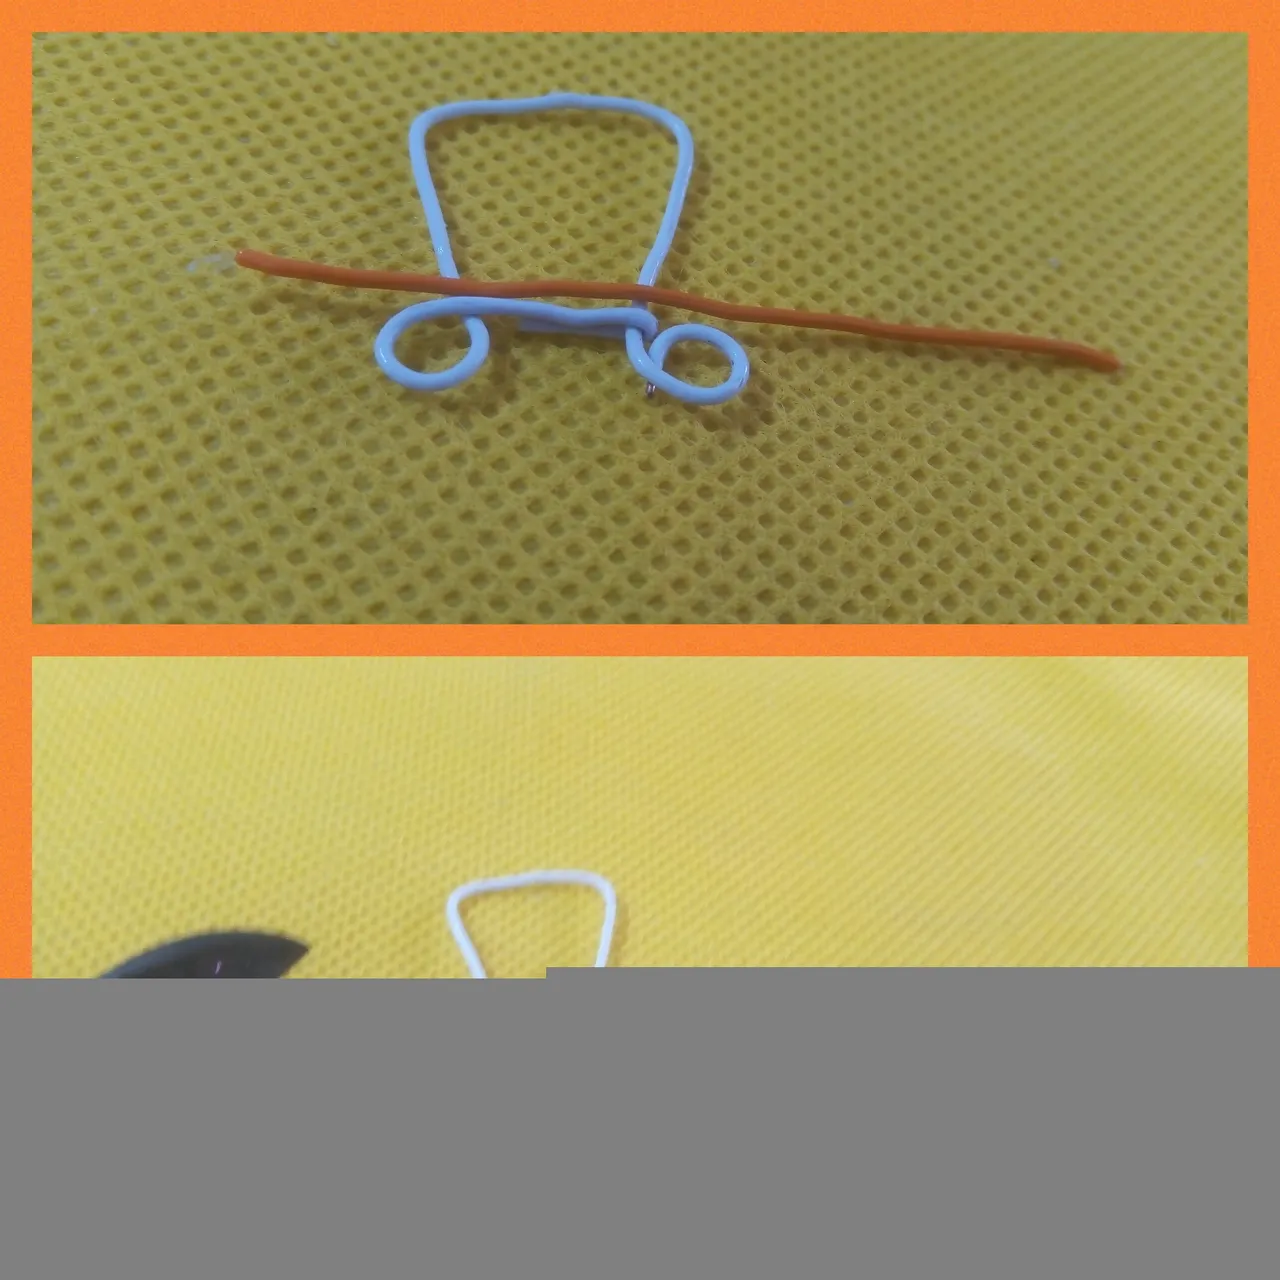
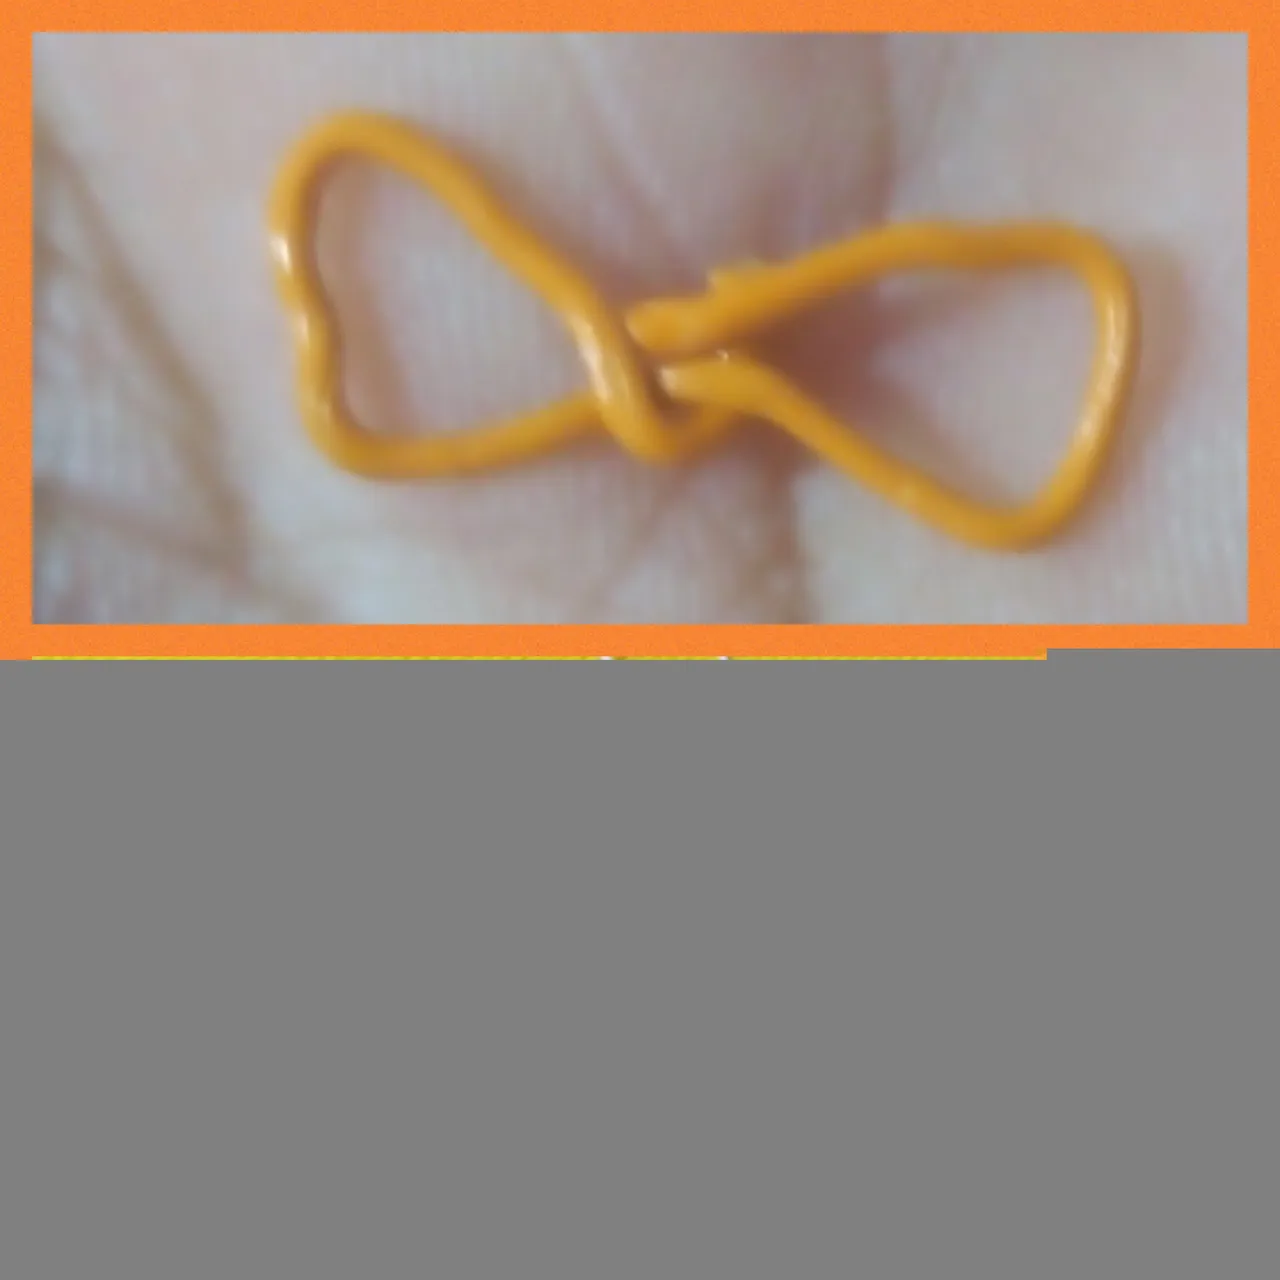
QUINTO PASO:
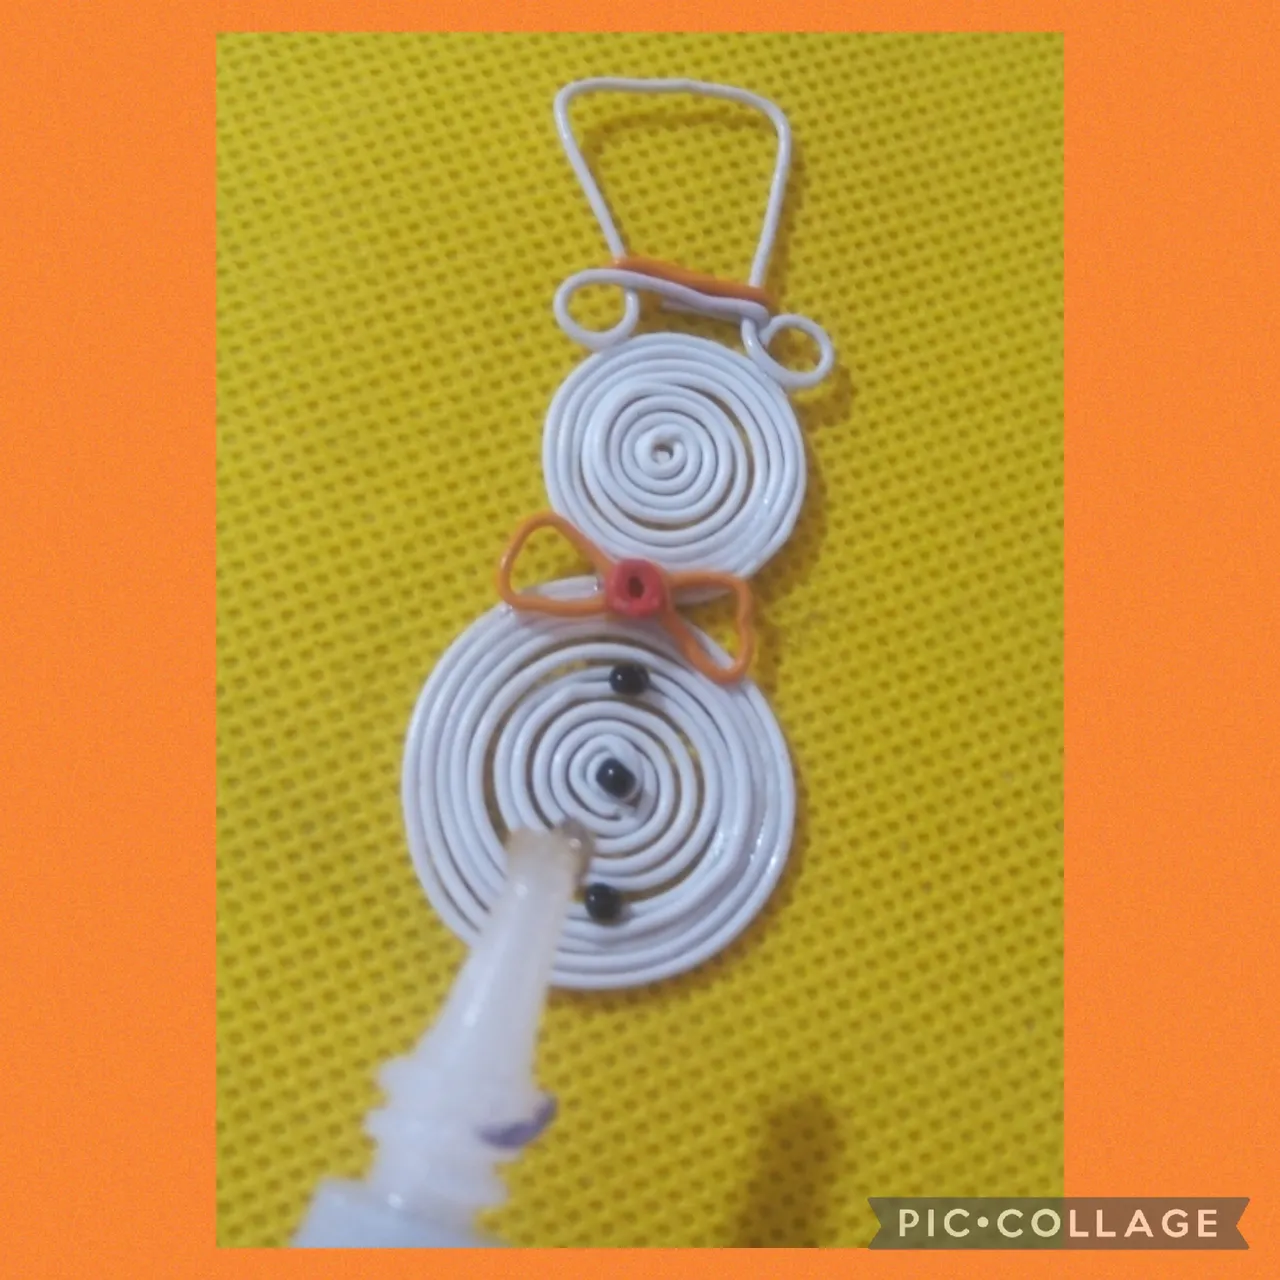
En este paso para darle un detalle de color al sombrero uso alambre naranja y paso por la copa para que simule una especie de cinta, así como se ve en las fotos, de nuevo uso la pinza de corte y remato, ahora de nuevo con alambre naranja realizó un lazo y con la pega instantánea lo coloco en el cuello. Así mismo con la pega instantánea pongo las tres mostacillas negras y de esta forma termino el muñeco de nieve.
FIFTH STEP:
In this step, to give a color detail to the hat, I use orange wire and go through the crown to simulate a kind of ribbon, as seen in the photos, again I use the cutting and finishing pliers, now again with wire. Orange made a bow and with the instant glue I placed it on the neck. Also with the instant glue I put the three black beads and in this way I finish the snowman.
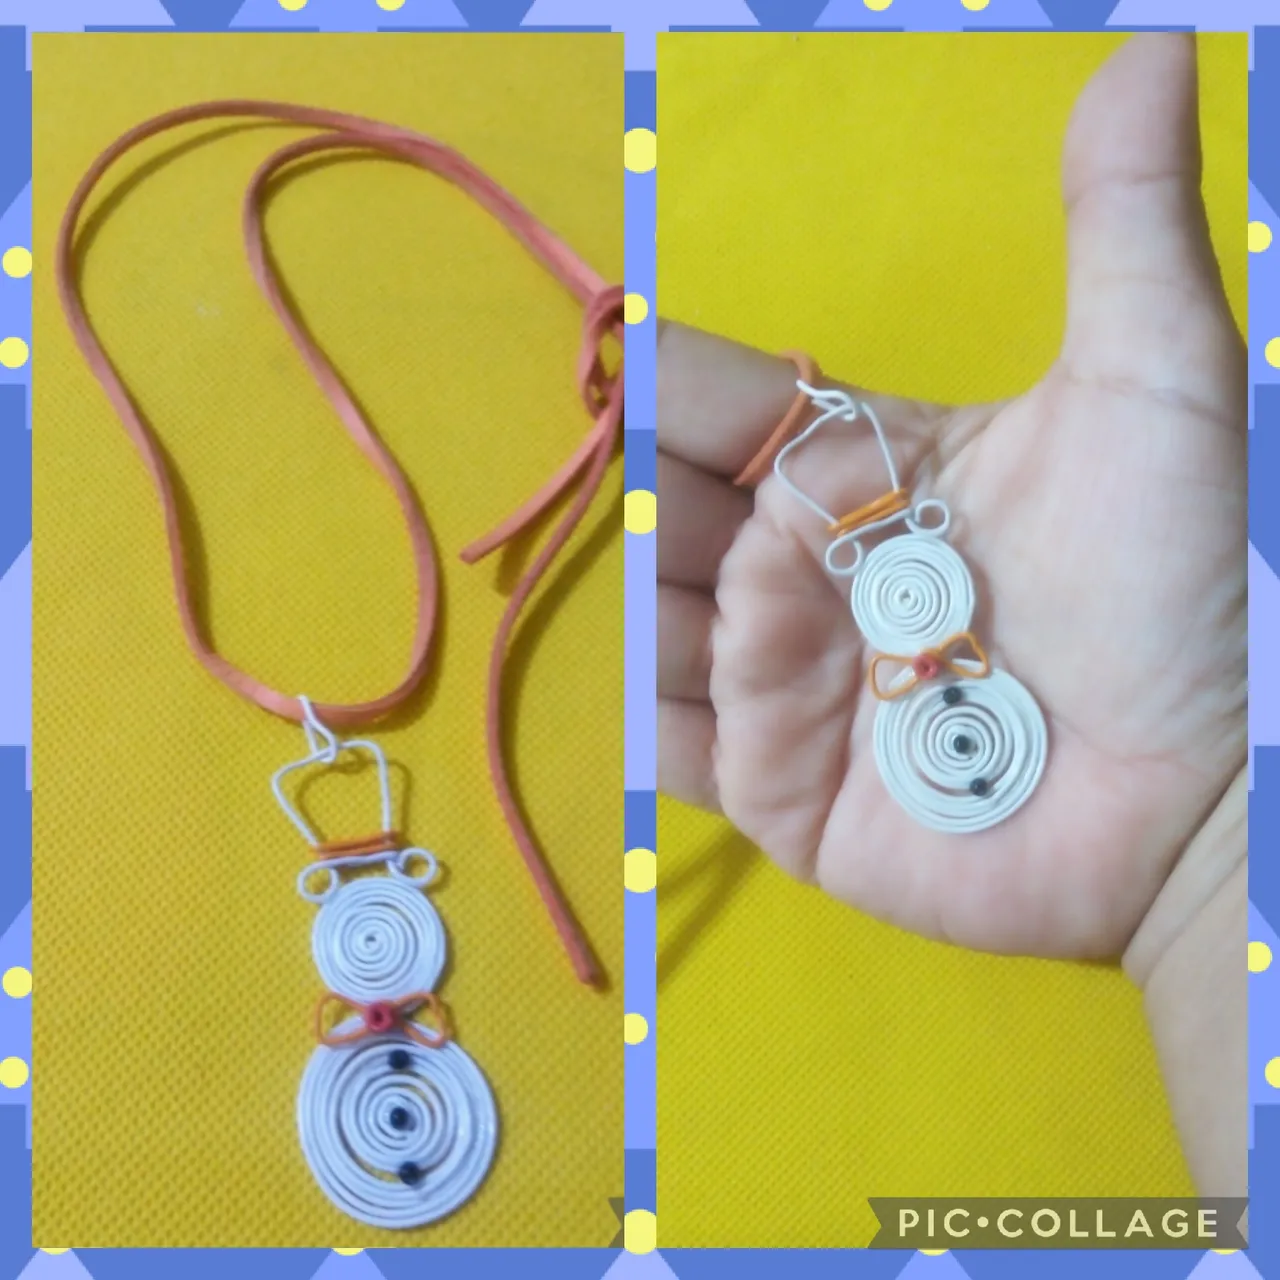
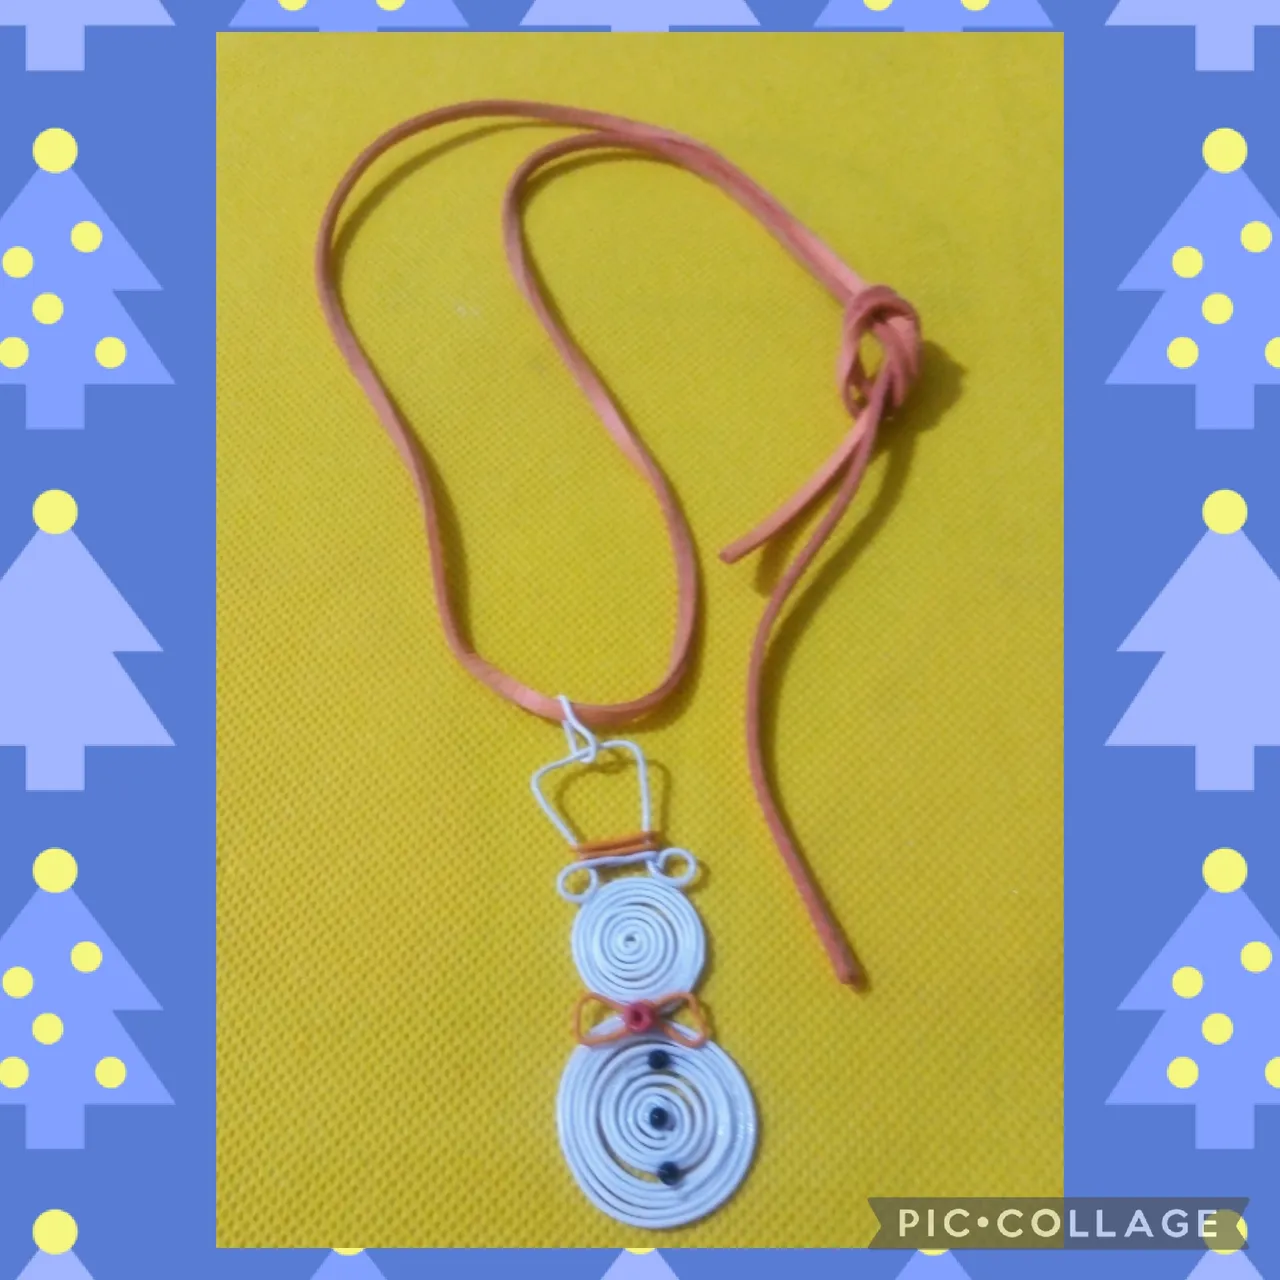
Artesanos de la creatividad, este es el resultado final de mi manualidad de hoy Un Colgante con temática Muñeco de Nieve, parte de los accesorios que estoy realizando para los regalos y detalles de la comunidad.
Espero que está idea sea de su total agrado y realicen sus colgantes ; Yo le coloque un cuerito naranja pero ustedes pueden usar el color de su preferencia.
Gracias por leer y apoyar mis publicaciones, nos vemos en la próxima manualidad.
Artisans of creativity, this is the final result of my craft today A Snowman-themed Pendant, part of the accessories that I am making for the gifts and details of the community.
I hope that this idea is to your total liking and that you make your pendants; I put an orange skin on it but you can use the color of your choice.
Thanks for reading and supporting my posts, see you in the next craft.
Las imágenes de este tutorial son de mi propiedad las fotos fueron tomadas con mi celular Motorola E6 y las edite con una aplicación gratis del mismo.
Para traducir texto usé geogle traduuctor.
The images in this tutorial are my property, the photos were taken with my Motorola E6 cell phone and I edited them with a free application of the same.
To translate text I used geogle translator.