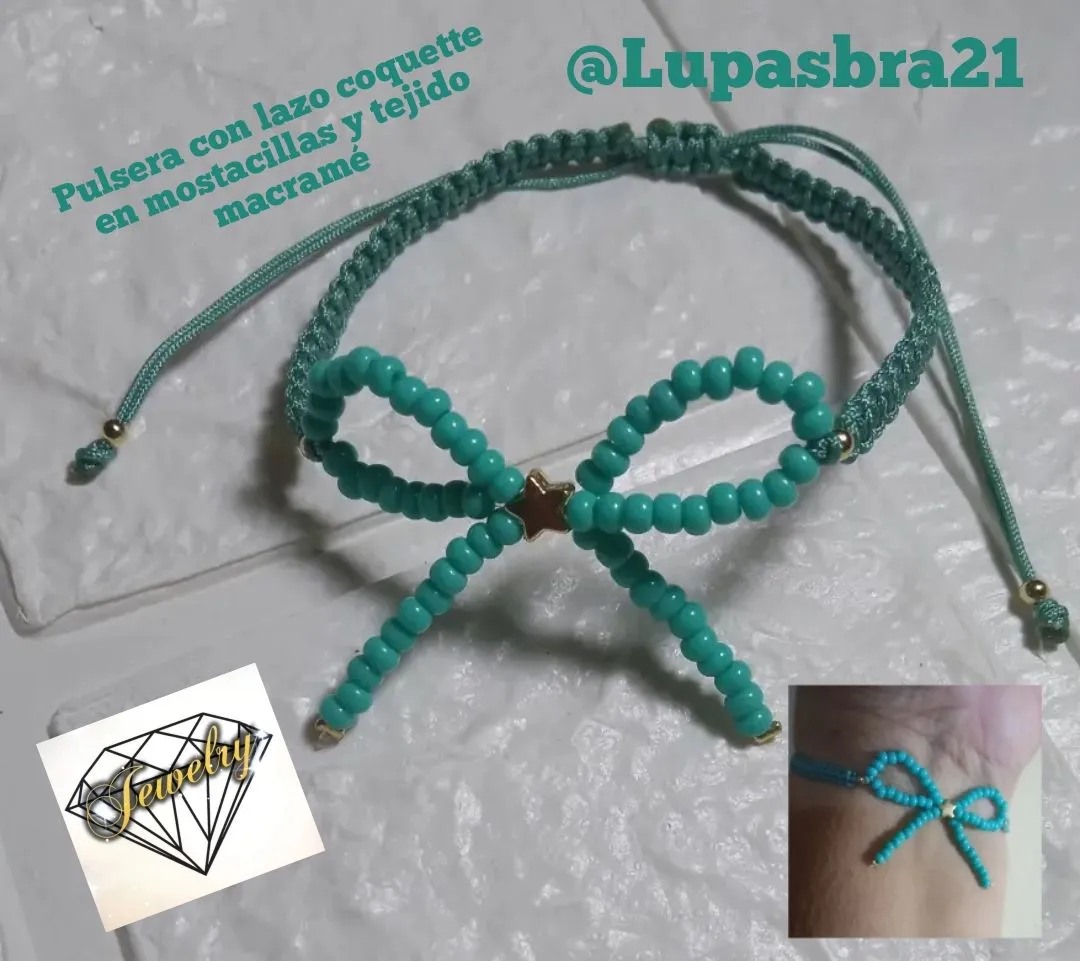
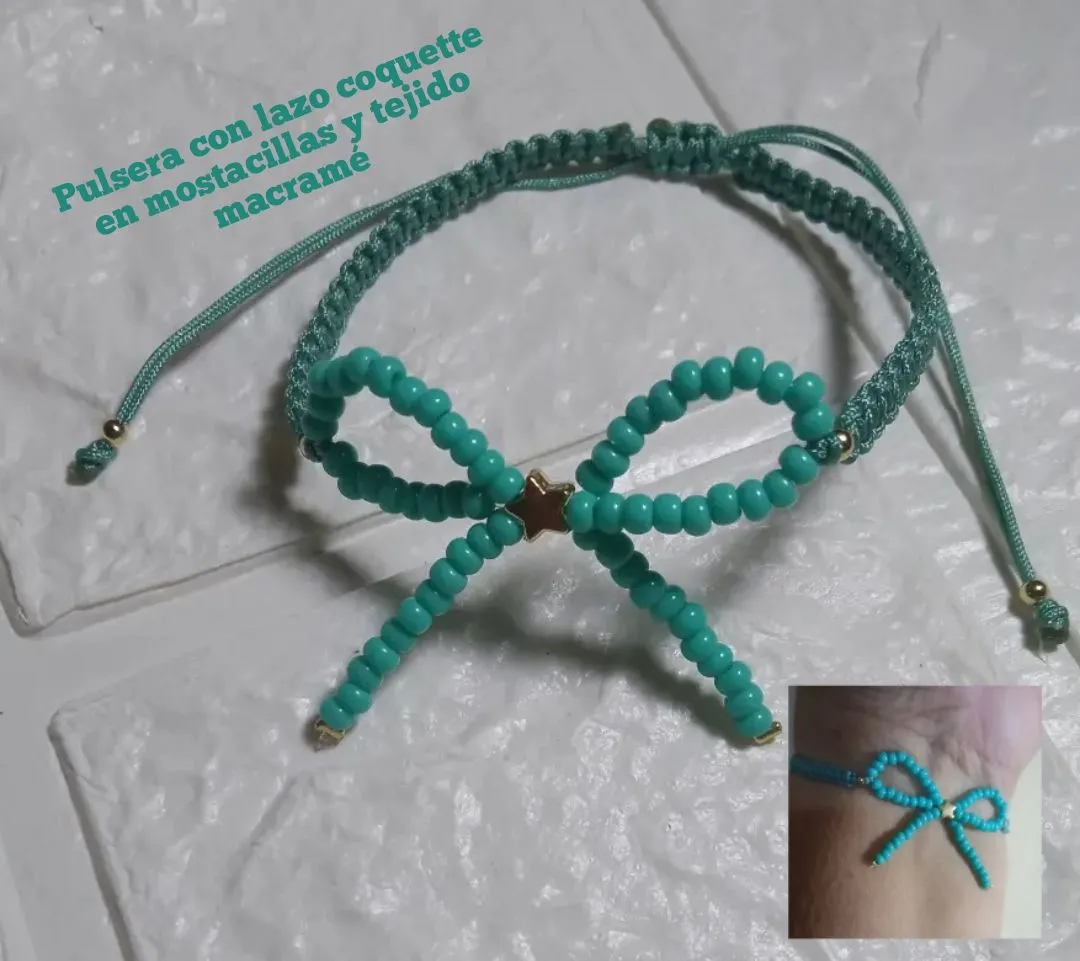
Hola, hola comunidad #hive y mi comunidad #jewelri cómo están todos? Deseo que estén bien, yo por acá con ustedes siguiendo con la moda en tendencia como lo es el lazo coquette, la verdad es una locura , en esta oportunidad lo realicé en mostacillas y tejido macramé la cual quedó muy bonita , yo ya he realizado una gargantilla o shoker en cristales, que también quedó espectacular y una pulsera el lazo tejido en macramé , también quedó muy bonita y ahora voy a mostrarle el paso a paso o tutorial de cómo realice la pulsera con lazo 🎀 coquette en mostacillas y en tejido macramé, se ven muy bonitas, y las he vendido mucho también, gracias a Dios 🙏 , la verdad estoy muy activa con la realización de accesorios, sobre todo me piden muchas pulseras ... Así que los invito quedarse hasta el final y ver el paso a paso de mi proyecto, a todos gracias por visitar mi blog y por sus comentarios.
Hello, hello #hive community and my #jewelri community, how are you all? I wish you are well, I'm here with you following the fashion trend as is the coquette bow, the truth is crazy, this time I made it in beads and macrame weaving which was very nice, I have already made a choker or shoker in crystals, which was also spectacular and a bracelet with the bow woven in macrame, it was also very nice and now I am going to show you the step by step or tutorial of how to make the bracelet with bow 🎀 coquette in beads and macrame weaving, they look very nice, and I have sold them a lot too, thank God 🙏 , the truth is I am very active with the realization of accessories, especially I am asked for many bracelets . .. So I invite you to stay until the end and see the step by step of my project, thank you all for visiting my blog and for your comments.
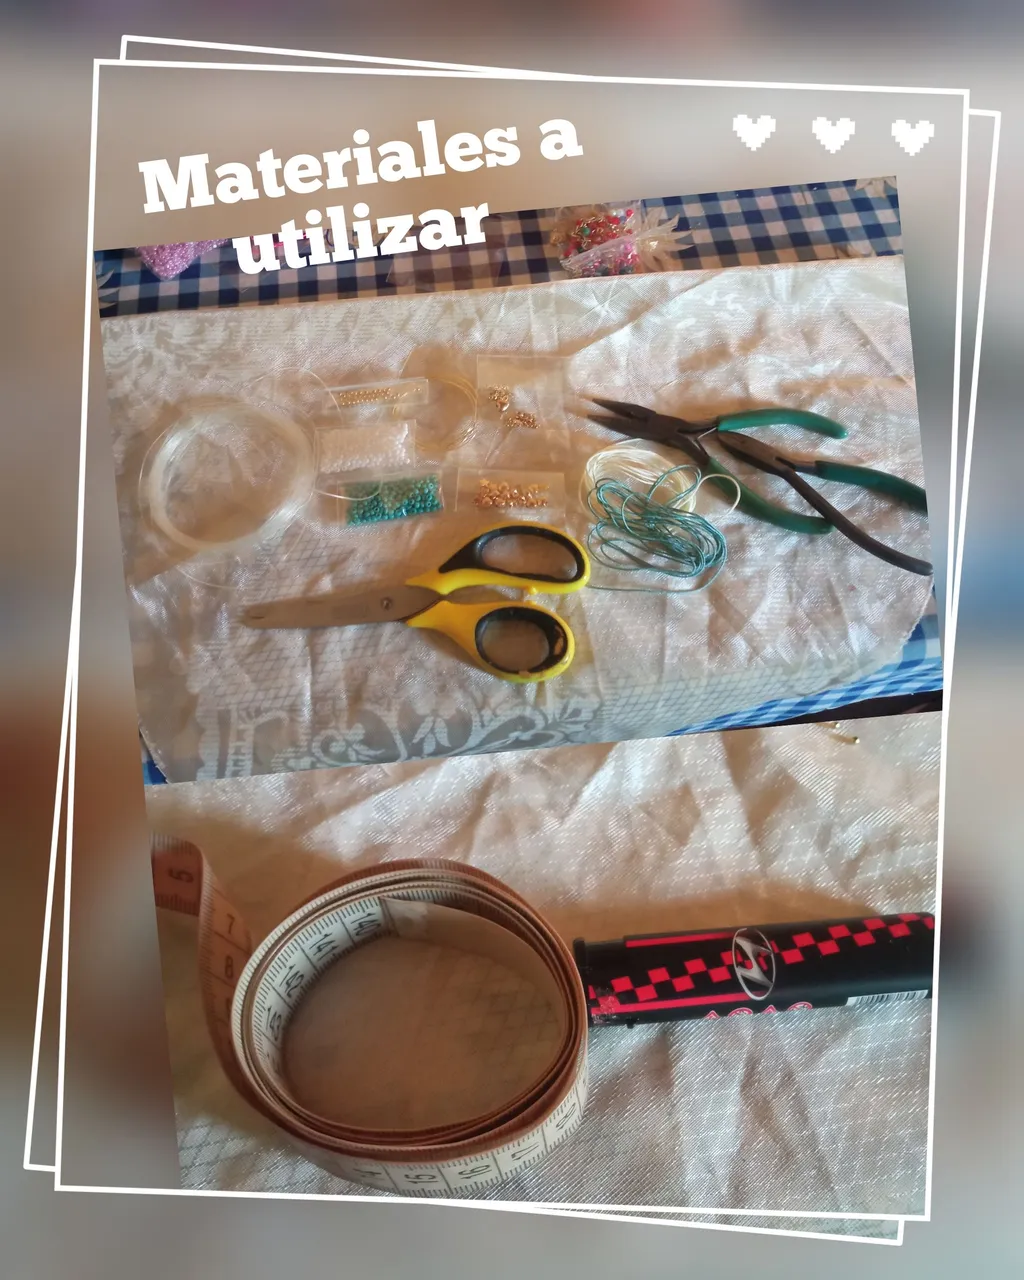
Materiales a utilizar
🎀 Mostacillas para Miyuki ya que son mostacillas calibradas , son excelentes para trabajar con ellas.
🎀 Hilo nylon.
🎀 2 grapas o escarlachin en goldfieeld.
🎀 Hilo chino.
🎀 4 balines en goldfieeld.
🎀 Tijeras.
🎀Yesquero o encendedor.
🎀 1 dije de estrella en goldfieeld.
🎀 Cinta métrica.
🎀 Pinza punta plana.
Materials to use
🎀 Miyuki beads as they are calibrated beads , they are excellent to work with.
🎀 Nylon thread.
🎀 2 staples or scarlachin in goldfieeld.
🎀 Chinese thread.
🎀 2 pellets in goldfieeld.
🎀 Scissors.
🎀Yesquero or lighter.
🎀 1 star charm in goldfieeld.
🎀 Tape measure.
🎀 Flat nose pliers.
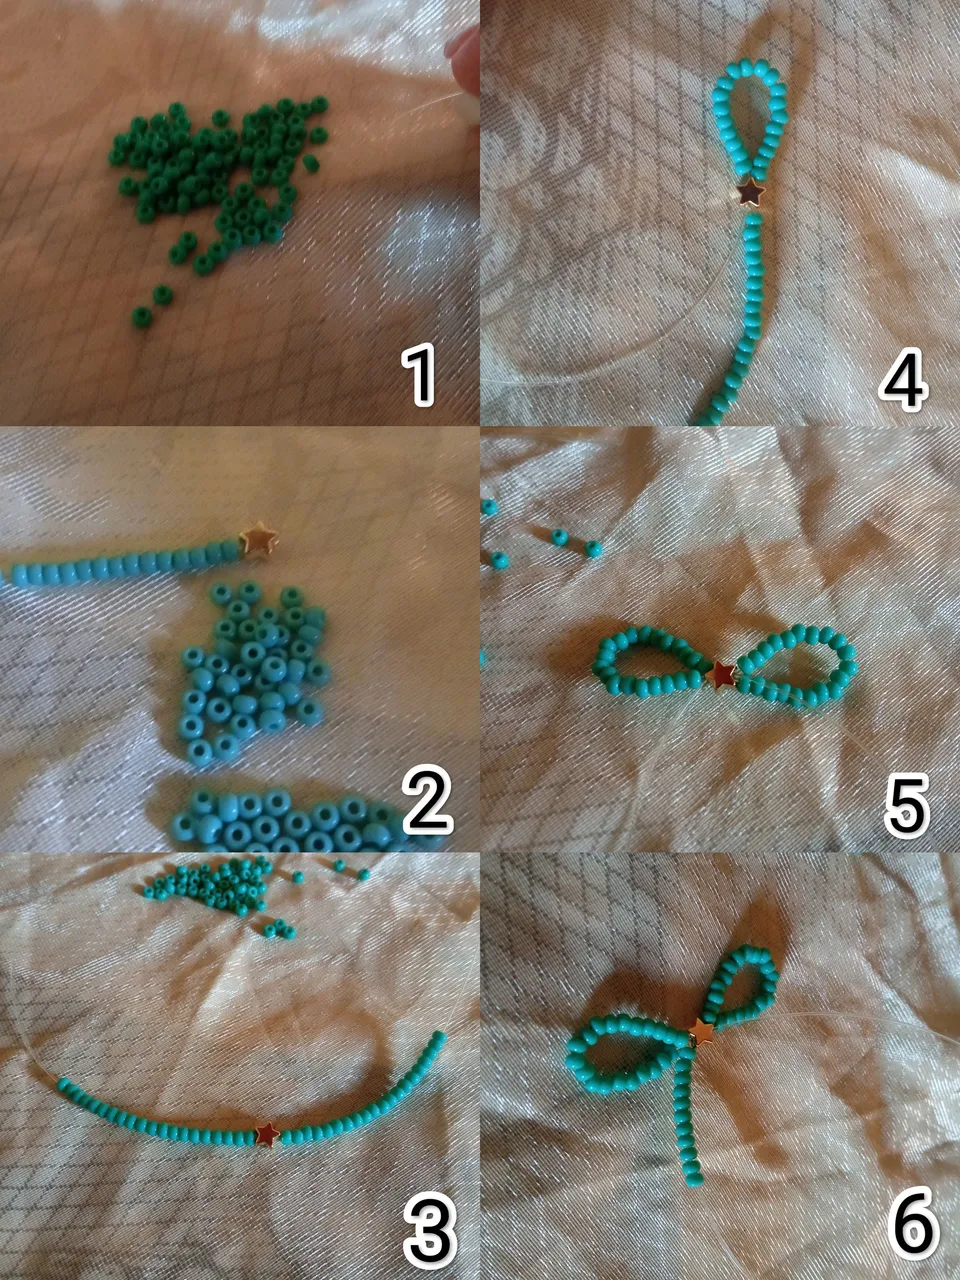
Paso a paso o tutorial.
Inicio cortando un hilo nylon de 30 cm , luego introduzco 20 mostacillas, luego el dije de estrella, seguido de 20 mostacillas más, luego el hilo nylon del lado derecho lo introduzco por el dije estrella y repito con el nylon del lado izquierdo quedan cruzados , luego introduzco 11 mostacillas en el nylon y ya se ve la forma del lazo. ( 1 al 6)
Step by step or tutorial.
I start by cutting a 30 cm nylon thread, then I introduce 20 beads, then the star charm, followed by 20 more beads, then the nylon thread on the right side I introduce it through the star charm and repeat with the nylon thread on the left side, then I introduce 11 beads in the nylon and the loop shape is already visible (1 to 6).
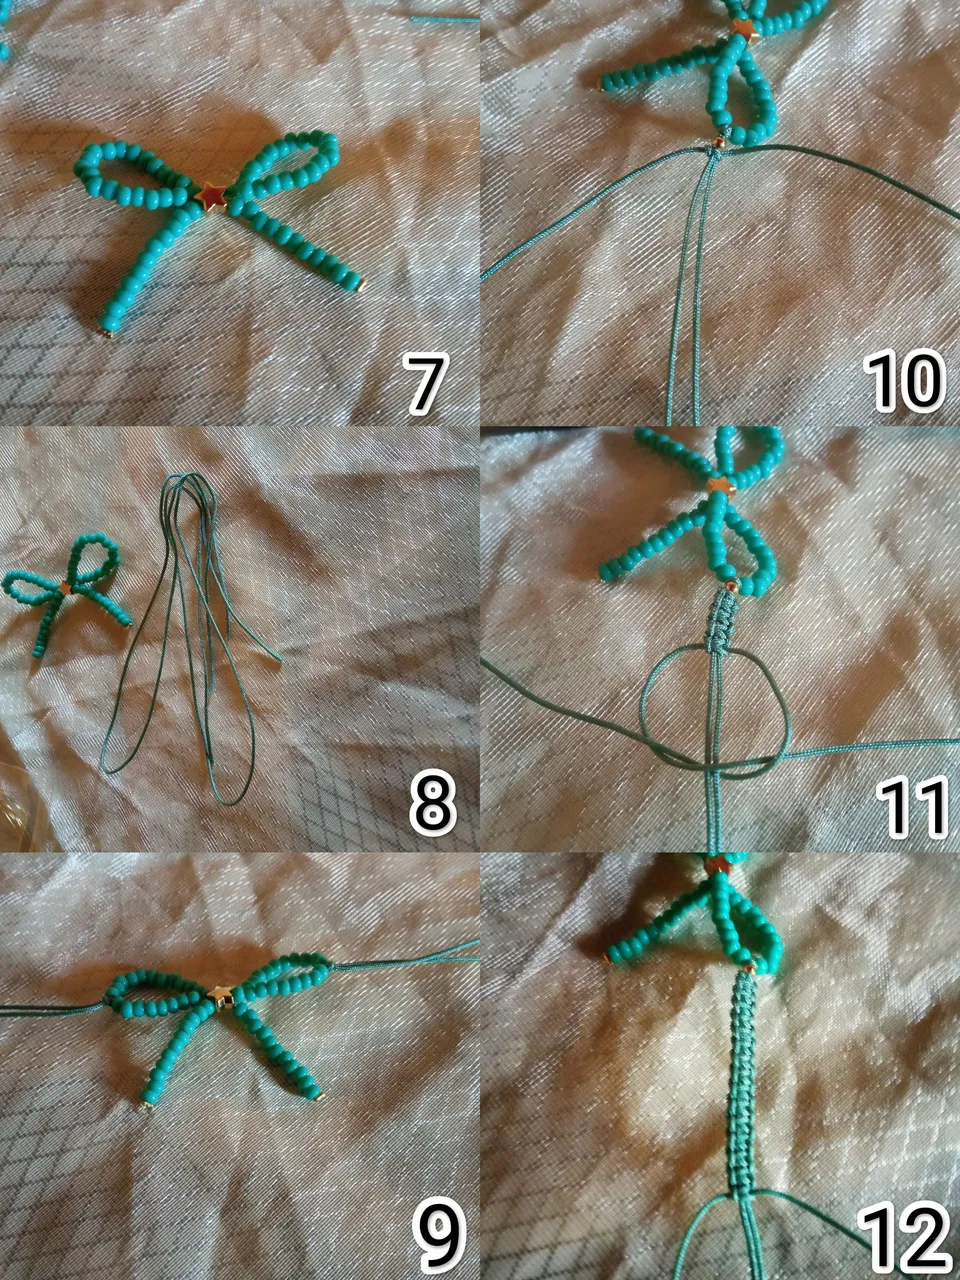
Luego introduzco 11 mostacillas más en el otro hilo nylon y coloco una grapa o escarlachin al final de las mostacillas, aprieto con la pinza punta plana para asegurar las mostacillas y de esta manera ya tengo el lazo listo , luego mido y corto dos hilos chinos de 30 cm cada uno y realizo un nudo alondra en cada extremo del lazo e introduzco un balín en cada extremo, luego corto dos hilos más de 45 cm cada uno con el cual voy a realizar el tejido macramé punto plano a la pulsera ( 7 al 12).
Then I introduce 11 more beads in the other nylon thread and place a staple or scarlachin at the end of the beads, I tighten with the flat tip pliers to secure the beads and in this way I have the loop ready, then I measure and cut two Chinese threads of 30 cm each one and I make a lark knot in each end of the loop and I introduce a ball in each end, then I cut two more threads of 45 cm each one with which I am going to make the macramé weave flat weave to the bracelet (7 to 12).
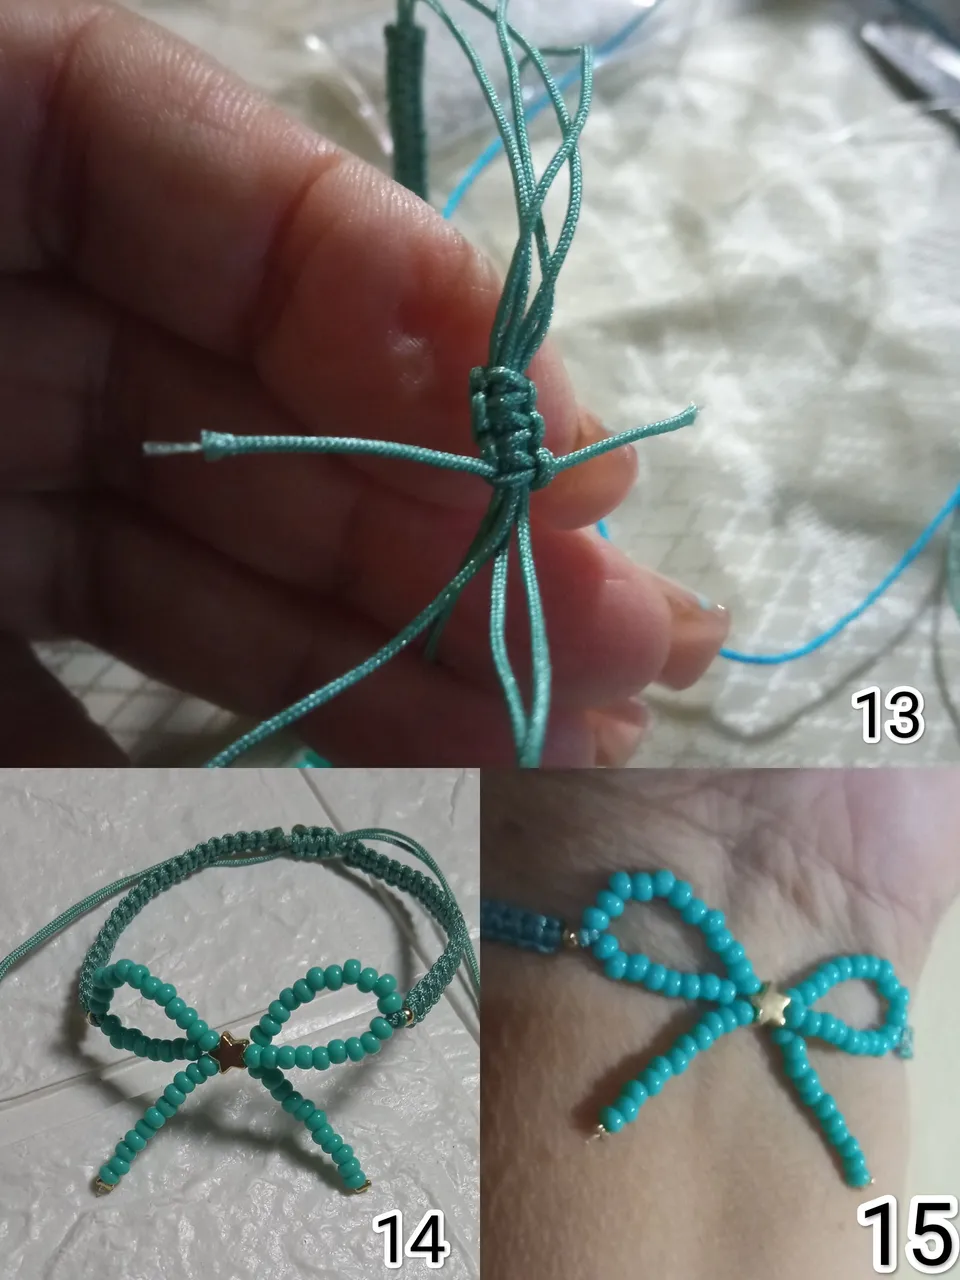
Luego de realizar el tejido macramé nudo plano en ambos extremos , cruzo los hilos de la base de la pulsera realizo el cierre con nudo plano corredizo , corto el hilo sobrante y quemo para asegurar la pulsera, al final del hilo en cada extremo coloco un balín realizo un nudo , corto el sobrante, quemo y doy por terminado el trabajo (13 al 15).
After weaving the macramé weave flat knot at both ends, I cross the threads at the base of the bracelet and make the clasp with a flat slip knot, cut the excess thread and burn to secure the bracelet, at the end of the thread at each end I place a pellet, tie a knot, cut the excess, burn and finish the job.(13 to 15).
La verdad queda muy bonita las realicé en blanco, roja, verde , azul eléctrico, negro y se ven bien, espero les haya gustado el resultado final, será hasta una próxima oportunidad que este por acá con ustedes nuevamente.
Todas las fotos son de mi autoría tomadas con mi teléfono inteligente Redmi note.
Use la aplicación polish para la edición de fotos.
Use el traductor Deepl translate.
The truth is very nice I made them in white, red, green, electric blue, black and they look good, I hope you liked the final result, it will be until the next time that I will be here with you again.
All the pictures are of my authorship taken with my Redmi note smartphone.
I used the polish application for photo editing.
Use the translator Deepl translate.