¡Hola, hola! Hivers y hermosa comunidad de DIYHub, espero todos se encuentren súper bien, animados e inspirados 💟
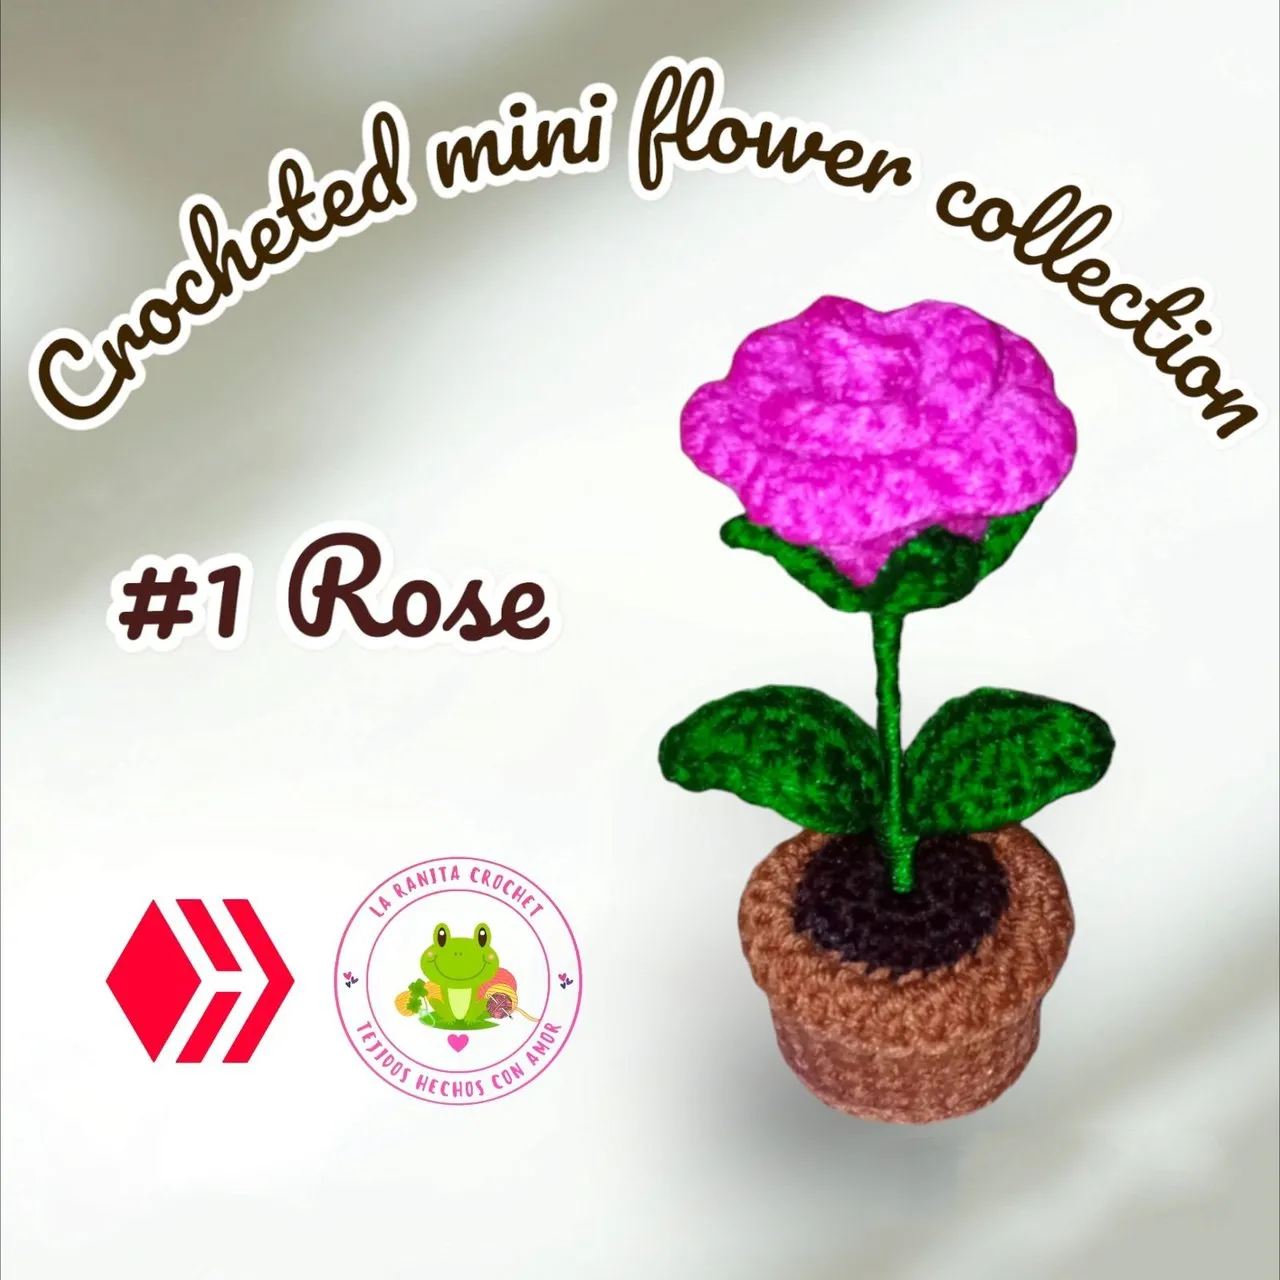
Luego de hacer mi entrada al concurso de este mes Love is in the Air - Let's spread love with our DIY contest! Al cual por cierto aún tienen chance de entrar y participar, para así mostrar ese detallito que realizaron para el día del amor y la amistad; decidí realizar una pequeña colección de mini flores tejidas a crochet con sus macetas, así que el día de hoy les mostrare como realice la primera flor de la colección que es una rosa.
Hello, hello! Hivers and beautiful DIYHub community, I hope you're all feeling super well, encouraged and inspired 💟.
After making my entry to this month's Love is in the Air - Let's spread love with our DIY contest! Which by the way you still have a chance to enter and participate, to show that little detail that you made for the day of love and friendship; I decided to make a small collection of mini crocheted flowers with their pots, so today I will show you how I made the first flower of the collection which is a rose.
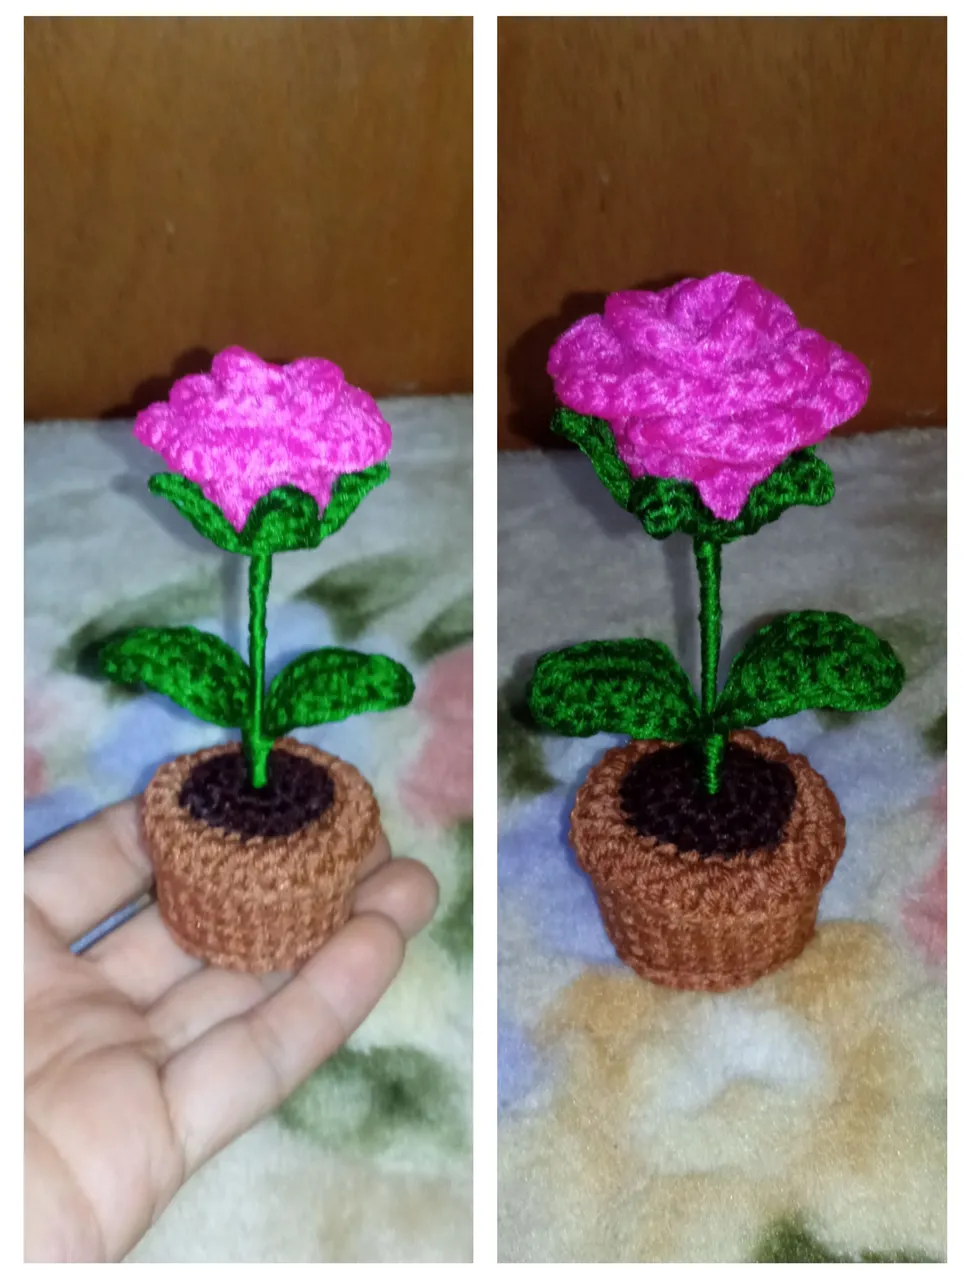
Es la primera vez que tejo una rosa, y pues por esa razón fue la primera flor que decidí tejer para mi colección, y el resultado realmente me encanto sobre todo por lo fácil y rápido que fue tejerla.
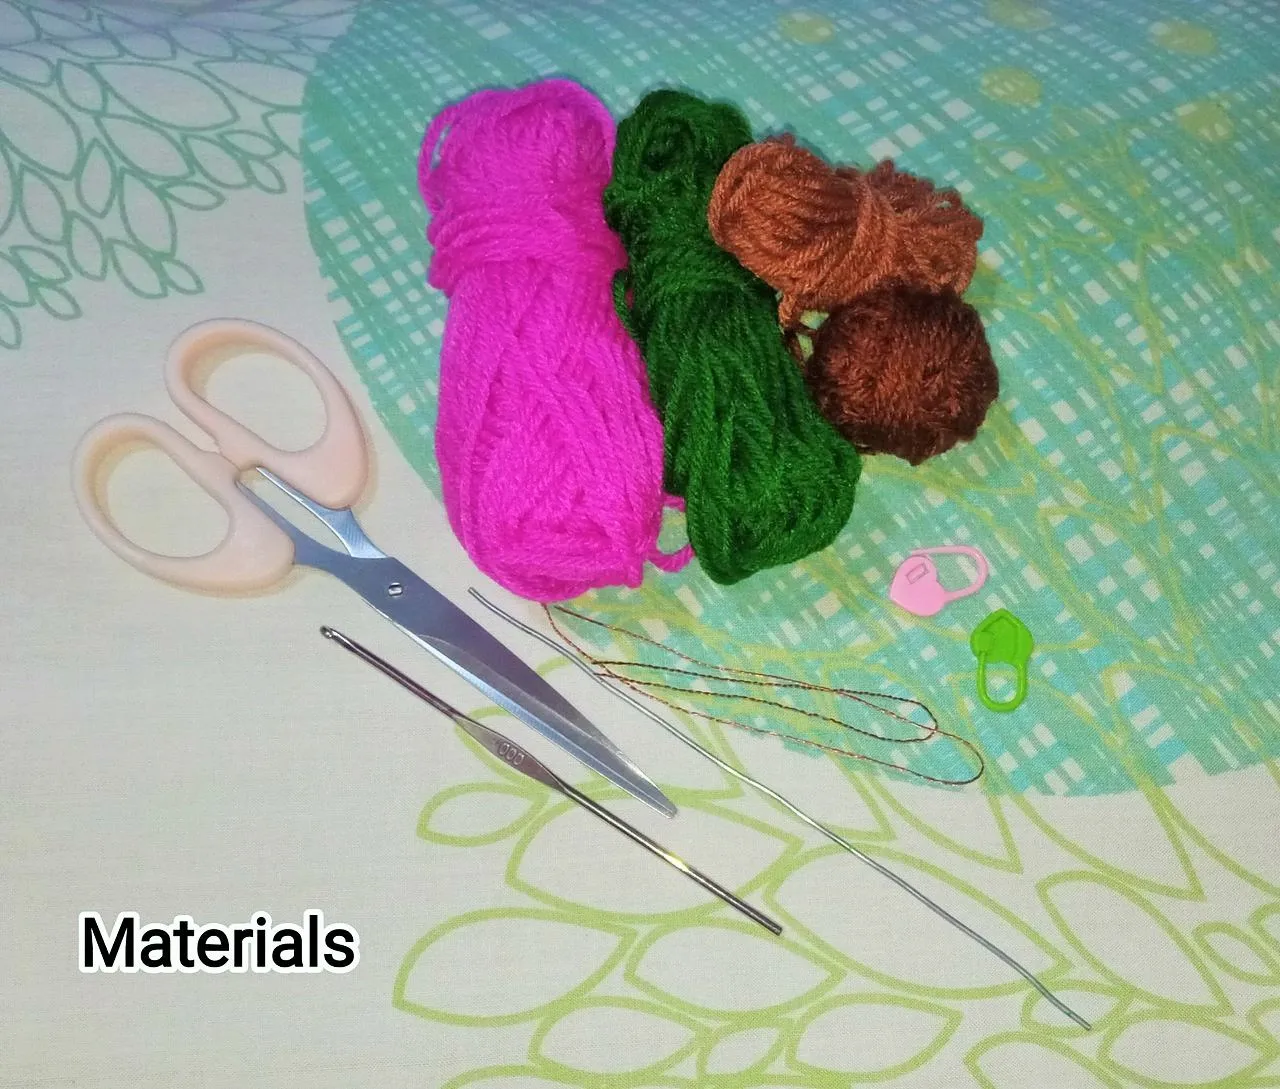
Bueno amigos a continuación les presento los materiales que use para realizar esta hermosa Mini rosa tejida a crochet y también con el proceso de tejido.
MATERIALES:
- Estambres de color fucsia, verde, caramelo y marrón.
- Aguja de crochet #000.
- Marcadores de puntos.
- Aguja lanera.
- Relleno siliconado.
- Silicón o pegamento.
- Alambre para el tallo y las hojas.
- Tijera.
It is the first time I knit a rose, and for that reason it was the first flower I decided to knit for my collection, and the result really charmed me especially for how easy and fast it was to knit it.
Well friends here are the materials I used to make this beautiful mini rose crocheted and also with the process of knitting.
MATERIALS:
- Fuchsia, green, caramel and brown stamens.
- Crochet needle #000.
- Stitch markers.
- Wool needle.
- Silicone stuffing.
- Silicone or glue.
- Wire for the stem and leaves.
- Scissors.
ABREVIATURAS DE LOS PUNTOS A UTILIZAR:
- Pa: punto alto.
- Mpa: medio punto alto.
- Pb: punto bajo.
- Cad: cadeneta.
- Pd: punto deslizado.
- Aum: aumento.
- Am: anillo mágico.
- BLO: tejer solo en la hebra trasera.
- FLO: tejer solo en la hebra frontal.
ABBREVIATIONS OF THE STITCHES TO BE USED:
- dc: double crochet.
- hdc: half double crochet.
- sc: single crochet.
- ch: chain stitch.
- sl st or ss: slip stitch.
- Inc: increase.
- Mr: magic ring.
- BLO: knit only in the back loop.
- FLO: knit only in the front loop.
PASO A PASO:
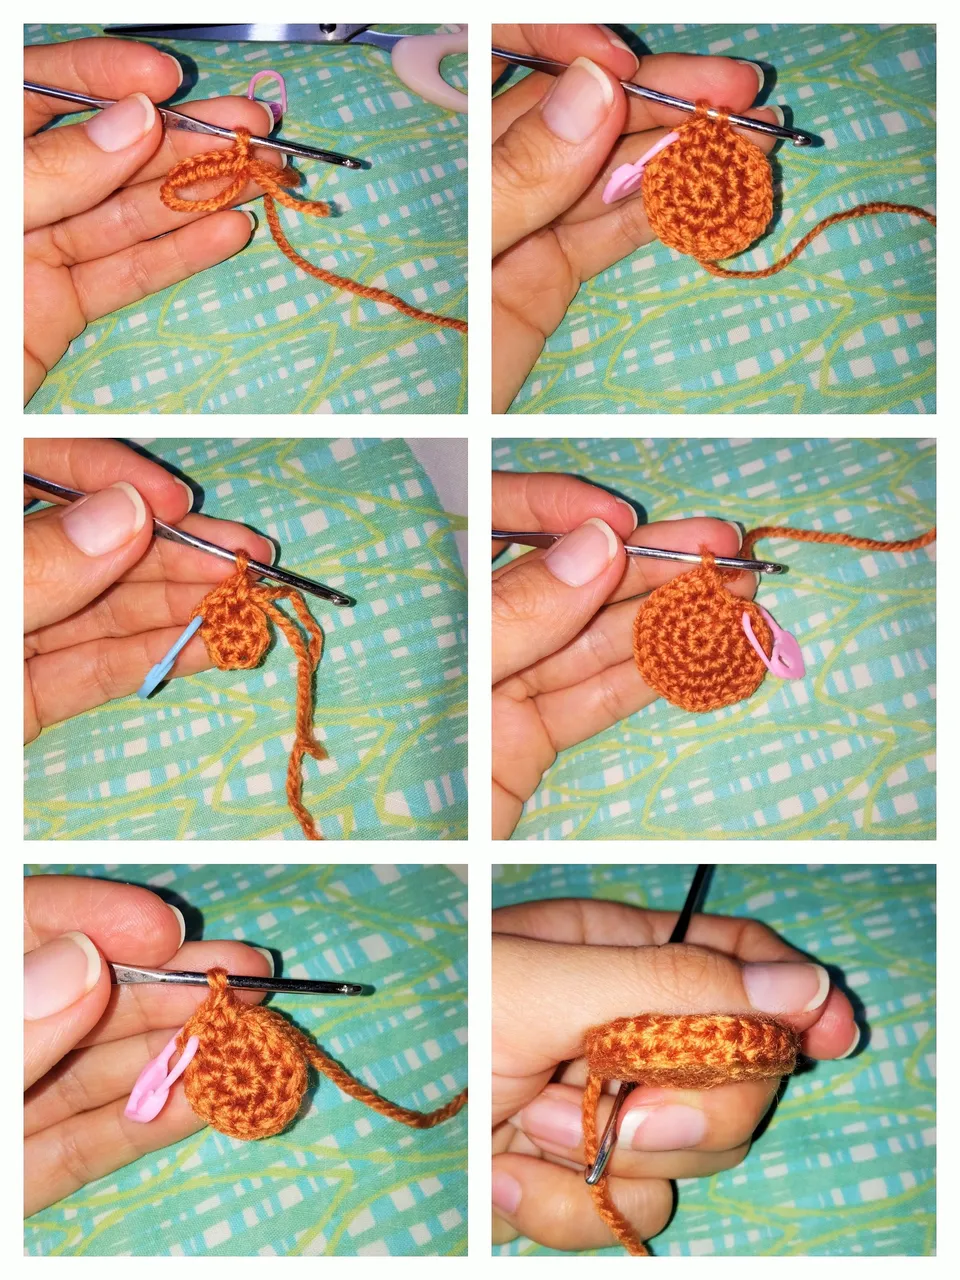
Para iniciar tejí la maceta donde luego colocaría mi pequeña rosa tejida, y esta la hice igual que la de la plantita en forma de corazón con la que entre en el concurso, acá les dejo la descripción del patrón y pues les adelanto que de esta misma manera tejeré todas las macetitas de la colección.
Maceta (caramelo):
V1: Am con 6 Pb. (6)
V2: 6 Aum. (12)
V3: (1 Pb, 1 Aum) x6. (18)
V4: (2 Pb, 1 Aum) x6. (24)
V5: 24 Pb tejidos en BLO. (24)
V6-10: 24 Pb. (24)
V11: 24 Pa tejidos en FLO (24) cerrar con Pd, cortar y ocultar la hebra.
Para finalizar, tejer en la hebra delantera de la vuelta 5 24 Pd, esto es para dar un mejor acabado y firmeza a la maceta en la base.
STEP BY STEP:
To start I knitted the pot where I would later place my little knitted rose, and this one I made the same as the one for the heart-shaped plant pot with which I entered the contest, here I leave you the pattern description and well I advance you that in this same way I will knit all the plant pots of the collection.
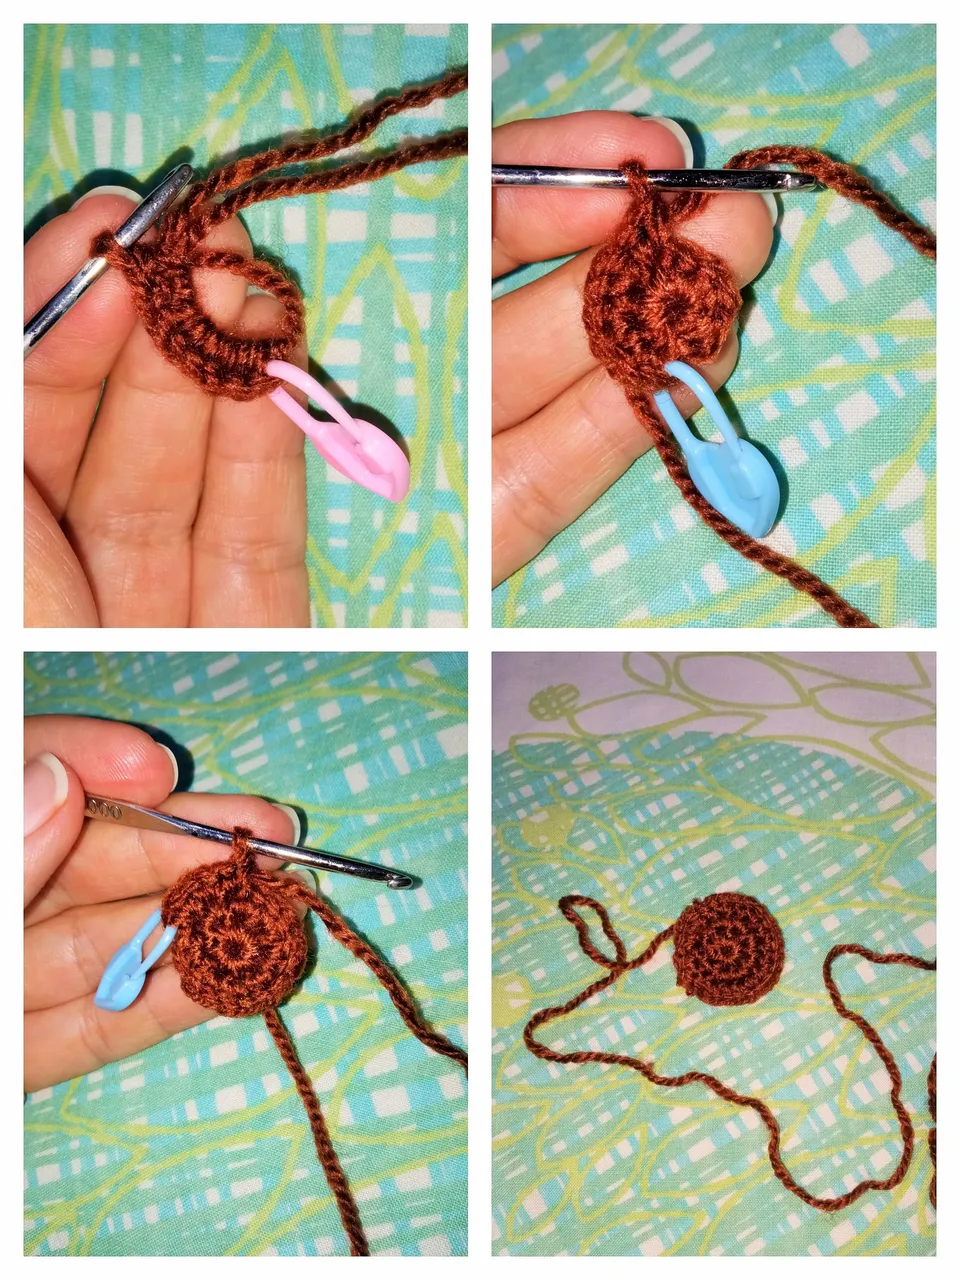
Pot (caramel):
R1: Mr with 6 sc. (6)
R2: 6 Inc. (12)
R3: (1 sc, 1 Inc) x6. (18)
R4: (2 sc, 1 Inc) x6. (24)
R5: 24 sc knitted in BLO. (24)
R6-10: 24 sc. (24)
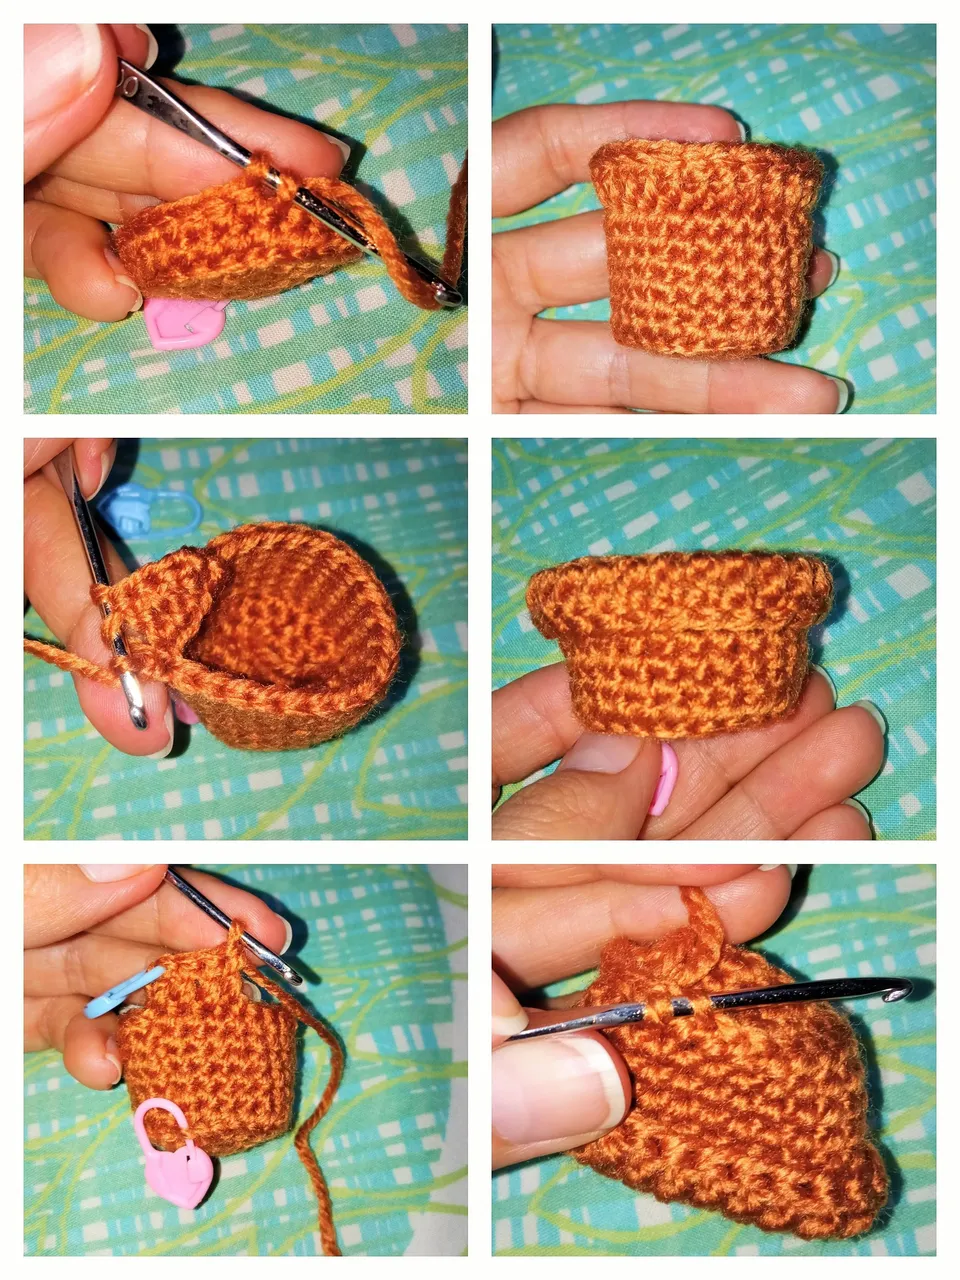
R11: 24 dc knit in FLO (24) close with ss, cut and hide the loop.
To finish, knit in the front loop of row 5 24 Pd, this is to give a better finish and firmness to the pot at the base.
Tierra (marrón):
V1: Am con 8 Pb. (8)
V2: 8 Aum. (16)
V3: (1 Pb, 1 Aum). (24) cerrar con Pd, dejar la hebra de más o menos 15cm y cortar.
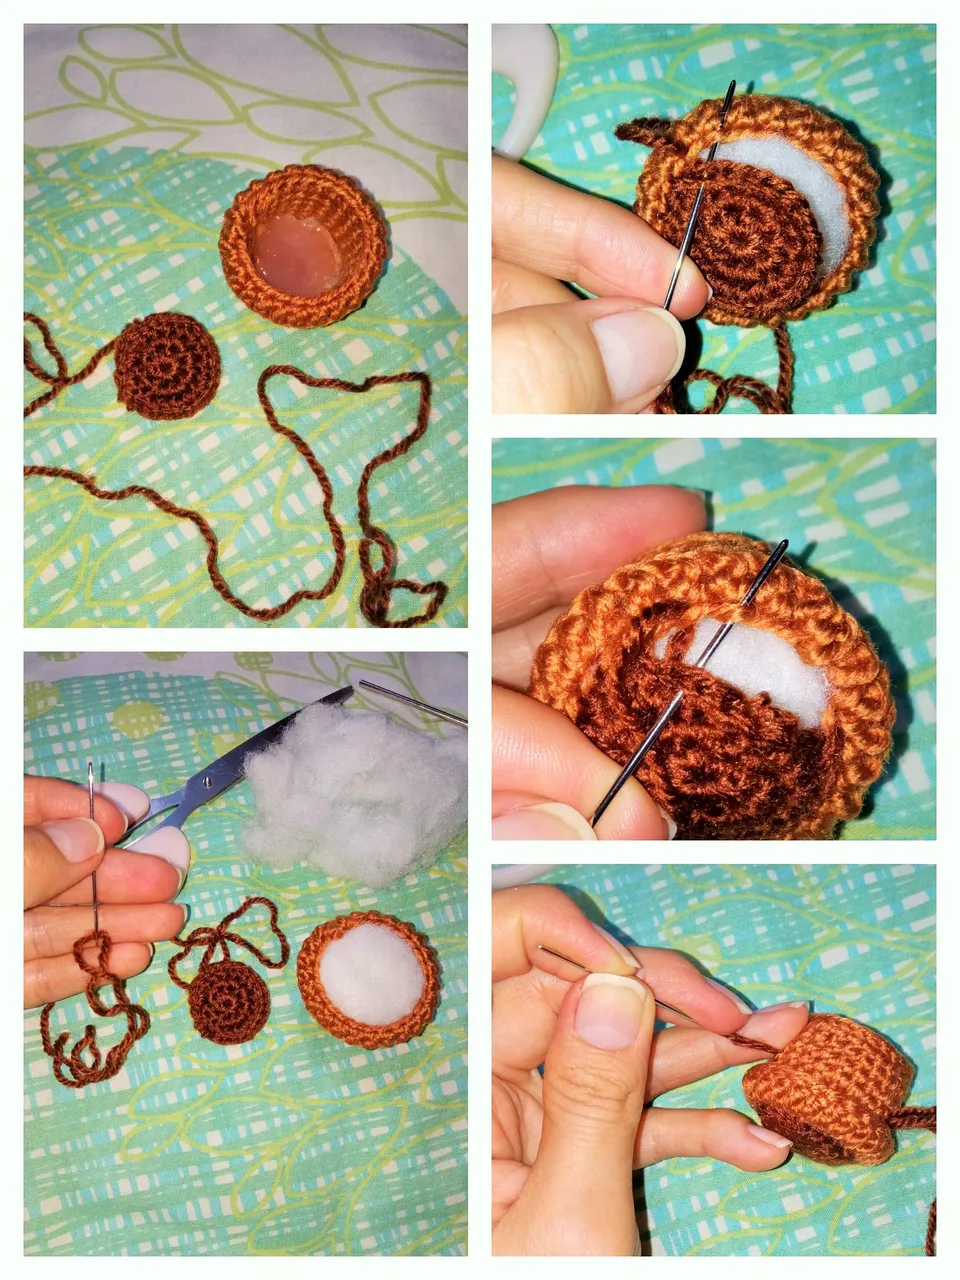
Ground (brown):
R1: Mr with 8 SC. (8).
R2: 8 Inc. (16)
R3: (1 Pb, 1 Inc). (24) close with SS, leave the loop of about 15cm and cut.
Para armar la maceta lo que hice fue aplicar un poco de silicón caliente en la base, y luego rellene la maceta y cosí el círculo marrón a la misma, que es lo que simula la tierra.
To assemble the pot what I did was to apply some hot silicone on the base, and then I filled the pot and sewed the brown circle to it, which is what simulates the soil.
Rosa (fucsia):
V1: tejer 29 cad, iniciando en el segundo punto desde la aguja hacer 28 Pb.
V2: tejer 3 cad, saltar 2 espacios o puntos y en el tercero tejer ´1 Pa, 2cad, 1Pa´ todo dentro del mismo punto, y repetir la secuencia hasta terminar la vuelta, siempre saltando 2 puntos y tejiendo en el tercero.
V3: hacer 3 cad de altura y entre las 2 cadenetas de la vuelta anterior tejer 6 Pa, y 1 pd sobre el Pa de la vuelta anterior. Así formamos los pétalos de la flor.
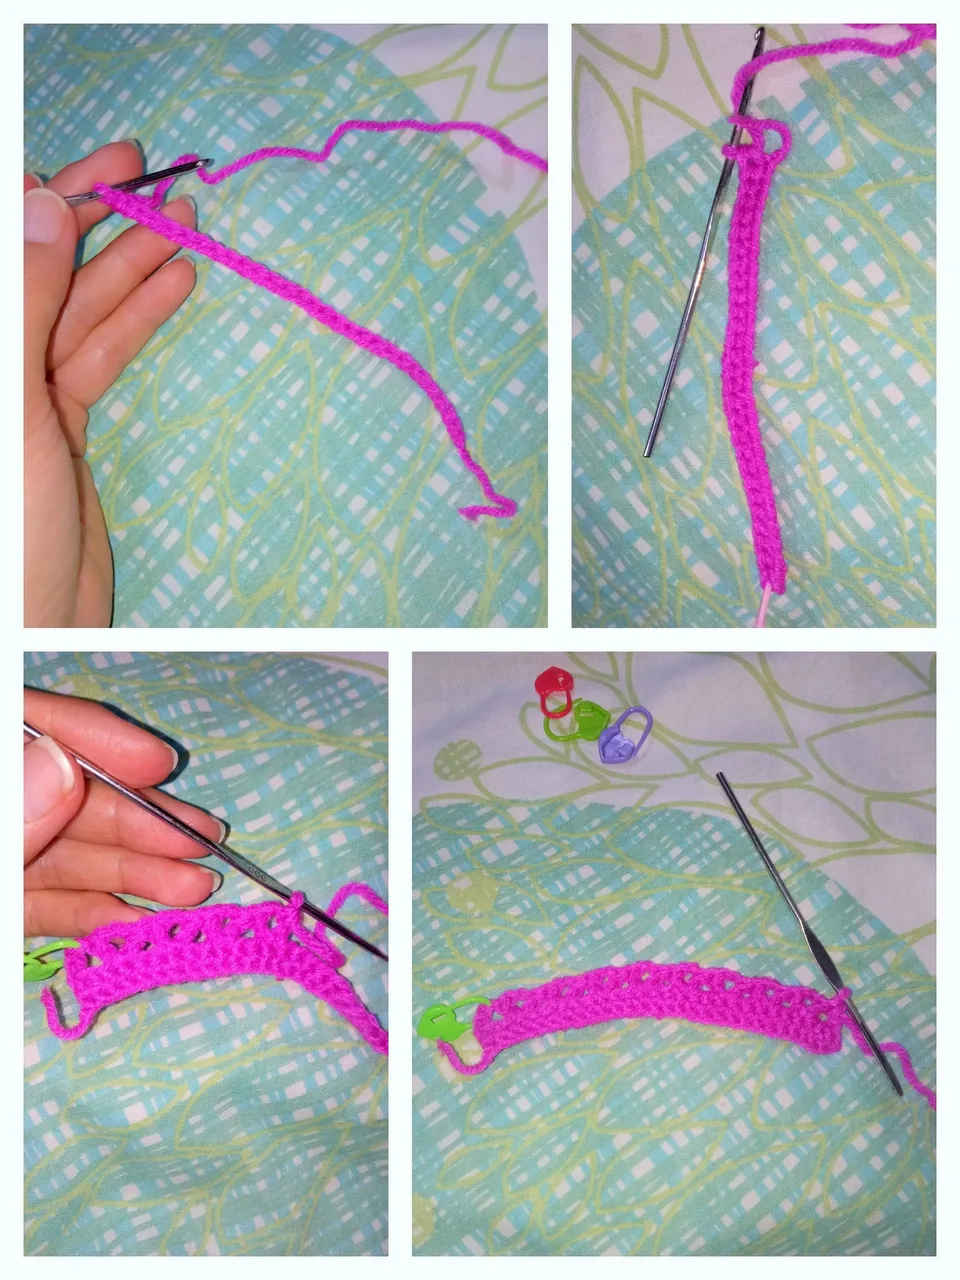
Rose (fuchsia):
R1: knit 29 ch, starting in the second stitch from the needle make 28 sc.
R2: knit 3 ch, skip 2 spaces or stitches and in the third ch knit '1 dc, 2ch, 1dc' all within the same stitch, and repeat the sequence until the end of the row, always skipping 2 stitches and knitting in the third stitch.
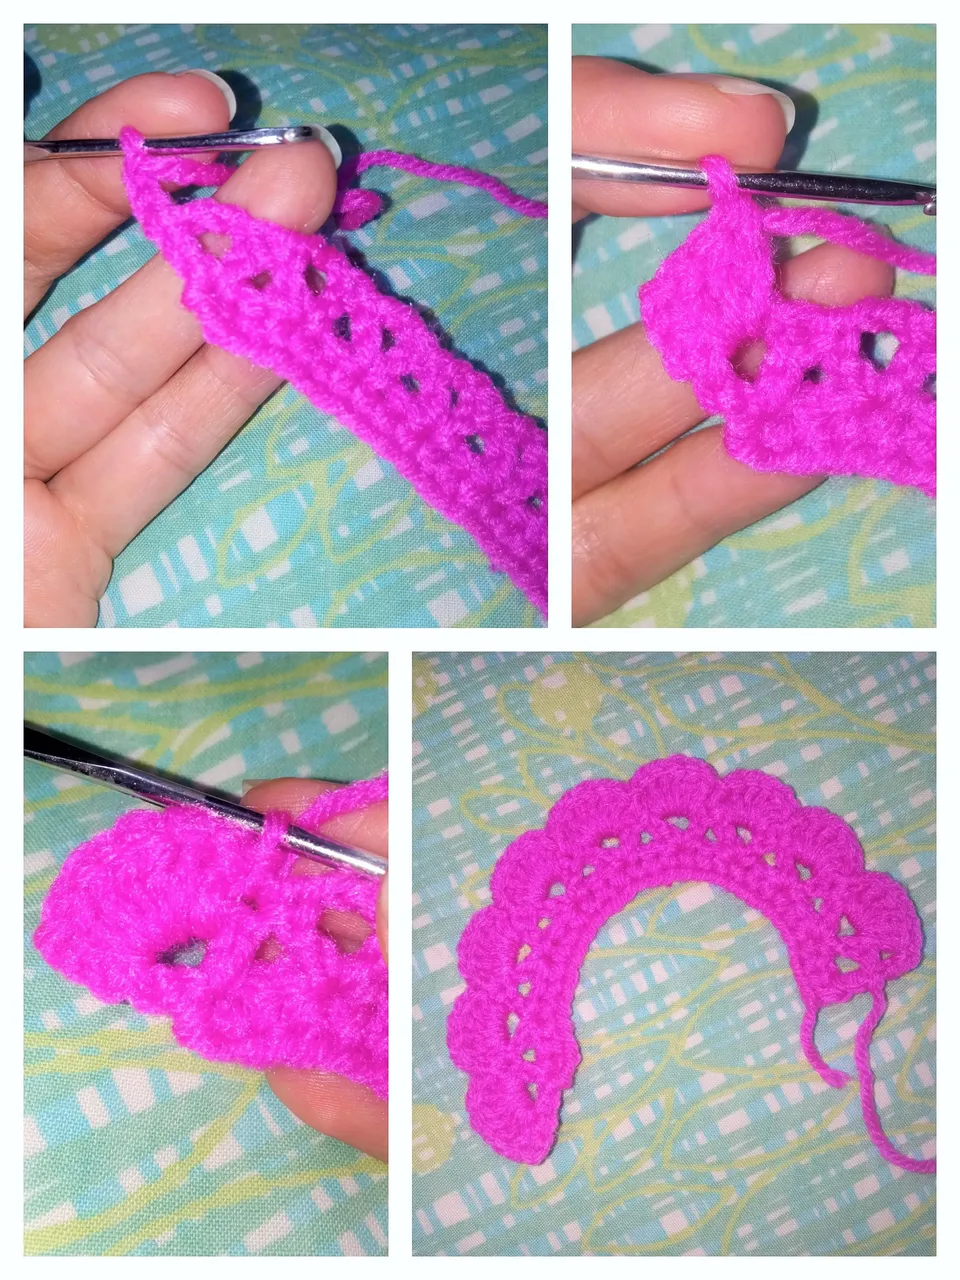
R3: make 3 ch high and between the 2 chains of the previous row knit 6 dc, and 1 ss over the dc of the previous row. This way we form the petals of the flower.
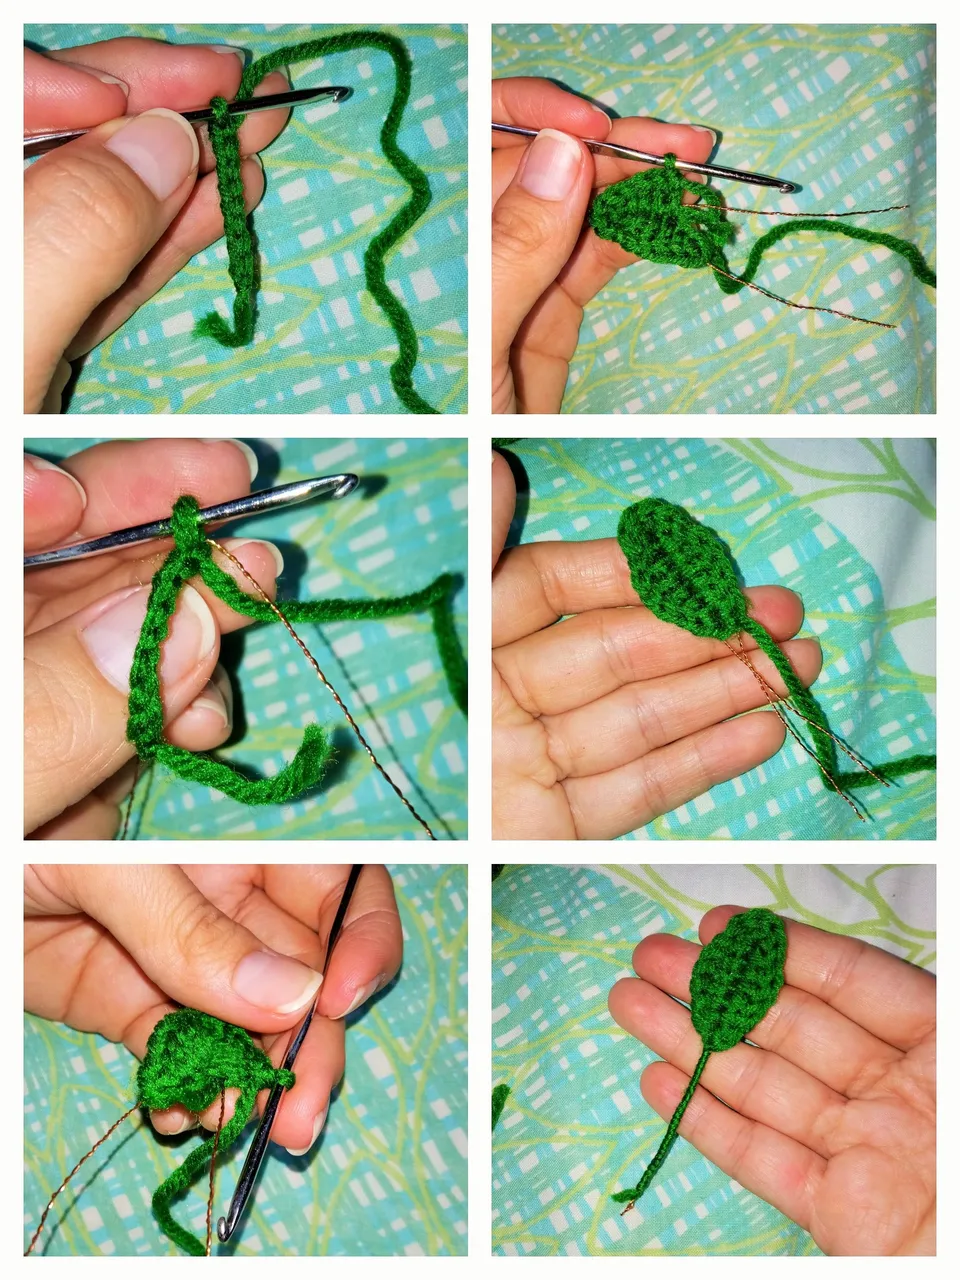
Hoja x 2 (verde):
Tejer una cadeneta de 8 puntos, iniciando desde el segundo punto desde la aguja realizar la siguiente secuencia (1 Pb, 1 mpa, 3 Pa, 1 mpa, 4 Pb) y comenzar a tejer del otro lado de la cadeneta (1 mpa, 3 Pa, 1 mpa, 1 Pb) cerrar con Pd sobre el primer Pb. Cortar la hebra un poco larga para enrollarla en el alambre.
Leaf x 2 (green):
Knit a chain of 8 stitches, starting from the second stitch from the needle make the following sequence (1 sc, 1 hdc, 3 dc, 1 hdc, 4 sc) and start knitting on the other side of the chain (1 hdc, 3 dc, 1 hdc, 1 sc) close with sl st over the first sc. Cut the loop a little long to wrap it around the wire.
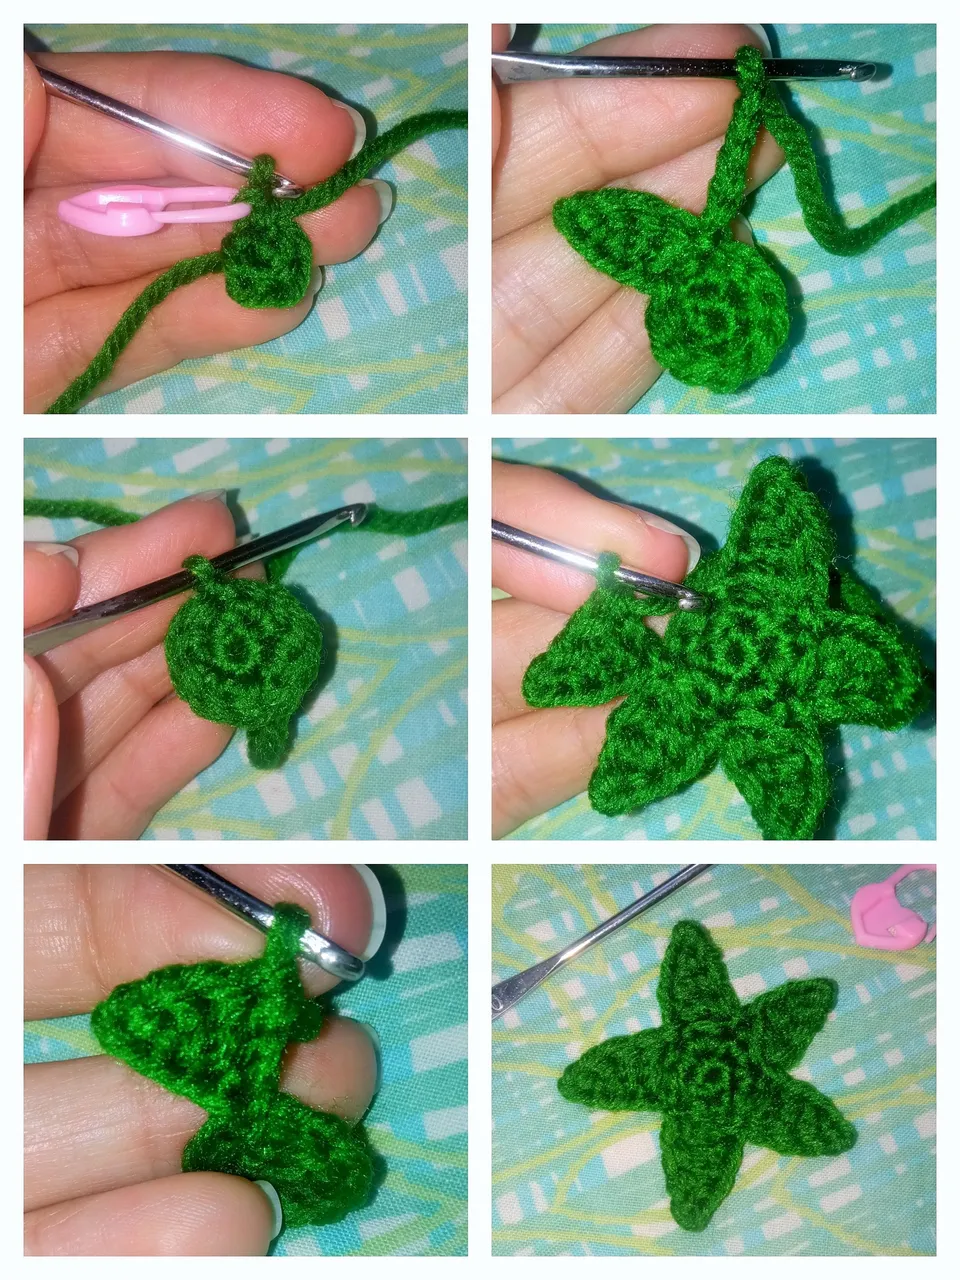
Sépalos (verde):
V1: Am con 5 Pb. (5)
V2: 5 Aum. (10)
V3: (5 cad, en la segunda cad tejer 1Pd, 1 mpa, 2 Pa) x 5. Se salta 1 punto y en el siguiente se teje 1 Pd y se vuelve a repetir la secuencia para ir formando los capuchones.
Sepals (green):
R1: Am with 5 sc. (5)
R2: 5 Inc. (10)
R3: (5 ch, in the second ch knit 1ss, 1 hdc, 2 dc) x 5. Skip 1 stitch and in the next stitch knit 1 ss and repeat the sequence again to form the caps.
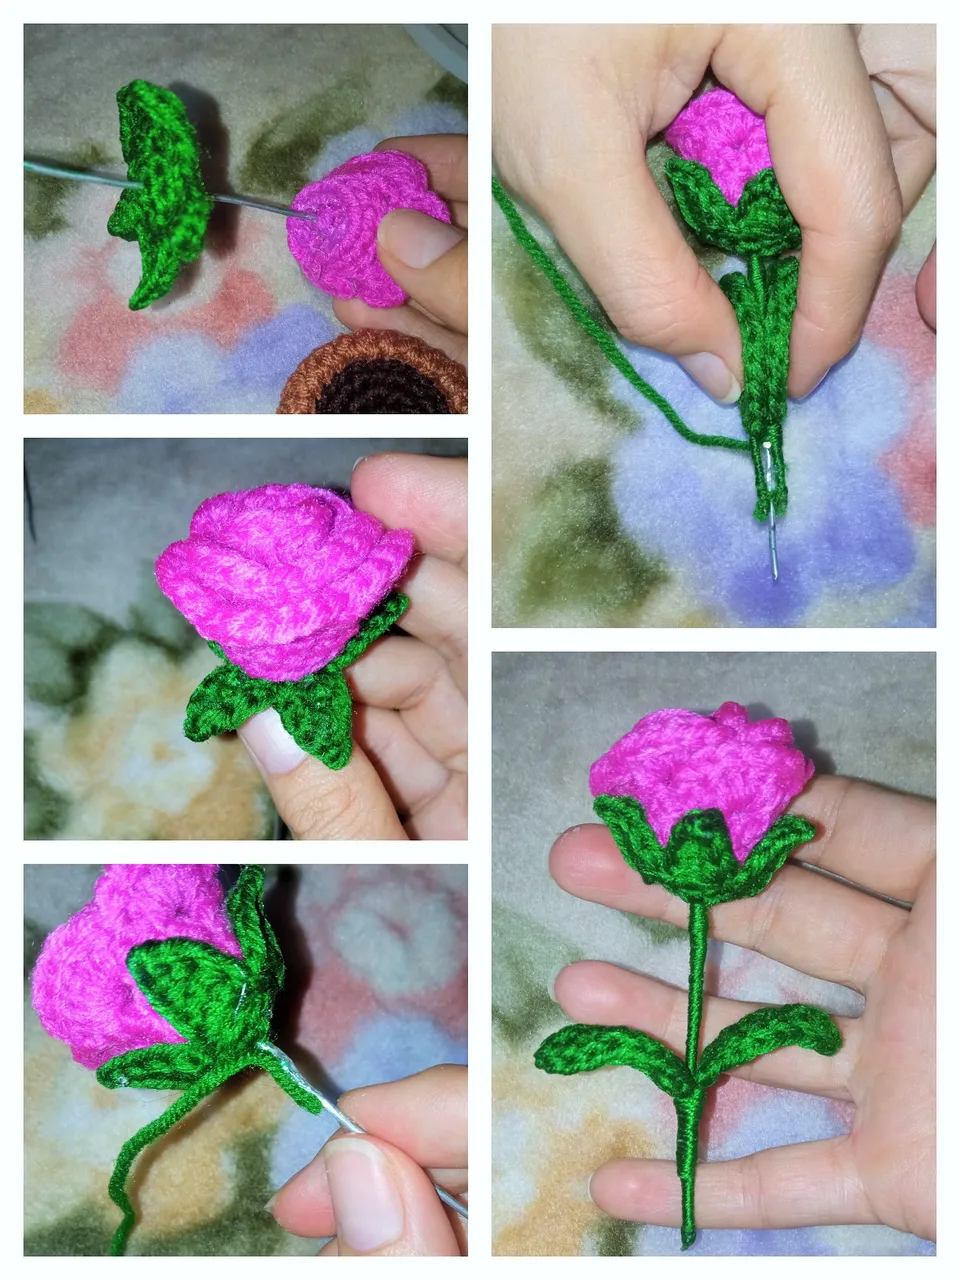
Armado:
- Aplicar un poco de pegamento al alambre del tallo y enrollar en este los pétalos de la rosa.
- Luego aplicar un poco de pegamento en la base de los pétalos para pegar los sépalos.
- Luego se forra el tallo con un poco de estambre verde, y se incorporan las hojas al tallo y se continúa forrando el tallo.
- Ya para finalizar se coloca un poco de pegamento en el extremo inferior del tallo y se introduce la flor en el centro de la maceta.
Assembly:
- Apply a little glue to the stem wire and roll the rose petals onto it.
- Then apply some glue to the base of the petals to glue the sepals.
- Then line the stem with a bit of green yarn, and incorporate the leaves to the stem and continue lining the stem.
- Finally, place some glue on the lower end of the stem and insert the flower in the center of the pot.

BUENO AMIGOS DESEO LES HAYA GUSTADO TANTO COMO A MÍ EL RESULTADO FINAL DE ESTA MINI ROSA TEJIDA A CROCHET Y ESPERO SUS BONITOS COMENTARIOS Y/O VOTOS, ASÍ ME MOTIVAN PARA SEGUIR COMPARTIENDO MIS CREACIONES CON USTEDES, YO ESTARÉ FELIZ DE RESPONDER TODOS SUS COMENTARIOS, SEAN FELICES Y QUE LA MUSA DE LA CREATIVIDAD NUNCA LOS ABANDONE!
¡GRACIAS POR VISITAR MI BLOG!
Se despide de ustedes con mucho cariño su amiga Nathalie @laranitacrochet
WELL FRIENDS I HOPE YOU LIKED AS MUCH AS I DID THE FINAL RESULT OF THIS MINI ROSE CROCHETED AND I HOPE YOUR NICE COMMENTS AND / OR VOTES, SO MOTIVATE ME TO CONTINUE SHARING MY CREATIONS WITH YOU, I WILL BE HAPPY TO ANSWER ALL YOUR COMMENTS, BE HAPPY AND THAT THE MUSE OF CREATIVITY NEVER LEAVES YOU!
THANK YOU FOR VISITING MY BLOG!
Your friend Nathalie @laranitacrochet bids you a fond farewell.
*Todas las fotografías utilizadas en la publicación son propiedad de la autora.
*Las fotografías fueron tomadas y editadas con mi REDMI 9 y con la App FotoRoom.
*La traducción la hice en https://www.deepl.com/es/translator
*All photographs used in this publication are property of the author.
*The pictures were taken and edited with my REDMI 9 and the FotoRoom App.
*The translation was done at https://www.deepl.com/es/translator