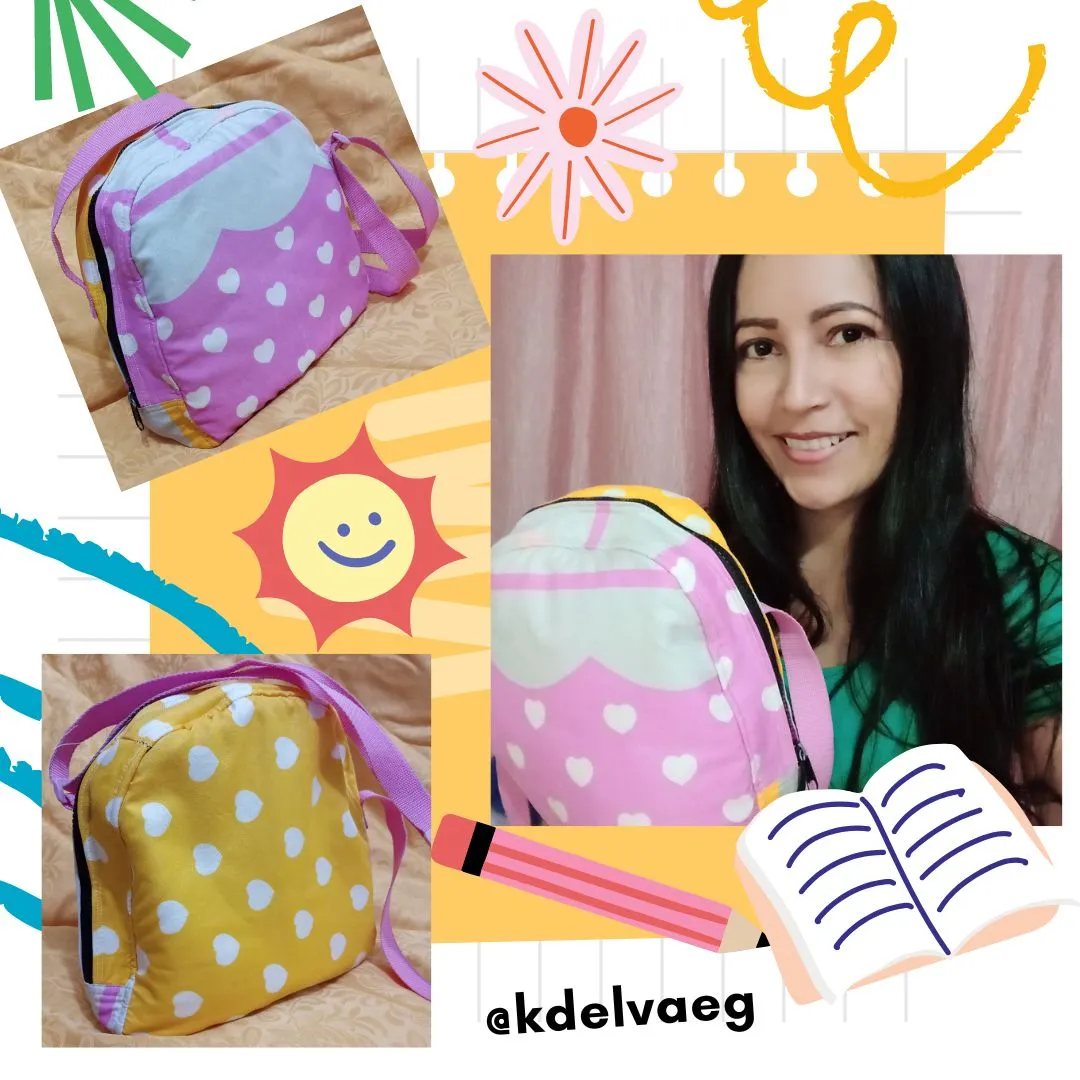


Hello my dear readers, I hope you are well and that you have or have had an excellent and wonderful day. Here in Venezuela a couple of days ago a new school year started and for my daughter to take her snack to school, I made her a little fabric bag, bandolier type. They are quite comfortable because they are easy to put on and her hands are free.
I confess that this is the first time I make a bag, I'm not an expert at sewing on a machine either, but I decided to do it anyway to see how it turned out, so today I share with you the step by step of how I made it.
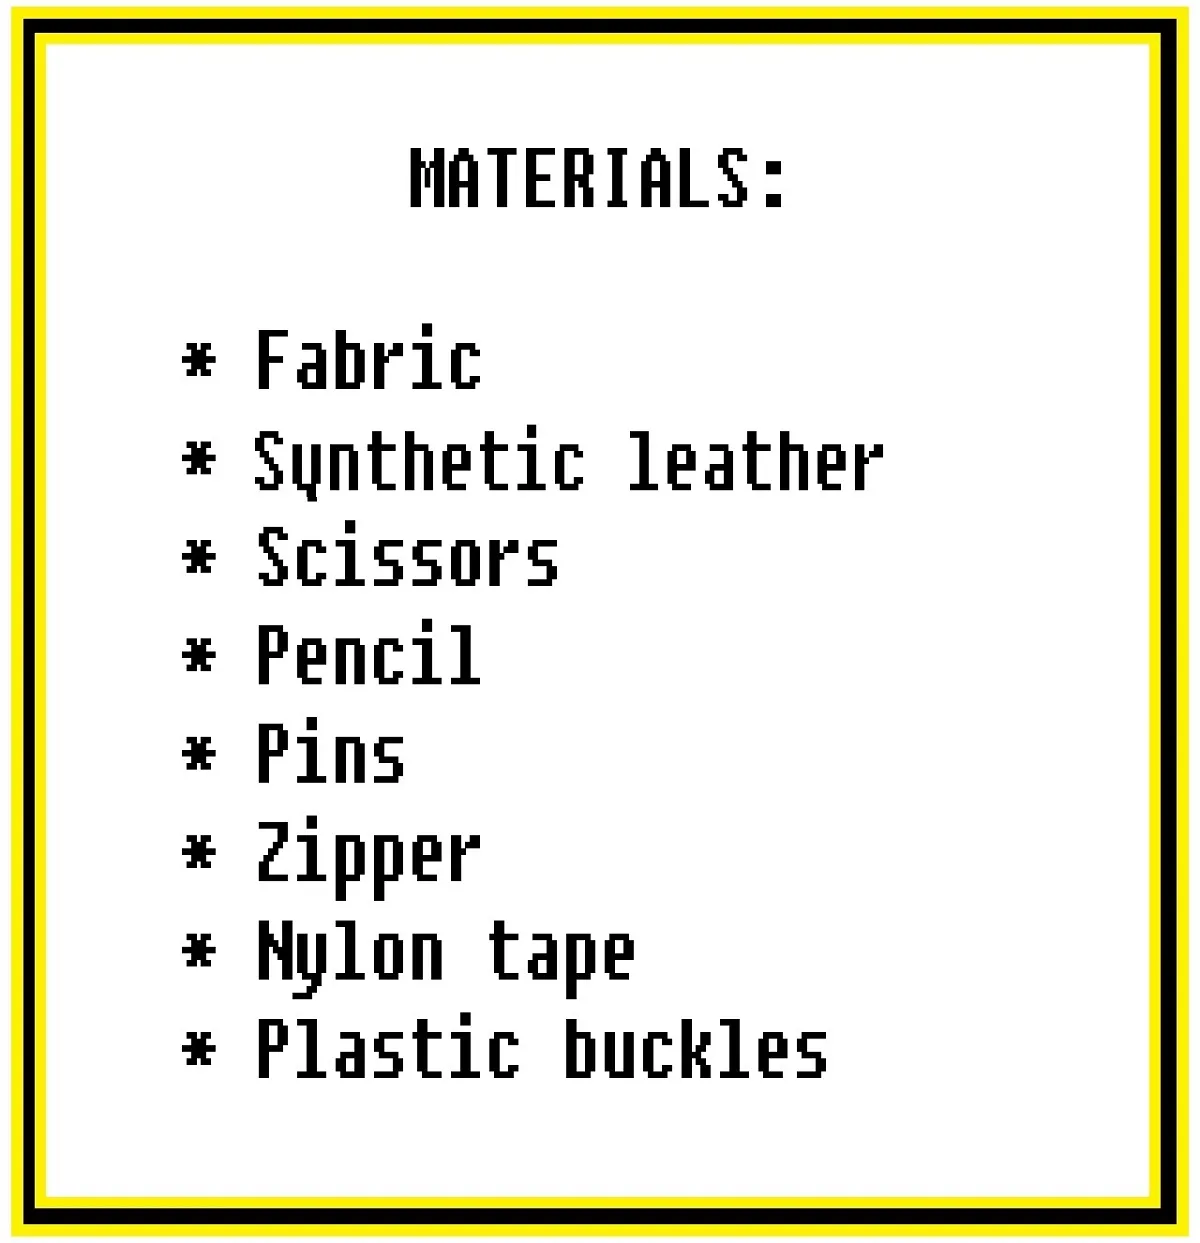
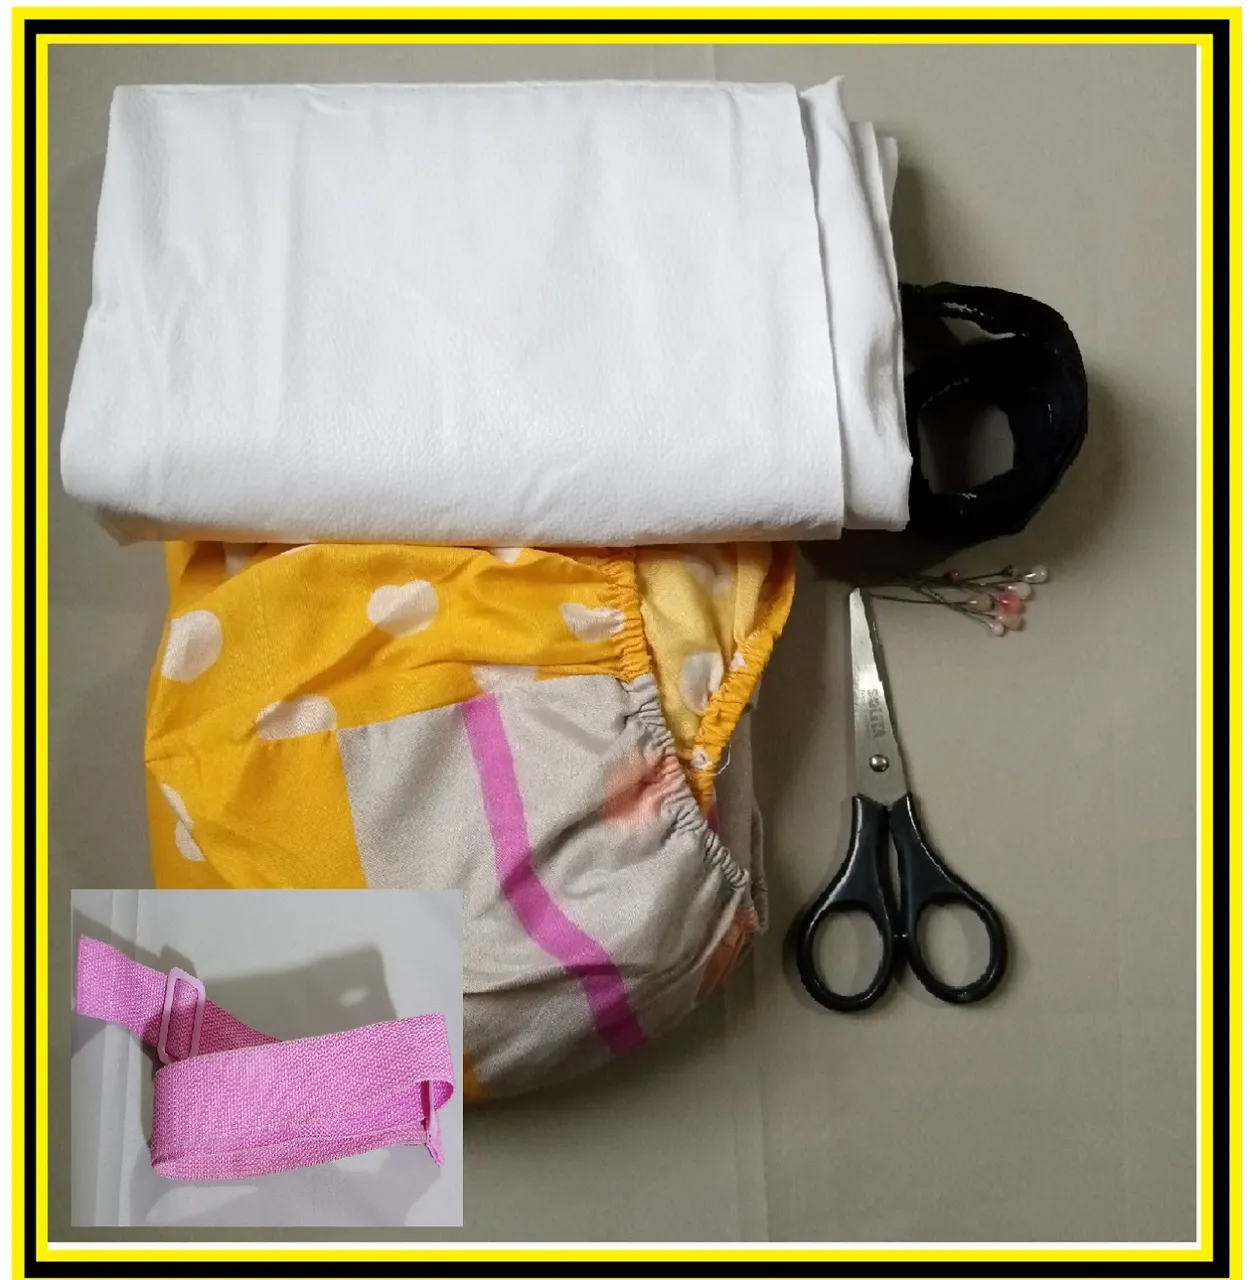
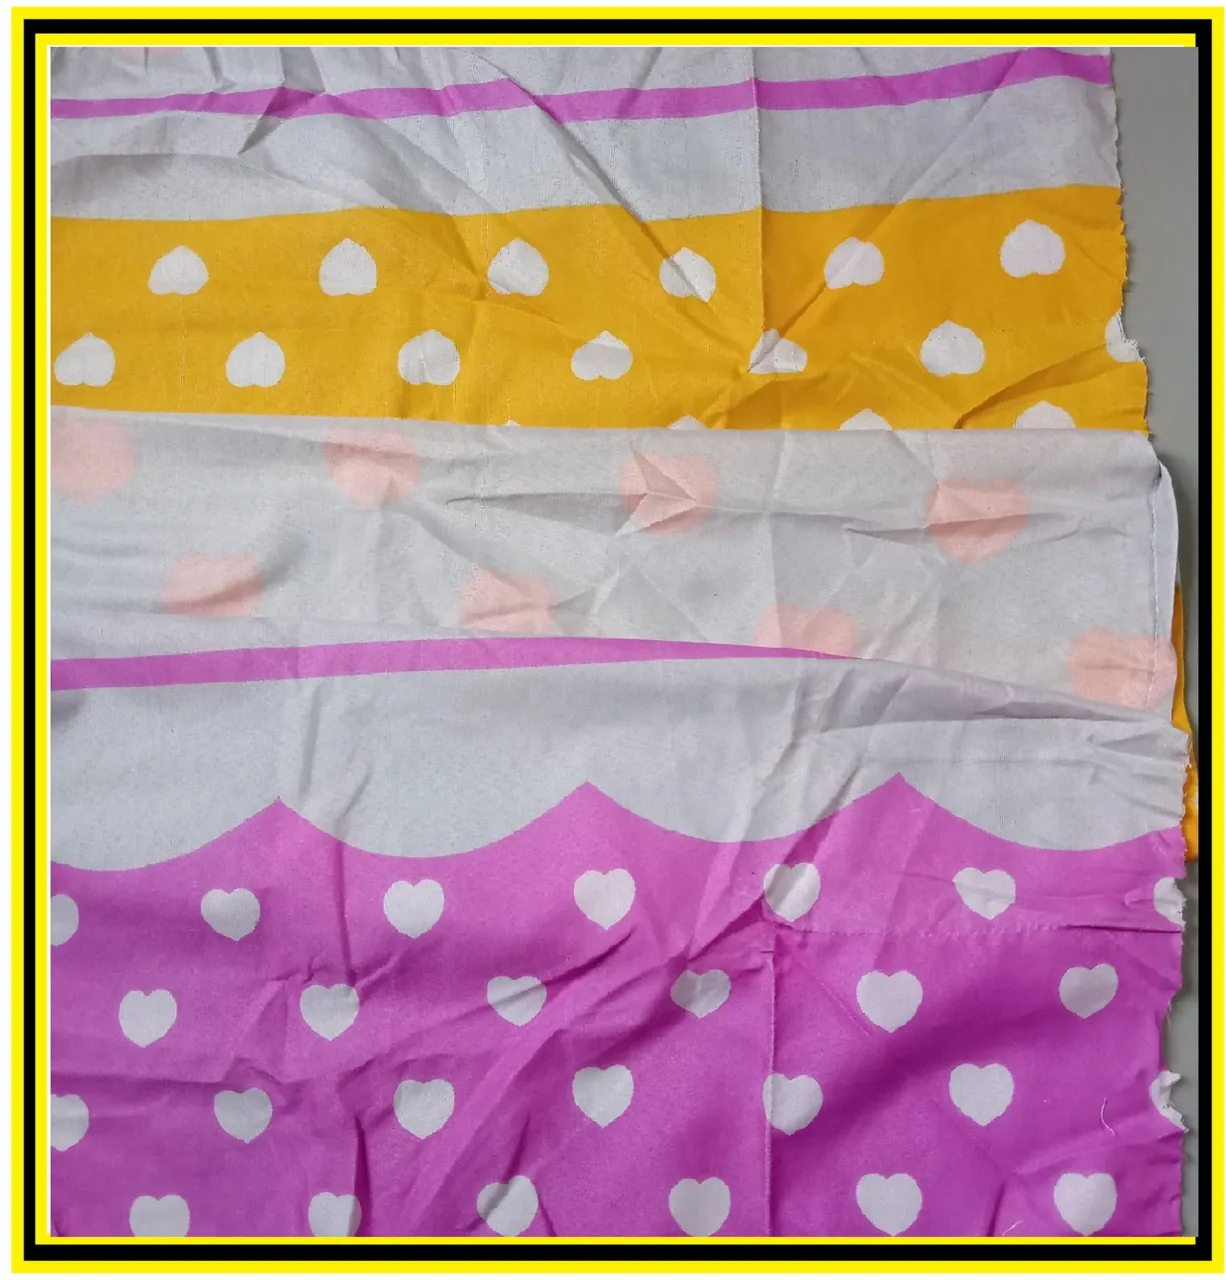
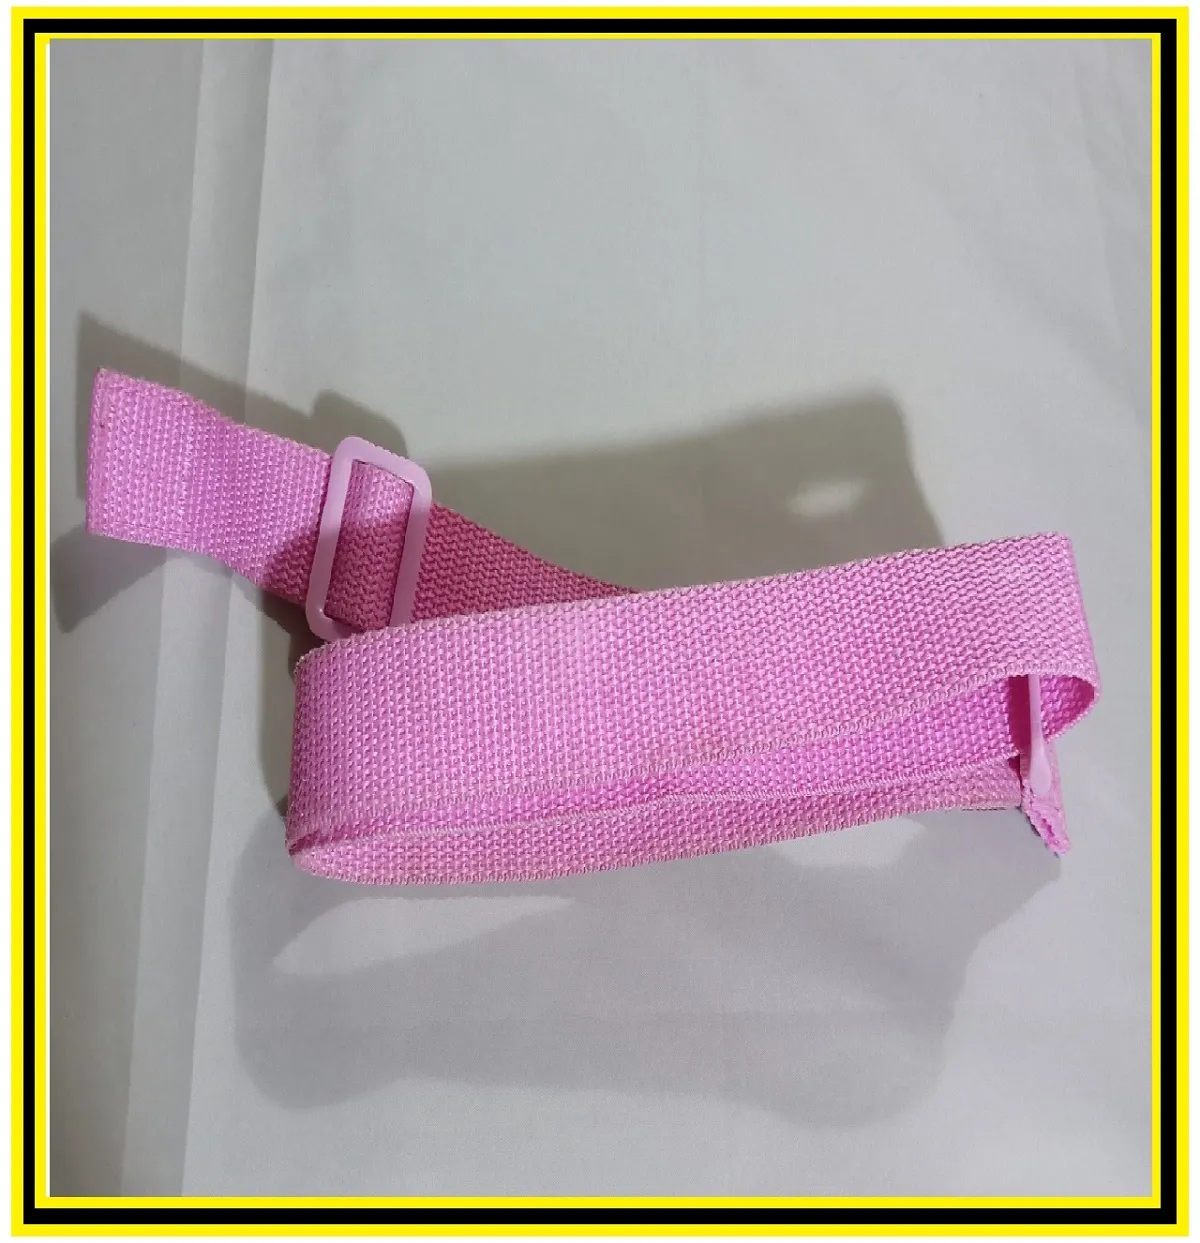
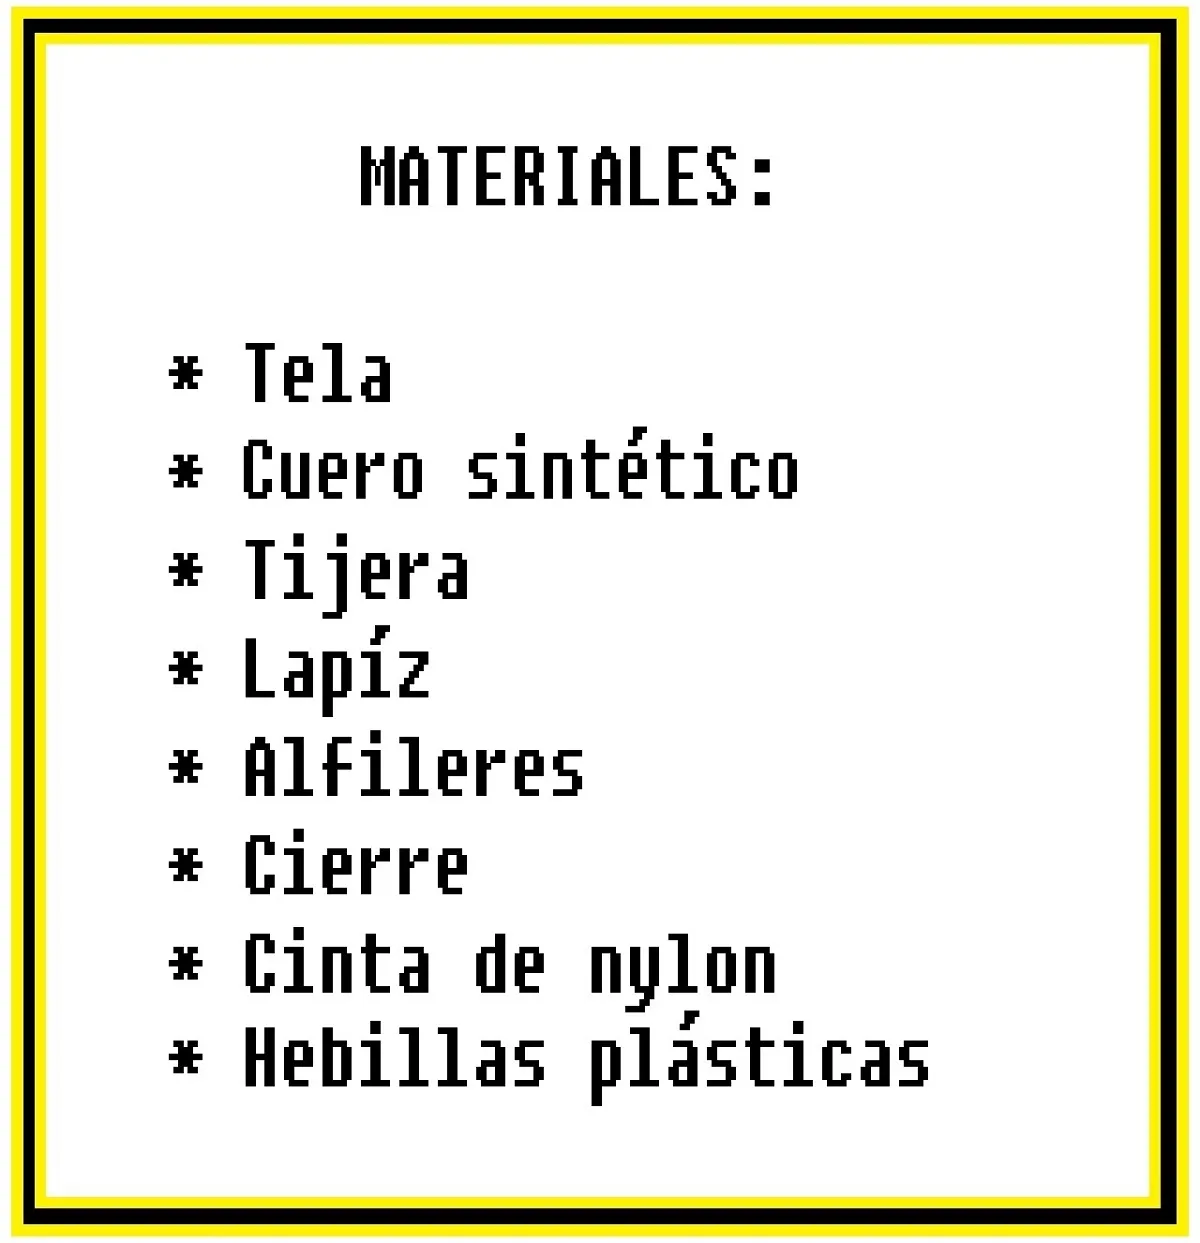
The bag was made with recycled materials, the fabric I used was from a corner sheet that I had to cover the mattress of my daughter's crib, as I didn't use it I decided to give it another use. The synthetic leather was a piece I had left over from a motorcycle seat cover. And the pink ribbon I used to hang the bag, I took it from a bag I had, but no longer used.
STEP BY STEP:
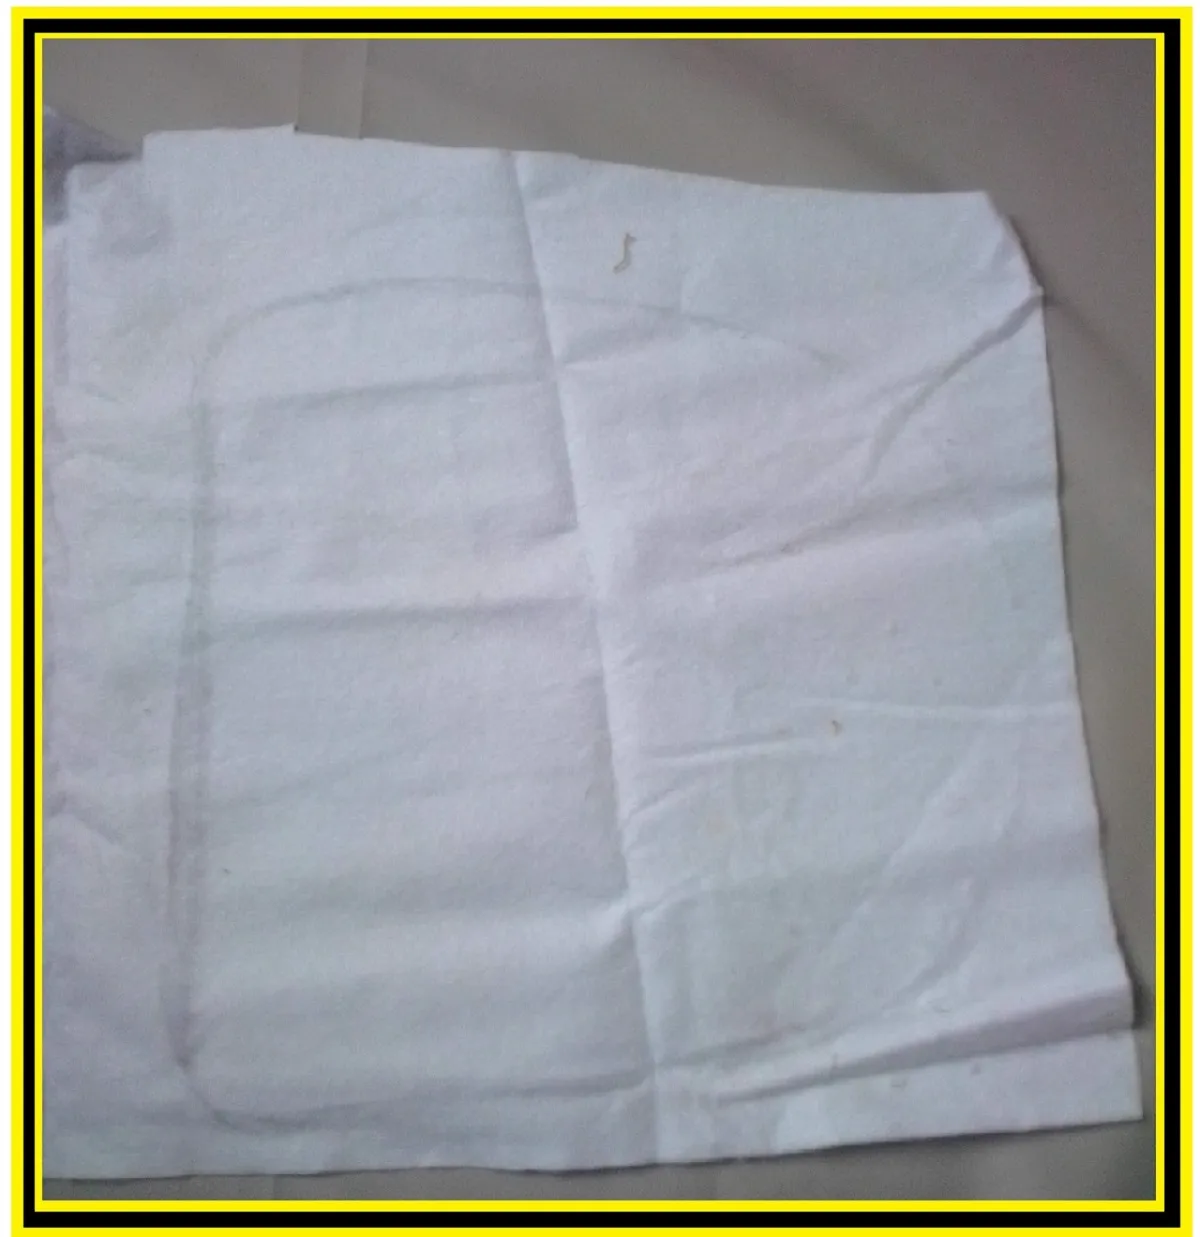
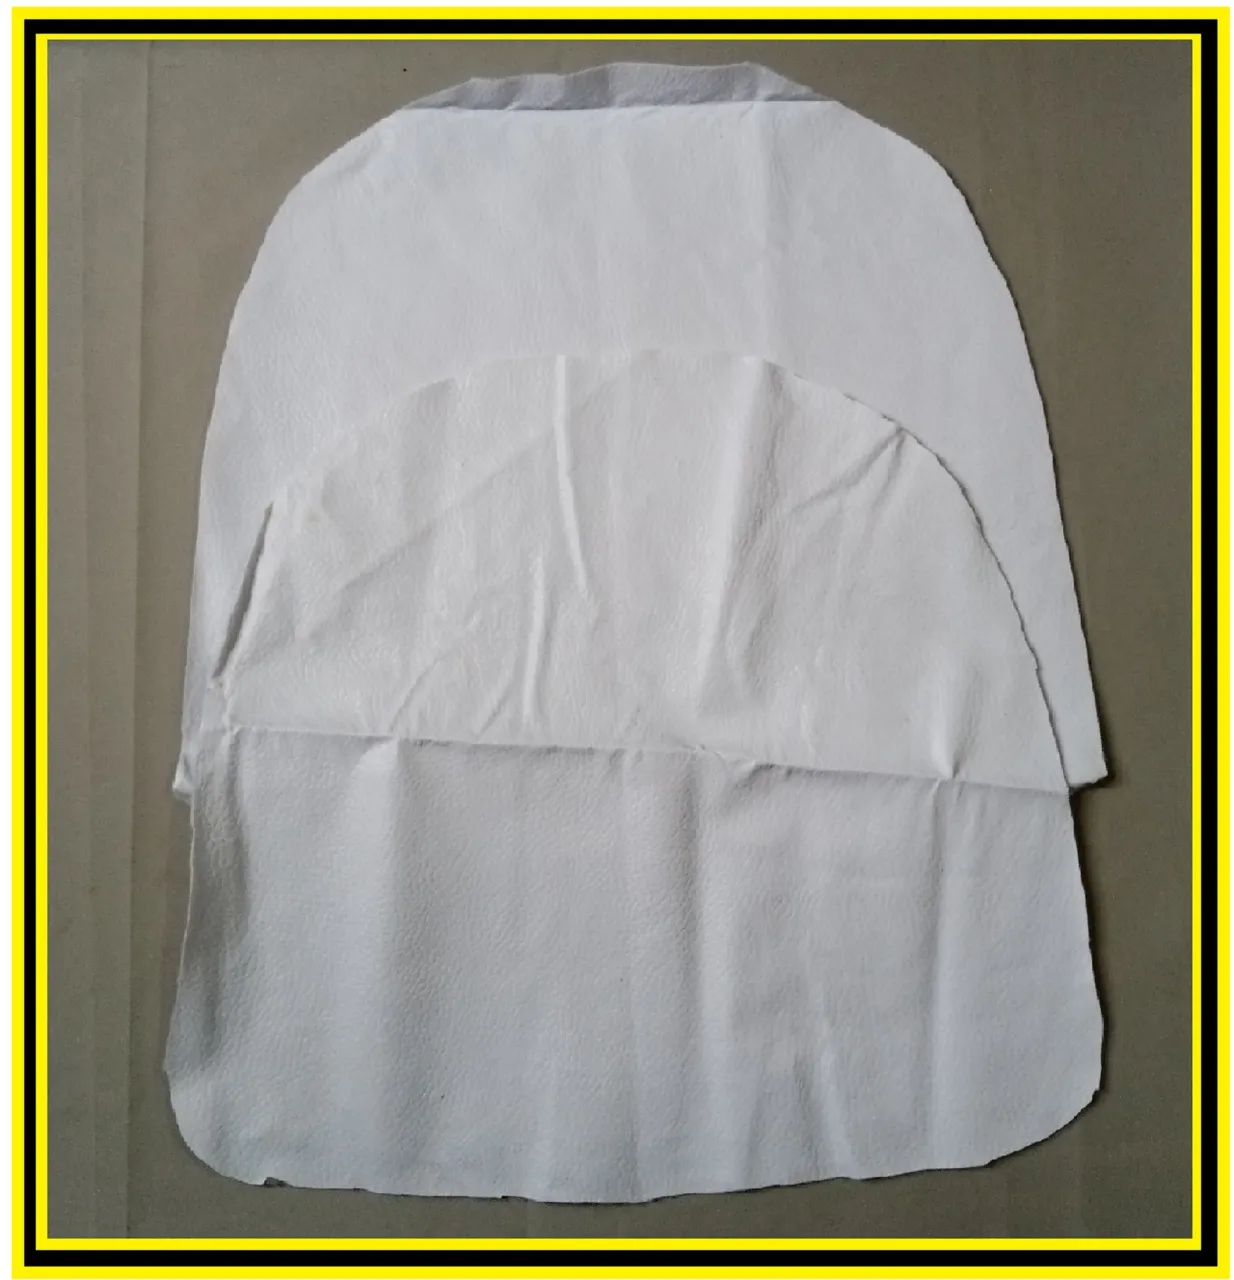
On the synthetic leather I will mark with the pencil, the shape of how I want the bag and I will cut two equal pieces. Take the synthetic leather, fold it in half and cut the piece so that I have 2 equal sides, especially in the curves. To tell the truth I didn't take an exact measurement, but the size was about 20 x 20 cm approximately.
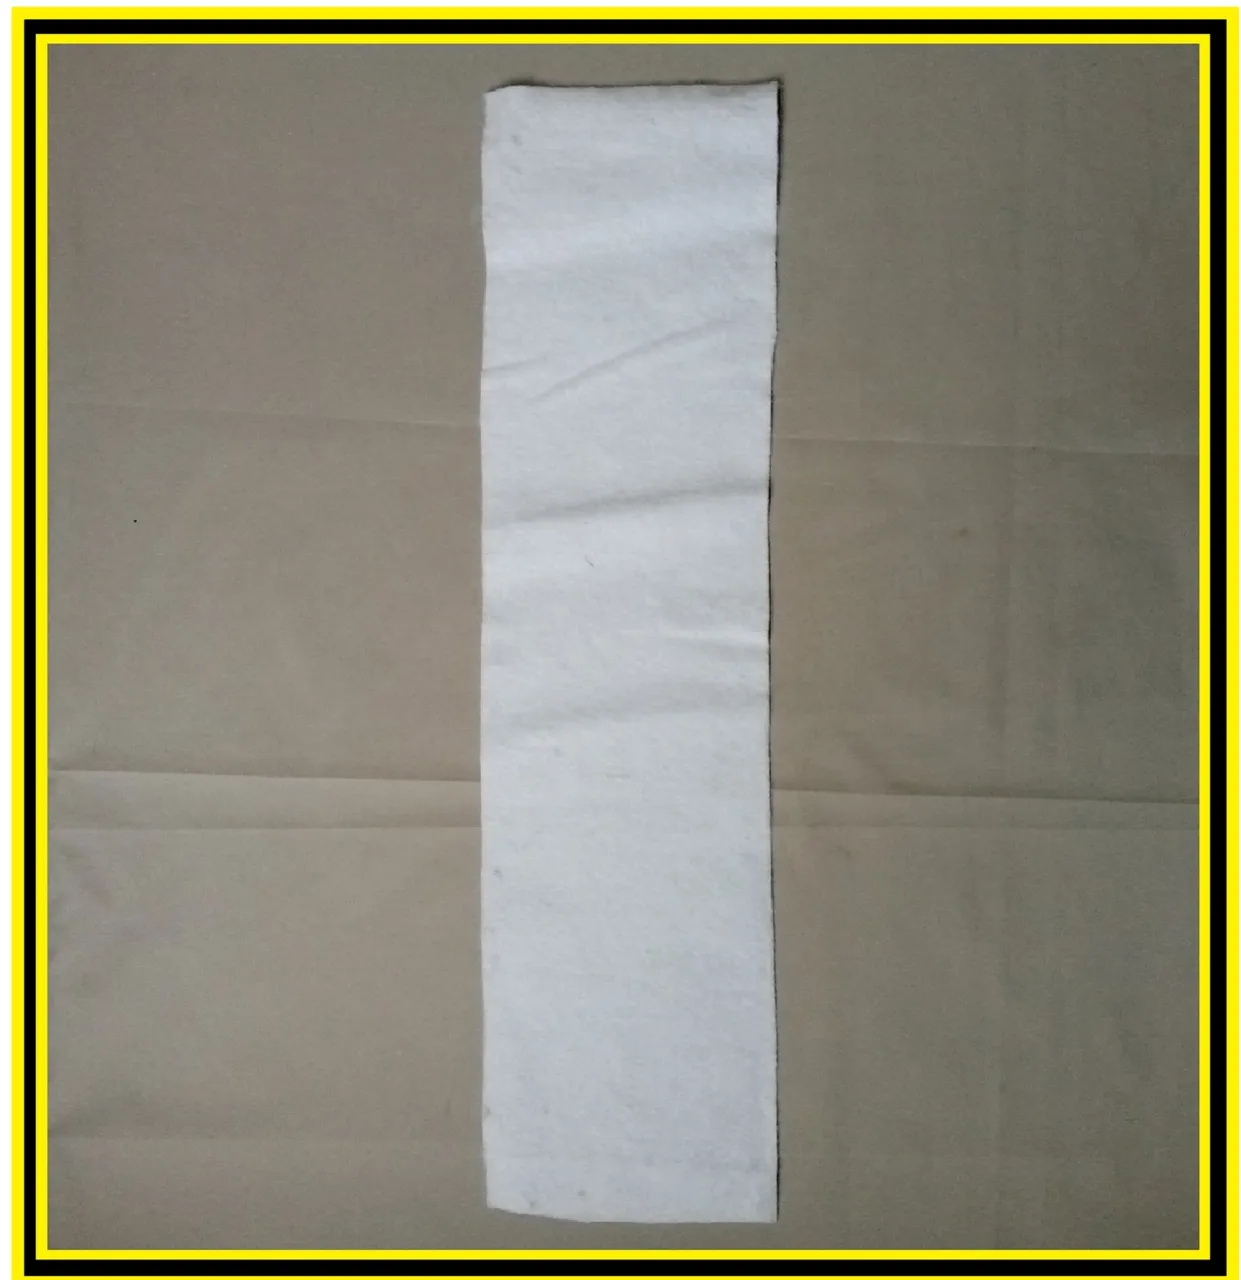
For the base of the bag, I will cut a strip with the semi leather of approximately 6 cm x 20 cm and reserve the pieces for the moment.
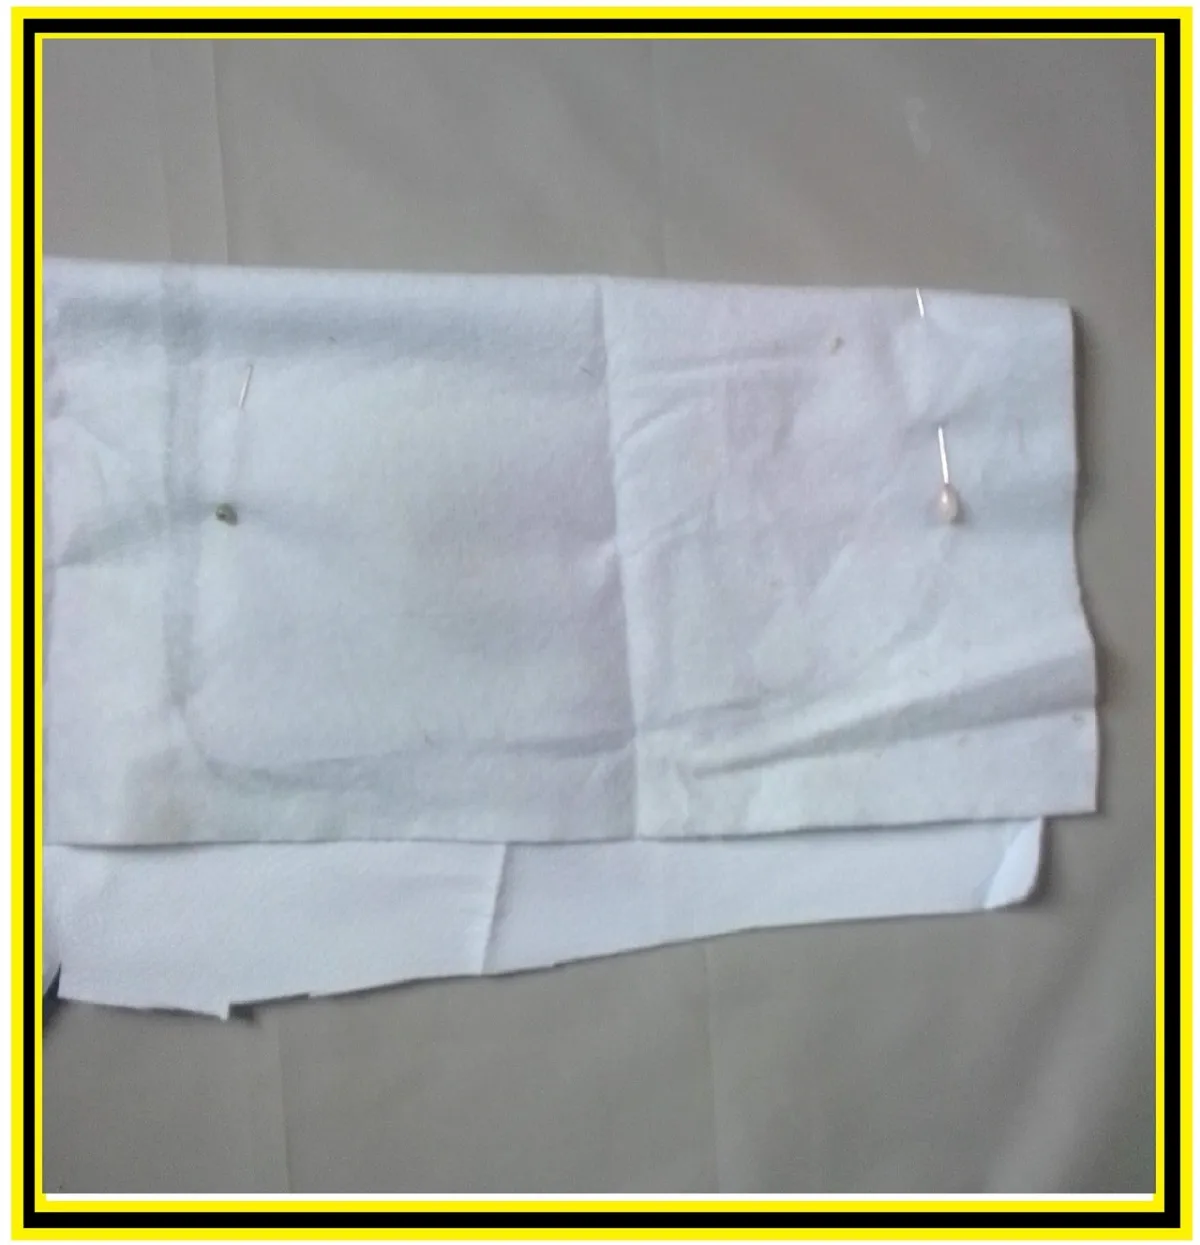
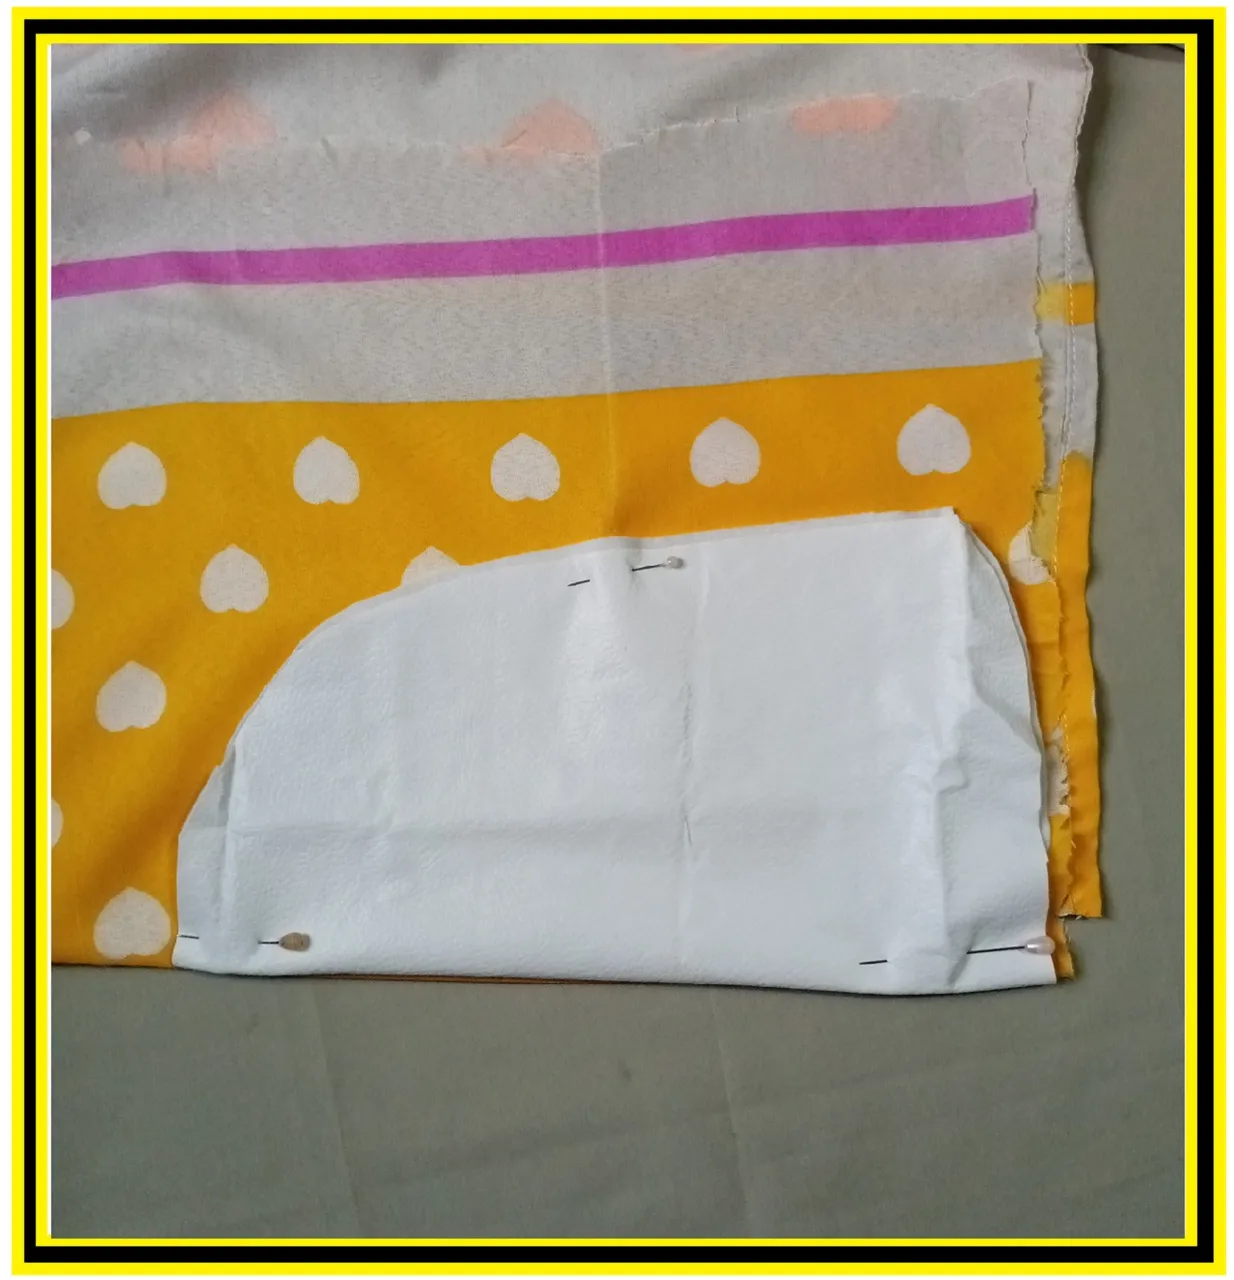
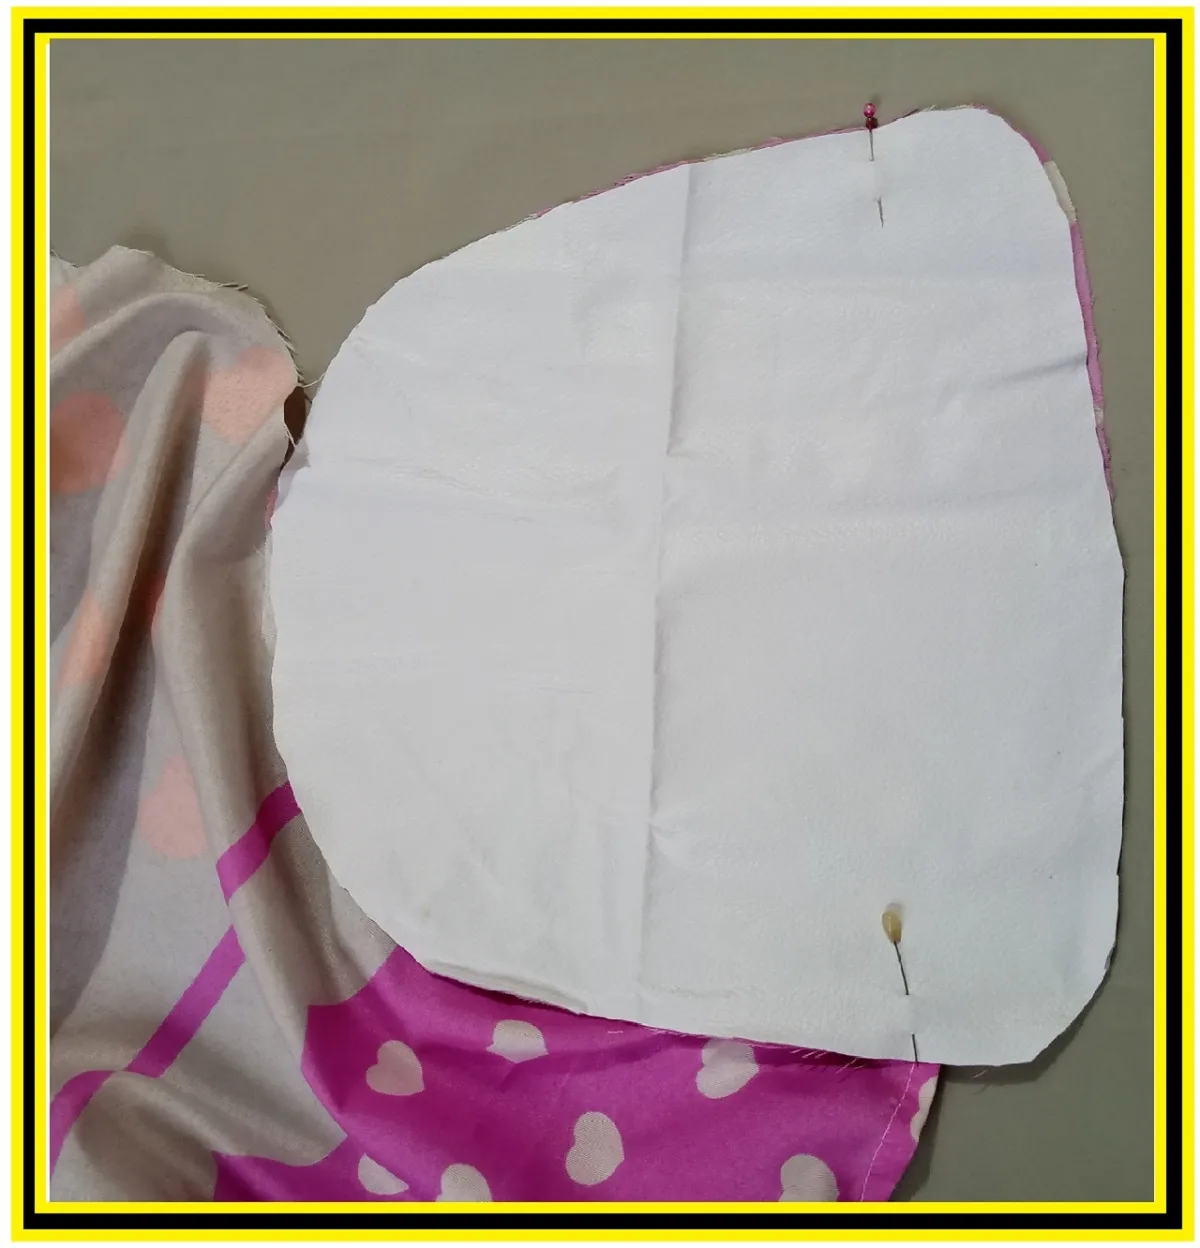
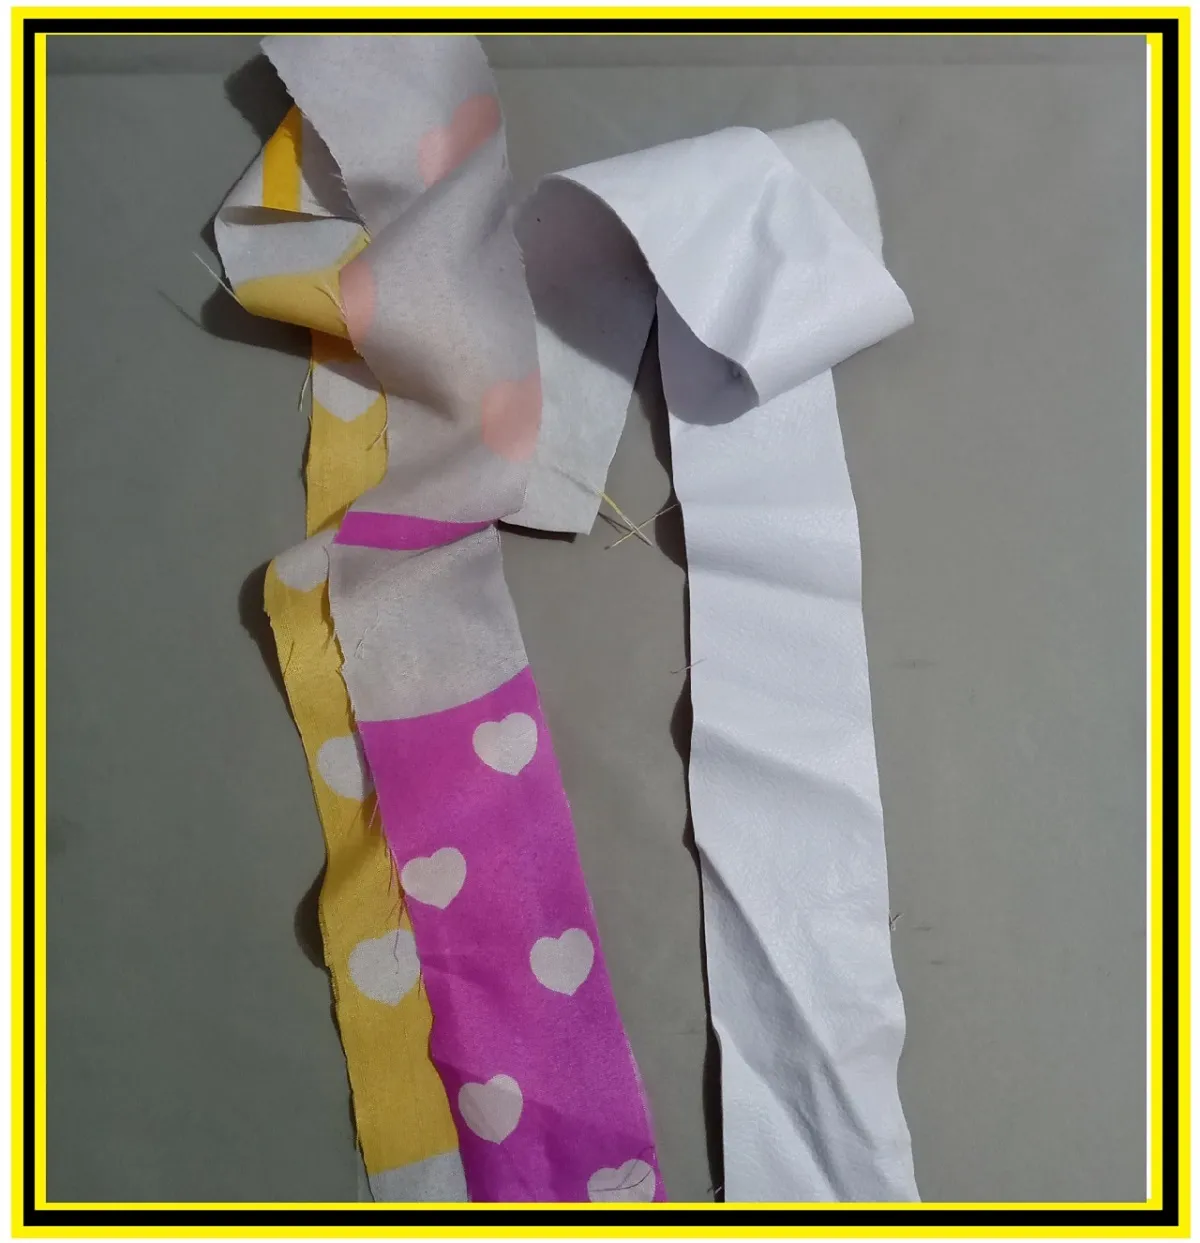
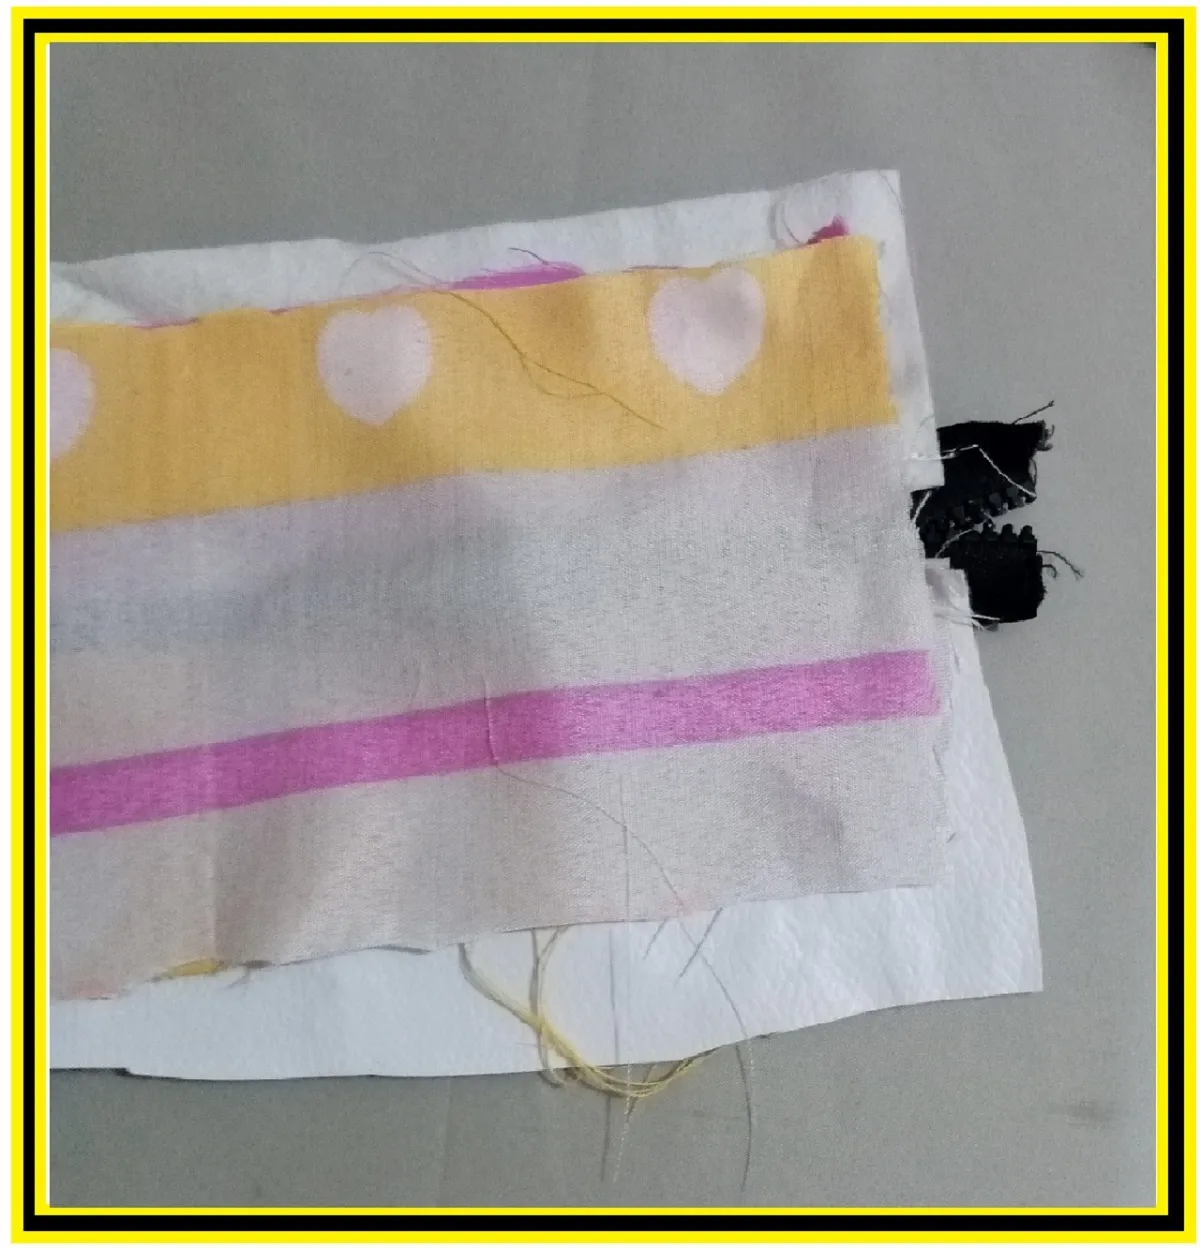
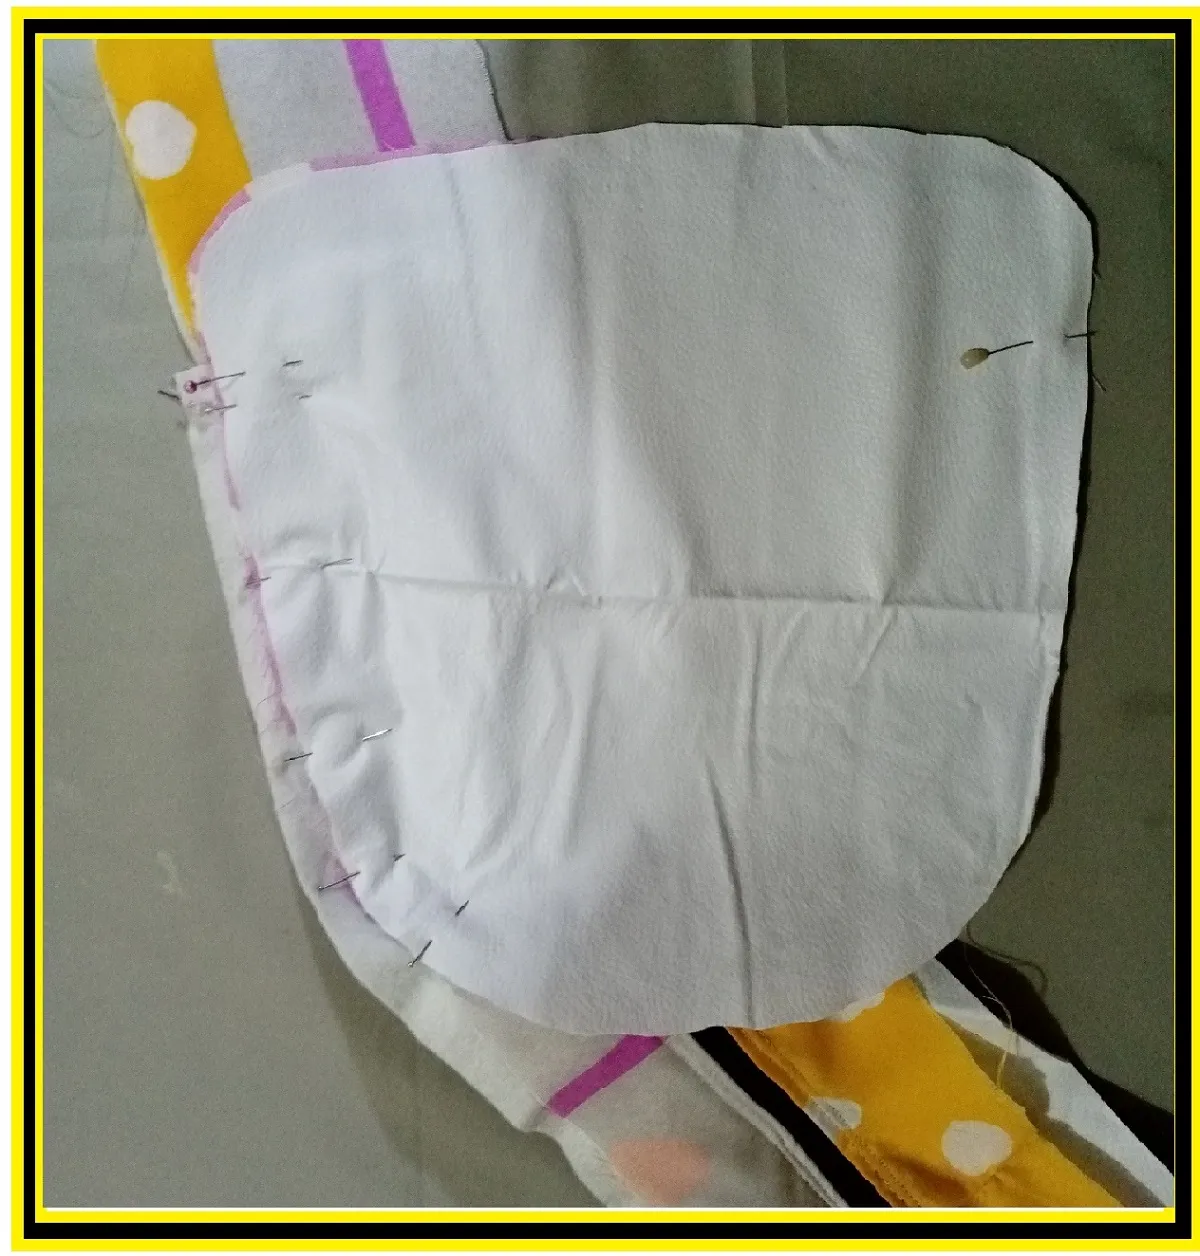
With the fabric of the sheet, as it had elastic on the sides, I cut them to make it easier to use it, I ironed it first to remove the wrinkles left by the elastic. As you can see the fabric has several colors, so I will take advantage of that, I will cut 1 piece in yellow and another in pink. To cut the piece fold the fabric in 2, place the synthetic leather piece on top, pin and cut all around the edge, as shown in the pictures.
 |  |  |
|---|
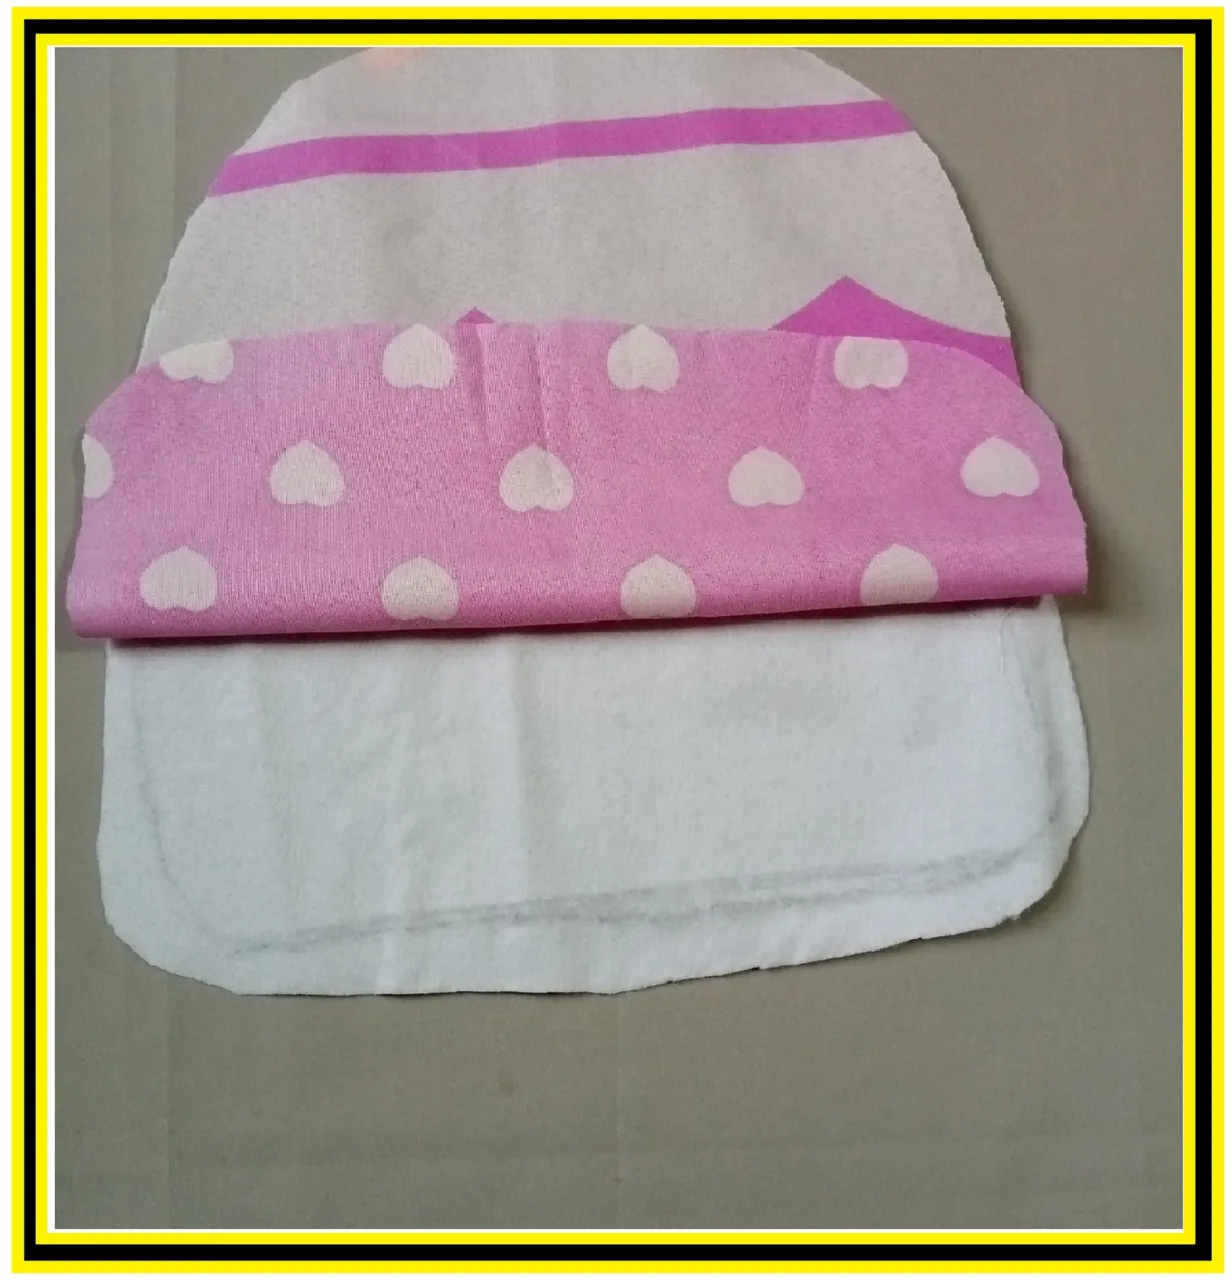
I did the same process to cut out the base part.
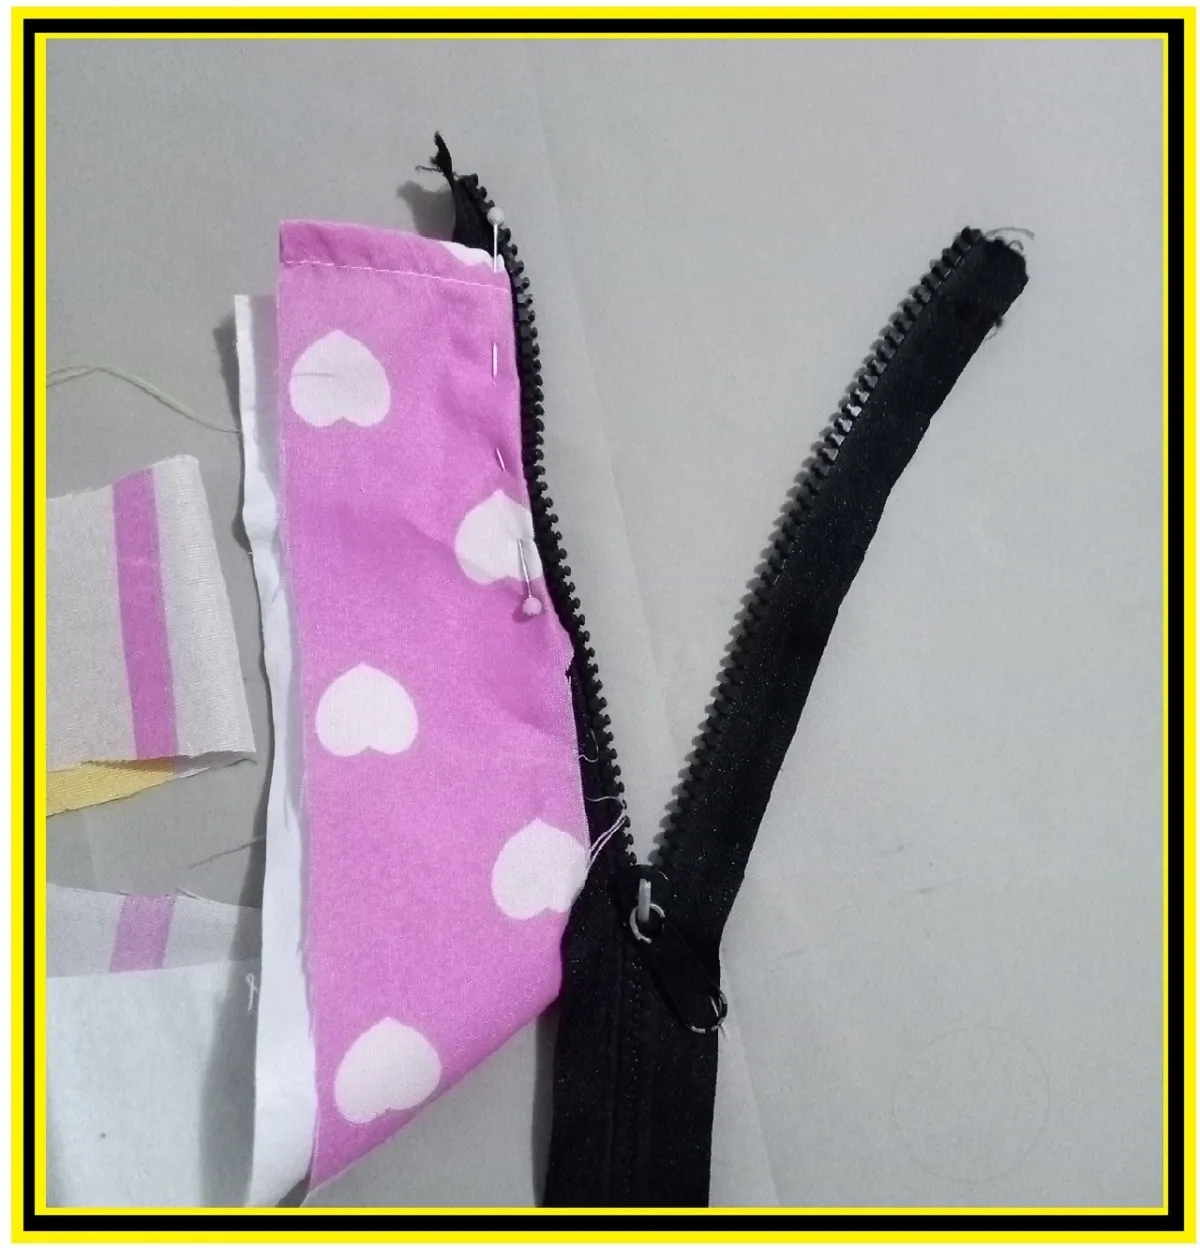
Now I will cut 4 strips of approximately 5 cm wide for the entire length that I will need to cover the top of the bag, there I will place the zipper. The pieces will be 2 in fabric and 2 in synthetic leather.
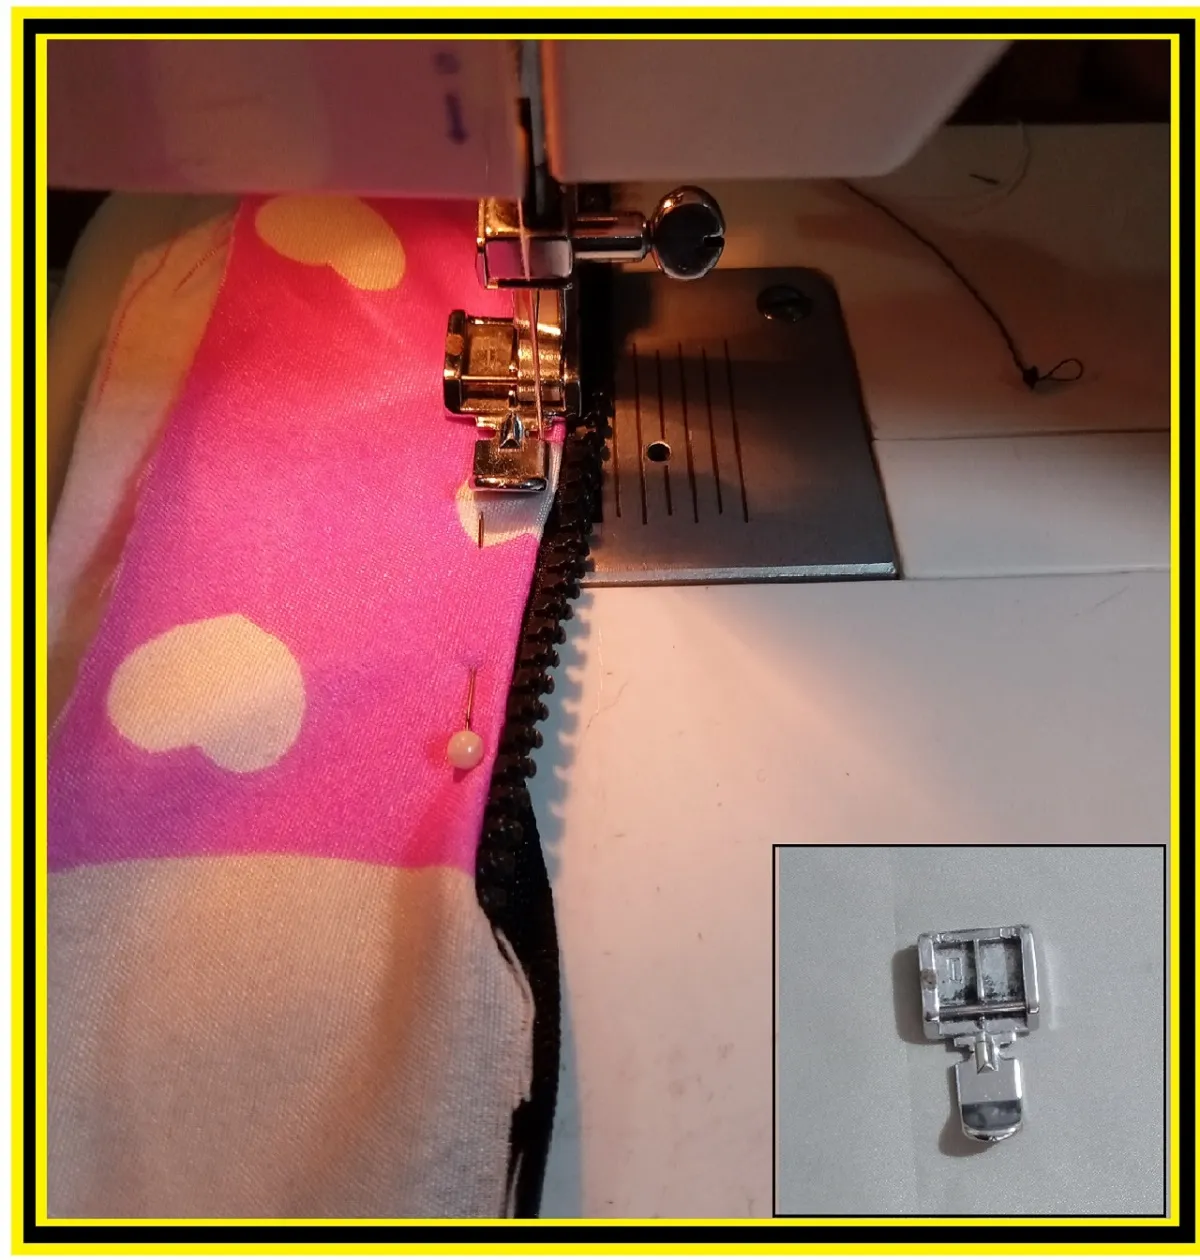
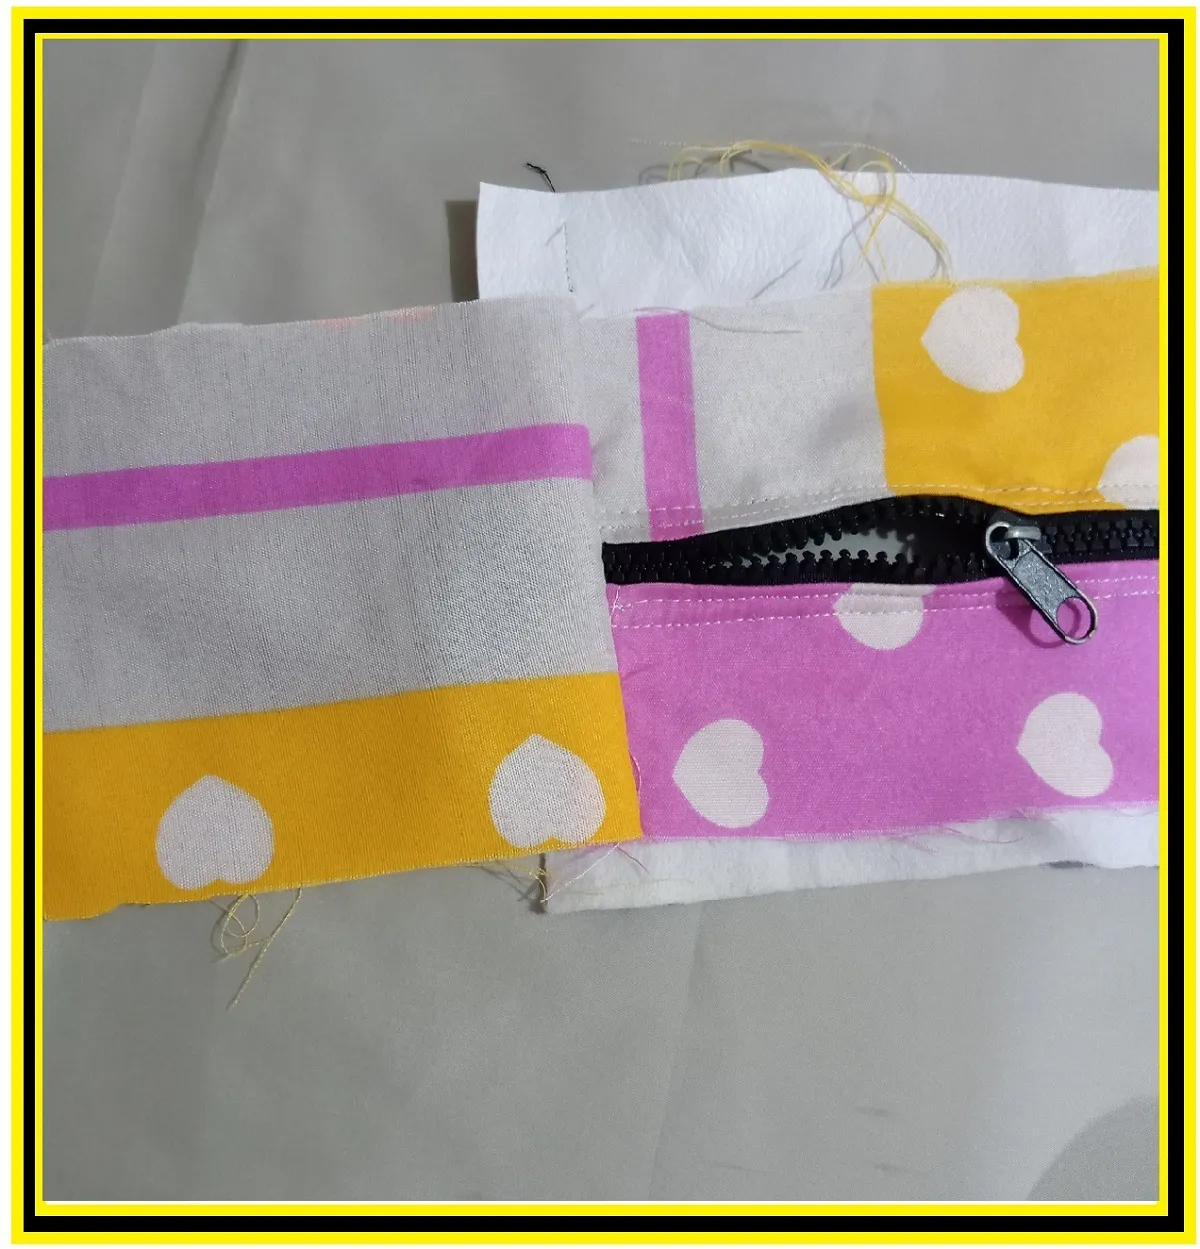
With the help of the pins, I will attach the zipper to the pieces of both the fabric and the synthetic leather, as you can see in the picture. There is a special piece for attaching zippers, I will use that foot as it is usually called and it will have a better finish and I will make a double seam all around the edge.
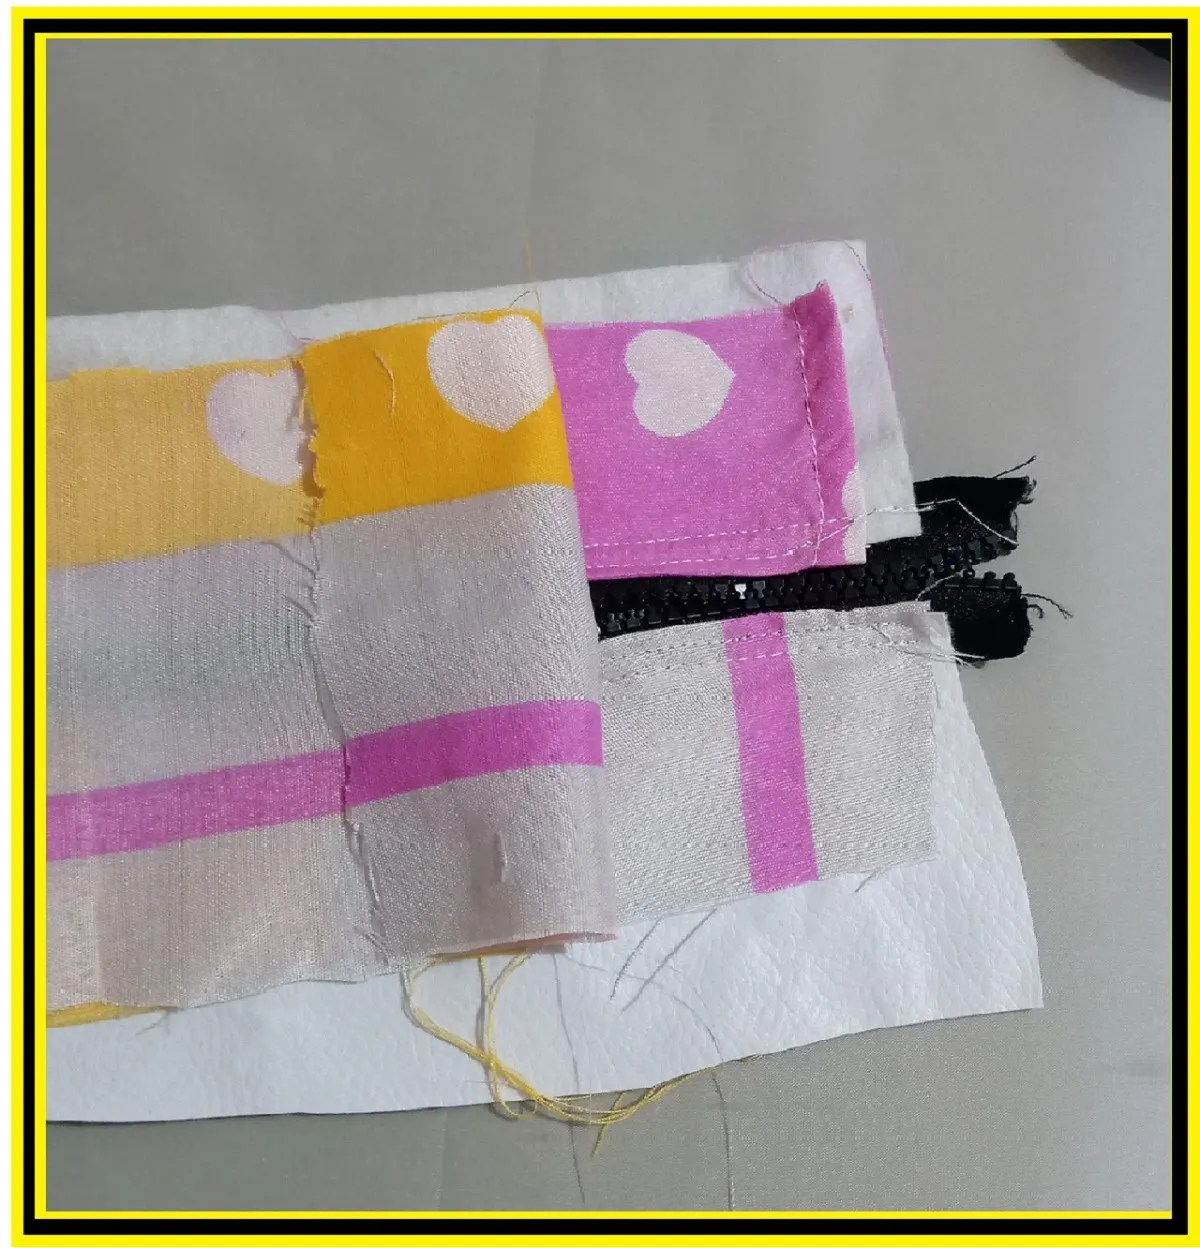
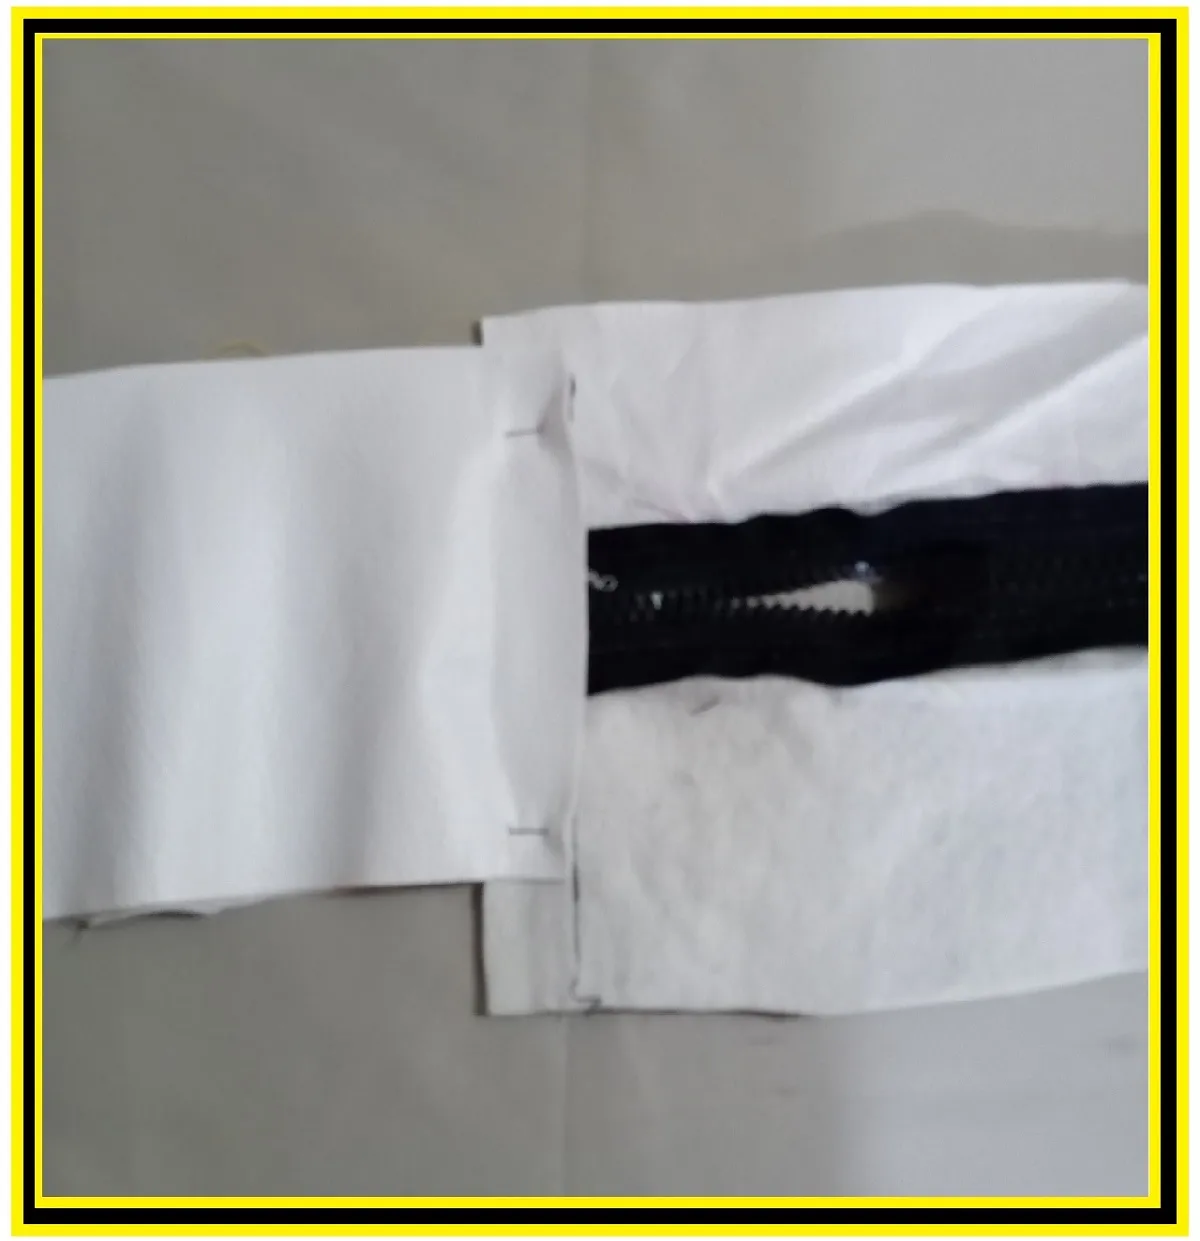
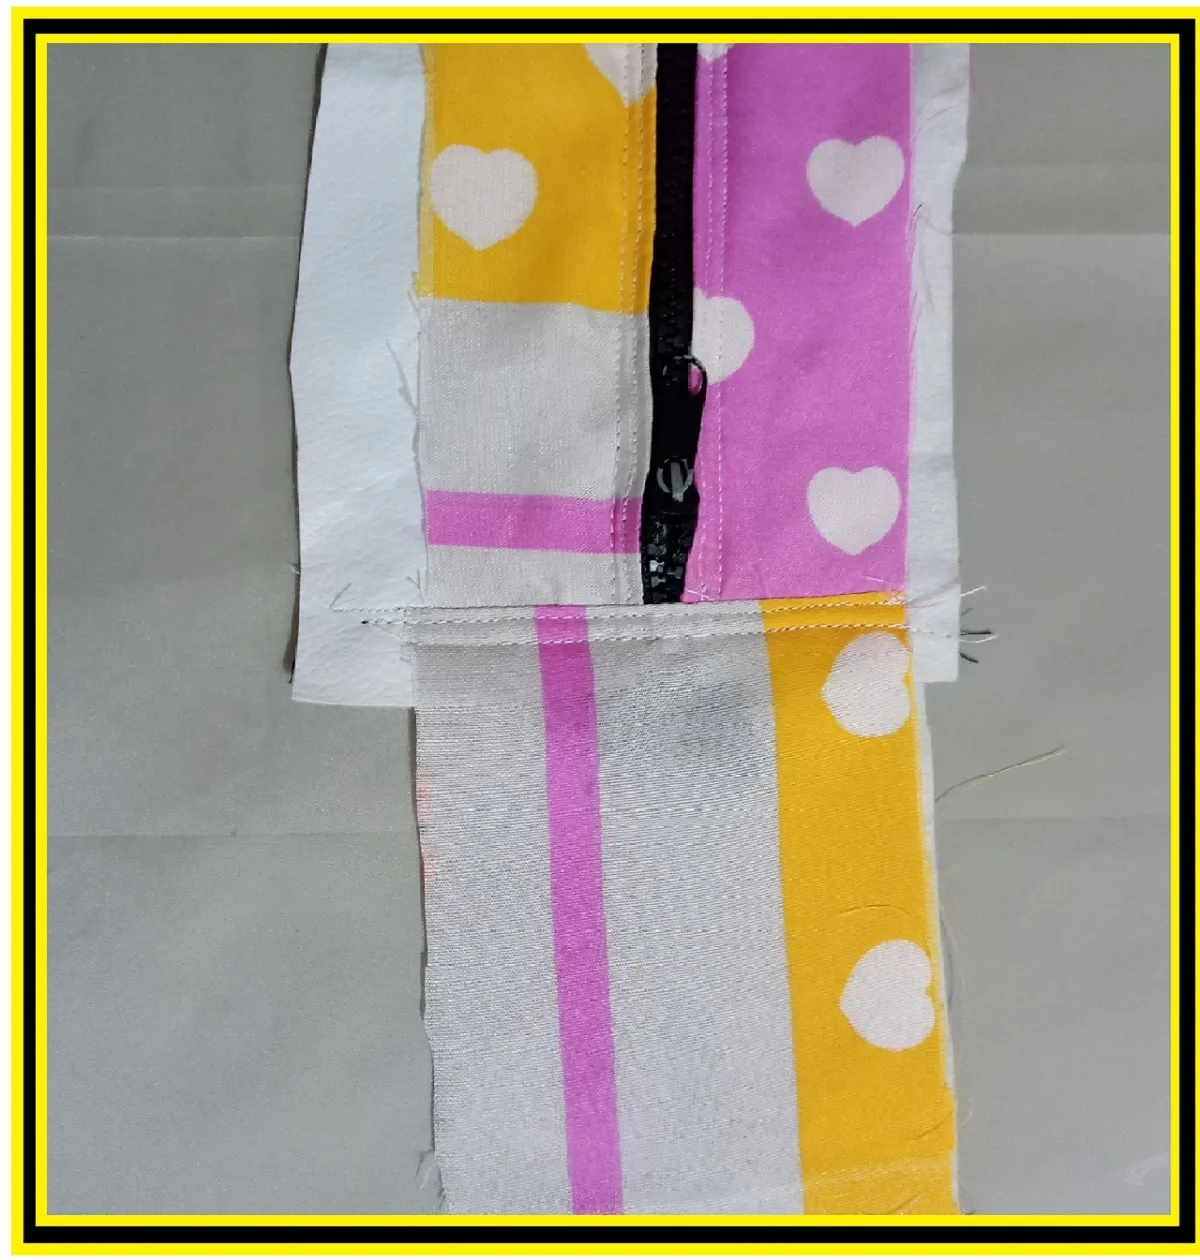
Once the zipper is sewn, I will join the 2 strips that I will use for the base of the bag and the top of the bag. As you can see in the picture I will place the two pieces right sides together and join them with a straight seam. Then I will flip and sew a double seam all along the junction of the 2 strips, but placing the synthetic leather underneath just at the junction, the idea is that when I turn the strip over, the seams will not be seen and it will have a better finish.
 |  |  |
|---|
 |  |
|---|
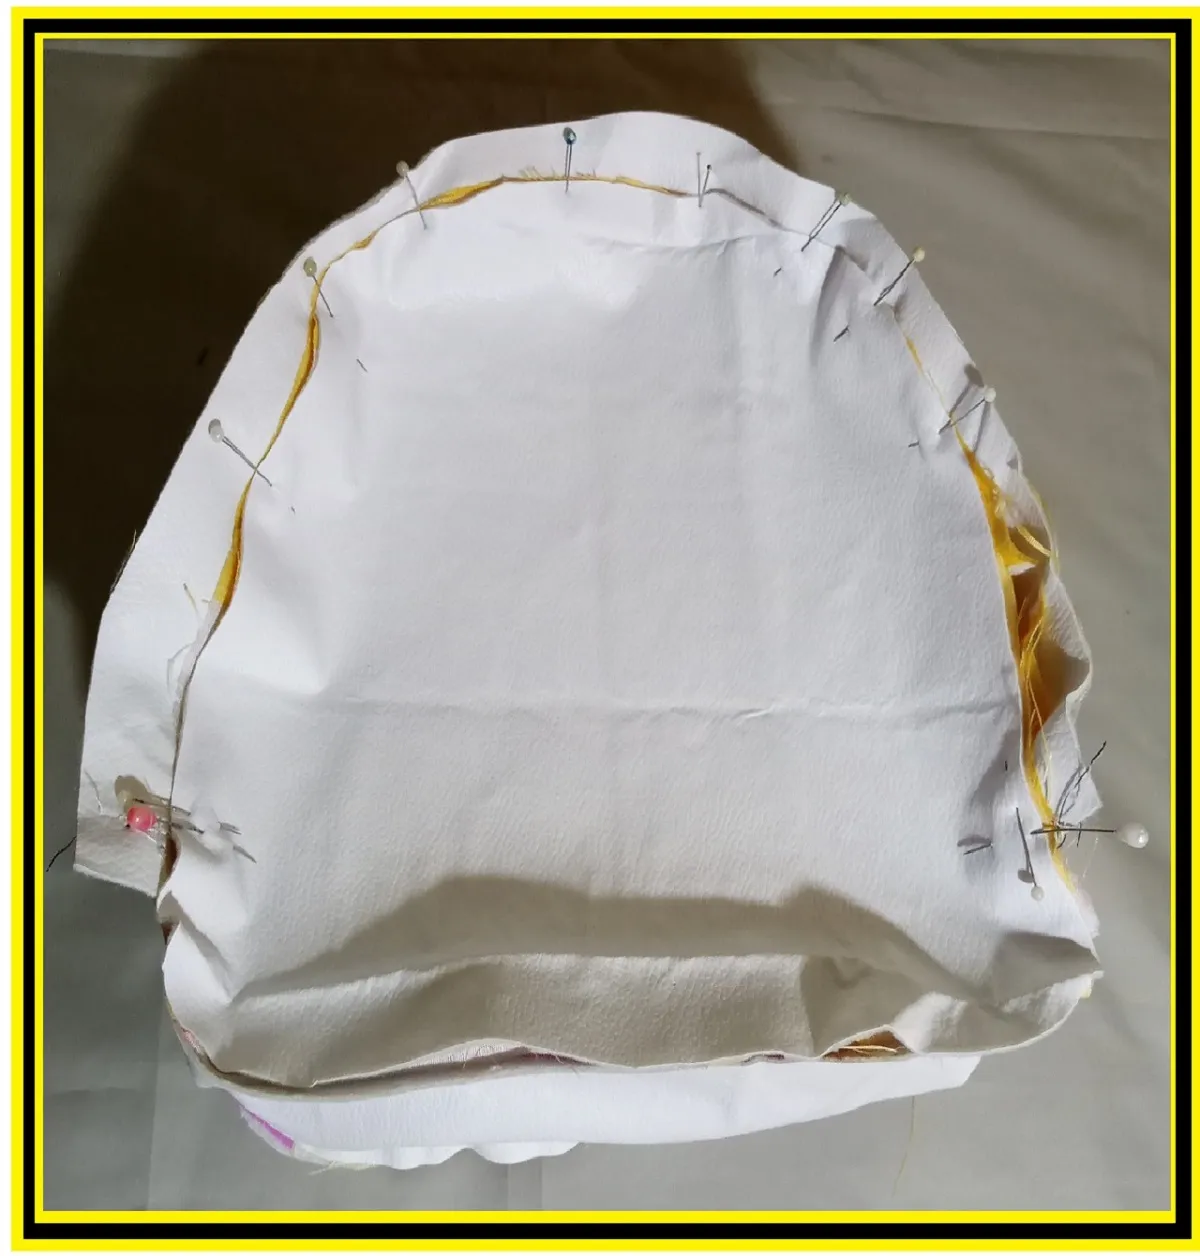
Now I proceed to join the strip with the big pieces of the bag, with the help of the pins, I will start to fix it, from the base of the bag to all around and with the machine I will sew all around the edge.
I will do the same procedure to glue the other flap on the other side of the bag and once I reach the junction of the strips, I will close with a straight seam.
Once the bag is assembled, I will glue the nylon ribbon to one side of the bag, sew it making a square at the tip and then making an "X" with the seam, the idea is that it is well fixed, as it is the one that will hold the weight of the bag and thus will not unravel.

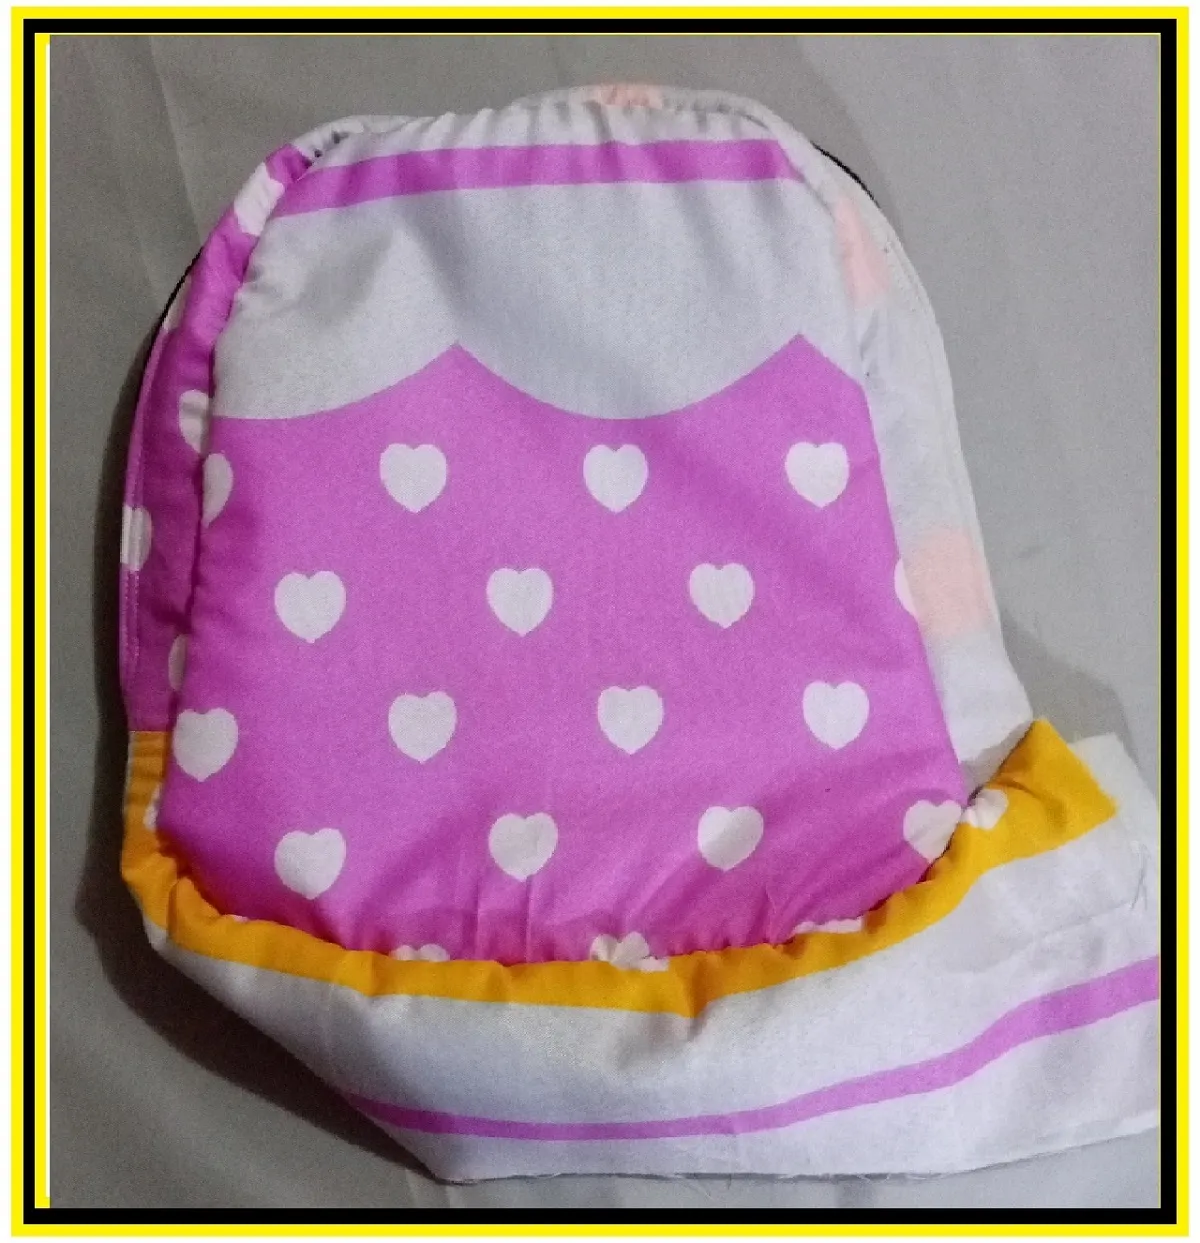
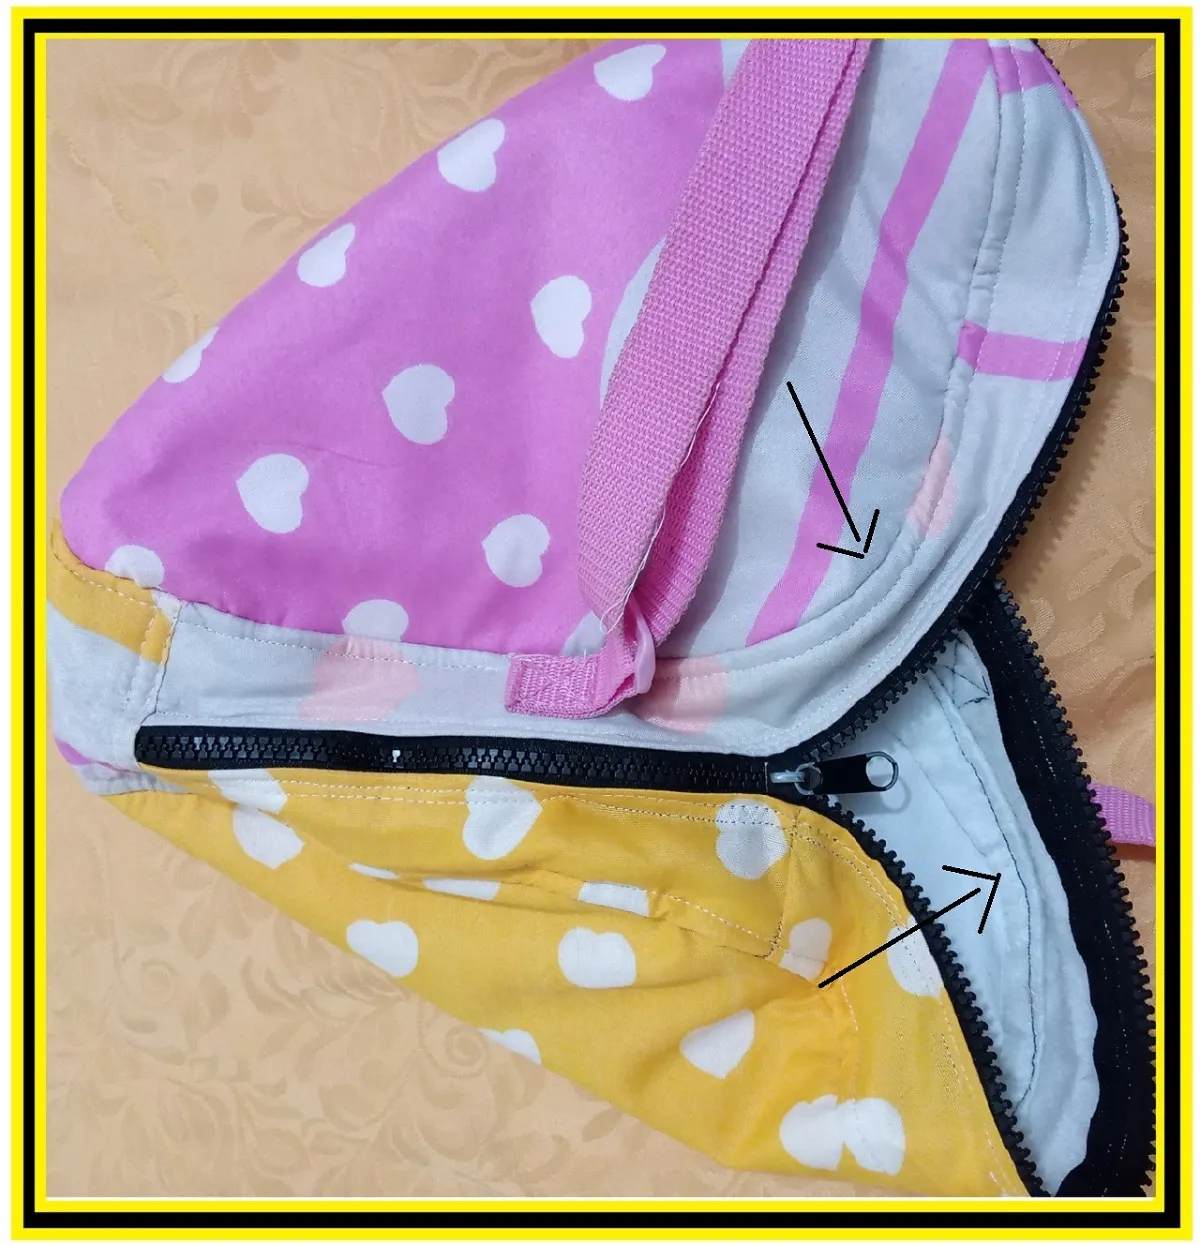
Once the whole bag is cooked, I will make a double seam around the edge of the bag and inside for a better finish, the synthetic leather that I left over from the strips where I glued the zipper, I will double it to cover the seam, as shown in the image.
And now I have my bag ready, the truth is that for the first time I make a bag, it was not bad at all. I liked the final result and my daughter loved it too.
 |  |
|---|
I hope you liked it and that you have learned to do it too. I say goodbye as always, but not before thanking you for dedicating a little bit of your valuable time and I hope to see you in my next post, thanks for visiting my blog. Take care and be well.
Original creation content:
✏️ All photos are my own taken and edited with my Alcatel cell phone.
📔 The cover image was made with Canva application and edited by me.
📏 The divider were taken from the Canva page and edited by me in Paint.
✂️ The English translation was done with the help of DeepL.
📘 The letters indicating the languages, were taken from the Cooltext page.

Hola mis queridos lectores, espero que se encuentren bien y que tengan o hayan tenido un excelente y maravilloso día. Aquí en Venezuela hace un par de días comenzó un nuevo año escolar y para que mi hija lleve su merienda al colegio, le hice un bolsito de tela, tipo bandolero. Son bastante cómodos porque se guindan y así sus manos quedan libres.
Les confieso que es la primera vez que realizo un bolso, no soy experta cociendo en máquina tampoco, pero me propuse hacerlo igual a ver que tal quedaba, así que hoy les comparto el paso a paso de como lo realice.
El bolso lo realice con materiales reciclados, la tela que use, era de una sabana esquinero que tenía para cubrir el colchón de la cuna de mi hija, como no la usaba decidí darle otra utilidad. El cuero sintético fue un pedazo que me quedo, de un forro que se le hizo al asiento de una moto. Y la cinta rosada que use para guindar el bolso, se lo quite a un bolso que tenía, pero que ya no usaba.
PASO A PASO:
En el cuero sintético marcaré con el lápiz, la forma de como quiero el bolso y recortaré dos piezas iguales. Tome el cuero sintético lo doble por la mitad y recorte la pieza para que así me queden los 2 lados iguales, sobre todo en las curvas. A decir verdad no tome una medida exacta, pero el tamaño quedo como de unos 20 x 20 cm aproximadamente.
Para la base del bolso, recortaré una tira con el cuero sintético de aproximadamente 6 cm x 20 cm y reservaré las piezas por el momento.
Con la tela de la sabana, como tenía elásticas por los lados, las corte para que se me haga más fácil usarla, la planche primero para quitar las arrugas que haya dejado la elástica. Como pueden ver la tela tiene varios colores, así que aprovecharé eso, sacaré 1 pieza en color amarillo y otra en rosado. Para cortar la pieza doble la tela en 2, coloque la pieza de cuero sintético encima, sujete con alfileres y corte por todo el borde, tal como se muestran en las imágenes.
| | |
|---|
Hice el mismo proceso para recortar la parte de la base.
Ahora recortaré 4 tiras de aproximadamente 5 cm de ancho por todo el largo que necesitaré para cubrir la parte de arriba del bolso, allí colocaré lo que es el cierre. Las piezas serán 2 en tela y 2 en cuero sintético.
Con la ayuda de los alfileres, voy a fijar el cierre a las piezas tanto de la tela como el cuero sintético, tal como se puede ver en la imagen. Hay una pieza especial para pegar cierres, usaré esa pie como se le suele decir y tendrá un mejor acabado y le haré una doble costura por todo el borde.
Una vez que ya haya cocido el cierre, uniré las 2 tiras que usaré para la base del bolso y la parte de arriba del bolso. Como pueden ver en la imagen colocaré las dos piezas, derecho con derecho y uniré con una costura recta. Después voltearé y coseré una doble costura por toda la unión de las 2 tiras, pero colocando por debajo el cuero sintético justo en la unión, la idea es que cuando le dé vuelta a la tira, las costuras no se vean y tenga un mejor acabado.
| | |
|---|
| |
|---|
Ahora procedo a unir la tira con las piezas grandes del bolso, con la ayuda de los alfileres, empezaré a fijarlo, desde la base del bolso hasta todo el alrededor y con la máquina coseré por todo el borde.
Haré el mismo procedimiento para pegar la otra tapa del otro lado del bolso y una vez que llegue a la unión de las tiras, cerraré con una costura recta.
Ya con el bolso armado, pegaré la cinta de nylon a un costado del bolso, la coseré haciendo un cuadrado en la punta y luego haciendo una "X" con la costura, la idea es que quede bien fija, pues ella es quien va a aguantar el peso del bolso y así no se descoserá.
Una vez cocido todo el bolso, haré una doble costura por todo el borde del bolso y por dentro para un mejor acabado, el cuero sintético que me sobro de las tiras donde pegue el cierre, la doble para poder cubrir la costura, tal como se aprecia en la imagen.
Y ya tengo listo mi bolsito, la verdad es que para ser la primera vez que hago un bolso, no me quedo nada mal. Me gusto el resultado final y a mi hija le encanto también.
| |
|---|
Espero que les haya gustado y que hayan aprendido a hacerlo también. Me despido como siempre, no sin antes agradecerles por dedicarme un poquito de su valioso tiempo y los espero en mi próxima publicación, gracias por visitar mi blog. Cuídense y pórtense bien.
Contenido de creación original:
✏️ Todas las fotos son de mi propiedad tomada y editadas con mi celular Alcatel.
📔 La imagen de portada fue realizada con la aplicación Canva y editada por mi.
📏 El separador fueron tomado de la página Canva y editado por mí en Paint.
✂️ La traducción al idioma inglés fue realizada con ayuda de DeepL.
📘 Las letras de indicación de los idiomas, fueron tomadas de la página Cooltext.