I'm the kind of person who doesn't really do the whole "new obsession" thing by halves. Since first getting into AI art, I've tried to figure out ways to make the outputs of AI models feel more like "my own" art and less like the soul-less byproduct of an algorithm and dataset over which I have no control. Naturally, this led me to investigate methods of building AI models on my own. I'm not much of a coder and have 0 skill with Python, which posed a pretty major early obstacle: a lot of the basic methods of building AIs require at least a passing knowledge of Python.
Luckily, before I spent too much time trying to crash-learn a whole new programming language, I came across RunwayML, which kind of solved the problem for me. This app makes it really easy to create custom AI models from any collection of pictures without any coding whatsoever, and you can always port in external models from GitHub if you like, but that's beyond me.
A really great feature of RunwayML is that it allows the creation of a free account and credits you with 3,000 free training steps for your first model (equal to about $15). Although RunwayML is pretty straightforward once you get used to it, the total beginner in AI modeling might find that they accidentally blow through those free credits and end up with a crappy model because they didn't completely understand the RunwayML UI/process before beginning. Below, I try to make creating a satisfactory first model as easy as possible.
I. Getting Started With RunwayML
Download the application and install it
Although RunwayML will soon be available as a browser-based application as well as desktop app, you currently need to download and install the software in order to use it. It can be found here.Create and verify your free account
Pretty straightforward, what it says on the tin.Gather your dataset
AI models generate new images based upon the data you train the model on. The algorithm's goal is to approximate as closely as possible the content, color, style, and shapes in your input dataset, and to do so in a way that matches the general relationships/angles/sizes of objects in the input images. This means that having a quality dataset collected is vital in developing a successful AI model.If you want a very specific output that closely matches your input, the input has to be fairly uniform. For instance, if you want a bunch of generated pictures of cats, but your dataset includes birds and gerbils, your output will be less catlike overall than it would be if the dataset was made up of cat images only. Angles of the input images matter, too--a dataset of cats in one uniform pose (probably an impossible thing, since cats are never uniform about anything) will create an AI model that generates more proportionally-convincing cats. Click through the site linked above to see what happens when a more diverse set of poses is used--the end results are still definitely cats, but while some images are really convincing, others are eldritch horrors.
If you're interested in generating more experimental forms, having a more diverse dataset might make sense, but you don't want to go too wild--if the AI can't find patterns and common shapes in your input, your output likely won't look like much.
Another important thing to keep in mind when building your input dataset is that both quality and quantity of images matter. Honestly, the more high-quality images you can find of your desired subject, the better, though the more uniform/simple the inputs, the fewer images seem to be absolutely necessary for the AI to get the picture. Even for uniform inputs, I'd recommend no fewer than 500 quality images for the best chance of creating a model that gives you recognizable outputs. For more diverse subjects, three or four times that number is closer to the mark, and even that might be too few. Really, just try to get as many good, high res images as you can.
But how do you get that number of high-res images without manually downloading every single one? Many AI artists use some form of bulk-downloading or web scraping. Personally, I use a Chrome extension called ImageAssistant. This extension bulk-downloads all the loaded images on any given webpage into a .zip file. Downsides of ImageAssistant are that it sometimes duplicates images, and it will also extract ad images, especially if you try to bulk download pinterest boards. There are Mac applications that you can use to scan the download folders for duplicated images, though, and the ImageAssistant interface makes getting rid of unwanted ad images fairly easy, and it's WAY faster than downloading thousands of images by hand.
Images that are royalty-free are obviously the best choice to download from a copyright perspective. AI outputs based on datasets with copyrighted material are a somewhat grey area legally, apparently. That being said, it does seem to me that creative commons laws should cover such outputs, especially when the copyrighted material is not at all in evidence in the end product. I'm no lawyer, though, so use your discretion when choosing what to download. A safe, high-quality bet would be to search on Getty images for royalty-free images of whatever you're building an AI model to duplicate, and then bulk-download the results.
Sometimes, in spite of exhaustive web searches, you just won't have quite enough images. In cases like that, a little data augmentation is called for. By bulk-flipping your images horizontally, you can double the size of your dataset without compromising its diversity. I generally practice this on all my datasets, even if I have a reasonably-sized dataset to start with.
II. Setting Up Your Model in RunwayML
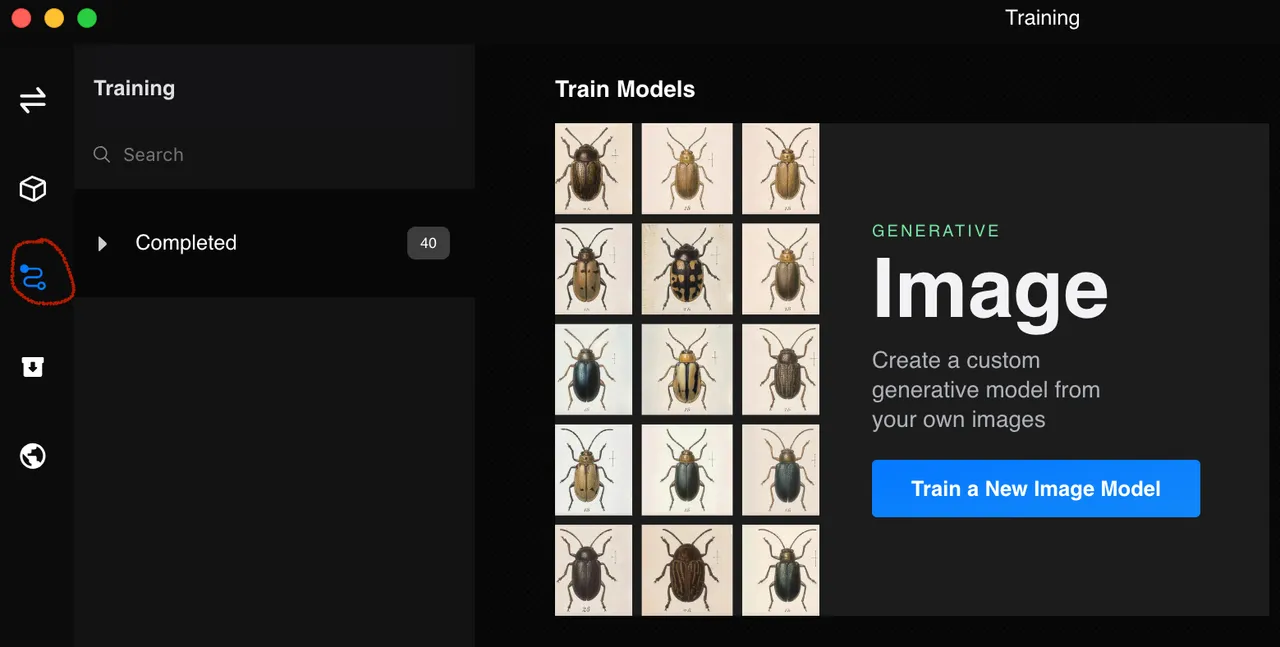
- Navigate to the "Training" Screen
You get there by clicking the squigley symbol (see image below).
From there, click "Train a New Image Model." Name your model whatever you like.
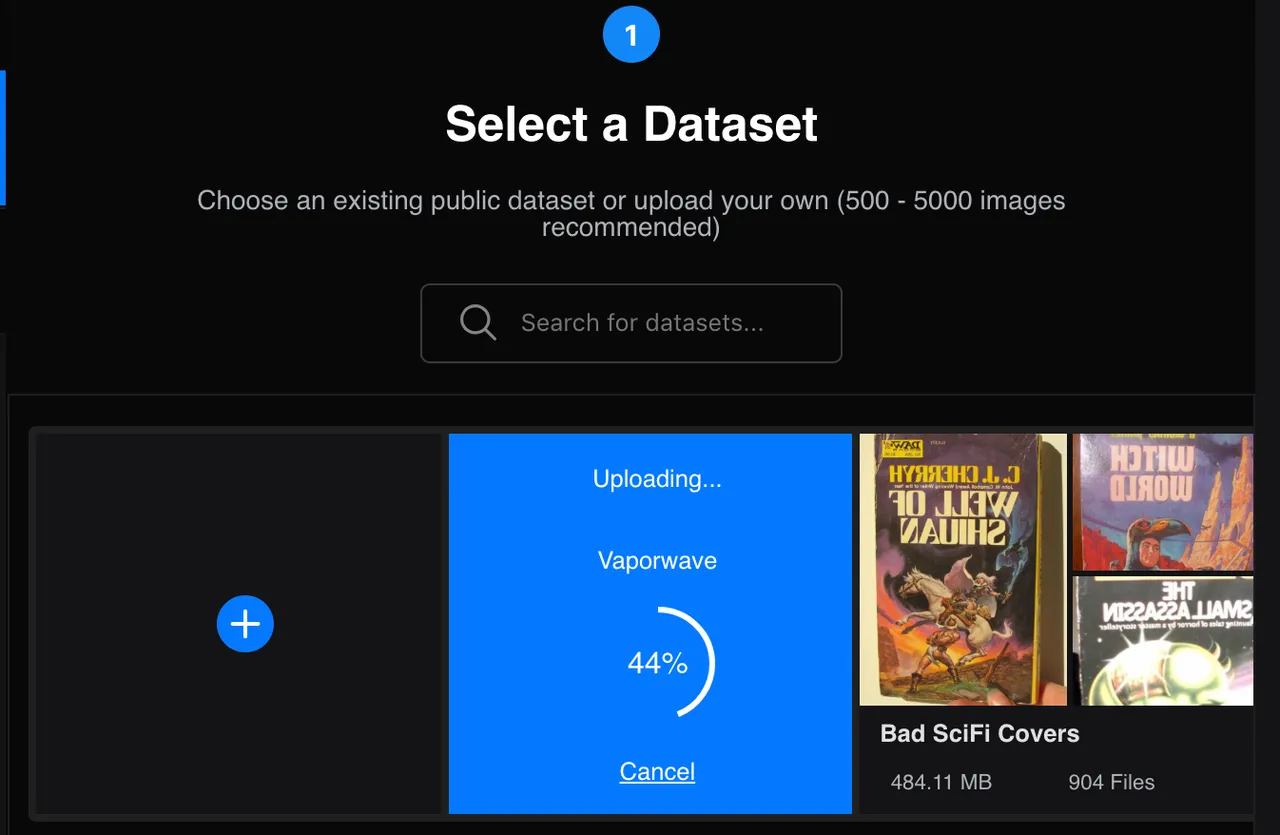
Upload your dataset
Select the file containing all of your images gathered in Part I and upload it to RunwayML. It'll take a minute to upload them all.
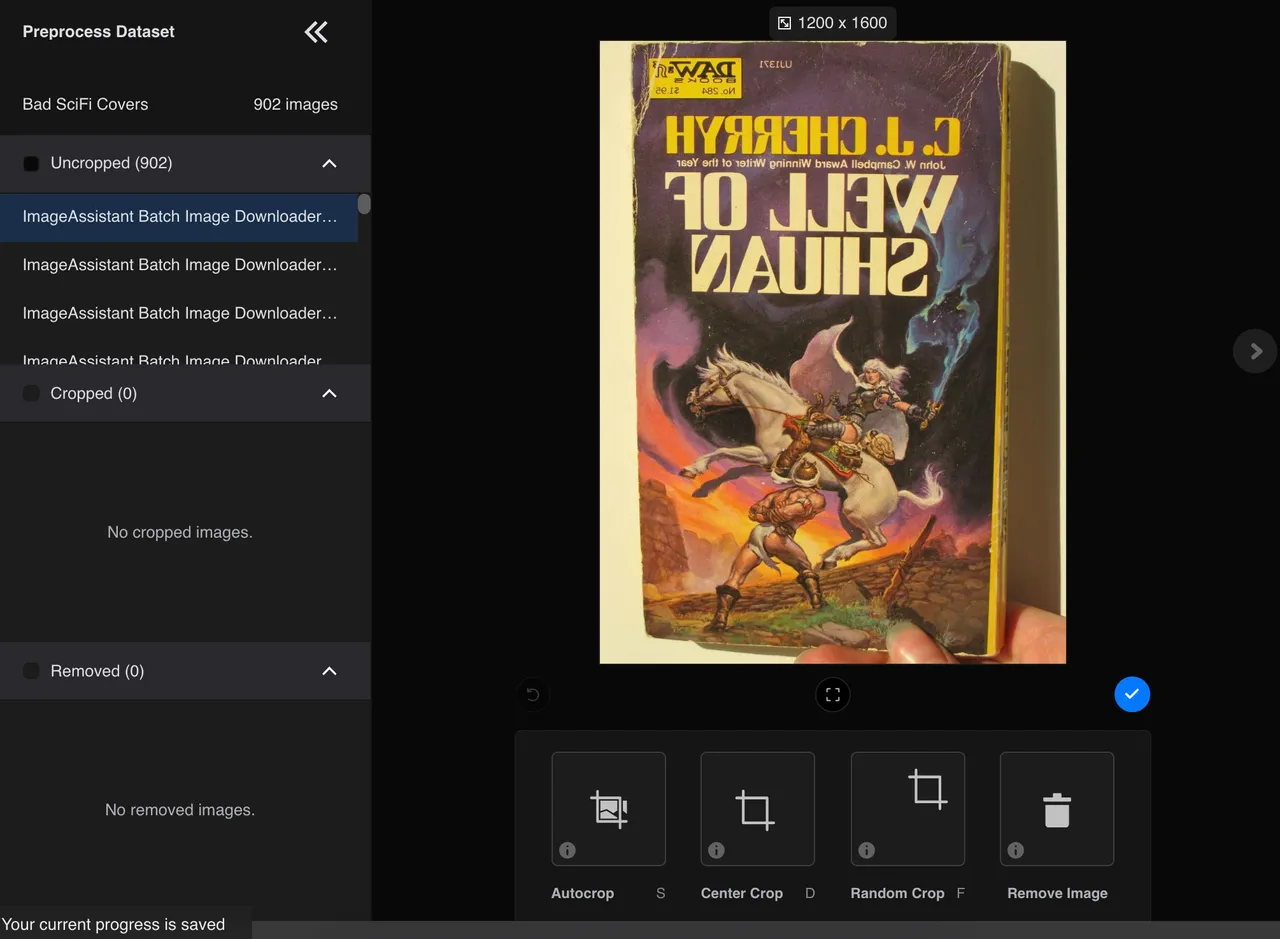
Pre-Process Dataset if Desired
I generally do this before I ever upload my images to RunwayML. This is just a chance for you to run your eye over your dataset one last time and make sure nothing snuck in that you didn't mean to include (like ad images or duplicates). Sadly, this is a manual process that isn't sped up by RunwayML at all, which is why I do it externally, where I have better tools.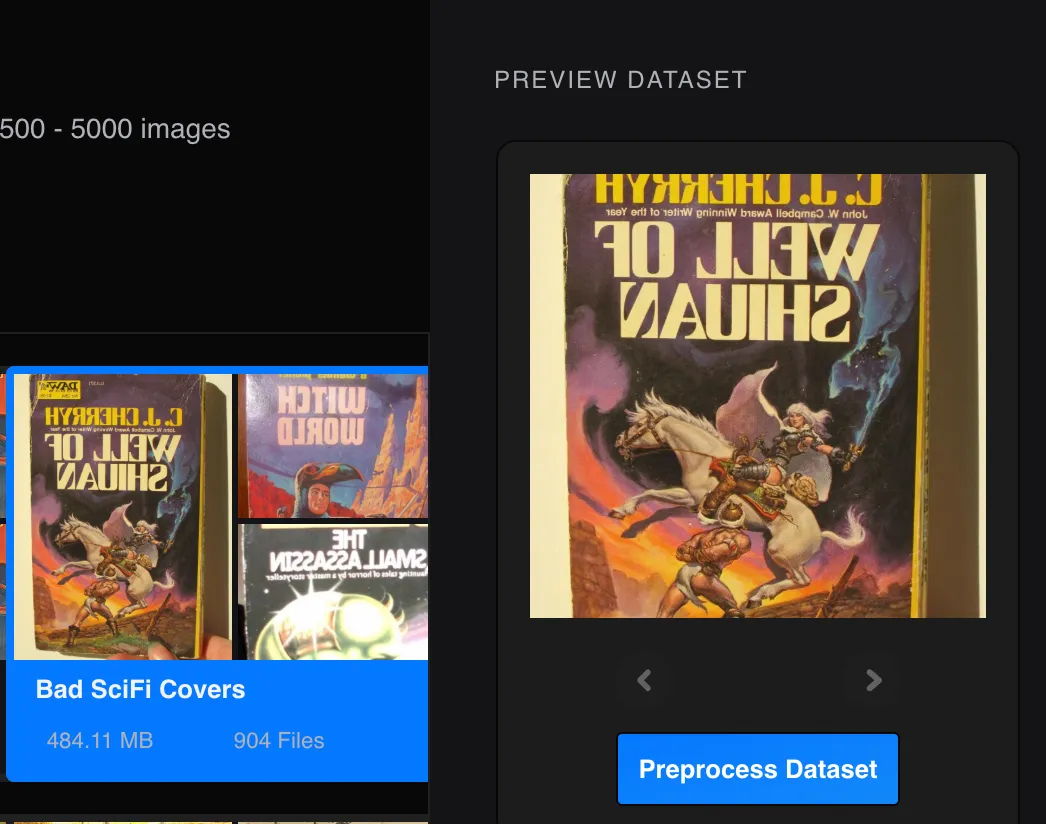
When you're satisfied with your dataset, hit "Next."
- Select the type of training architecture to apply to your dataset
This step is super-important, because it determines how the AI will interact with your dataset in order to train itself to replicate it.
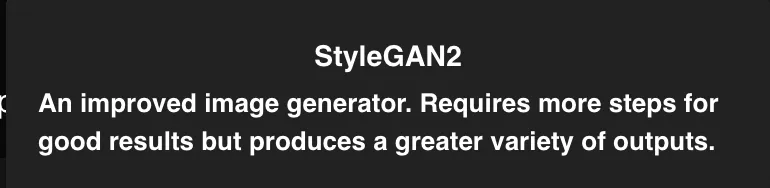
First, you have to choose what StyleGAN version to apply to your data. I always opt for StyleGAN 2, because it's an improved (though slower) version of StyleGAN. This might not be the best option for your free model training, though, because you're only given 3000 steps for free. That sounds like a lot, but if you're trying to get the most out of those 3000 steps, the original StyleGAN does it faster (though with less diversity and lower image quality).


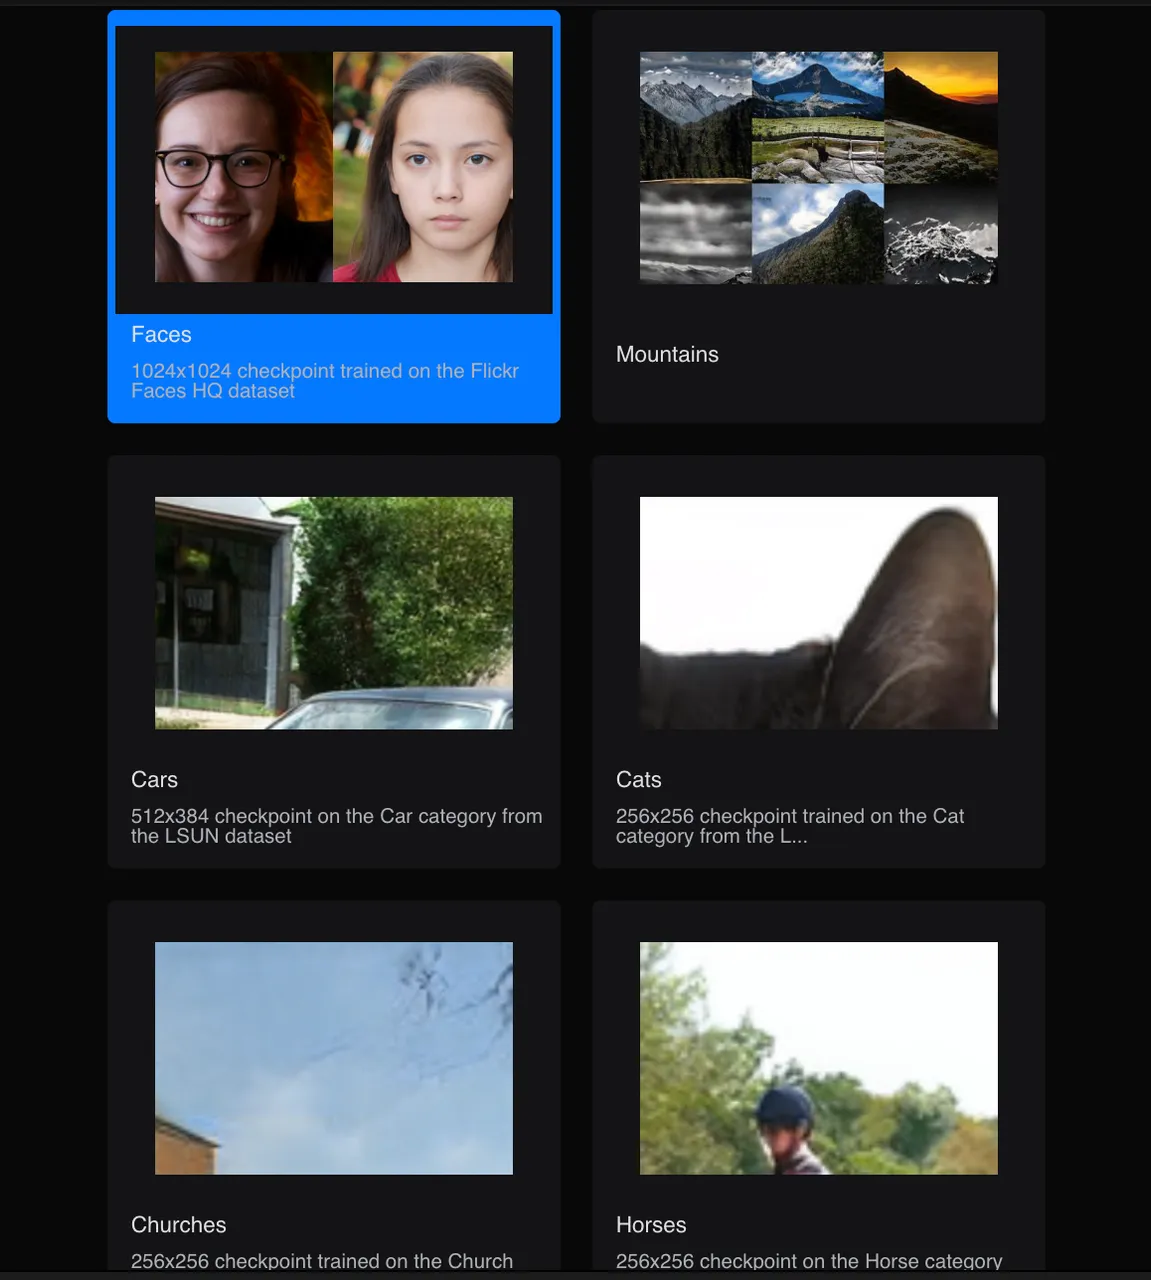
After you choose your StyleGAN version, you have to choose what pre-trained model to piggyback off of to begin training your model. With both versions of StyleGAN, the Faces model is the default, and it's also usually the option I choose because it's really good at edges and textures, and the outputs are larger in dimension. However, there are other options, and they may (or may not) work better for your dataset if your images are similar to the ones it generates.
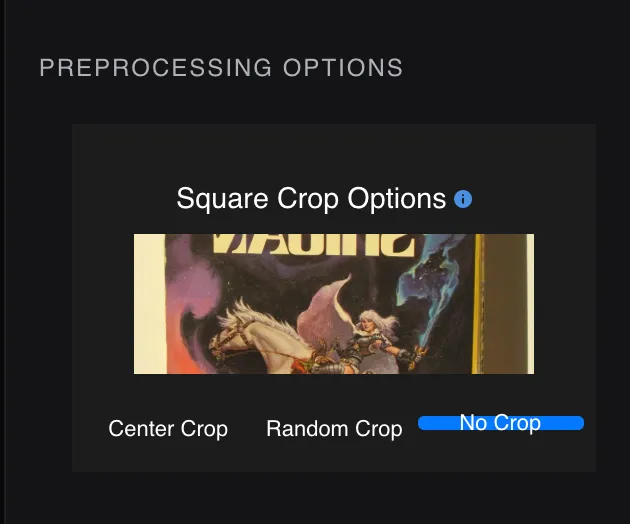
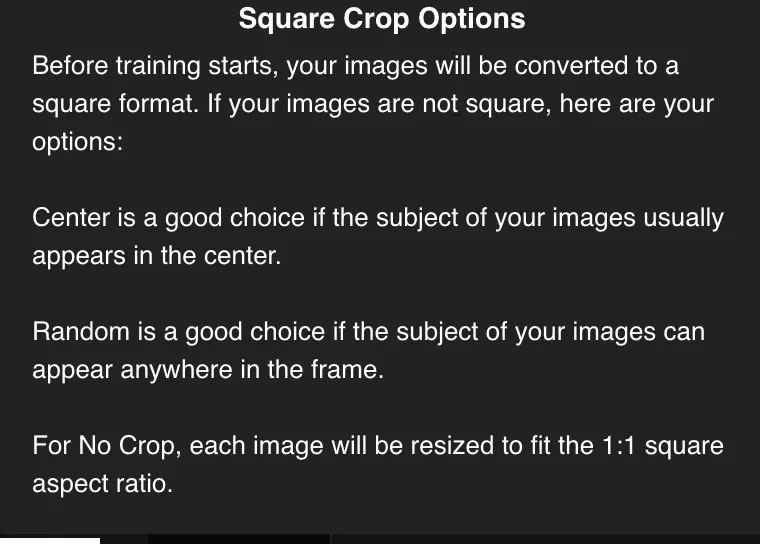
- Choose your Crop Style
When I first started using RunwayML, this is where I messed up and wasted my free trial. I didn't notice that RunwayML automatically center-crops images, and I wound up with a whole lot of useless outputs as a result. There is probably a time and place for both center-cropping and random-cropping, but I've yet to find it. I always select "no crop" now, but of course this is up to you.
Updated October 2021: Center crop has produced the best results for me. It's probably best to have your files set up so that they're square before uploading, that way "center crop" just chooses the whole image you've uploaded with no loss of margins!
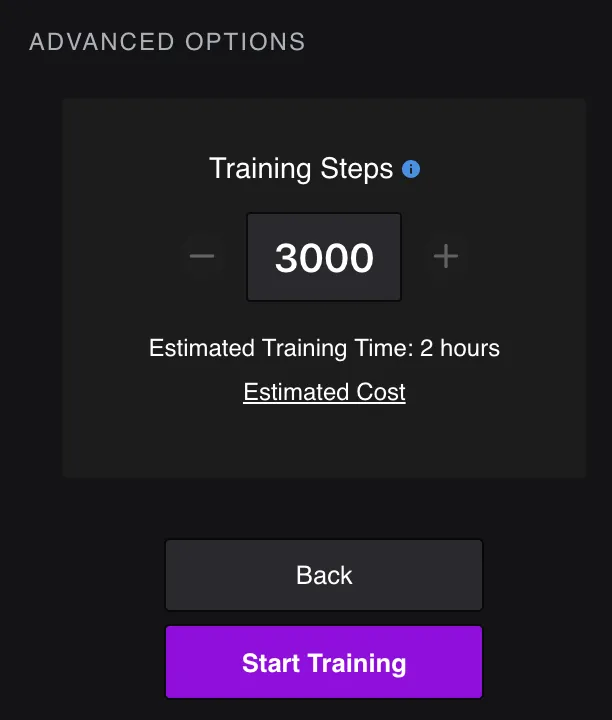
Choose your number of training steps
RunwayML automatically sets this to 3000, which is the number you get for free, and also a number that, if all goes well, will produce a model that does an adequate job of imitating your dataset with its outputs. If you want more steps, they cost .005 cents each, which means that another 3,000 steps will run you $15.00. For now, just stick with the 3,000 steps, though. You can always train the model more if you don't like where it's at after 3,000 steps.
Start Training!
Congrats, now comes the fun part! RunwayML gives you a live preview of your model being trained. Watch as the starting images begin to morph into something resembling your inputs. Every ten steps, you can download a progress image to see how it's coming along, and every 500 steps, it will update you FID Score (similarity score) to tell you how similar your input and output images are becoming. The lower the number, the more similar they are! Don't put too much stock in that number, though, it can fluctuate. If it starts to go steadily up and your images look like crap, you've over-trained and you should stop the model.This is only really an issue if you have too small a dataset and/or train for too long. 3000 steps shouldn't be enough to cause this if you had enough images going in, just bear it in mind if you decide to train your model more later. I've never gotten my FID score lower than 54, and I'm usually fairly happy with anything in the 60-80 range. It's possible that if I trained my sets more, the numbers would get lower, but it's also possible that it would have the opposite effect.
III.Your Model Is Done! Now What?
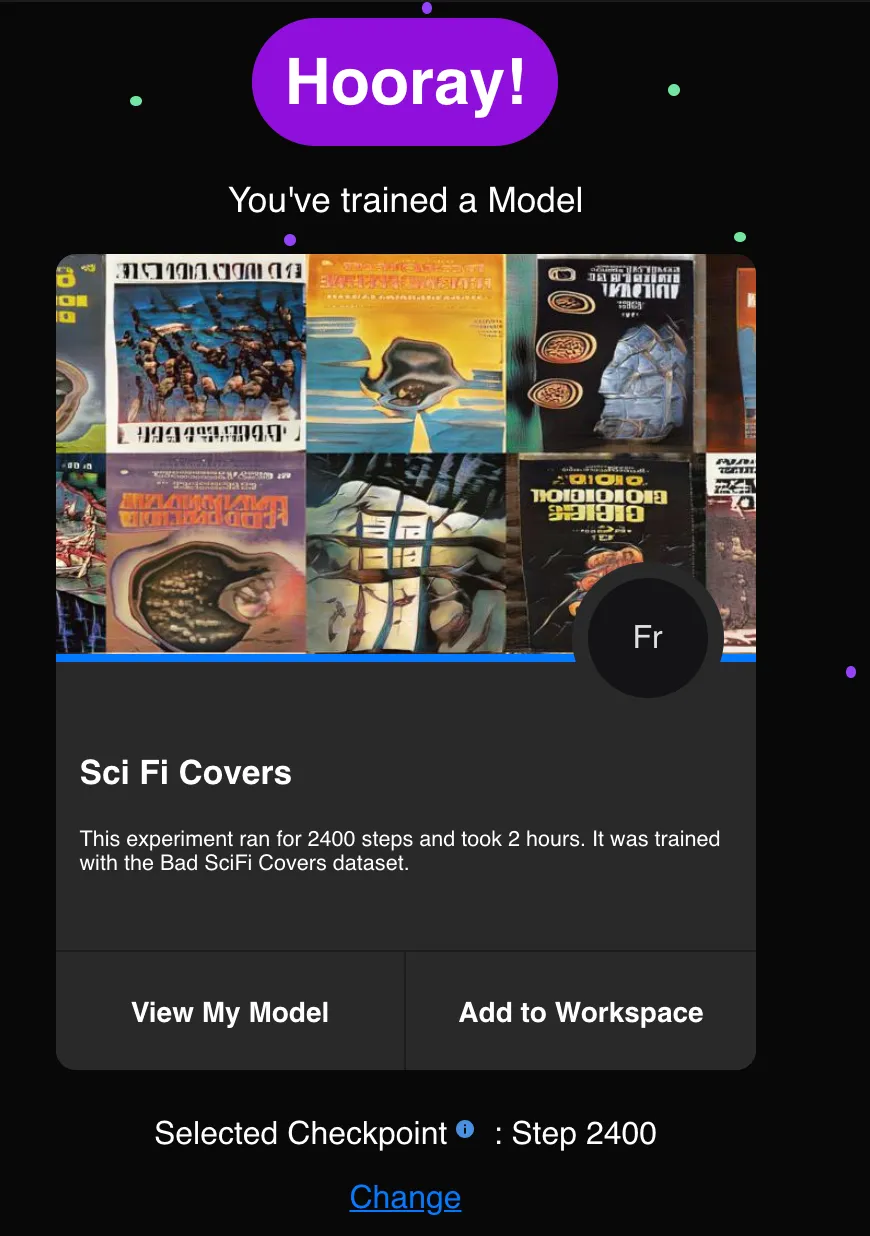
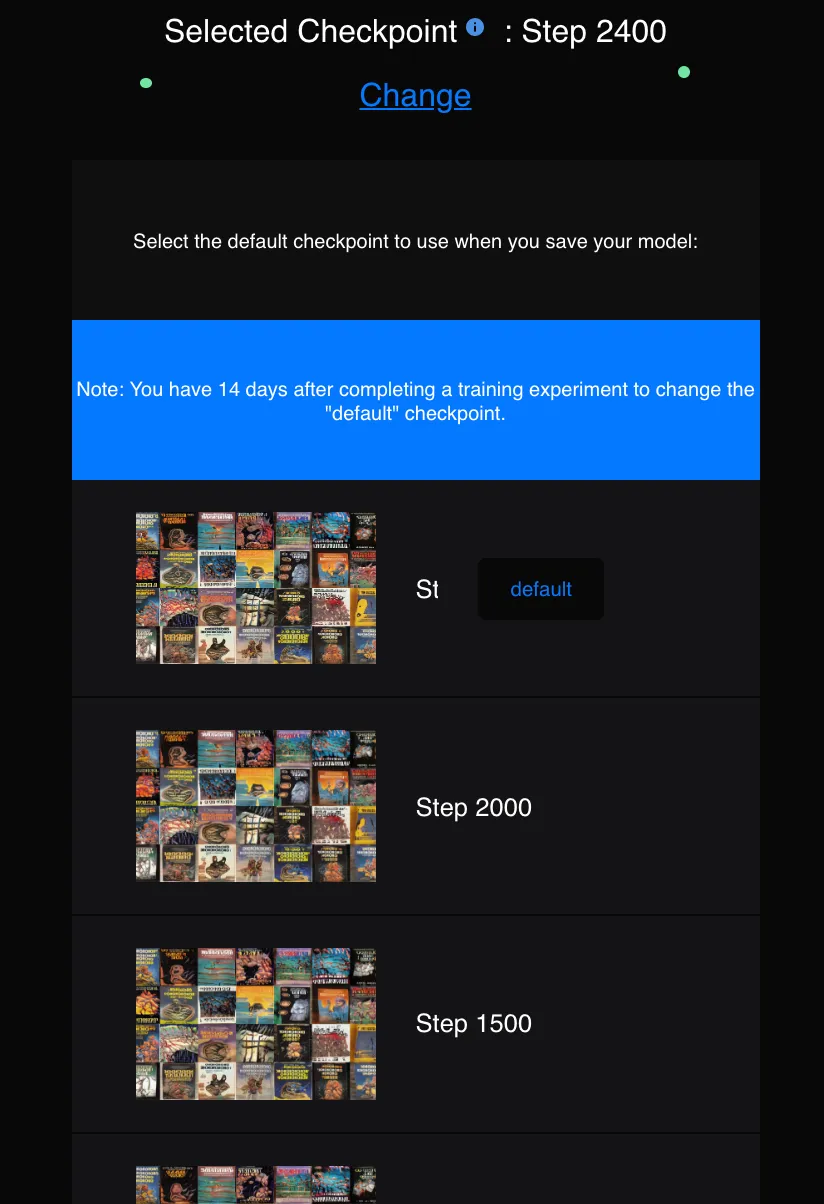
Awesome, you have your own AI model now! If you're happy with how it looks at checkpoint 3000, awesome, but you can also revert it to an earlier checkpoint within 14 days of creating the model by clicking "change" under "selected checkpoint," scrolling down, and choosing the checkpoint you prefer.
Once you're satisfied with the model, how do you get images out of it? There are a couple ways. You can automatically generate a certain number of images and have them downloaded (this costs 1 cent per image, but you get a certain number free with your trial), or you can add your model to your RunwayML workspace and manually sift through latent space, only saving the images you like. This is also not free by default, but if you have the right hardware, you can use your own GPU (instead of the remote one owned by RunwayML) and do this for no cost. That's a whole different tutorial, though.
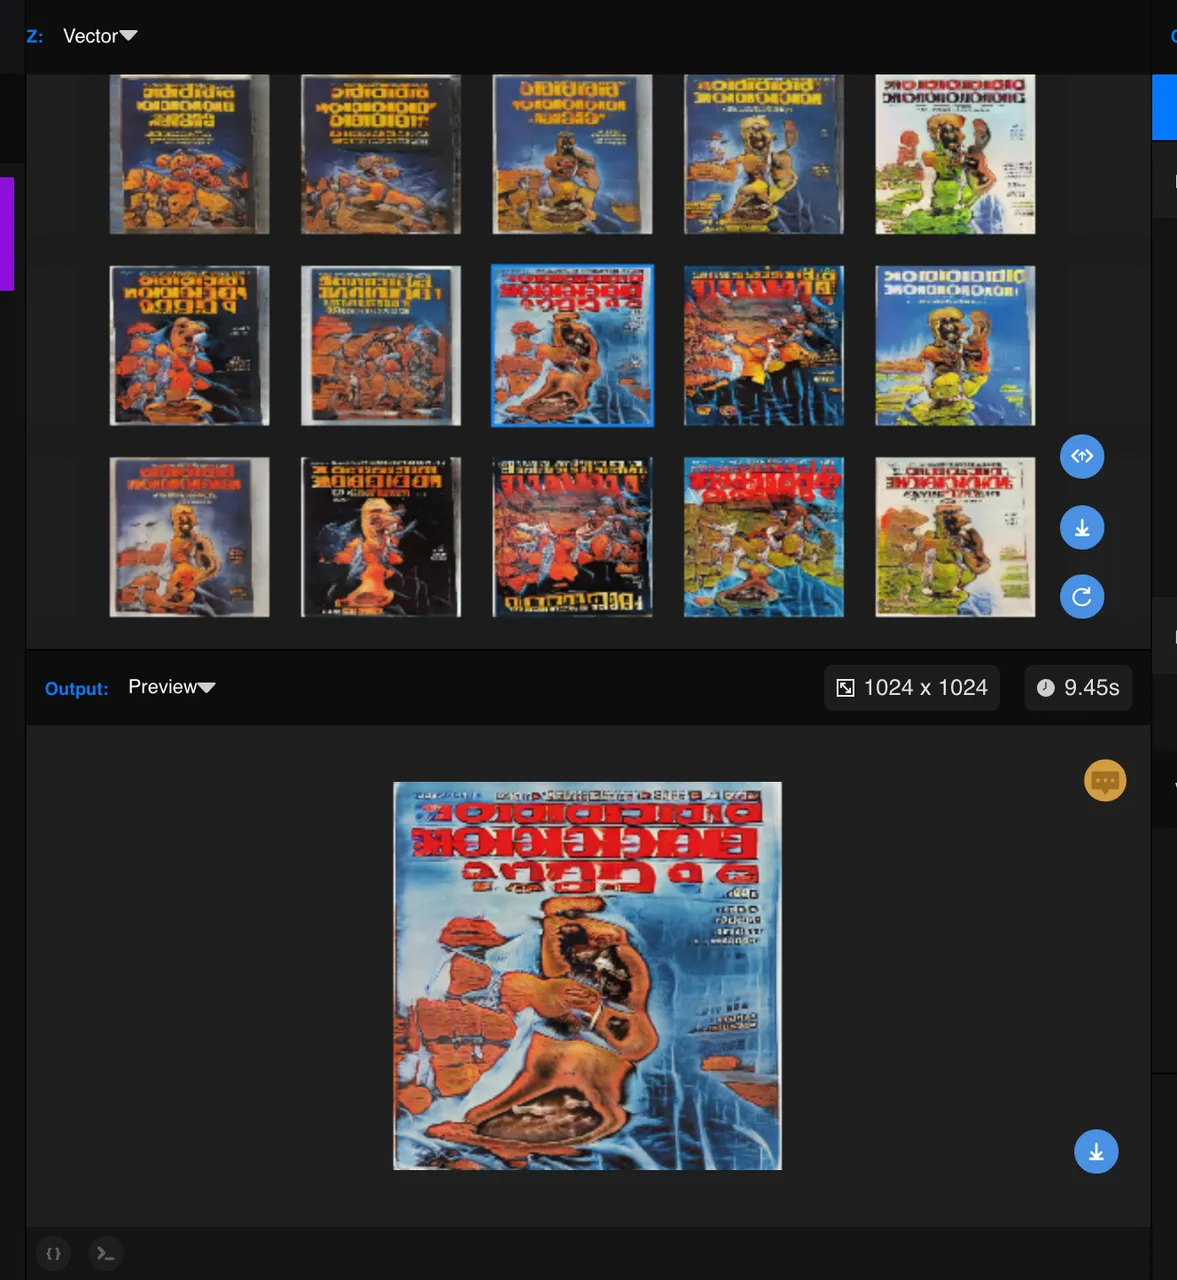
If you choose to add your model to your workspace and manually explore it, select "add to workspace." In your workspace, choose "vector" as your input type, play around with the vector and interface option sliders if you like, and click "run remotely." It'll take a second, but then you should see the squares populate with images from your model. Save the ones you like!
That's it for this tutorial, but I'm happy to answer any questions folks might have as they begin playing around with RunwayML. I'll probably write a tutorial for the RunwayML text AI feature, too, so stay tuned!
For examples of work created with AI models I built in RunwayML, see:
Invisible Cities
Potion of the Day
Latent Space Bestiary