English
content sources
.deepl translation
gift:
facebook logo
instagram logo
Pictures taken with samsung galaxi j6+.


I am pleased to share with you a small repair of a printing machine that was made because of a bad blade and this is because it had already expired and I want to share it with you. This machine is very important because it is the one that prints the forms that we give to customers who come for phone repairs. I'm Daniel, friends and I leave you with the photos.
In the workshop where I am working there is a printer which we always use to make copies. But there has been a problem lately and it is that the copies have come out very dirty and this is because the roller that holds all the paper is too dirty, This makes the ink sticks between papers and the copy just comes out very dark and very dirty, then the ink spills.
We tried to look on the internet for a specific model to see how to disassemble it, but we didn't know how to do it because it is a job we are not used to doing and if we did something that should not be done it can be completely damaged. So we called a technician.
The images below show the work the technician did to repair the toner. While he was disassembling the toner, I was asking questions and taking pictures to show you. In reality the scheme of the work is complicated and you have to know how to do things because if you don't you can damage it.
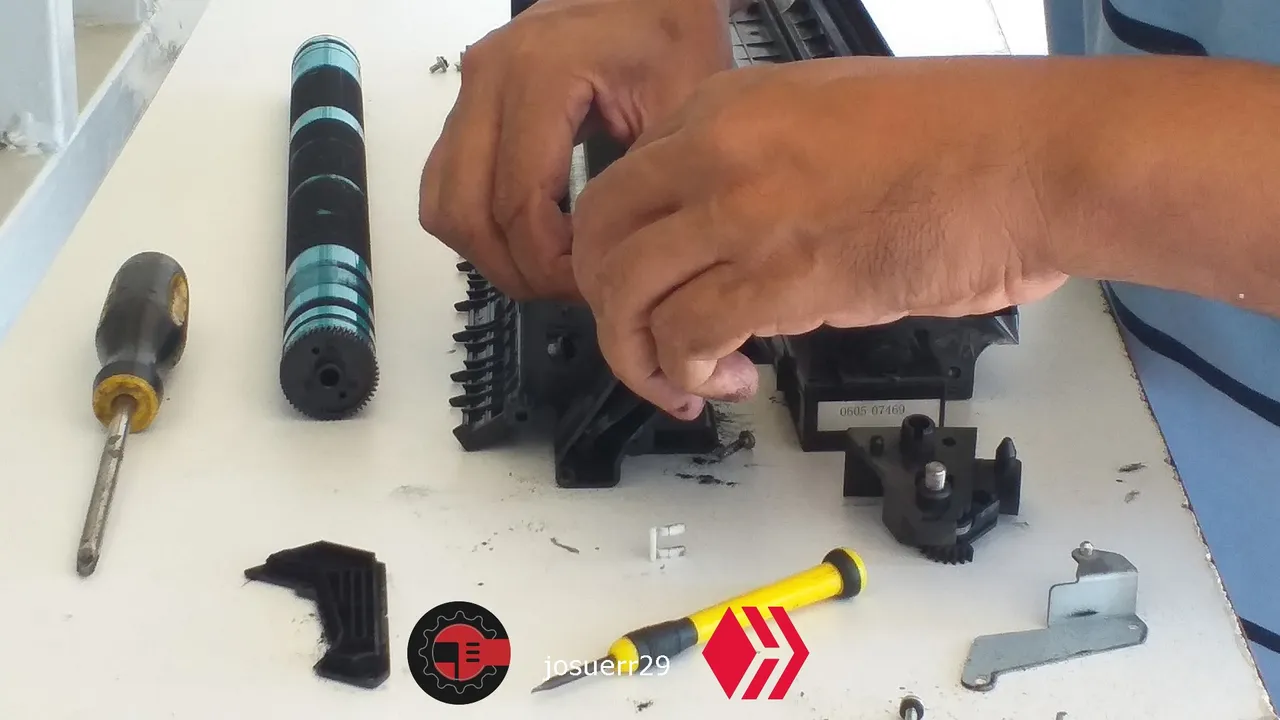
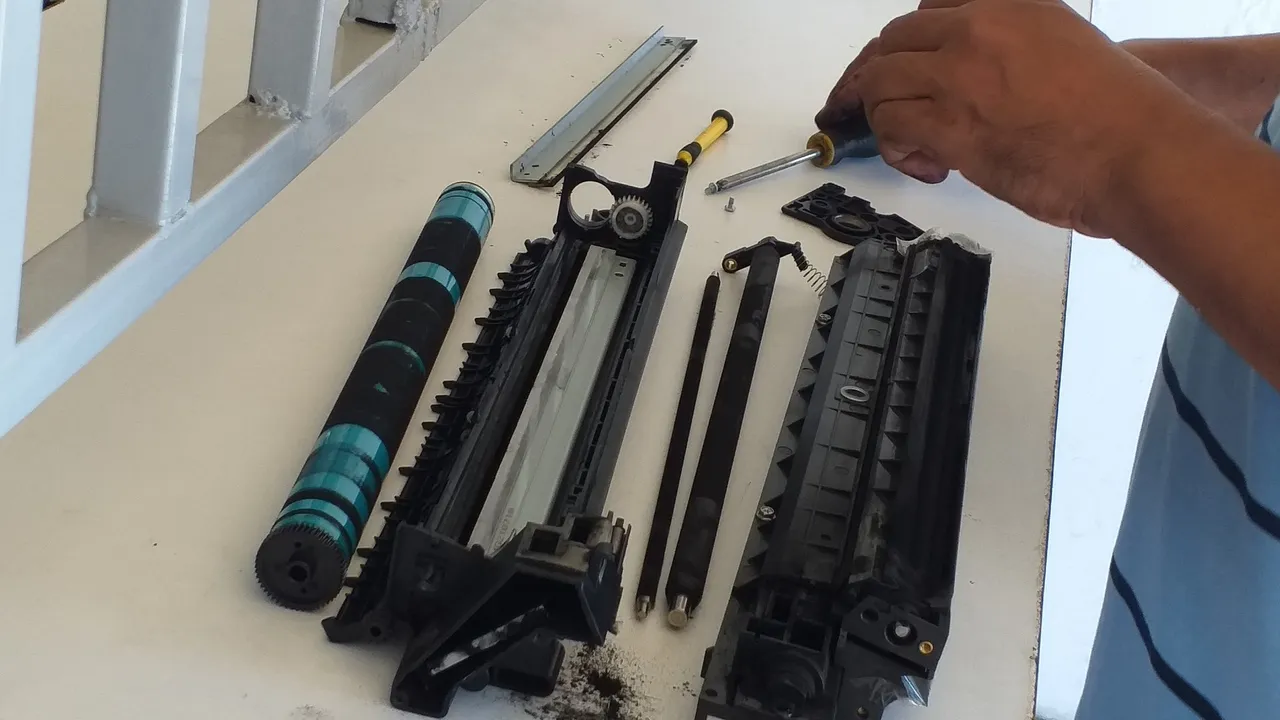
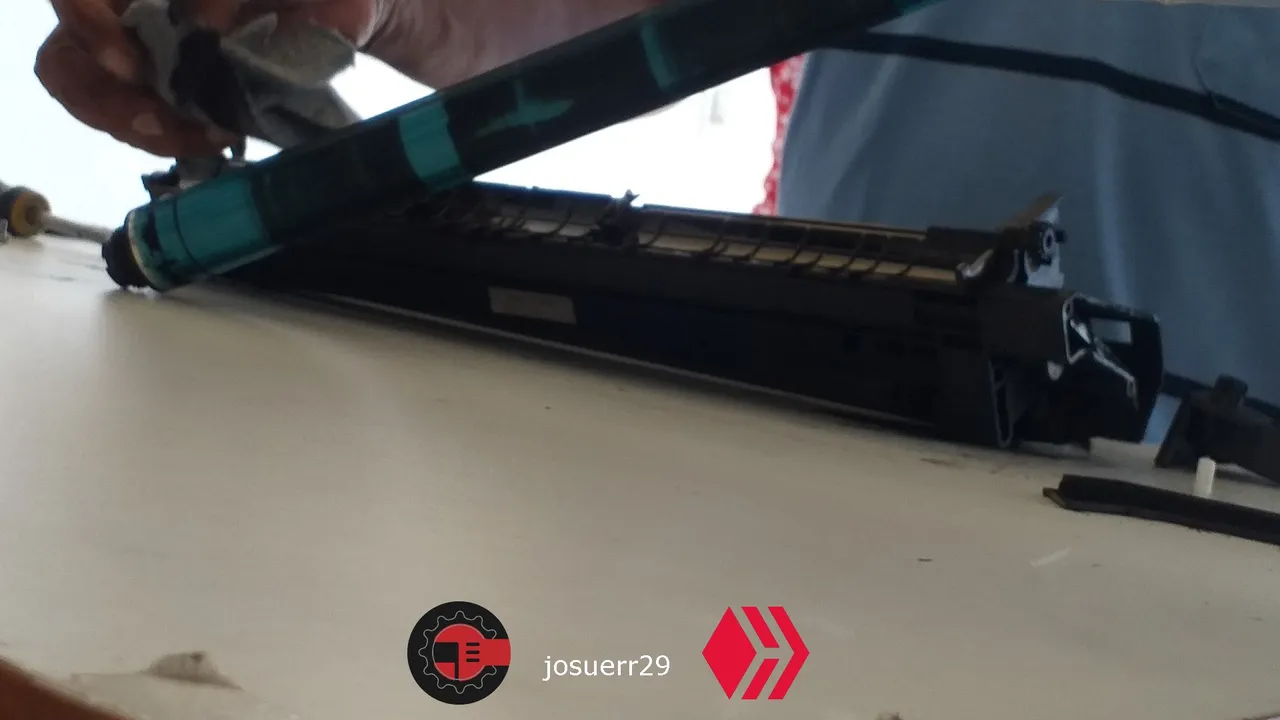
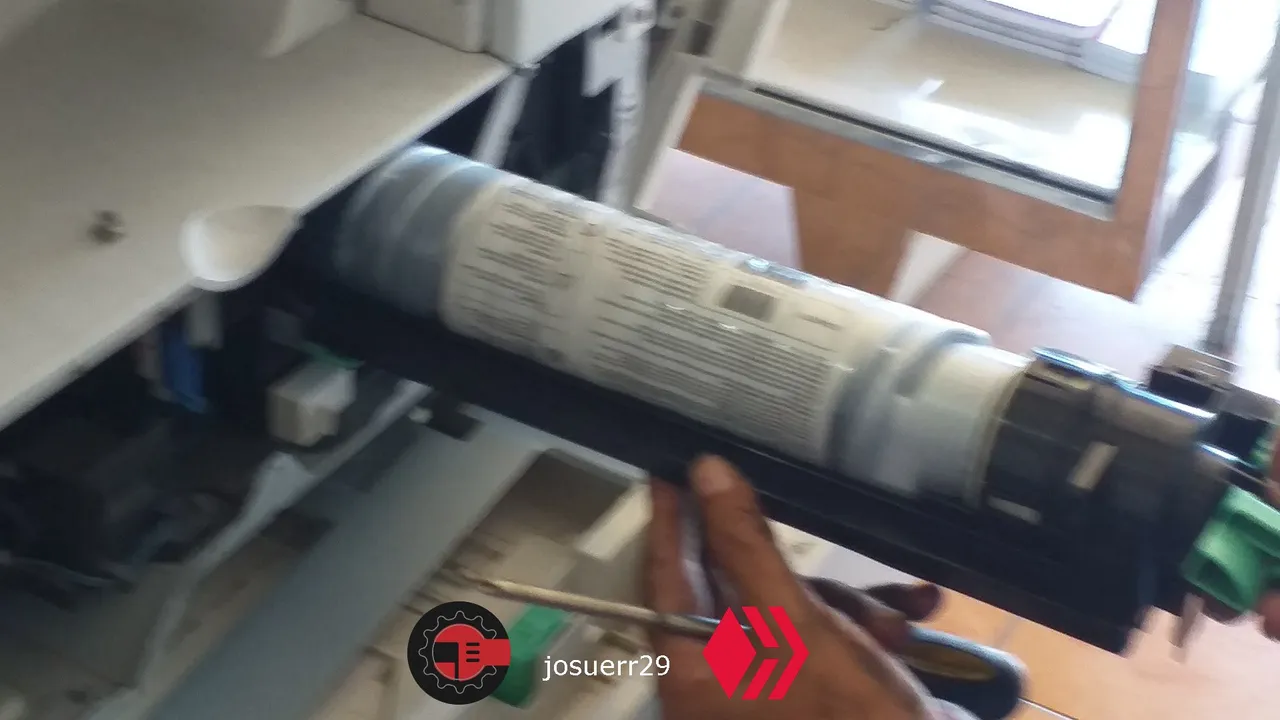
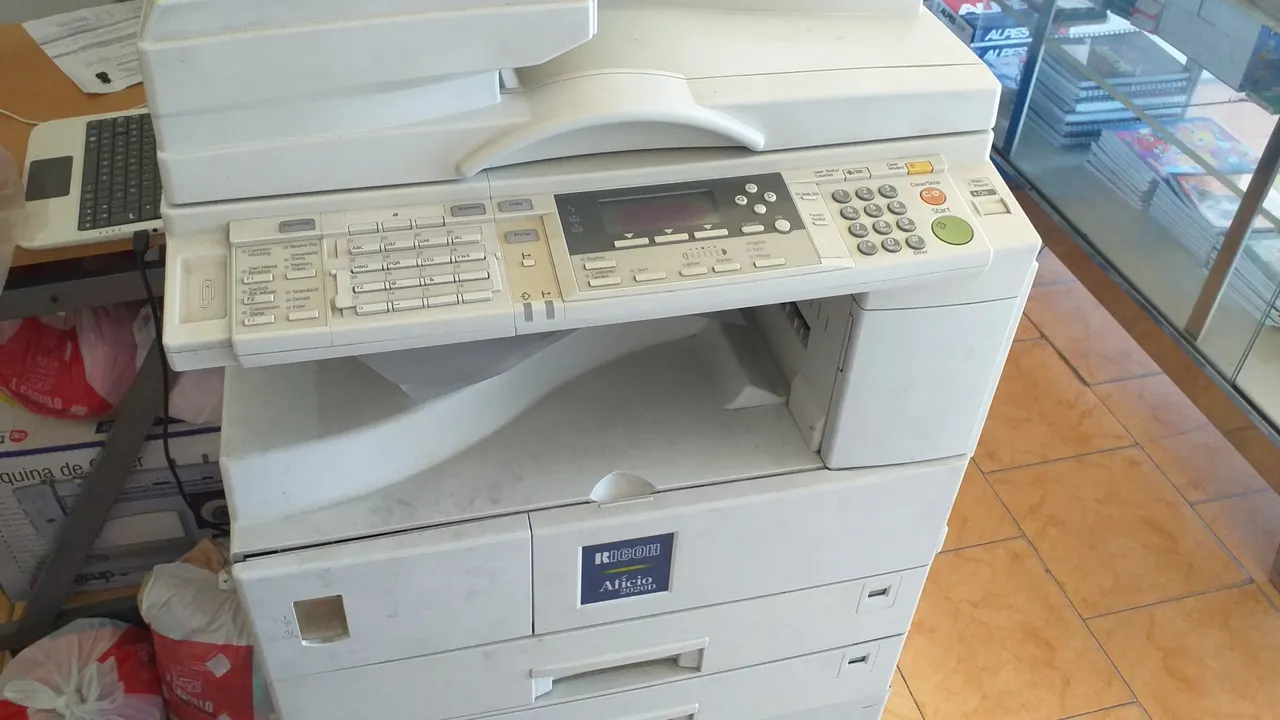
Friends here watching a printing machine ricoh 2020d we have already removed the toner and the components and now we have to disassemble the component that has the roller to remove and replace the blade.

This blade has a function and it is simply to clean the roller through which the paper passes after being painted and as it is freshly painted the roller tends to get dirty with this ink, however, the job of the blade is to pass through the roller, clean it and this ink that remains is reused to retake copies.
That blue thing you see there is the roller and it is where the paper goes through to hold it after it has been painted and as you can see it is very black.
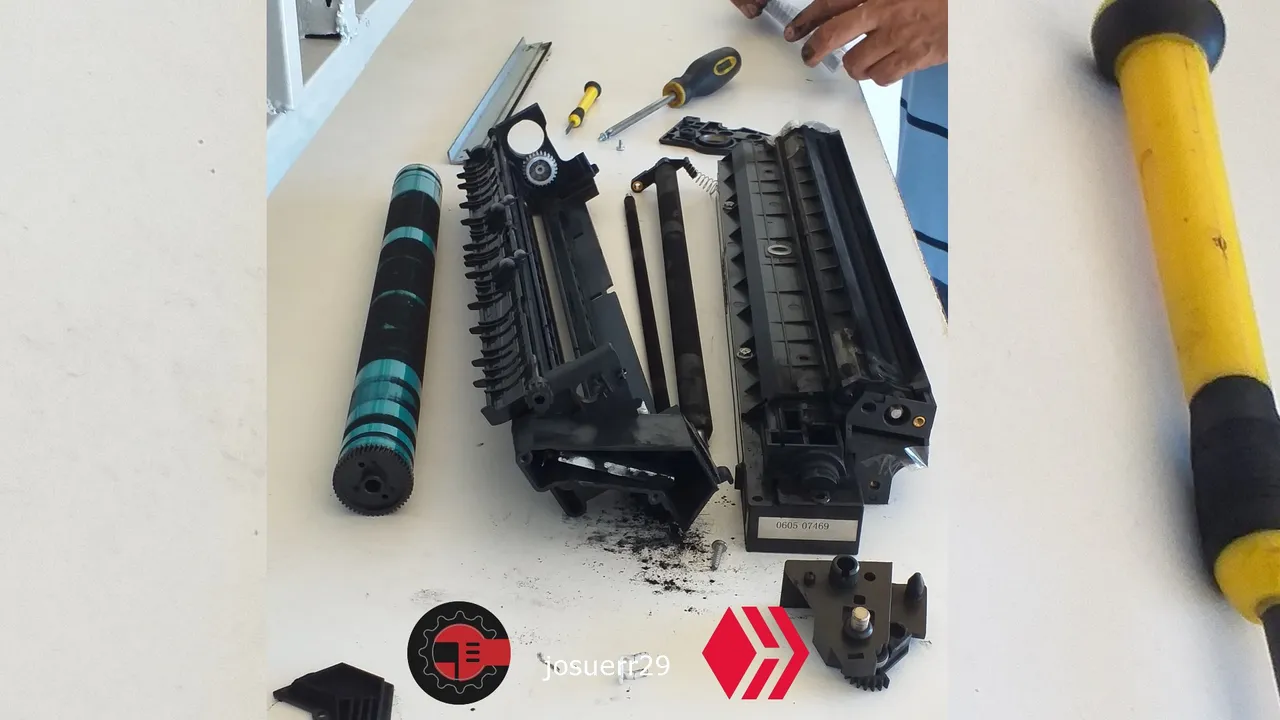
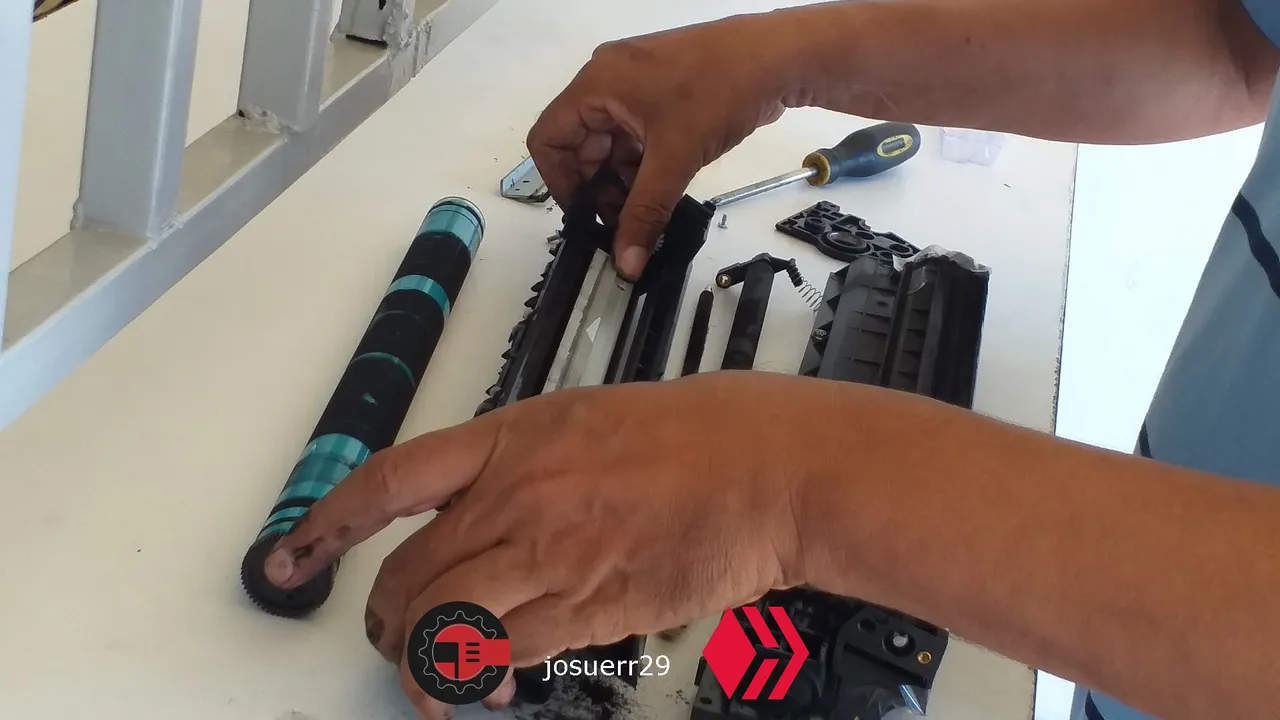
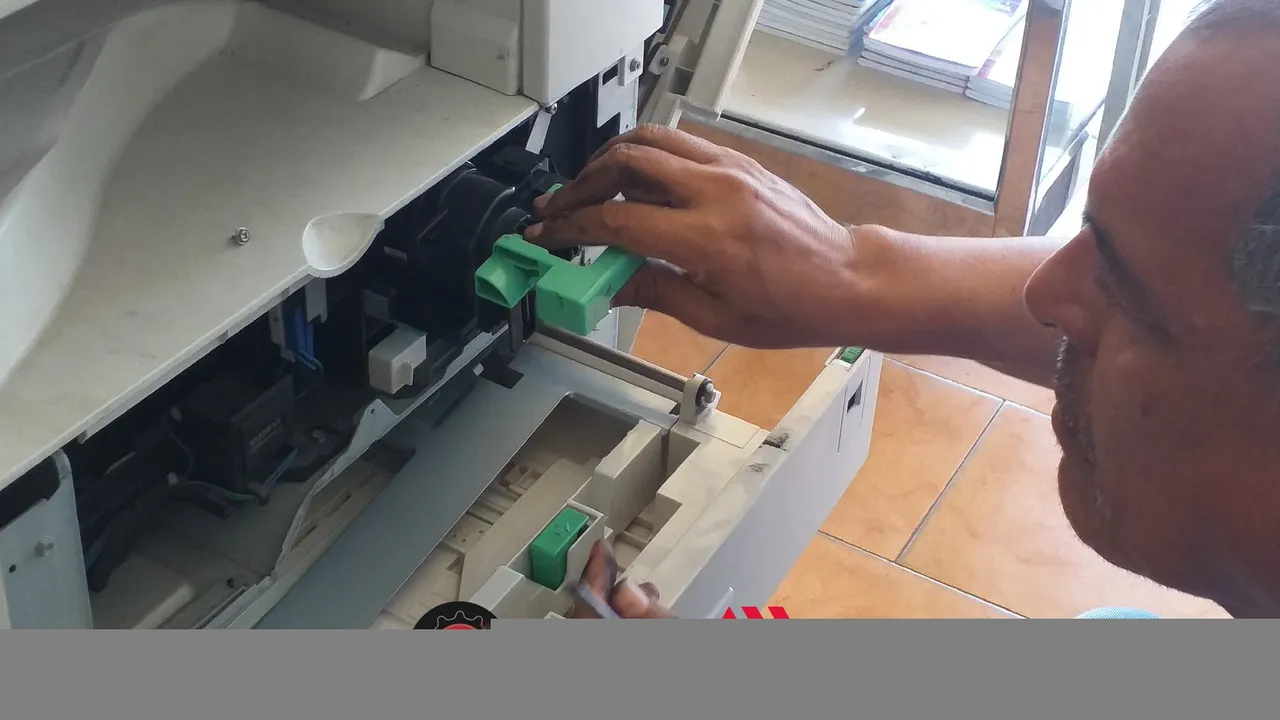
As you can see later we are disassembling the complete piece that holds the roller and the paper, but there is the blade and it is the one we have to take it out to change it.
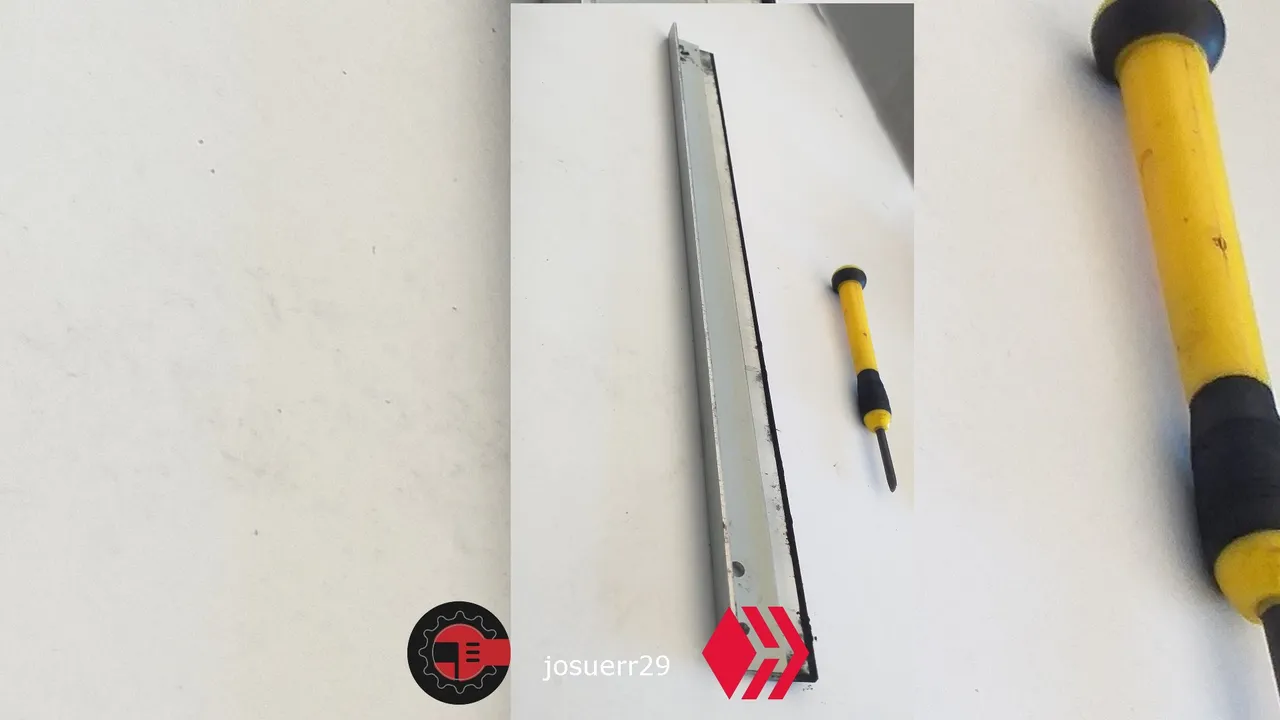
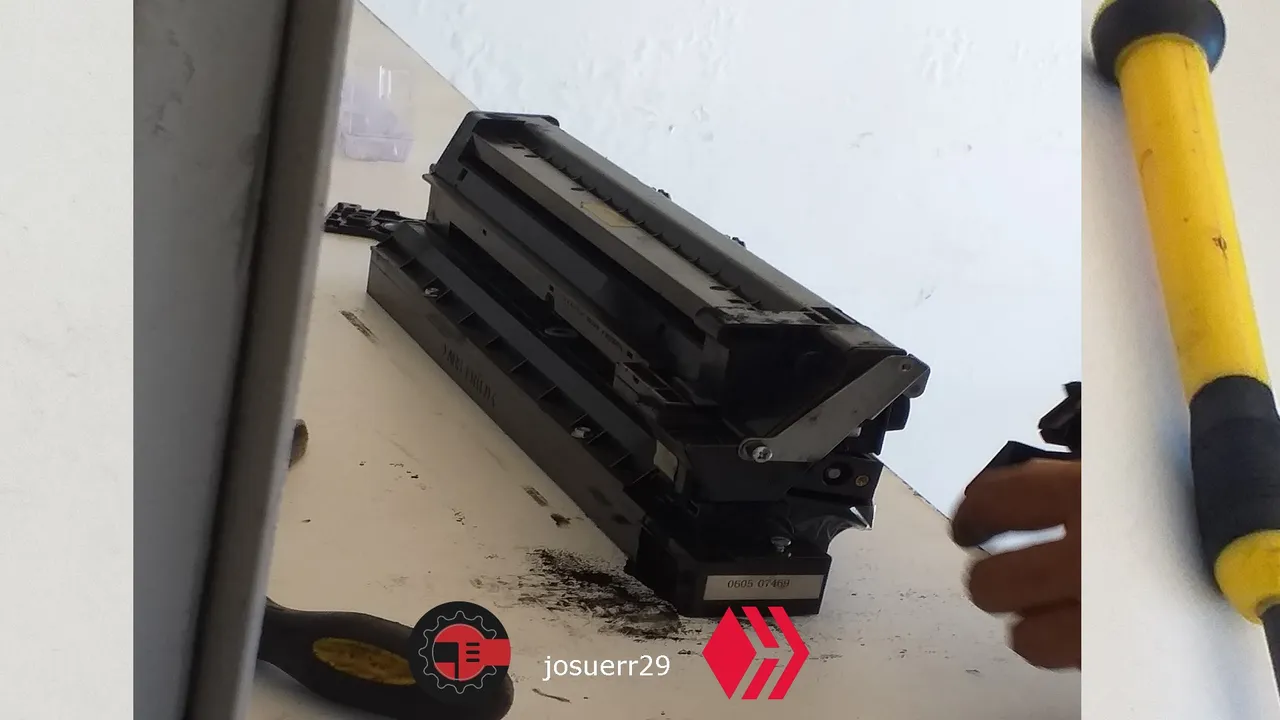
There you see on the outside a gray plate, this is the blade, it has a piece of plastic that comes out of it and makes the roller clean with this, if you look at it it is very black because it was not doing its job well, I think it may have expired, but the one we are putting inside is new and it will do its job very well.
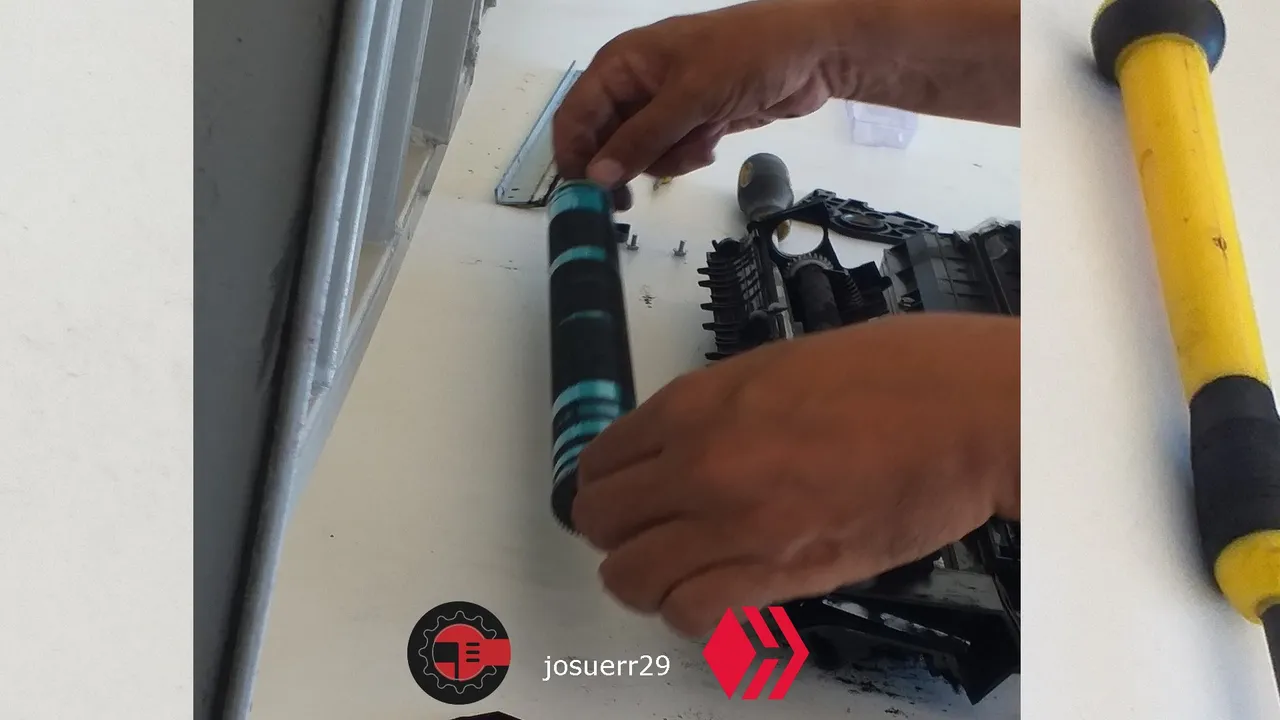
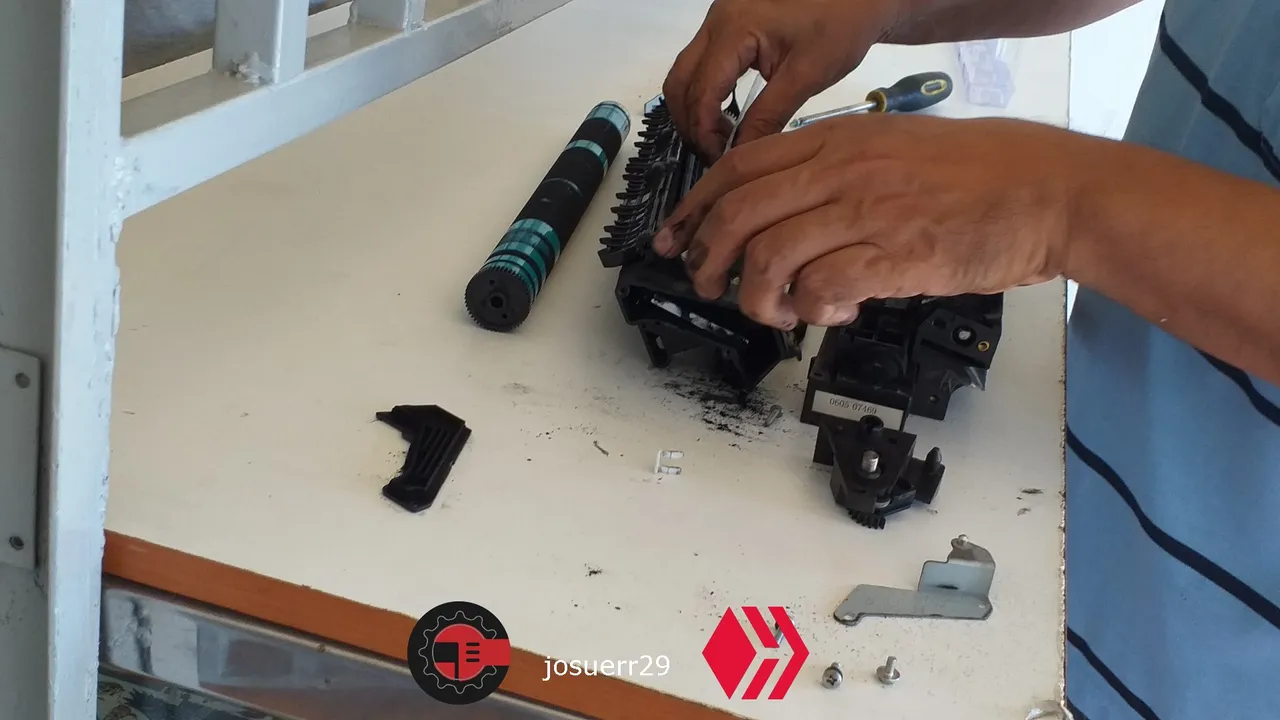
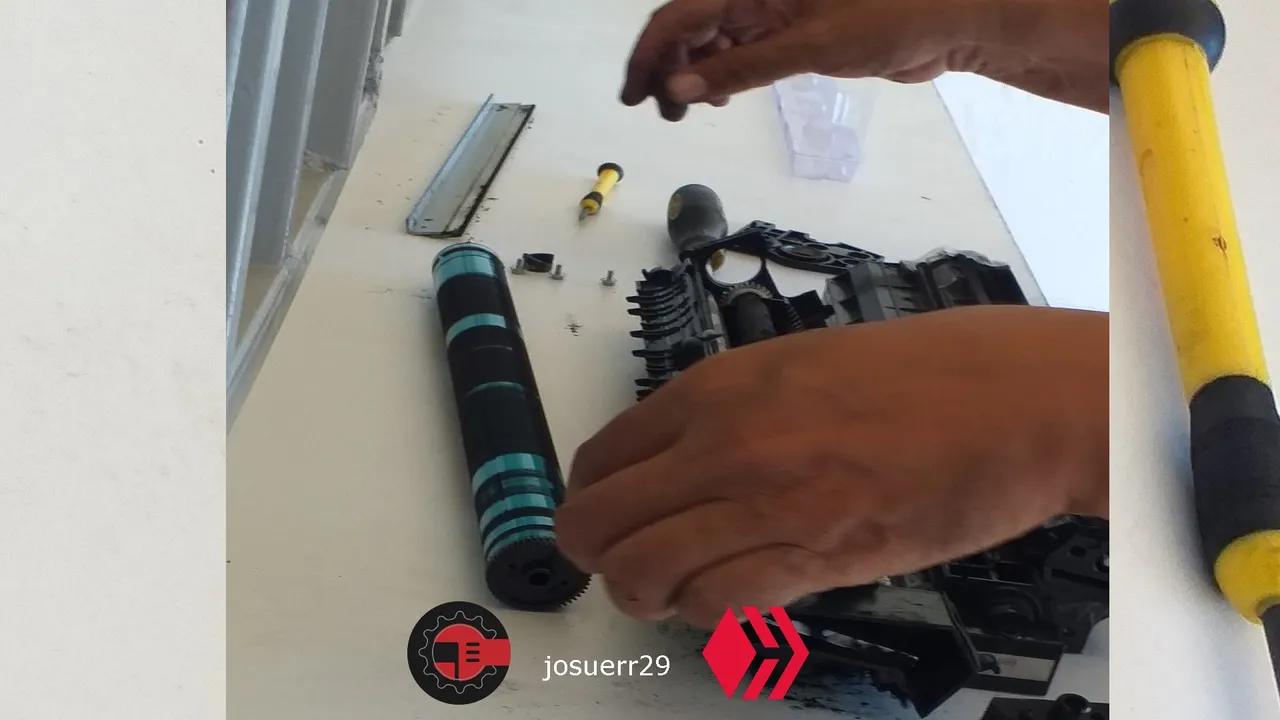
Here we are already assembling little by little and also as it is already completely adjusted this piece we need to place it very well. This one has many small components and we need to be careful, the technician recommended me that if I was going to disassemble it, I had to remove each very small piece and place it almost in the order how it goes so that later when I'm going to assemble it, it will be just as each piece goes and it will be very well assembled again.
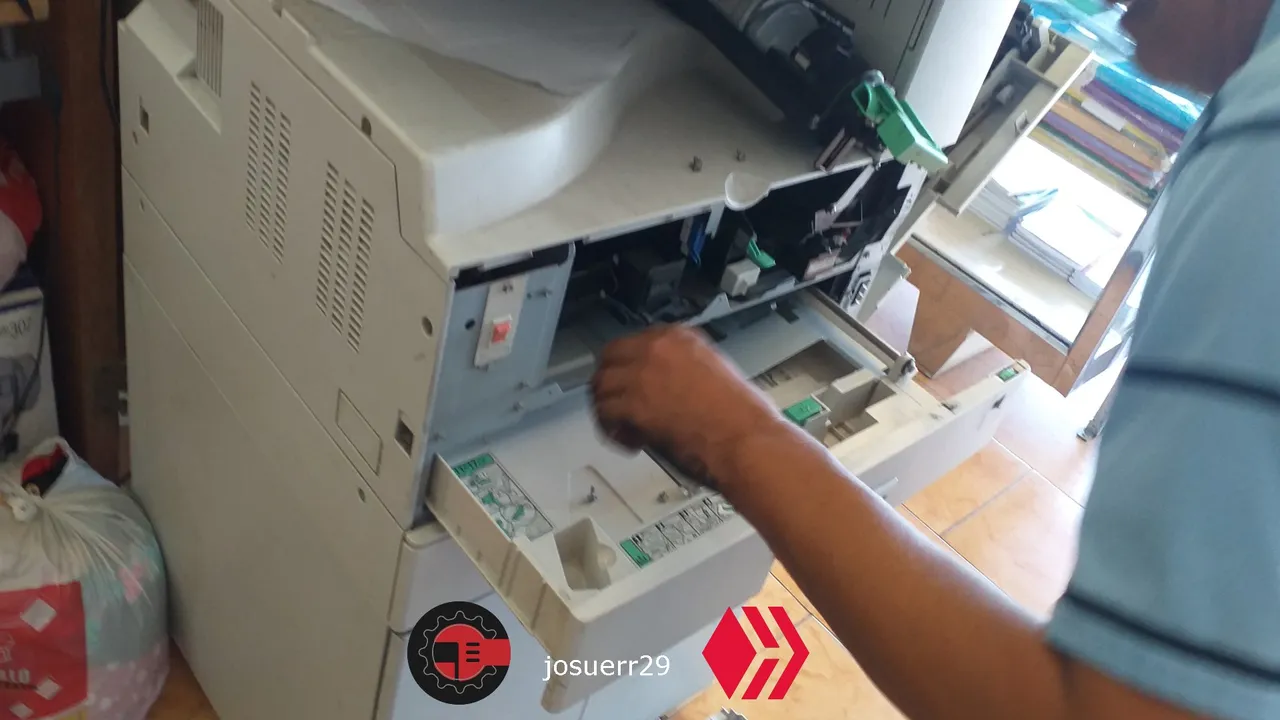
Already after this what we have to do is to observe the holes that are in the printer and see how the toner goes AND how the toner piece goes where the ink is stored and lasts too long, since it has a long time, however, her boyfriend to spend very fast because it was not fulfilling its function.
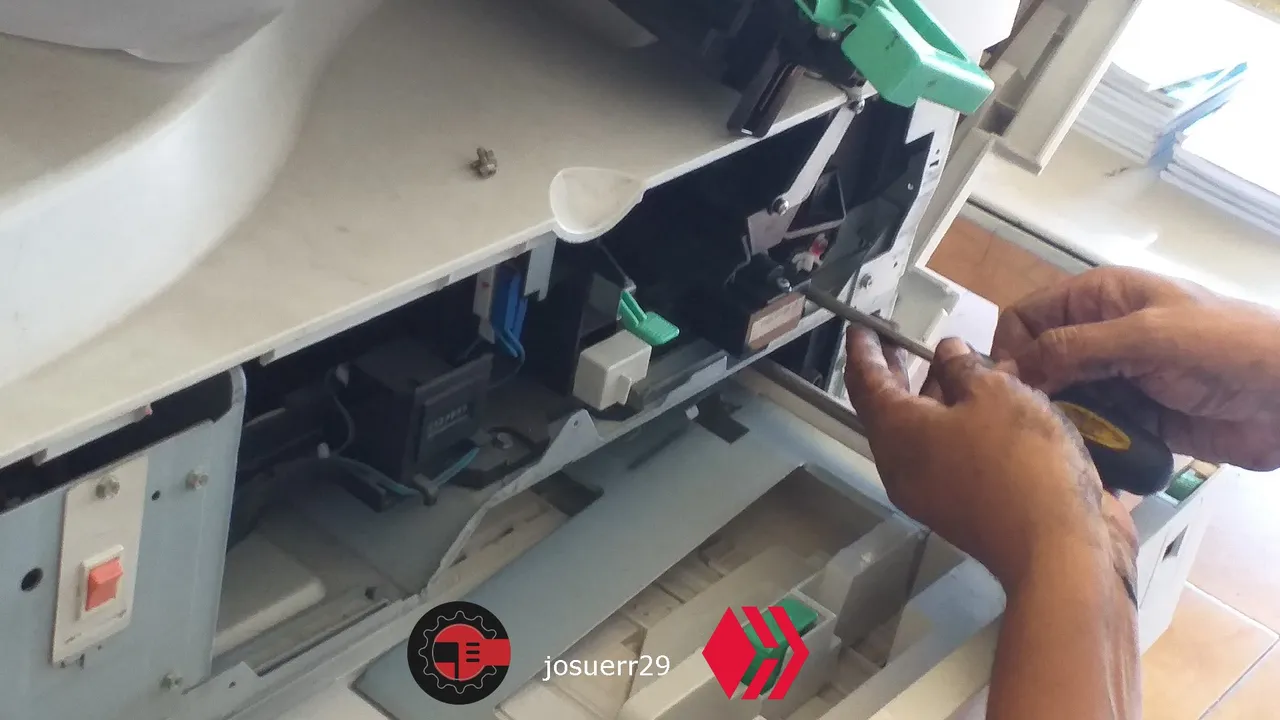
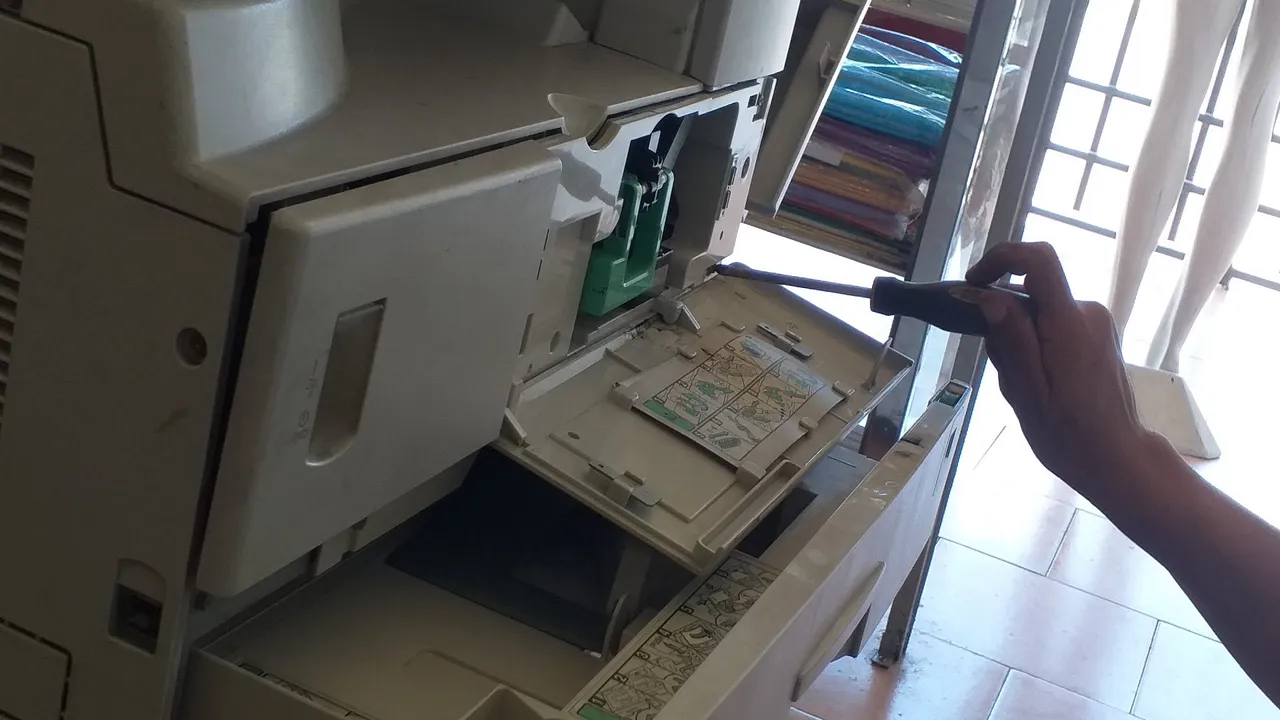
After placing the piece that holds all the paper and then place the toner we begin to place all the casing and the covers that protect for this internal part we place a screw where it goes and it is called, then the printer will be like new armed with all its pieces.
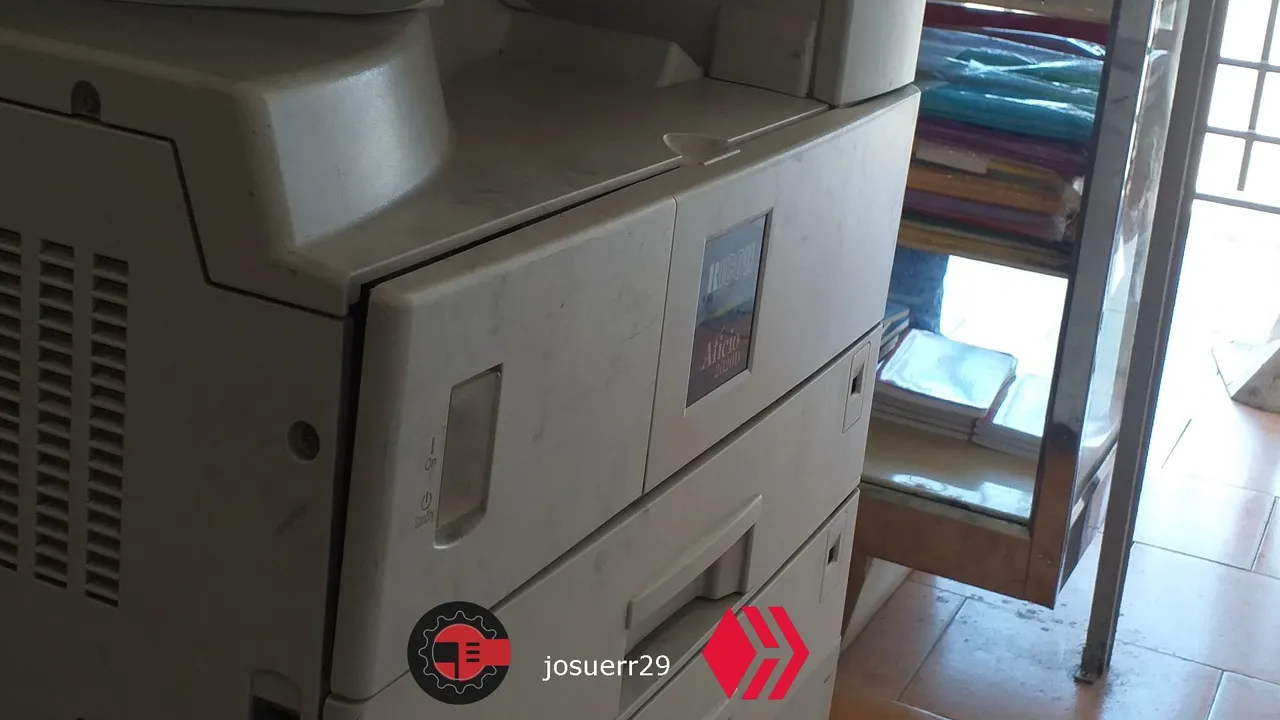
And this will make that I took out the copy as such Very good.
Español
Me complace compartir con ustedes una pequeña reparación de una máquina de impresión que se le realizó por causa de hojilla mala y esto es porque ya se había vencido y quiero compartirla con ustedes. Asta máquina es muy importante, ya que es la que imprime los formularios que le damos a los clientes que vienen por reparaciones de teléfonos. Soy Daniel, amigos y los dejo con las fotos.
En el taller donde yo estoy laborando hay una impresora la cual Nosotros aprovechamos siempre para sacar copias. Pero ha habido un problema últimamente Y es que las copias han salido muy sucias y esto es porque el rodillo que sostiene todo el papel está demasiado sucio, Esto hace que la tinta se pegue entre papeles y la copia simplemente salga muy oscura y muy sucia, entonces la tinta se derrama.
Entonces habíamos pensado en desarmarla nosotros mismos, Tratamos de buscar en internet modelo específico para ver cómo desarmarla, pero no sabíamos cómo hacerlo porque es un trabajo al cual no estamos acostumbrados Y si hacíamos algo que no debía que hacerse se puede dañar por completo Entonces llamamos a un técnico.
Las imágenes que les mostramos a continuación son las del trabajo que realizó el técnico para poder reparar el tóner. Mientras él iba desarmando yo iba preguntando y tomando fotografías para poder enseñarles. En realidad el esquema del trabajo está complicado y hay que saber hacer las cosas porque si no la puedes dañar.
Amigos por aquí observan a una máquina de impresión ricoh 2020d ya le hemos sacado el tóner y le hemos sacado los componentes y nos toca ahora desarmar el componente que tiene el rodillo para sacar y reemplazar la hojilla.
Esta hojilla tiene una función y es simplemente limpiar el rodillo por el cual pasa el papel después de ser pintado y cómo está recién pintado el rodillo tiende a ensuciarse con esta tinta, sin embargo, el trabajo de la hojilla es pasar por el rodillo, limpiarlo y está tinta que queda es reutilizada para volver a sacar copias.
Esa cosa azul que ven allí ese el rodillo y es por donde pasa el papel para sostenerlo después de haberlo pintado y como ven allí está muy negro.
Cómo ven después estamos desarmando la pieza completa que sostiene el rodillo y el papel, pero allí se encuentra la hojilla y es la que tenemos que sacar para poder cambiarla.
Allí ven del lado de afuera una platina de color gris, esta es la hojilla, ella tiene un pedazo de plástico que resulta fuera de ella y hace que el rodillo se limpie con esto, si la observan está muy negra porque su trabajo no lo estaba haciendo bien, Creo que se pudo haber vencido, pero la que le estamos colocando dentro esta nueva y estará su trabajo muy bien.
Aquí ya estamos armando poco a poco y además como ya queda completamente ajustada esta pieza la necesitamos colocar muy bien. Esta lleva muchos componentes pequeñitos y demos tener cuidado, el técnico me recomendó que sí lo iba a desarmar, yo tenía que quitar cada pieza muy pequeña y colocarla casi en el orden Cómo va para que luego cuando la vaya a armar quede justo como va cada pieza y quedé muy bien ensamblada otra vez.
Ya después de esto lo que tenemos que hacer es observar los orificios que están en la impresora y ver cómo va el tóner Y cómo va la pieza el tóner En dónde va almacenada la tinta y dura demasiado, ya que tiene mucho tiempo, sin embargo, su novio a gastar muy rápido porque no estaba cumpliendo su función.
Después de colocar la pieza que sostiene todo el papel y luego colocar el tóner comenzamos a colocar toda la carcasa y las tapas que protegen para esta parte interna colocamos un tornillo dónde va y se llama, luego la impresora quedará como nueva Armada con todas sus piezas.
Y esto hará que saqué la copia como tal Muy buena.
fuentes del contenido
Traducción deepl
gift:
Logo facebook
logo instagram
Fotografías tomadas con samsung galaxi j6+
Regitrate en hive
Ganar algunios pequeños tokens por buscar en google. Registrare aqui
 Instagram

spanish english motors repair tutorial mechanics electricidad electricity bicycle rubber ocd