*****English version*****
(Abajo está la versión en español)
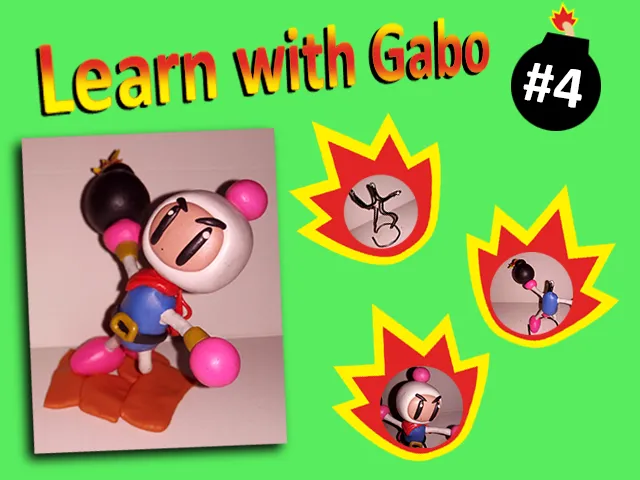
Greetings creative friends. This time I bring you another installment of learn with Gabo, specifically installment number 4.
In this installment I will teach you something that I have not shown you in the previous installments, how to make a wire skeleton and how to work according to this skeleton.
You can check out the previous installments by following these links:
Learn with Gabo #1:
@gaboamc2393/learn-with-gabo-1-aprende-con-gabo-1-engesp
Learn with Gabo #2:
@gaboamc2393/learn-with-gabo-2-aprende-con-gabo-2-engesp
Learn with Gabo #3
@gaboamc2393/learn-with-gabo-3-aprende-con-gabo-3-engesp
For this tutorial, we will be making a Bomberman figurine, a rather famous Konami video game character, so without further ado, let's get started.
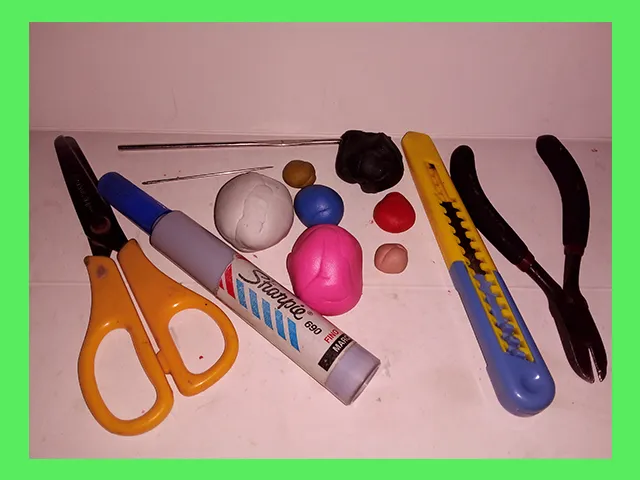
The materials we will use will be the usual ones:
-Plastiline
-Scissors
-Blade
-Needles (for knitting and sewing)
-Wire
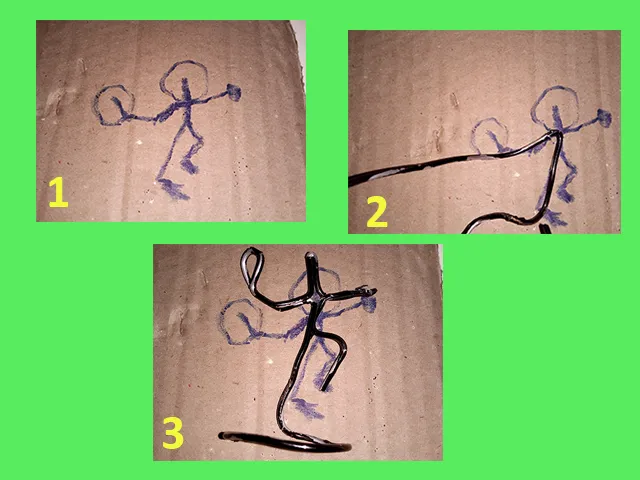
The first thing I almost always do to make the skeletons of the figure, is to make a drawing of how I want to do it (1), then I shape the wire following the base of the drawing (2). Although it is not always exact, I try to follow this guide until I get the desired result (3).
As seen in image 4 below, this is how the skeleton looks like. I always hold the center of the skeleton well with thread or more wire (15), then I cut the ends of the joints so that the wire is thinner, so that there is no double wire in any extension of the figure (6).
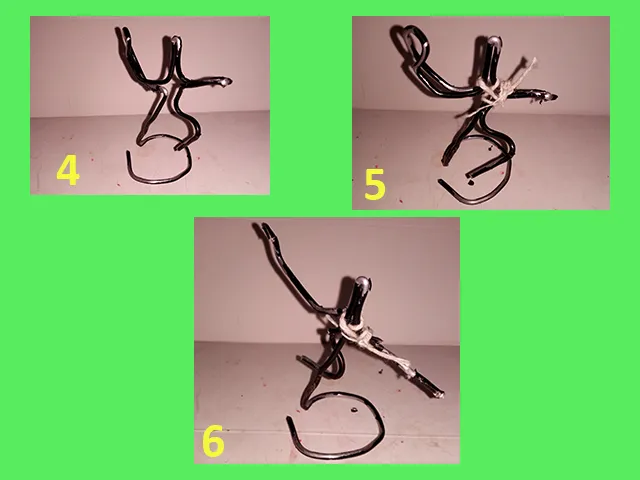
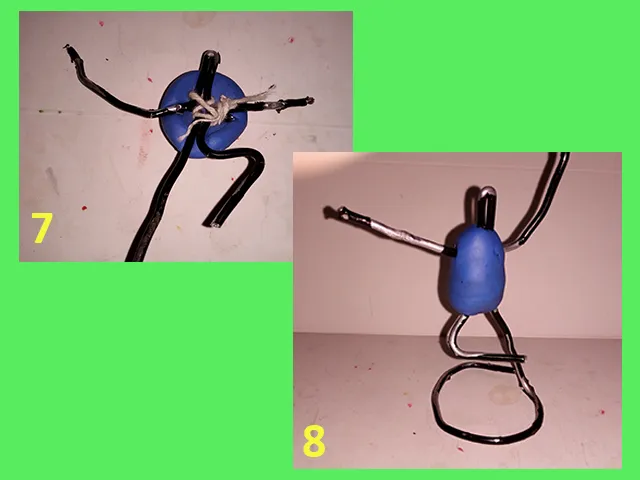
Once the skeleton is ready, we begin to cover the torso of the figure, which is the largest part of the body (7). We close it and mold it in the shape of an egg or as close as possible to this shape (8).
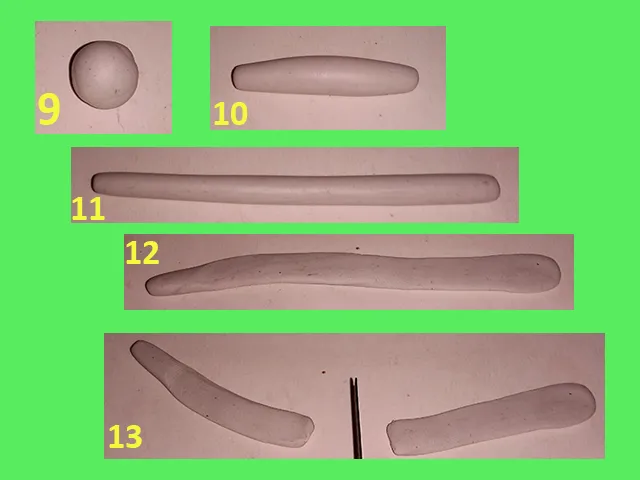
When the body is ready, we start with the extremities, in this case the legs. The first thing is to make a white sphere (9), stretch it in a cylindrical shape (10, 11) and then flatten it little by little (12). Finally we cut in half what we did (13).
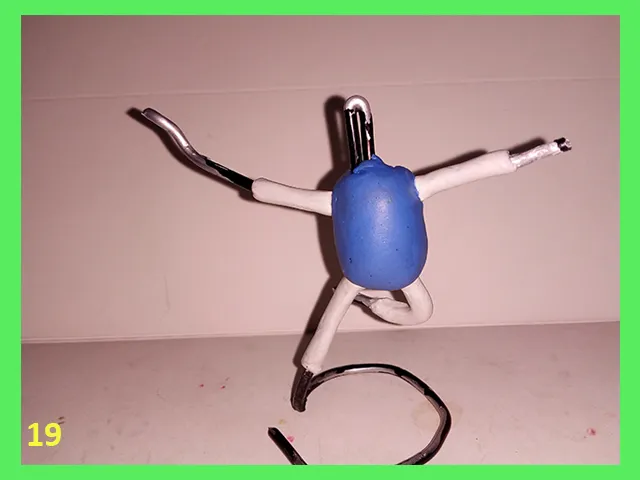
Each half will be for an extremity. We place the thin layer of plasticine on the wire (14) and close it (15), then we mold it with the help of the needle until we obtain the desired result (16).

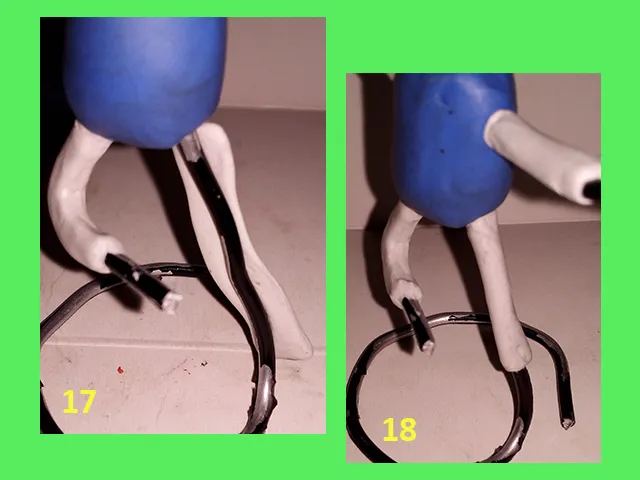
Repeat the same process for the other leg. Cover (17) and close (18).
This is how the figure looks with all the extremities covered with plasticine.
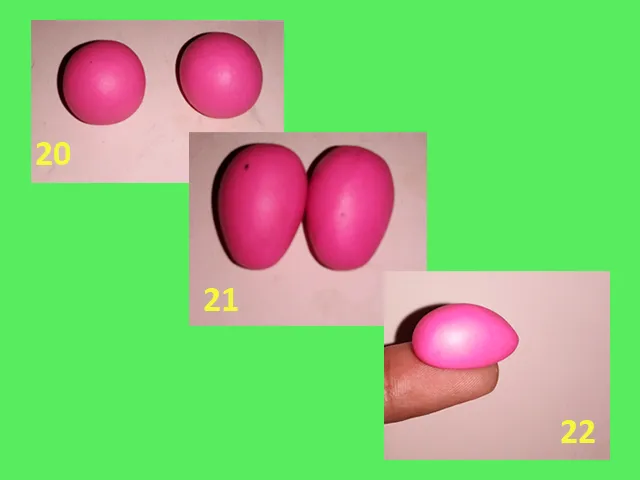
Now it's time to work on the feet. In learn with Gabo #4 we made Kirby's feet, which are the same type of feet we will make for this figure. First a sphere (20), we molded a conical shape (21) and finally we flattened the base of the feet (22).
In the image 23 you can see the size that each foot should have in comparison with the legs of the figurine. We have to make two small holes in the case (24), cut the heel part (25), place it on the base after cutting the heel of the foot (26) and close it (27).
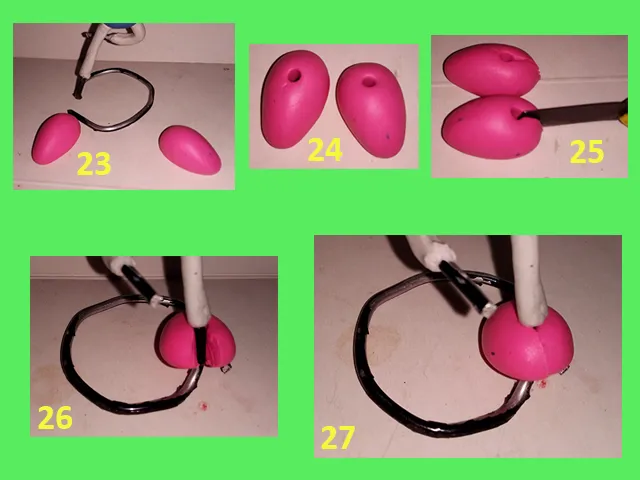
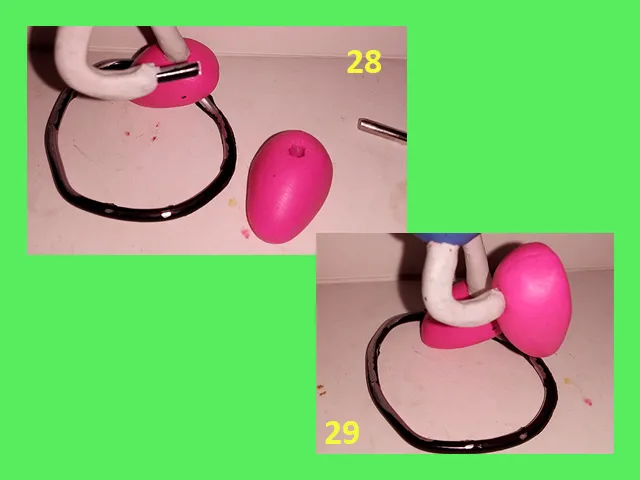
With the other foot it is not necessary to open it, we simply make a hole in the foot (28) and place it on the wire (29).
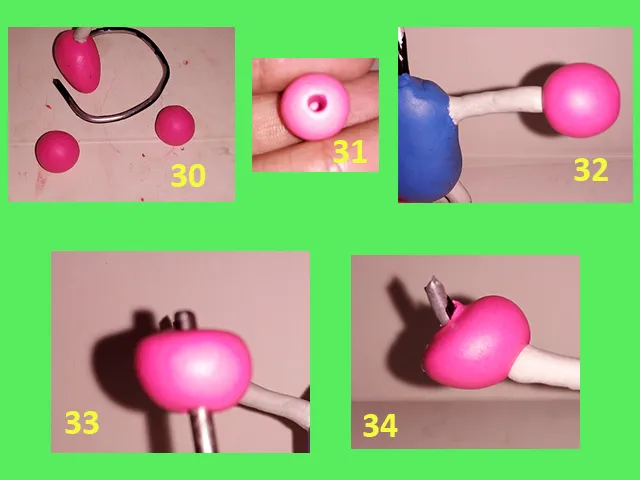
For the hands it is much simpler, we simply make two spheres (30), we make a hole in each sphere (31) and we put them in place (32). For the right hand we have to flatten a little what would be the palm to place the pump (33) and once this is done we place it in place (34).
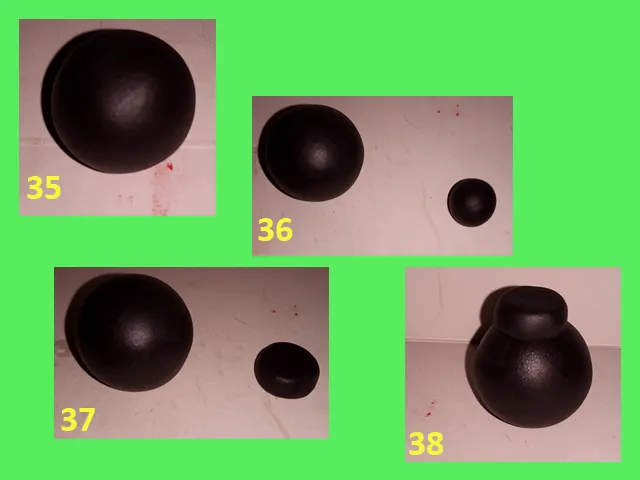
In this case for the pump is much simpler too. We make a black sphere (35), and a much smaller sphere (36). We flatten the smaller sphere (37) a bit and place the black tortilla on top of the larger black sphere (38).
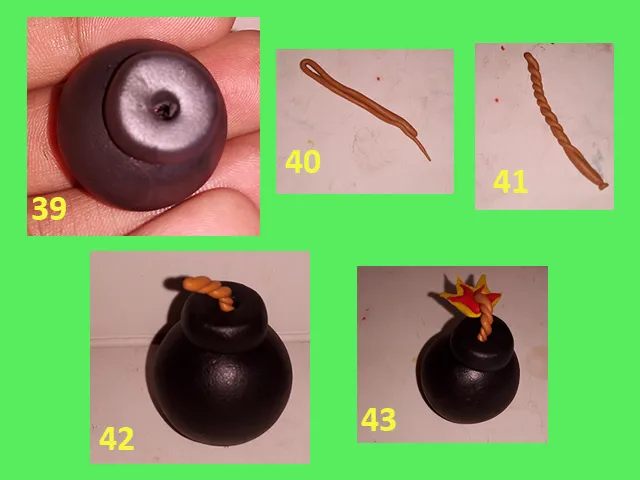
Make a hole on the bomb for the wick (39), make a strip of plasticine, fold it (40) and roll it up like a braid (41). Then put the wick in place (42) and make a small flame by cutting yellow and red plasticine with scissors (43).
Once the sphere is ready, we put it in place. This is how the figure goes so far:

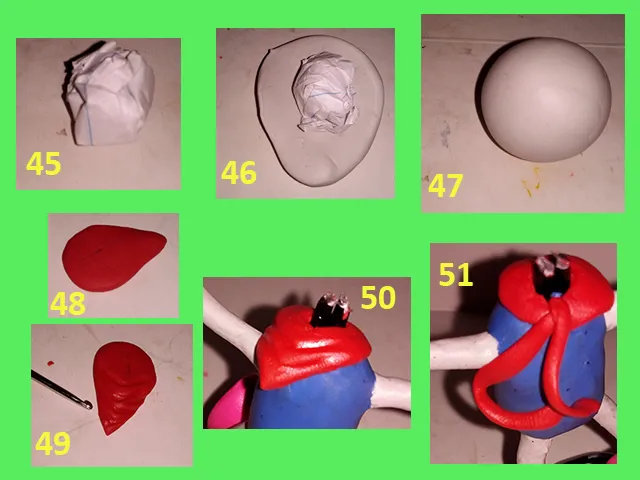
To make the head, for the size, we make a paper sphere (45), then we cover it with white plasticine (46), then we close it and give it the desired shape of the head of our bomberman, almost sphere but somewhat flattened (47).
The other thing is a scarf. To make it we flatten red plasticine and cut it with a scissors until we get the desired shape (48), then we shape the folds with the tip of a needle or a wooden stick (49). We put it in place (50) and place two more red strips on the back (51).
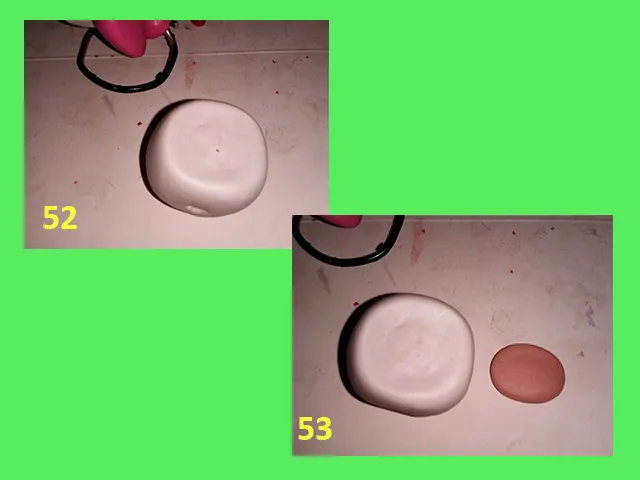
To continue with the head, we use our thumb and flatten a little the place where the face will go (52). We use pink plasticine and make a sort of oval (53).
This is what the figure looks like once the face is in place:
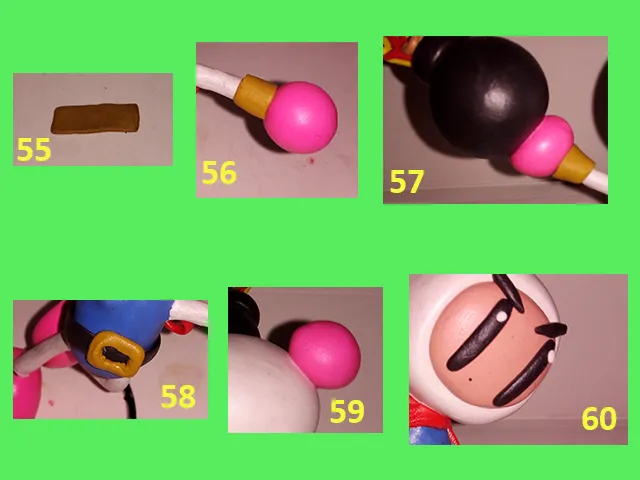
Time for details. Our bomberman has a sort of golden bracelet on his wrist. For this we make a mustard-colored sheet (the color closest to gold in plasticine) (55) and put it in place (56). We do the same with the other arm (57).
He also wears a belt that is simply made with a sheet of black plasticine and a small square of the same color of the bracelet (58). You also have to make a pink sphere for a little detail that has bomberman in the helmet (59) and finally the eyes, in the purest style of the Kirby of the previous delivery (60).
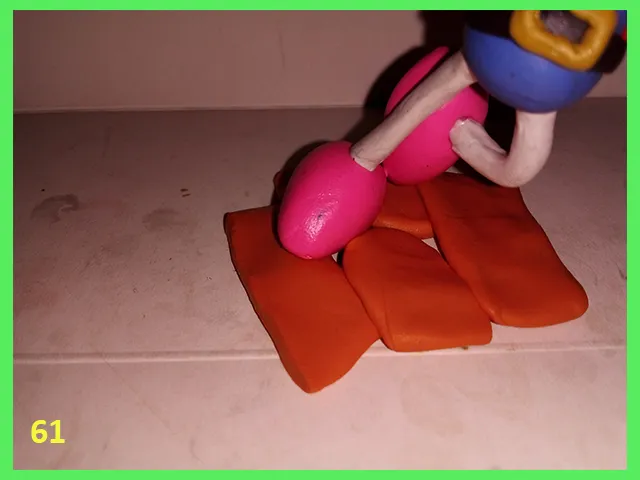
To this figurine I made a base simulating a brick, simply sheets of flattened orange plasticine.
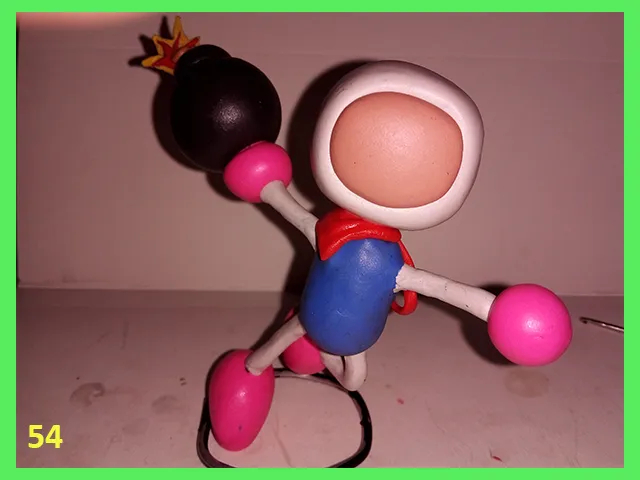
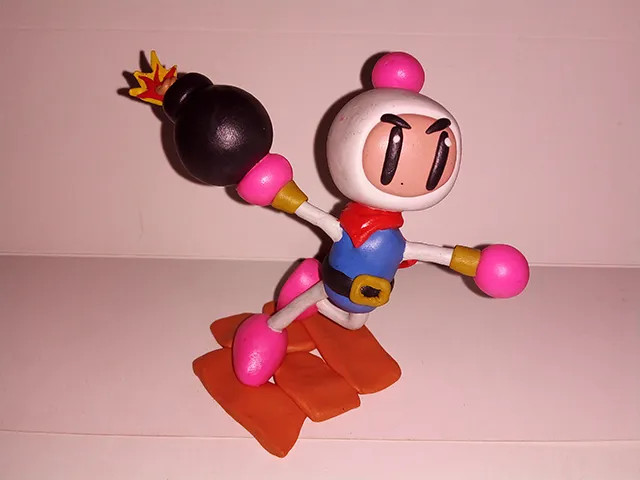
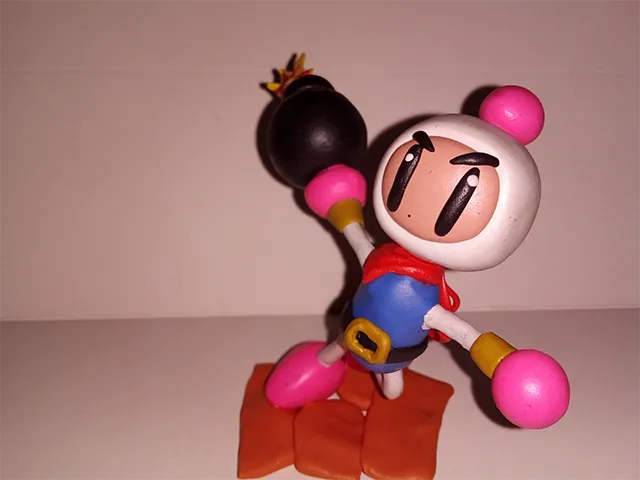
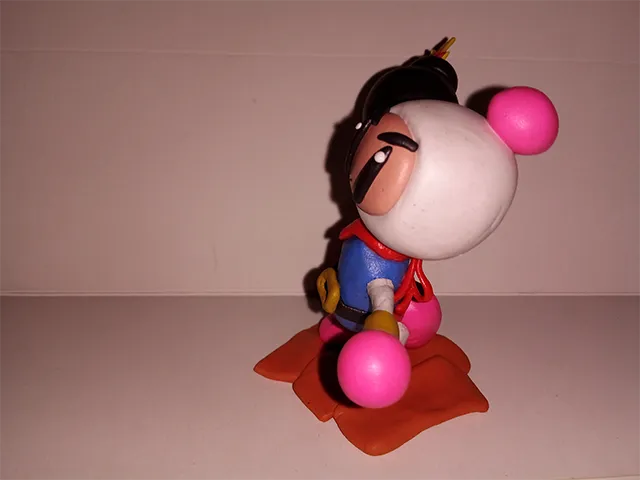
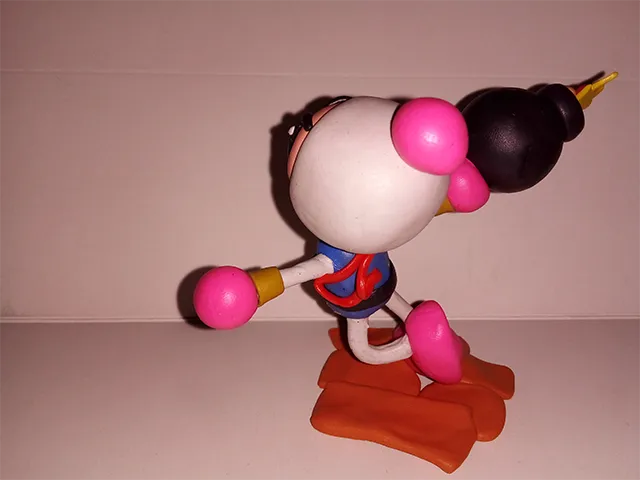
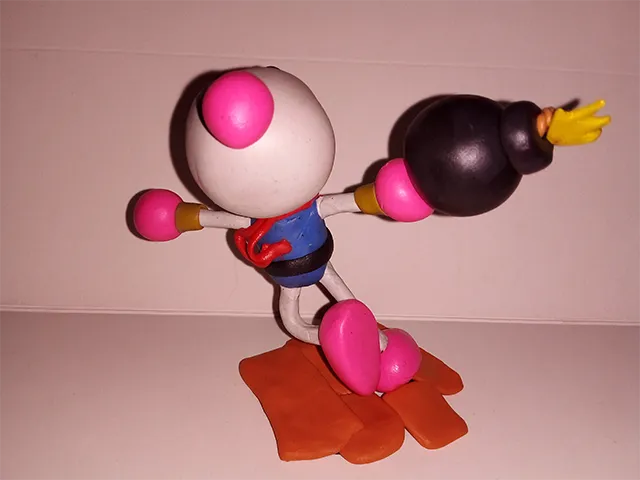
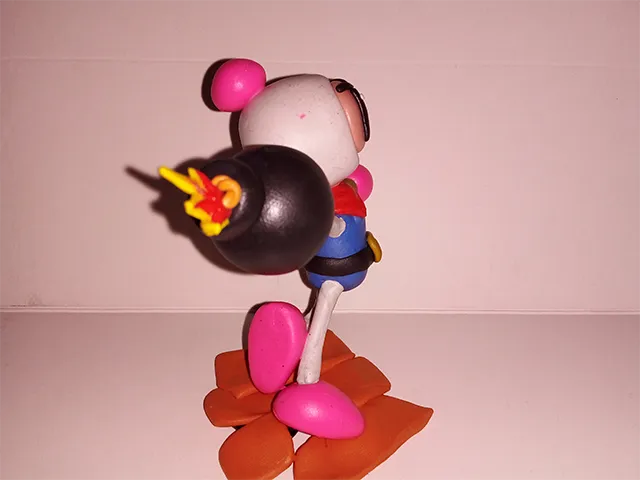
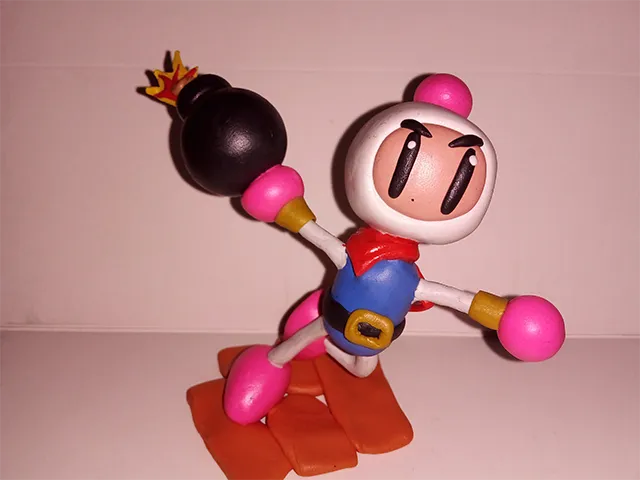
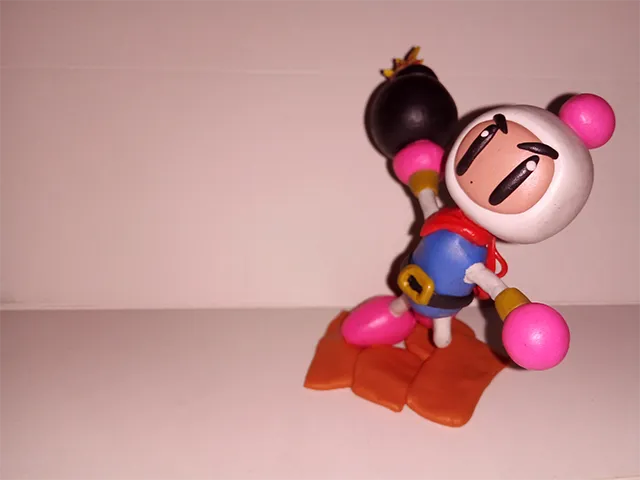
This is how our bomberman figure was finished. Below I leave a series of photographs from different angles.
What did you think? For this installment I want to mention that I did something special and that is to add the tag "learwithgabo", so you can find with this tag all the tutorials of this series, so if you like to learn how to model this kind of figurines, these are the tutorials you should follow,
If you like you can leave your opinions and suggestions about the figure below in the comments, as always I will be happy to read them. Without more to add, I say goodbye then....
See you next time!
*****Versión español*****
Saludos amigos creativos. En esta ocasión les traigo otra entrega de aprende con Gabo, específicamente la entrega número 4.
En esta entrega les enseñaré algo que no les he mostrado en las entregas anteriores, a hacer un esqueleto de alambre y a trabajar en función de este esqueleto.
Pueden consultar las anteriores entregas siguiendo estos enlaces:
Learn with Gabo #1:
@gaboamc2393/learn-with-gabo-1-aprende-con-gabo-1-engesp
Learn with Gabo #2:
@gaboamc2393/learn-with-gabo-2-aprende-con-gabo-2-engesp
Learn with Gabo #3
@gaboamc2393/learn-with-gabo-3-aprende-con-gabo-3-engesp
Para este tutorial, haremos una figurita de Bomberman, un personaje de videojuegos de Konami bastante famoso, así que sin más que agregar, comencemos.
Los materiales que usaremos serán los de siempre:
-Plastilina
-Tijeras
-Hojilla
-Agujas (de tejer y coser)
-Alambre
Lo primero que yo casi siempre hago para hacer los esqueletos de la figura, es hacer un dibujo de cómo quiero hacerlo (1), luego voydando forma al alambre siguiendo la base del dibujo (2). Aunque no siempre queda exacto, trato de seguir esta guía hasta obtener el resultado deseado (3).
Como se observa en la imagen 4 abajo, así quedó el esqueleto. Yo siempre sujeto bien el centro del esqueleto con hilo o más alambre (15), luego corto los extremos de las uniones para que el alambre quede más delgado, para que no haya alambre doble en ninguna extensión de la figura (6).
Una vez listo el esqueleto, comenzamos a cubrir el torso de la figura, que es la parte más grande del cuerpo (7). Lo cerramos y moldeamos con forma de huevo o lo más parecido posible a esta forma (8).
Cuando esté listo el cuerpo, comenzamos con las extremidades, en este caso las piernas. Lo primero es hacer una esfera de color blanco (9), estiramos de forma cilíndrica (10, 11) y luego aplastamos poco a poco (12). Finalmente cortamos a la mitad lo que hicimos (13).
Cada mitad será para una extremidad. Colocamos la delgada capa de plastilina sobre el alambre (14) y lo cerramos (15), luego moldeamos con ayuda de la aguja hasta obtener el resultado deseado (16).
Repetimos el mismo proceso por la otra pierna. Cubrimos (17) y cerramos (18).
Así queda la figura con todas las extremidades cubiertas con plastilina.
Toca ahora trabajar en los pies. En el learn with Gabo #4 hicimos los pies de Kirby, los cuales son el mismo tipo de pies que haremos para esta figura. Primero una esfera (20), moldeamos con forma cónica (21) y finalmente aplastamos la base del pies (22).
En la imagen 23 se observa el tamaño que debería tener cada pie en comparación con las piernas de la figurita. Hay que hacer dos agujeritos en la case (24), cortar la parte del talon (25), colocarla en la base tras cortar el talon del pie (26) y cerramos (27).
Con el otro pie no es necesario abrirlo, simplemente hacemos un agujero en el pie (28) y lo colocamos en el alambre (29).
Para las manos es mucho más sencillo, simplemente hacemos dos esferas (30), le hacemos un agujero a cada esfera (31) y las colocamos en su lugar (32). Para la mano derecha hay que aplastar un poco lo que sería la palma para colocarle la bomba (33) y una vez hecho esto lo colocamos en su lugar (34).
En este caso para la bomba es mucho más sencillo también. Hacemos una esfera negra (35), y una esfera mucho más pequeña (36). Aplastamos un poco la esfera más pequeña (37) y colocamos la tortilla negra sobre la esfera negra más grande (38).
Hay que hacer un agujero sobre la bomba para la mecha (39), hacemos una tirita de plastilina, la doblamos (40) y la enrollamos cual trenza (41). Luego se coloca la mecha en su lugar (42) y se hace una pequeña llama cortando plastilina amarilla y roja con una tijera (43).
Una vez lista la esfera, la colocamos en su lugar. Así va la figura hasta ahora:
Para hacer la cabeza, por el tamaño, hacemos una esfera de papel (45), luego la cubrimos con plastilina blanca (46), luego la cerramos y le damos la forma deseada de la cabeza de nuestro bomberman, casi esfera pero algo aplastada (47).
Lo otro es una bufanda. Para hacerla aplastamos plastilina roja y la cortamos con una tijera hasta obtener la forma deseada (48), luego le damos forma a los pliegues con la punta de una aguja o un palillo de madera (49). La colocamos en su lugar (50) y le colocamos dos tiritas rojas más en la parte de atrás (51).
Para continuar con la cabeza, usamos nuestro pulgar y aplastamos un poco el lugar donde irá la cara (52). Usamos plastilina rosa y hacemos una suerte de ovalo (53).
Así se ve la figura una vez que colocamos la cara en su lugar:
Hora de los detalles. Nuestro bomberman tiene una suerte de brazalete dorado en la muñeca. Para ello hacemos una lámina de color mostaza (el color más aproximado al dorado en la plastilina) (55) y la colocamos en su lugar (56). Hacemos lo mismo con el otro brazo (57).
También lleva un cinturón que simplemente se hace con una lámina de plastilina negra y un cuadradito del mismo color del brazalete (58). También hay que hacer una esfera rosa para un detallito que tiene bomberman en el casco (59) y por último los ojos, al más puro estilo del Kirby de la entrega anterior (60).
A esta figurita le hice una base simulando ladrillo, simplemente láminas de plastilina naranja aplastada.
Así quedó terminada nuestra figura de bomberman. A continuación dejo una serie de fotografías desde distintos ángulos.
¿Qué les pareció? Para esta entrega quiero mencionar que hice algo especial y es añador la etiqueta "learwithgabo", para que puedas encontrar con esta etiqueta todos los tutoriales de esta serie, así que si gustas aprender a modelar este tipo de figuritas, estos son los tutoriales que deberías seguir,
Si gustan pueden dejar sus opiniones y sugerencias sobre la figura abajo en los comentarios, como siempre yo estaré encantado de leerlos. Sin más que agregar, me despido entonces...
¡Hasta la próxima!

Imagenes editadas con Photoshop
Traducido con DeepL
Photos edited with Photoshop
Translated with DeepL
Últimos tres post/Last three posts:
Peanuts and monster Weekend / Fin de semana de cacahuetes y monstruos
My participation in Cardboard World: King Ghidorah
Gabo Empanadas