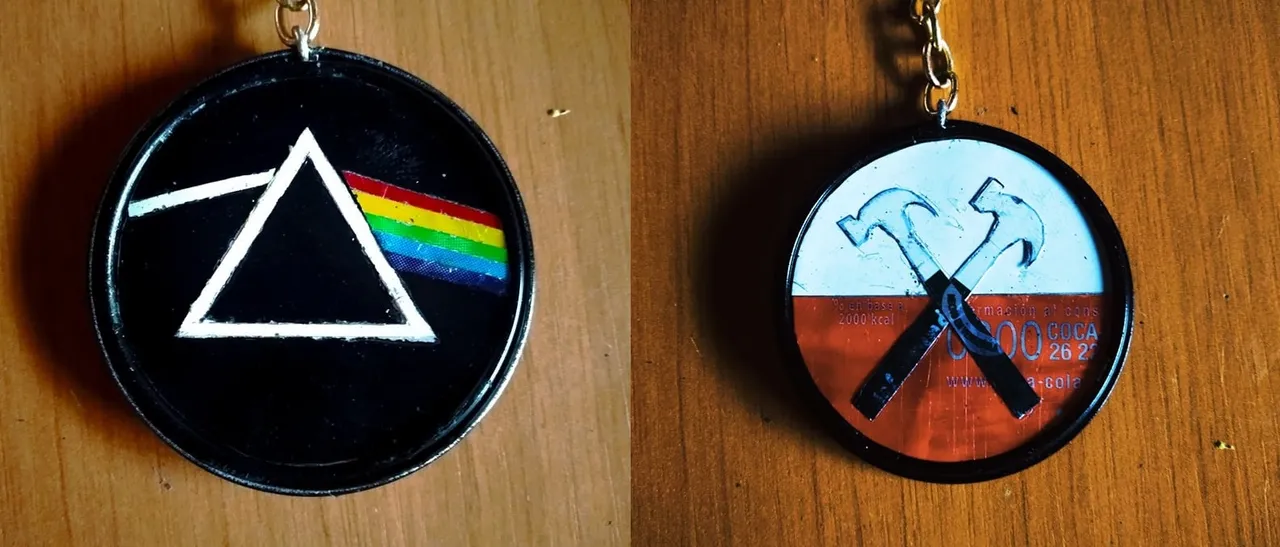
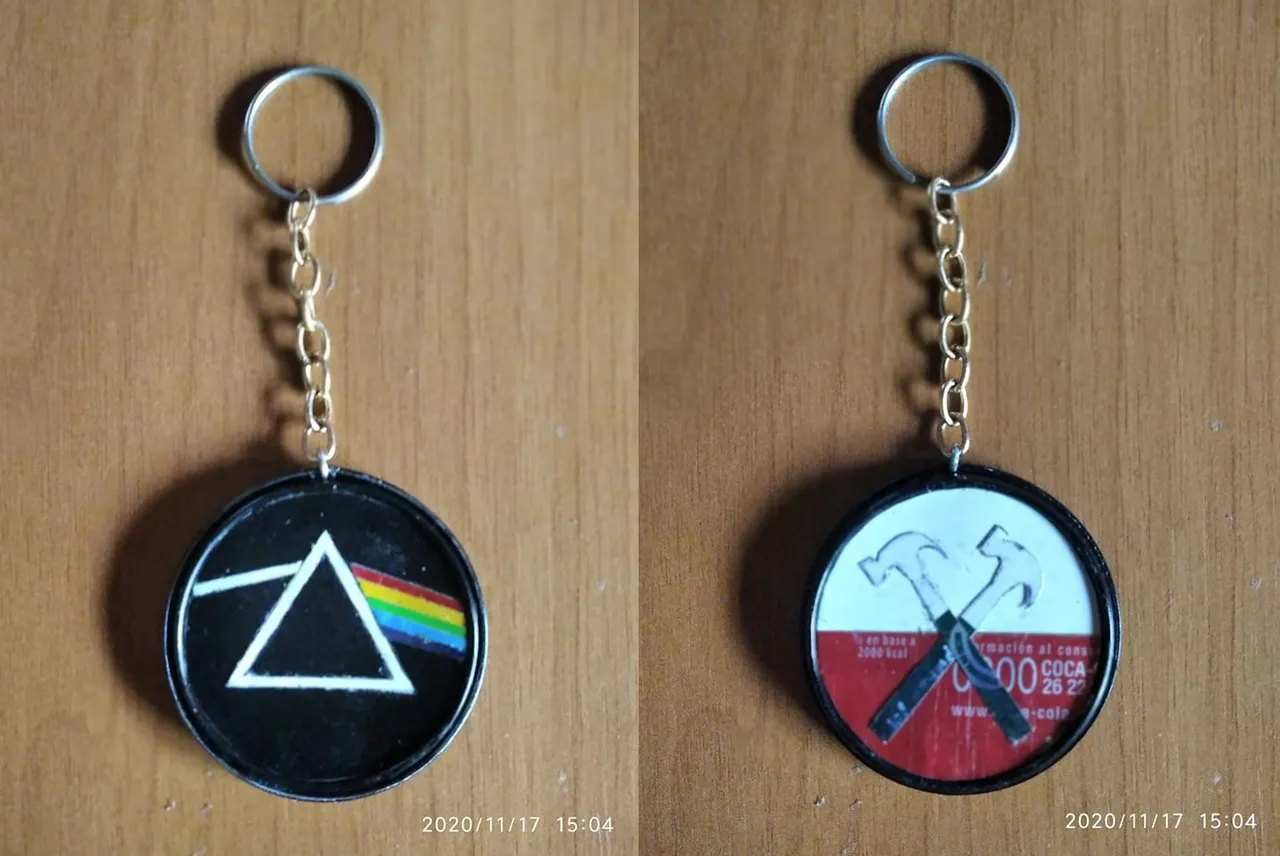
Hello friends of hive I hope you are very well and working for the community. Today I want to show you my latest work in recycling. This is a keychain from the progressive rock band Pink Floyd. I really like this band because in its time it took rock to incredible levels, releasing impressive albums every year. Of all the Pink Floy albums I really like A Saucerful Secrets, the band's second album that came out in 1968. This album is so experimental that you get lost in its melodies. This was the record that I listened to while making the keychain, I hope you like it and watch the process.
Hola amigos de hive espero esten muy bien y trabajando por la comunidad. Hoy quiero mostrarle mi ultimo trabajo en reciclaje. Se trata de un llavero de la banda de rock progresivo Pink Floyd. Esta banda me gusta mucho porque en sus tiempos llevo al rock a niveles increibles, sacando cada año discos impresionantes. De todos los discos de Pink Floy me gusta mucho A Saucerful Secrets, segundo disco de la banda que salio en 1968. Este disco es tan experimental que uno se pierde en sus melodías. Este fue el disco que escuché mientras hacía el llavero, espero les guste y contemplen el proceso.
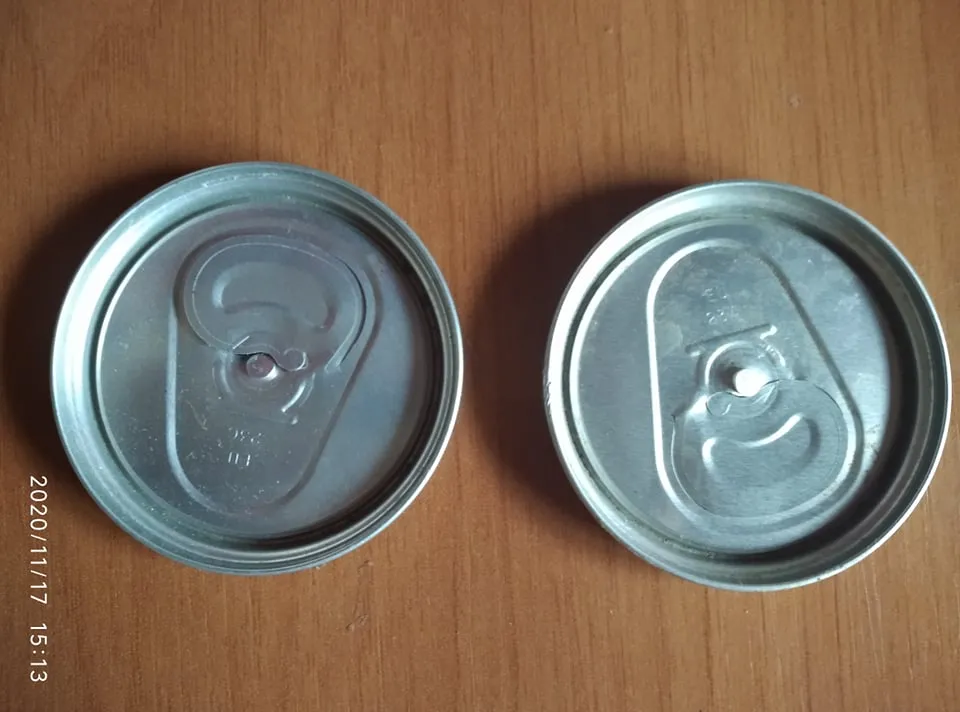
I usually make keychains always with two faces to take advantage of the material and so that the design is varied. To do this we choose the upper part of a soda can and cut two, with it we will make two faces for the Pink Floy keychain like a coin.
Yo suelo hacer los llaveros siempre con dos caras para aprovechar el material y para que el diseño quede variado. Para hacerlo escogemos la parte superio de una lata de soda y cortamos dos, con ella haremos dos caras para el llavero de Pink Floy tal como una moneda.
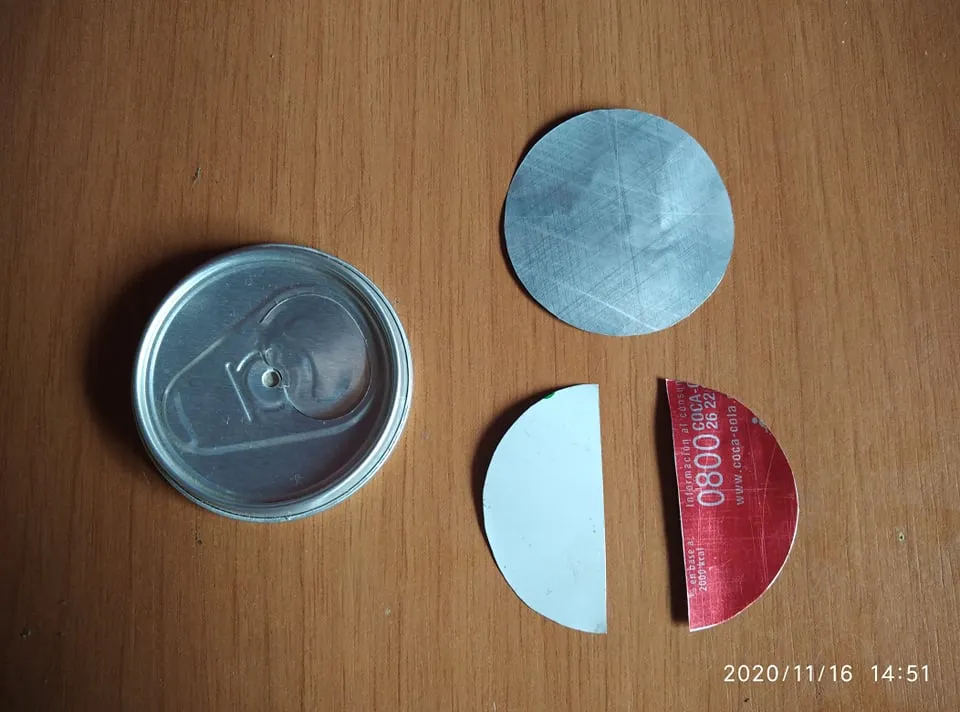
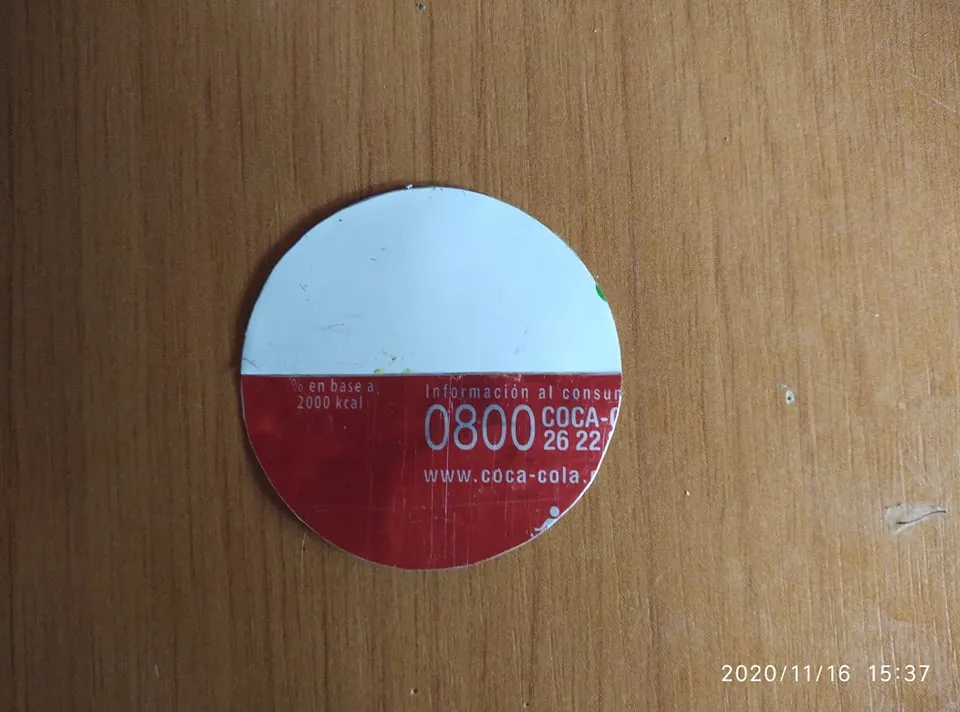
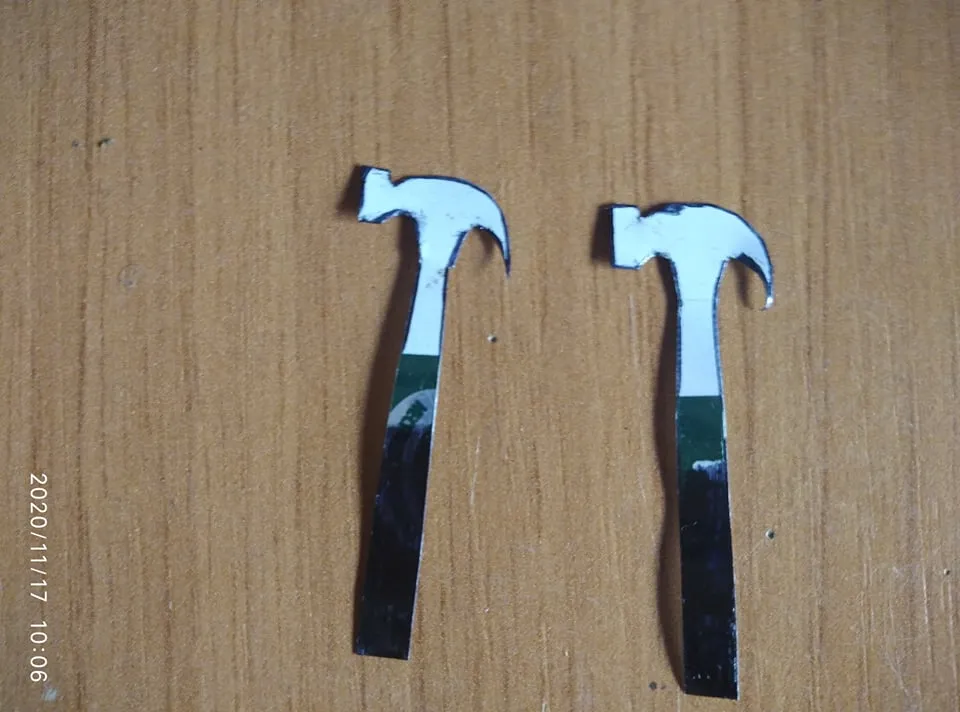
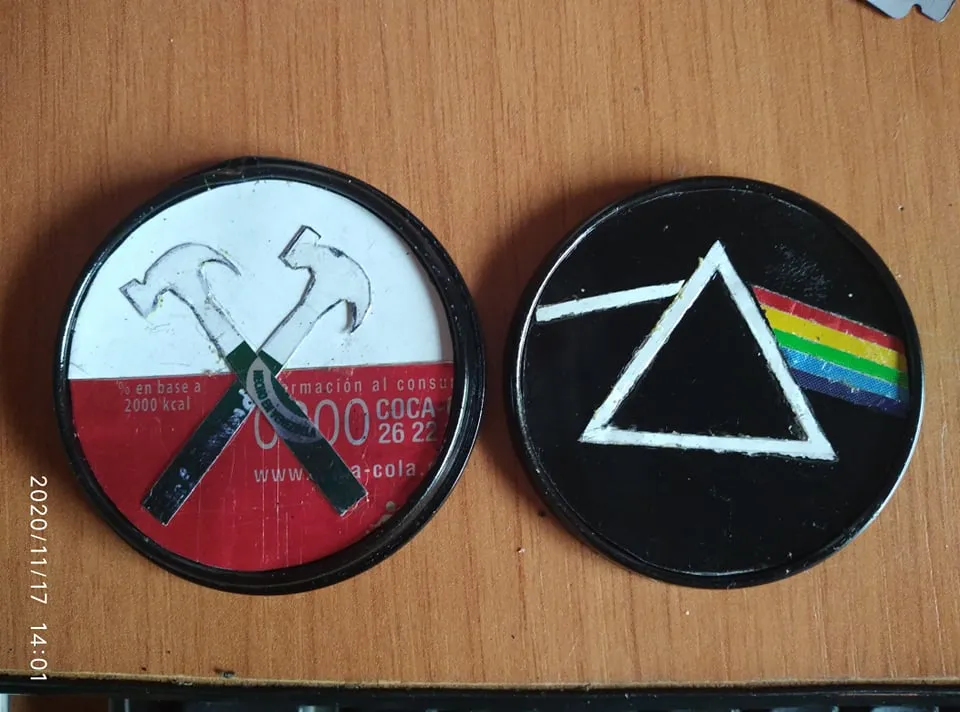
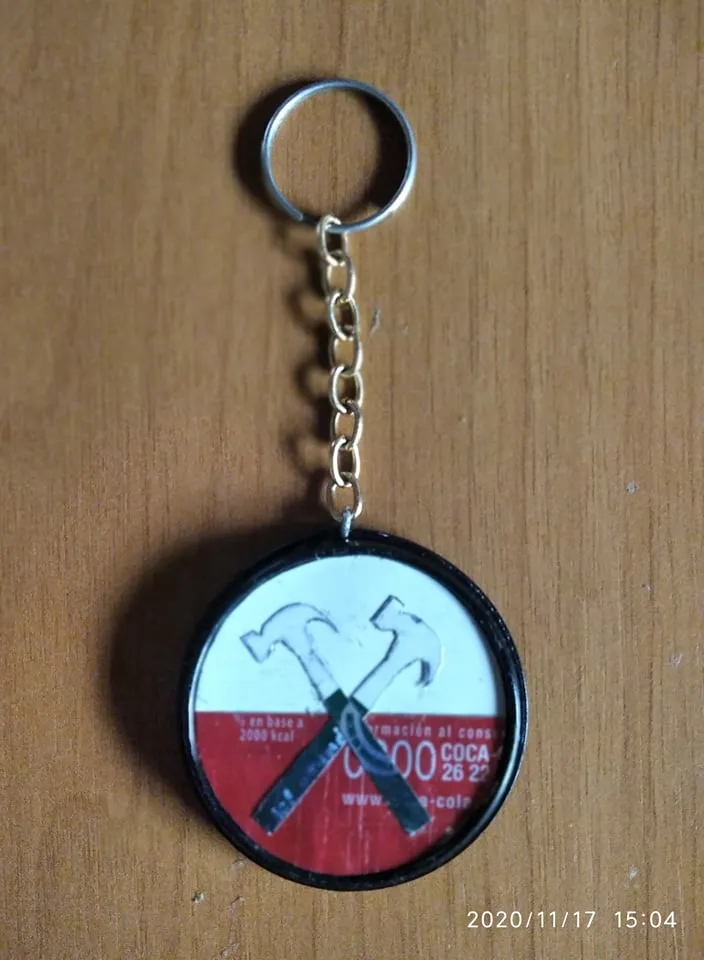
For the first design we measure with the top of the can and cut another piece of can in a circular way. The next step we take that circle and we measure it in half, we look for a black can and a white one and we cut them in half each. So we can make that background mitan white and half red. Then we measure and make the hammers that are exactly inside the circle.
Para el primer diseño medimos con la parte superior de la lata y cortamos otro pedaco de lata de manera circular. El siguiente paso tomamos ese circulo y lo medimos por la mitad, buscamos una lata de color negro y una de color blanco y las cortamos asi por la mitad cada una. Asi podremos hacer ese fondo mitan blanco y mitad rojo. Luego medimos y hacemos los martillos que nos queden exactamente dentro del circulo.
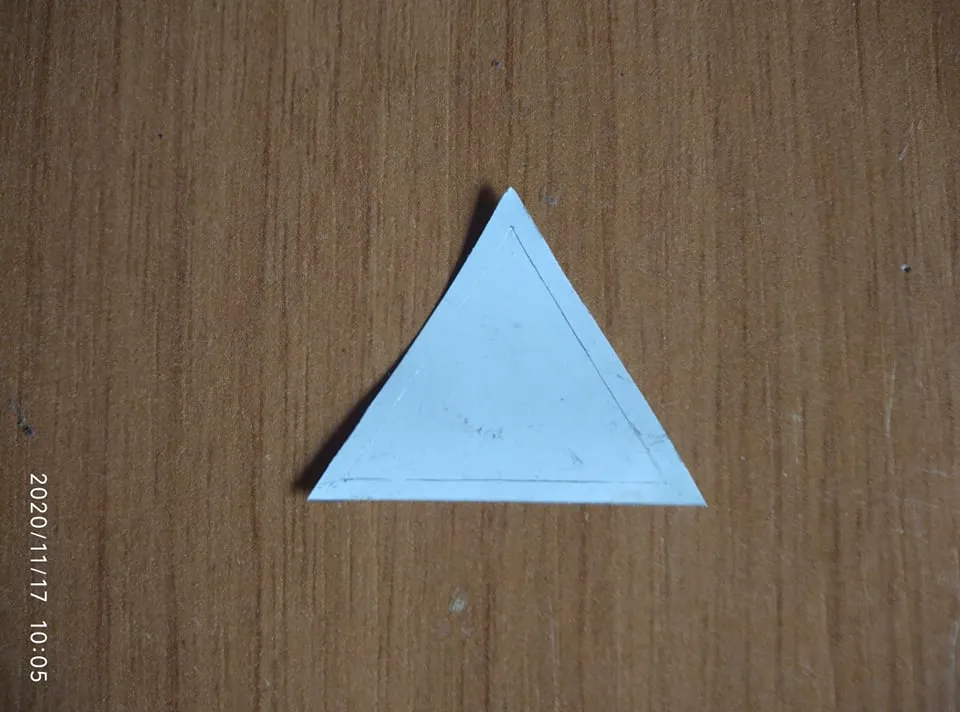
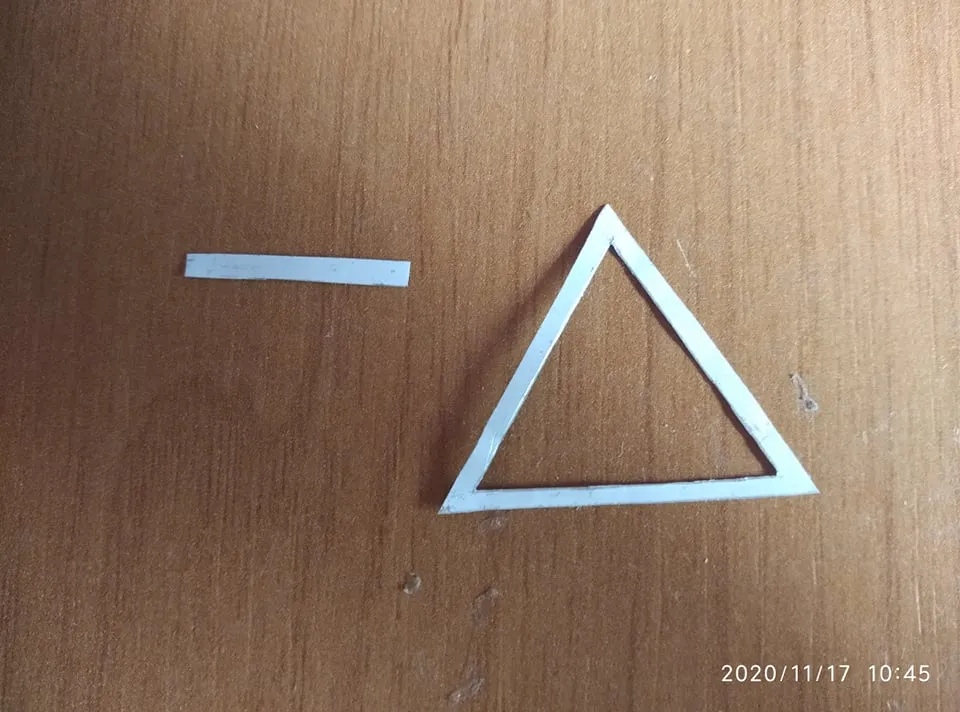
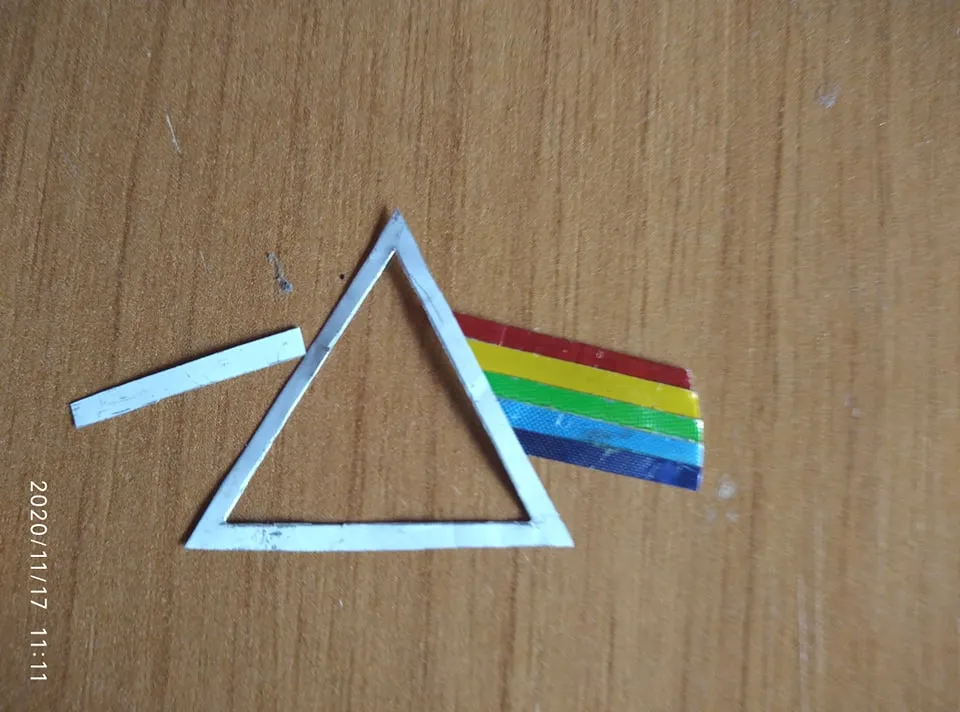
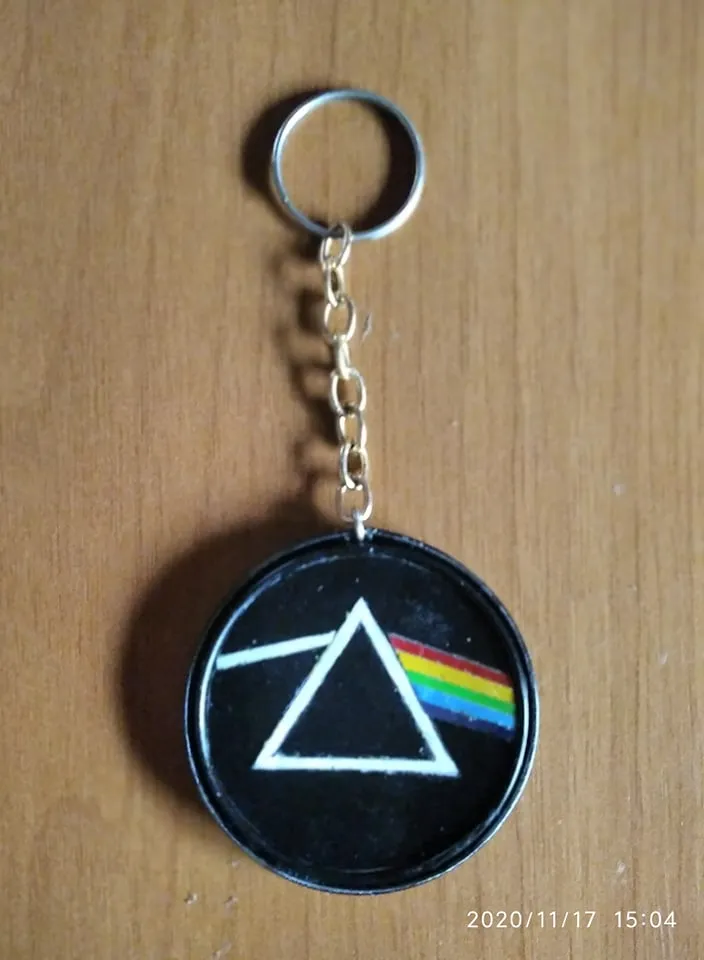
Then we went on to make the other side of the keychain which will carry the cover of the album The Dark Side of The Moon. We first make the white triangle, this triangle measures 3 cm on all sides and fits perfectly inside the circle. We also cut a small line that measures 2 mm and that will be the beginning of the triangle and lastly we cut a small patch which will be covered with the colors of the prism
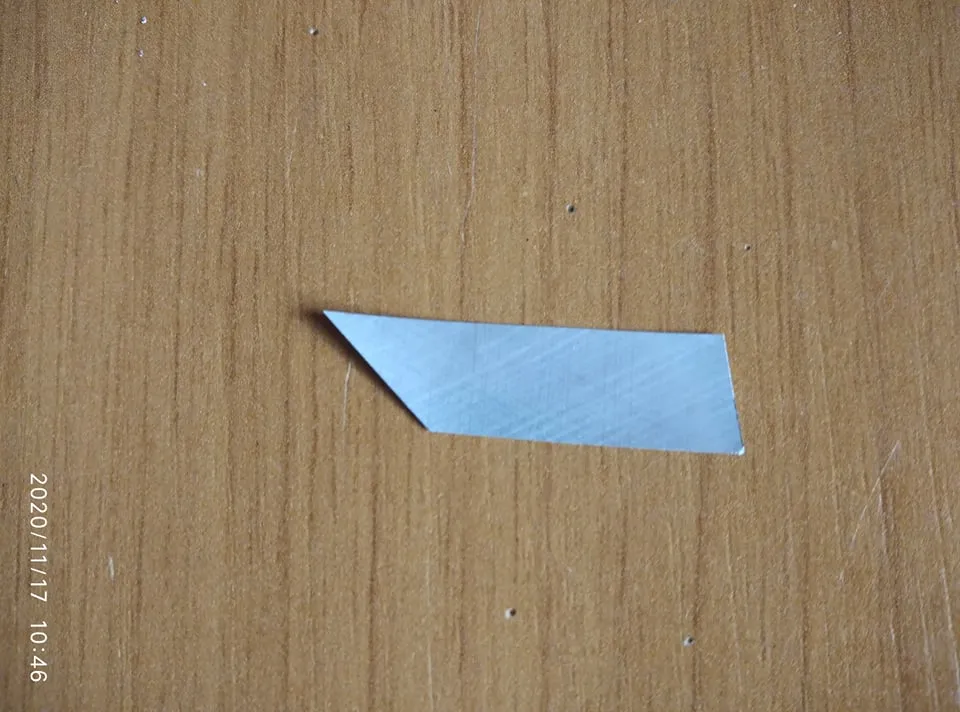
Luego pasamos a hacer la otra cara del llavero la cual llevara la portada del disco The Dark Side of The Moon. Hacemos primero el triangulo blanco, discho triangulo mide 3 cm por todos sus lados y cabe perfectamente dentro el circulo. Tambien cortamos una pequeña linea que mida 2 mm y que sera el inicio del triangulo y de ultimo cortamos un pequeño retazo el cual ira cubierto de los colores del prisma
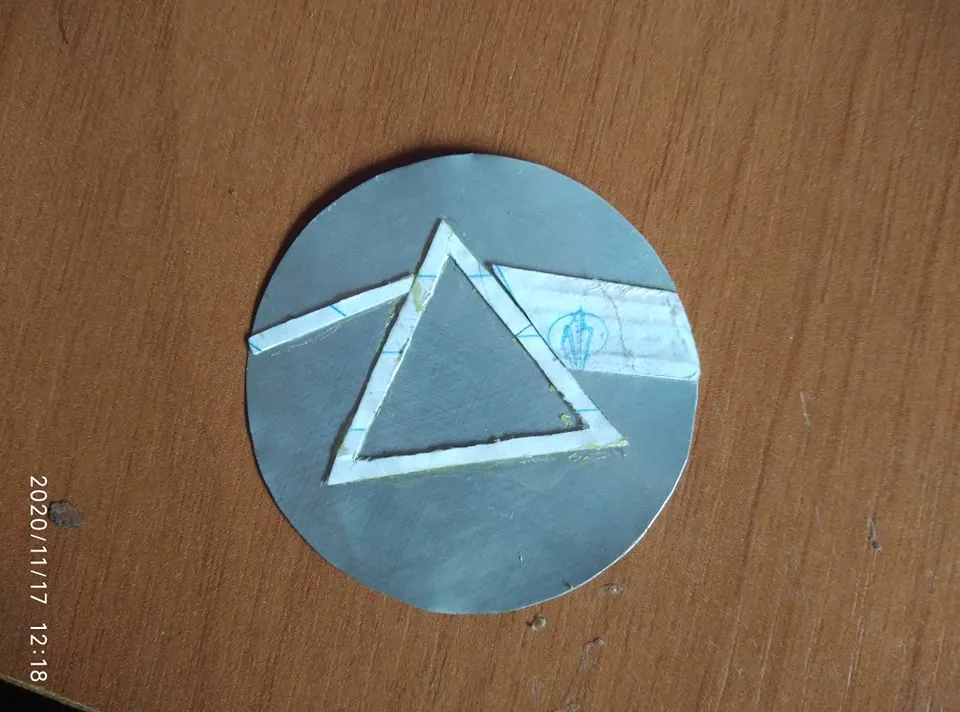

Once we have these three parts made, we make another tin circle the same size as the previous one and that fits in the lids. We glue the triangle and the rest with glue and cover it with something, we can use adhesive. We do this because we will paint everything black with spray paint. Once we spray paint we remove the adhesive so that everything remains intact.
Una vez tenemos estas tres partes hechas, hacemos otro circulo de lata del mismo tamaño que el anterior y que quepa en las tapas. Pegamos con pegamento el triangulo y lo demas y lo cubrimos con algo, podemos usar adhesivo. Hacemos esto porque pintaremos todo de color negro con pintura en aerosol. Una vez que pintamos con aerosol retiramos el adhesivo para que nos quede todo intacto.
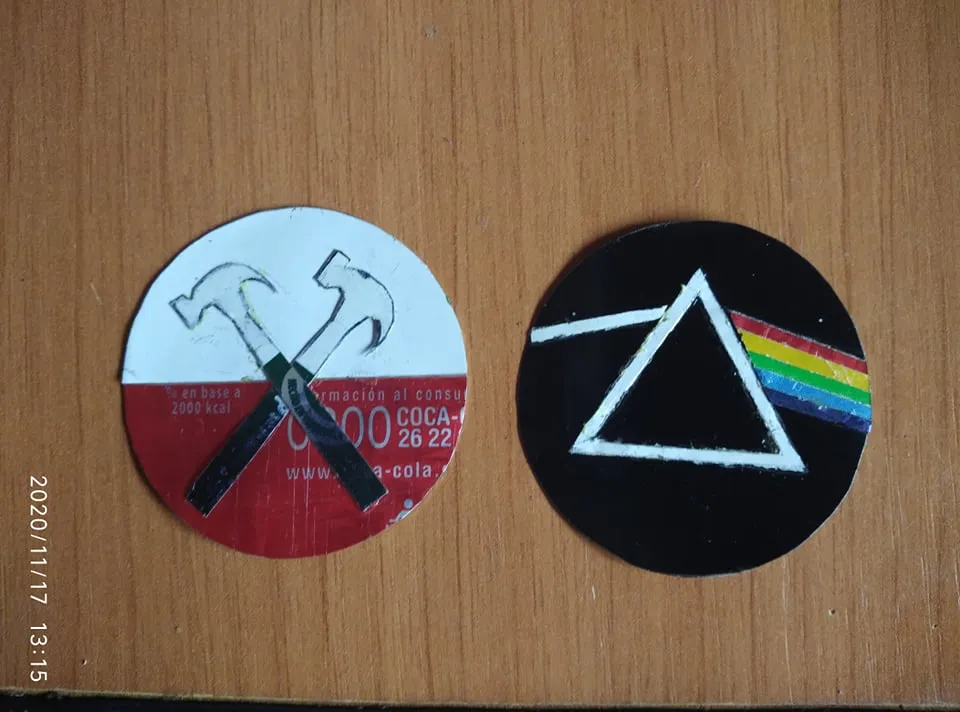
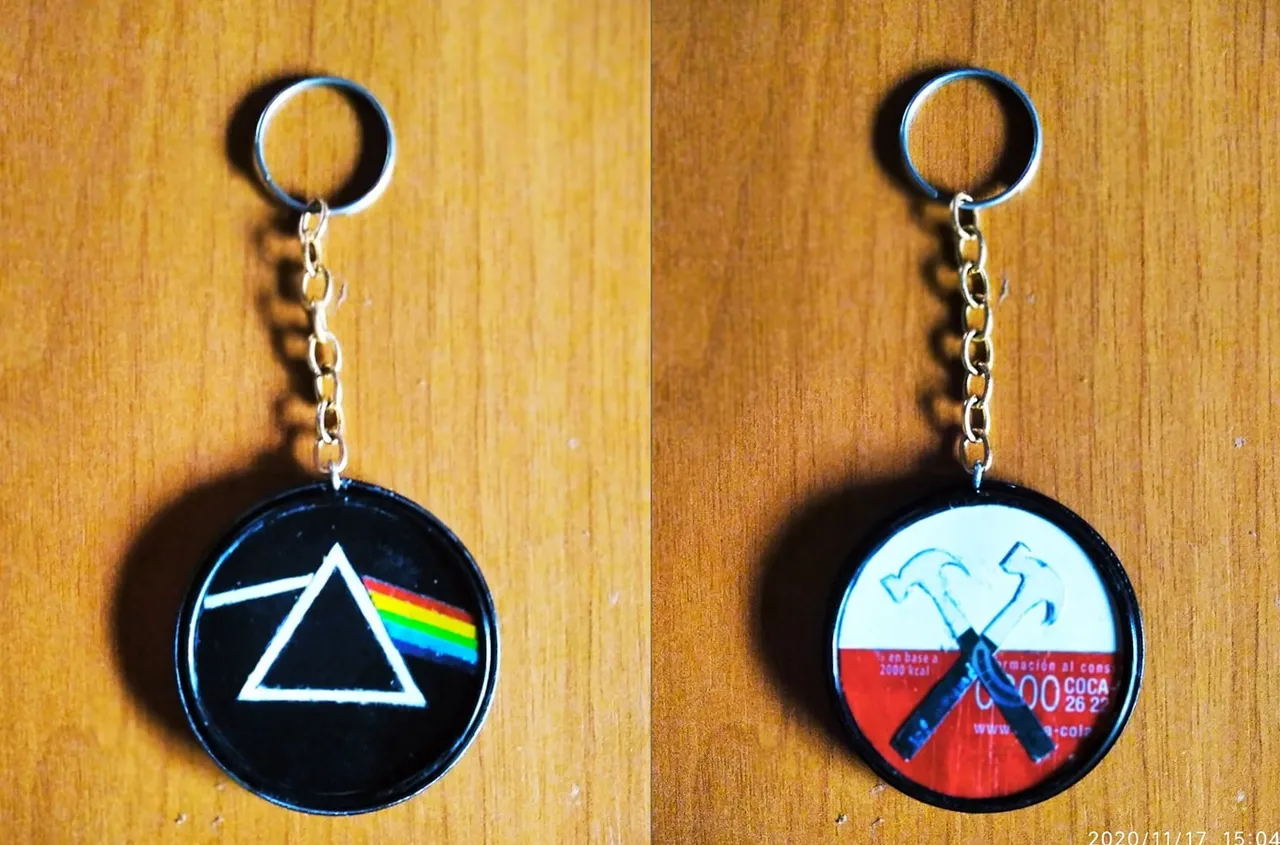
So we have both designs. When we glue the hammers on top of the white background with red and when we remove the adhesive from the triangle. The truth was amazed with the result. We only need to adhere them to the lids of the can and we will have our keychain ready.
Asi nos quedan ambos diseños. Cuando pegamos los martillos encima del fondo blanco con rojo y cuando retiramos el adhesivo del triangulo. La verdad quede maravillado con el resultado. Solo nos falta adherirlos en las tapas de la lata y tendremos nuestro llavero listo.
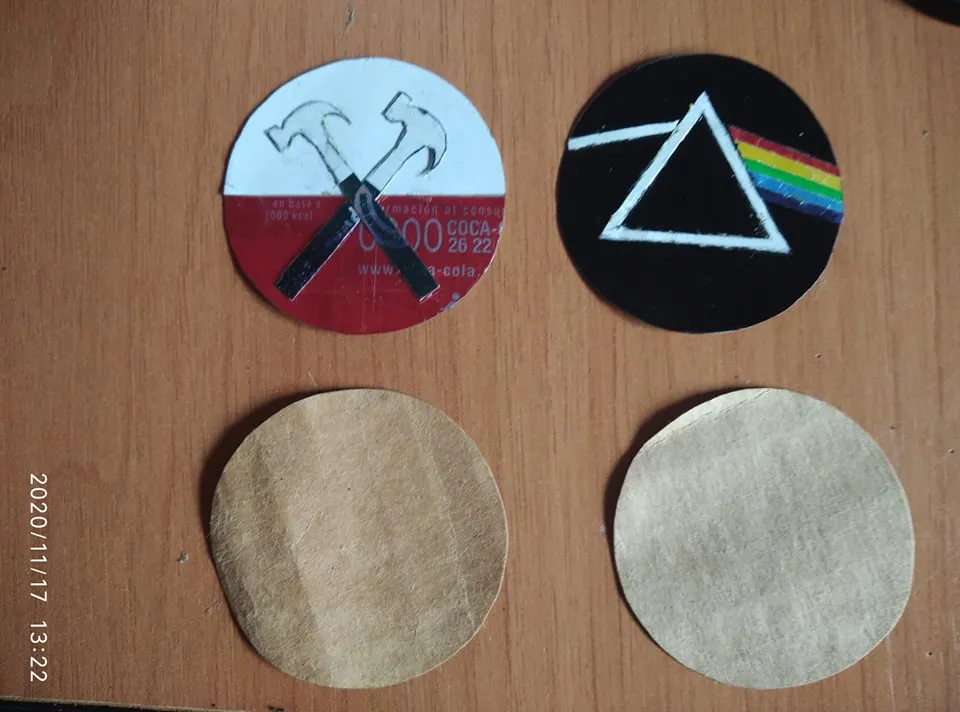
So that the logos are well adjusted to the key ring, we cut two circular cardboard and glue them on the back. This part of the cardboard will be fixed in the can and will give the key ring strength and resistance while the glue will be better.
Para que los logos nos queden bien ajustados al llavero cortamos dos cartones circulares y los pegamos en la parte trasera. Esta parte del carton irá fijada en la lata y le dara dureza y resistencia al llavero mientras que el pegamento quedará mejor.
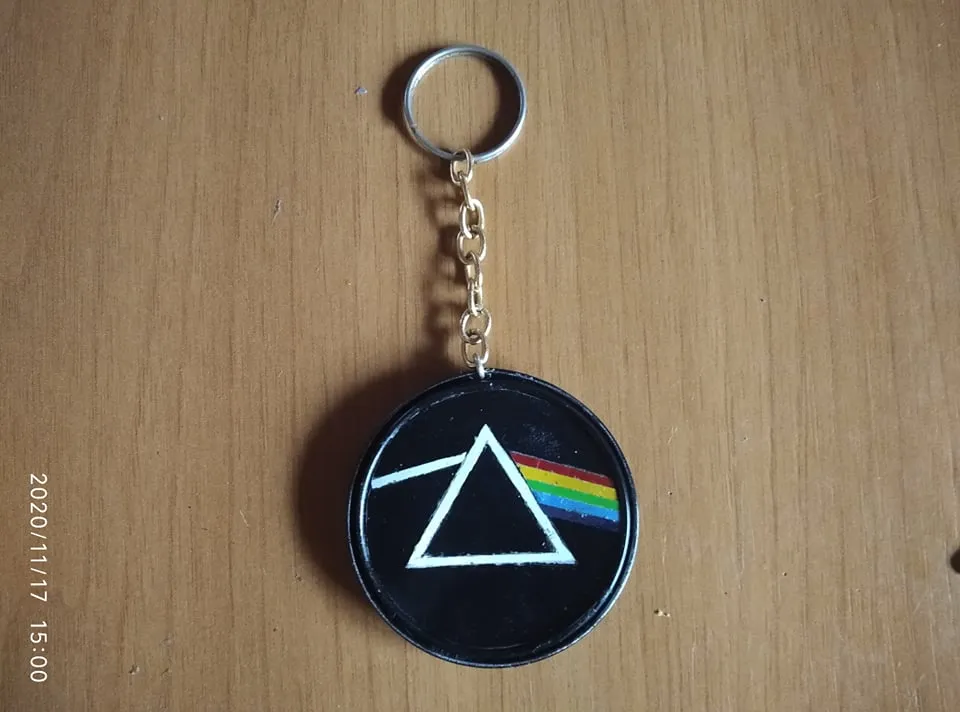
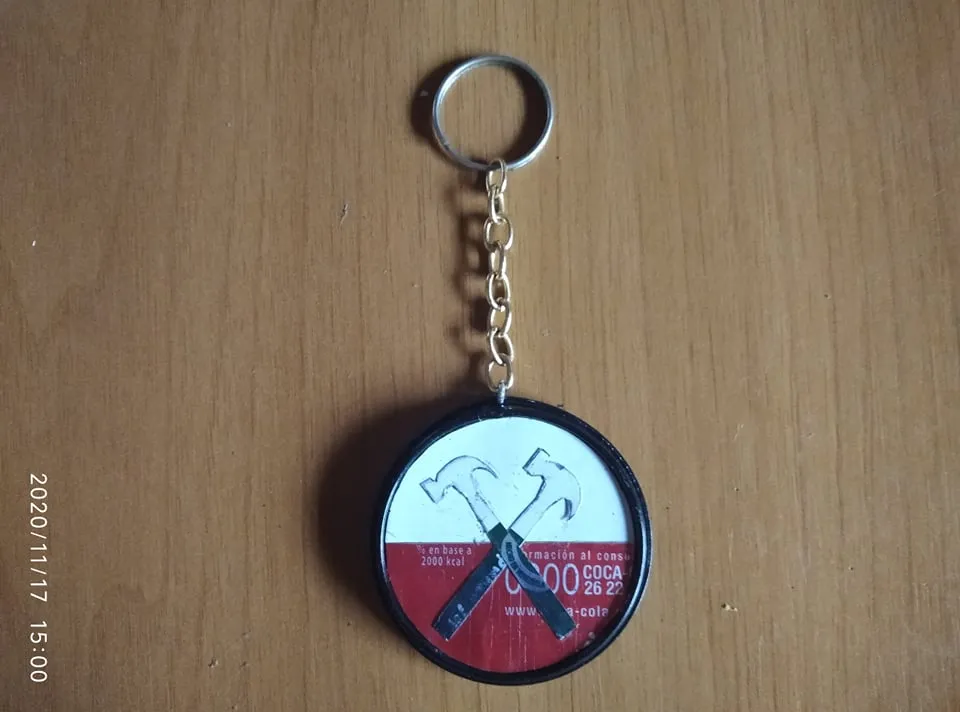
The last step is to join both sides with the logos and open a small hole so that the chain can enter and thus complete our keychain.
El ultimo paso es unir ambas caras con los logotipos y abrirle un pequeño agujero para que pueda entrar la cadena y asi completar nuestro llavero.
This has been my work for today I hope you like it and are encouraged to make one that you like from a design made by you. You just have to put creativity and patience to achieve it, in our homes we have many materials that we accumulate and sometimes it becomes garbage. So we can give it a new use. If you liked my keychain leave a comment and if you wish you can follow me. You have to recycle .. See you soon.
Este ha sido mi trabajo por hoy espero que les guste y se animen a hacer uno que les guste de un diseño hecho por ustedes. Solo hay que ponerle creatividad y paciencia para lograrlo, en nuestras casas tenemos muchos materiales que acumulamos y a veces se convierte en basura. Asi podemos darle un nuevo uso. Si te gusto mi llavero deja un comentario y si lo deseas puede seguirme. Hay que reciclar.. Nos vemos pronto.
If you want you can also follow me on instagram where I also show all my work.
Si quieres tambien puedes seguirme en instagram donde tambien muestro todos mis trabajos.