
Saludos comunidad creativa, ¿cómo están? espero todos se encuentren en un lindo momento y si no confiemos en que todo pasara y tendrán días maravillosos.
Paso por aquí para mostrarles unas etiquetas con motivos del inicio de clases.
Cuando llega la temporada de inicio de clases, es todo un acontecimiento como un bazar cuadernos, lápices uniformes, zapatos entro otros artículos es lo que se respira por doquier.
Mi hijo está en segundo grado, por lo que su lista fue relativamente pequeña, y la tarea además de adquirir los útiles escolares es identificarlos, no solo para saber a quien pertenece cada cuaderno o libro, sino tambien en caso de extravió lo cual me parece genial.
Mi intención inialmente era realizar las etiquetas digitales e imprimirlas, las hacia a mi gusto y hasta más económicas me iban a salir, pero entre mi trabajo y actividades diarias el tiempo no me rindió, y bueno básicamente salgo los sábados y tendría que esperar hasta el próximo sábado para lograr mi objetivo.
Por lo que decidí mejor hacerlas a mano y les confieso me encanto el resultado final, creo no me hubiesen quedado tan bellas si los hubiese hecho digital.
¿Qué piensan ustedes?
Aquí les muestro como las realice:
los materiales que utilice:
✏️Marcadores punta fina rojo, azul, verde, naranja, amarillo, negro
✏️Colores azul pastel, verde pastel, rojo
✏️Marcador extrafina negro
✏️Regla, lapiz, borrador, hoja blanca, tijera y silicona liquida.
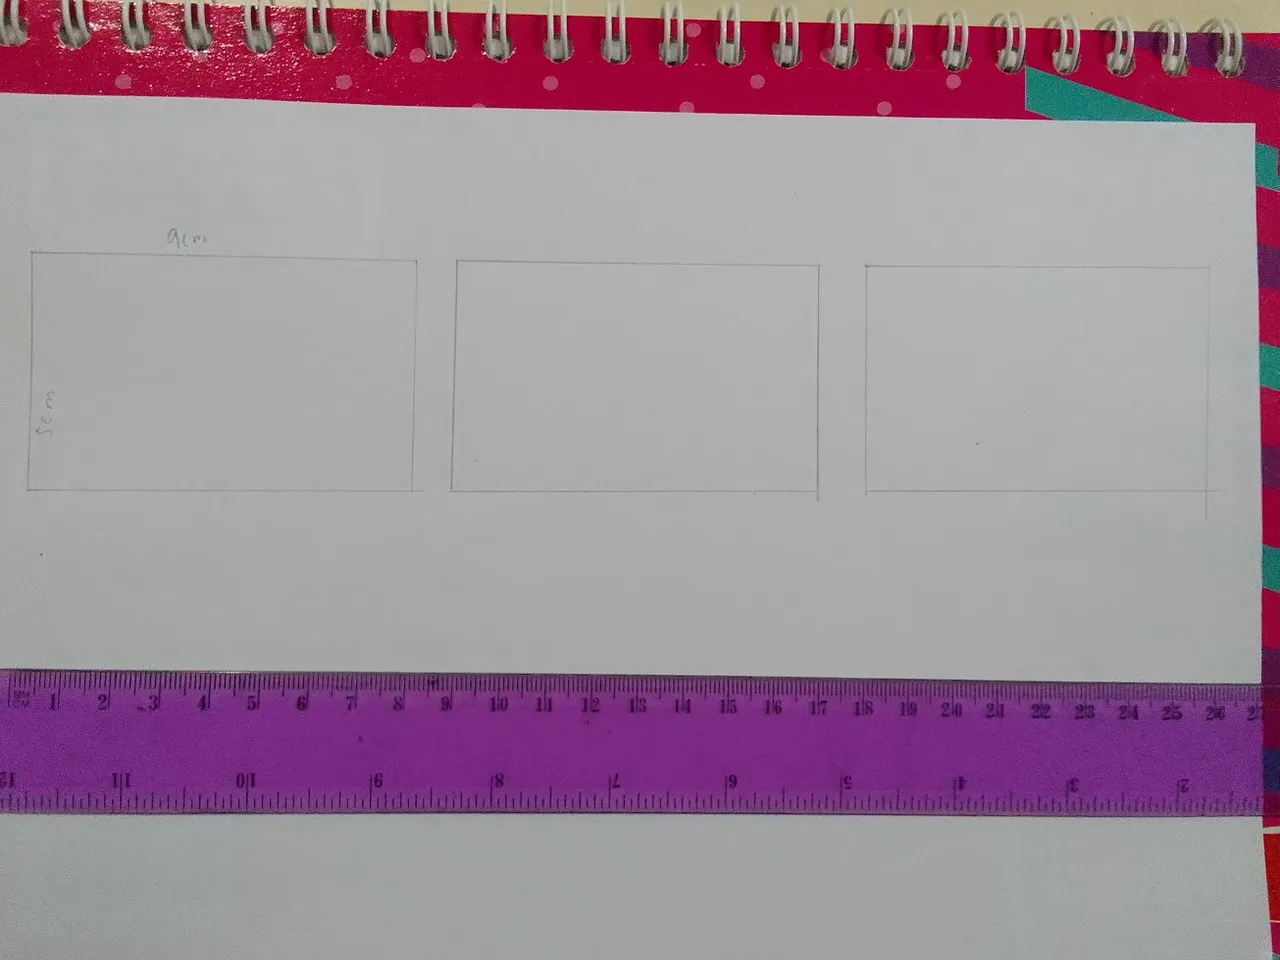
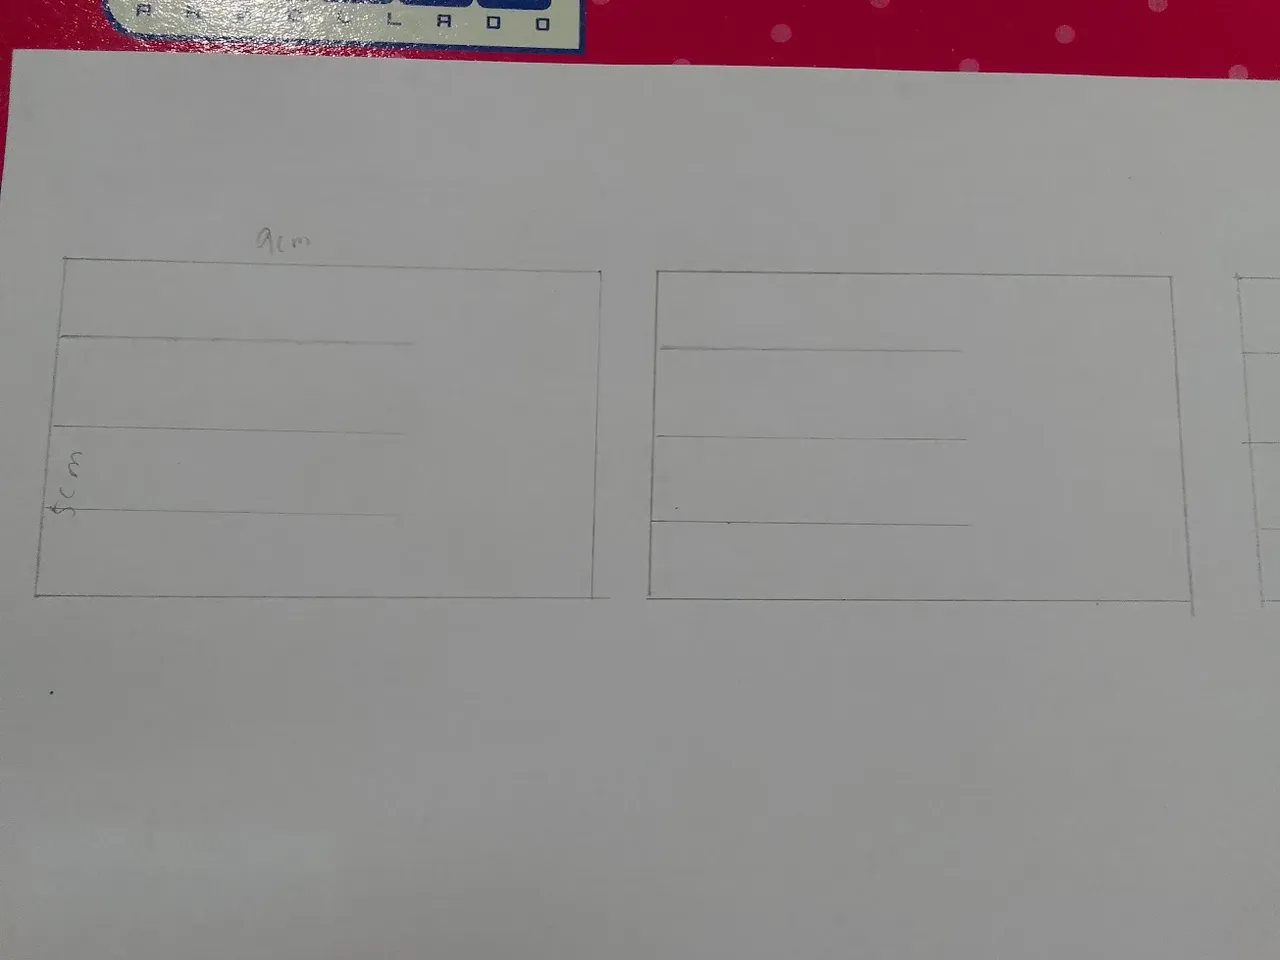
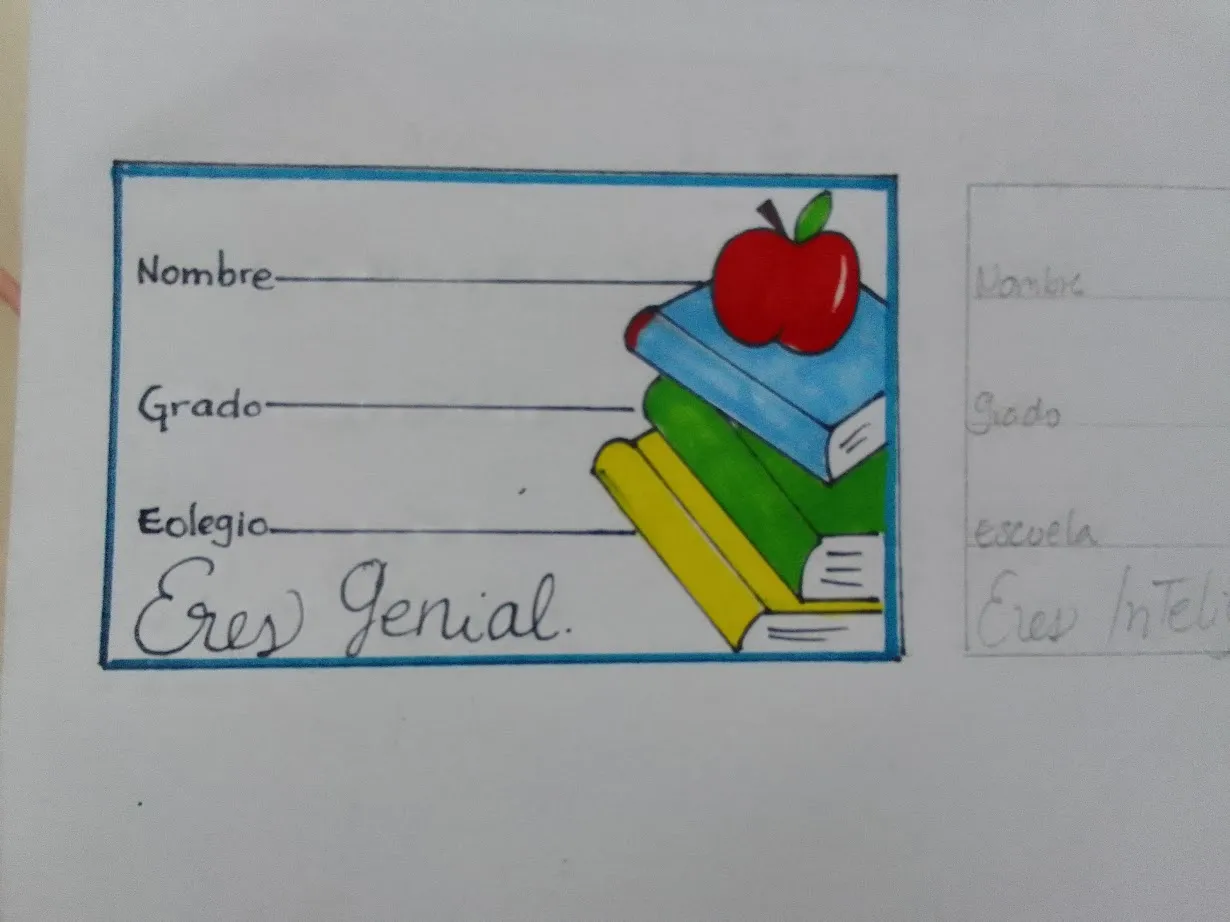
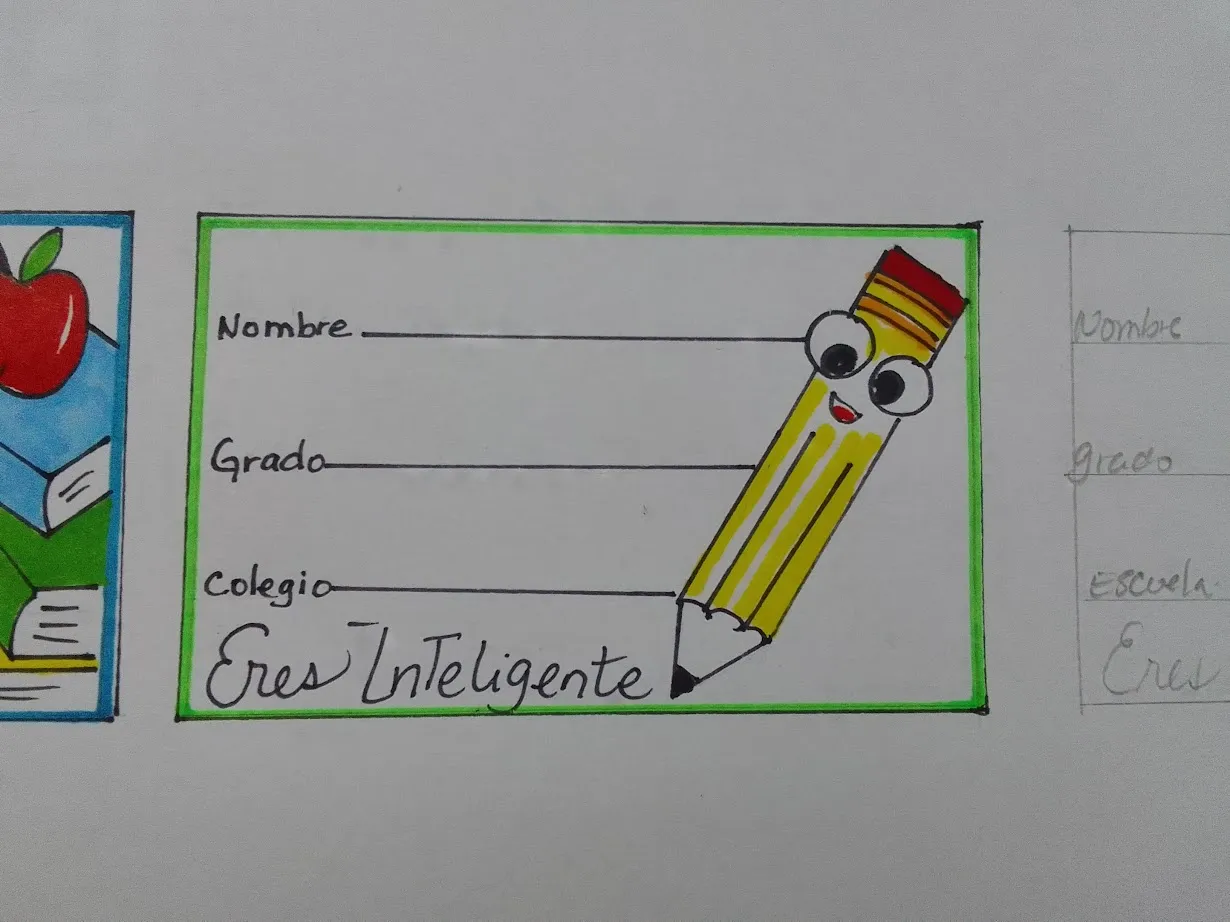
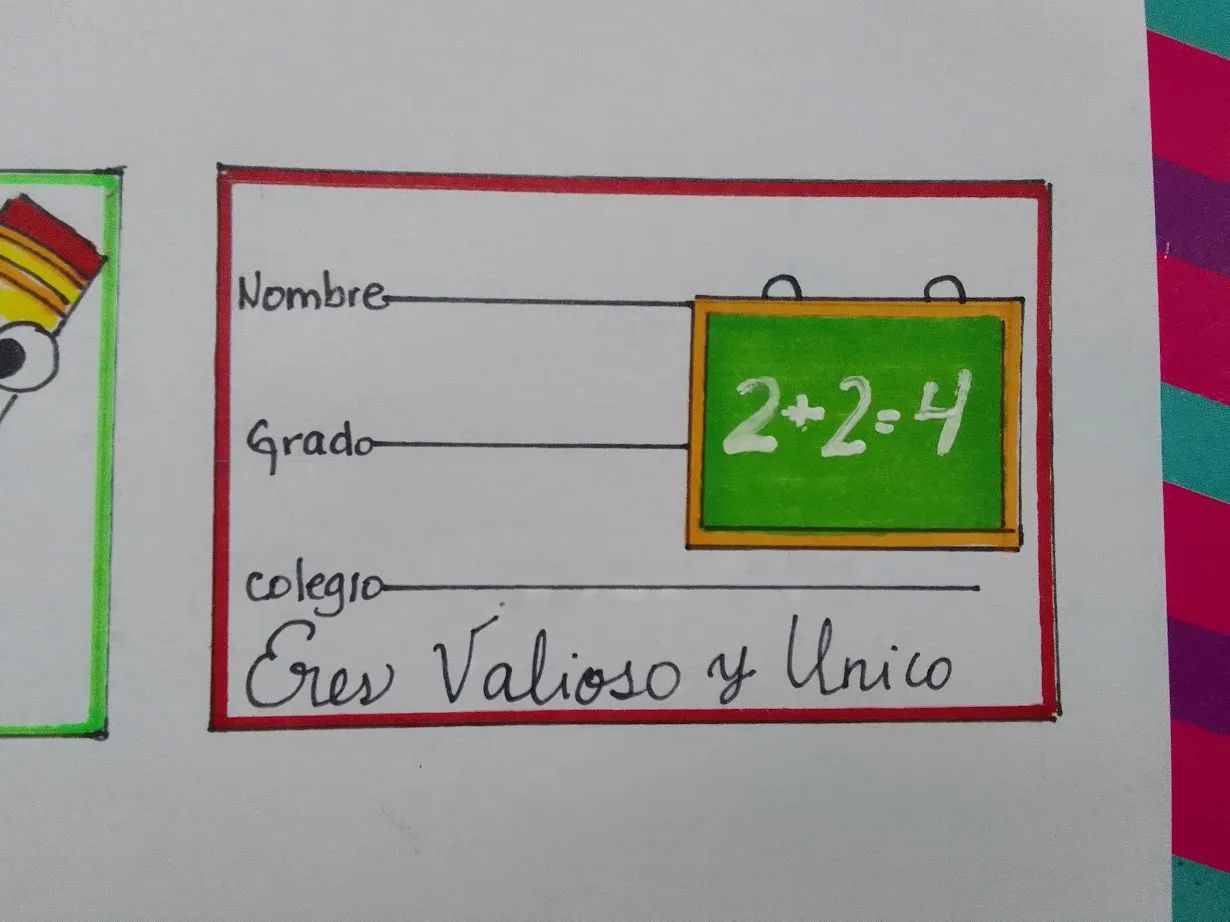
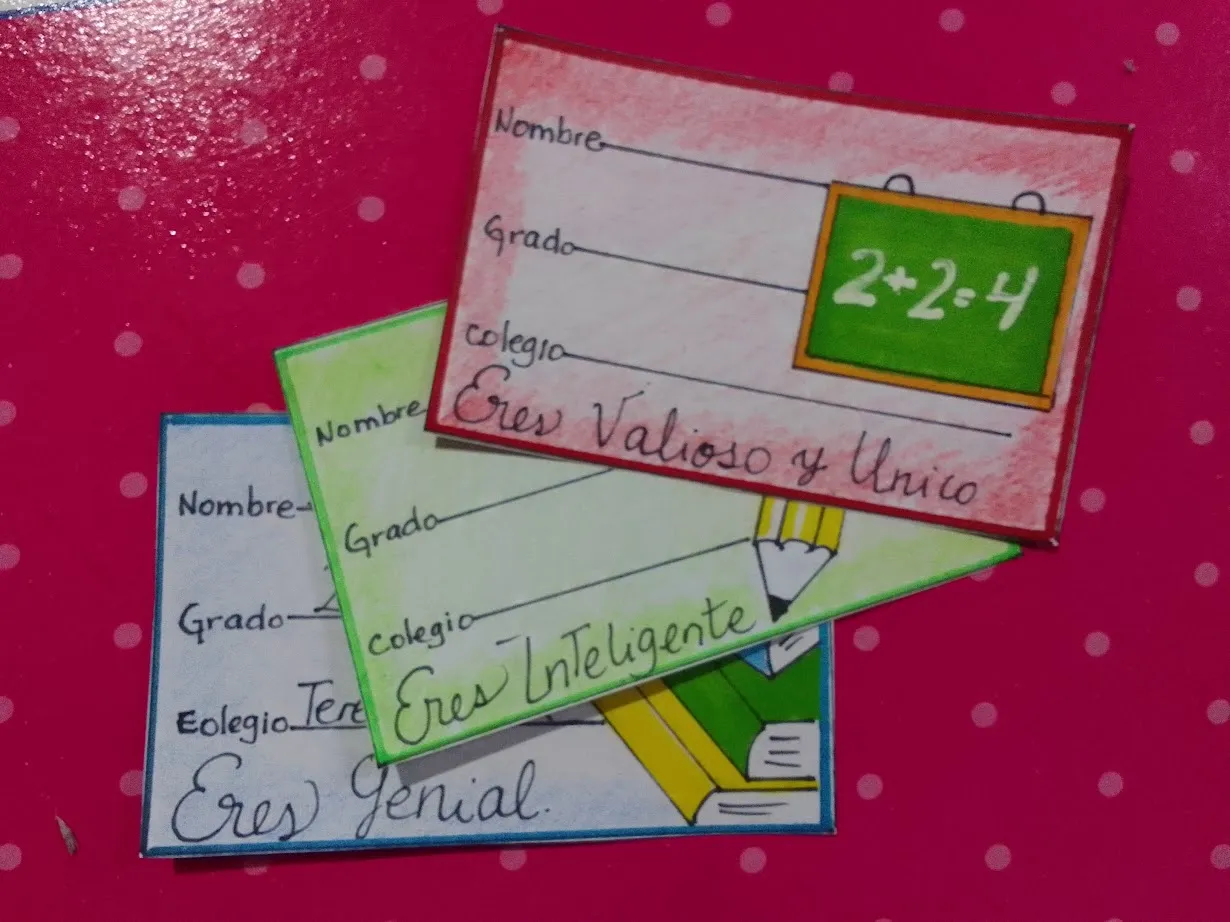
- En una hoja blanca con la ayuda de una regla dibuje 3 rectángulos de 9x5cm, luego dentro del rectangulo le coloque tres líneas a cada una donde iba el nombre, el grado y nombre del colegio.
 |  |
|---|
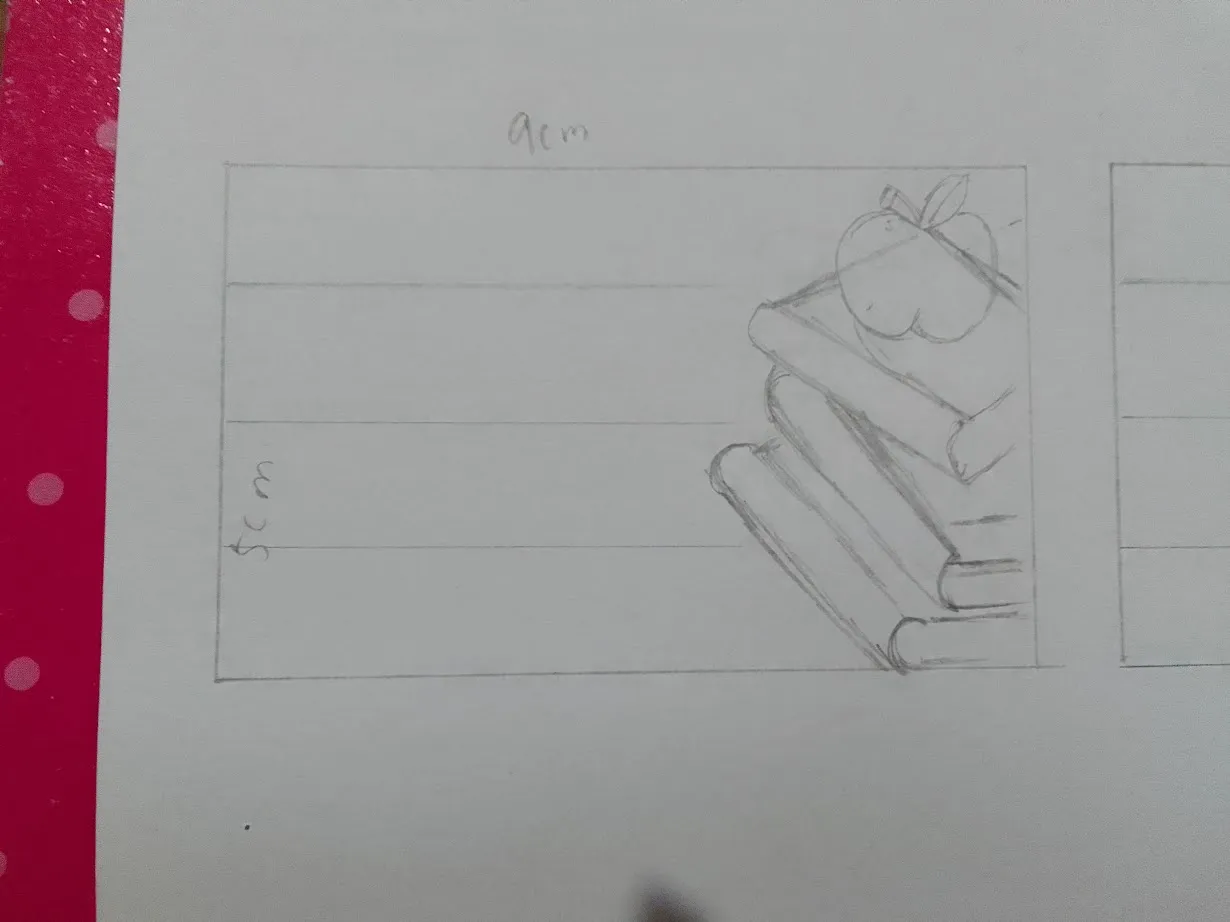
- Luego a cada rectángulo, les realice un dibujo pequeño alusivo a artículos escolares, en una dibuje una pila de libros con una manzana, al otro un lápiz, y al siguiente una pizarra.
 |  |
|---|
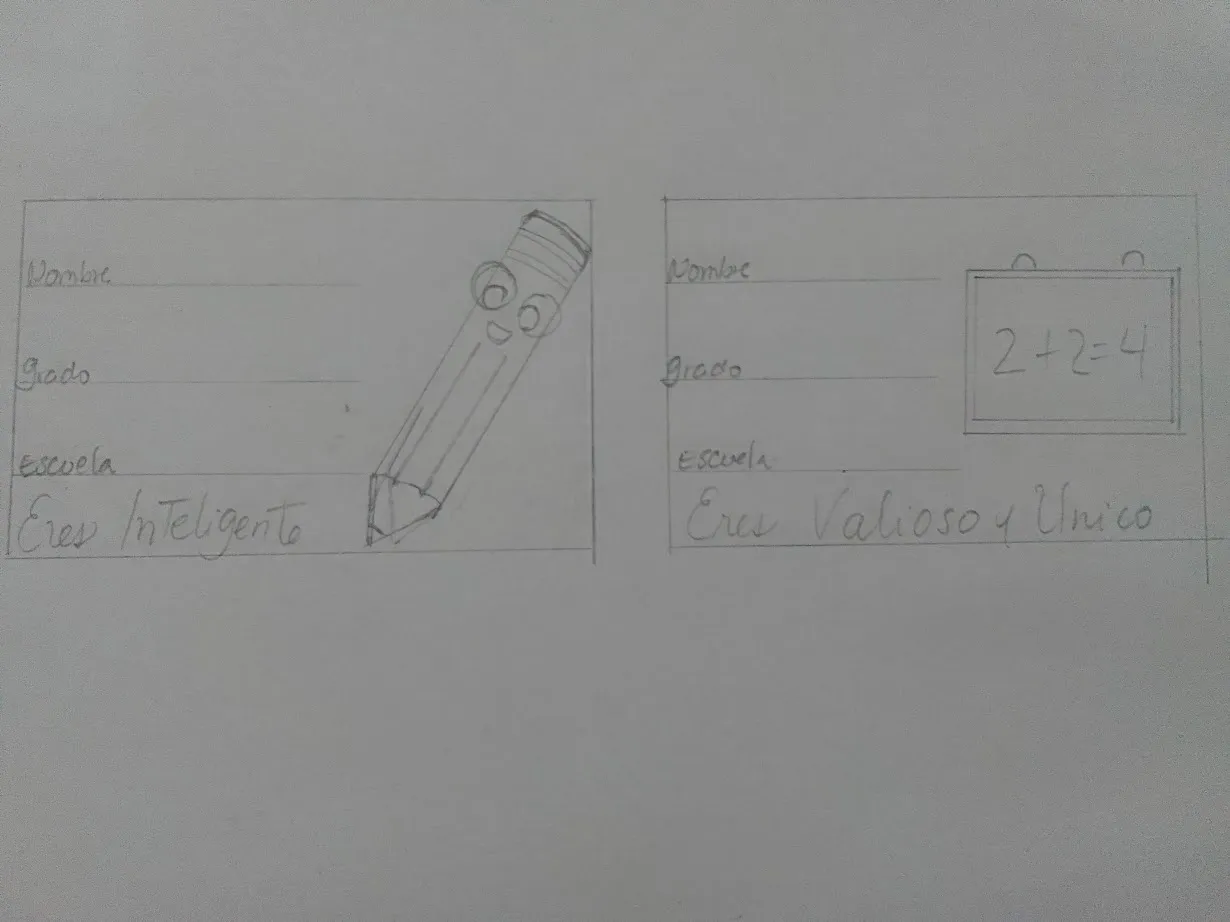
- Al terminar los bosquejos, con los marcadores de color azul, verde y rojos dibuje los bordes le coloque marcador y luego pase el marcador extrafino negro, y les aplique color a los dibujos, y
tambien a las frases positivas.
 |  |  |
|---|
- Con colores de madera, le dibuje el fondo a cada rectángulo, y posteriormente los recorte.

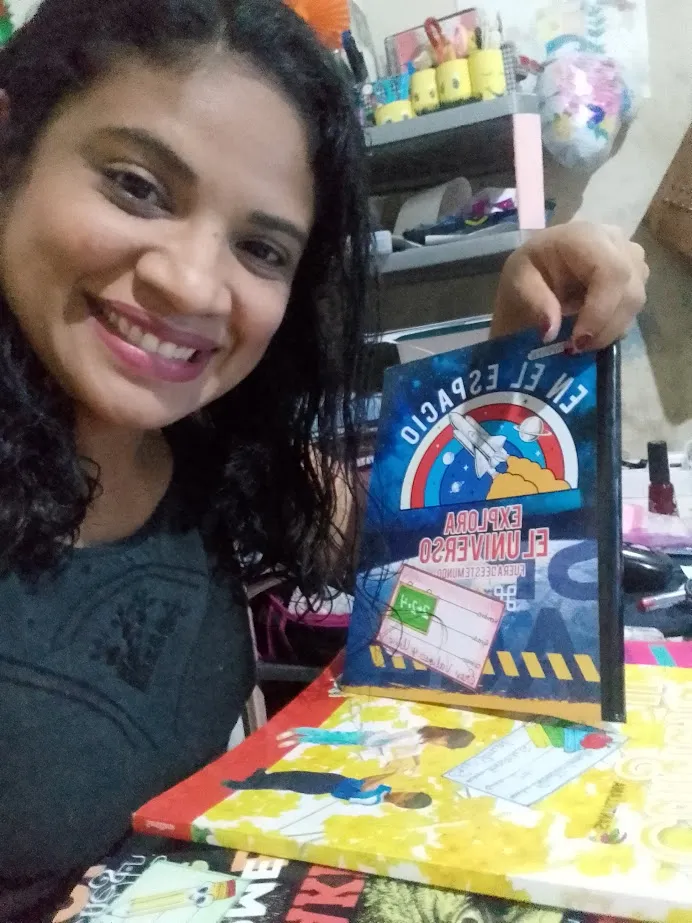
- Para finalizar los pegue consilicona liquida en sus respectivos cuadernos y libro.
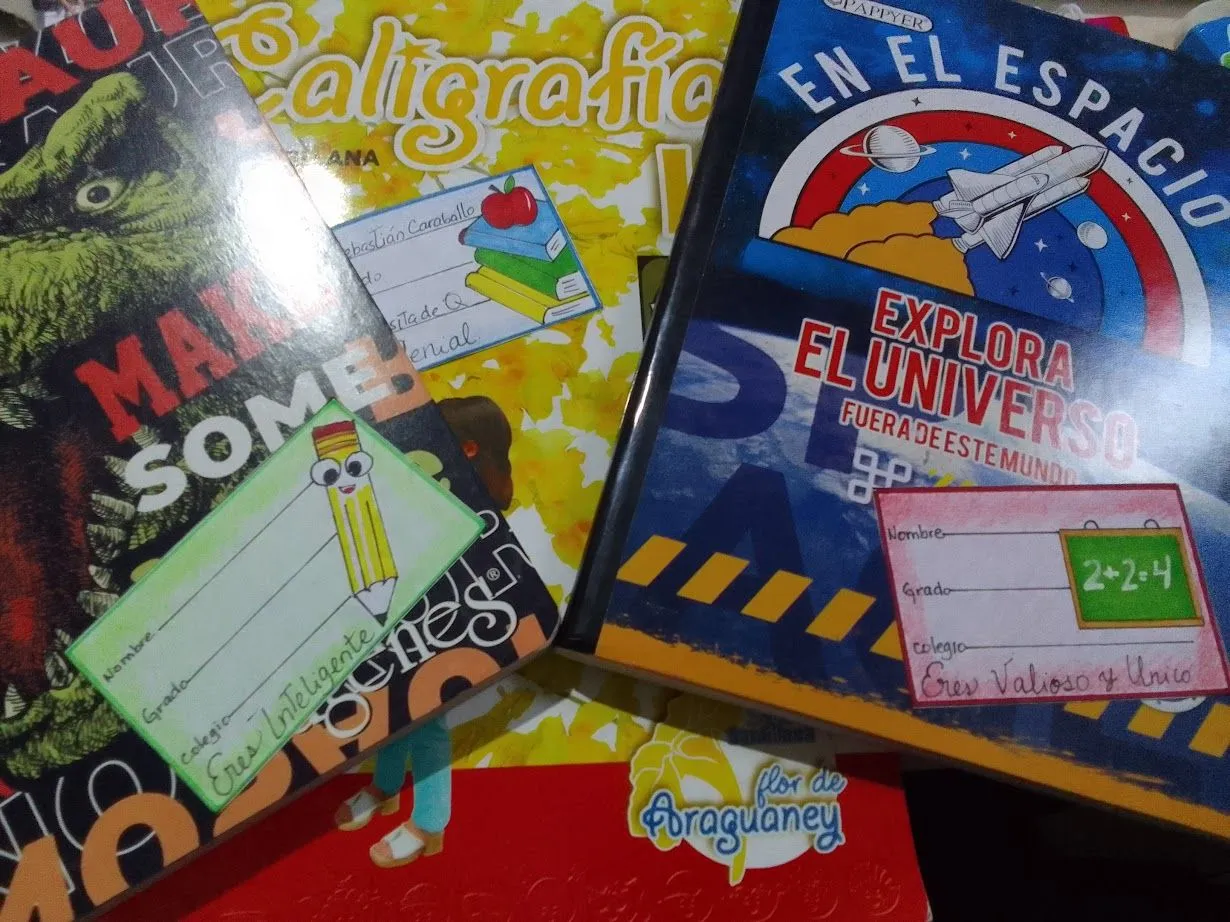
y así se ven...
 |  |
|---|
Dependiendo de los gustos de cada persona puede ser una buena idea si no tenemos disponibilidad para comprar etiquetas o para imprimir y las queremos personalizadas.
Espero les sea agradable.
Greetings creative community, how are you? I hope you are all in a nice moment and if not, let's trust that everything will pass and you will have wonderful days.
I'm dropping by to show you some labels for the start of school.
When the start of school season arrives, it is quite an event as a bazaar of notebooks, pencils, uniforms, shoes and other items is what you breathe everywhere.
My son is in second grade, so his list was relatively small, and the task in addition to acquiring school supplies is to identify them, not only to know who owns each notebook or book, but also in case of loss which I think is great.
My initial intention was to make the digital labels and print them, I would make them to my liking and even cheaper, but between my work and daily activities the time was not enough, and well basically I go out on Saturdays and I would have to wait until next Saturday to achieve my goal.
So I decided to make them by hand and I confess I love the final result, I think they would not have been so beautiful if I had made them digitally.
What do you think?
Here I show you how I made them:
the materials I used:
✏️Fine tip markers red, blue, green, orange, orange, yellow, black.
✏️Pastel blue, pastel green, pastel green, red colors.
✏️Black extra fine marker.
✏️Ruler, pencil, eraser, white sheet, scissors and liquid silicone.
- On a white sheet with the help of a ruler draw 3 rectangles of 9x5cm, then inside the rectangle I placed three lines to each one where the name, grade and school name went.
| |
|---|
- Then to each rectangle, I made a small drawing alluding to school items, in one I drew a pile of books with an apple, in the other a pencil, and the next a blackboard.
| |
|---|
- After finishing the sketches, with the blue, green and red markers, draw the borders, put marker on them and then pass the extra fine black marker, and apply color to the drawings, and also to the positive phrases.
| | |
|---|
- With wood colors, draw the background of each rectangle, and then cut them out.
- To finish, I glued them with liquid silicone in their respective notebooks and books.
and this is how they look...
| |
|---|
Depending on the tastes of each person it can be a good idea if we do not have availability to buy labels or to print and we want them personalized.
I hope you enjoy it.

Pictures taken with my mobile device