
Hello everyone... 💛💙❤️
Hello to my dear Hivers, and to the great family of my dear community #Jewelry, first of all I start wishing you a happy new year 2023 full of infinite blessings, success, health, peace, love, prosperity, abundance, may you be granted all your most desired dreams and heartfelt purposes that you have for this new year that you start, all the best of good vibes for each of you.
Here I am to offer you my first publication of this year, showing you a new work made with love and as always especially for you 💕
For today I bring you a recycling work which I wanted to recreate from some decals that I got at home, and I said to myself, with this I know I can make some earrings and a pendant so you can appreciate that with almost anything that comes before our eyes, we can put our mind and imagination to fly, make a simple and quality work.
Along with these decals I looked for some other things that I had available and I know that many of you can substitute for some others and materialize what I bring you today. I also wanted to add details with the colors of my Venezuelan flag yellow, blue and red and of course something white to symbolize the stars 💛💙❤️
Without further ado and hoping that it is to your liking:
Let's get started:😃

Hola a todos... 💛💙❤️
Hola a mis queridos Hivers, y a la gran familia de mi querida comunidad de #Jewelry, ante todo inicio deseándoles un feliz año nuevo 2023 colmado de bendiciones infinitas, éxitos, salud, paz, amor, prosperidad, abundancia, que se les concedan todos sus sueños más anhelados y propósitos de corazón que tengan para este nuevo año que inician, toda la mejor de las buenas vibras para cada uno de ustedes.
Aquí me encuentro para ofrecerles mi primera publicación de este año, mostrándole un nuevo trabajo hecho con mucho amor y como siempre especialmente para ustedes 💕
Para hoy les traigo un trabajo de reciclaje el cual quise recrear a partir de unas calcomanías que conseguí en casa, y me dije, con esto sé que puedo elaborar unos pendientes y un dije para que puedan apreciar que con casi cualquier cosa que se presente ante nuestros ojos, podemos poner a volar nuestra mente e imaginación, realizar un trabajo sencillo y de calidad.
Junto a estas calcomanías busque algunas otras cosas que tenía a disposición y sé que muchos de ustedes pueden sustituir por algunas otras y materializar lo que les traigo hoy día. También quise agregar detalles con los colores de mi bandera de Venezuela amarillo, azul y rojo y por supuesto algo blanco para simbolizar las estrellas 💛💙❤️
Sin más preámbulos y esperando que sea de su agrado:
Comencemos:😃

• Trozo de cartón fino de cualquier color, de una caja o lo que tengan a mano.
• Calcomanías redondas negras, (Pueden hacer los círculos con papel negro).
• Cintas de quilling de 3mm de ancho amarillo, azul y rojo.
• Lápiz.
• Alfiler o aguja punta gruesa.
• Pega blanca extra fuerte (de carpintería).
• Tijera.
• Base para zarcillos colgantes (anzuelos).
• Argollas medianas de bisutería.
• Argollas medianas de bisutería.
• Perlas blancas pequeñas de bisutería.
• Perlas de madera medianas.
• Pintura al frio, amarillo, azul, roja y negra.
• Hilo chino fino color negro.
• Pincel.
• Alicate punta fina.
• Pinza punta fina.
- Piece of thin cardboard of any color, from a box or whatever you have on hand.
- Round black stickers, (You can make the circles with black paper).
- 3mm wide quilling ribbons yellow, blue and red.
- Pencil.
- Thick pin or needle.
- Extra strong white glue (carpentry glue).
- Scissors.
- Base for hanging tendrils (hooks).
- Medium size costume jewelry earrings.
- Medium size costume jewelry earrings.
- Small white costume jewelry beads.
- Medium wooden beads.
- Cold paint, yellow, blue, red and black.
- Thin black Chinese thread.
- Paintbrush.
- Fine-nosed pliers.
- Fine tip tweezers.

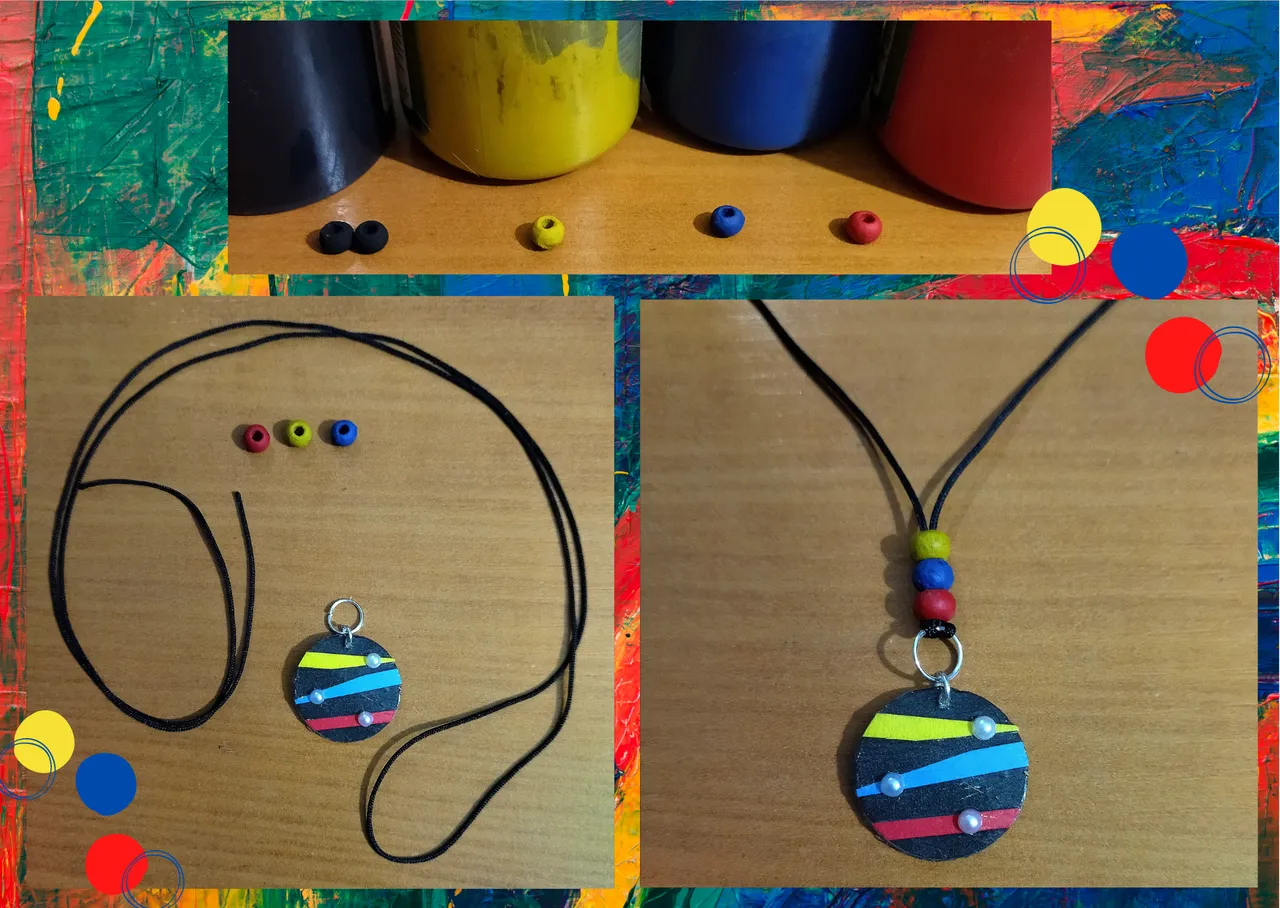
I am going to make a pair of dangling earrings and a necklace charm, but I am going to focus the process in one piece of which I will need three, at the end when it is convenient I will place the three pieces to make the complete set, you will make the necessary pieces to complete the amount of charms you want. This process is going to be very easy and you will see the beautiful set we are going to get.
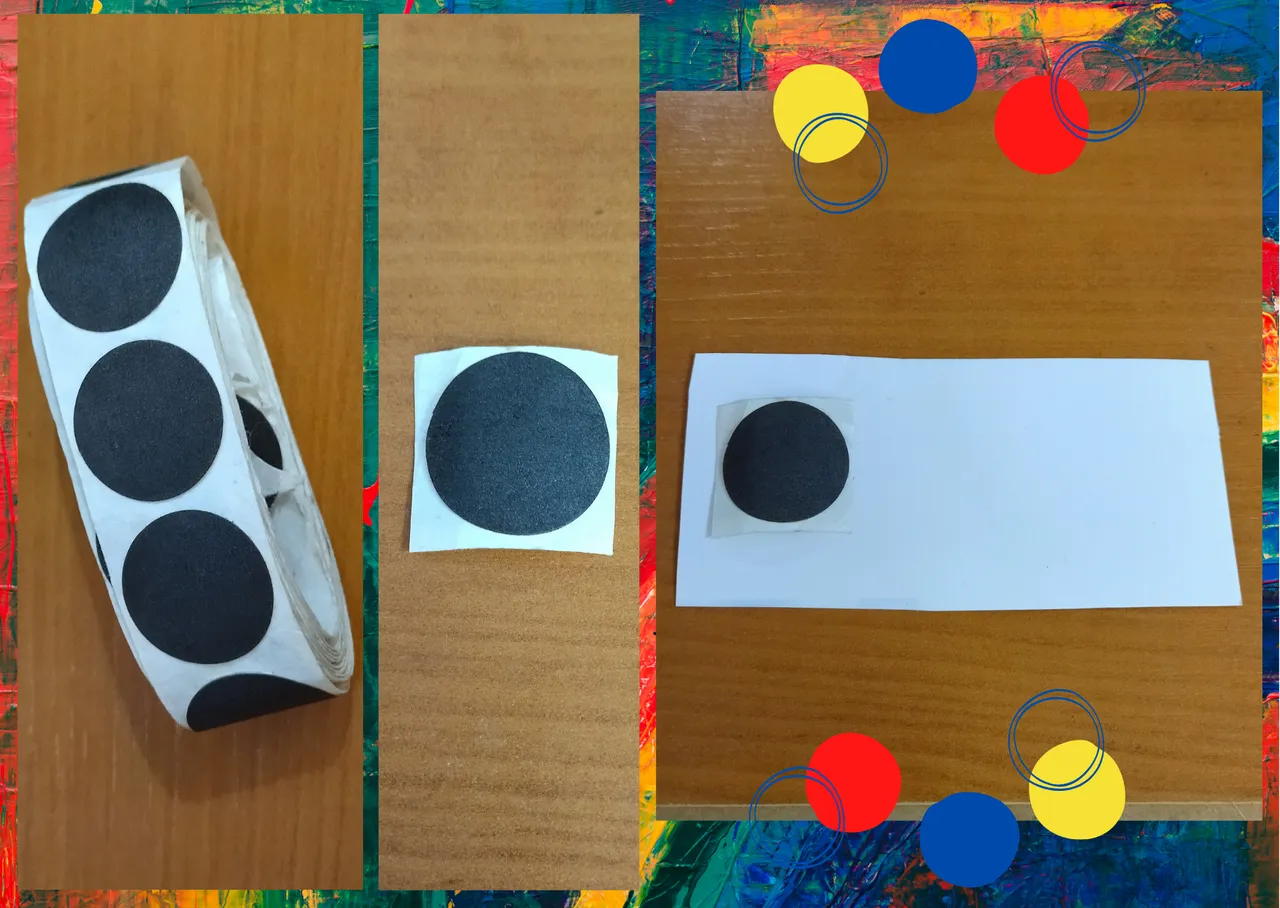
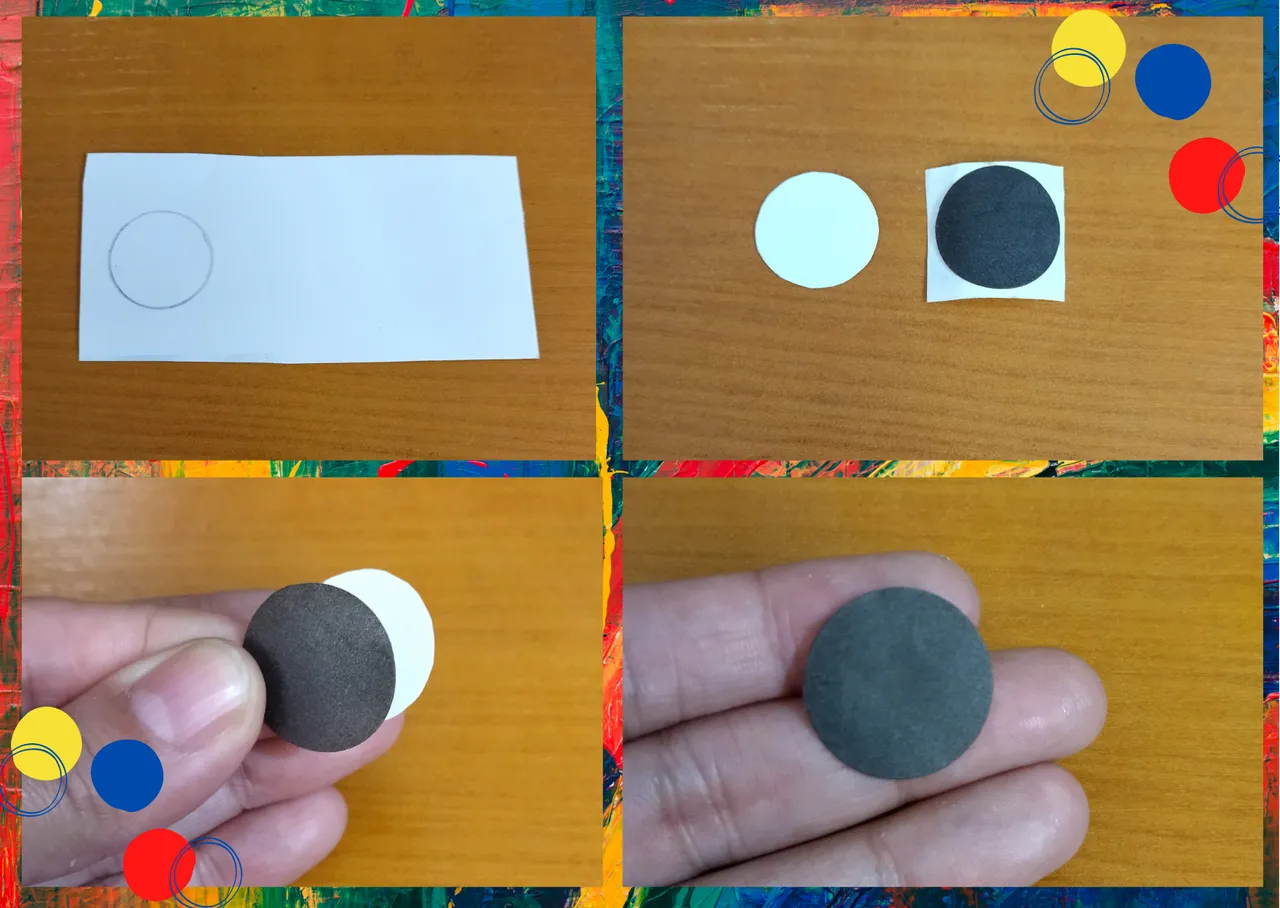
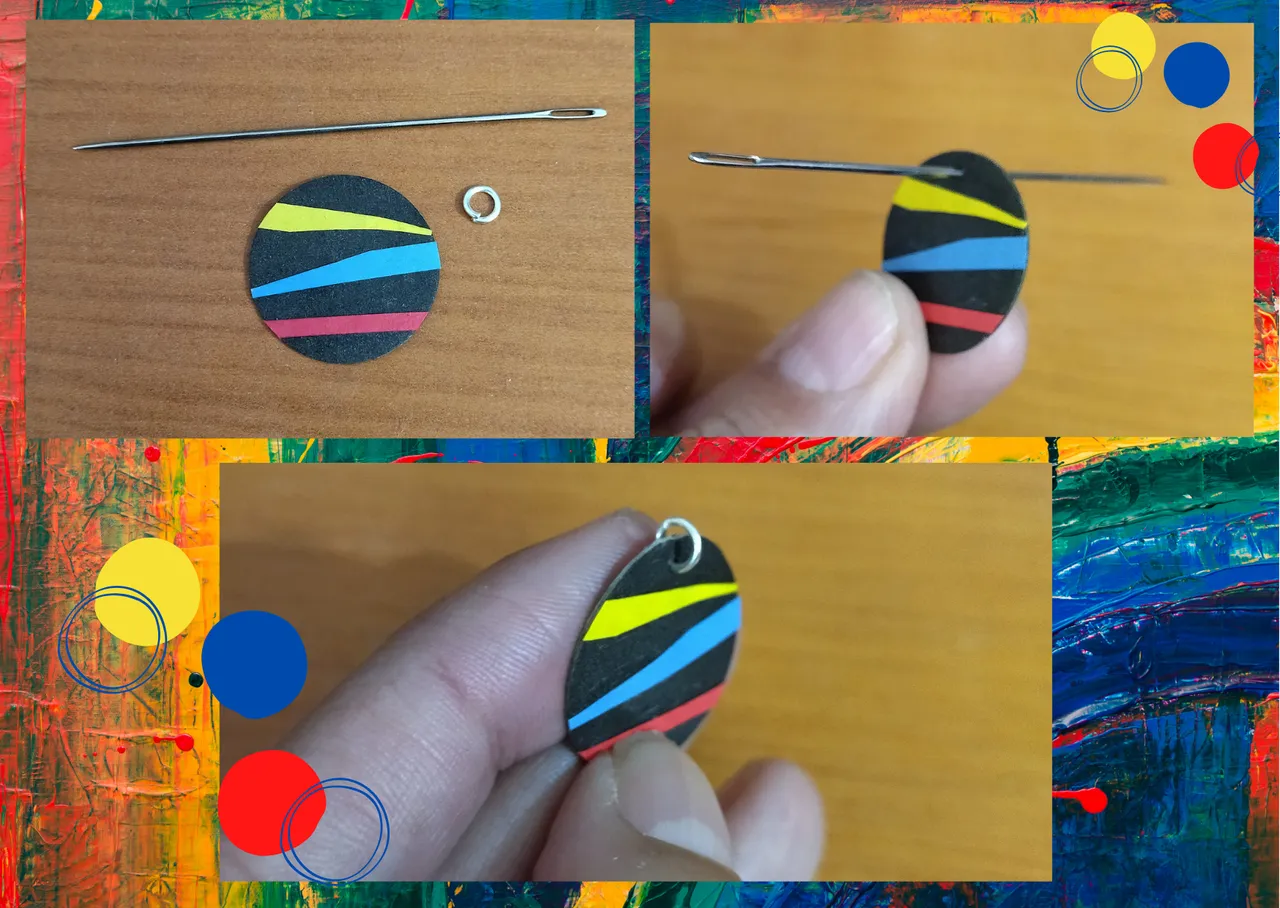
- Let's start by taking one of the black circular stickers that I found at home, it has a measure of 2cms wide x 2cms high or 20 millimeters of circumference, (you can simply cut a circle of black paper that you have at hand of the size of your preference).
- From this circle we are going to take a thin piece of cardboard from any box we have and we are going to cut out another one of the same size, what do I want to achieve with this, make the piece I want to make thicker.
- Once the cardboard circle is cut out we are going to glue the decal on that circle, we will take another decal and glue it on the other side of the circle, this way we will have a durable, consistent and resistant piece.

Voy a realizar un par de zarcillos colgantes y un dije para collar, pero les voy a enfocar el proceso en una sola pieza de la cual yo necesitare tres, al final cuando sea conveniente colocare las tres piezas para armar el conjunto completo, ustedes harán las que sean necesarias para completar la cantidad de dijes que deseen. Este proceso va a ser muy fácil y verán el bonito conjunto que vamos a obtener.
• Vamos a comenzar tomando una de las calcomanías circulares negras que encontré en casa, tiene una medida de 2cms de ancho x 2cms de alto o 20 milímetros de circunferencia, (ustedes pueden simplemente recortar un circulo de papel negro que tengan a la mano de la medida de su preferencia).
• A partir de este círculo vamos a tomar un trozo de cartón fino de cualquier caja que tengamos y vamos a recortar otro del mismo tamaño, ¿qué deseo conseguir con esto?, hacer más gruesa la pieza que deseo realizar.
• Una vez recortado el circulo de cartón vamos a pegar la calcomanía en ese círculo, tomaremos otra calcomanía y pegaremos por el otro lado del círculo, de esta manera tendremos una pieza duradera, consistente y resistente.
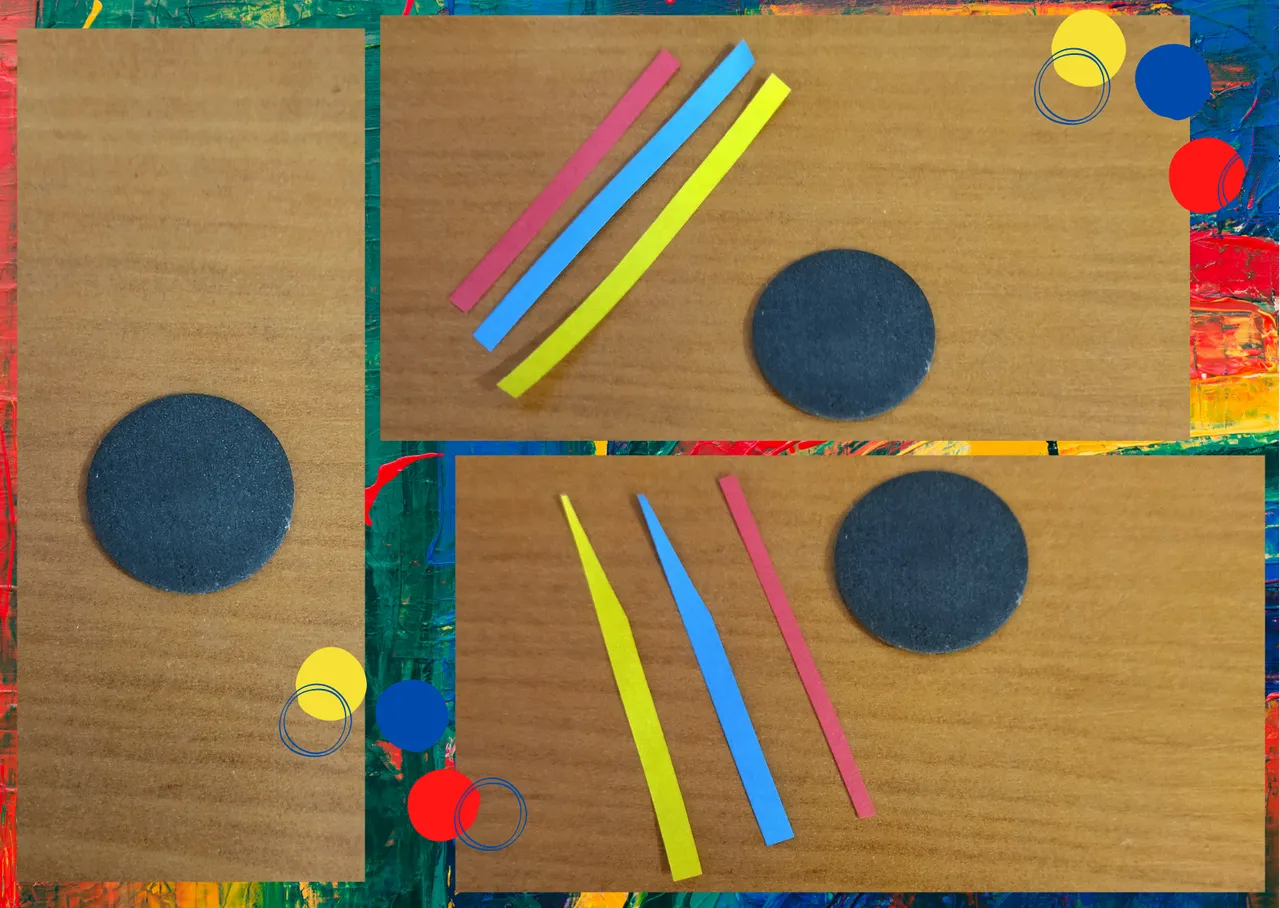
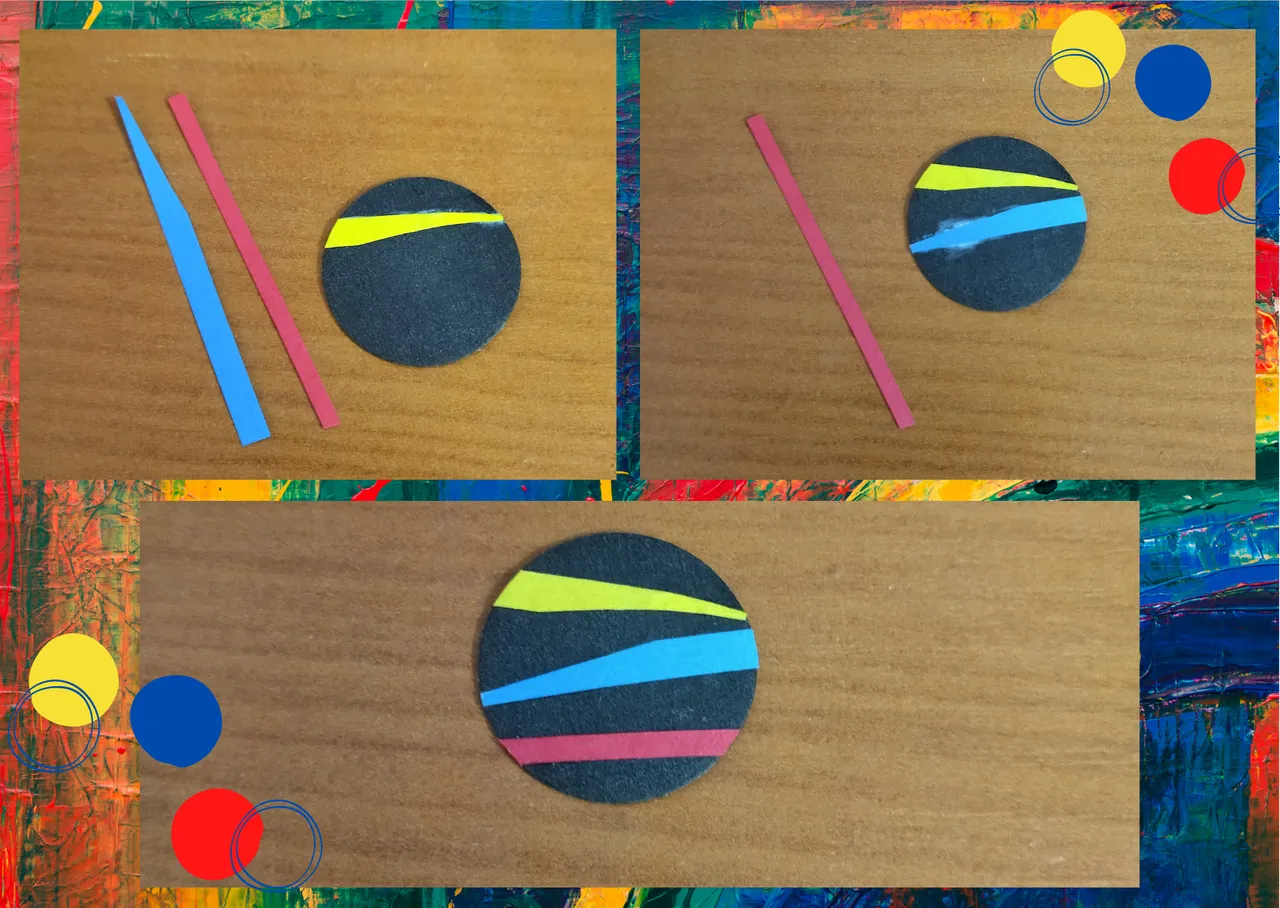
- We are going to take 3 small pieces of quilling ribbon 3mm wide yellow, blue and red these depending on the size of the circumference we made, the ones I cut measure approximately 2.5cms long, we are going to cut two of them, the yellow and the blue at the ends, giving a pointed shape and the red one I decided to leave it in its original shape, you decide what shape you want to give to your ribbons.
- We take the circular pendant we made and glue the ribbons in the way we like with extra strong white glue, this will be one of the decorations of our pendant.
- At this point, we will take a thick needle and make a hole in the top of the pendant to which we will add a small costume jewelry ring.
• Vamos a tomar 3 pequeños trozos de cinta de quilling de 3mm de ancho amarillo, azul y rojo estas dependiendo de la medida de la circunferencia que realizamos, las que yo corte median aproximadamente 2.5cms de largo de ellas, vamos a recortar dos la amarilla y la azul por los extremos, dando una forma puntiaguda y la roja decidí dejarla de su forma original, ustedes decidían que forma desean darles a sus cintas.
• Tomamos el dije circular que realizamos y pegaremos las cintas de la manera que más nos guste con pega blanca extra fuerte, esta será una de las decoraciones de nuestro dije.
• Llegado a este punto, tomaremos una aguja punta gruesa y realizaremos un orificio en la parte de arriba del dije al cual añadiremos una argolla pequeña de bisutería.
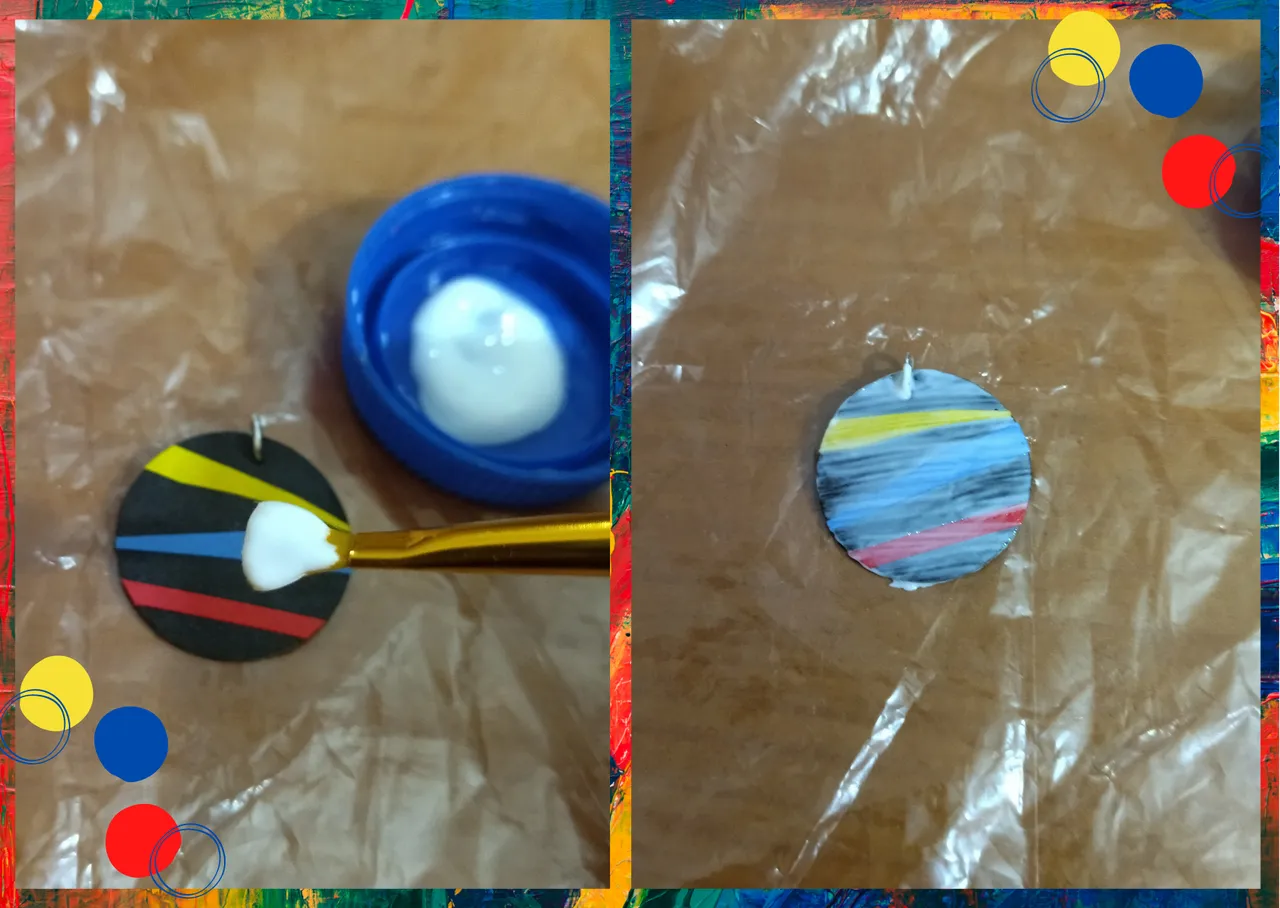
- We are going to give the pendant its protection and plasticizing to make it even more resistant, we will take extra strong white glue and add several layers with a brush, letting it dry between one and the other.
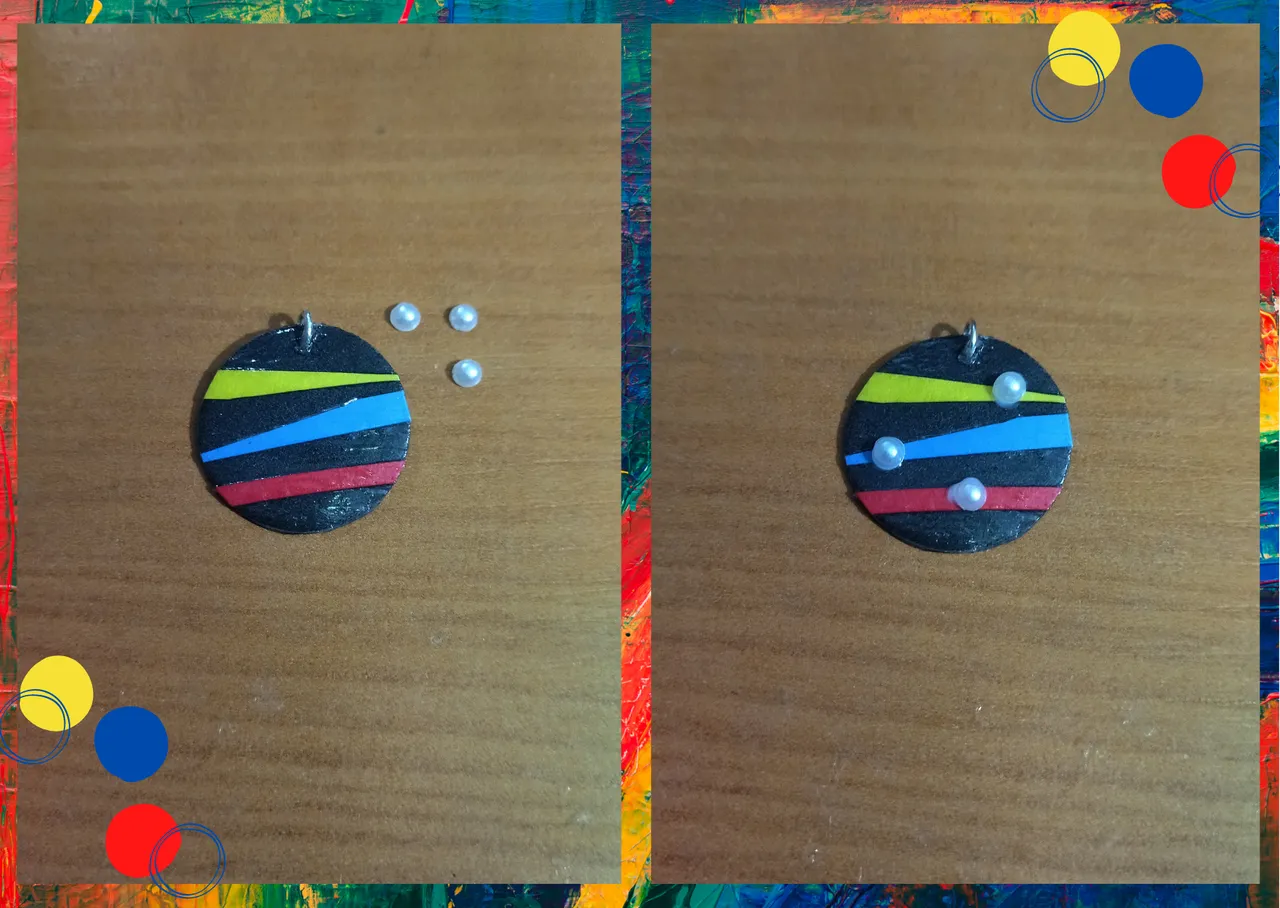
- I wanted to add another detail to the pendant to give more delicacy to the work, in each of the ribbons I placed a small pearl, you can place it where you want, you can also place crystals or any pretty detail you have at hand, or just leave the pendant that simple way.
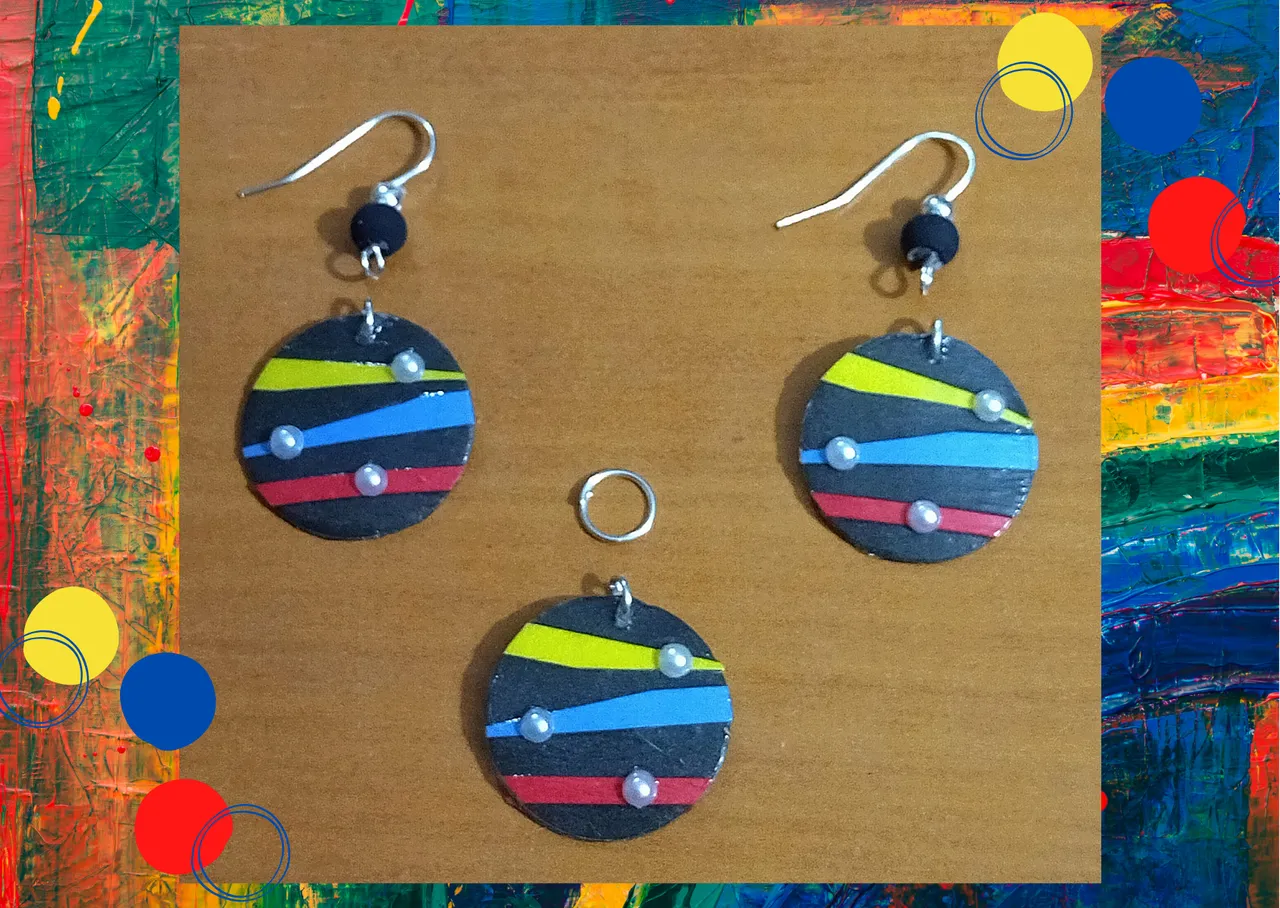
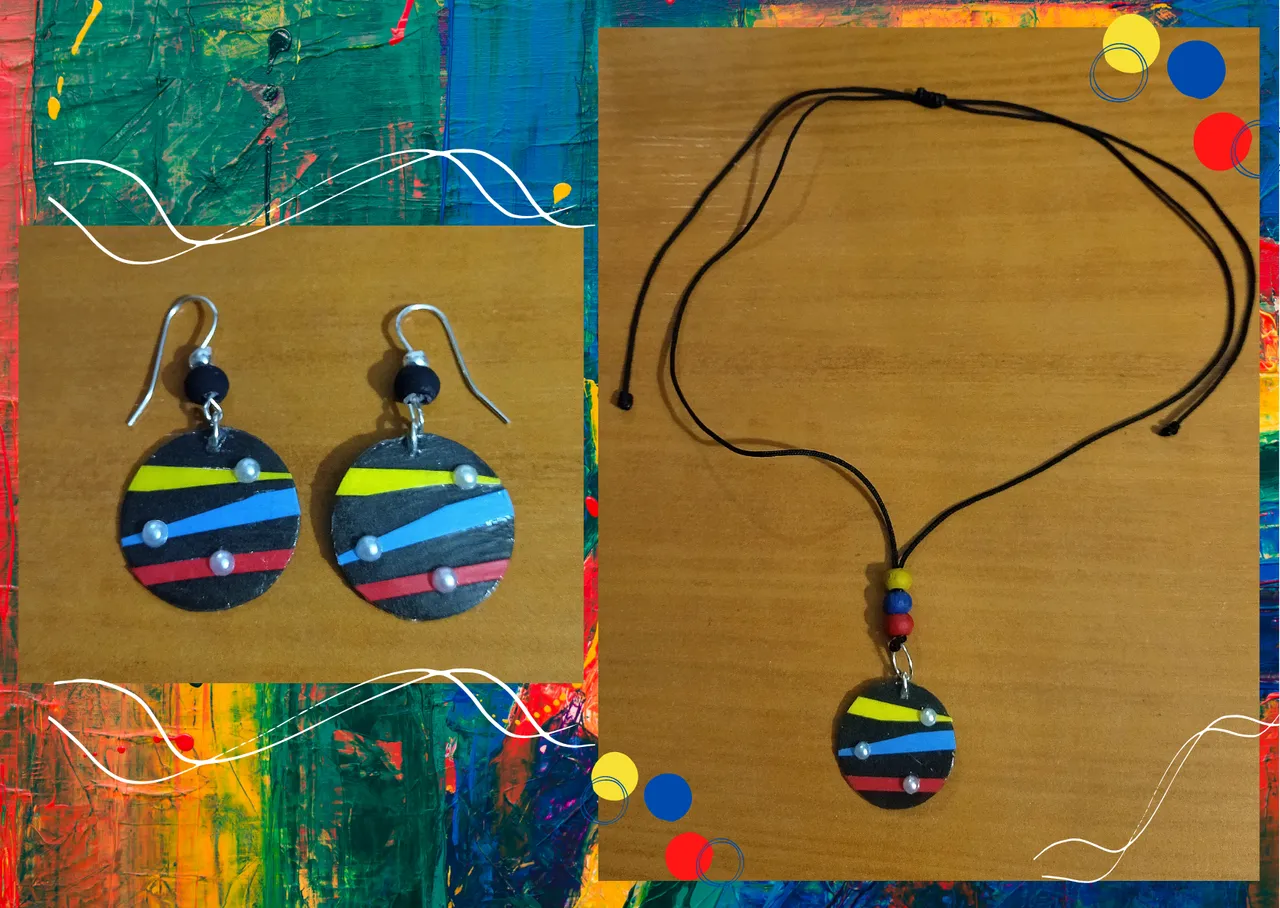
- As I told you for the pair of earrings, plus the pendant for the necklace I made three pieces, to two of them I will place their base for hanging tendrils (hooks) to which I previously placed a black wooden pearl, (I always add something to the hook to make it look better), to the pendant for the necklace I added a medium size costume jewelry ring.
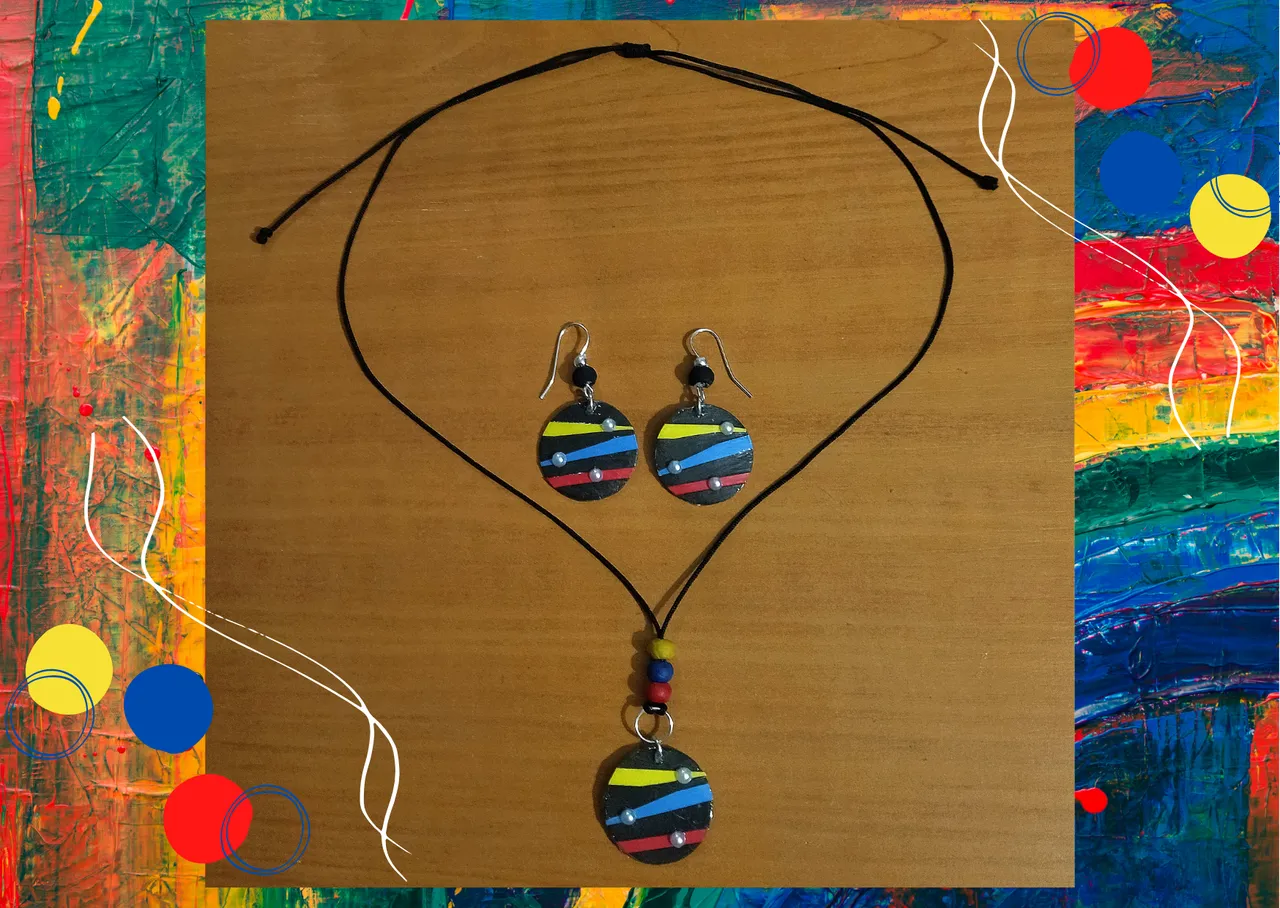
- In this easy way we will have a pair of dangling earrings and a necklace charm that can be placed on the necklace of your choice. In my case I took thin black Chinese thread, which I passed through the pendant ring, I added three medium wooden beads, one yellow, one blue and one red, as I didn't have those specific colors of beads I painted them with cold paint of the respective colors, let them dry. To finish I simply made a sliding knot to be able to adapt the necklace together with the pendant to the height of the neck of my liking.
• Vamos a darle su protección y plastificado al dije para hacerlo aún más resistente, tomaremos pega blanca extra fuerte y añadiremos con un pincel varias capas, dejando secar entre una y la otra.
• Quise añadir otro detalle al dije para darle más delicadeza al trabajo, en cada una de las cintas le coloqué una pequeña perla, ustedes se la pueden colocar donde deseen, también pueden colocar cristales o cualquier bonito detalle que tengan a la mano, o simplemente dejar el dije de esa manera sencilla.
• Como les dije para el par de pendientes, más el dije para collar realice tres piezas, a dos de ella les colocare su base para zarcillos colgantes (anzuelos) a los que previamente le coloque una perla de madera color negro, (siempre suelo añadirle algo al anzuelo para que luzca mas), al dije para collar le añadí una argolla de bisutería mediana.
• De esta manera tan fácil tendremos un par de zarcillos colgantes y un dije para collar al que pueden colocar en el collar de su preferencia. En mi caso tome hilo chino fino color negro, el cual pase por la argolla del dije, le añadí tres perlas de madera medianas, una amarilla, una azul y una roja, como no tenía esos colores específicos de perlas las pinte con pintura al frio de los respectivos colores, deje secar. Para finalizar simplemente hice un nudo corredizo para poder adaptar el collar junto al dije a la altura del cuello a mi gusto.

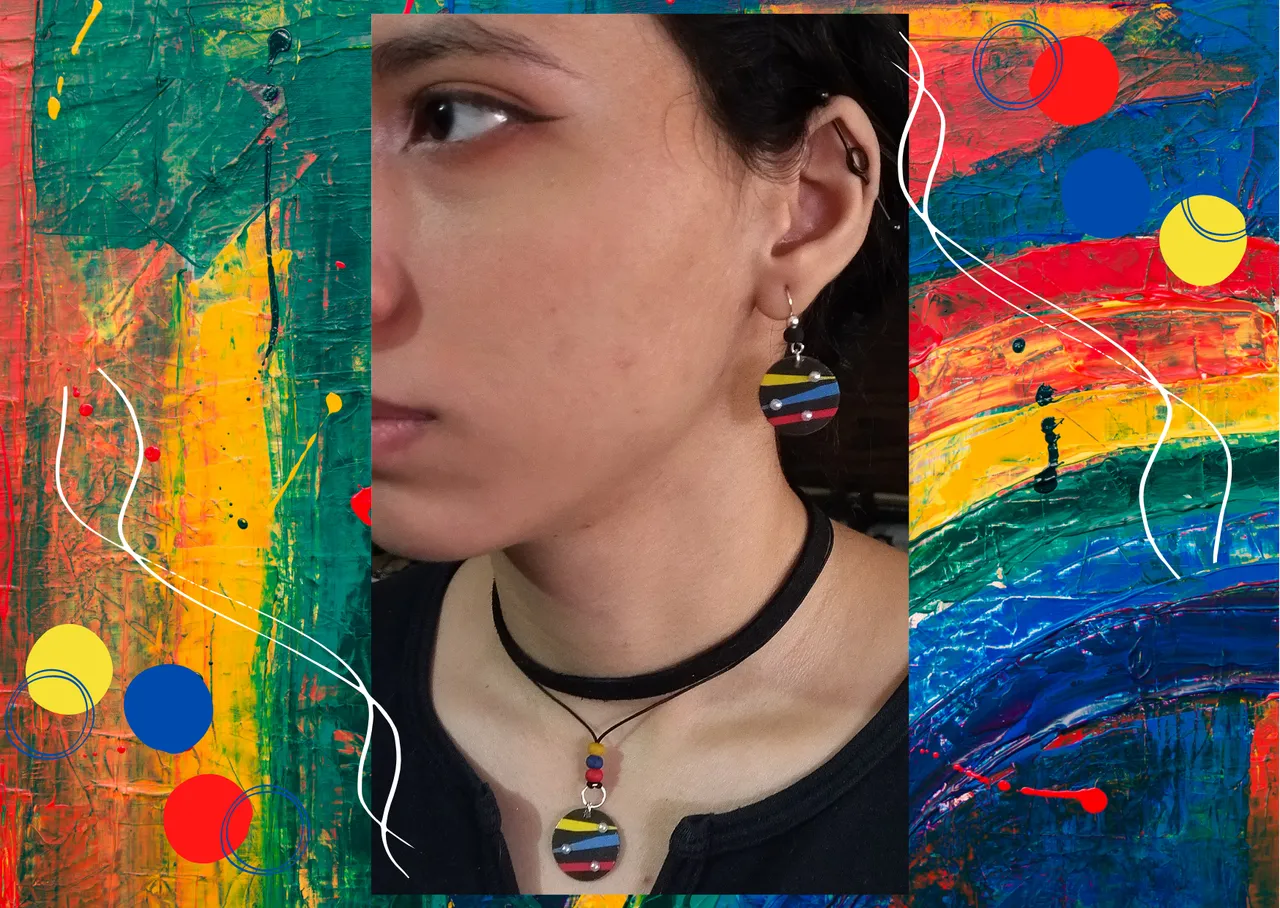
What did you think, did you like it?
I hope you did, I hope you liked my explanation, procedure and photos, I made them with love for you.
"Let out that muse that inspires you, and let your imagination fly".
Thank you all, see you next time. 💛💙❤️
¿Que les pareció, les gustó?
Espero que sí, que les haya gustado mi explicación, procedimiento y fotos, los hice con mucho cariño por y para ustedes.
"Deja salir esa musa que te inspira, y deja volar tu imaginación".
Gracias a todos, nos vemos en la próxima. 🐾🐱💕
Los invito que apoyen a "La Colmena", dale tu voto ✨
 Vote la-colmena for witness By @ylich
Todas las fotos usadas en este post son de mi autoría y han sido sacadas en mi celular personal un Redmi 9T y editadas Canva Banner y separador hecho por mí en Canva Traducido con la ayuda de DeepL
