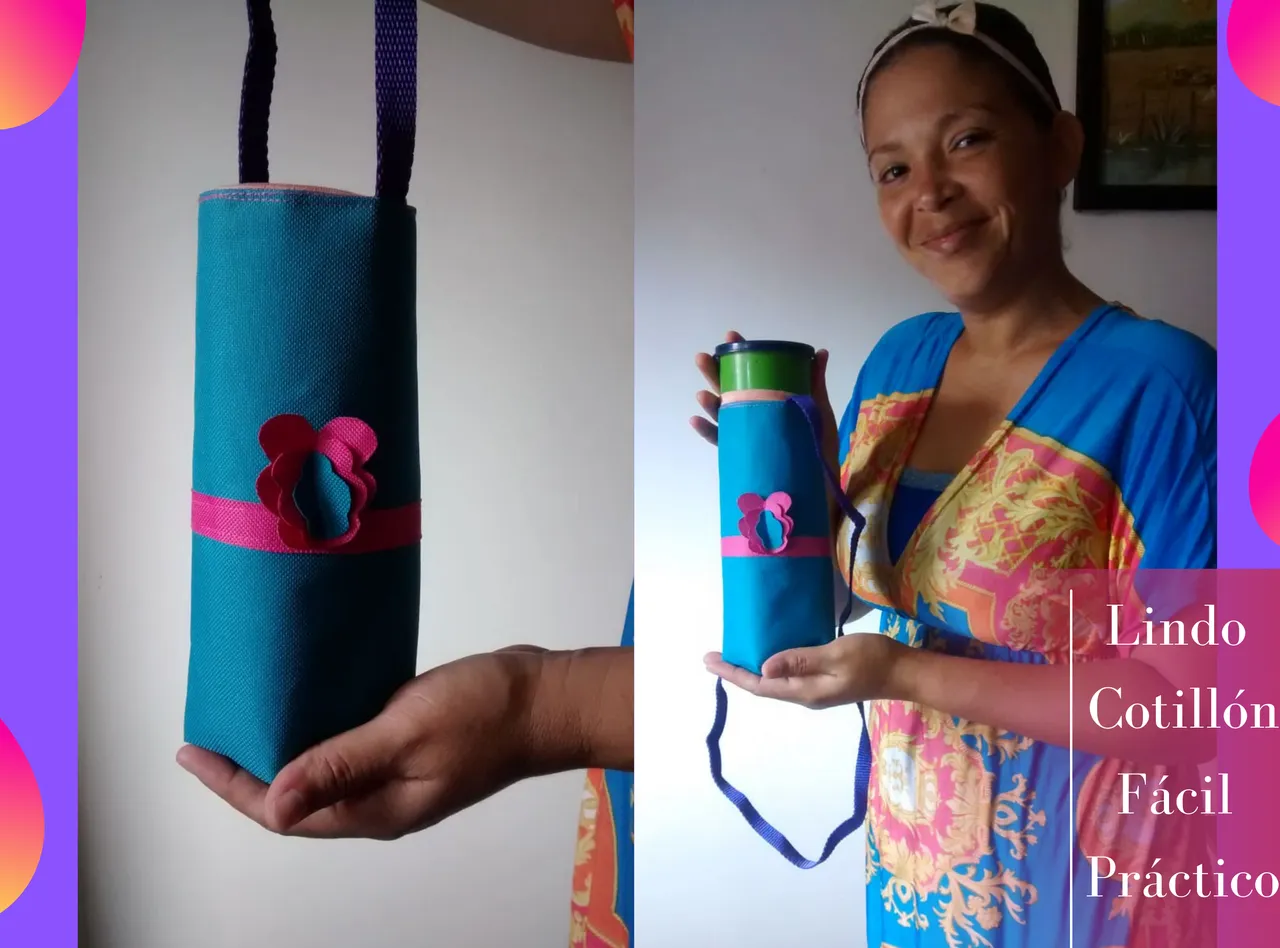
Hello Hive Family, I hope everyone is very well, I am very pleased to participate in this great #Hivediy Contest called Party kids, where we are motivated to make a cotillion for children, exposing our talents to the maximum. This cotillion is very easy and practical, as it can be used to fill it with candy for our children, but also has another use, which is to carry the thermos of water for children, anywhere we go, they are always thirsty, then I came up with the great idea to make something that they use and can enjoy, let's start.

-Materiales:
-25cm de Loneta. 21 de largo y 27 de ancho.
-Cinta para sostener nuestro cotillón.
-Tijera.
-Hilo de coser, de los colores que vamos a usar.
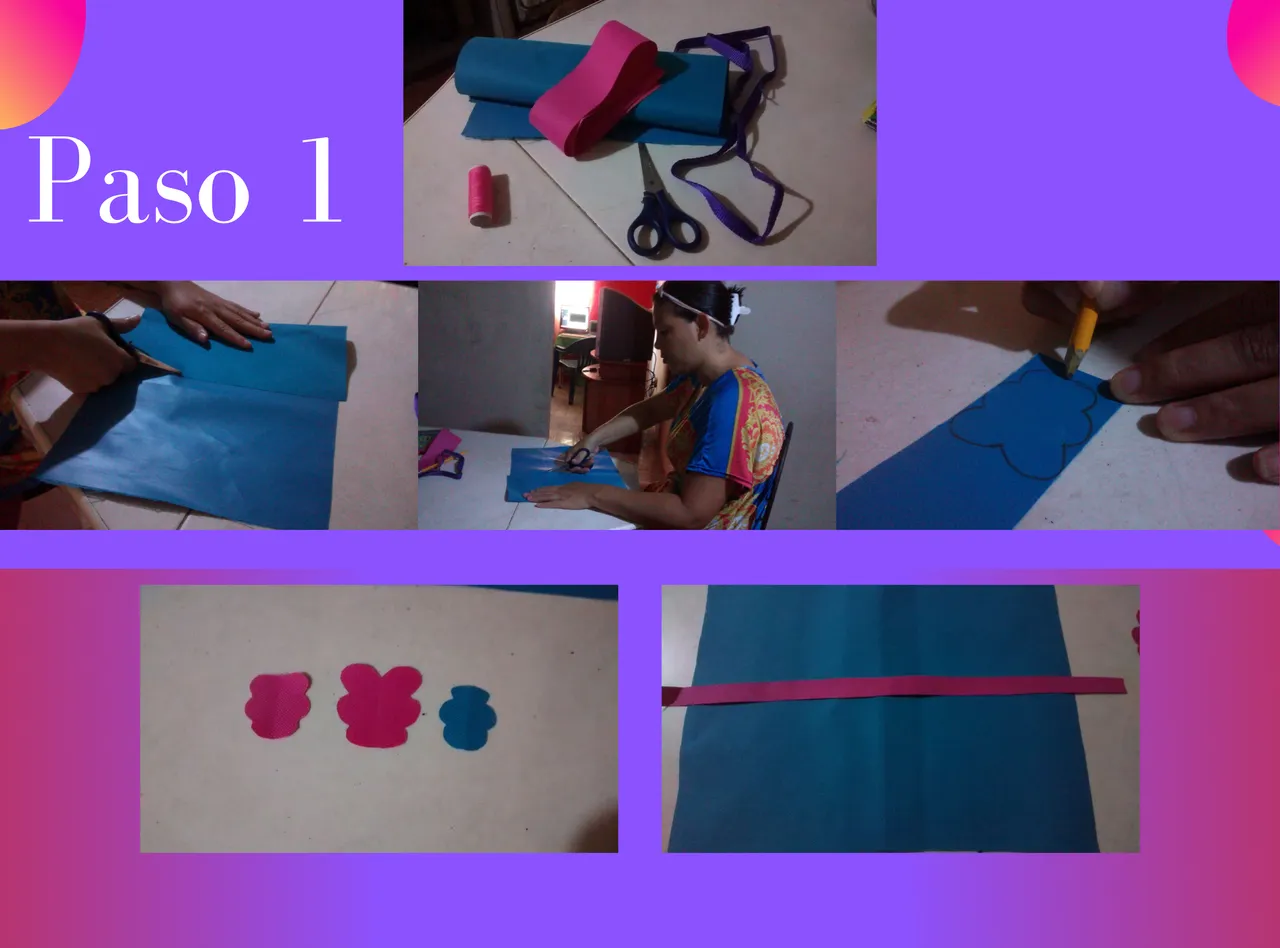
-Paso 1: Procedemos primeramente a Cortar primeramente la medida que usaremos para nuestro cotillón, es considerable tomar la altura de nuestro termo, para que podamos usarlo adecuadamente. Decidí hacer unas mariposas las dibujé en la tela y luego las recorté. Allí les muestro lo que usaremos ya recortado, tenemos las mariposas, una tira que irá para decorar nuestro cotillón, y la medida de nuestro cotillón.
-Materials:
-25cm Canvas. 21 long and 27 wide.
-Tape to hold our cotillion.
-Scissors.
-Sewing thread, of the colors we are going to use.
-Step 1: We proceed first to cut the measure that we will use for our cotillion, it is considerable to take the height of our thermos, so that we can use it properly. I decided to make some butterflies, I drew them on the fabric and then cut them out. There I show you what we will use already cut out, we have the butterflies, a strip that will go to decorate our cotillion, and the measure of our cotillion.
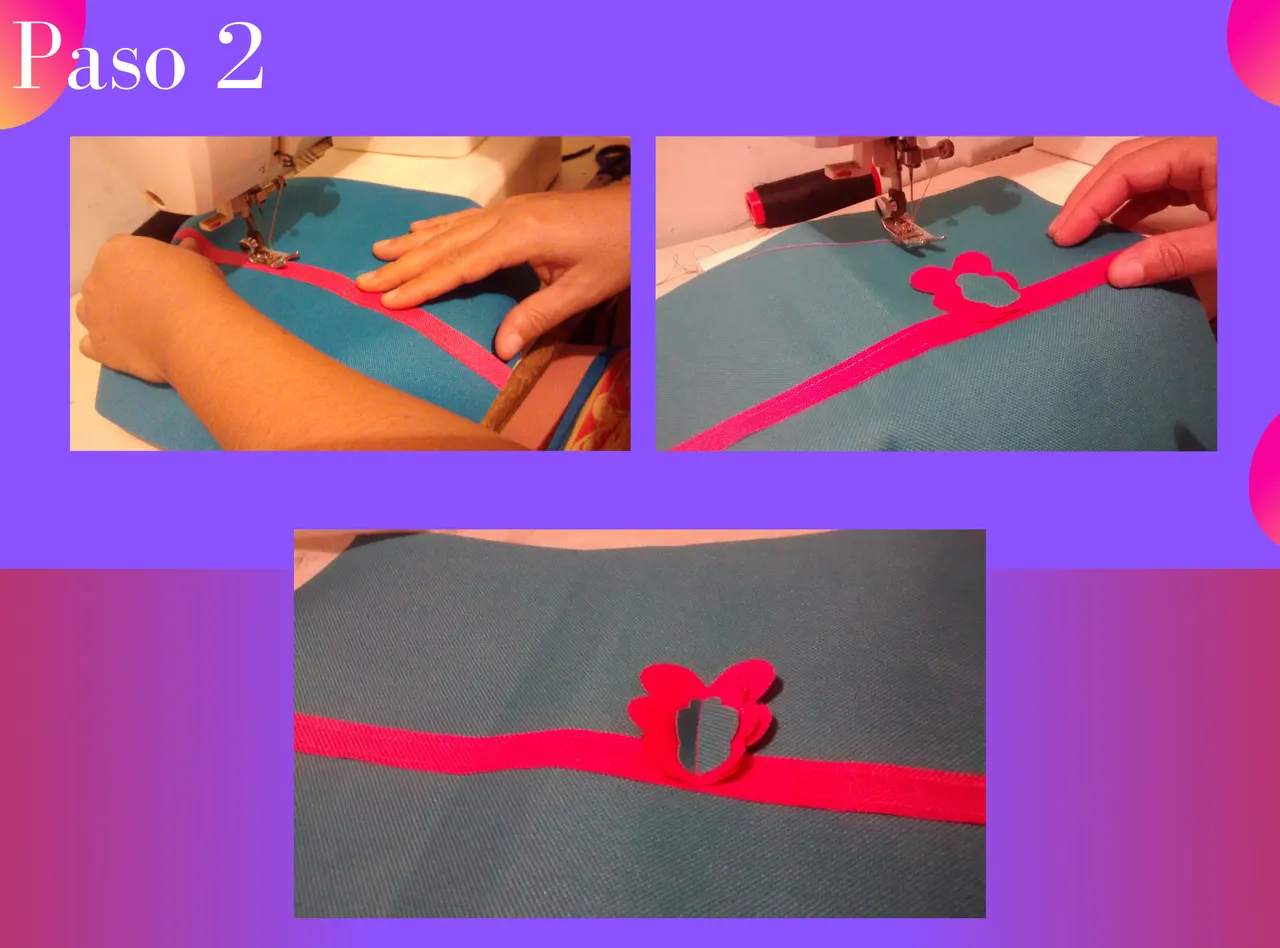
-Paso 2: Primeramente vamos a coser la tira que cortamos para decorar nuestro cotillón, justo en el centro de nuestro cotillón, luego cosemos la mariposa, recorté 3, de distintos tamaños, una grande, luego mediana y una pequeña, y las colocamos en ese orden, una tras otra, y la cosemos a un ladito del cotillón.
-Step 2: First we sew the strip we cut to decorate our cotillion, right in the center of our cotillion, then we sew the butterfly, I cut 3 of different sizes, one large, then medium and one small, and we place them in that order, one after the other, and sew it to one side of the cotillion.
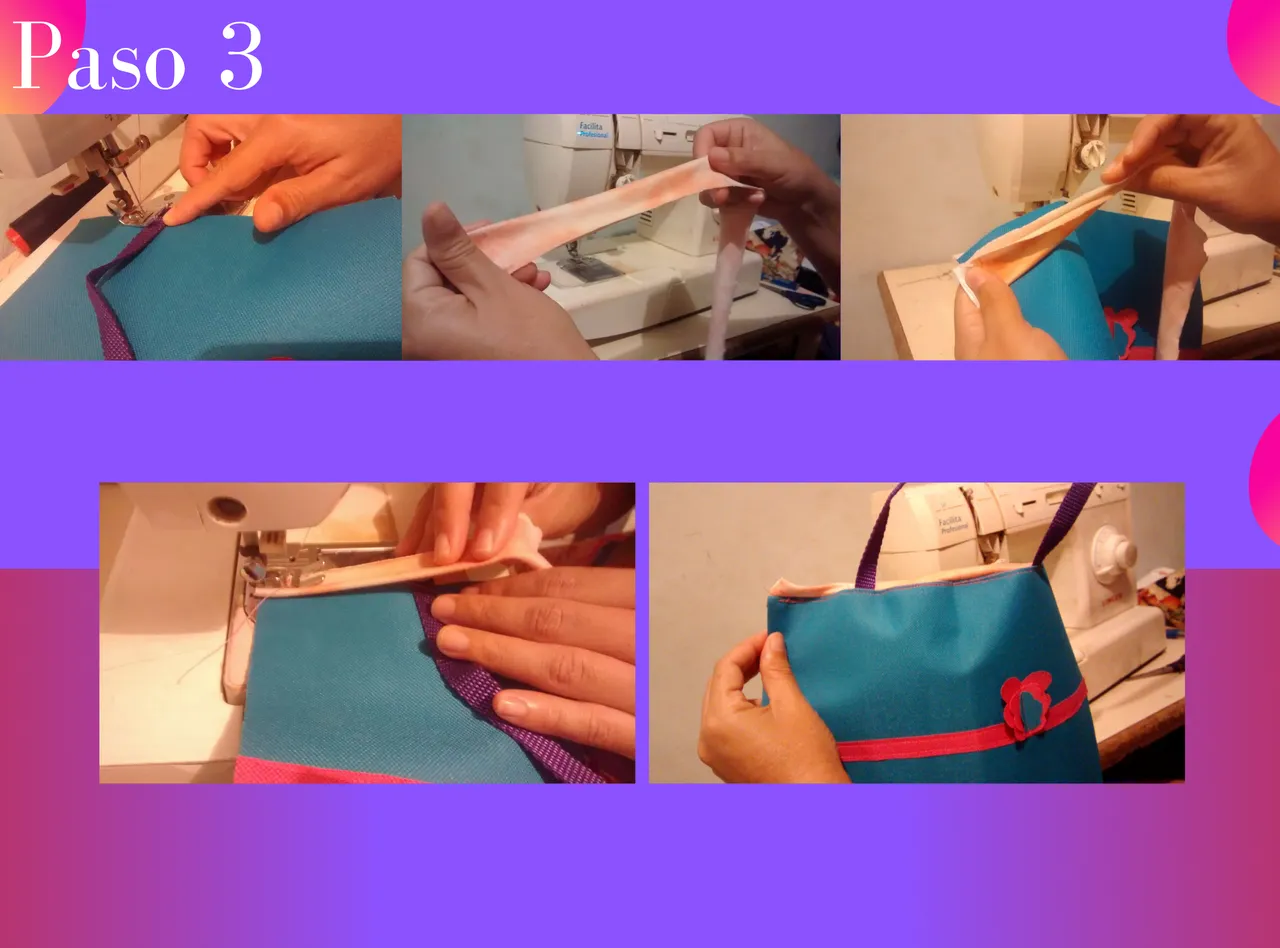
-Paso 3: La cinta que les comenté para sostener nuestro termo, la procedemos a coser a nuestro cotillón, en la parte de arriba, a una medida distanciada, cortamos un retazo de tela, un pedazo finito, esto lo coseremos a la parte de arriba de nuestro cotillón, la que este será un soporte para que allí tenga más firmeza al momento de introducir el termo para los niños.
-Step 3: The ribbon that I mentioned to hold our thermos, we proceed to sew it to our cotillion, at the top, at a distant measure, we cut a piece of fabric, a thin piece, this we will sew it to the top of our cotillion, which will be a support so that it has more firmness at the moment of introducing the thermos for the children.
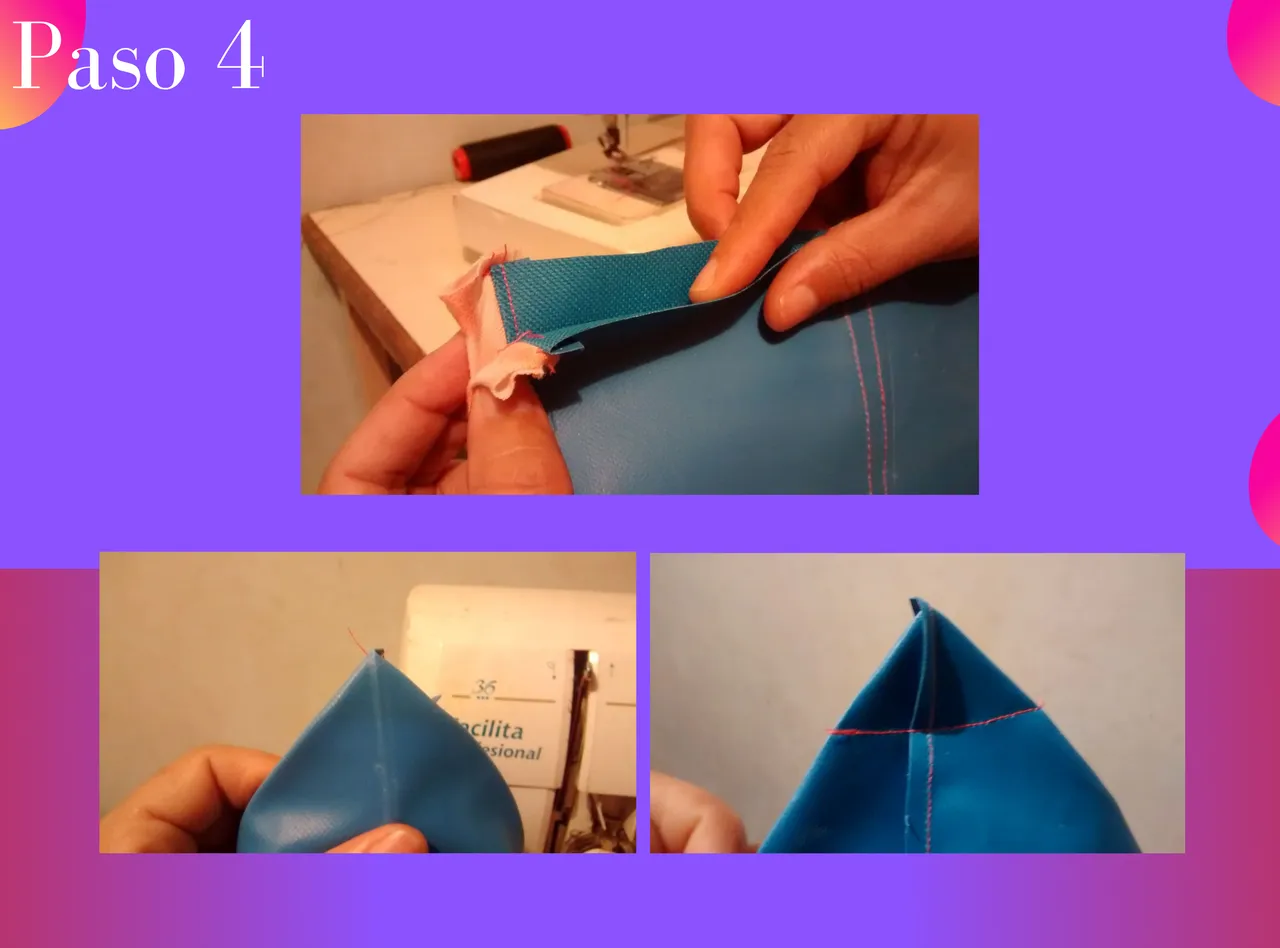
-Paso 4: Luego de haber cocido esto, procedemos a unir los extremos de nuestro cotillón, de afuera hacia adentro, y coseremos la parte de abajo de nuestro cotillón, de manera triangular y luego cosemos, esto es para darle más forma a nuestro cotillón. Estos son unos retazos de tela y materiales que tenía en mi casa desde hace mucho tiempo, y me pareció perfecto usarlos para este maravilloso concurso, espero que les gustes tanto como a mi, saludos a todos.
-Step 4: After having cooked this, we proceed to join the ends of our cotillion, from the outside to the inside, and sew the bottom of our cotillion, in a triangular shape and then sew, this is to give more shape to our cotillion. These are some scraps of fabric and materials that I had in my house for a long time, and I thought it was perfect to use them for this wonderful contest, I hope you like them as much as I do, greetings to all.
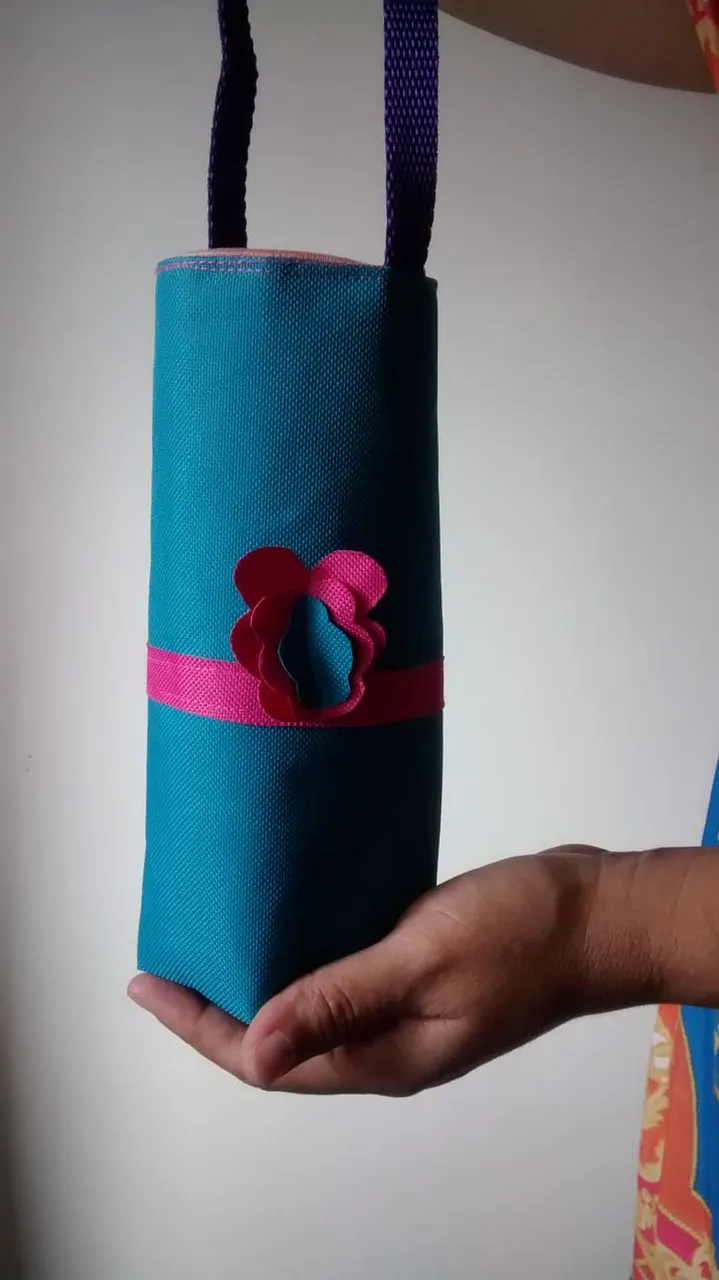
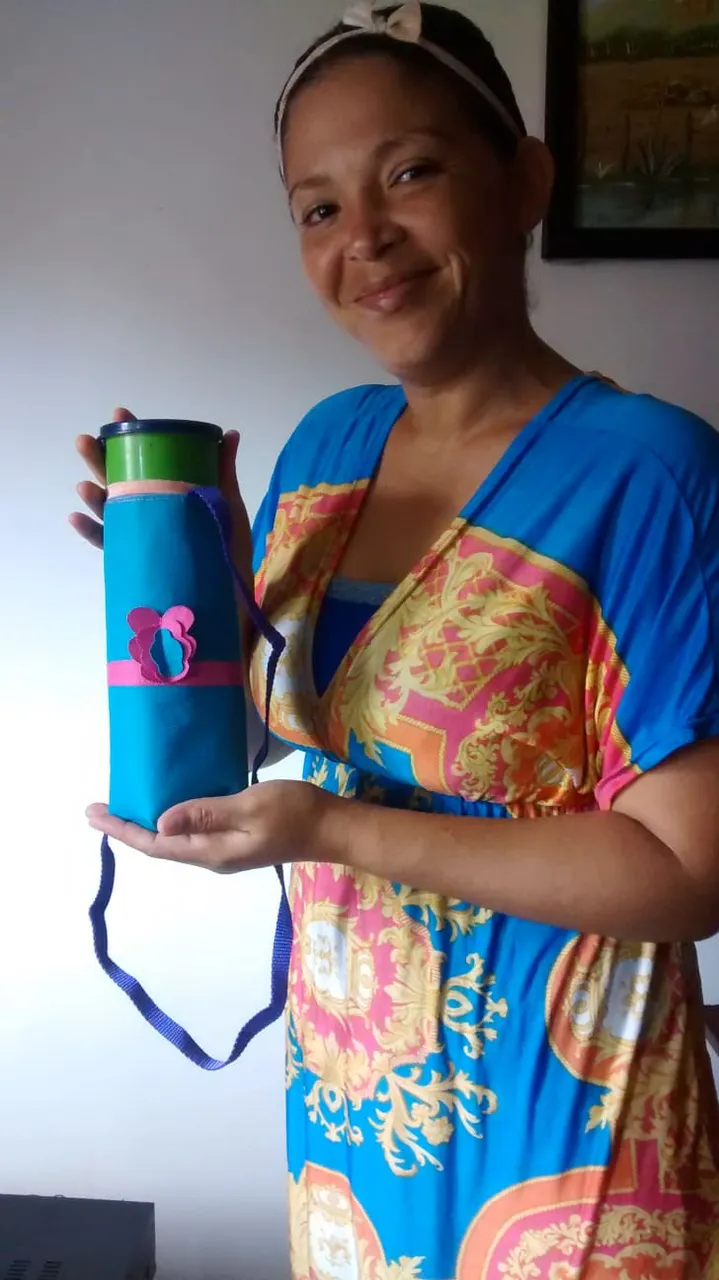
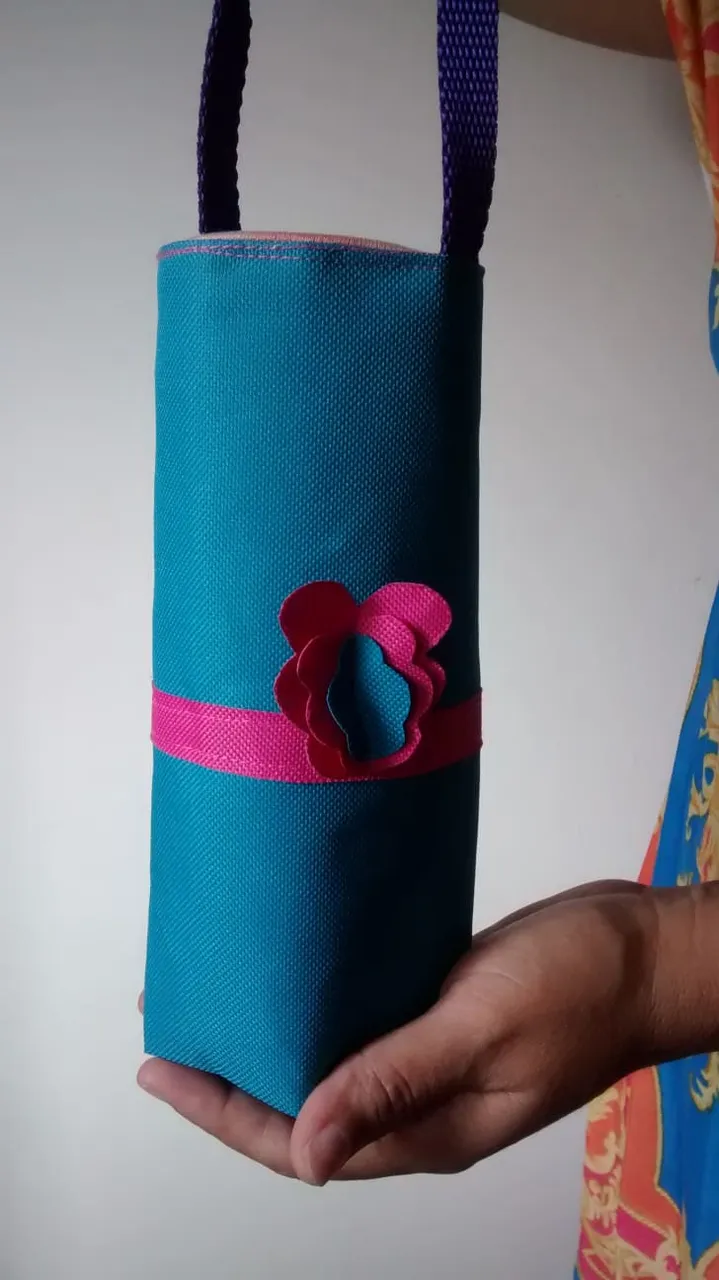
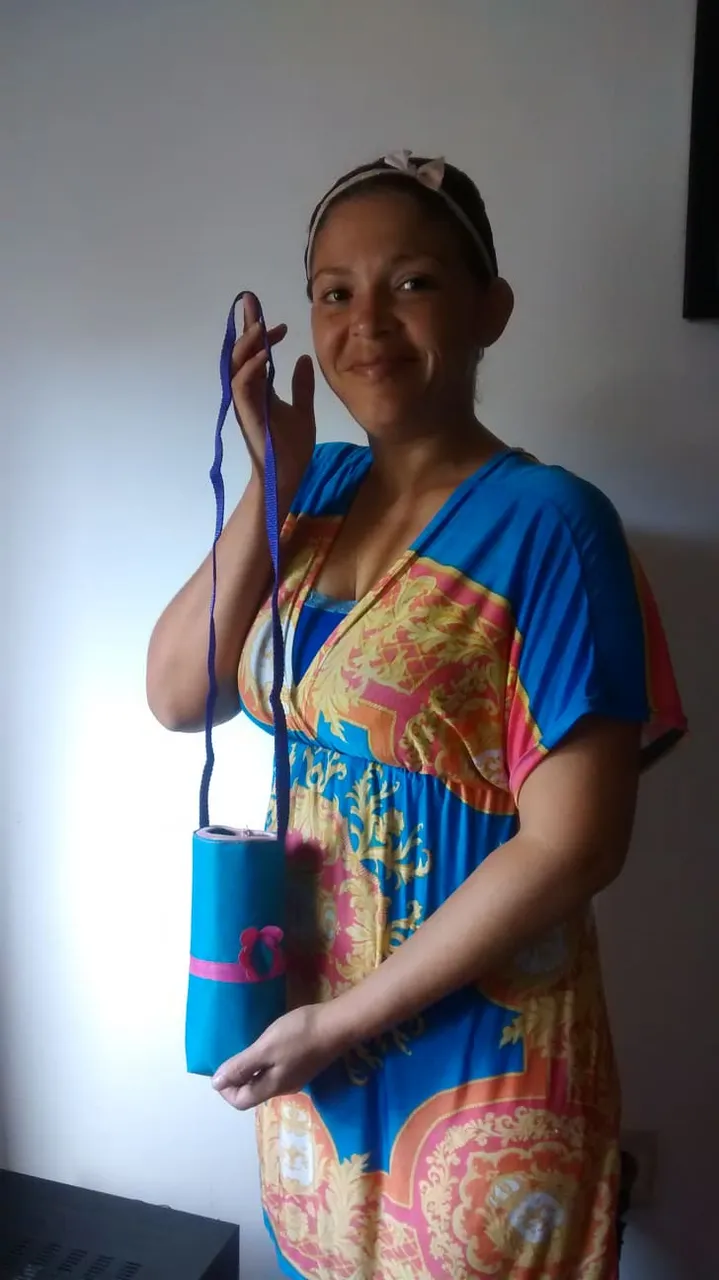
This is my final result, hope you like it, thanks for visiting my blog.
All photos are of my authorship and edited with canva.
I extend the invitation to @eribetzi
