You'll probably hear me say this at the start of all my Cricut DIYs but I swear it to be true every single time.. Having a cutting machine has seriously changed my life.
Sure it's a bit of a money pit, but once you've stocked up on all the materials (vinyls, leather, blanks etc) the possibilities are endless.
The thing I like most about having a cutting machine is the ability to make custom gifts.
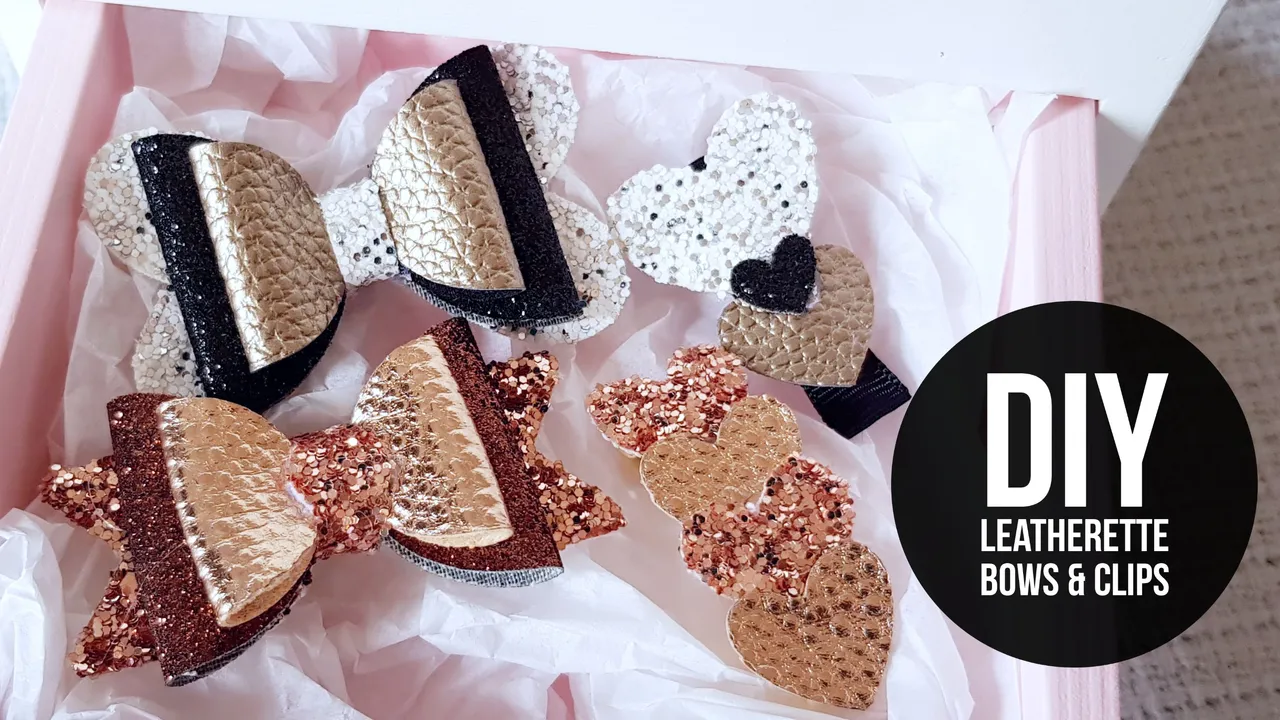
The "one of a kind, no one else has, made just for you" gifts like this bow set.
DIY BOW CLIPS
Since @bella.bear was born with a full head of hair, we've always had to use hair clips and hair ties to keep her hair out of her eyes.
For a while there it felt like no matter how many we bought, we ended up with only one or two after a couple of weeks.
But not anymore... 😁
WHAT YOU'LL NEED
A cutting machine (I have a Cricut Air 2)
PC with Cricut Design Space
Faux Leather
Scissors
Alligator clips (I use 4mm ones)
Hot Glue Gun
1mm Cross grain ribbon (optional)
STEP 01: DESIGN
Open design space and create or upload the bow design.
There's plenty of free bow svg files online. A simple google search should do the trick. That said, it's also quite easy to make your own bow template using design space by creating shapes and welding them together.
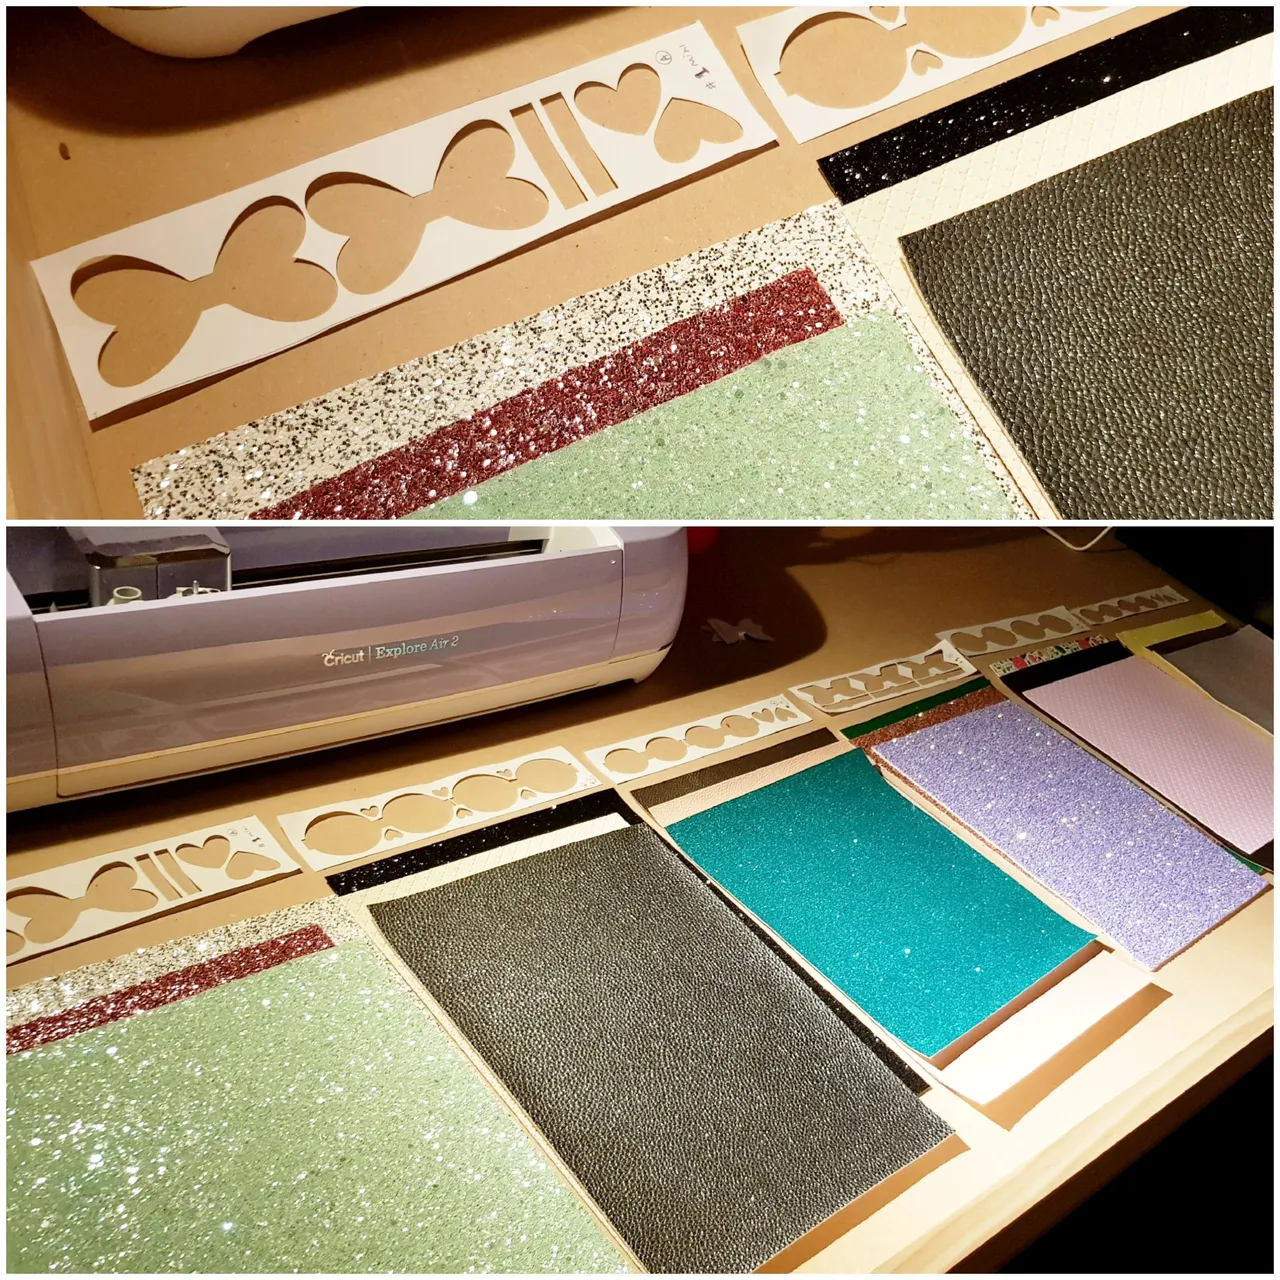
Once I'm happy with my design I print out a template on paper and pick the leathers.
Printing out a template is an important step for me since I don't cut entire sheets of leather. Having a template means I see how the pieces will fit together without having to waste leather. It also allows me to cut the exact amount of leather I need.
STEP 02: CUT
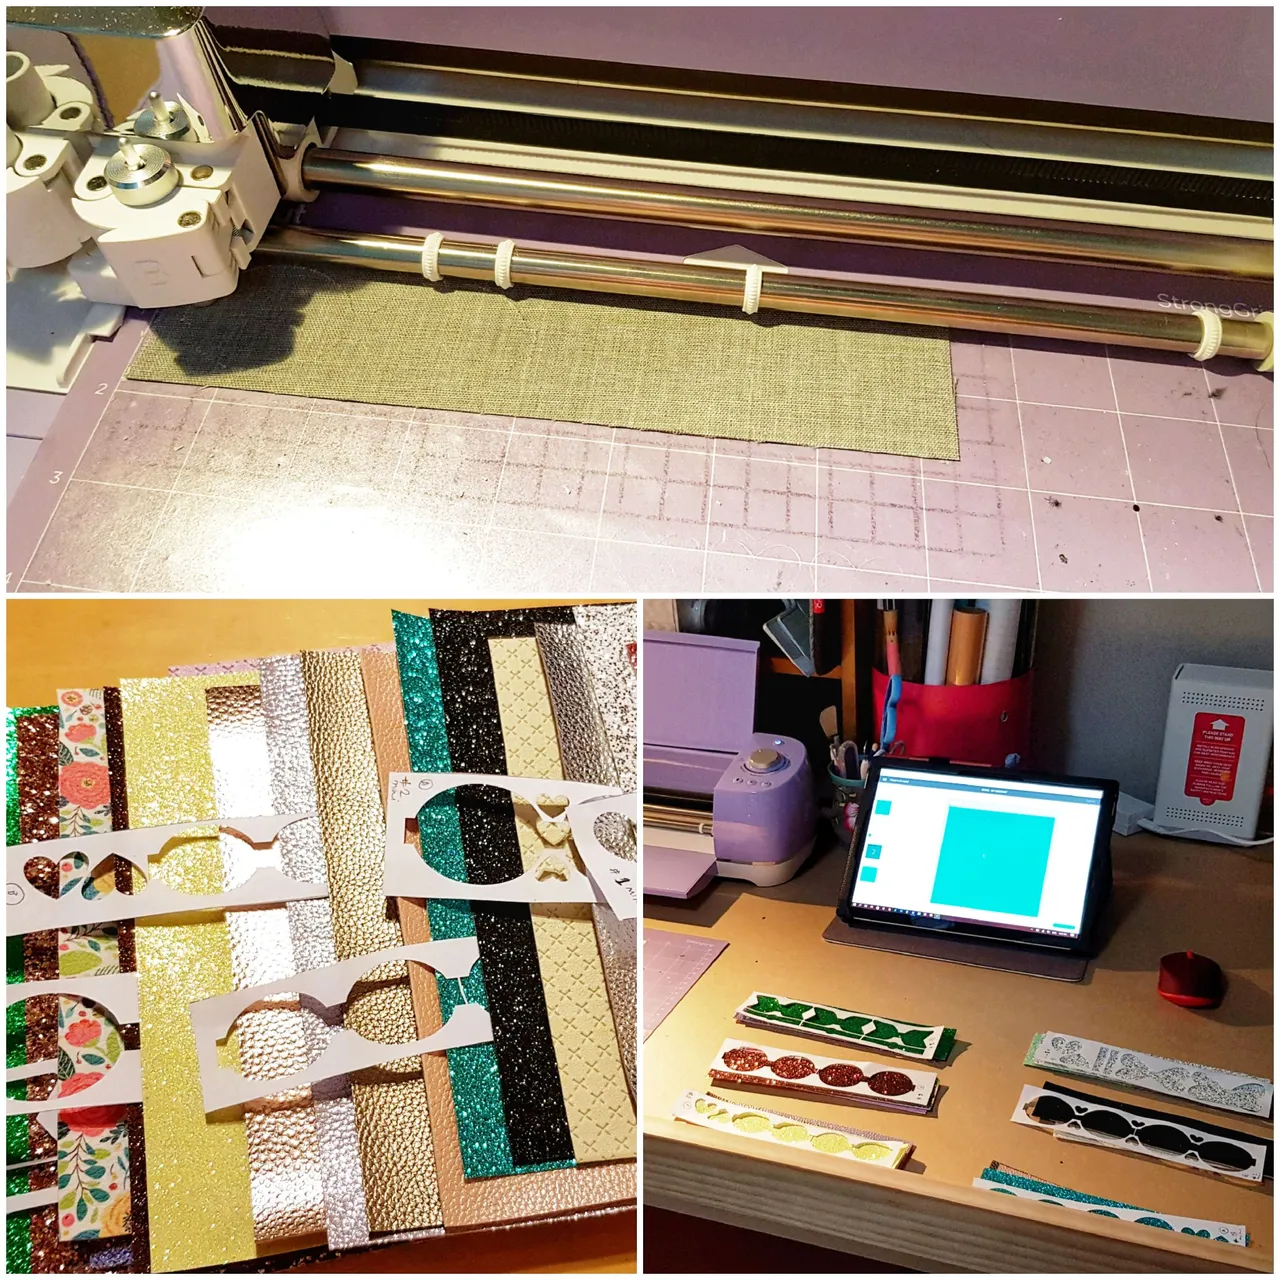
Once the templates are done, the leather are cut into strips and organised, it's time to place the leather on the cutting mat.
I like to put a layer of clear adhesive paper on my mat every time I cut lather. This is so I can preserve my mat a bit longer since leather is a very messy material to cut. This way once the mat is no longer sticky I can just replace the adhesive and keep cutting.
STEP 03: GLUE TIME

This is the final and most satisfying stage.
Simply take the edge of the bows, pull them towards the center, then glue ~ repeat until all the bow pieces look like bows. Glue all the bows together, then glue wrap the center piece around the alligator clip.
I like to glue a cross grain ribbon along the alligator clip to provide a nice soft barrier between the rough edges of the clip and soft skin. It also gives it a nice finished look, so it's worth the effort.
TAAADAAA!!
Find a nice box to keep them in and it's done!
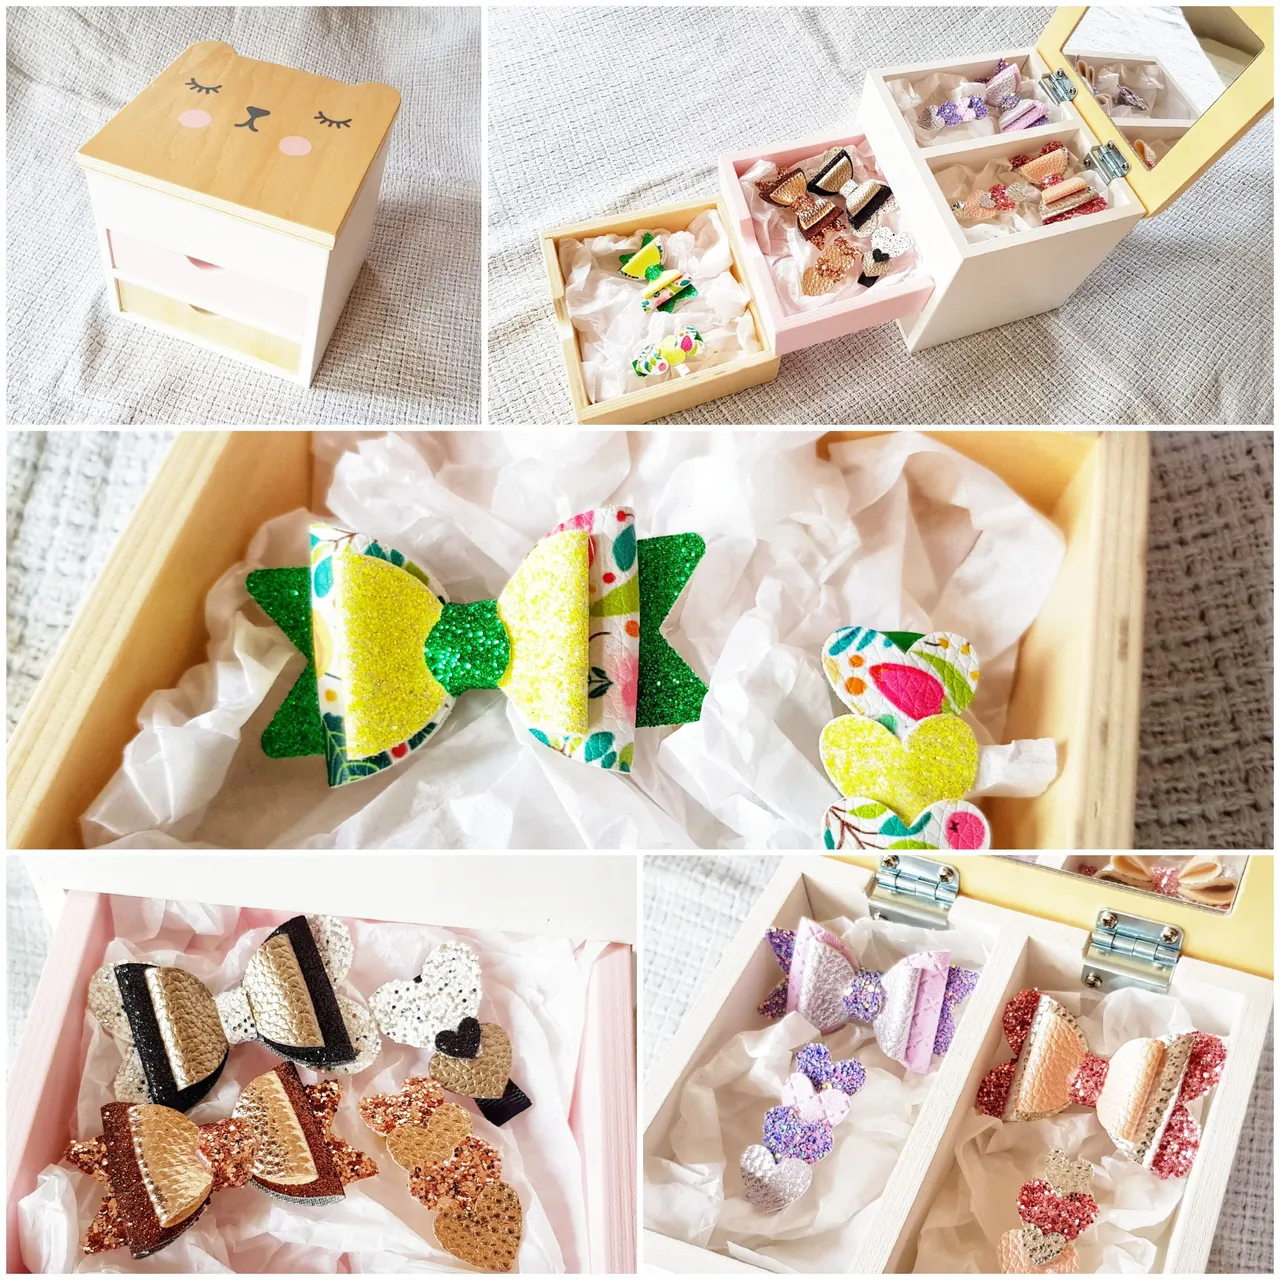
This was meant to be a Christening present but then lock downs happened and the Christening was cancelled.
I still need to add their name on the box and their initials and christening date teddy bear to complete the gift. Thanks to lock down I've got more time to get all that sorted out.
What do you think about the bows in the box for a Christening gift? Yay or Nay?