It's time to make our girls fall in love, beautiful bracelet made with wire and jewelry stones
Hola feliz noche para todo espero se encuentren bien, quiero agradecerle a todos los amigos y amigas que me me brindan su apoyo muchas gracias, la noche de hoy quiero compartir con ustedes la elaboración de una pulsera con una hermosa cruz está pulsera es muy fácil de elaborar en mis otros tutoriales e utilizado la misma técnica pero en esta pulsera trate de que fuera muy elegante y muy delicada por eso busque unas piedras muy cálidas y que combinará con cualquier prenda les confieso que no son perlas pero se asemejan mucho a las perlas una amiga de esta hermosa comunidad compartió unos zarcillos y una cadena muy bonita echas con perlas así que me gustaría que ella mirara esta hermosa pulsera, bueno amigos y amigas espero esté tutorial sea de su agrado y trataré de ser lo más breve posible para que también puedan elaborar las suyas , sin más que decir pasaremos al paso a paso .
Hello, happy night to all, I hope you are well, I want to thank all my friends who give me their support, thank you very much, tonight I want to share with you the making of a bracelet with a beautiful cross, this bracelet is very easy to make in my other tutorials and I used the same technique but in this bracelet I tried to make it very elegant and very delicate so look for some very warm stones that will combine with any garment I confess that they are not pearls but they are very similar to the pearls a friend of this beautiful community shared some earrings and a very nice chain made with pearls so I would like her to look at this beautiful bracelet, good friends and friends I hope this tutorial is to your liking and I will try to be as brief as possible to that they can also make their own, without further ado we will go step by step.
What do we need.
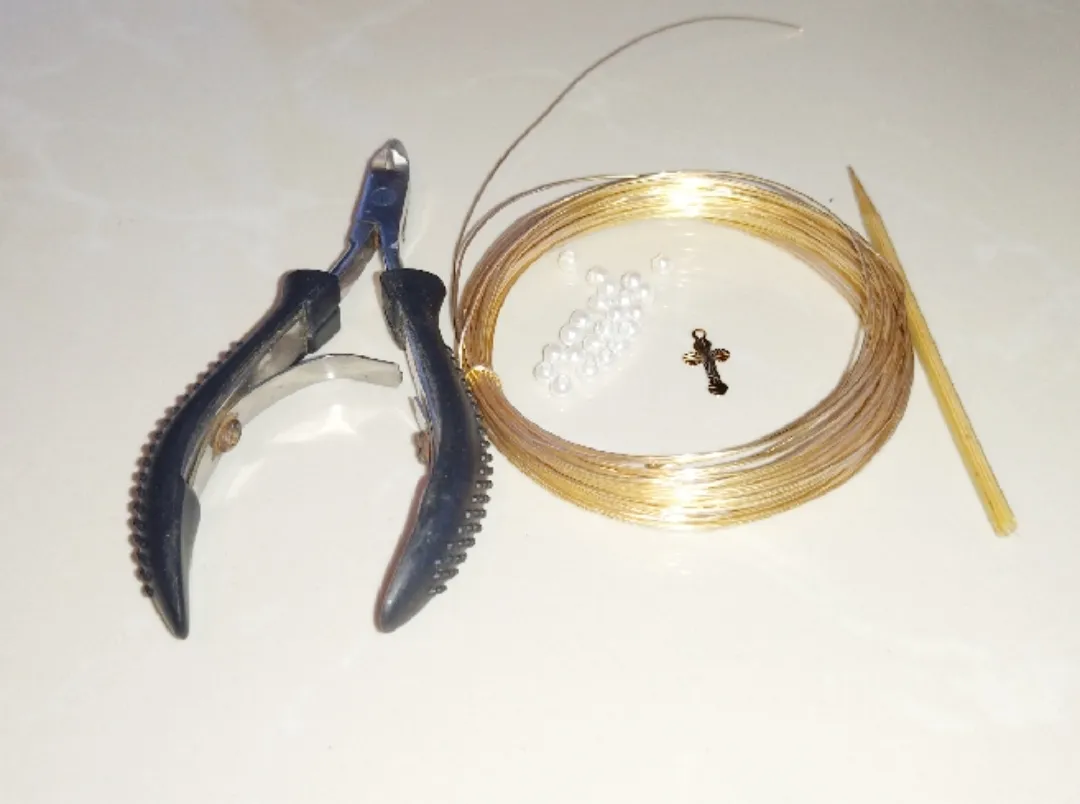
- piedras de bisutería
- alambre para bisutería calibre 22
- pinzas
- un palillo
jewelry stones
22 gauge jewelry wire
tweezers
a toothpick
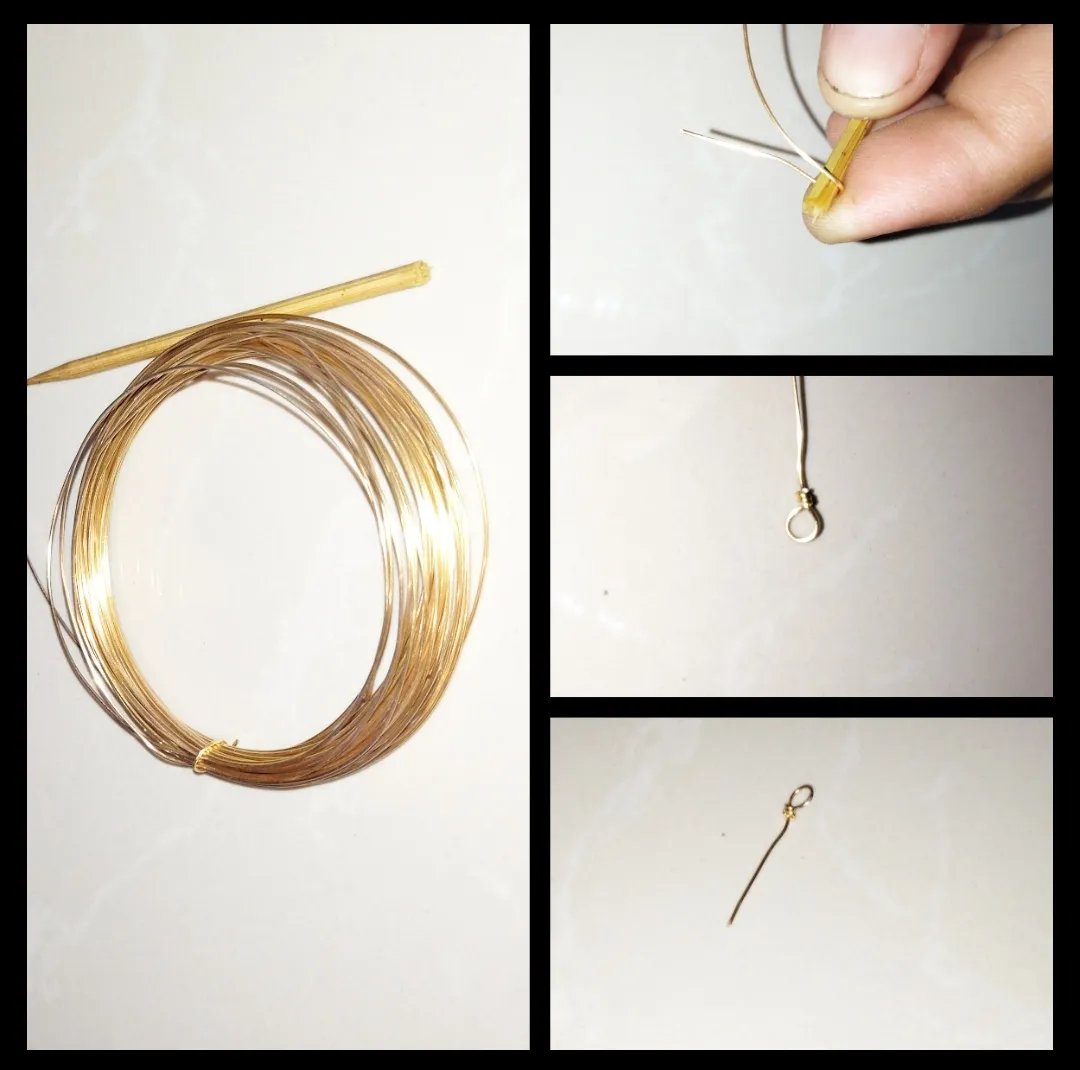
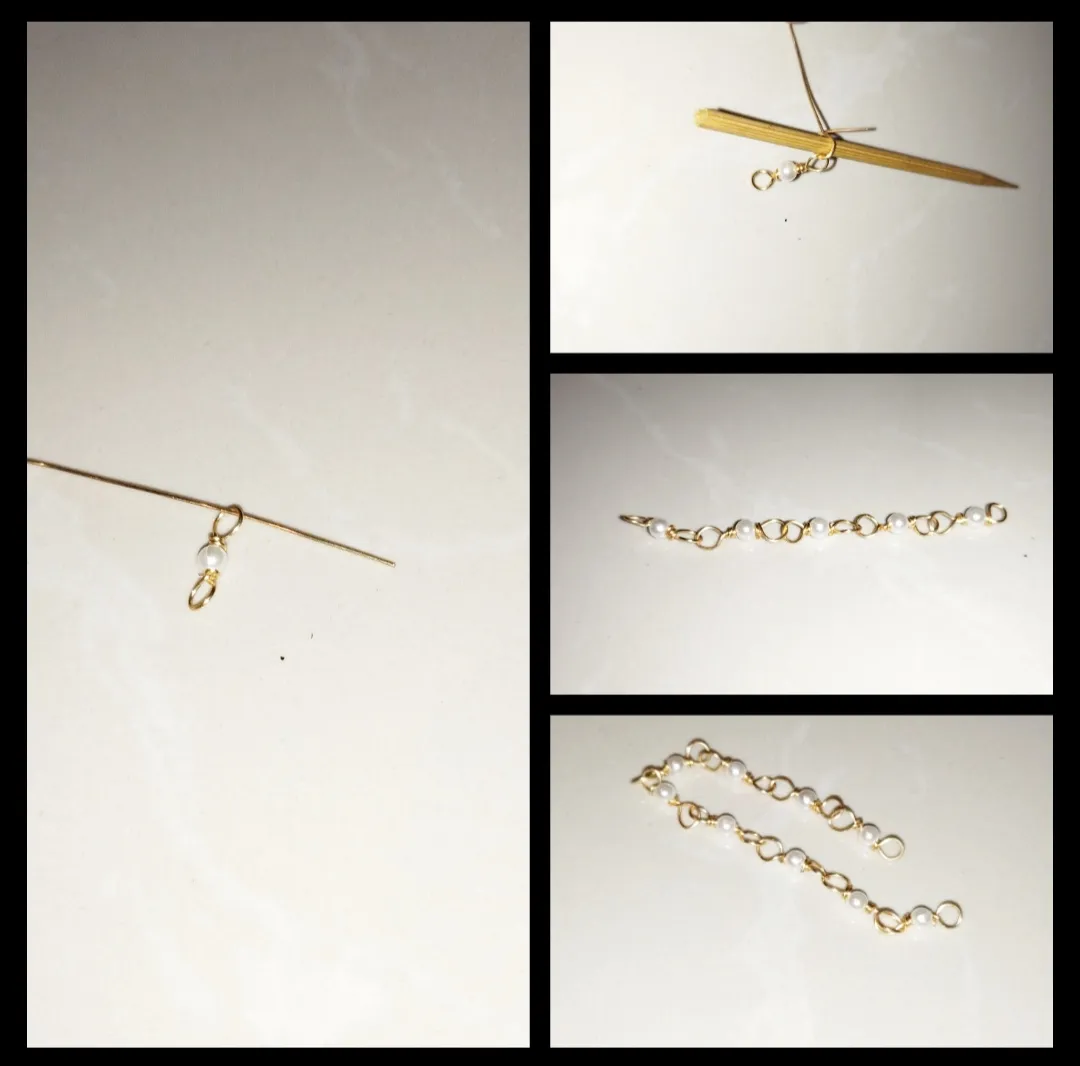
Paso 1: Bueno amigos ya empezamos como les dije esta técnica ya la e utilizado es super fácil un poco tediosa pero debemos tener mucha paciencia para el primer paso podemos tomar un trozo de alambre inutilizar el rollo completo para así no desperdiciar el alambre bueno ya teniendo el alambre también utilizaremos el palillo luego de estar listo tomaremos el alambre y aremos un redondo ayudándonos con el palillo luego de tener el redondo listo cortaremos el exceso de alambre y también corteremos dejando un trozo de alambre no muy largo .
Step 1: Well, friends, as I told you, we have already started this technique. I have already used it. It is super easy, a bit tedious, but we must have a lot of patience for the first step. We can take a piece of wire and disable the entire roll so as not to waste the wire. Well, having the wire, we will also use the toothpick. After being ready, we will take the wire and make a round helping us with the toothpick. After having the round ready, we will cut the excess wire and also cut, leaving a piece of wire that is not very long.
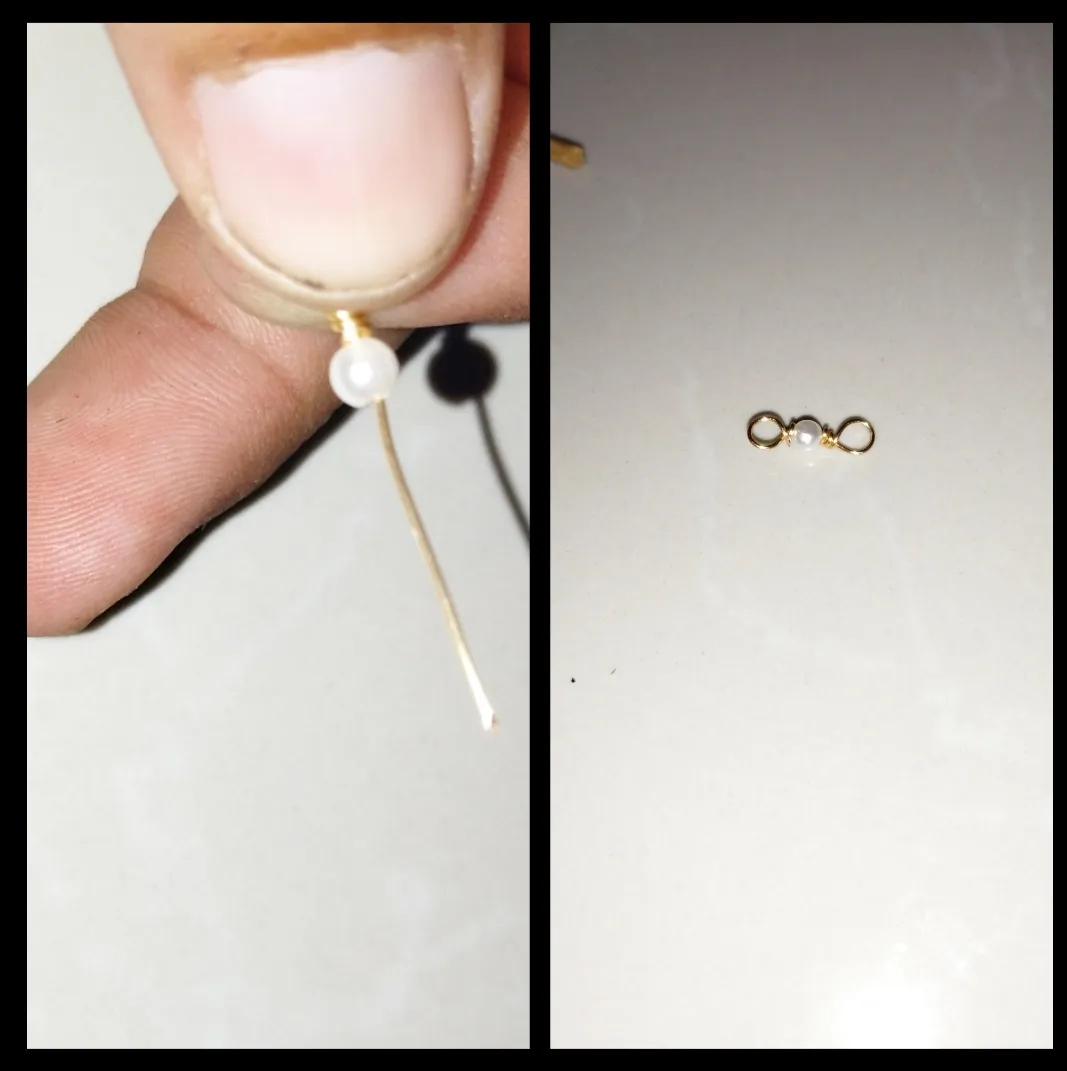
Paso 2: Para nuestro segundo paso tomaremos la pieza que estábamos elaborando en nuestro primer paso esta pieza la dejamos con un redondo y un trozo de alambre un poco largo meteremos una de nuestras piedras y del mismo modo que hicimos el primer redondo aremos y cerraremos está perimera pieza luego meteremos el alambre por uno de los agujeros luego utilizaremos el palillo aremos un redondo y daremos vuelta al rededor del mismo nos quedará igual que en la primera pieza meteremos una piedras y cerraremos de igual manera super fácil y así seguiremos haciendo asta optener en tamaño que queremos .
Step 2: For our second step we will take the piece that we were making in our first step, we will leave this piece with a round rod and a slightly long piece of wire, we will insert one of our stones and in the same way that we did the first round we will and we will close this first piece then we will put the wire through one of the holes then we will use the toothpick we will make a round and we will turn around it, it will be the same as in the first piece we will put a stone and we will close in the same way super easy and so we will continue doing until we get the size we want.
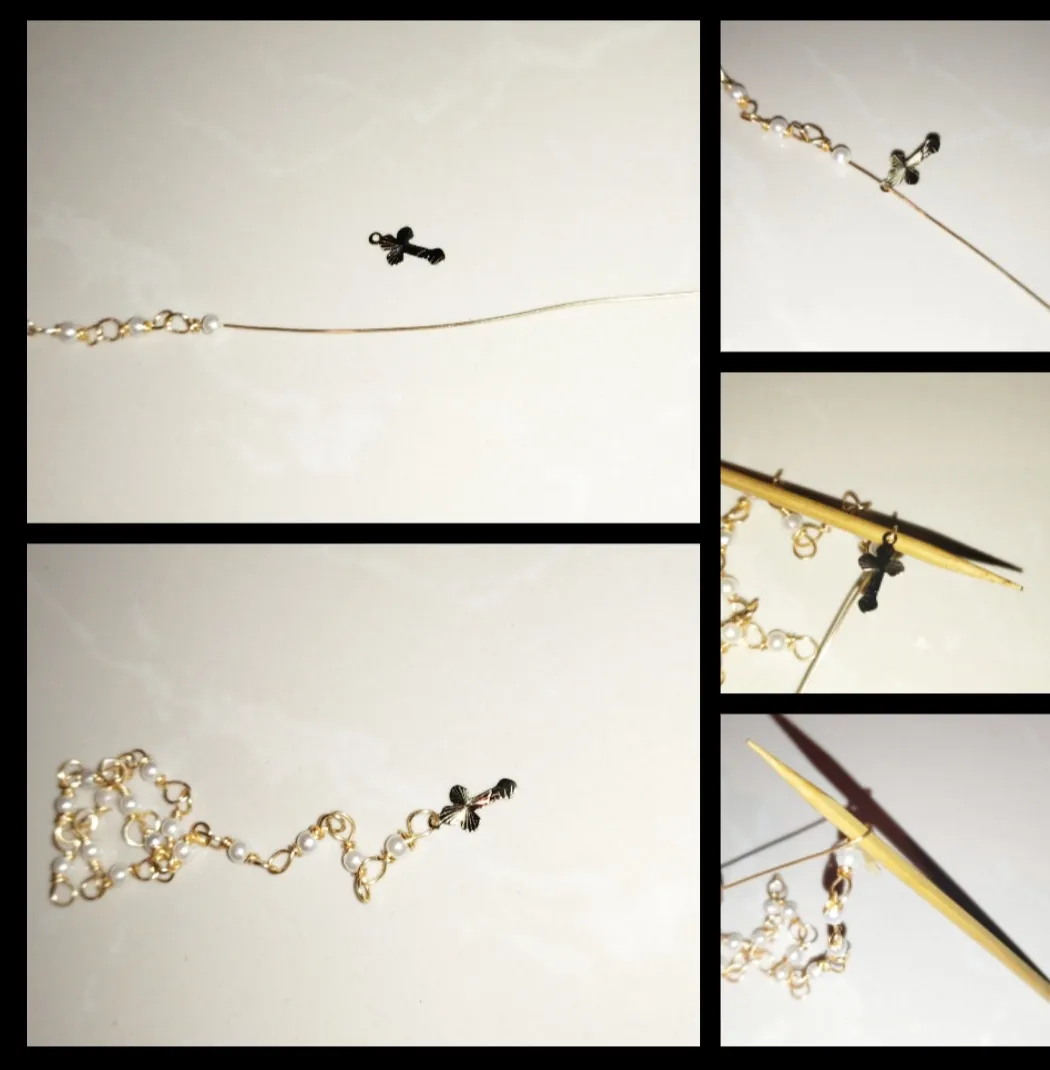
Paso 3:Bueno amigos y amigas ya casi estamos terminando como pueden ver y leer es muy fácil de hacer esta hermosa pulsera, seguiremos trabajando, para este paso le pondremos la cruz a nuestra pulsera como se la pondremos para colocar está cruz antes de cerrar el último tramo de la cadena la pondremos como primero primero aremos el redondo pondremos la piedra luego de poner la piedra en el mismo alambre meteremos la cruz luego pondremos el palillo y aremos el redondo tratando de que la piedra quede hacia un lado y la cruz hacia el otro entorchamos muy bien y cortamos el exceso
Step 3: Well friends and friends we are almost finished as you can see and read it is very easy to make this beautiful bracelet, we will continue working, for this step we will put the cross on our bracelet as we will put it on to place this cross before to close the last section of the chain we will put it as first first we will make the round we will put the stone after putting the stone in the same wire we will put the cross then we will put the toothpick and we will make the round trying that the stone is to one side and the cross towards the other we twist very well and cut the excess
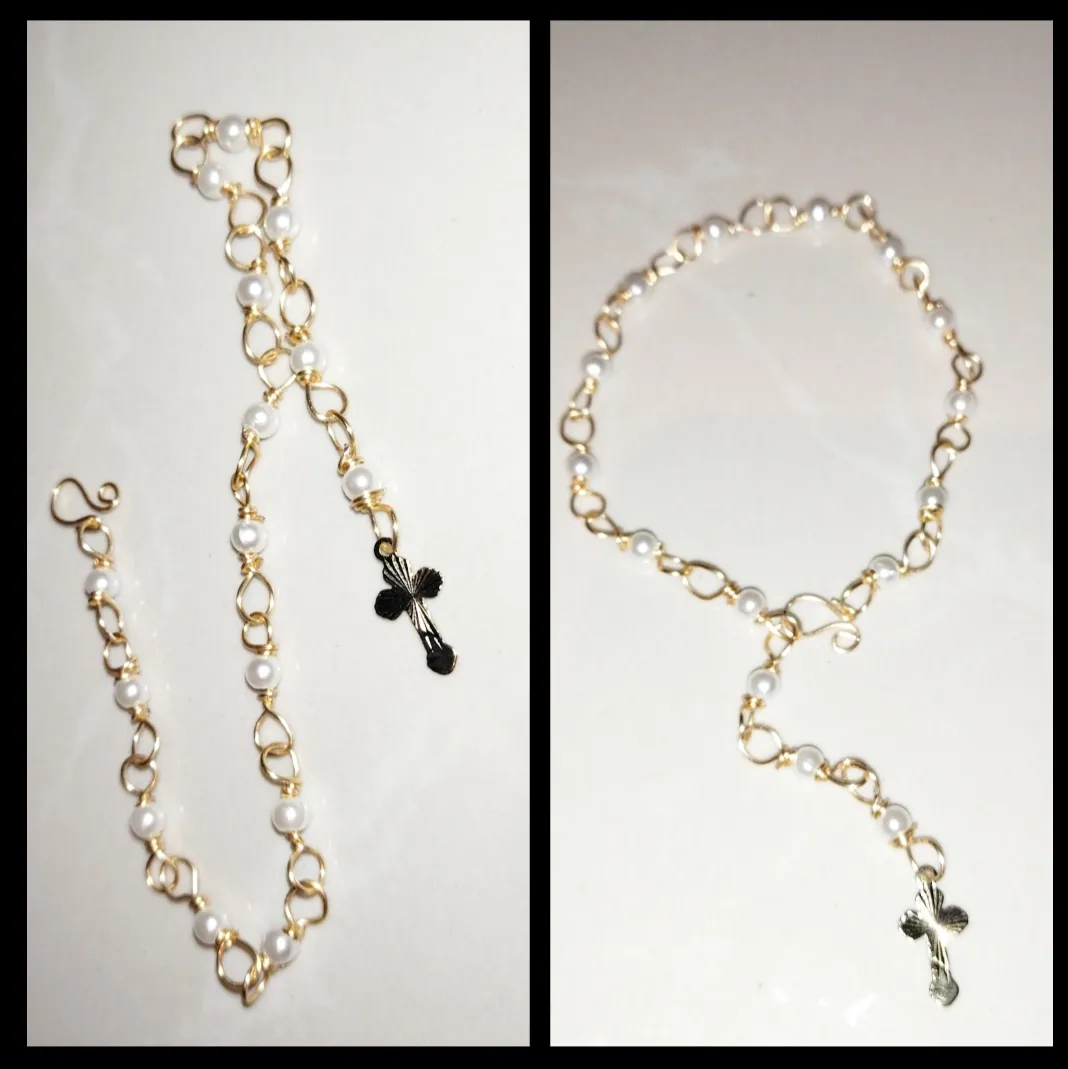
Paso 4:Para nuestro último paso las cosas serán mucho más fáciles, para este paso tomaremos un trozo de alambre no muy largo y aremos una U en uno de los extremos luego meteremos esa U en el extremo de la cadena que nos quedó libre luego de enganchar apretamos muy bien con nuestra pinza luego de apretar muy bien aremos un redondo luego cortaremos el exceso de alambre y aremos un espiral en la punta no muy grande tratemos que ese espiral pueda pasar por los agujeros de nuestra pulsera y listo bueno chicas espero les guste esta hermosa pieza está echa con mucho cariño será asta la próxima feliz noche para todos.👍👍👍👍👍👍💖😃😊
Step 4: For our last step things will be much easier, for this step we will take a short piece of wire and make a U in one of the ends then we will insert that U in the end of the chain that we have left free after hooking we tighten very well with our clamp after tightening very well we will make a round then we will cut the excess wire and we will make a spiral in the tip not very big let's try that this spiral can pass through the holes of our bracelet and that's it good girls I hope you like this beautiful piece, it is made with love, it will be until next time, happy night to all.👍👍👍👍👍👍💖😃😊

listo nuestros hermosa pulsera , espero que a las damas les guste, fue un gusto compartir con ustedes .
ready our beautiful bracelet, I hope the ladies like it, it was a pleasure to share it with you.
Todas las Fotos son de mi autoría y fueron tomadas con mi Celular Redmi 9T
All Photos are my authorship and were taken with my Redmi 9T Cellphone