Hello friends of light art!
Well-known scenes from the James Bond film "Spectre", in which the 'Día de Muertos' in Mexico City is shown and a few photos from my trip to
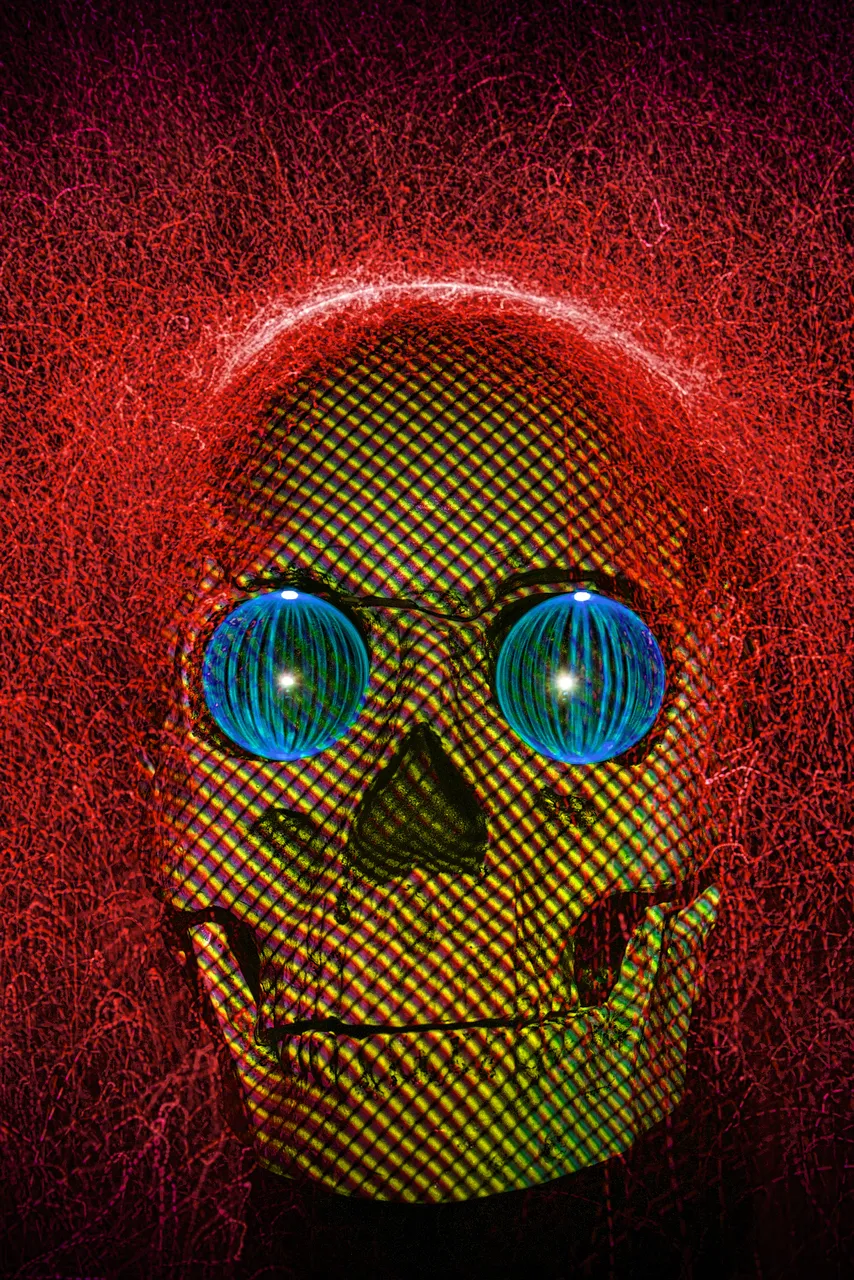
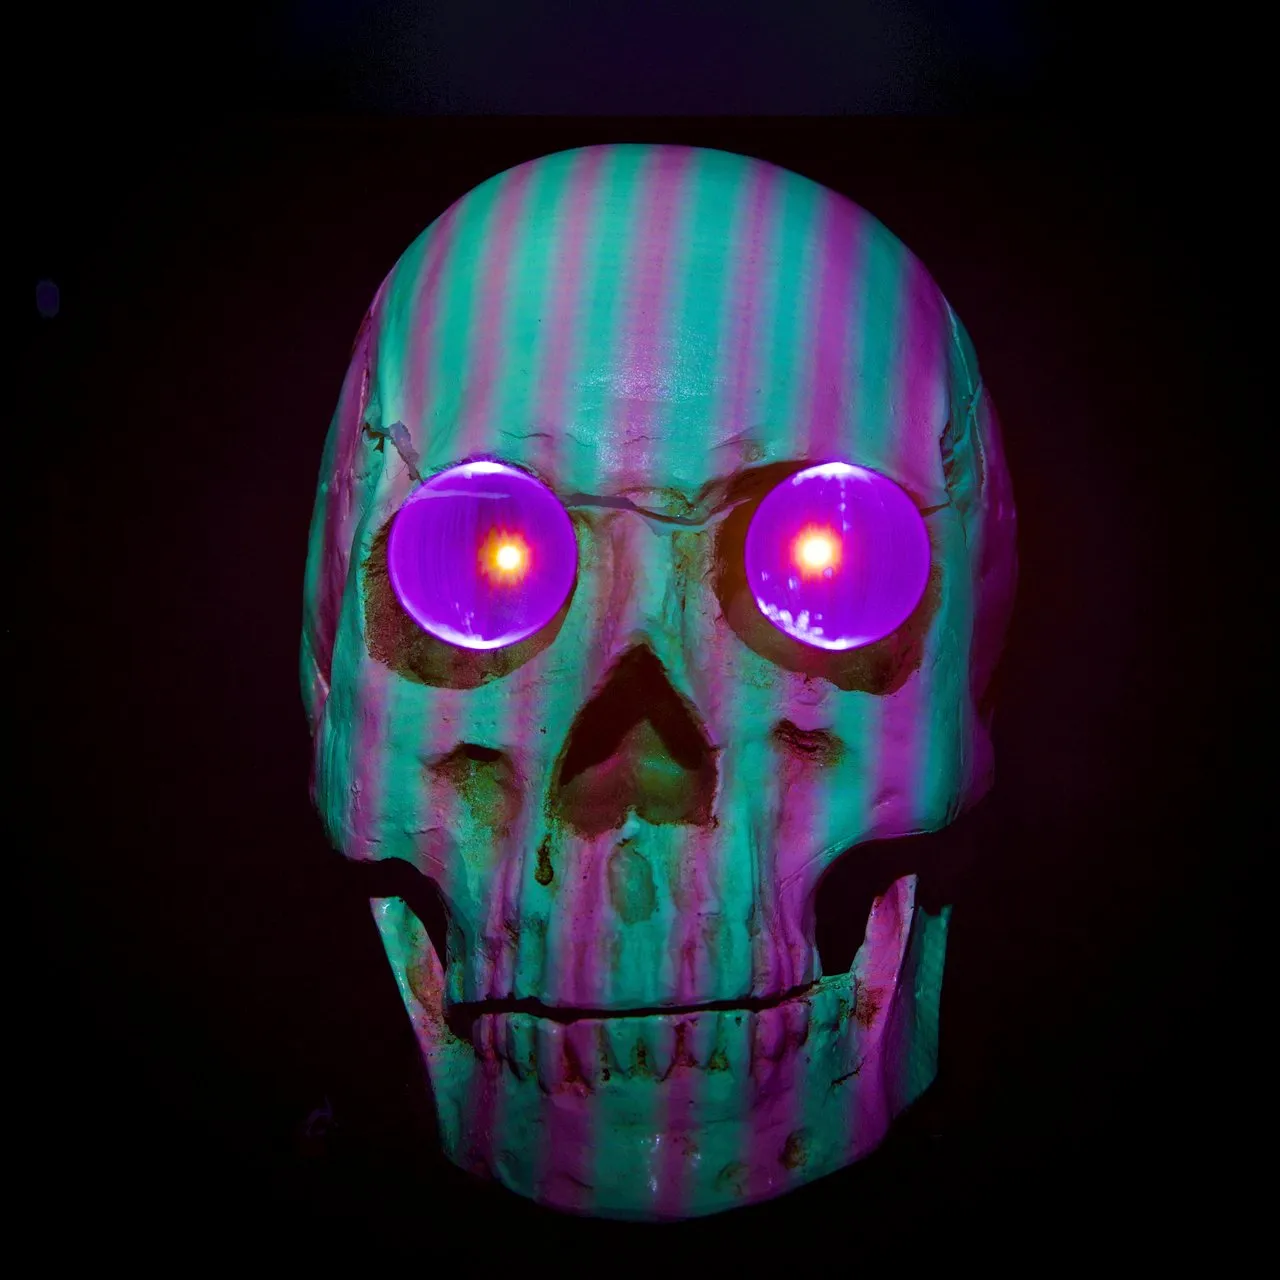
Guadalajara have inspired me to this picture. I didn't have to leave my house for this spooky light painting. I was able to realize this idea in my office, which had been converted into a studio. I had already developed the tools for this some time ago for other projects. It is a DIYS projector with a very low resolution of 128x160 pixels, my ORBOMAT and for the background I used fiber optics with an adapter and color filter from Light Painting Paradise on a flashlight from LEDLenser.
Bekannte Szenen aus dem James Bond Film "Spectre", in dem der ‚Día de Muertos‘ in Mexiko City gezeigt wird und ein paar Fotos von meiner Reise nach
Guadalajara haben mich zu diesem Bild inspiriert. Für dieses gruselige Lightpainting musste ich mein Haus nicht verlassen. Diese Idee konnte ich in meinem zum Studio umgebauten Büro verwirklichen. Die Tools dafür hatte ich schon vor einiger Zeit für andere Projekte entwickelt. Es handelt sich dabei um einen DIYS Projektor mit sehr geringer Auflösung von 128x160 Pixeln, meinen ORBOMAT und für den Hintergrund benutzte ich Glasfaser mit Adapter und Farbfilter von Light Painting Paradise an einer Taschenlampe von LEDLenser.
Canon EOS 6D Mark II
Canon EF16-35mm ƒ4L IS USM (zwei Verlaufsfilter)
Canon EF 24-70mm ƒ4L IS USM
ISO100; f11; 302s

guadalajara flea market
The exposure in order:
- Expose object through projector
- Make the background with the fiberglass
- Lens change
- Spin first orb.
- Expose the pupil with a flashlight
- Spin second orb
- Expose second pupil
- Complete!
Die Belichtung der Reihe nach:
- Das Objekt durch den Projektor belichten
- Mit dem Glasfiber den Hintergrund gestalten
- Linsenwechsel
- Ersten Orb drehen.
- Pupille mit Hilfe einer Taschenlampe belichten
- Zweiten Orb drehen
- Zweite Pupille belichten
- Fertig!
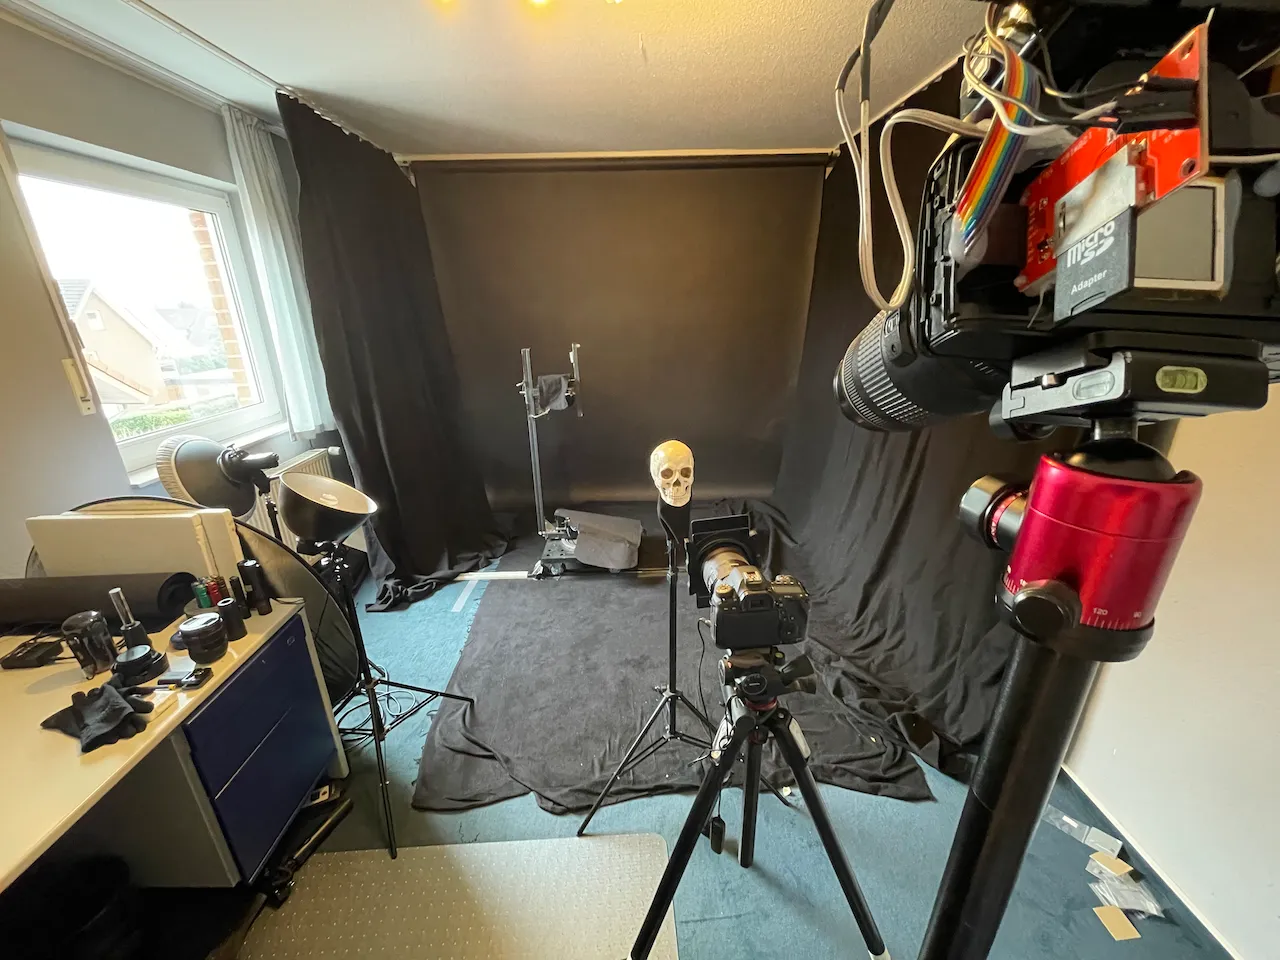
That was my setup for the project: the projector on the top right and the ORBOMAT on the cable duct rail to the left of the skull.
Das war mein Setup für das Projekt: Oben rechts der Projektor und links neben dem Totenkopf der ORBOMAT auf der Kabelkanal-Schiene.
It wasn't that easy after all.
When turning the ORB, the ceiling and parts of the floor were illuminated. So I built two more gradient filters in front of my wide-angle lens. Maximum precision was required when positioning the ORBs. For this I put my ORBOMAT on rails. A cable duct served as a rail, which I taped to the floor and fitted with two battering rams to precisely position the ORBs.
Ganz so einfach war es doch nicht. 🤨
Beim drehen des ORBs wurde die Decke und Teile des Bodens angestrahlt. Also baute ich noch zwei Verlaufsfilter vor mein Weitwinkelobjektiv. Bei der Positionierung der ORBs war höchste Präzision gefragt. Dafür stellte ich meinen ORBOMAT auf Schienen. Als Schiene diente ein Kabelkanal, den ich mit Tape am Boden befestigt- und mit zwei Rammböcken versehen habe, um die Position der ORBs genau festzulegen.
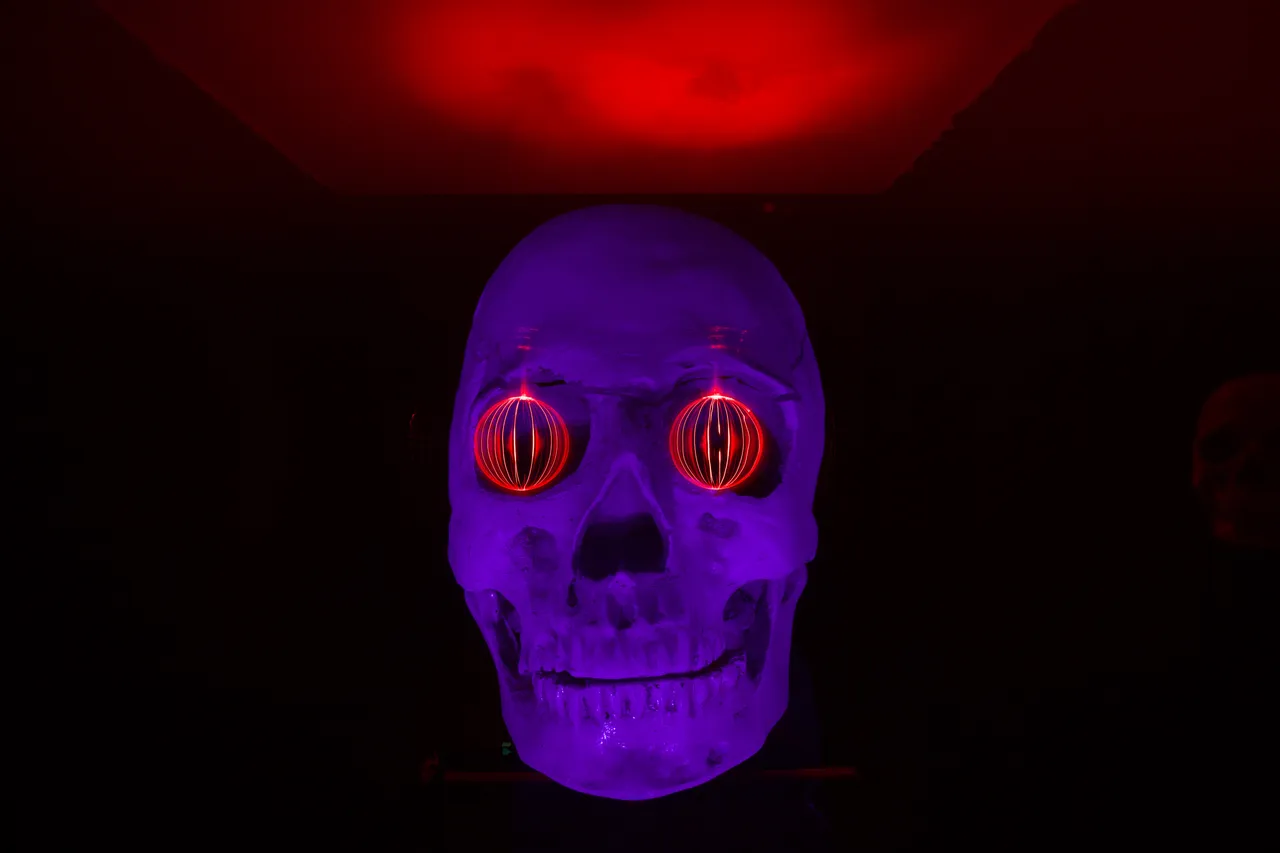
This photo shows how the ORBOMAT illuminates the ceiling
Bei diesem Foto sieht man, wie der ORBOMAT die Decke ausleuchtet
For the two ORBs, the focal length and position still need to be adjusted.
Für die zwei ORBs müssen Brennweite und Position noch angepasst werden.
The DIYS projector projects a bmp file previously created on the PC onto my object using a freely selectable lens. The lens was adjusted on the cover image so that every single pixel on the skull can be seen as a square. This gives the scan pattern. You can see another example in the picture below.
Der DIYS Projektor projiziert ein vorher am PC erstellte bmp-files über ein frei wählbares Objektiv auf mein Objekt. Das Objektiv wurde bei dem Titelbild so eingestellt, dass jedes einzelne Pixel auf dem Schädel als ein Quadrat zu sehen ist. Dies ergibt das Scan-Muster. Ein weiteres Beispiel seht ihr im Bild unten.
Canon EOS 6D Mark II
Canon EF16-35mm ƒ4L IS USM (zwei Verlaufsfilter)
Canon EF 24-70mm ƒ4L IS USM
ISO100; f11; 354s
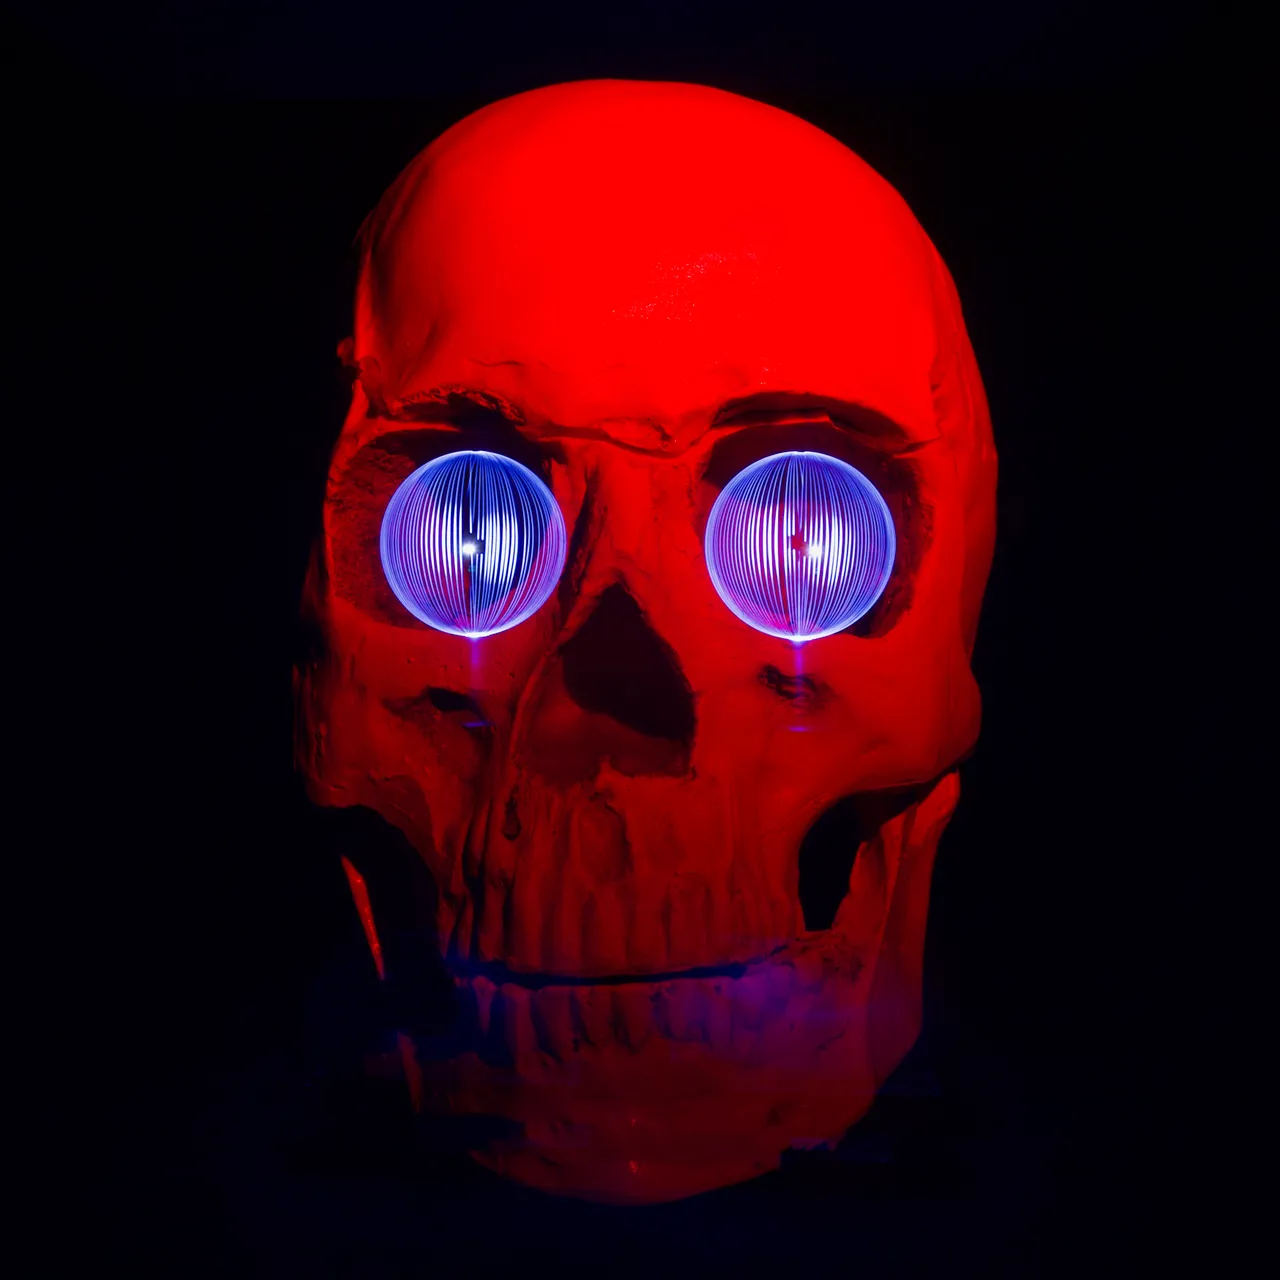
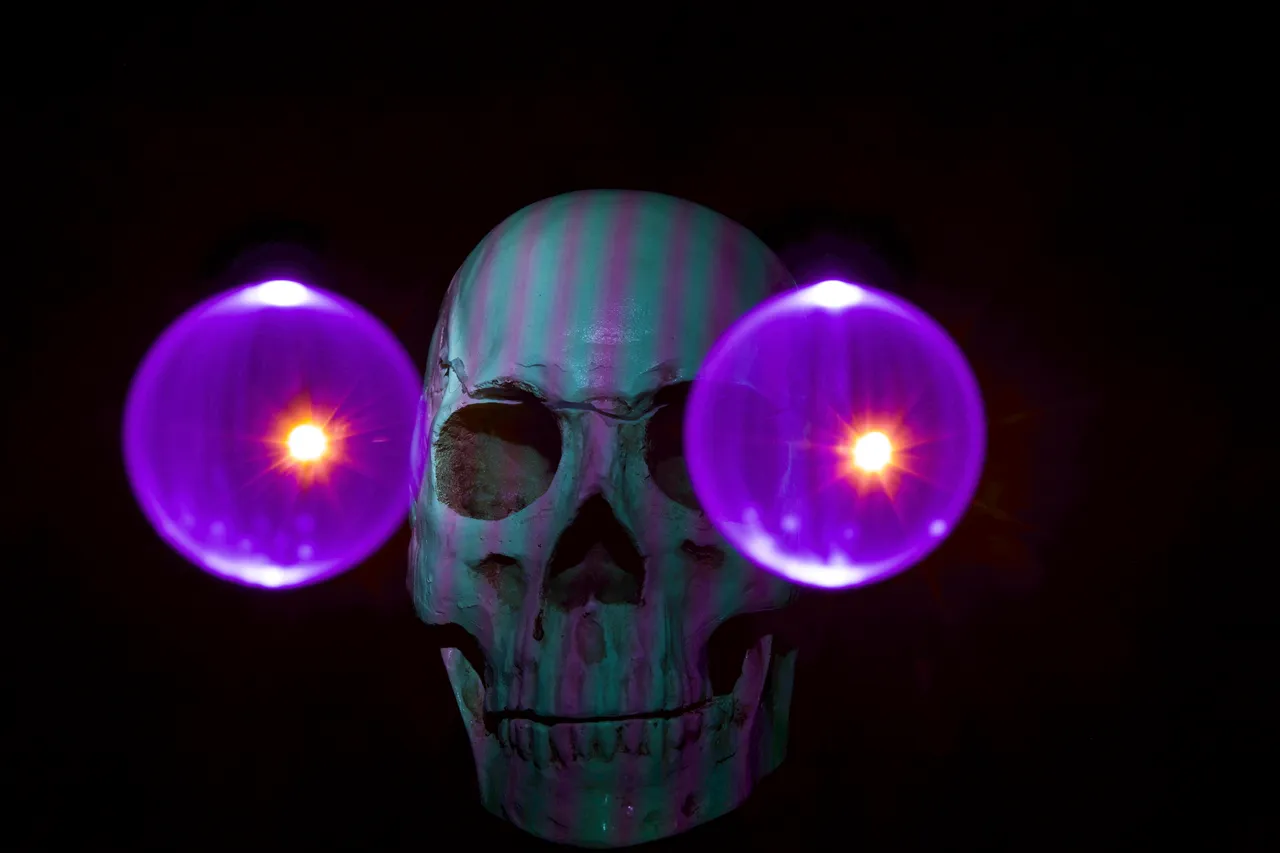
This image comes without a projector and glass fiber. The skull was only illuminated with a Convoy S2+. The eyes were created with the ORBOMAT and the pupils with a MINI-LEDLenser.
Dieses Bild kommt ganz ohne Projektor und Glasfiber aus. Der Schädel wurde nur mit einer Convoy S2+ ausgeleuchtet. Die Augen wurden mit dem ORBOMAT erstellt und die Pupillen mit einer MINI-LEDLenser.
WHAT IS LIGHT PAINTING?
Light painting is a unique form of art. The darkness is illuminate by the artist with diverse light sources and light traces are paint into the picture with various light tools. Various techniques are use, such as camera rotation or other movements of the camera during the exposure. The creative possibilities are almost unlimited. All the pictures were taken during one single exposure. Apart from denoising, sharpening, cutting and possibly adjusting the white balance, the pictures are not processed on the computer.
CandelART
more about me and my art:
www.candelart.de
Flickr
OpenSea
Instagram

WE ARE LIGHT PAINTERS
To help and support the LightPainters community here on Hive I would appreciate your delegation of HivePower. Any amount is appreciated. It does not require much to get started, we are happy for any gesture. @lightpainters
How to delegate?
Delegate 50HivePower, [50HP]
Delegate 250HivePower, [250HP]
Delegate 500HivePower, [500HP]
Delegate 1000HivePower, [1000HP]
All the Hive Power will help to upvote the artist's contribution as part of the LightPainters community.