Create a gif file from your portfolio images.
I really wanted to display my photography in a carousel using steemit, but the functionality isn't there yet… so I turned my portfolio into a GIF!
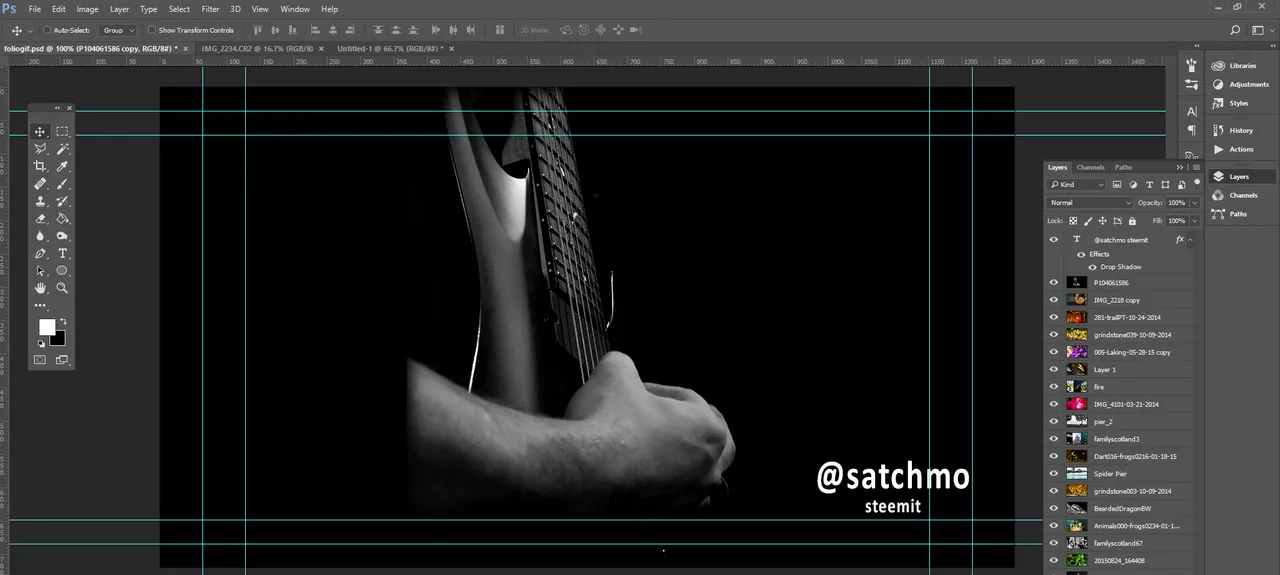
https://steemit.com/photography/@satchmo/photography-portfolio-in-gif
If you want to make your own photography portfolio, gif, all you need for this tutorial are some images and Adobe Photoshop. I created this in Photoshop CC - earlier versions of Photoshop should be able to accomplish this task, though the compression quality may not be as good.
This is a Step-By-Step guide for creating a high quality gif with your photography portfolio.
Open a new document
Specify your dimensions. For this tutorial I chose 1200X800.

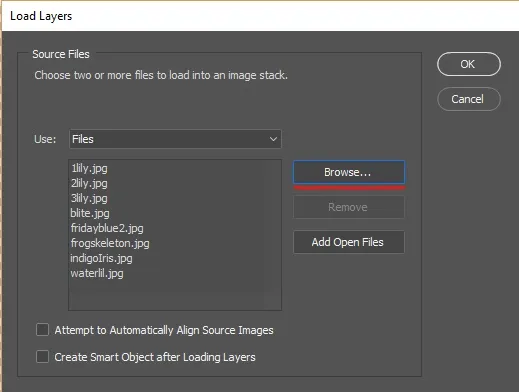
Load your images into a stack

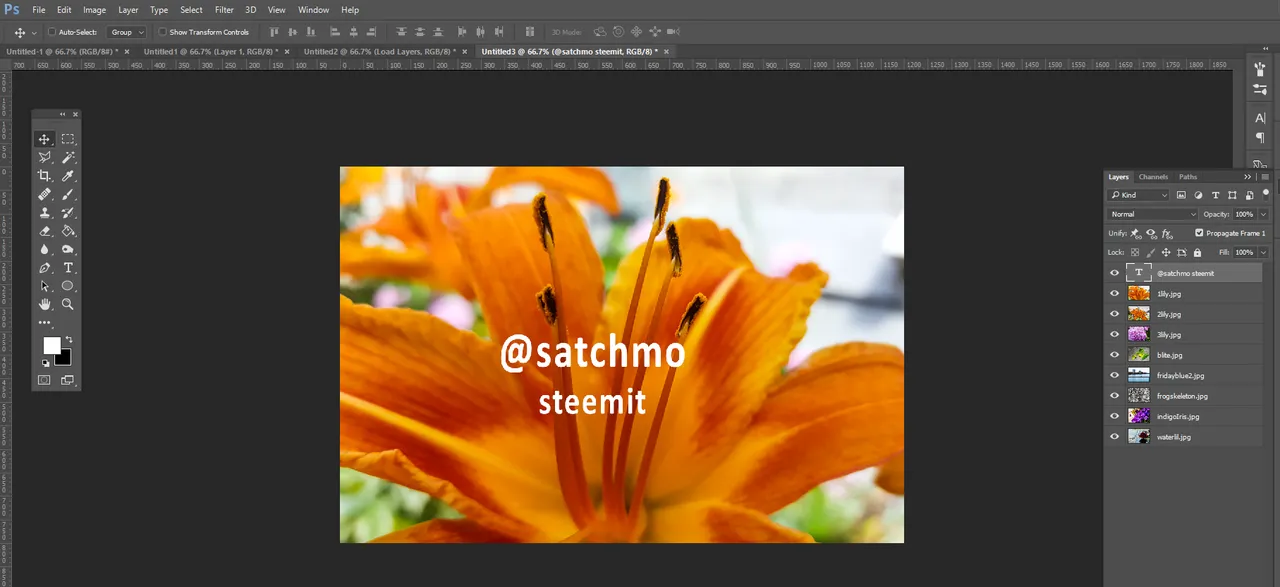
Adjust your images to fit and watermark
You may have to adjust some images to fit your dimensions. Create a new text layer and add watermark or brand.
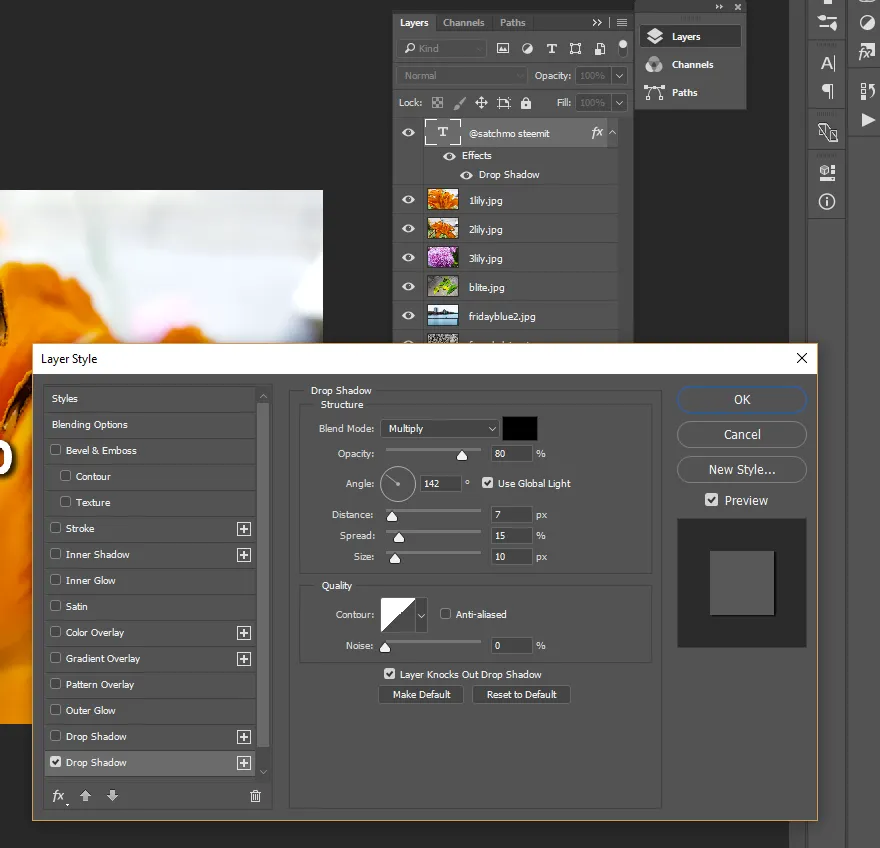
Add a drop shadow
Double Click the text layer to open the layer styles menu. Check and select Drop Shadow and adjust accordingly. The settings I used are contained within the screenshot.
Open the Animation Timeline

Use the timeline drop down menu to select Create Frame Animation
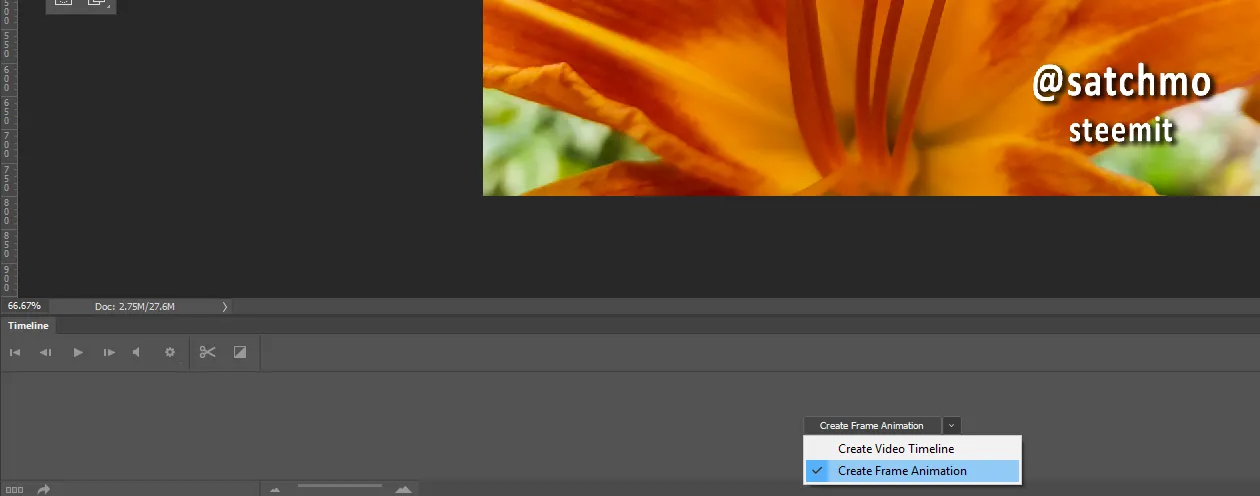
A timeline will be generated and will look something like this. 
Select all of the layers and use the timeline menu button to select, Make Frames From Layers.
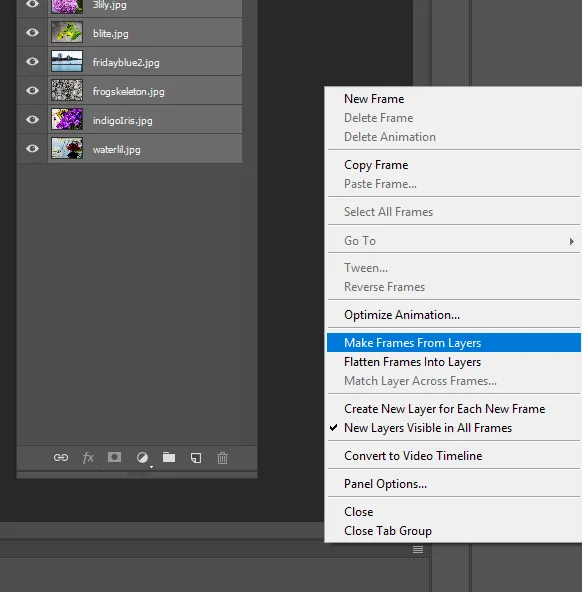
Clean up your timeline
When the timeline generates your watermark will be turned into a frame. Simply delete this.
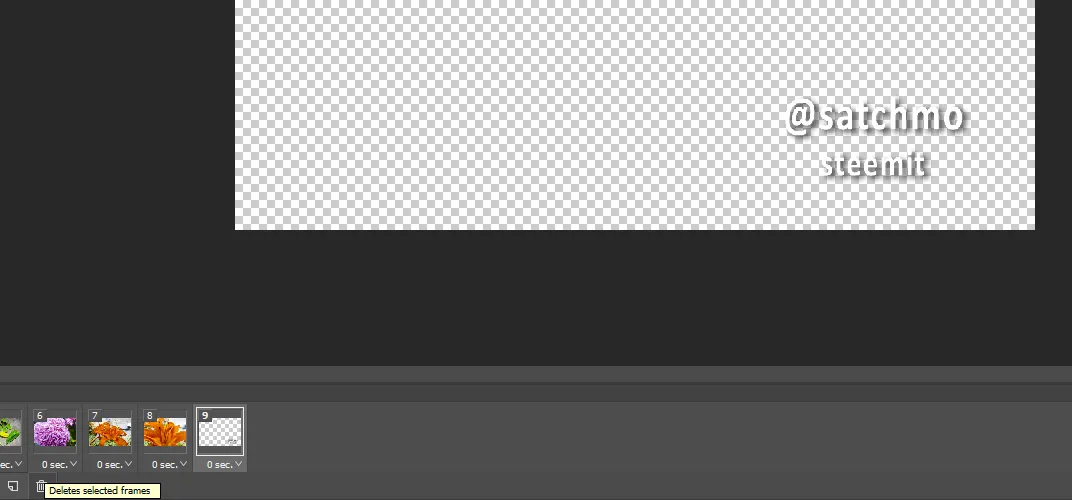
Arrange your images on the timeline in the order you wish them to appear. Select the first image.

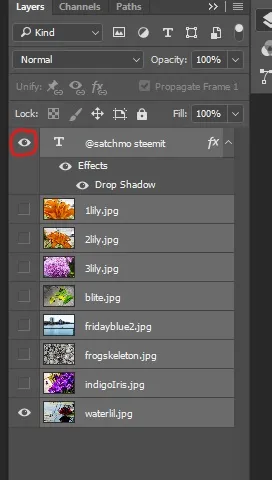
With the first image selected, in your Layers panel turn visibility back on for your watermark. It will apply the layer visibility globally to each frame in the timeline.
Now we can set the frame length
Select all of the images in the timeline and click the arrow next to the duration. I set my own duration through the other menu, 4.0 Sec - this is a matter of preference.
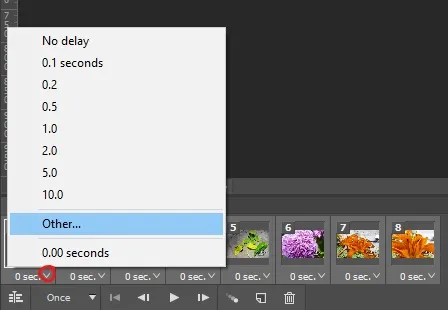
Don't Forget to loop it!
All of the images in our timeline are now set to the same length.

Click the arrow down next to where it says, Once. Select, Forever.

Finally, Review your animation thus far!

Transitions
If you want to explore animated transitions there is a button called tweening which will generate additional frames - Some times I like a dissolve, sometimes I like a hard cut.

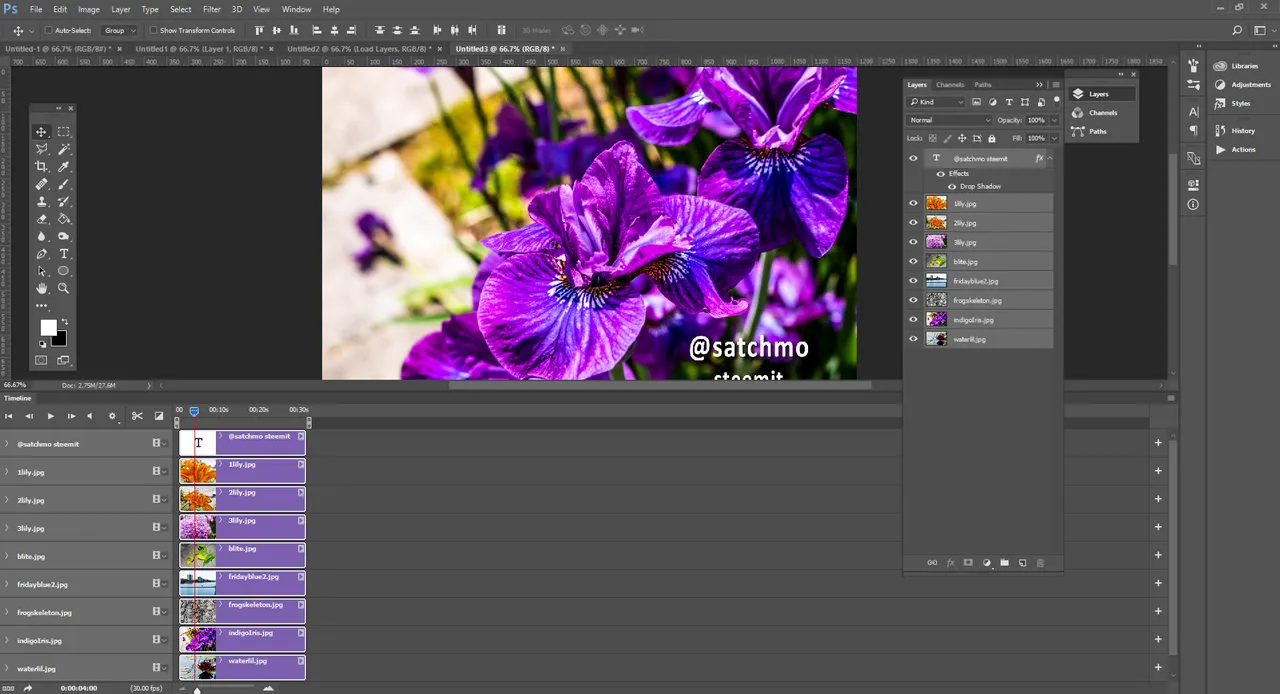
Adobe did add a visual timeline
Adobe added a timeline very similar to what you would get inside a video editor. I found it to be quite limiting, and slower than the above steps, but if you want to try it out...
Click the small button in the corner, Convert Video Timeline. Before you do this, save any work as this may disrupt what you have already accomplished.

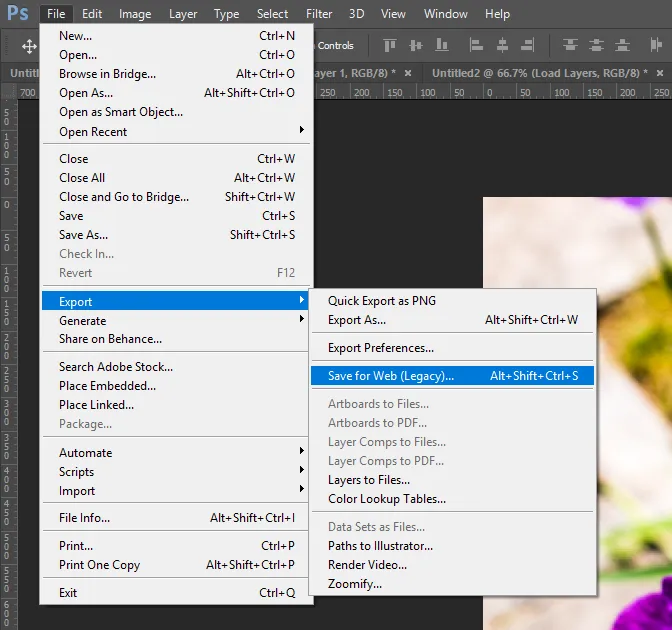
Saving your GIF
Open the file menu, go into Export and choose, Save For Web (Legacy)
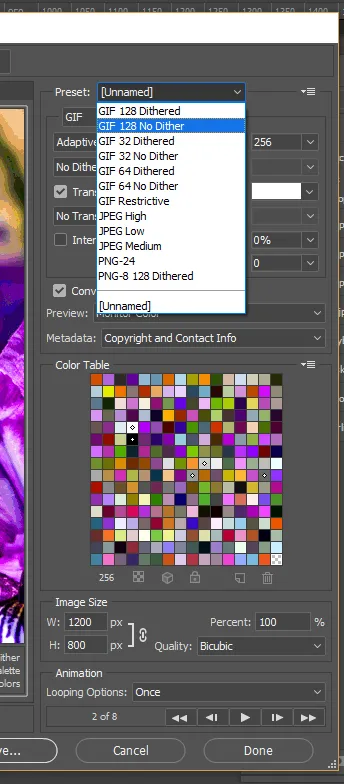
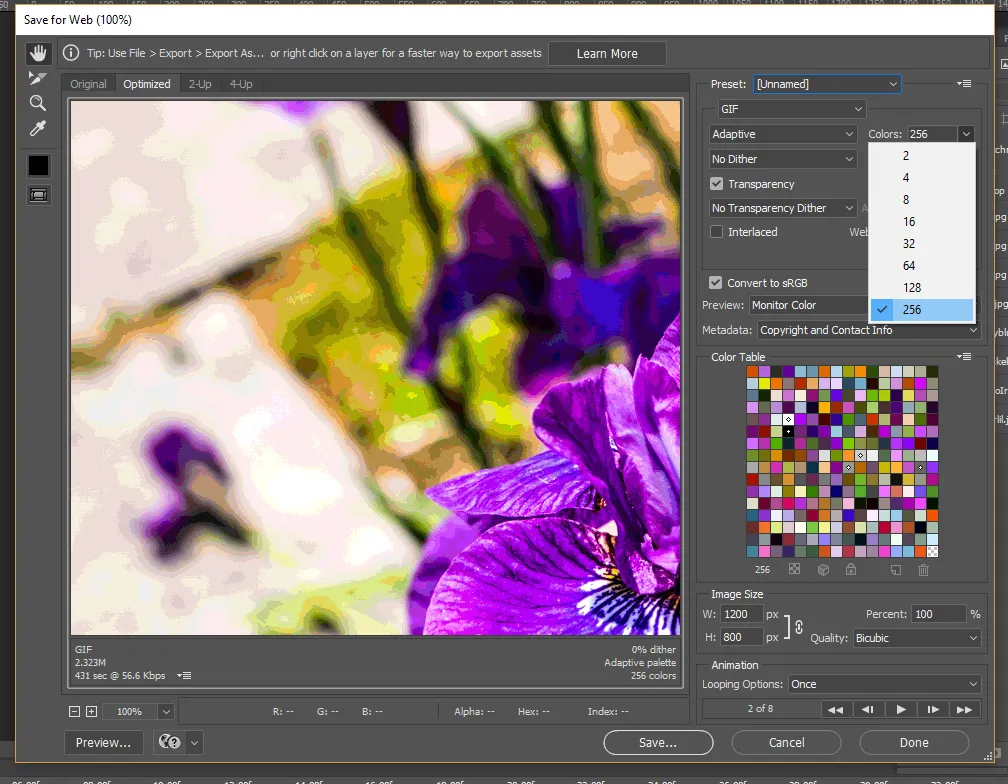
Select the preset GIF 128 No Dither
 )
)
Select 256 colors. Ensure that the gif is adaptive. You have the option to adjust the dimensions and scale here. Ensure looping options are set to forever. Hit save....
Voila!

