Hello friends of my dear Sewing Mondays in Hive, here to tell you about the realization of a new embroidery project, based on ideas from a friend in the free garden style.
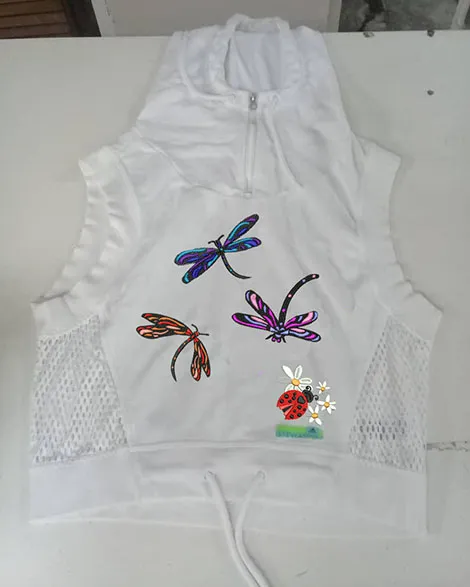
The month of July for me was full of creativity and innovation, designs like the one in the previous aqua green t-shirt were made by placing butterflies flying it was an artistic move, then we had the audacity to place some dragonflies and a ladybug on a white sleeveless sports sweeter .
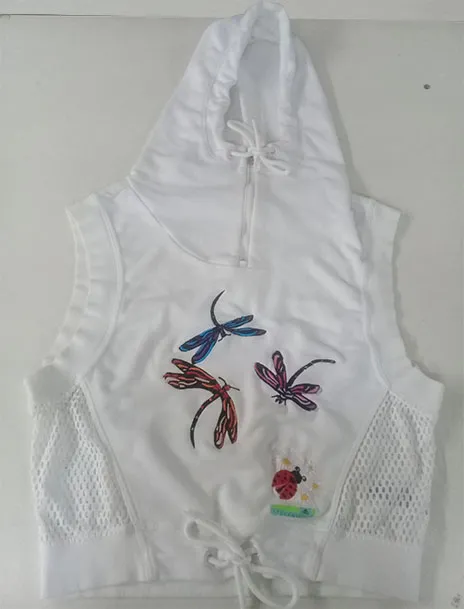

The real reason for everything was that the sweeter had suffered an accident with a coffee stain that my friend could never remove, in fact she really likes the garment and did not want to give it up.
For that she approached me to place a design that she had already been thinking about, with that ladybug, she already had the ideas, so let's see how it became a reality in embroidery.
With the Embroidery wilcom program we were able to digitize by thread previously to create the design that will lead us to achieve and visualize in advance what we are going to embroider, in addition to allowing us to make endless forms of filling in the embroidery, a variety of typographic fonts among many others more tools that allow us to carry out a job to our liking and that of a client as in this case.
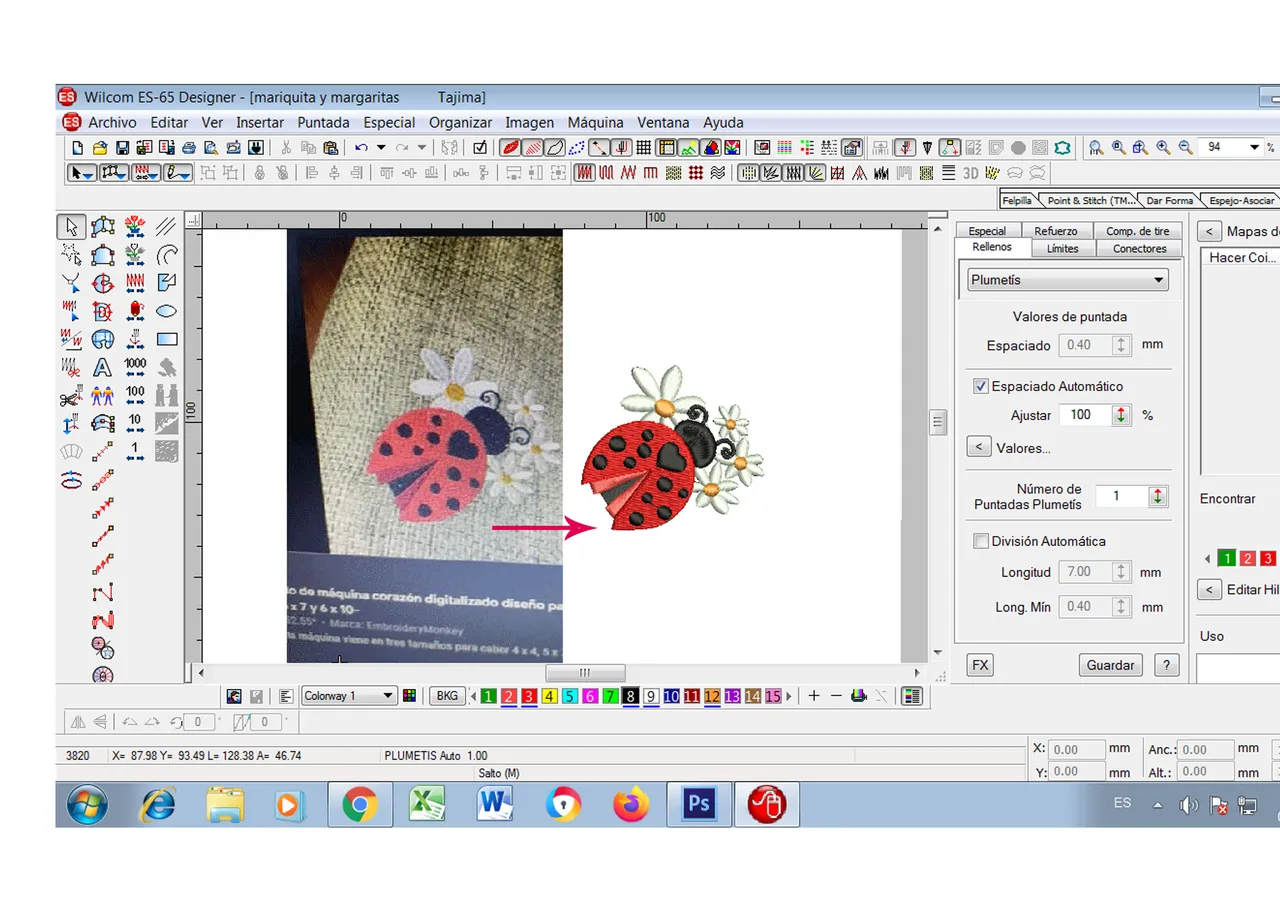
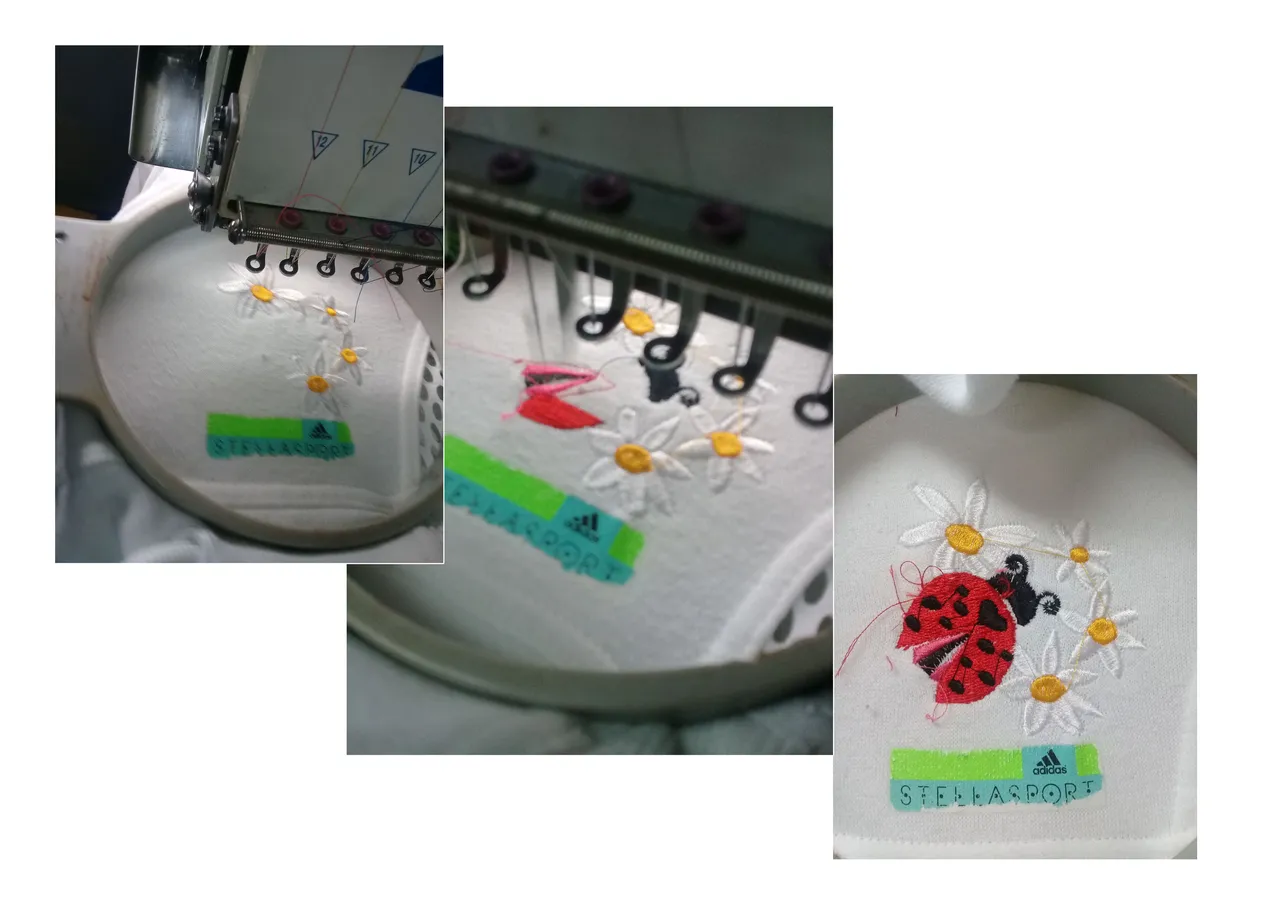
The ladybug should have a measurement of 5 cm but the daisies should be a little larger than the original image, we elaborated it to place it just above the label of the sweeter.
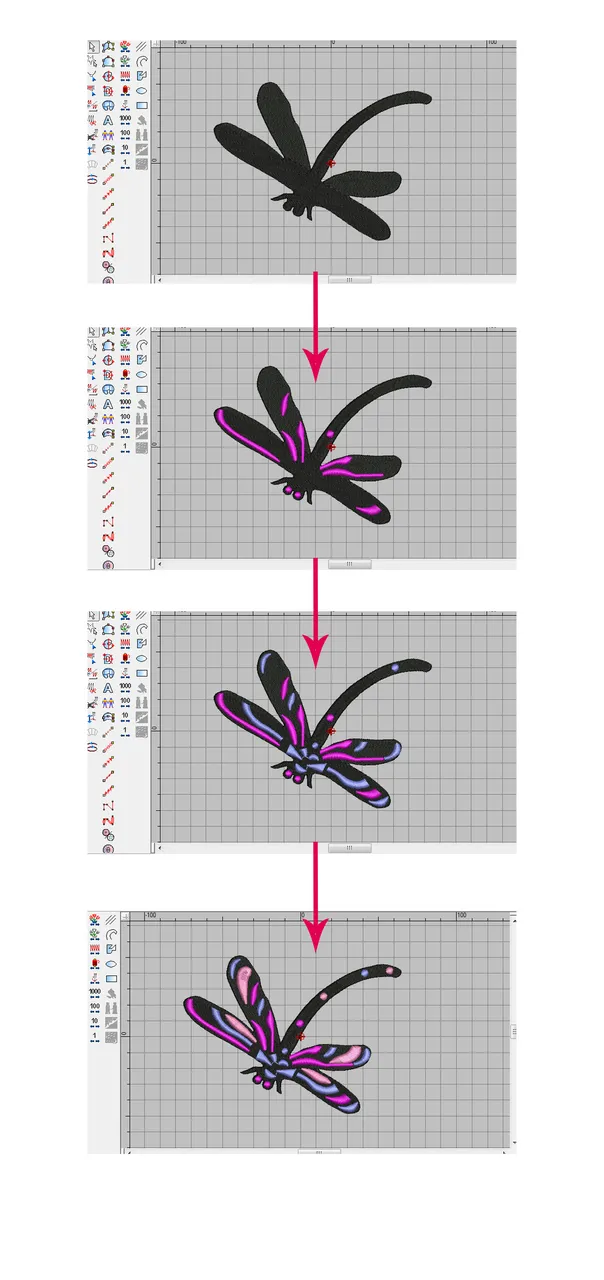
Having our ladybug embroidered in its location, we are going to go on to design the dragonflies, where each one will have different colors with a black base, trying to simplify the rays of the wings by playing with a color in different shades and classified in warm colors and cold colors.
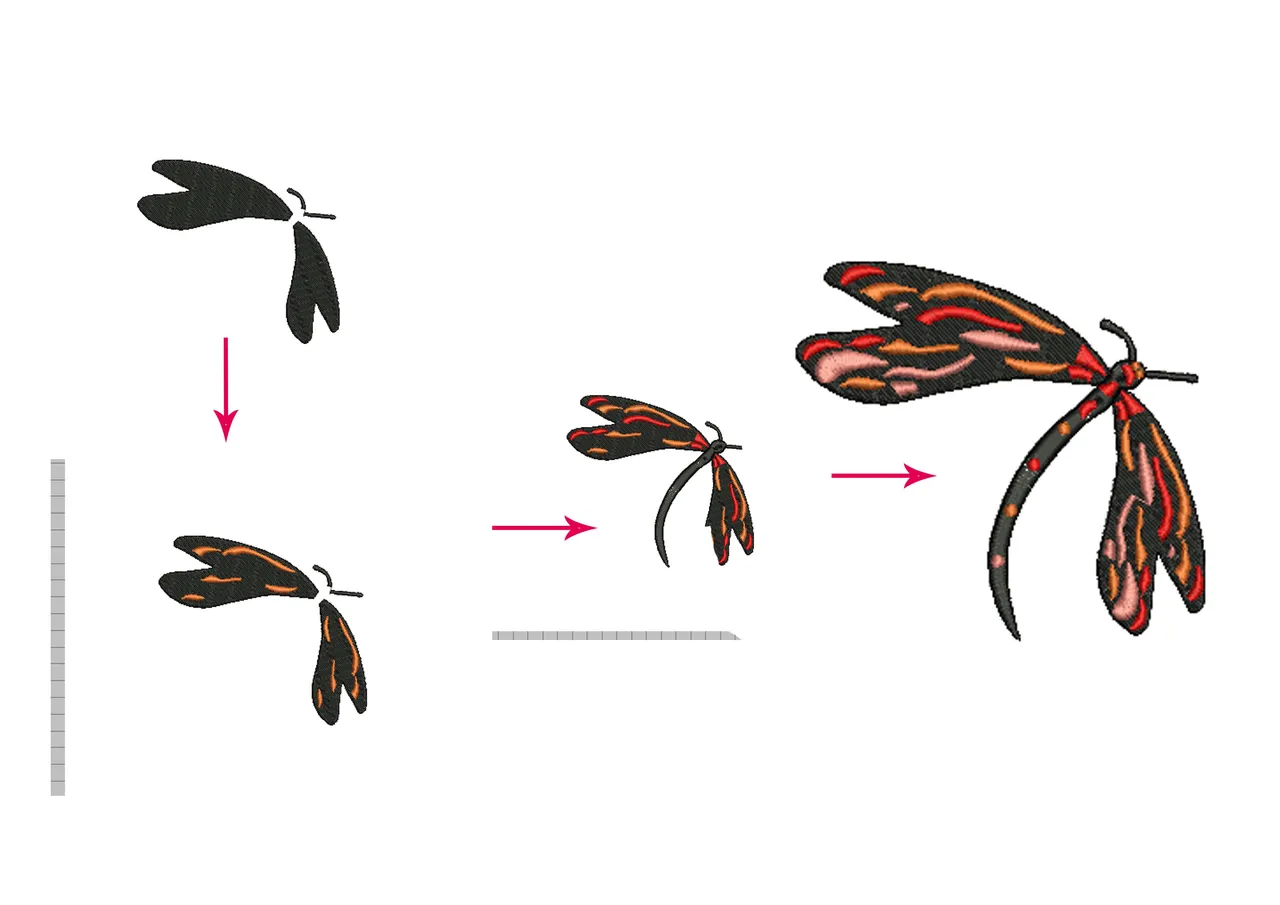
This first one is orange with red in warm tones and the dragonfly has a stylized and long shape and so we also see how we make the fuchsia and lilac dragonfly, in all of them using tatami stitch at the base and the decorations of the wings in plumetis stitch with a little more thread in the filling to give it the intensity of color and the base does not swallow the stripes above and with different directions, in this way you will have better demarcation in the forms.
So will our dragonflies now let's make a montage of how my friend wants to place them, so that she can then guide me when embroidering it on the machine and that it is just as she wants it.
I named it the design approval section:
Location of each figure according to my friend Tatiana
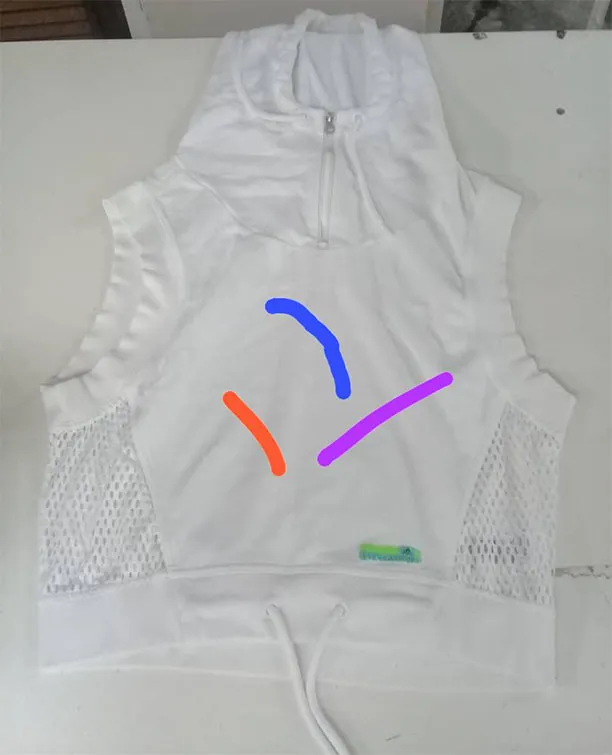
Design expectation
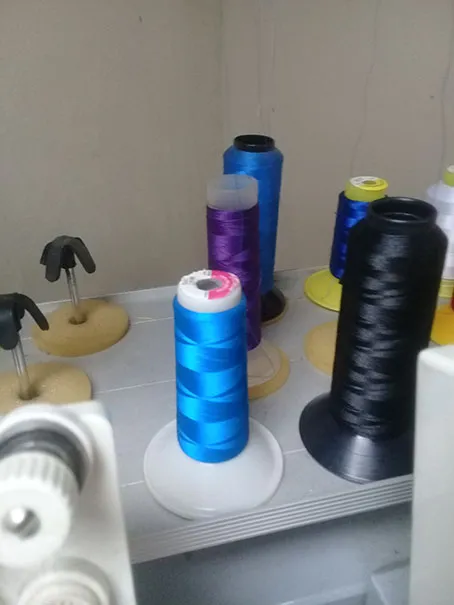
There was only a correction in the dragonfly that we changed position, already with our elaborated and approved design we go from expectation to reality with our embroidery machine, previously selecting the colors of threads to use.
Now we are going to see how the machine performed our transformation of sweeter...
Making of Ladybug and Daisies Embroidery
Elaboration of Embroidery Dragonfly cold tone blue and purple
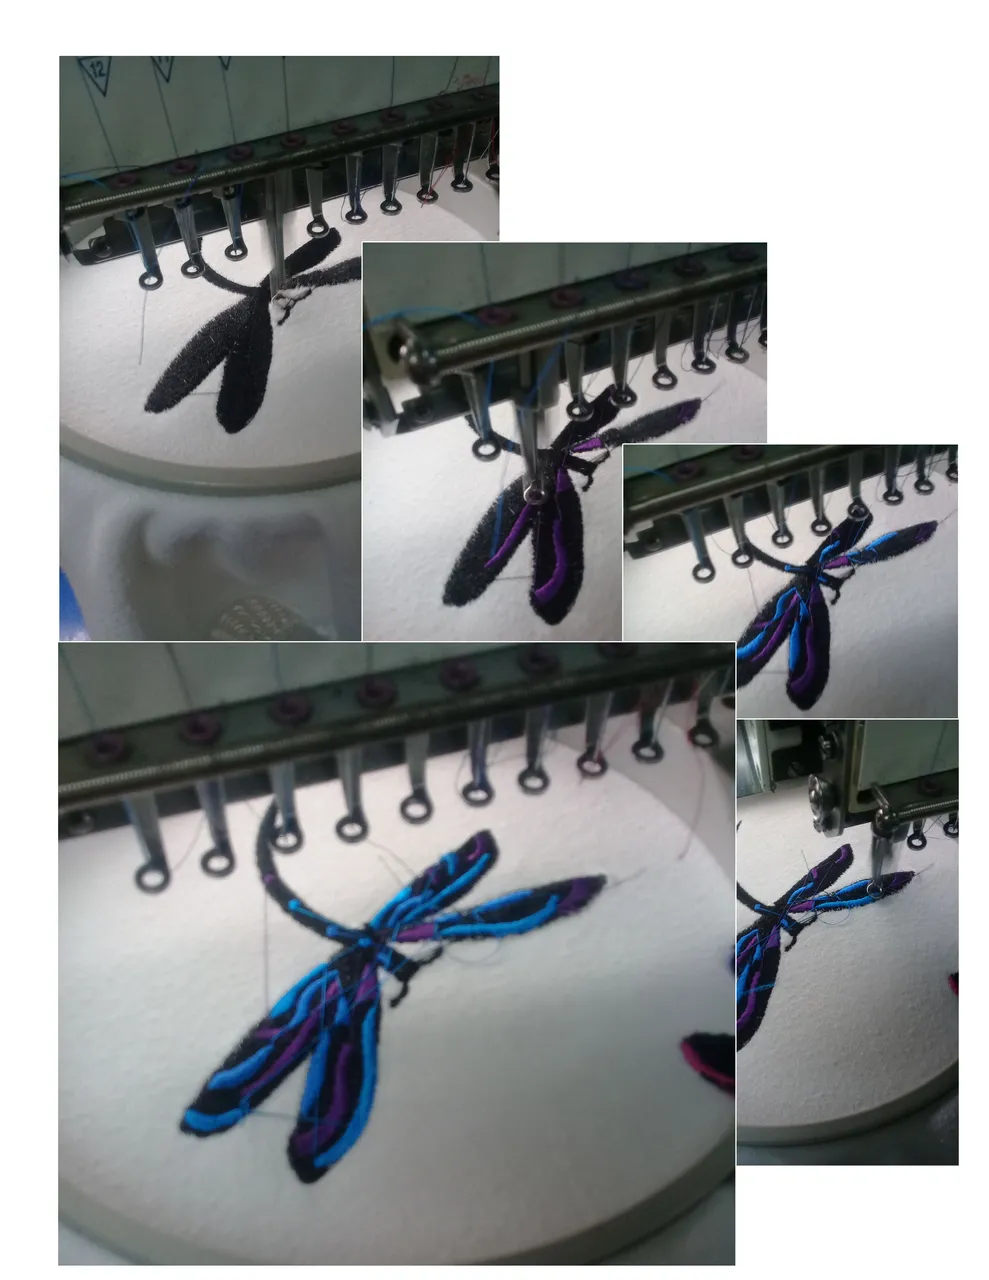
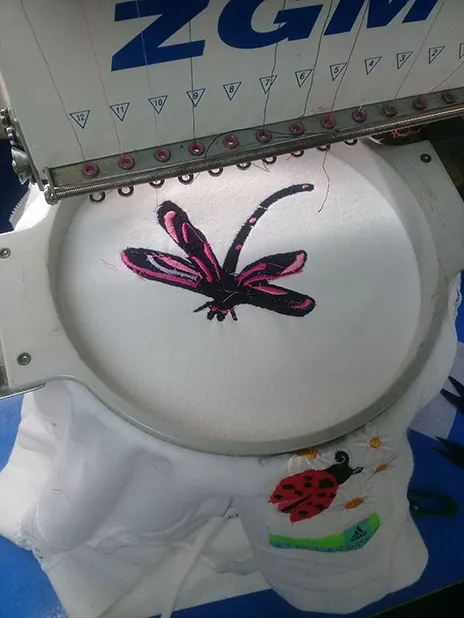
Elaboration of Embroidery Libelula fuchsia and lilac
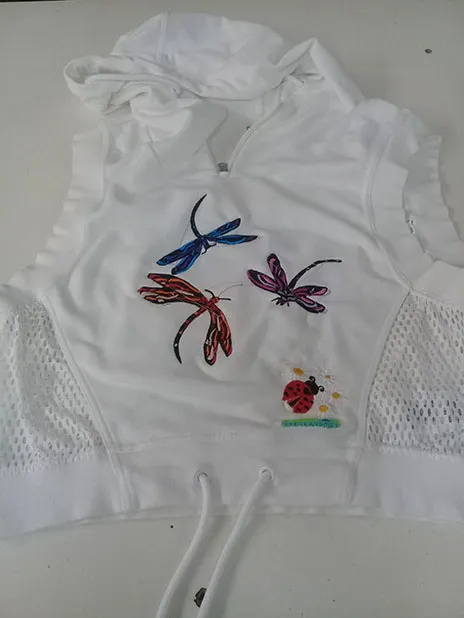
Thanks that everything went quite well and it was very similar to the pre in design that we made, the wings were a little big of the orange dragonfly and it was a little more stuck than we had thought, but in the same way my friend loved the sweeter And I am very happy with this change, because thanks to the blue dragonfly, the detail of the stain that we thought was irreversible is no longer noticeable.
Happy to have passed through this community this Monday.
I say goodbye with a blessed start of the week
With love