No se si les pasa, pero yo tengo varios pares de lentes y siempre los dejo por todos lados, necesito tener un par de emergencia en mi cartera,esto lo hago desde una vez que viaje desde mi ciudad de origen a la capital de mi país y perdí mis anteojos en el autobús, pasé 4 largos y borrosos días sin mis lentes.
También recuerdo haber perdido unos en una sala de cine, se me cayeron y nunca los pude encontrar, en fin soy un verdadero desastre con los lentes, por eso decidí hacer este estuche acolchado para guardar mis gafas en la cartera.
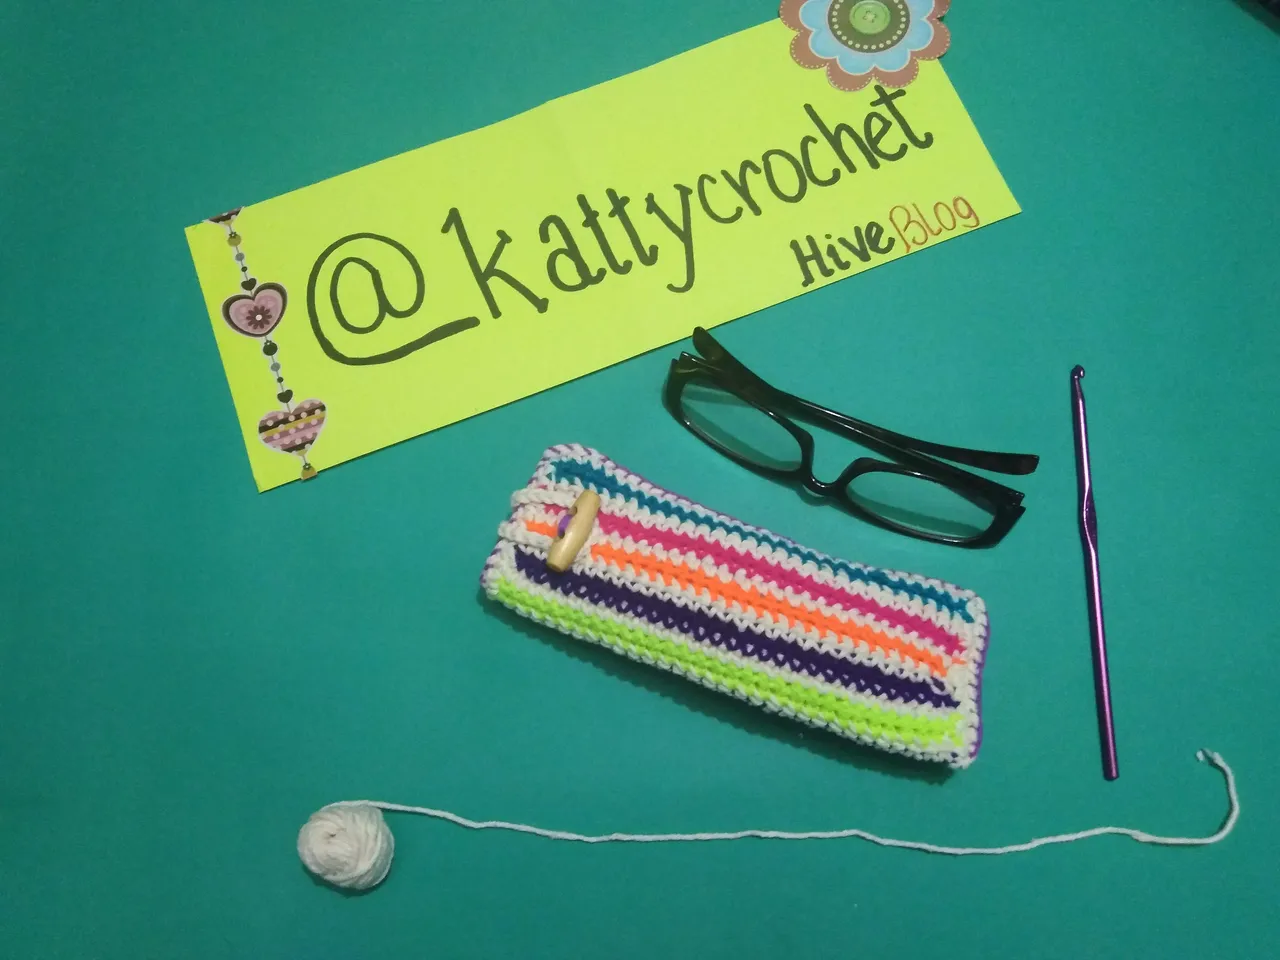
Hello my dear Needleworkers, how good to be able to share with you another Needle Monday and appreciate your creations and share mine. This time I bring you a slightly different project. It is a colorful case to store your glasses.
I do not know if it happens to you, but I have several pairs of glasses and I always leave them everywhere, I need to have an emergency pair in my wallet, I do this from once I travel from my city of origin to the capital of my country and I lost my glasses on the bus, I went 4 long, blurry days without my glasses.
I also remember having lost some in a movie theater, I dropped them and I could never find them, in short I am a real disaster with lenses, so I decided to make this padded case to store my glasses in my wallet.

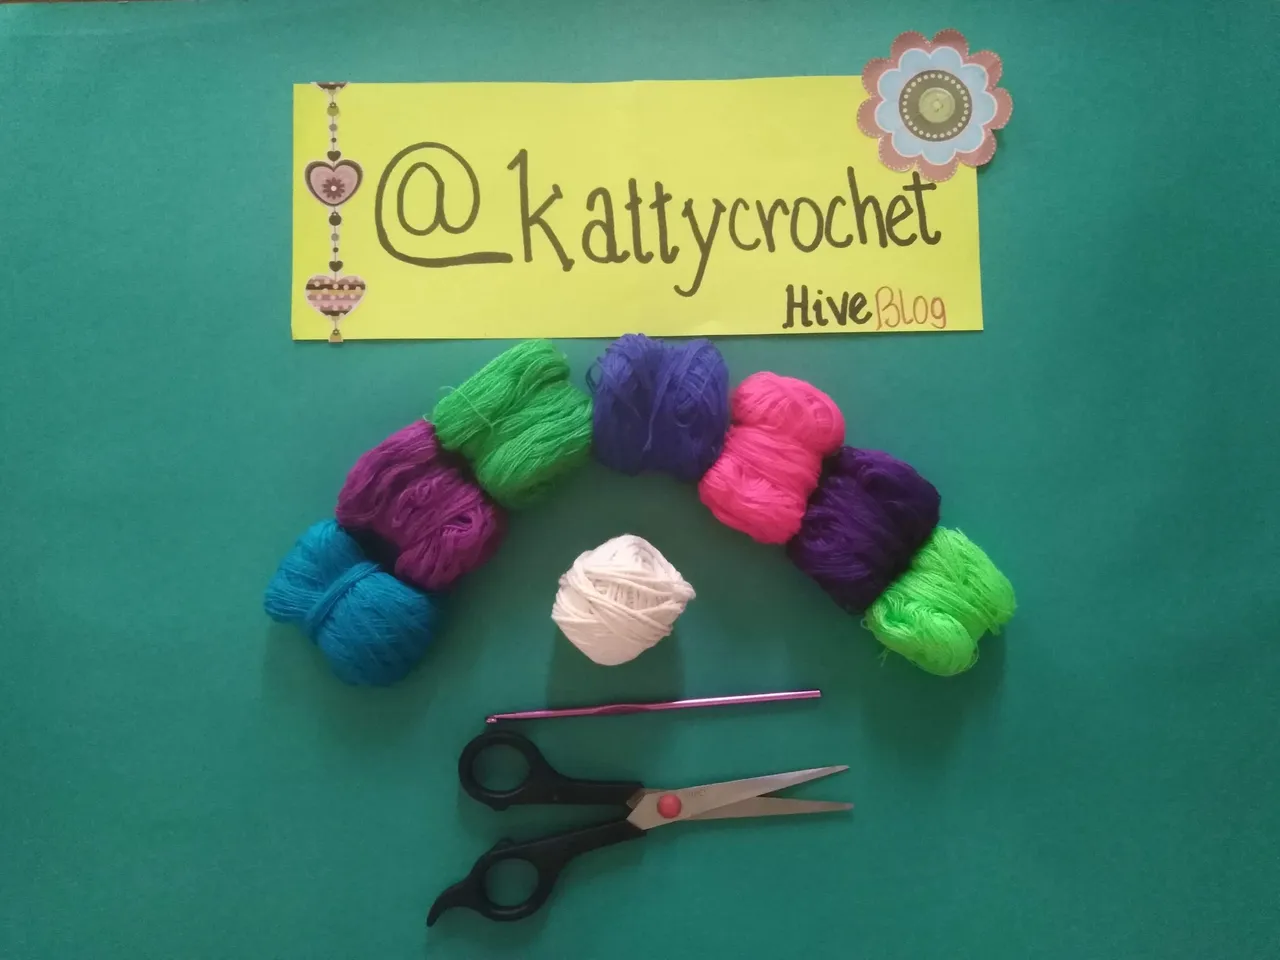
- Hilo pabilo crudo color natural
- Estambres de diferentes colores
- Crochet # 3 mm
- Tijeras
- Retazo de tela
- Relleno antialérgico
- Natural color raw wick thread
- Stamens of different colors
- Crochet # 3 mm
- Pair of scissors
- Piece of cloth
- Anti-allergic padding

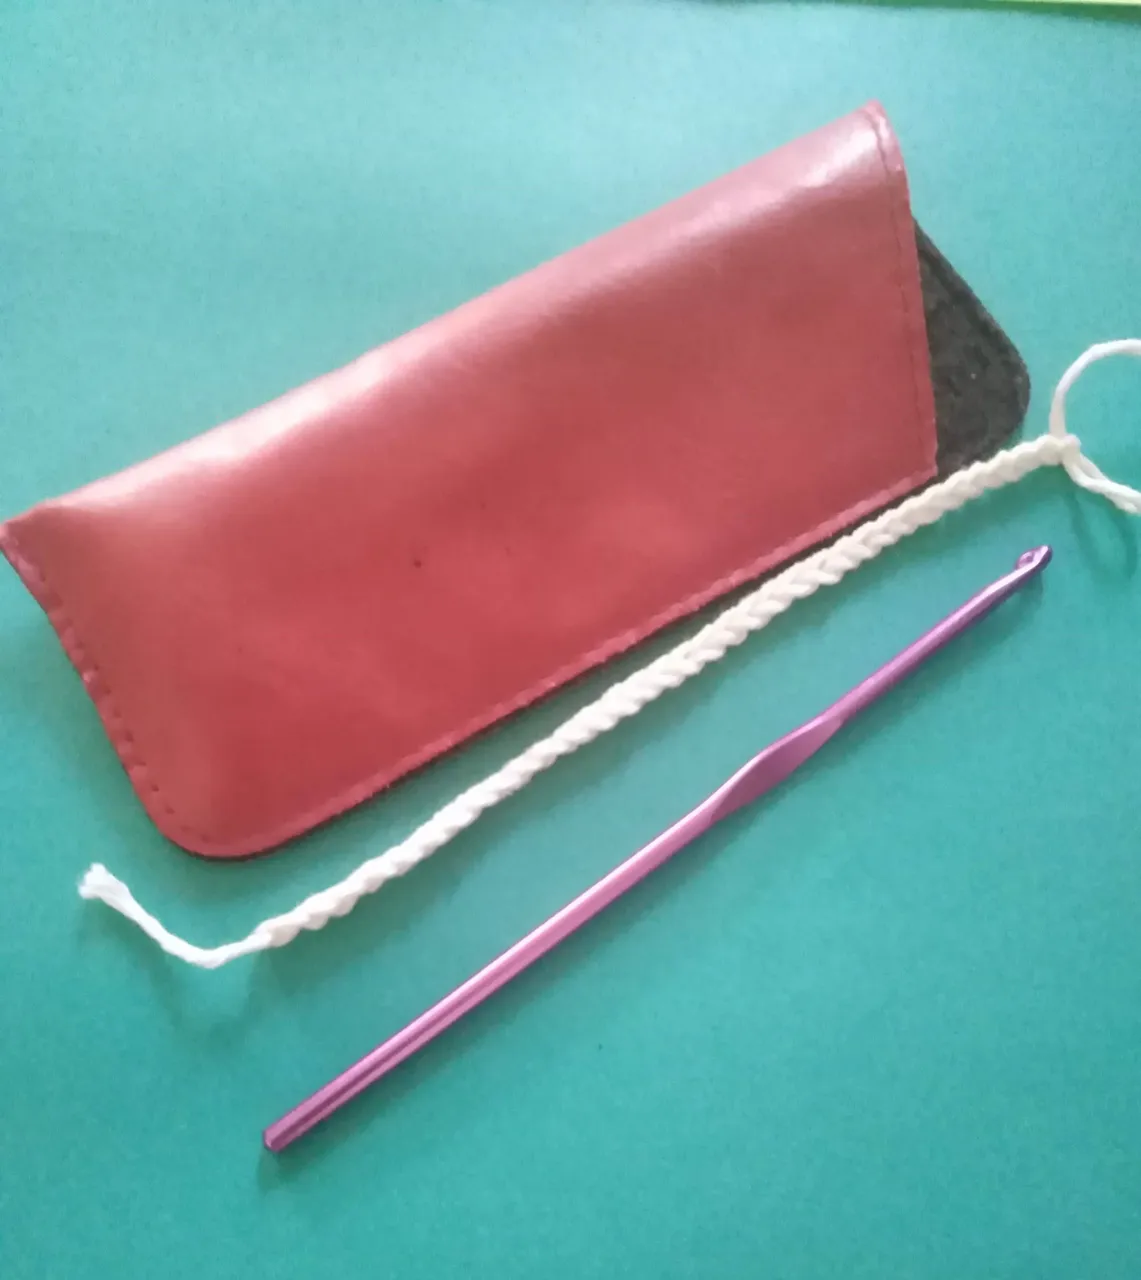
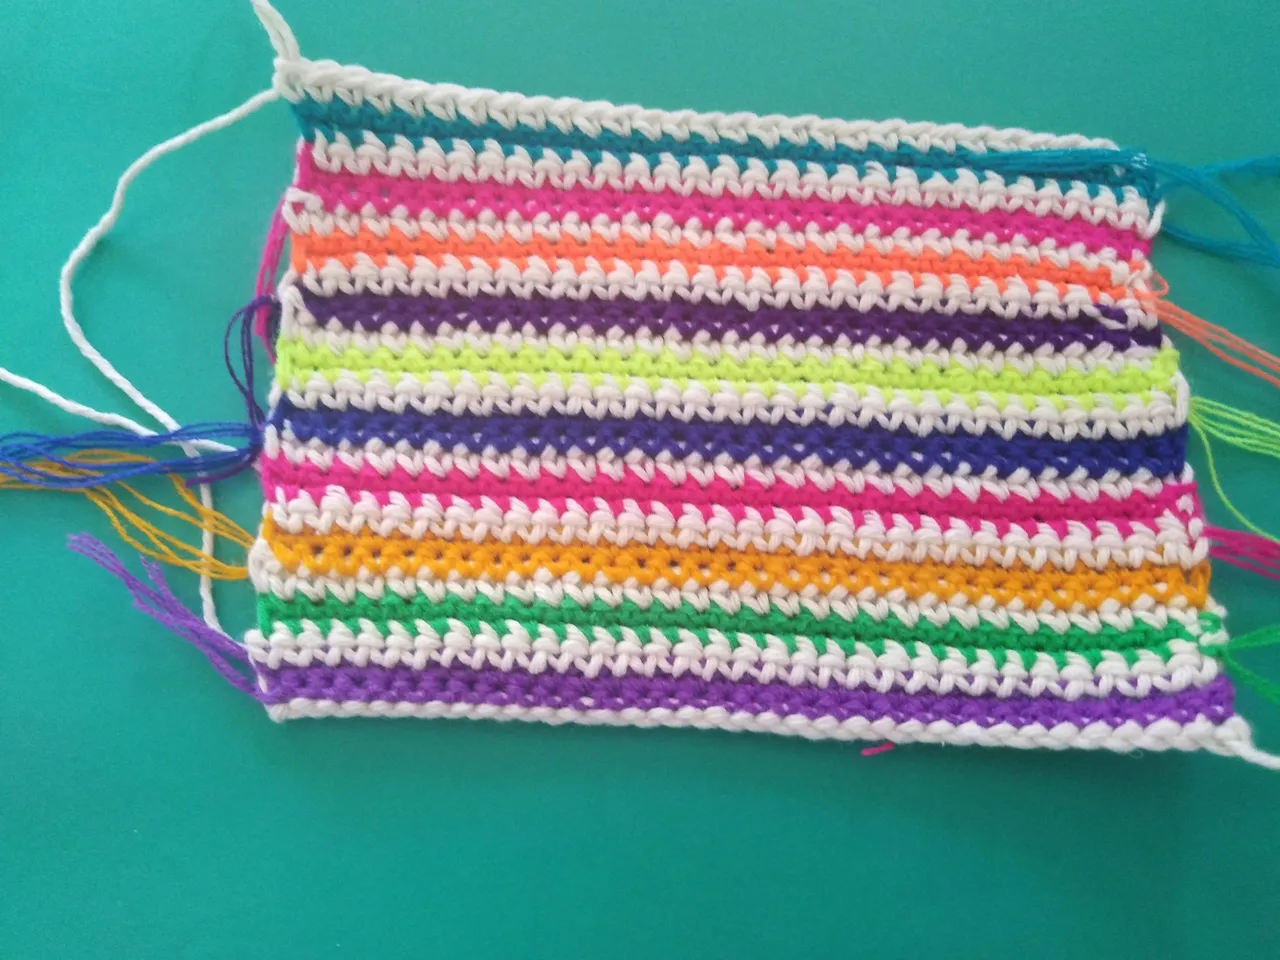
The first thing I did was take a lens case as a reference and start knitting based on that measurement. I started with a chain-link base with wick yarn to give it a more rustic and firm touch at the same time.
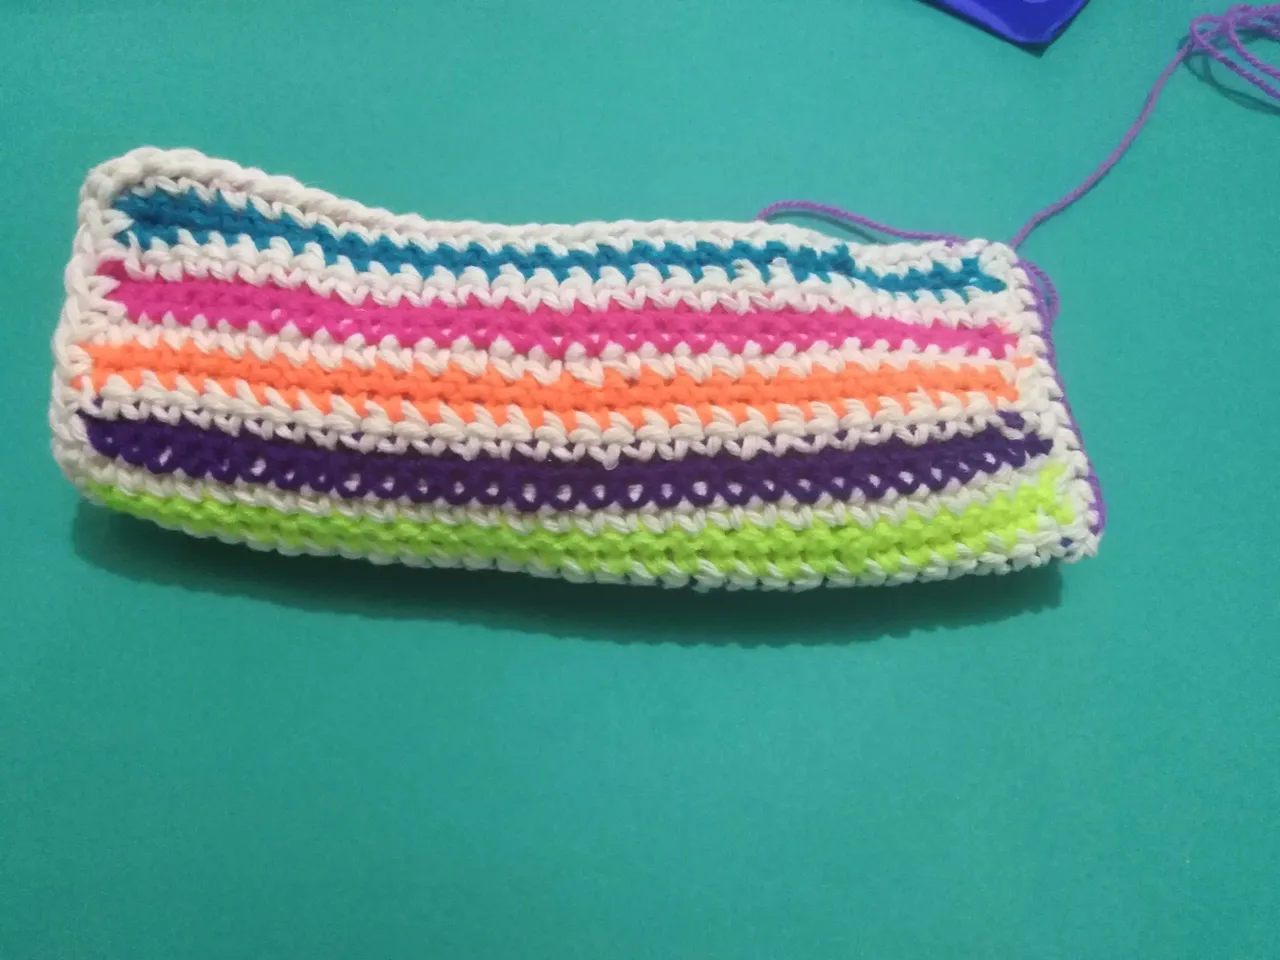
The next thing was to weave colored lines horizontally; interleaving 1 line of single crochets in wick and 2 lines of single crochets in color.
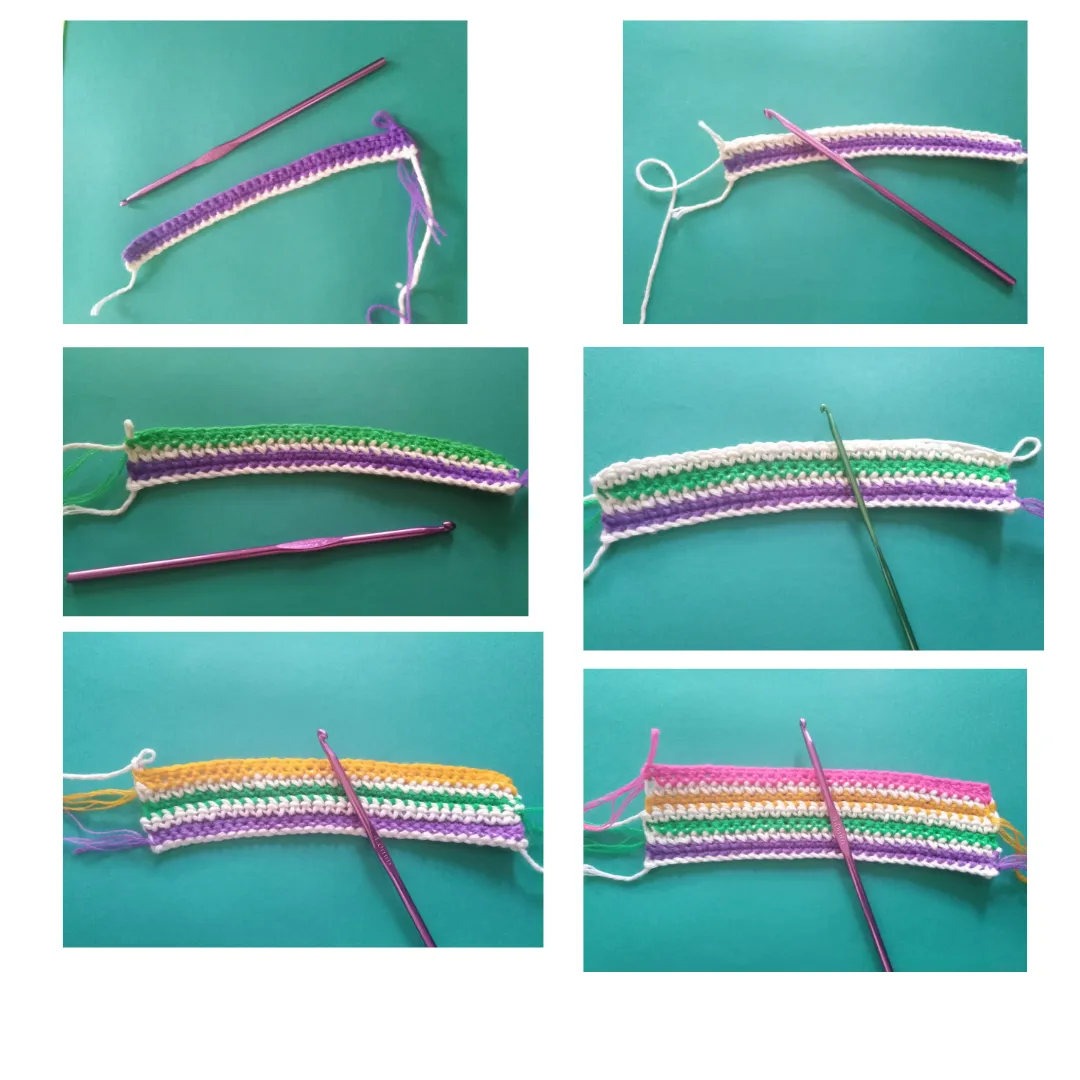
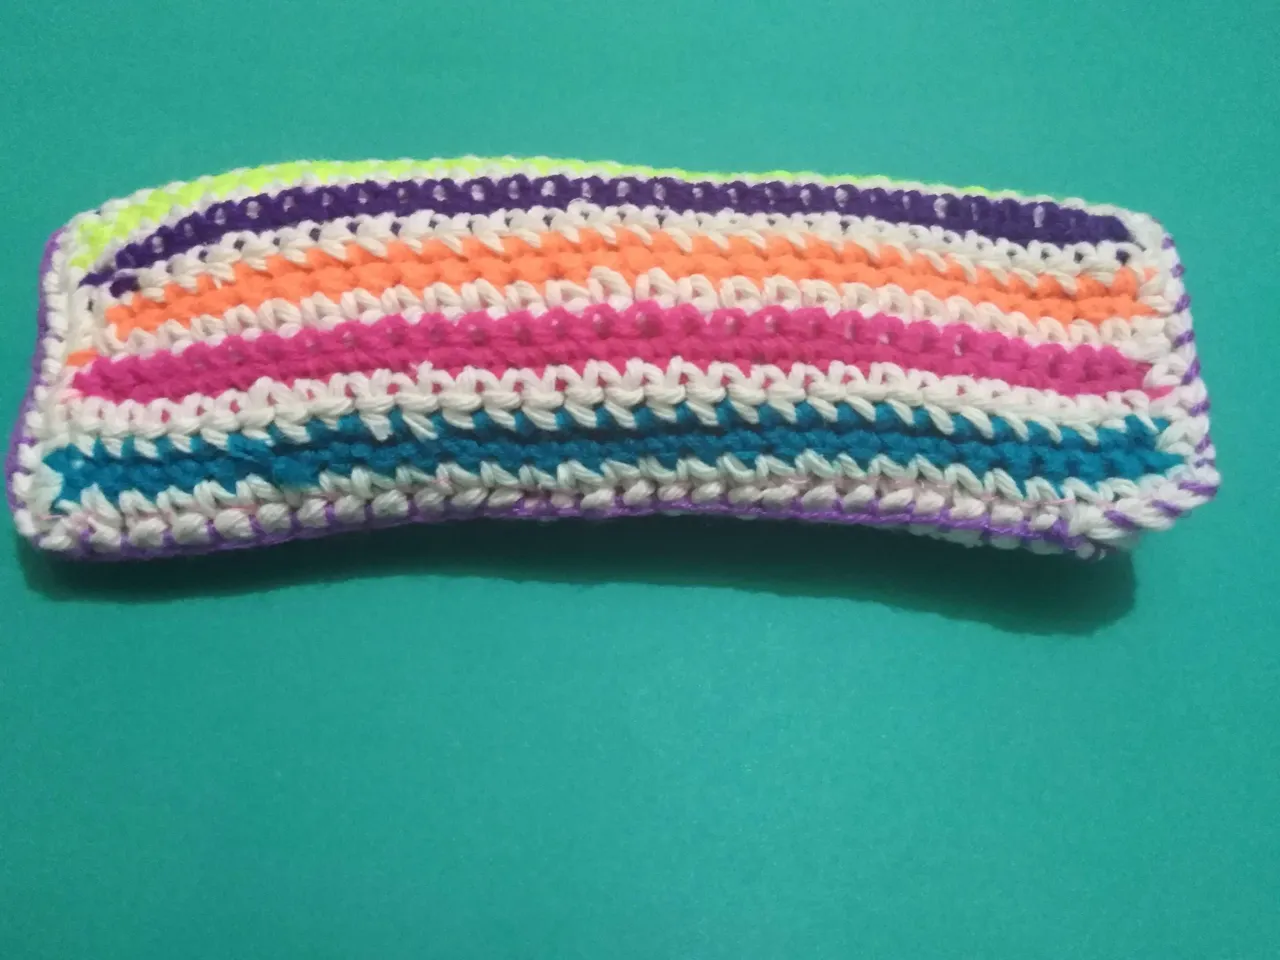
With this sequence of colors and the wick yarn, I continued weaving until I obtained a square of the necessary size so that when folded in half it would be the size of the reference case.
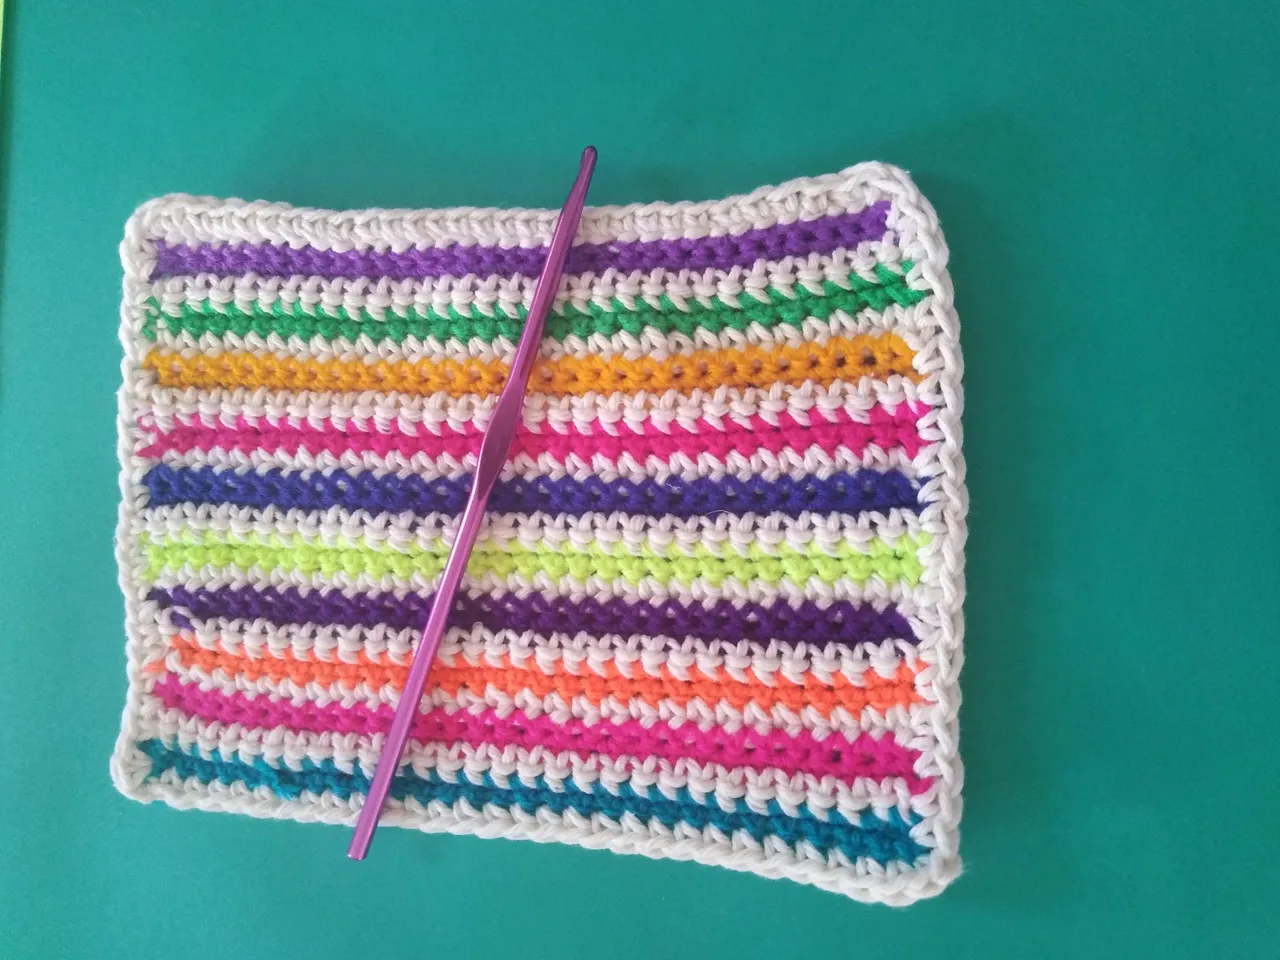
Next, I knitted a single crochet border with the wick and hid the excess threads of the colored threads.
Now it is time to do the internal part. To do this, I cut the piece of fabric to the size of the fabric; leaving a few extra inches to fold in.
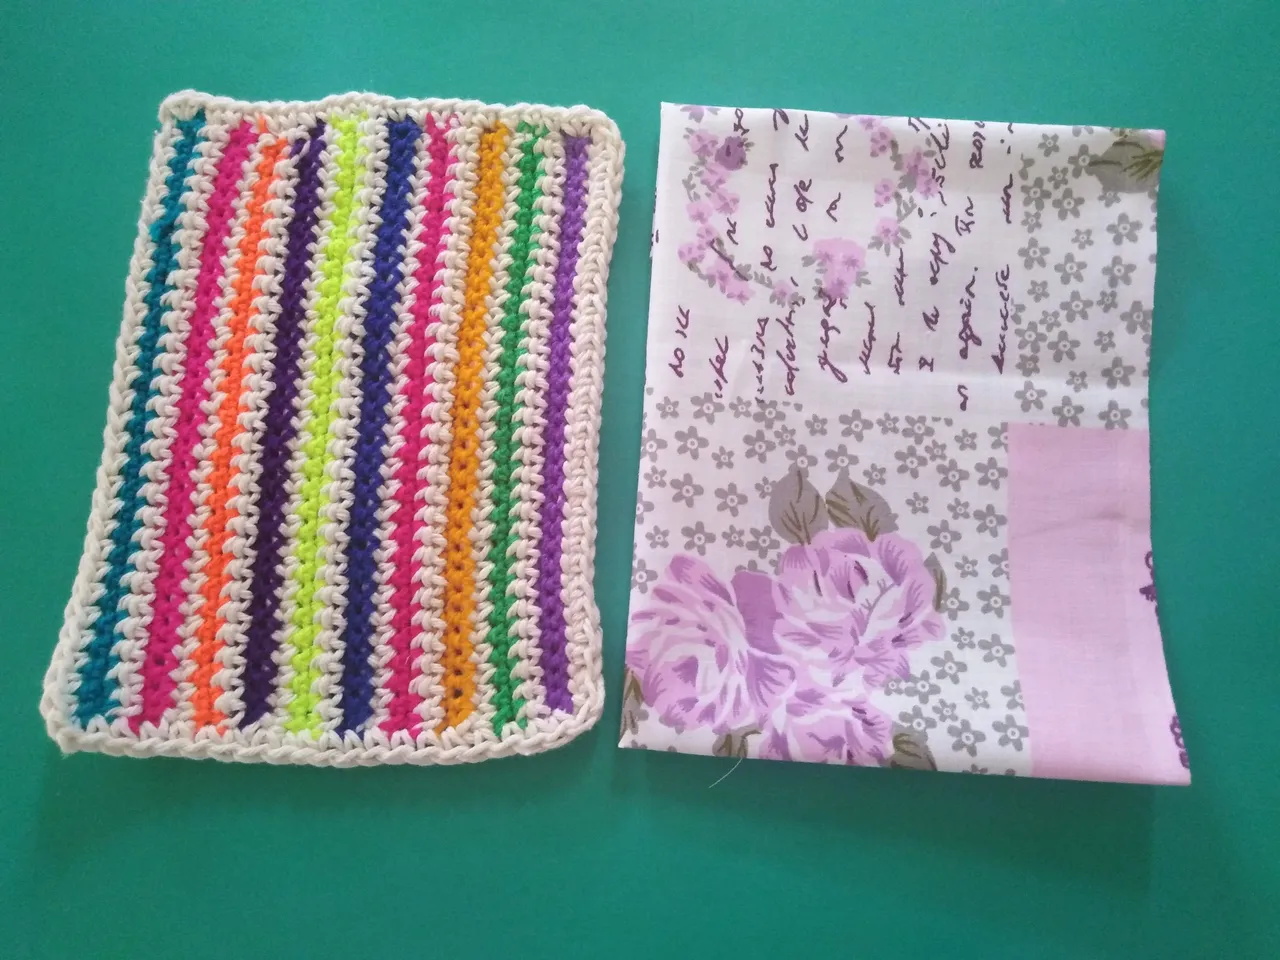
Then, I attached the fabric to the fabric with some pins and sewed it, leaving an opening to introduce the filling and then closed. The square was padded to better protect the glasses.


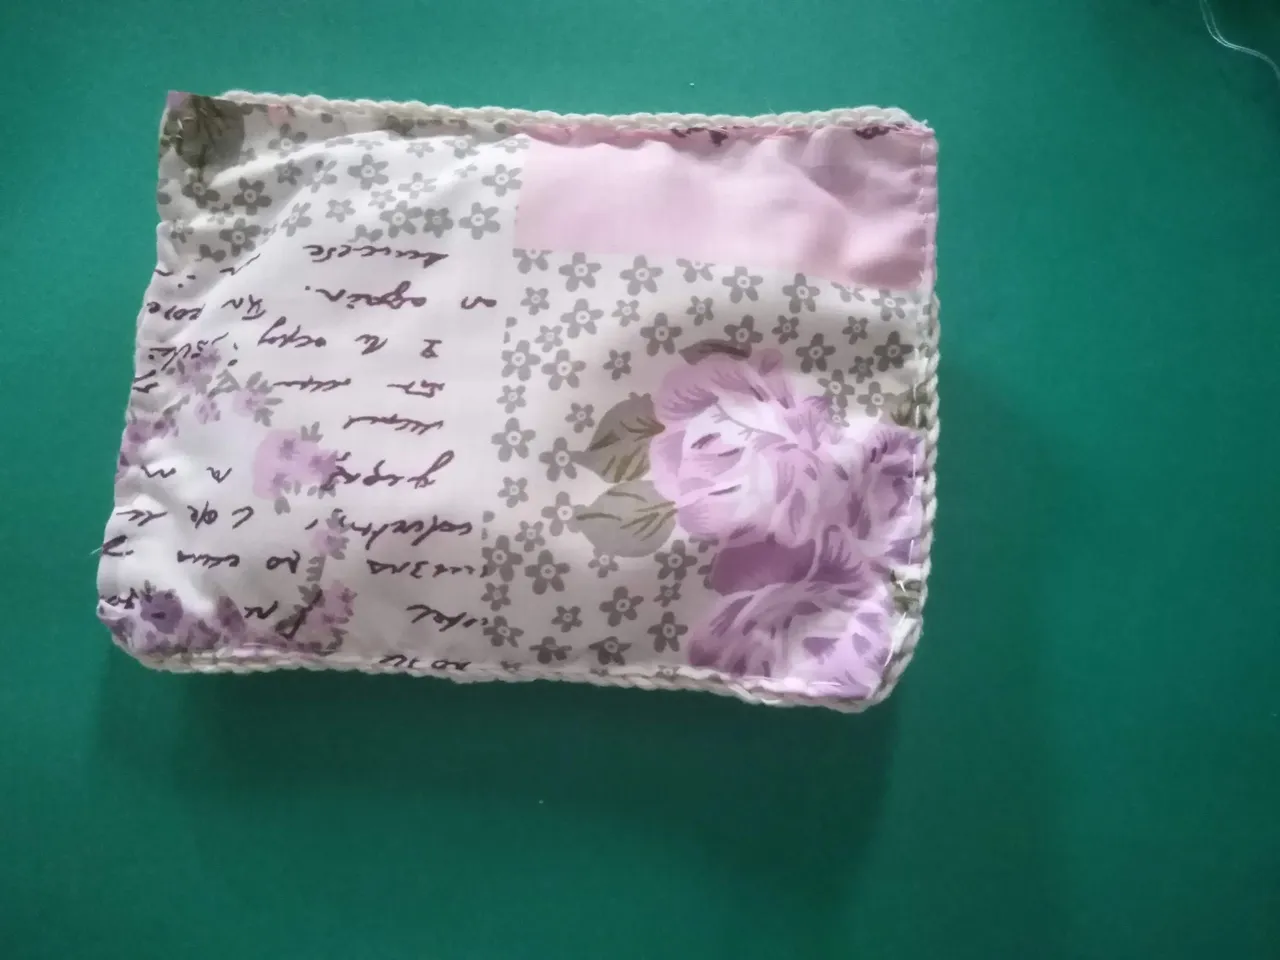
Then I folded the square in half and stitched the edge with colored yarn and a blunt needle.
To finish, I placed a wooden button to complement the rustic wick and wove a small cord to hold the button.
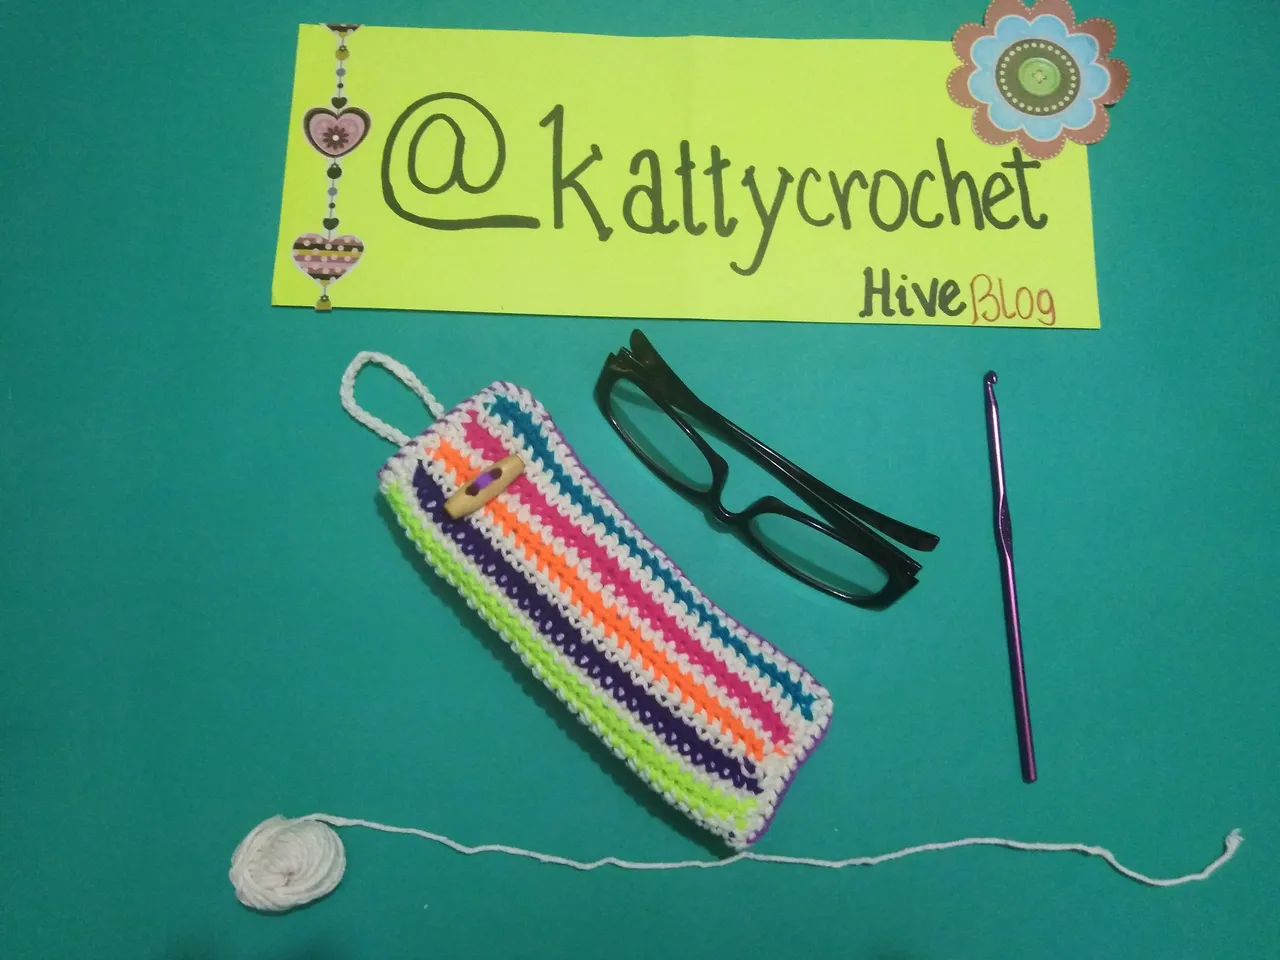
I hope you liked the end result. Now I hope I never lose my glasses anywhere else thanks to this colorful case. Thanks for visiting my blog, greetings and blessings!
