If you want to save packaging and plastic waste and therefore switch from shower gel etc. to soap then you also need a storage facility for the soap in the shower. And what could be closer than a small soap bag? There is a nice one made of sisal, but I didn't find it anywhere in the city and I didn't want to order it online. Yesterday I had the idea to crochet one myself.
Wenn man Verpackungs- und Plastikmüll einsparen will und somit von Duschgel und Co. auf Seife umsteigt dann benötigt man auch eine Aufbewahrungsmöglichkeit für die Seife in der Dusche. Und was liegt näher als ein kleines Seifensäckchen? Es gibt ein Schönes aus Sisal, aber das habe ich hier in der Stadt nirgends gefunden und online bestellen wollte ich nicht. Gestern kam ich dann auf die Idee, einfach eines selbst zu häkeln.
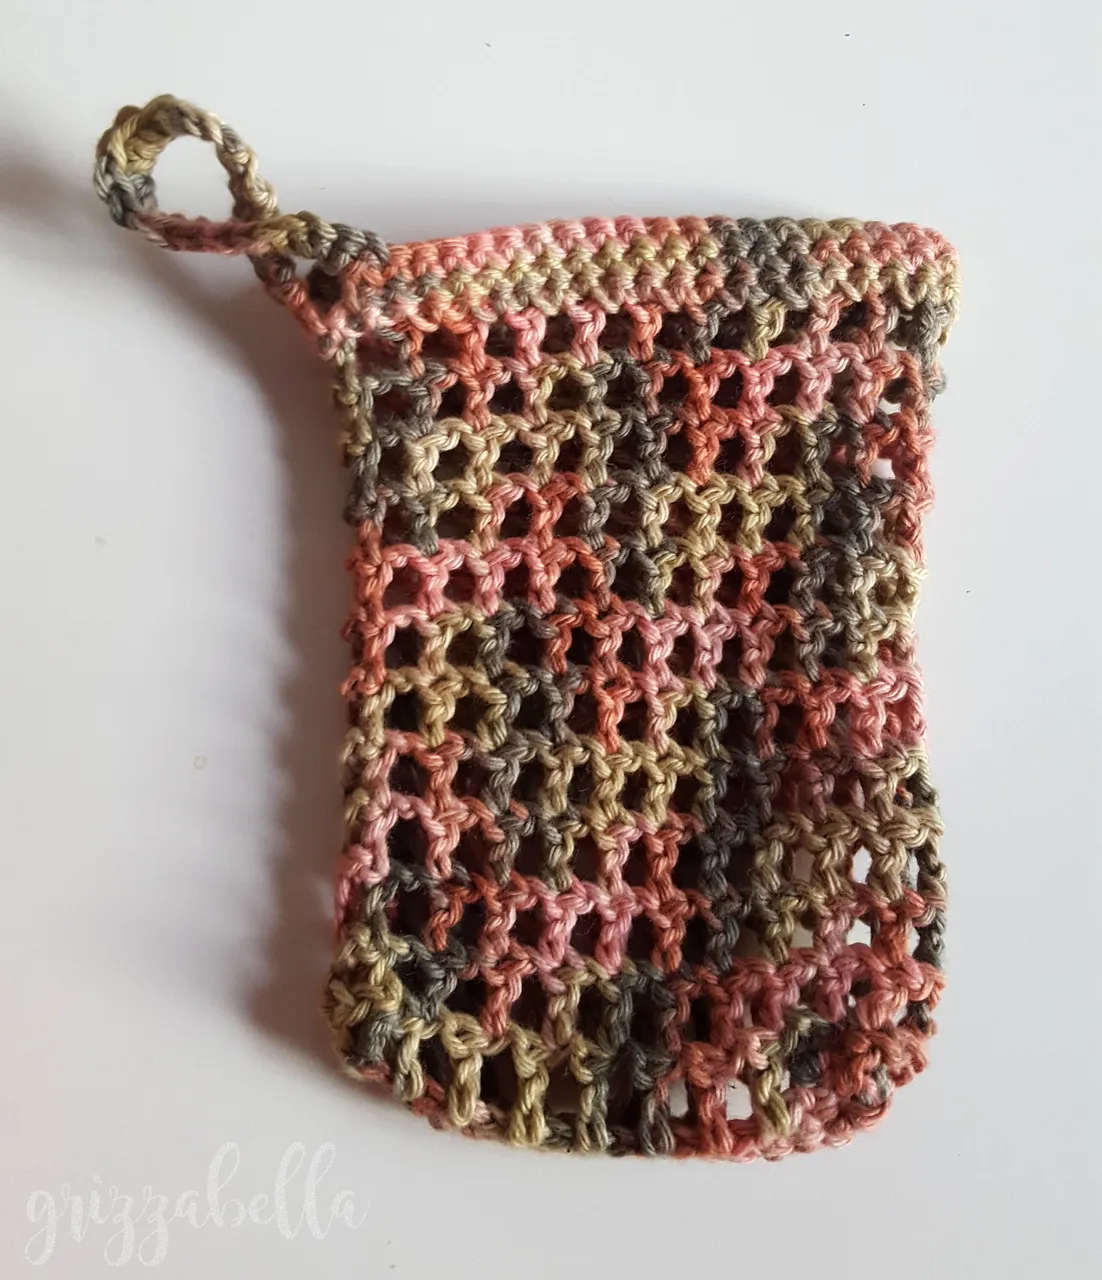
Das Säckchen lässt sich ganz schnell und einfach häkeln.
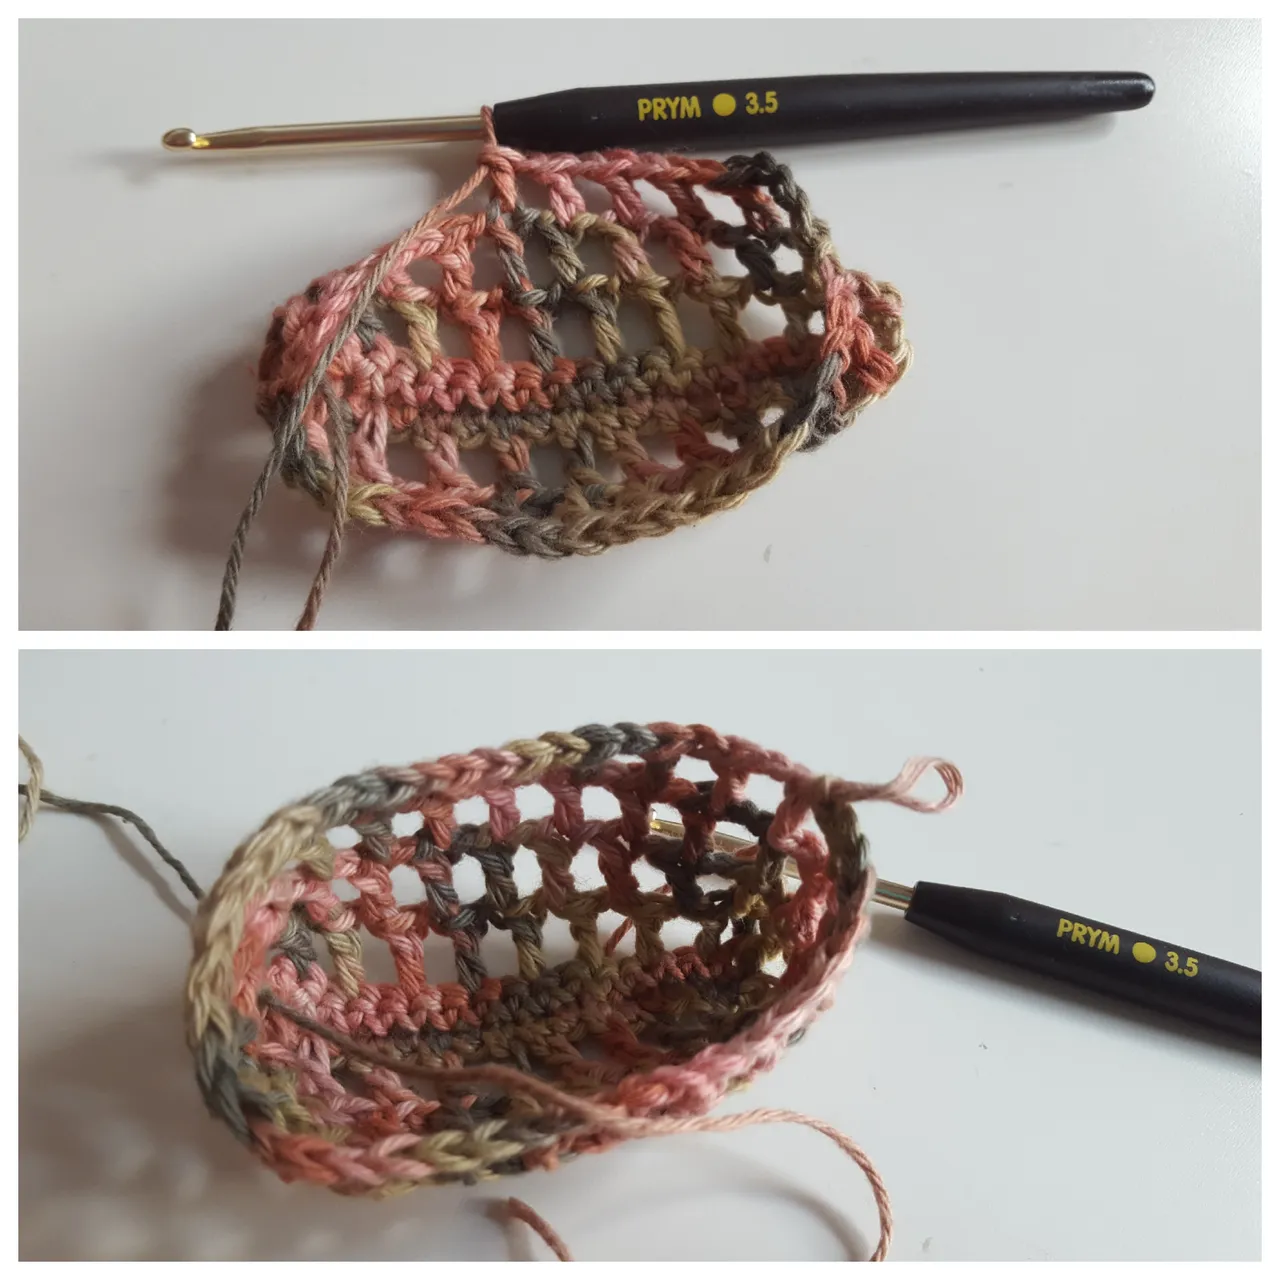
Ich gebe dir sogar gleich noch die Anleitung zur Hand:
Für den Boden beginnst du mit einer Reihe Luftmaschen - je nachdem wie groß dein Seifensäckchen werden soll, reichen 10 bis 15 Maschen. Nun wechselst du mit einer Luftmasche in die 2. Reihe und häkelst feste Maschen zurück. Dann noch eine 3. Reihe feste Masche häkeln.
Nun folgen die Seitenwände: Ab jetzt wird reihum gehäkelt, jede neue Runde wird mit 2 Luftmaschen begonnnen, dann werden im Wechsel Luftmaschen und Stäbchen gehäkelt. Die Stäbchen der nächsten Runde immer in das Stäbchen der vorherigen Runde häkeln, so entsteht ein schönes Netzmuster. Das machst du so lange, bis du die gewünschte Höhe erreicht hast.
The bag is quick and easy to crochet.
I'll even give you the instructions right away:
For the bottom you start with a row of chains - depending on how big you want your soap bag to be, 10 to 15 chains will do. Now you change with one chain into the 2nd row and crochet back single crochets. Then crochet a 3rd row of single crochets.
Now the side walls follow: From now on you will crochet in turn, each new round will start with 2 chains, then you will crochet alternately chains and double crochets. Always crochet the double crochets of the next round into the double crochets of the previous round, this will create a nice net pattern. Continue until you have reached the desired height.
Zum Abschluss werden noch Saum und Henkel gehäkelt. Für den Saum wechselst du mit einer Luftmasche in die nächste Reihe und umhäkelst diese mit festen Maschen. Die 2. Reihe des Saumes beginnst du mit ca. 30 Luftmaschen = Henkel, erst danach häkelst du eine weitere Runde feste Maschen. Es folgt eine 3. Runde feste Maschen, dabei umhäkelst du auch den Henkel und schließt die Runde mit einer Kettmasche.
Fertig ist dein Seifensäckchen :)
Finally crochet hem and handle. For the hem, change to the next row with one chain and crochet single crochets around it. Start the 2nd row of the hem with approx. 30 chains = handle, then crochet another round of single crochets. A 3rd round of single crochets follows, while you also crochet around the handle and close the round with a slip stitch.
Your soap bag is ready :)