LINUX
BASIC PRE-INSTALL GUIDE OF
MX-19.4_x64.iso on the laptop ASUS_n551
EDITED IN 2021
PRELIMINARY STATEMENT
It's been 5 years since the install of UBUNTUamd64-MATE_15.10 on my old laptop ASUS_n551. I've noticed during this last weeks that no more uptdates/upgrades was possible to do. A lot of unfixable issues by missing/broken-packages/repositories stuff or other kind of weird error messages was reported while I was trying to do the updates. So I have deduced that this distro version is abandoned and no more maintained or sort of. I've noticed that MX-Linux is actually the first distro ranked on distrowatch.com and so my decision to opt for it. This distro offers two kind of graphic interface, an Xfce/Fluxbox one and a KDE one. Given the old age of my laptop I opted for the first one.
As title say this post isn't a complete install process explanation but only represents the preliminary stage. In the next days and weeks I will publish an almost complete and detailed overview of the entire install process.
STEP 1
wget -bqc http://ftp.riken.jp/Linux/mxlinux-iso/MX/Final/MX-19.4_x64.iso-b : Go to background immediately after startup. If no output file is specified via the -o, output is redirected to wget-log.
-q : Turn off Wget's output (saves some disk space)
-c : Resume broken download i.e. continue getting a partially-downloaded file. This is useful when you want to finish up a download started by a previous instance of Wget, or by another program.
CHECK INTEGRITY

$ md5sum MX-19.4_x64.iso $ sha256sum MX-19.4_x64.iso

BURN THE ISO IMAGE
Once plugged in the usb stick be sure that it is unmounted before to burn the iso on it. The commands to burn the iso image should be something like that:
# umount /dev/sdb
# dd if=MX-19.4_x64.iso of=/dev/sdb bs=4M && sync
STEP 2
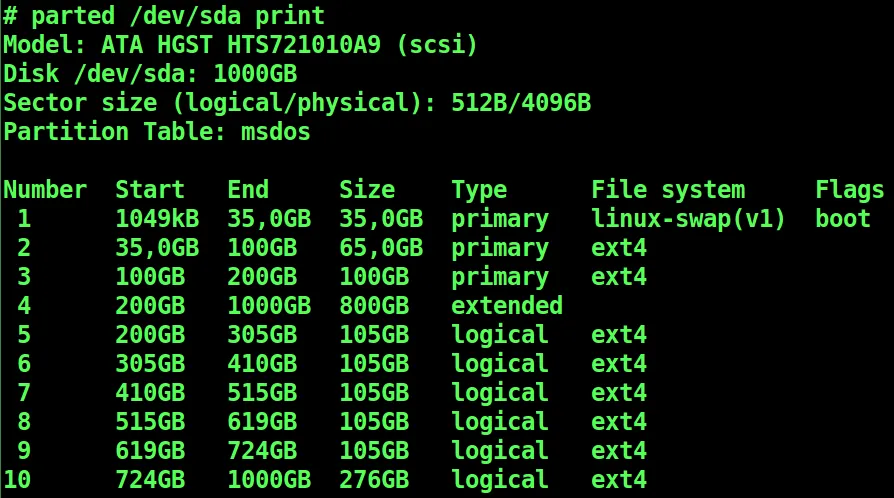
As any average Linux user your hard drive (from now hd) should be partitioned in many partitions, at least in two considering the mandatory requirement of the swap partition. Here a 10 partitions snapshot of 1tb hd in the targeted laptop:
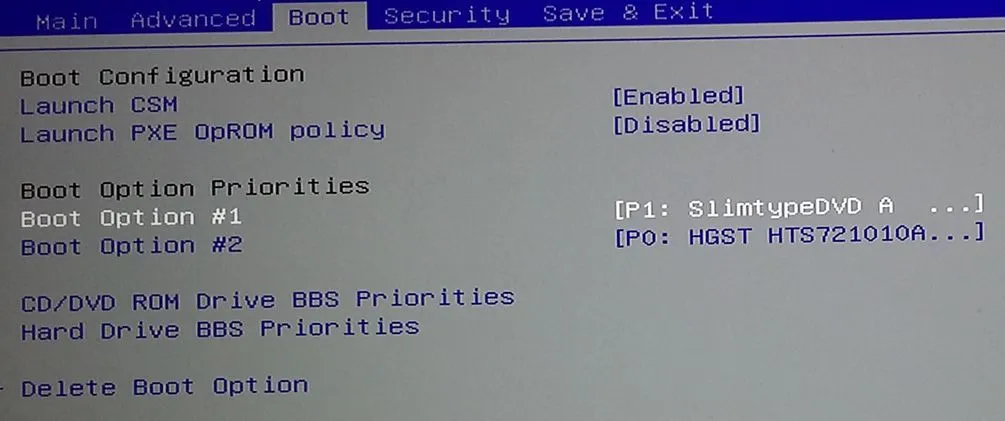
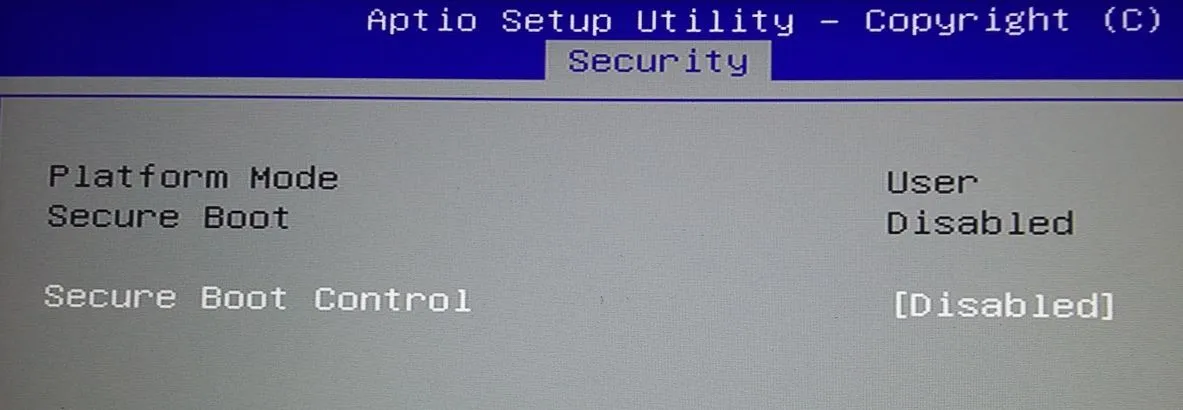
The pre-requisite to load the mastered usb stick at boot is a properly configured UEFI-bios (from now U-bios). Actually I'm not an expert in U-bios configs and I don't remember exactly what I've done with the U-bios switches many years ago when after some googling I've discovered how to configure them. Anyway I guess it has something to do with Launch CSM [enabled] in the boot section and Secure Boot Disabled in the secure one. So, after booting the computer, press and keep pressed the
[F2] key to have access to U-bios configs and customize them. Down below you can give a glance to my screenshots.U-bios BOOT SECTION
U-bios SECURITY SECTION
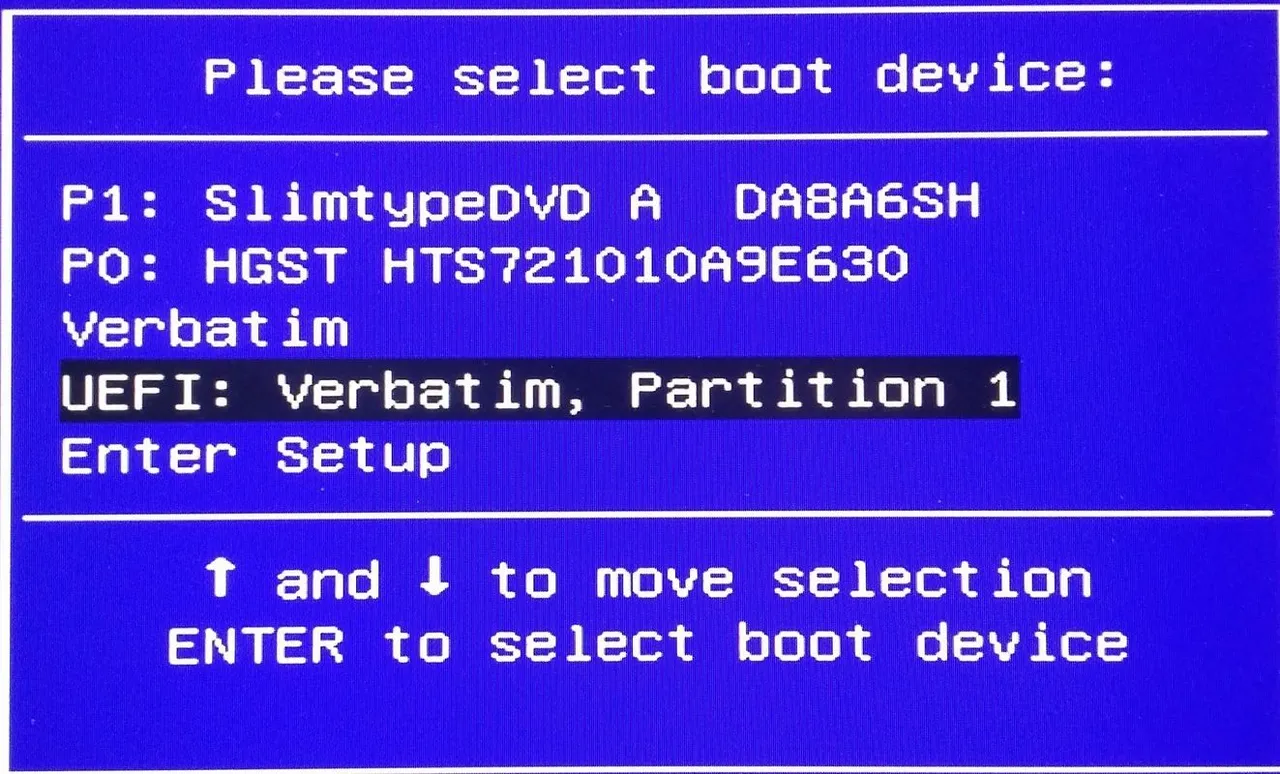
After having properly configured the U-bios boot the computer and press and keep pressed the
[esc] key and the below screenshot should be the something like menu you will see, where the "UEFI: Verbatim" line in this case represent my usb key.