Hola padres y madres de la comunidad #homeedders, bienvenidos a mi blog!
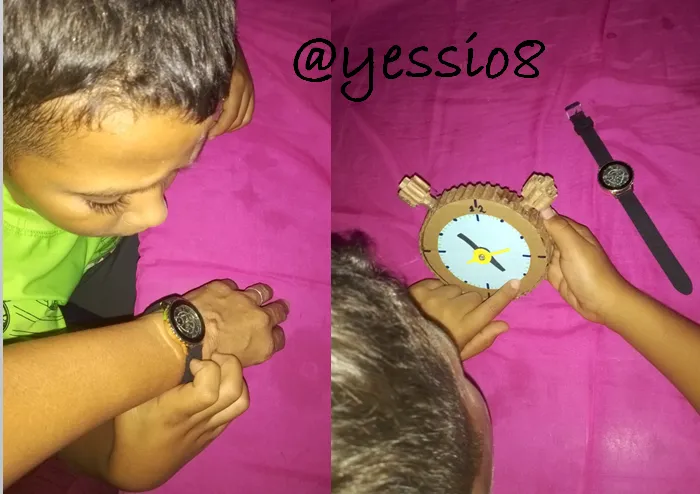
Hoy les quiero compartir un hermoso proyecto que realice en casa con mi hijo, el cual surgiò de una pregunta realizada por el; hace unos días me regalaron un reloj de aguja, de esos que solo tienen el numero 12; y para el fue una impresión cuando lo viò, y me dijo: ¿mami, como puedes saber la hora en un reloj que tiene un solo numero?
Así, que inmediatamente se me ocurrió hacer una replica en tamaño grande del reloj, y explicarle paso a paso como leer la hora cuando el reloj no tiene numero, entonces buscamos materiales de reciclaje que tenemos en casa, y nos pusimos manos a la obra!
Fuè una actividad muy enriquecedora, mi hijo realmente estaba feliz, a todo el que llega a casa, corre y le muestra el reloj y le explica como se lee la hora! jejej, aprendió mas rápido de lo que me imagine!
Esta actividad le trajo beneficios como:
adquirir nuevos conocimientos
trabajar el reconocimiento y la identificación
repaso de la division y la suma
seguir instrucciones
motricidad
creatividad
tiempo de calidad madre - hijo.
Espero les sea de utilidad como lo fue para mi hijo!
Hello parents of the #homeedders community, welcome to my blog!
Today I want to share with you a beautiful project that I made at home with my son, which arose from a question asked by him; a few days ago I was given a needle clock, one of those that only have the number 12; and for him it was an impression when he saw it, and he said: mommy, how can you tell the time on a clock that has only one number?
So, I immediately thought of making a big size replica of the clock, and explaining step by step how to read the time when the clock has no number, then we looked for recycling materials that we have at home, and we got down to work!
It was a very enriching activity, my son was really happy, everyone who comes home, runs and shows him the clock and explains how to read the time! hehehe, he learned faster than I imagined!
This activity brought him benefits such as:
acquiring new knowledge
discoveries
working on recognition and identification
review of division and addition
following instructions
motor skills
creativity
mother-child quality time.
I hope you find it as useful as it was for my son!


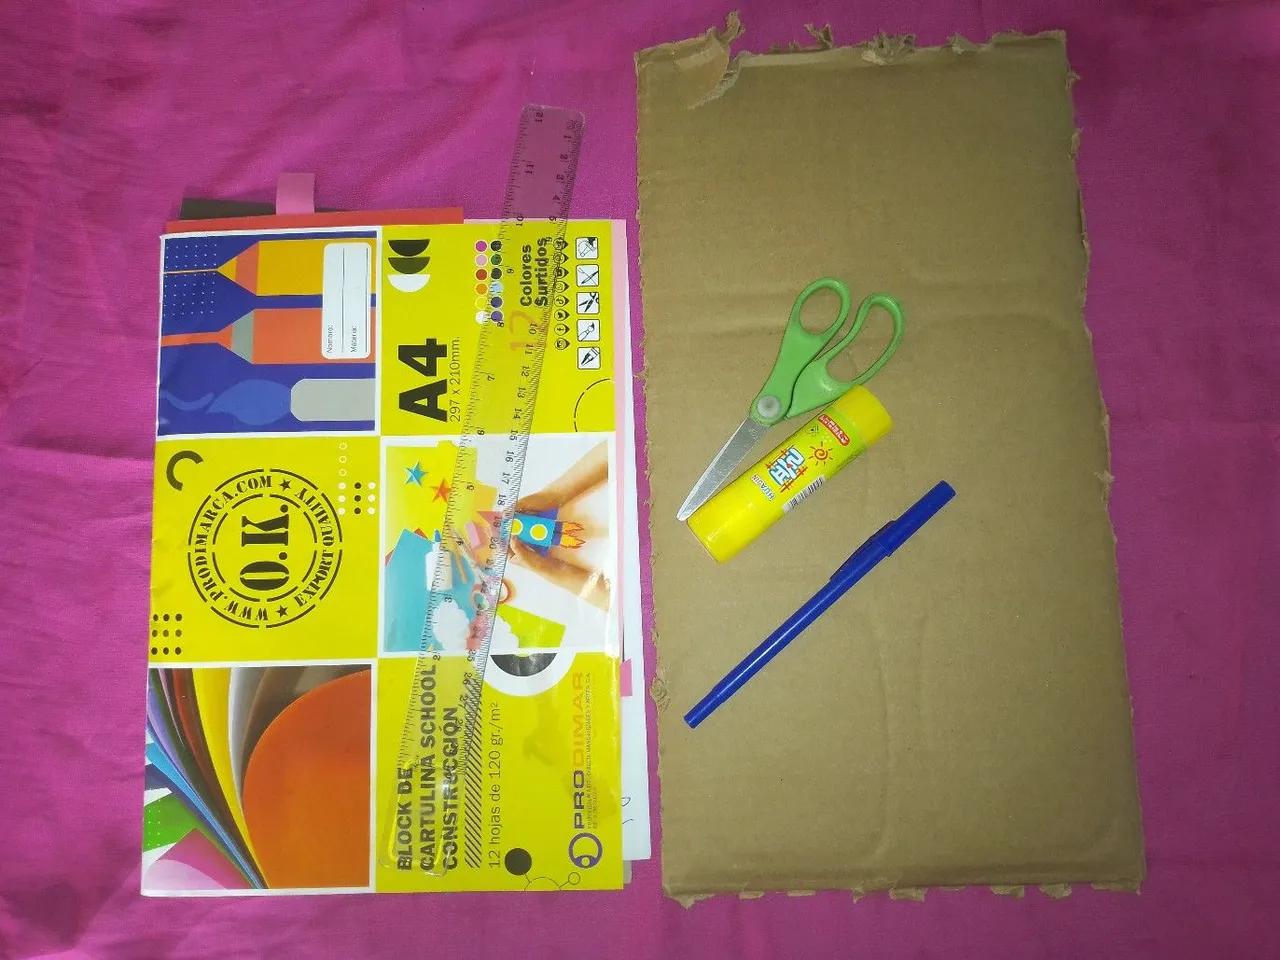
carton
tijera
cartulina azul
marcador permanente
color.
cardboard
scissors
blue cardboard
permanent marker
color.
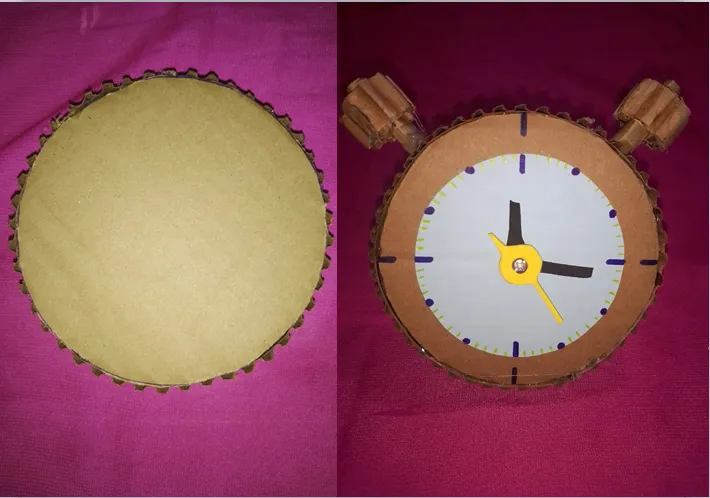
Lo primero es hacer el reloj; para ello tomamos el carton y cortamos un circulo, con la ayuda una regla ubicamos el centro; y marcamos los extremos al colocar la regla en forma horizontal y vertical.
En una cartulina azul, recortamos un circulo un poco mas pequeños y lo pegamos en el carton, y marcamos con una linea pequeña los extremos horizontales y verticales, que corresponden a la parte del reloj donde se ubican el 12, 3, 6 y 9.
The first thing to do is to make the clock; for this we take the cardboard and cut a circle, with the help of a ruler we locate the center; and we mark the ends by placing the ruler horizontally and vertically.
In a blue cardboard, cut a circle a little smaller and paste it on the cardboard, and mark with a small line the horizontal and vertical ends, which correspond to the part of the clock where the 12, 3, 6 and 9 are located.
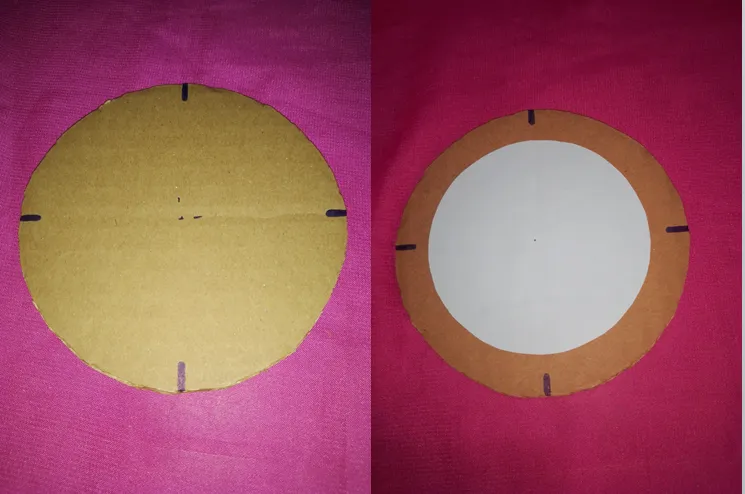
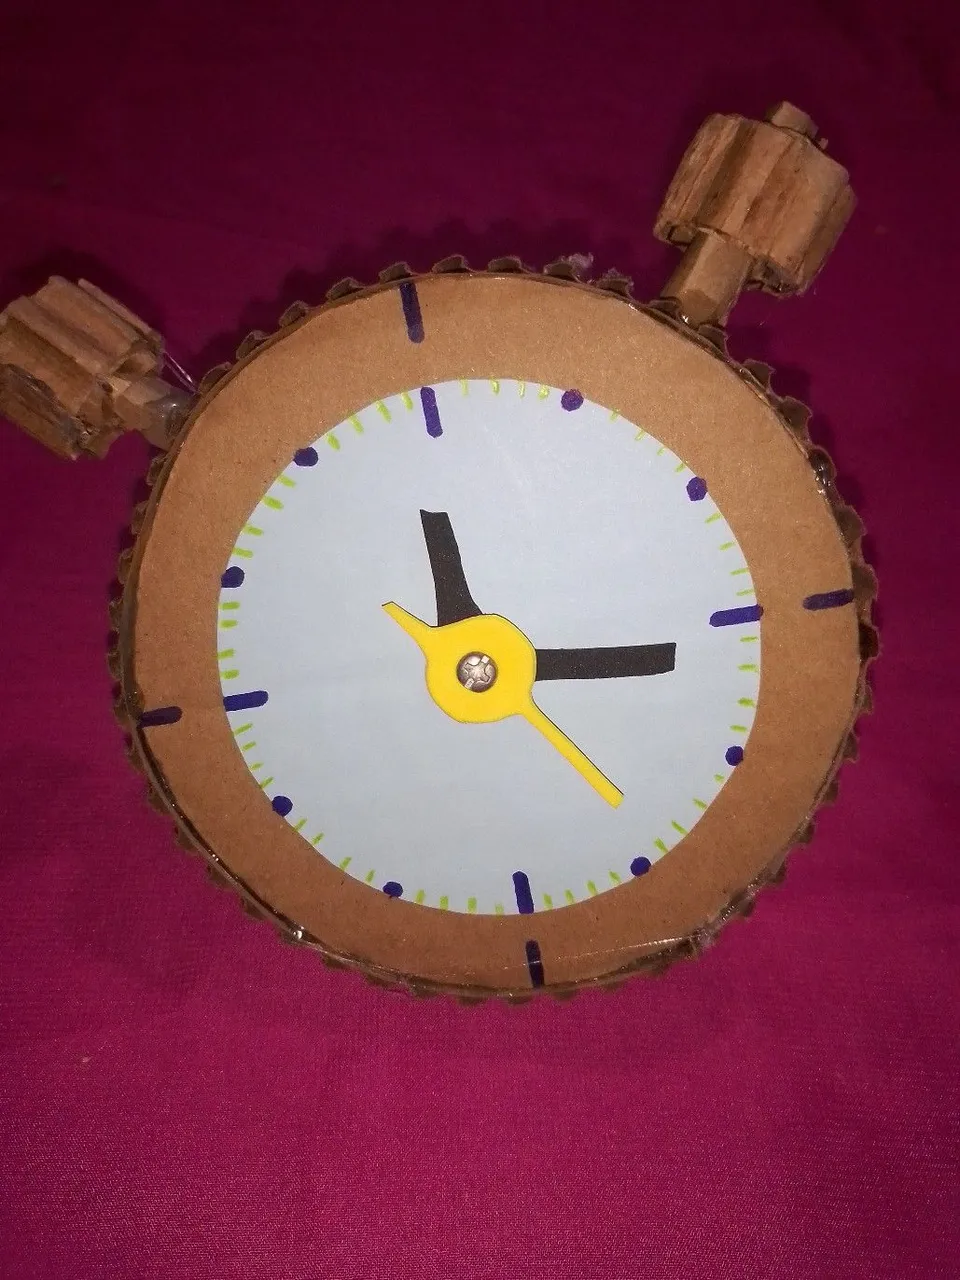
Luego con un punto marco las horas restantes, es decir; 2 puntos en cada division; y por ultimo con una linea de color marco lo minutos, es decir, 4 lineas entre cada punto.
En un trozo de foami, recorto las aguas del reloj, la que marca la hora, la minutera, y la segundera, y las fijo al carton con una tuerca con arandela.
Then with a dot I mark the remaining hours, that is to say; 2 dots in each division; and finally with a colored line I mark the minutes, that is to say, 4 lines between each dot.
On a piece of foami, I cut the waters of the clock, the one that marks the hour, the minute and second hands, and I fix them to the cardboard with a nut and washer.
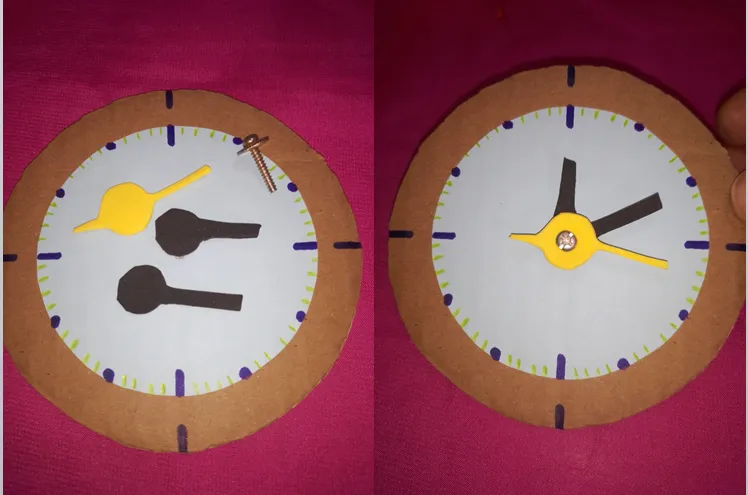
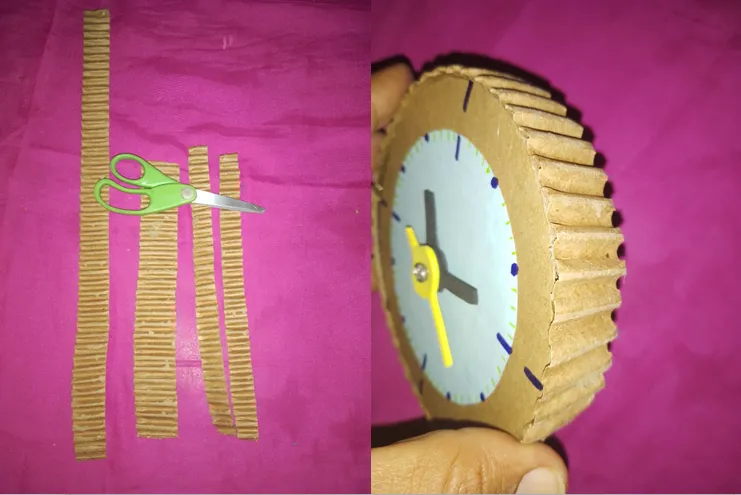
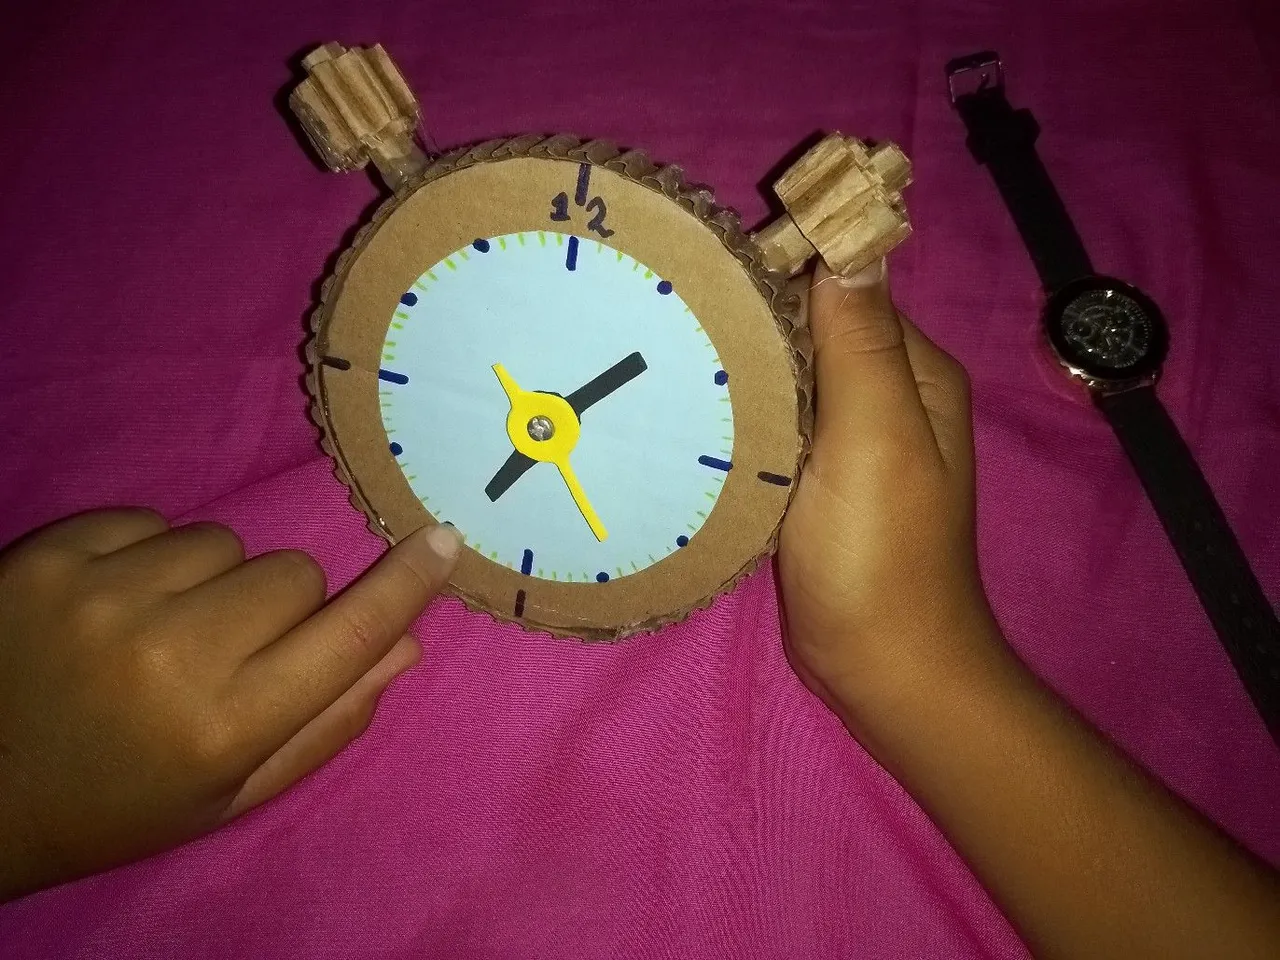
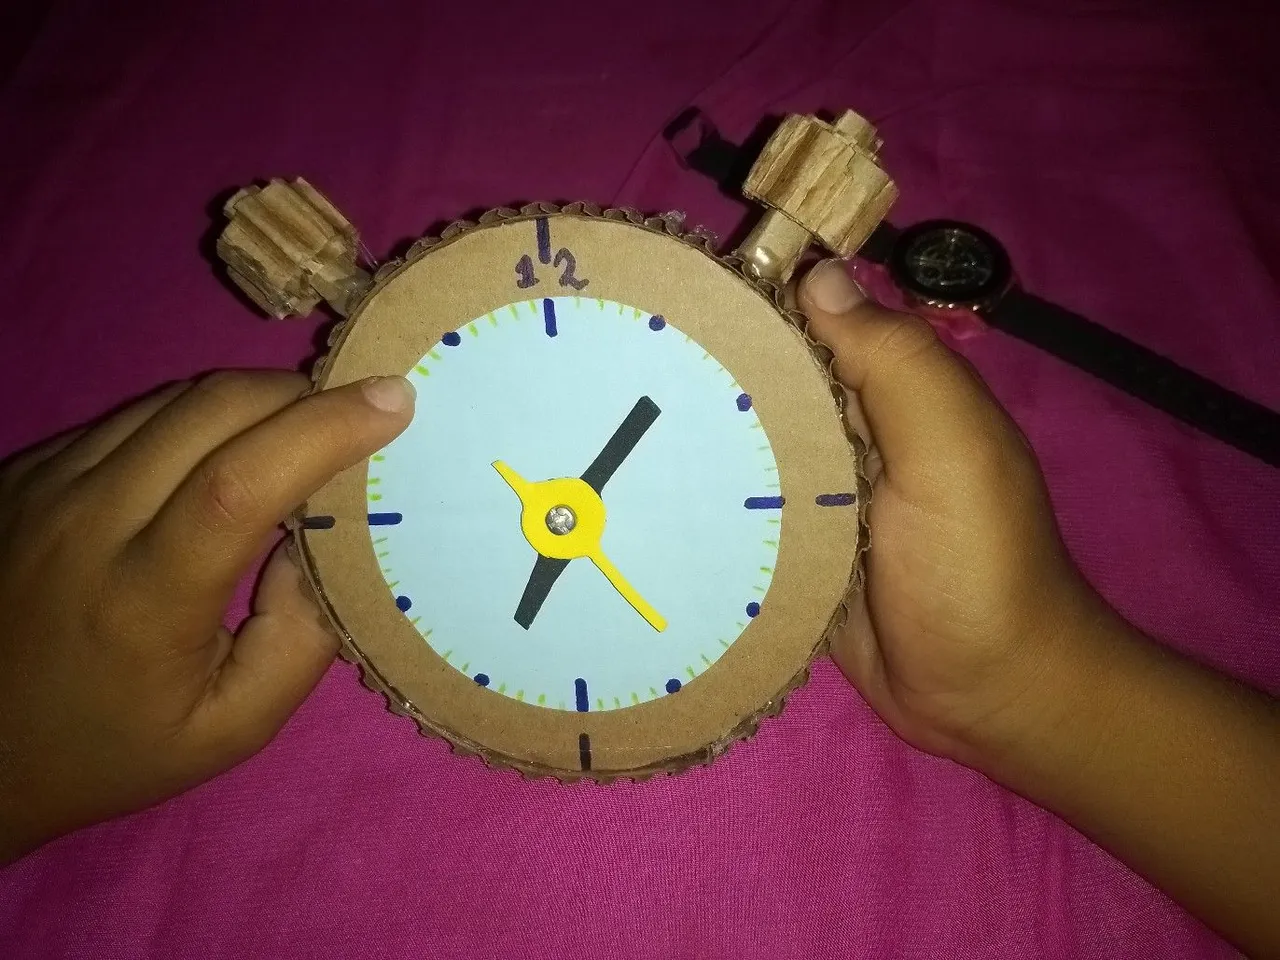
Luego recorte una tiras de carton y les retire la capa superior para darle un toque decorativo; y pegue alrededor del circulo, y por la parte de atrás para hacerlo mas hermoso le pegue un circulo, y en la parte superior le coloque unas manijas; y así, esta listo el reloj!
Para hacerlo idéntico al mio, le escribí el numero 12 donde corresponde; y comencé a explicarle que ese era el punto de partida y de llegada.
Then I cut a strip of cardboard and remove the top layer to give it a decorative touch; and glued around the circle, and on the back to make it more beautiful I glued a circle, and at the top I put some handles; and so, the clock is ready!
To make it identical to mine, I wrote the number 12 where it corresponds; and I began to explain to him that this was the starting and ending point.
Una vez listo el reloj, comencé a explicarle que la aguja negra pequeña indica la hora, la grande los minutos y la amarilla delgada los segundos!
Luego que, las lineas gruesas eran el punto de referencia para contar las horas, comenzando por el 12, y contando de izquierda a derecha; y que las lineas delgadas de color eran los minutos y que en cada division hay 5 para un total de 60; lo cual le permitió repasar la multiplicación!
Once the watch was ready, I began to explain that the small black hand indicates the hour, the big one the minutes and the thin yellow one the seconds!
Then, the thick lines were the reference point to count the hours, starting with 12, and counting from left to right; and that the thin colored lines were the minutes and that in each division there are 5 for a total of 60; which allowed him to review multiplication!
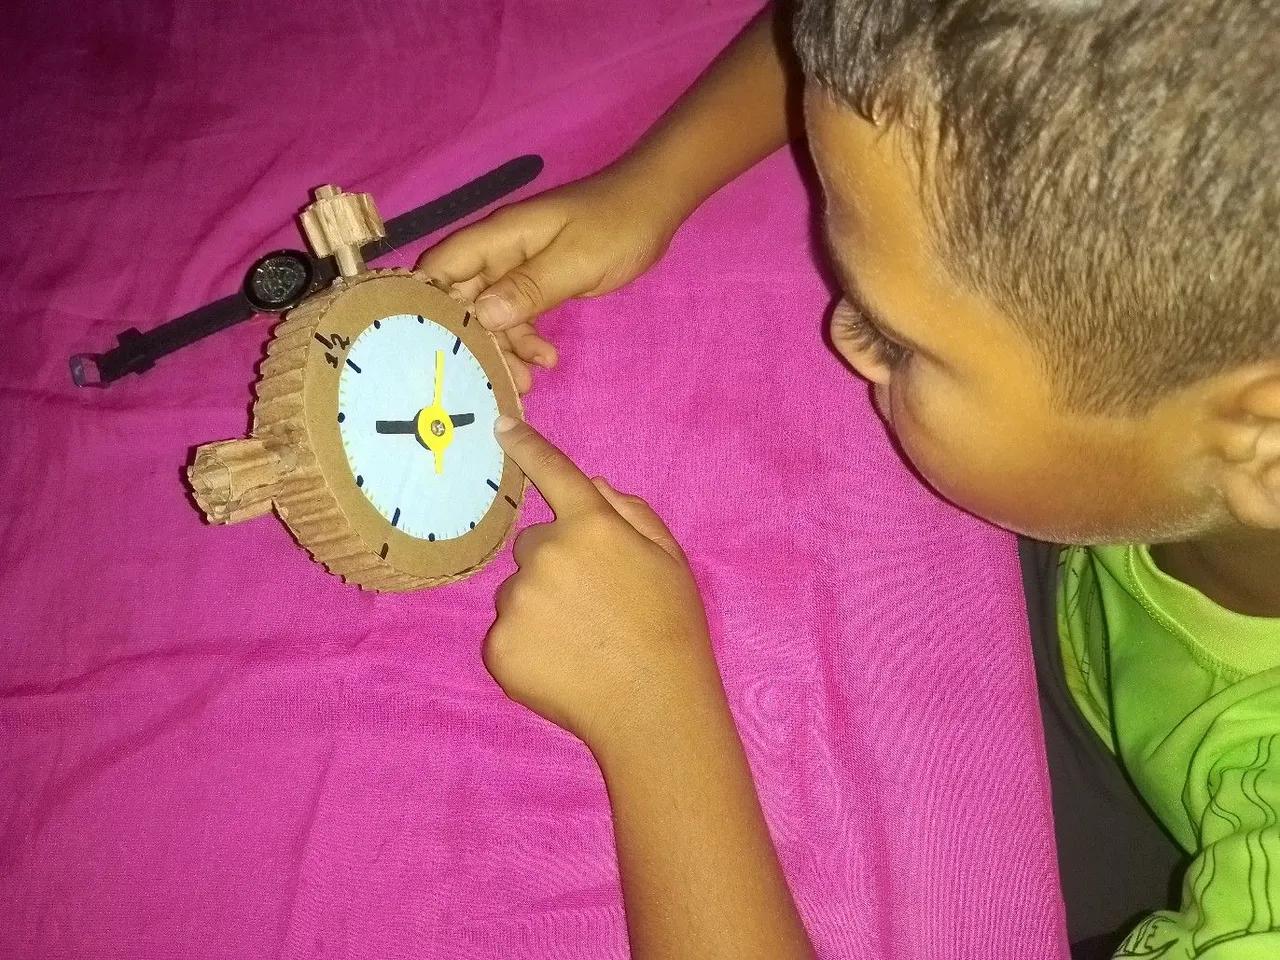
Seguidamente, le marcaba distintas horas en el reloj, y el las identificaba; realmente fue muy significativo para el!
Cuando el papà llego del trabajo saliò corriendo con su reloj y le contó de nuestro proyecto y le explico lo que había aprendido!
Next, I marked different times on the clock, and he identified them; it was really very meaningful for him!
When his dad came home from work he ran out with his watch and told him about our project and explained what he had learned!
Hasta acá mi presentación; espero sea de su agrado!
Gracias por visitar mi post.
Dios te bendiga!
So far my presentation; I hope you like it!
Thanks for visiting my post.
God bless you!
Translated with https://www.deepl.com/translator
      Todas las imágenes son de mi autoría, capturadas con mi teléfono ZTE.

   All images are my own, captured with my ZTE phone.