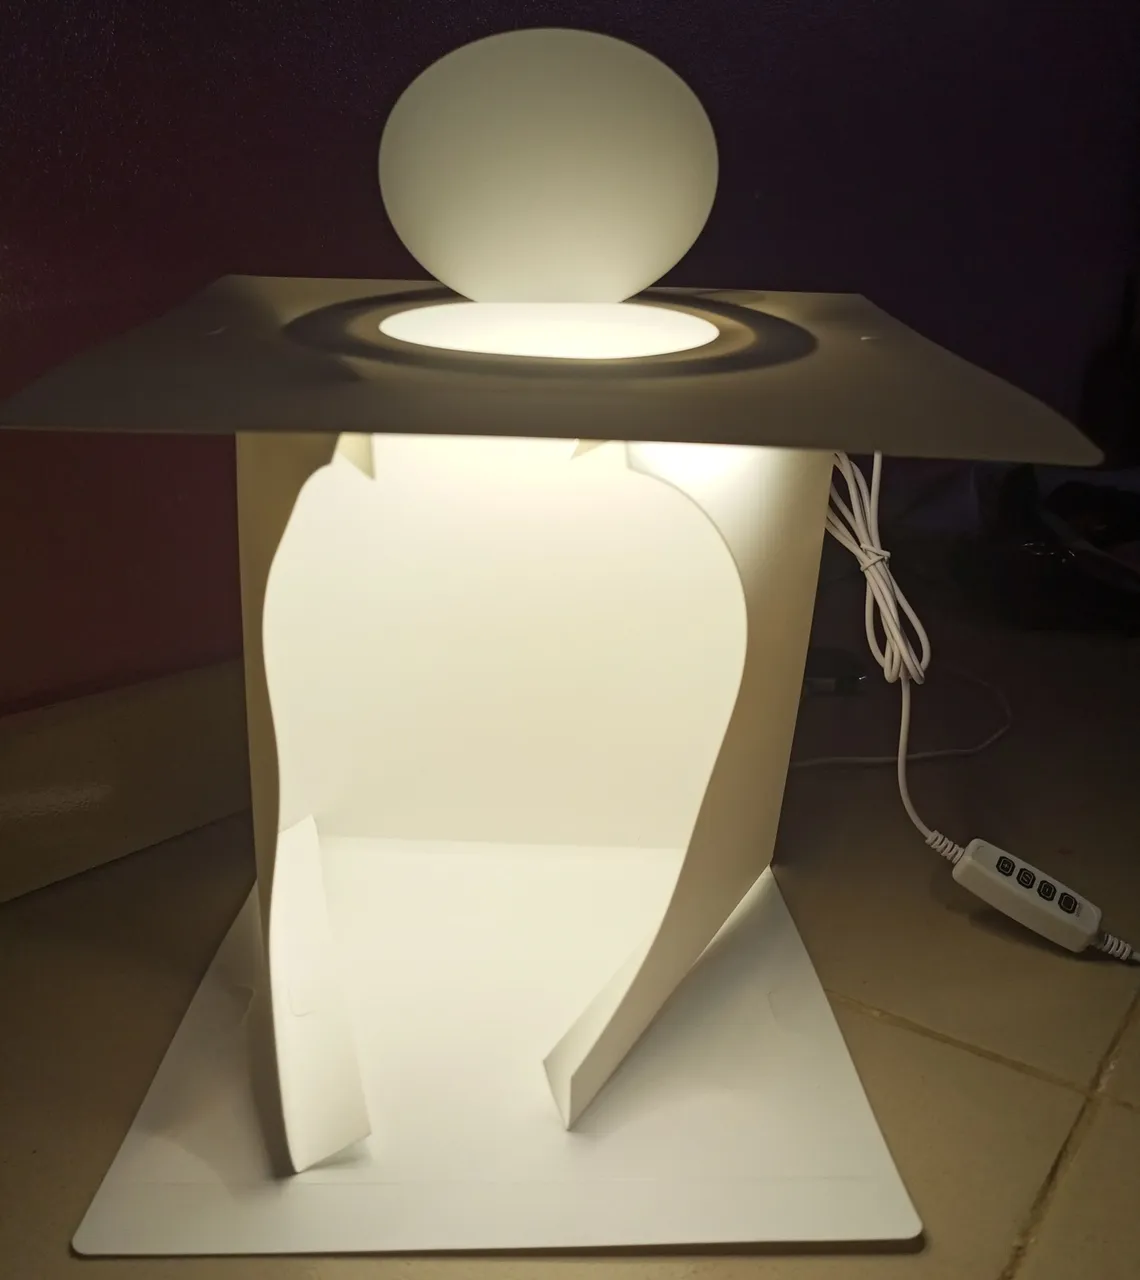
When it comes to photography, there is only a handful of things I wouldn't do to get involved. Well a lot actually, lol. I wouldn't go around murdering people like a psycho. What I am trying to say is that I love photography, all types. I always remember a few years ago when I started off with my mobile phone and folks would tell me to not shoot this, "shoot that, don't do this, it won't fetch you money, do that," bla bla bla. I never really allowed anybody to define my style, I just try to enjoy what I do. I see making money off my craft as a bonus. Whenever I start to learn something new, I try to enjoy it, and if it's not working I abandon it. Like the time I started learning to code, God, I hated those numbers. So I have been trying to get into product photography for a while now, you know, just for the fun of it. I have checked youtube and done a lot of research and I even wanted to build my mini-studio one time but I was unable to acquire the resources. So I decided to buy this product I came across in an online store. Ladies and Gentlemen, BEHOLD, THE PULUZ RING LED PORTABLE PHOTO STUDIO.
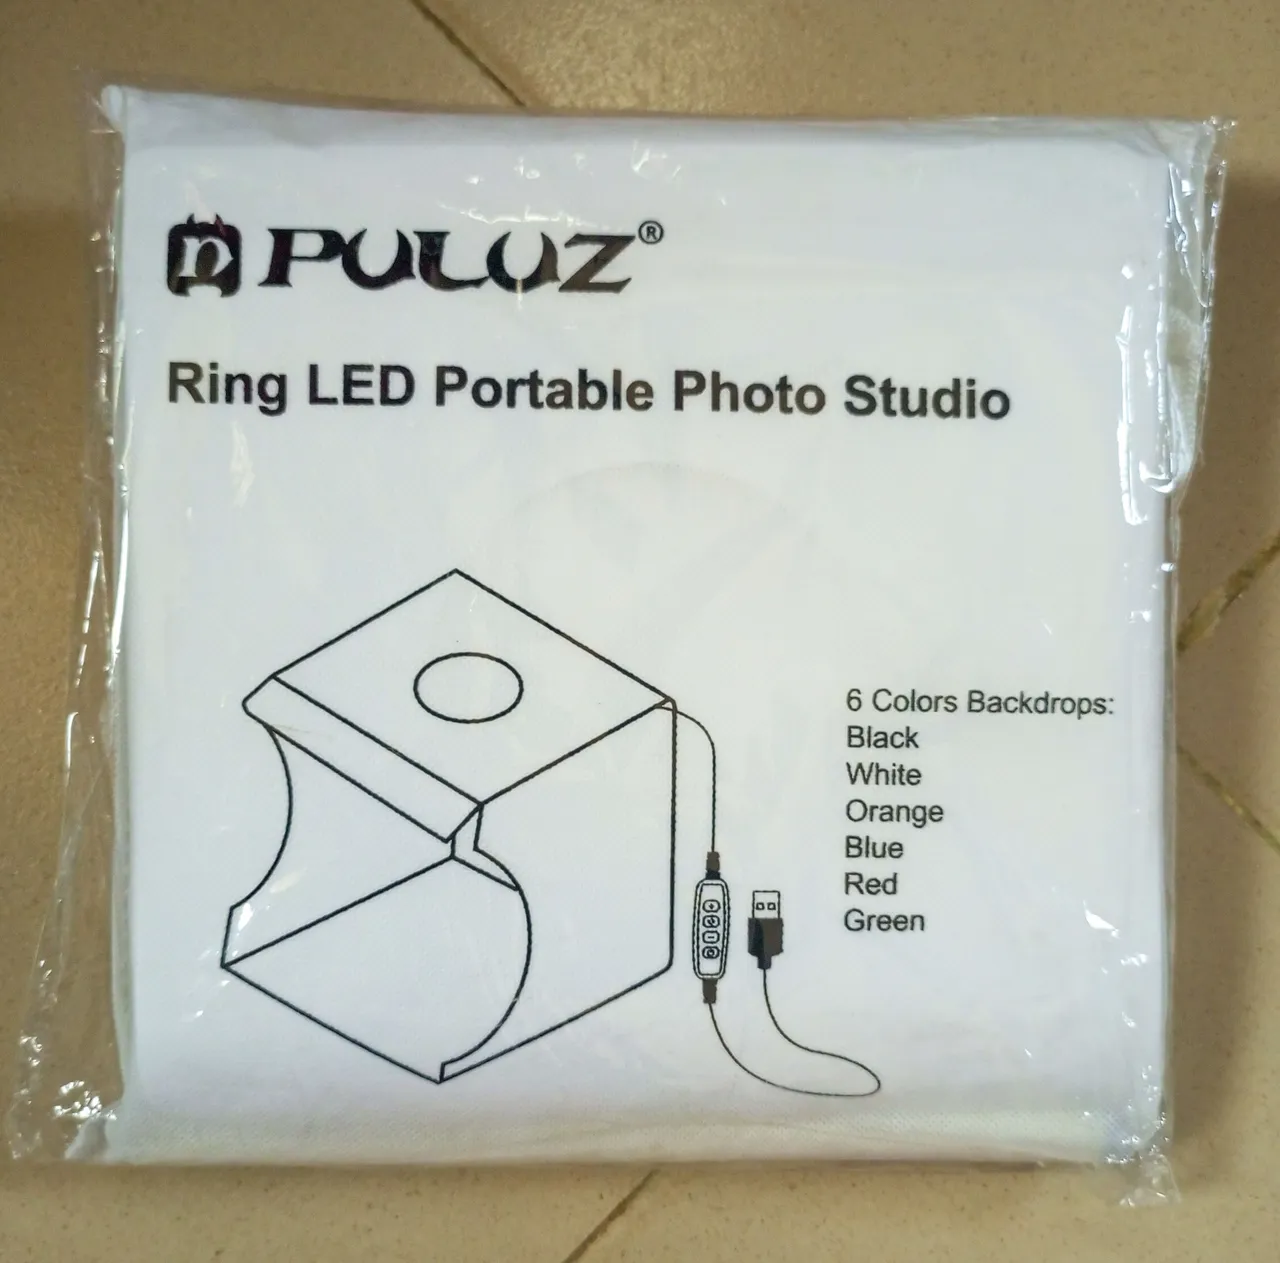
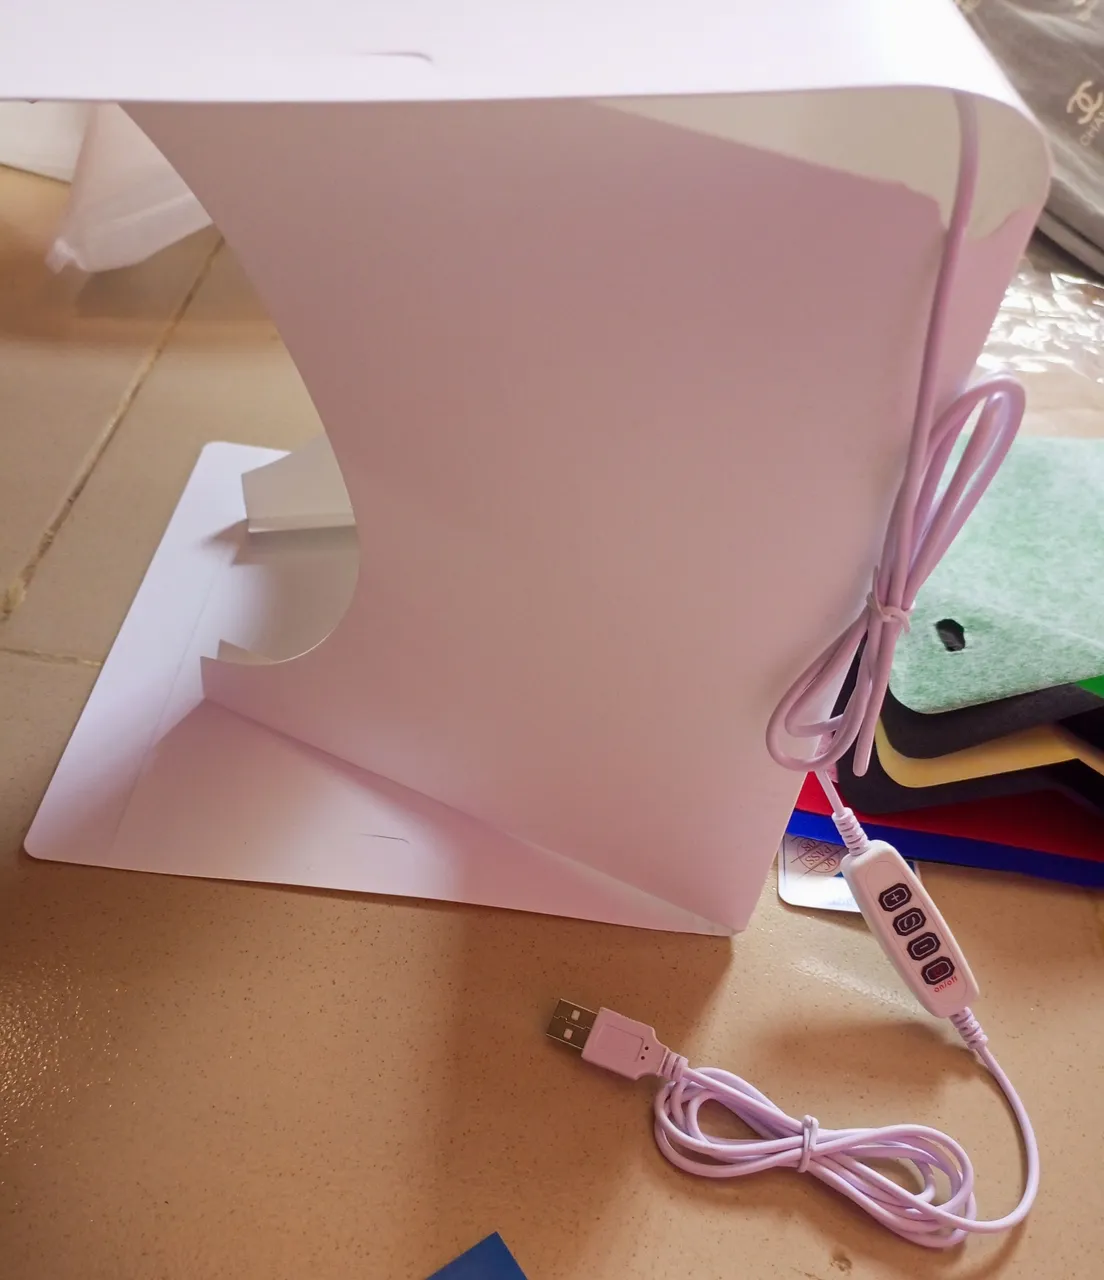

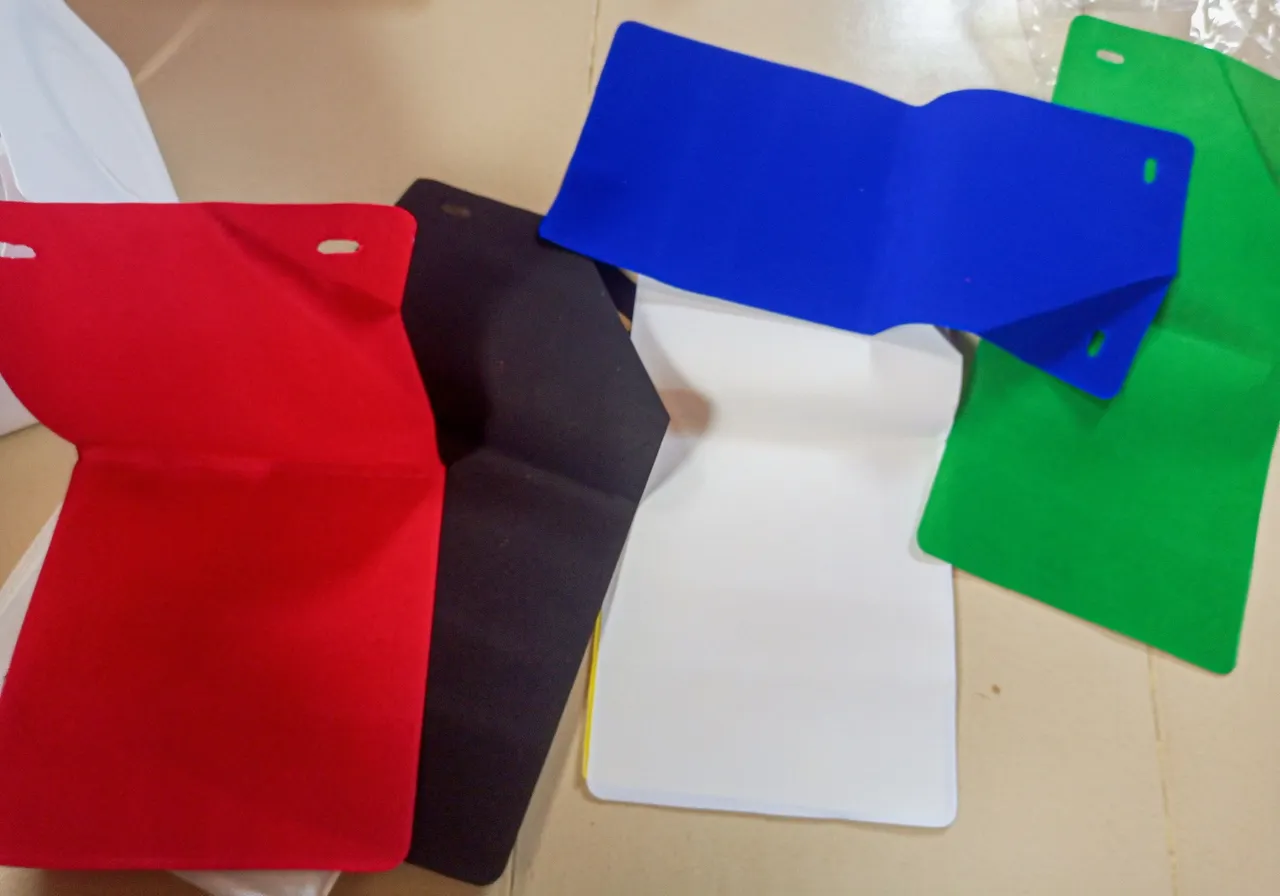
I got it delivered at my doorstep all together for a price roughly $20. I started the unboxing. Inside the box, you have the little studio itself and then a USB cable that extends out of it which conducts electricity to the led circuit inside the box. Also inside were 6 different color backgrounds for different types of products. So here's the thing, there are different types, sizes, and specifications of this product. Mine is around 30cm which is small and the studio box and backdrop are of inferior quality. I do have an option to return it within the next 6 days but I think I will keep it. It does the job at least. There are also buttons on the cable which I will tell you their functions later on as we take a closer look.
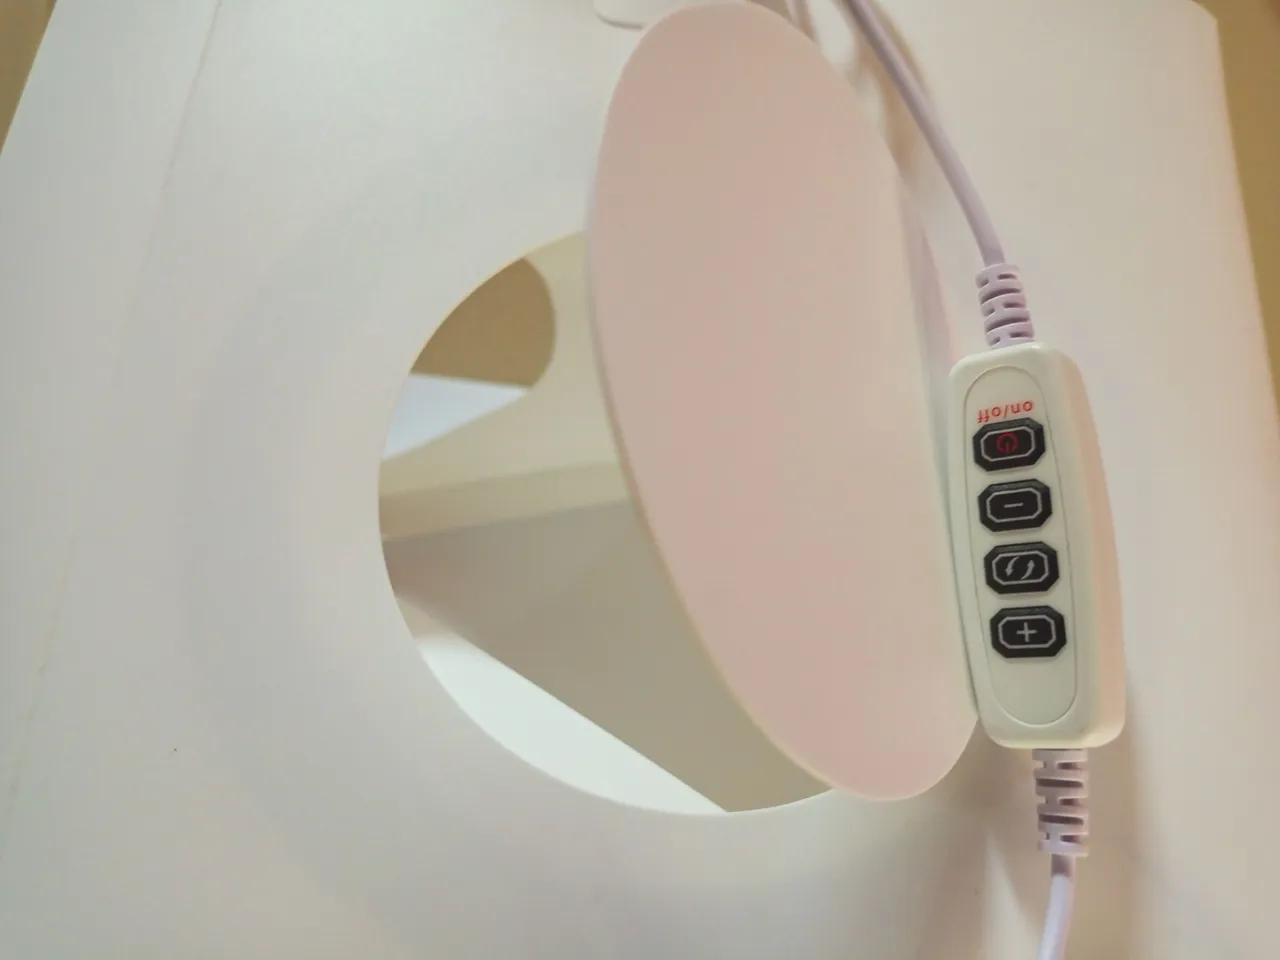
Right on top of the box is an opening so you can shoot from the top angle. Now the buttons. From the top; that's the power button, next is the negative button to reduce light intensity inside the box, and next is the rotate button to change to different modes of light depending on what you are shooting and the mood, e.g cool light, warm light, etc, and finally, the positive button to increase light intensity.
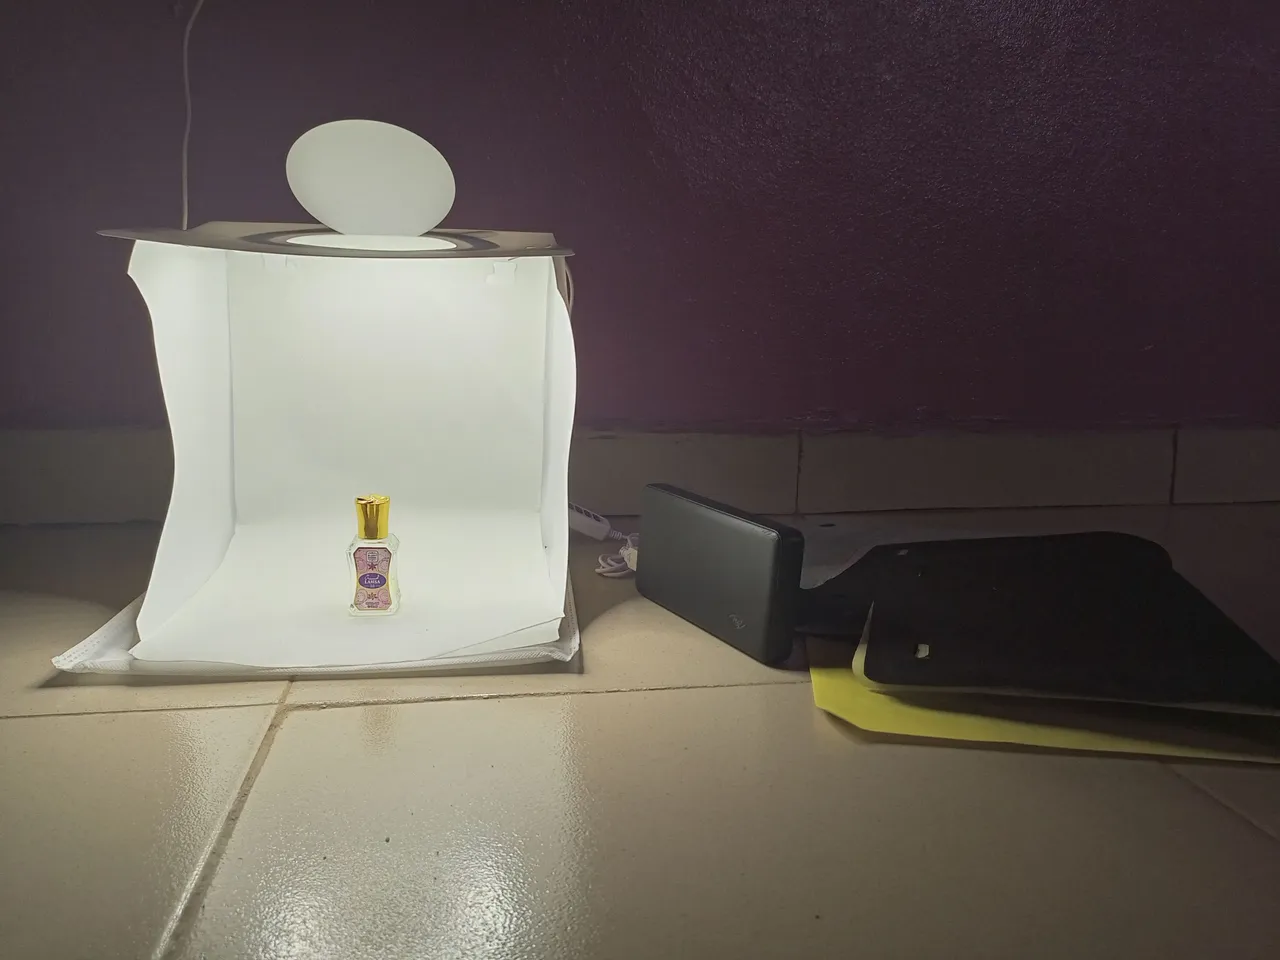
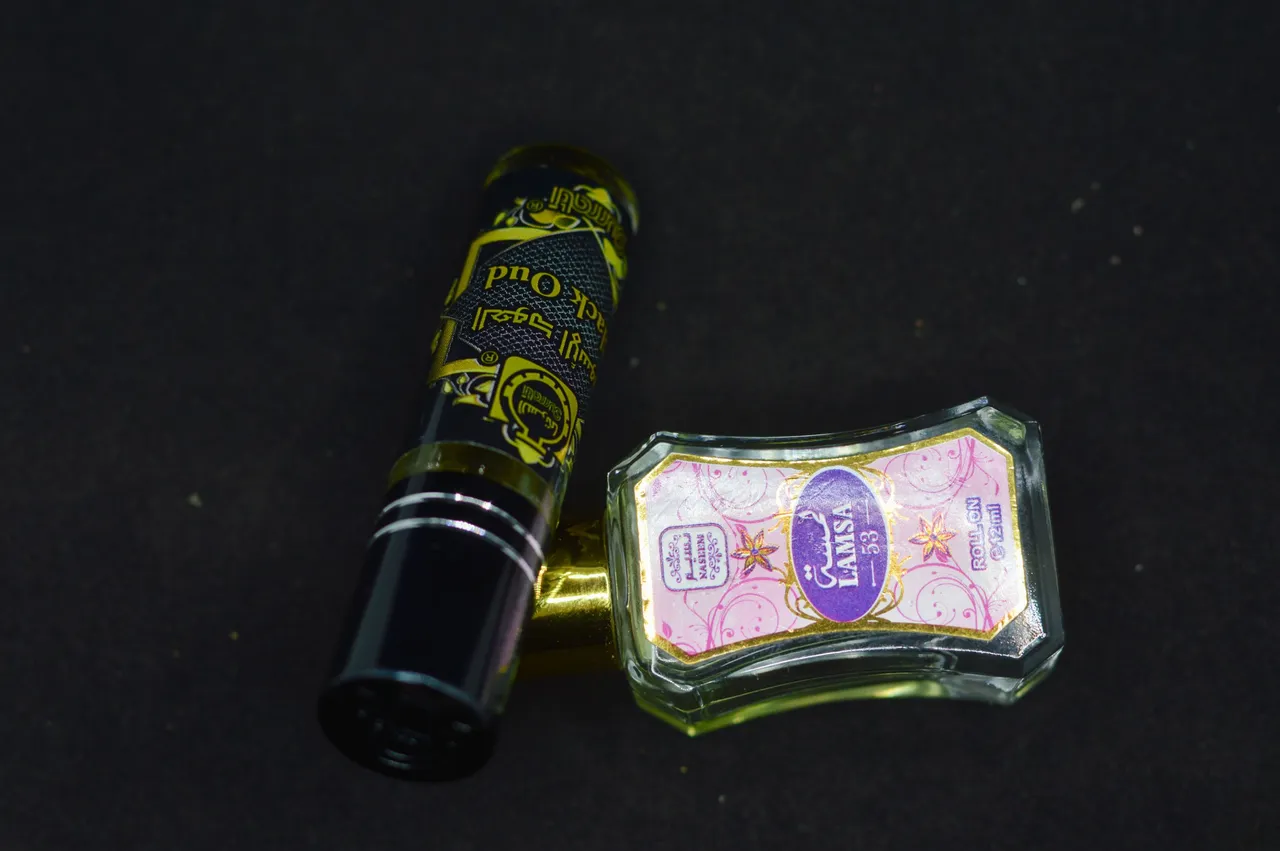
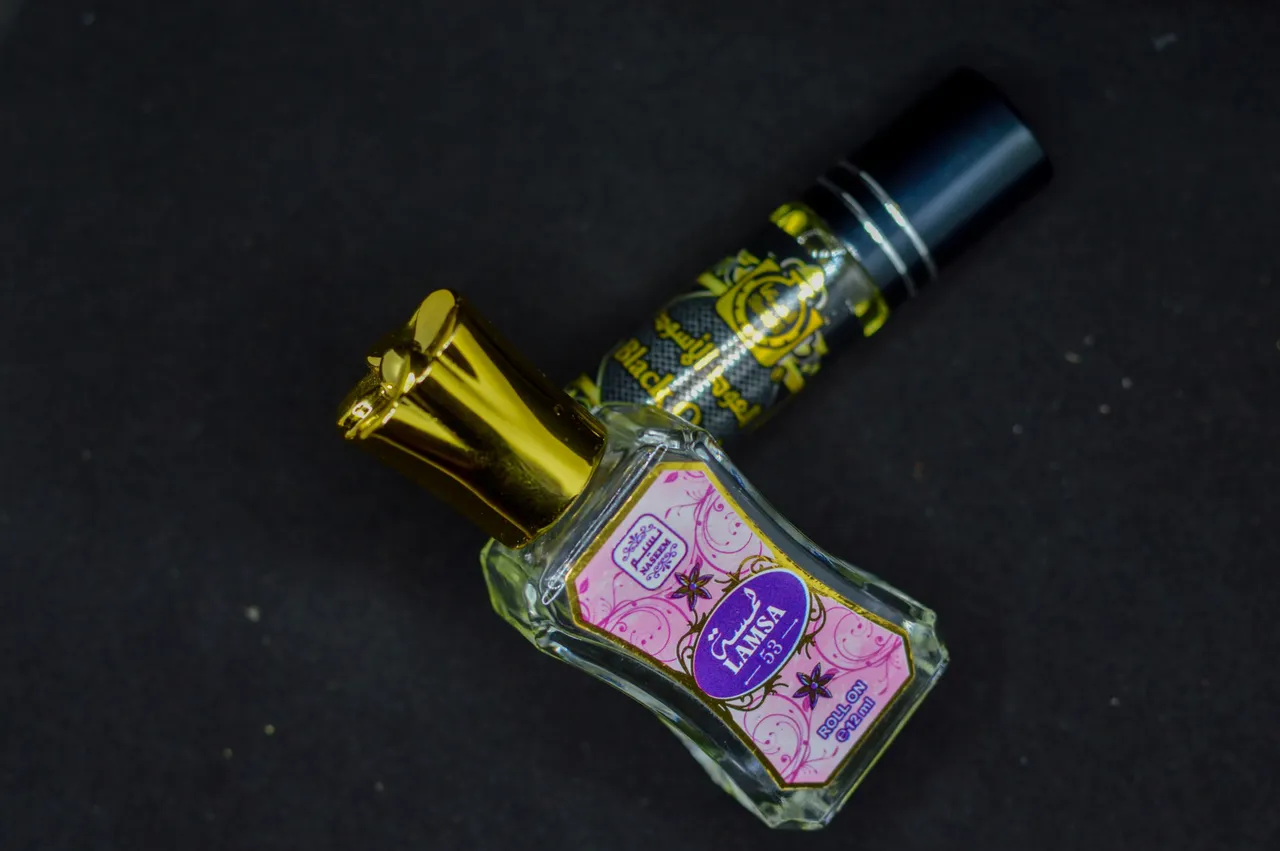
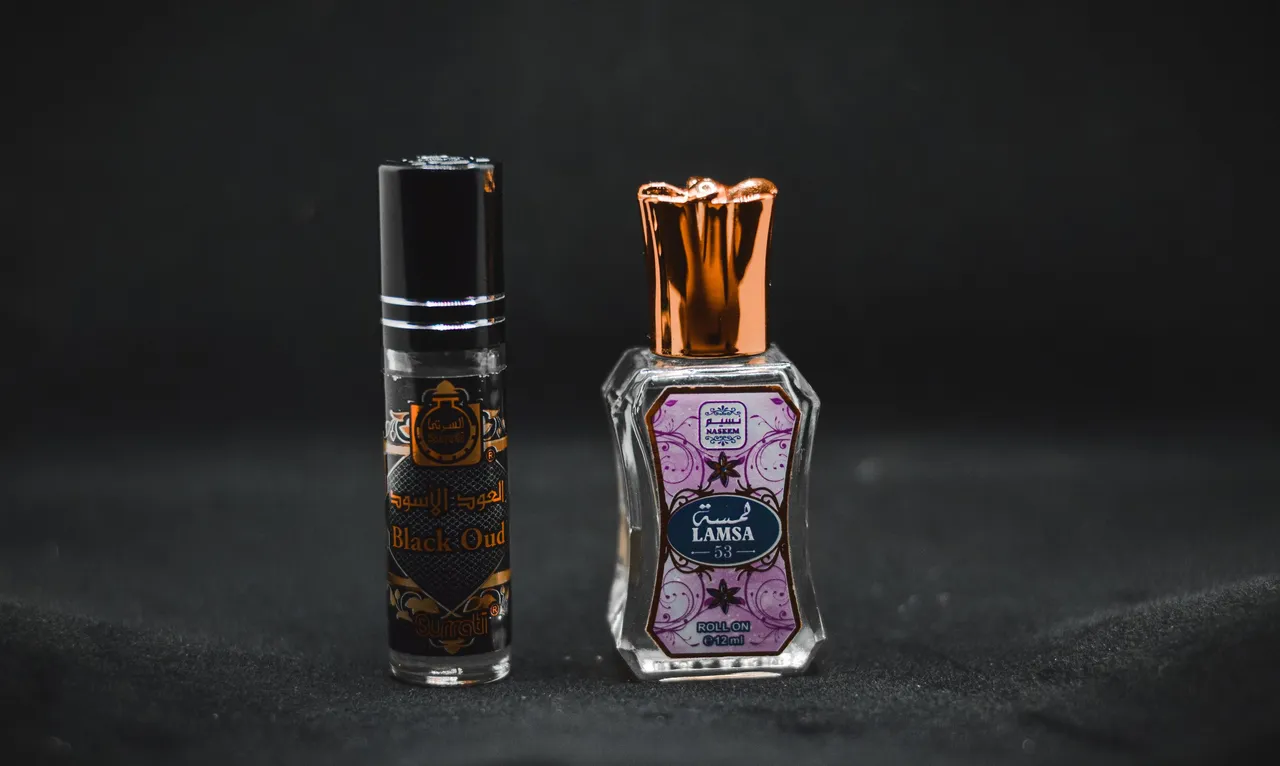
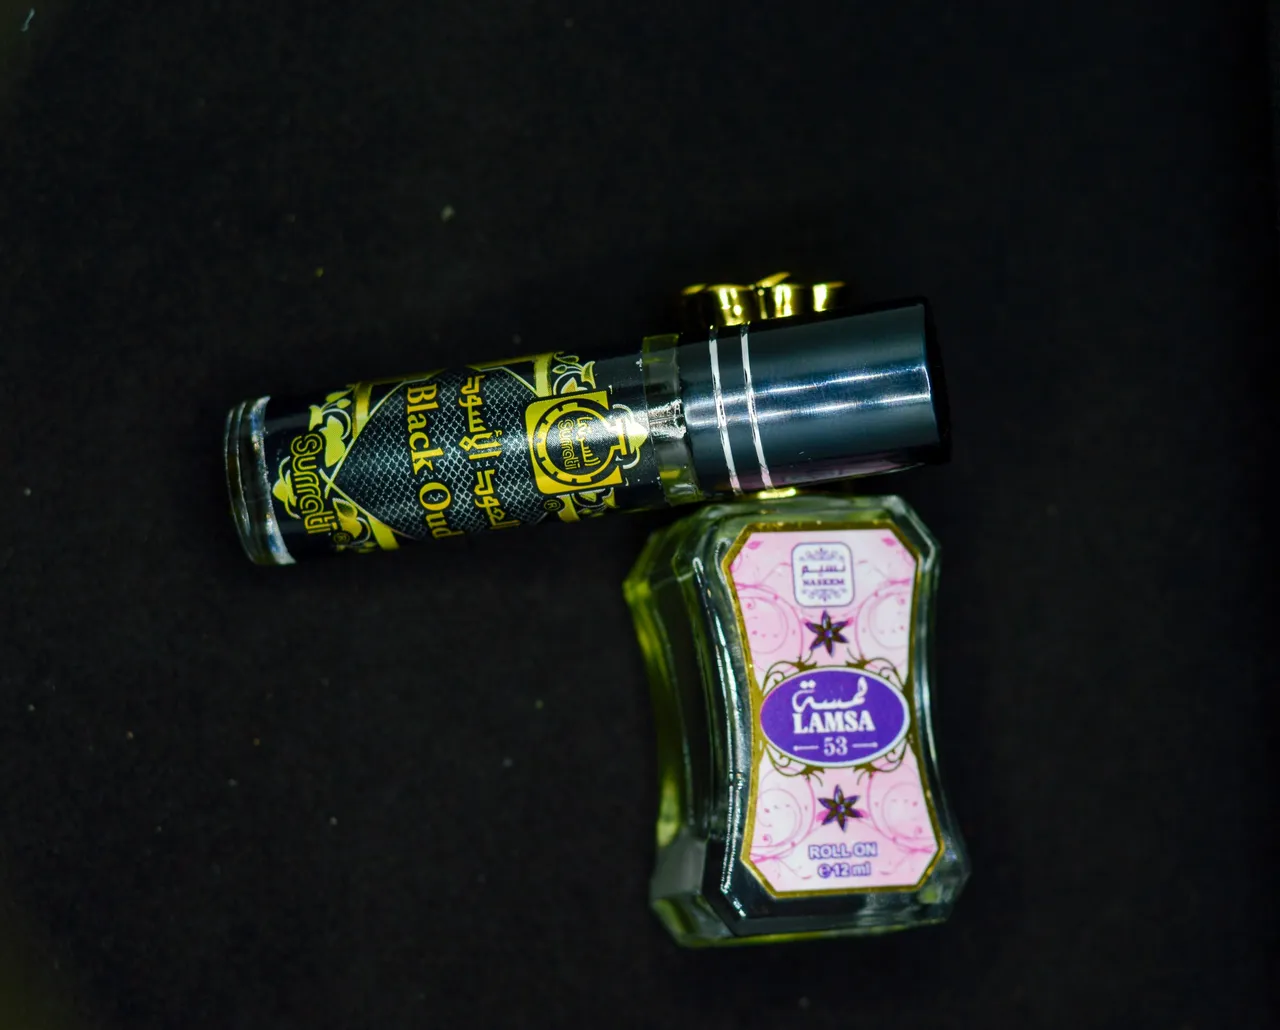
Here is the box fully set-up and ready for use. I connected the USB to my power bank to light it up. I happen to also be a fan of Oil-perfume so they were my test subject.
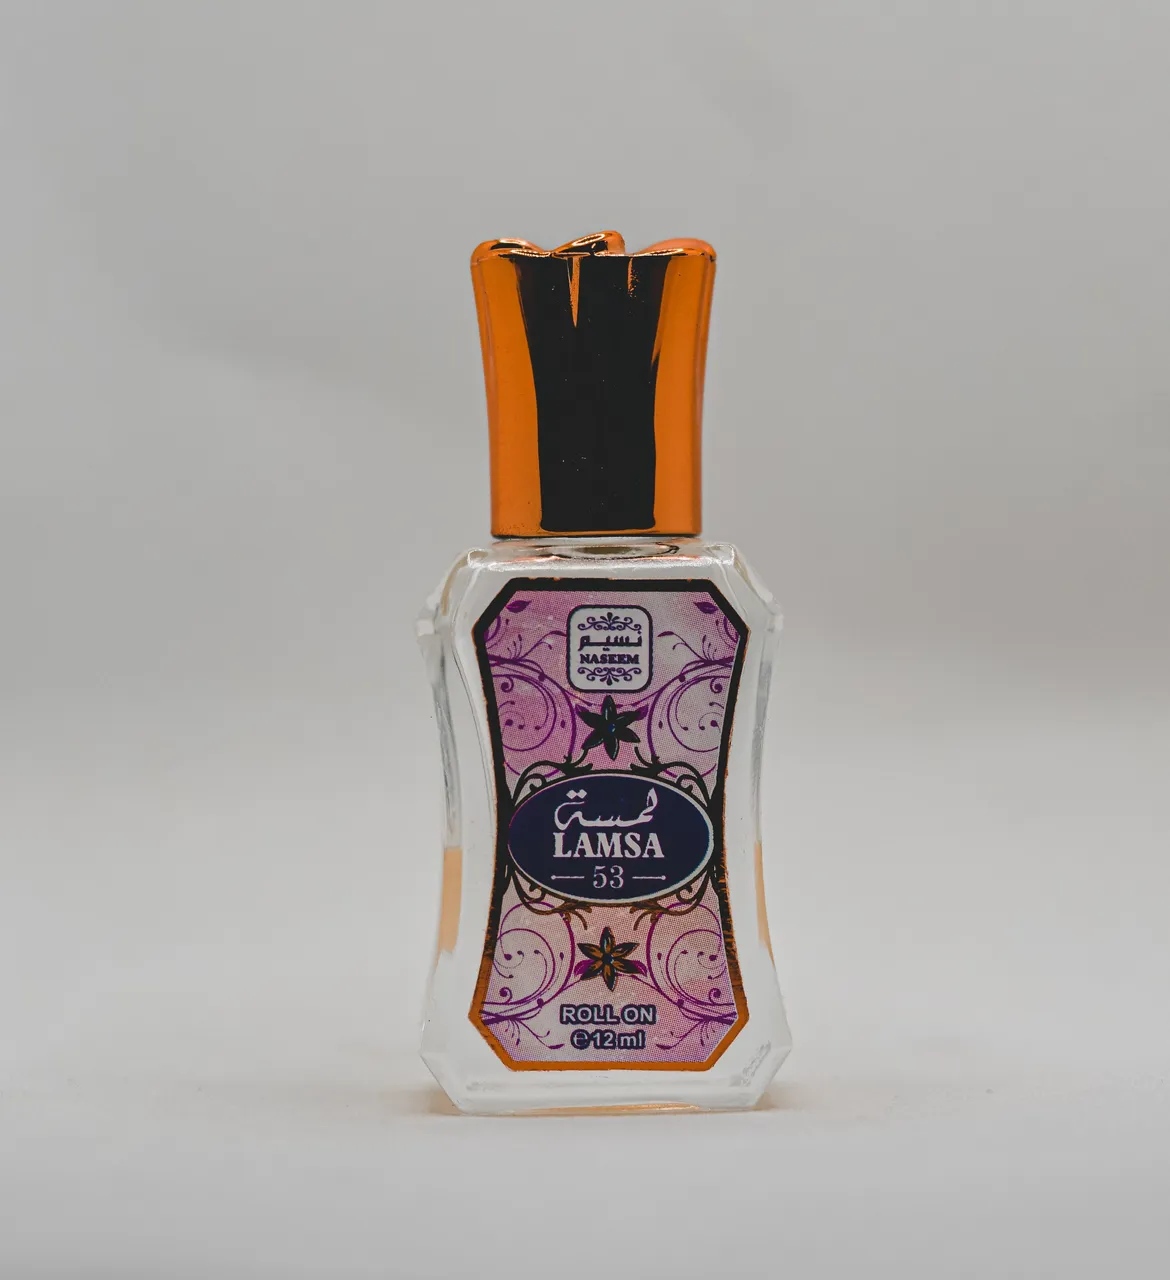
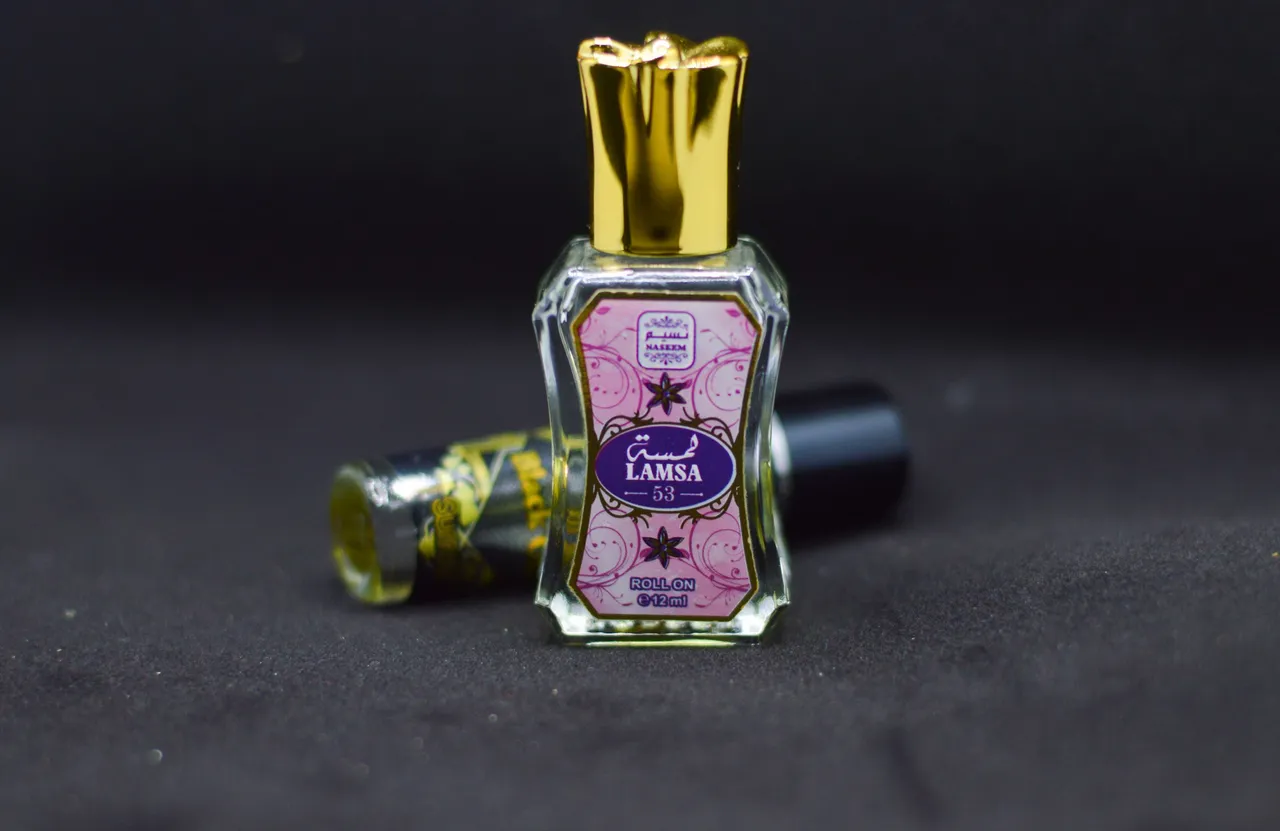
BELOW ARE THE RESULTS OF SOME OF THE PHOTOS I TOOK WITH MY DSLR
Final Review
This is a good device for anybody to have, not just photographers. You can shoot with your phone. You can also make one yourself with a simple DIY. There are tons of tutorial videos on youtube or anywhere else on the internet. You can also choose to buy one. Be aware that there are different variations. Sizes, quality, etc. It all depends on your budget. That's all for now. Await my next product shoot. Till next time. Ciao.