I love shooting outdoor portraits. Not only is the light generally good, but you get a background far more creative than a roll of paper, canvas, or some fabric haphazardly hanging from a wall.
There's limitless challenges and opportunity when you're shooting outdoors, and natural light from the blazing star in the sky is an excellent light source. However, you can augment and enhance that natural light in many creative ways if you are willing to take a flash with you.
You get even better results if you pop it in a modifier, or use it creatively.
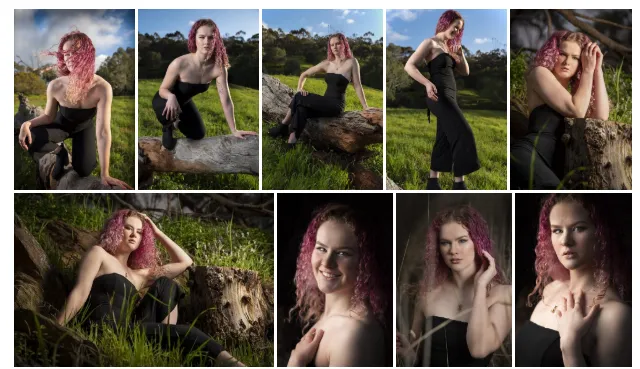
The following series of images are of Rebecca and were shot last Saturday, on location, in Gawler, South Australia - which isn't too far away from Adelaide, South Australia.
Here's a brief look at some of the shots from the series:
The first thing you're going to want to do in order to get a balanced exposure outdoors is to take a few light readings. The techniques vary for each person, but I've got a simple (well, perhaps complicated, formula to ensure you can dial in your Flash perfectly).
- Take a light reading through your camera for the background. Set your aperture and shutter speed as desired for a balanced background exposure.
- Take a light reading from the model's skin. If your subject is backlit, this means that they will be underexposed compared to the background. Don't change your camera settings.
- Using the light meter in the camera, think about how many stops underexposed your model is going to be.
- Adjust your flash power and its location to correctly expose the model.
- You'll get a balanced, dramatic looking exposure, with significant separation from the background as you marry the concepts of composition, focusing on the model's eye, and lighting them correctly using your flash!
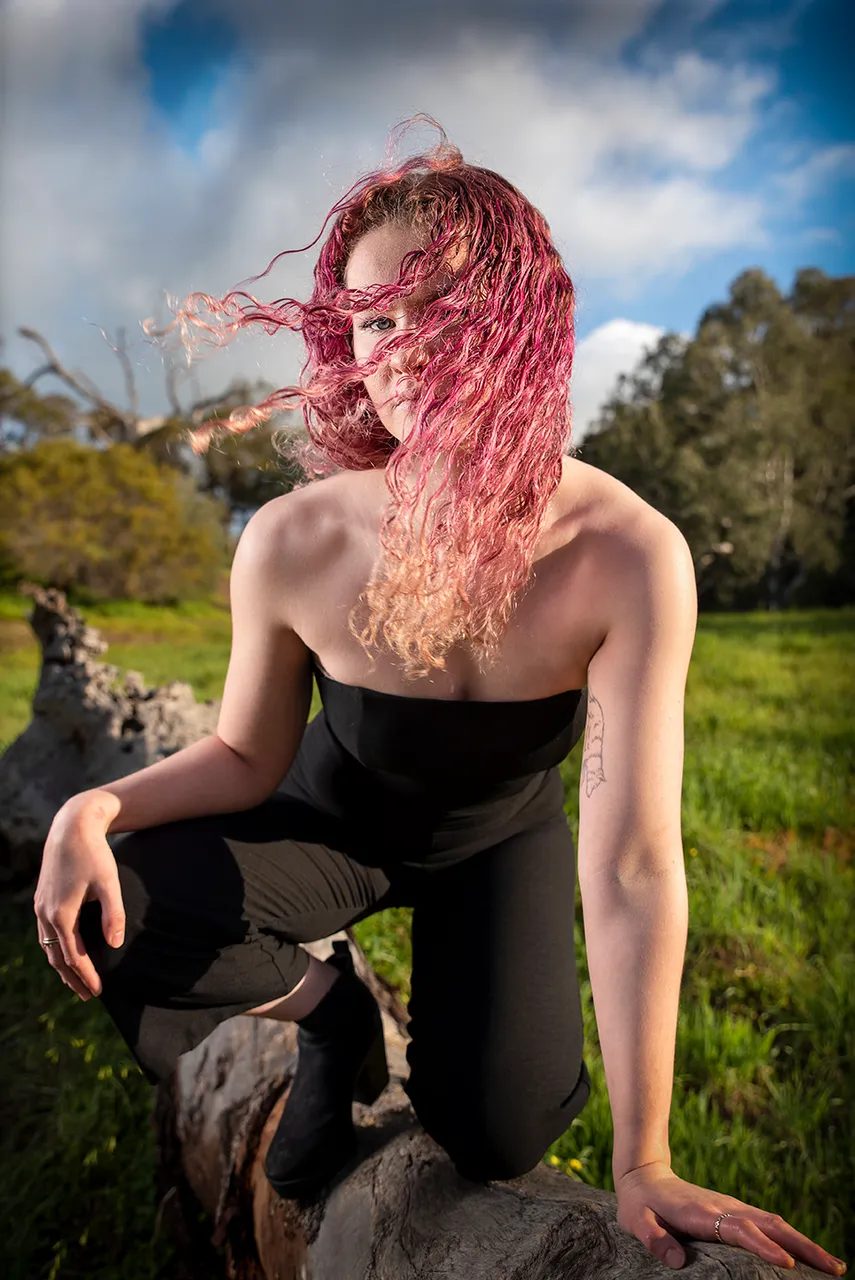
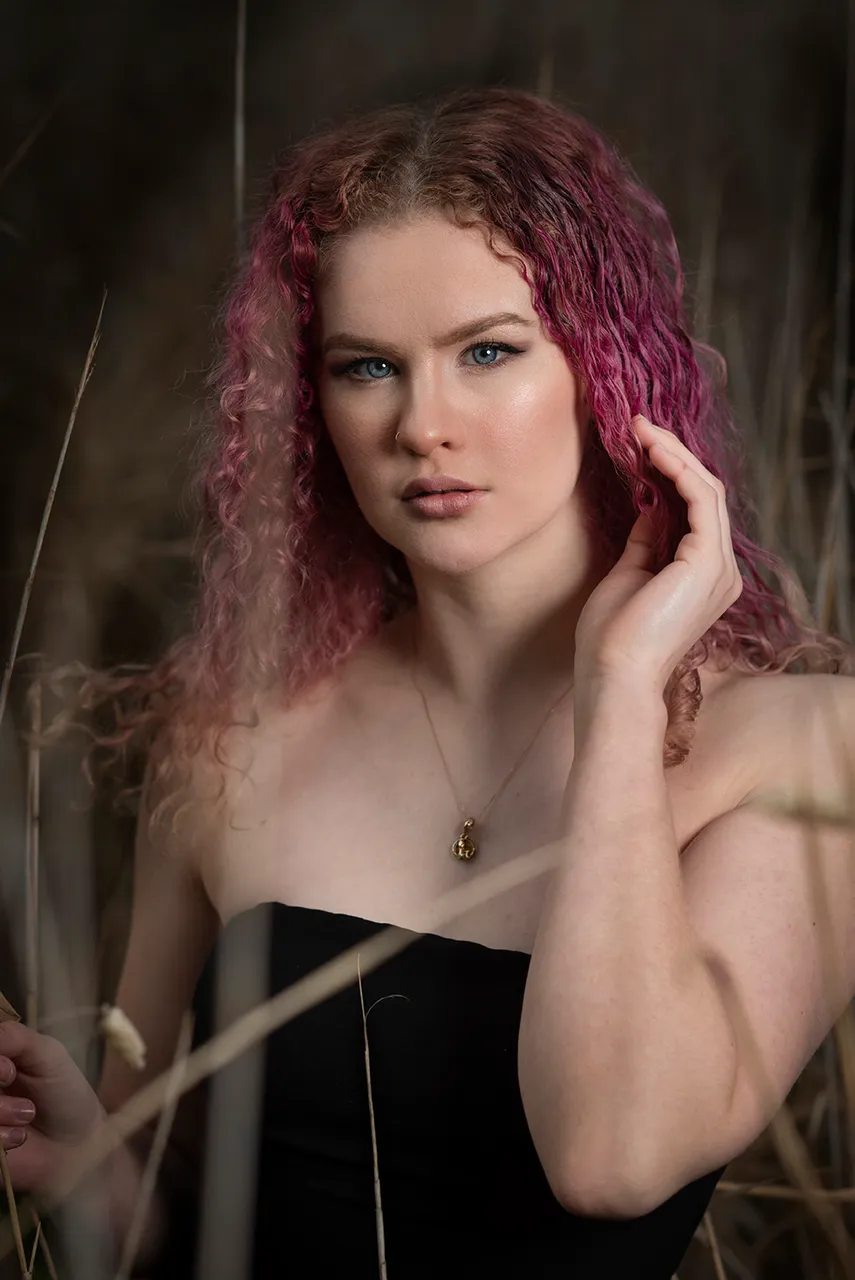
This first image is one that I absolutely love from the shoot - and it was a happy accident. I was asking Bec to move her head towards camera, and was "pre-focusing" on the location where her eye would end up. Enter a gust of window, and the sun popping out from behind a cloud (camera right) - and this moment was perfectly captured.
The images that follow are in simiar vein - with post processing consisting of some burning, dodging, and a mild use of frequency separation to even out tones. There's also a tad bit of selective sharpening applied across the image.
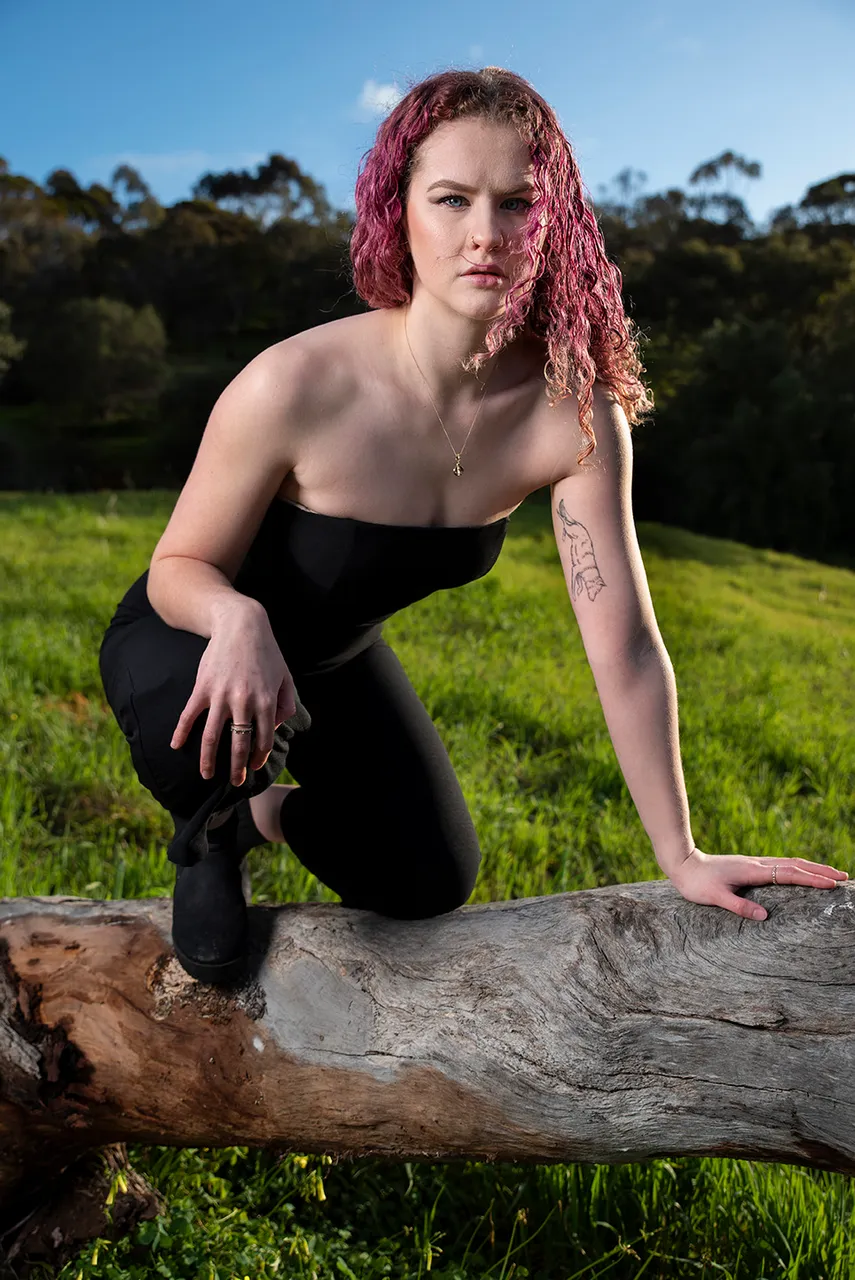
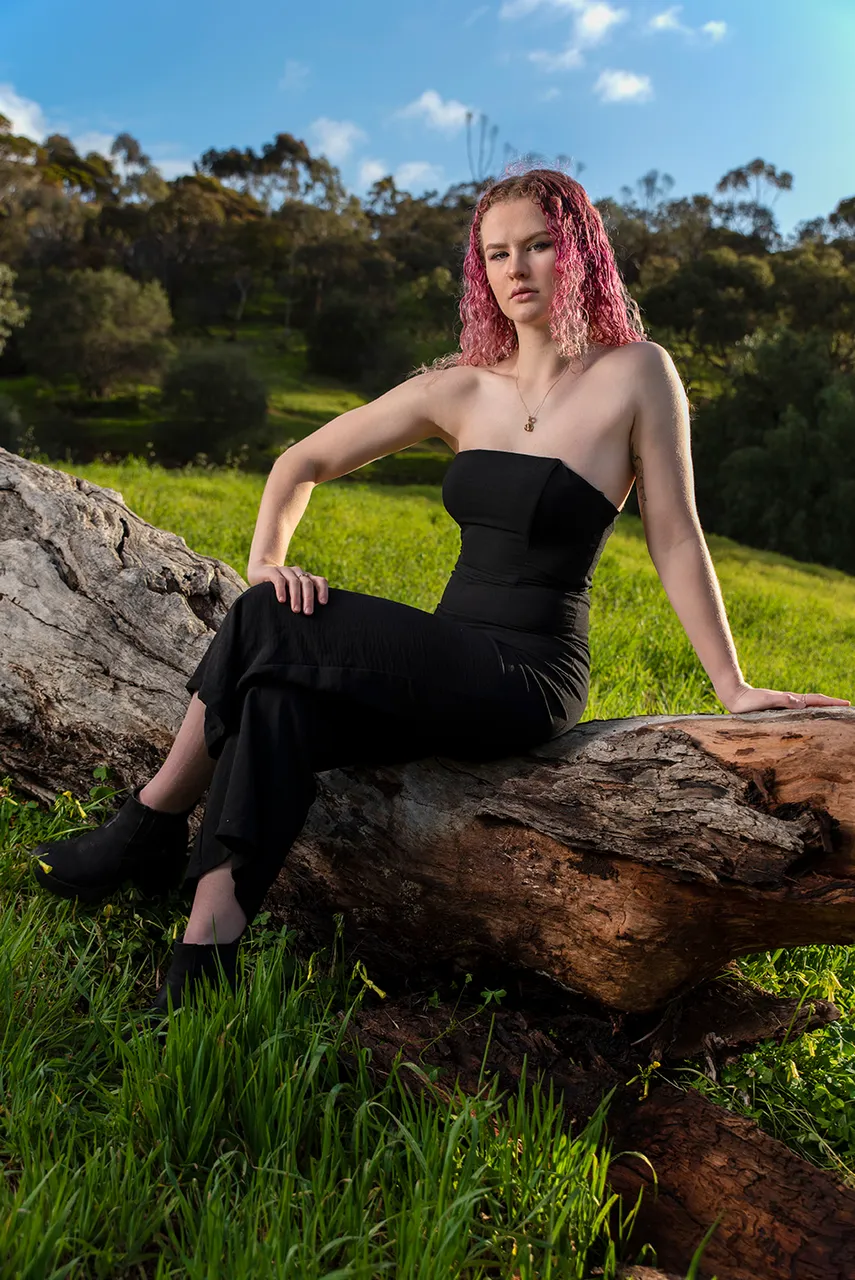
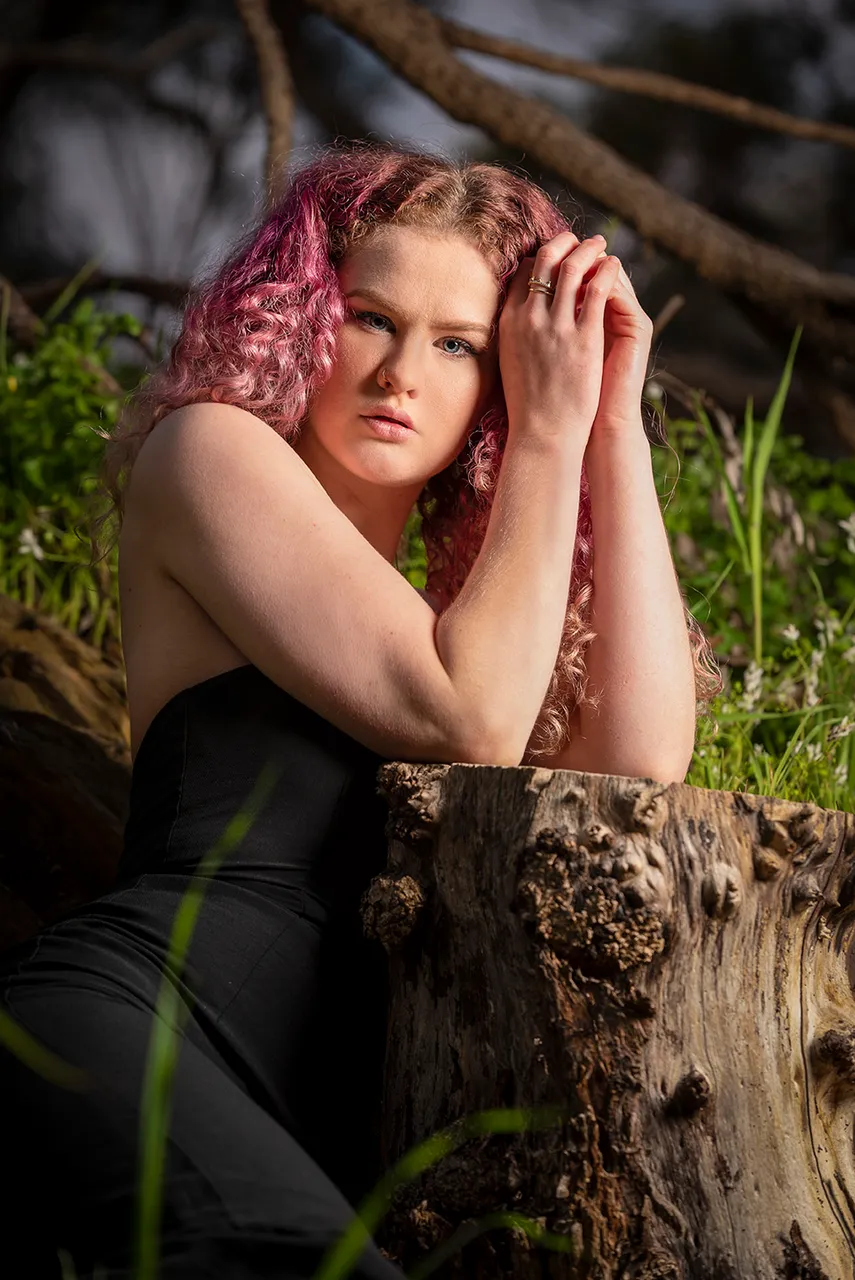
This was the first location of the shoot - a picturesque log on a hill. We then moved down the hill (after we had climbed it...) and found a hollowed out tree trunk that acted as a bit of a studio space. Here, I exposed in a similar way as I would indoors, or in a studio situation, using a single light, and the dark interior of the tree as a black "v-flat" to capture all the excess light from the flash, and get some nice low key portraits. 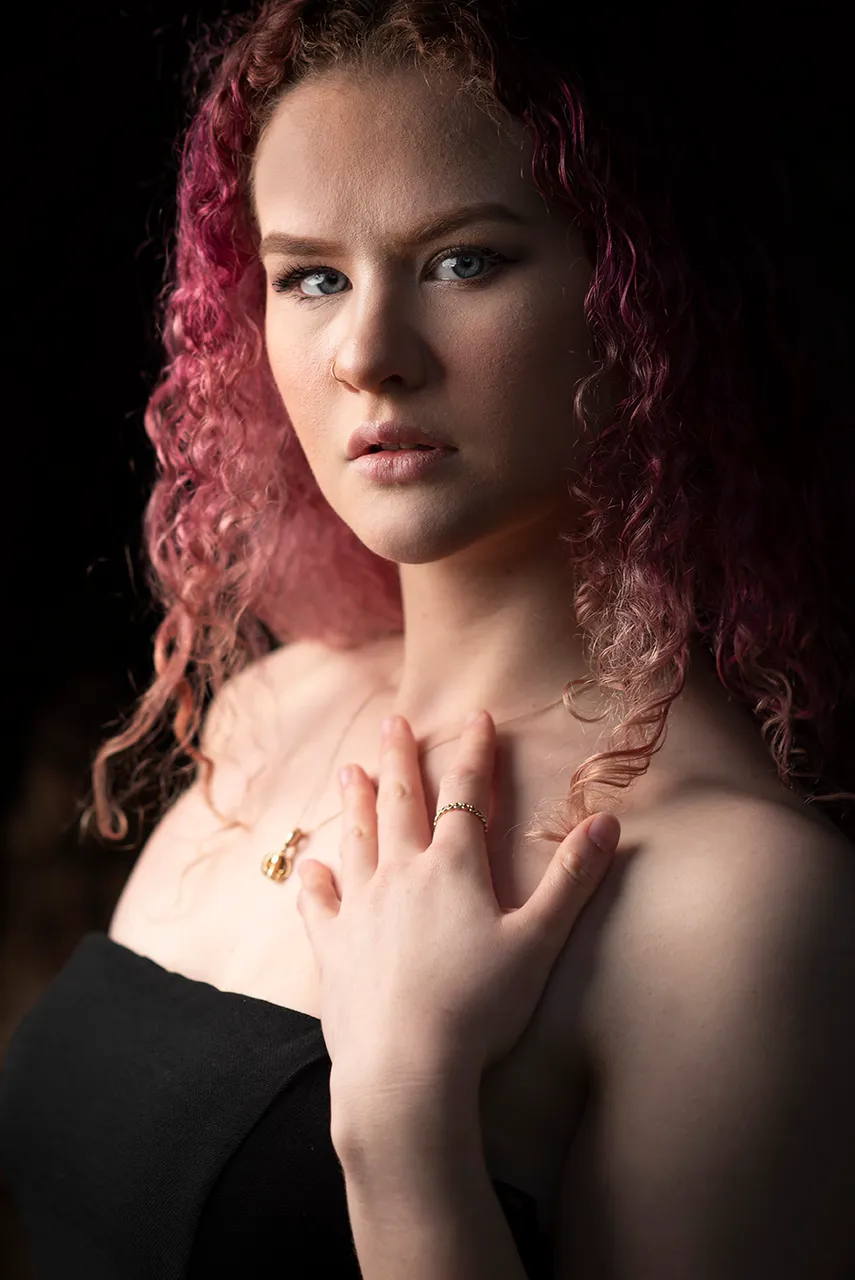
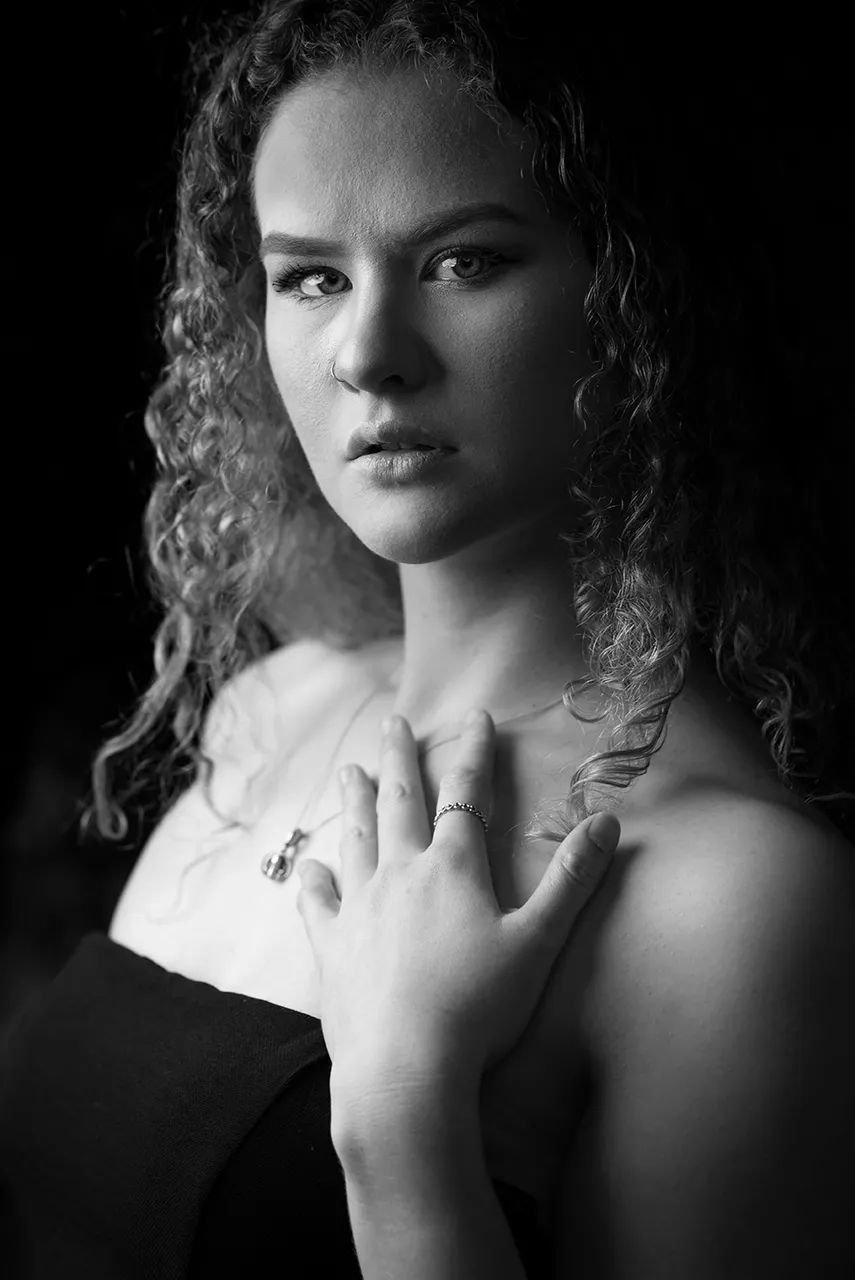
I couldn't decide whether I liked Black and White or Colour more, so I produced both options. I am leaning more towards the black and white versions of this part of the shoot.
I much prefer the black and white here - its contrasty, and a lot more timless than the colour variation.
Following the hollowed out tree log we moved to an area near the creek, that had some running water and a series of reeds. The image that follows is one of bec's favourites from that location.
I'm a little bit upset with my framing on this image. I cut off the shoulder to the right, and her hand to the left. I shot with with my 105 F/2 prime lens, and should've taken a single step back to bring those elements into the frame. This one looks incredibly in colour!
My favourite from the reeds was the last frame taken in that spot, which saw a more primal expression, and some interesting compositional elements as the reeds moved in the breeze. 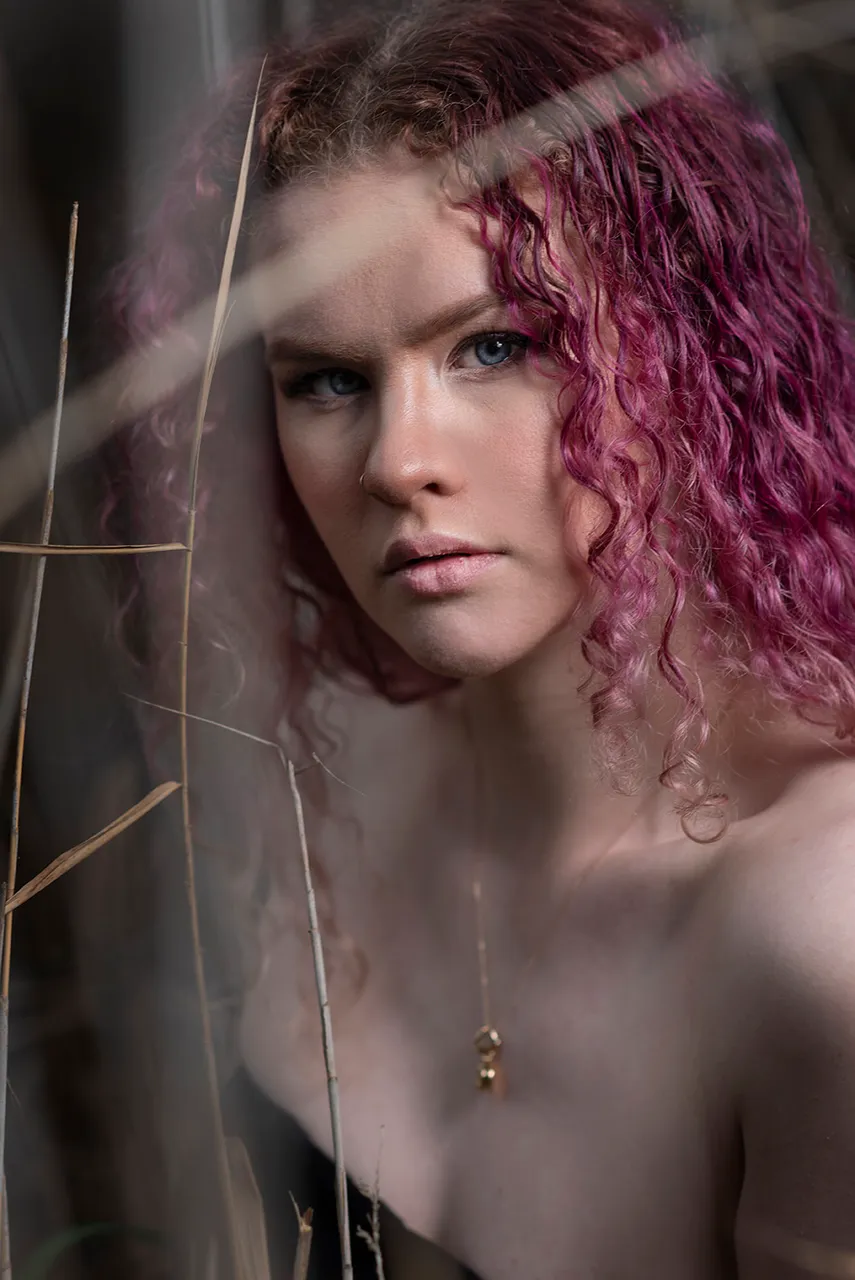
We then moved to another spot, where there was a bridge over the top of the creek. I was on the bridge, Bec moved to just near the water level, and I lay down on the cold concrete bridge. We didn't spend long here, as light was fading, and the cold afternoon air swirling against the trickling creek made it bloody freezing!
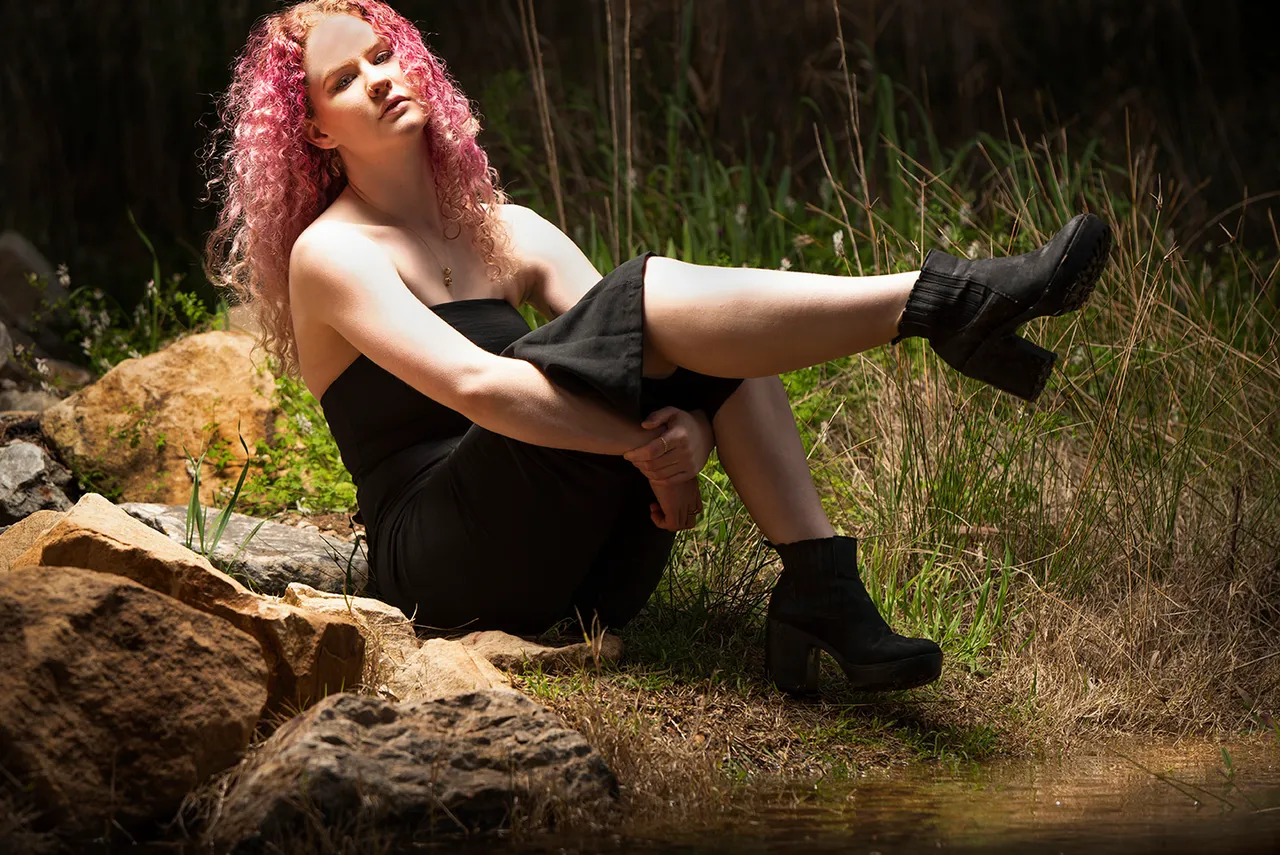
I decided to move away from this position when I could see goosepumps through the view finder- it was time to move. Good communication is always key when working with people. Here, the shot could be slightly better if I hadn't cropped out the top of Bec's hair. Lighting was from the sun (right), and a flash (above and to the left).
Finally, we moved to our last location for the shoot as light continued to fade very, very fast!
This location was up a steep hill, and we climbed up a muddy embankment to get there. There was a dazzling patch of awesome natural light, and I supplemented it with flash from the right of frame.
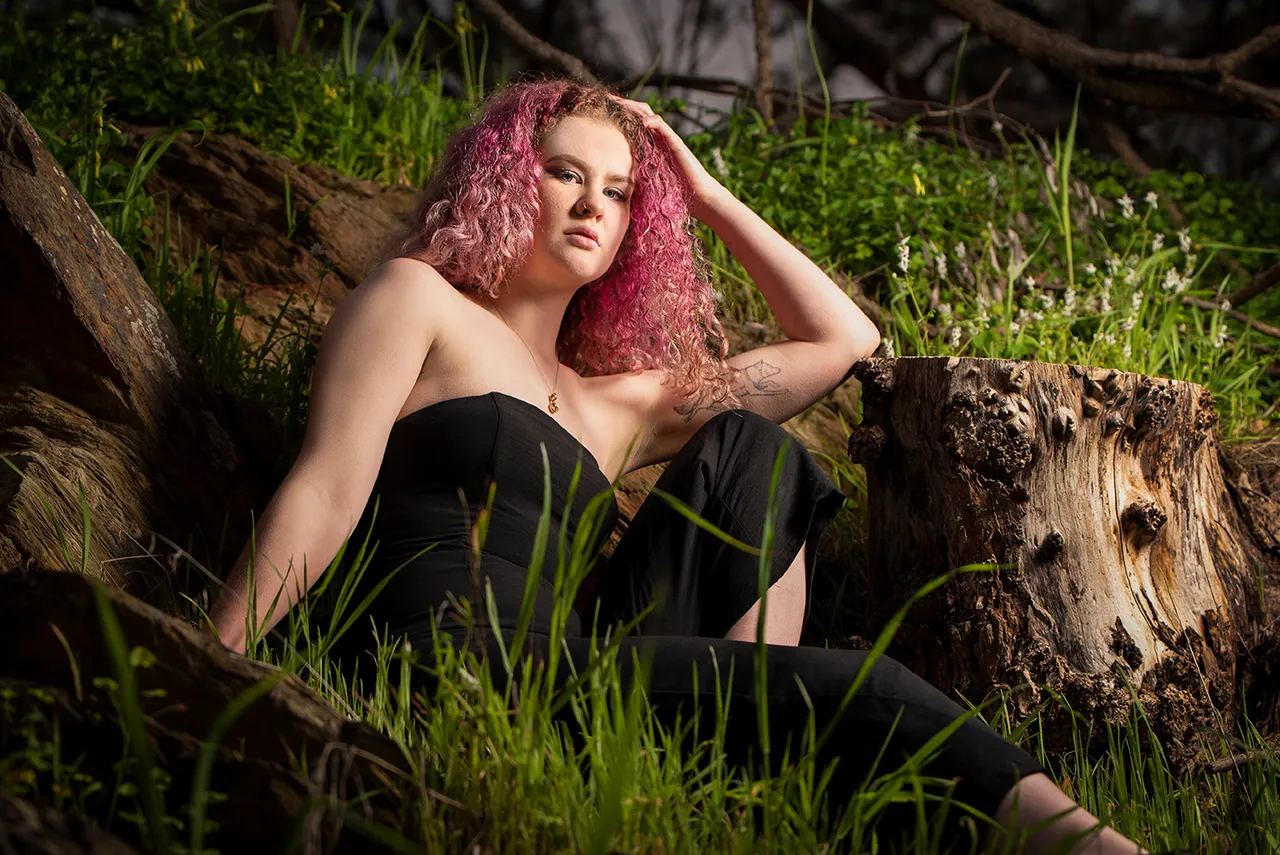
I saw something in that tree stump, among the rocks and grass, and decided to use it as a posing aid. I'm happy with the outcome:
All in all, this shoot was a good lesson in learning to use a new location. For once, I didn't location scout (beyond Google maps) - and made use of what was found in the environment. An assistant held up the flash (@ursa) - and I operated the camera and flash via a remote trigger.
A 80cm softbox is an ideal modifier for almost any situation, and in natural light and for portraits, it excels as a supplementary light source to take your portraits to the next level.
These images were shot on two different Nikon D750 camera bodies, and the lenses I used were a Tamron 70-200 f/2.8, Tamron 24-70 f/2.8, and the Nikkor 105 F2 DC. Lighting was provided by the sun, and a a Godox AD200 Portable strobe.
Thanks for reading, and please follow me if you want to see more of my photographic work - I've got a few on the editing table at the moment!
If you have any questions about my process, please let me know in the comments!