Hi everyone, sharing with you today a recently completed portrait commission of a family friend. He was very happy with the final result and I will share the process with you all here below.

I start with many quick marks trying to get a feel for the gesture and his energy. I am not too worried about proportions just focused on reflecting how he's feeling through the way I draw the fundamental strokes.
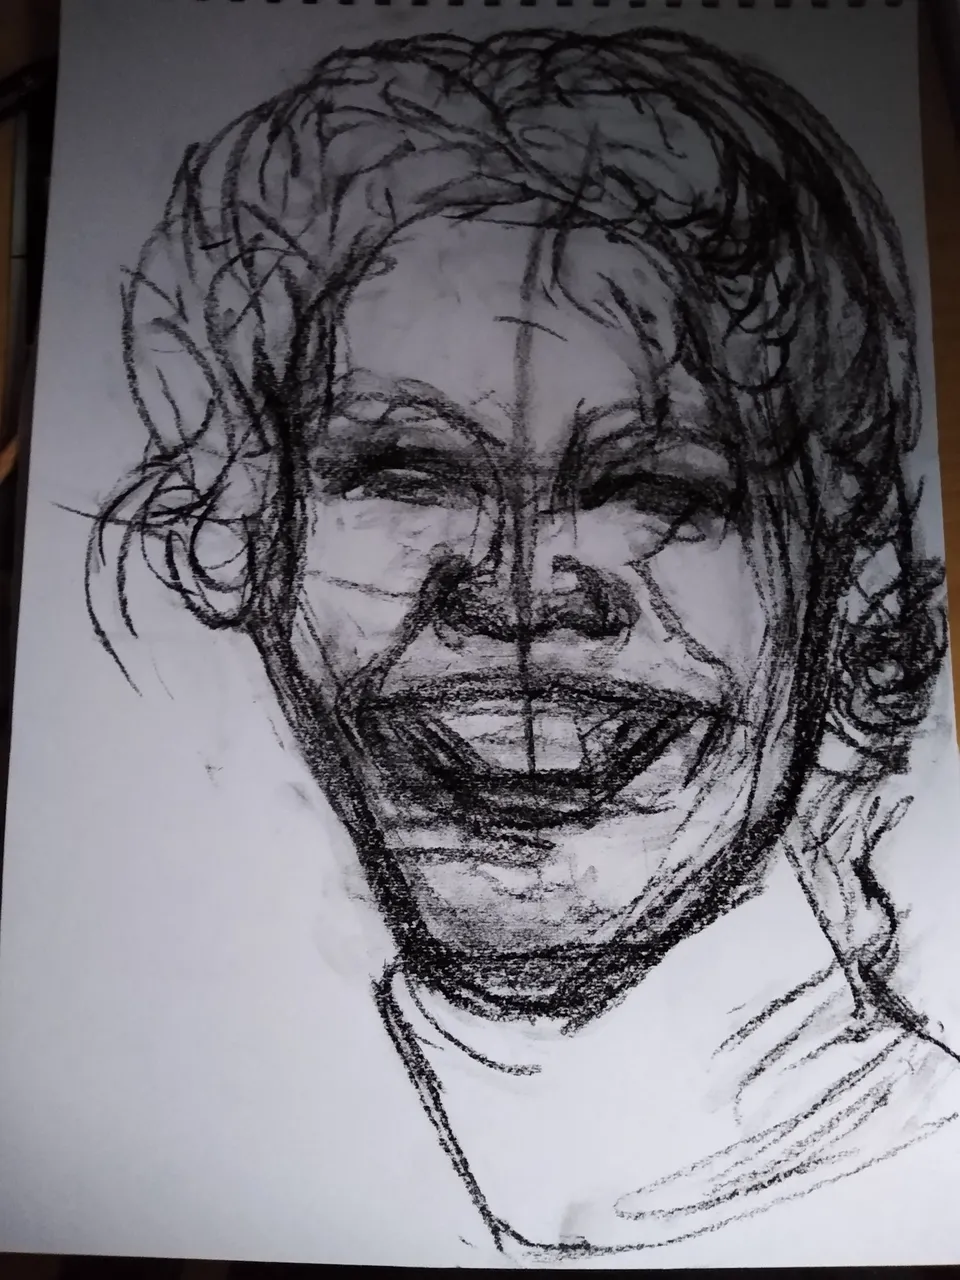
I then start to add the details and some of the tones to give his face shape.

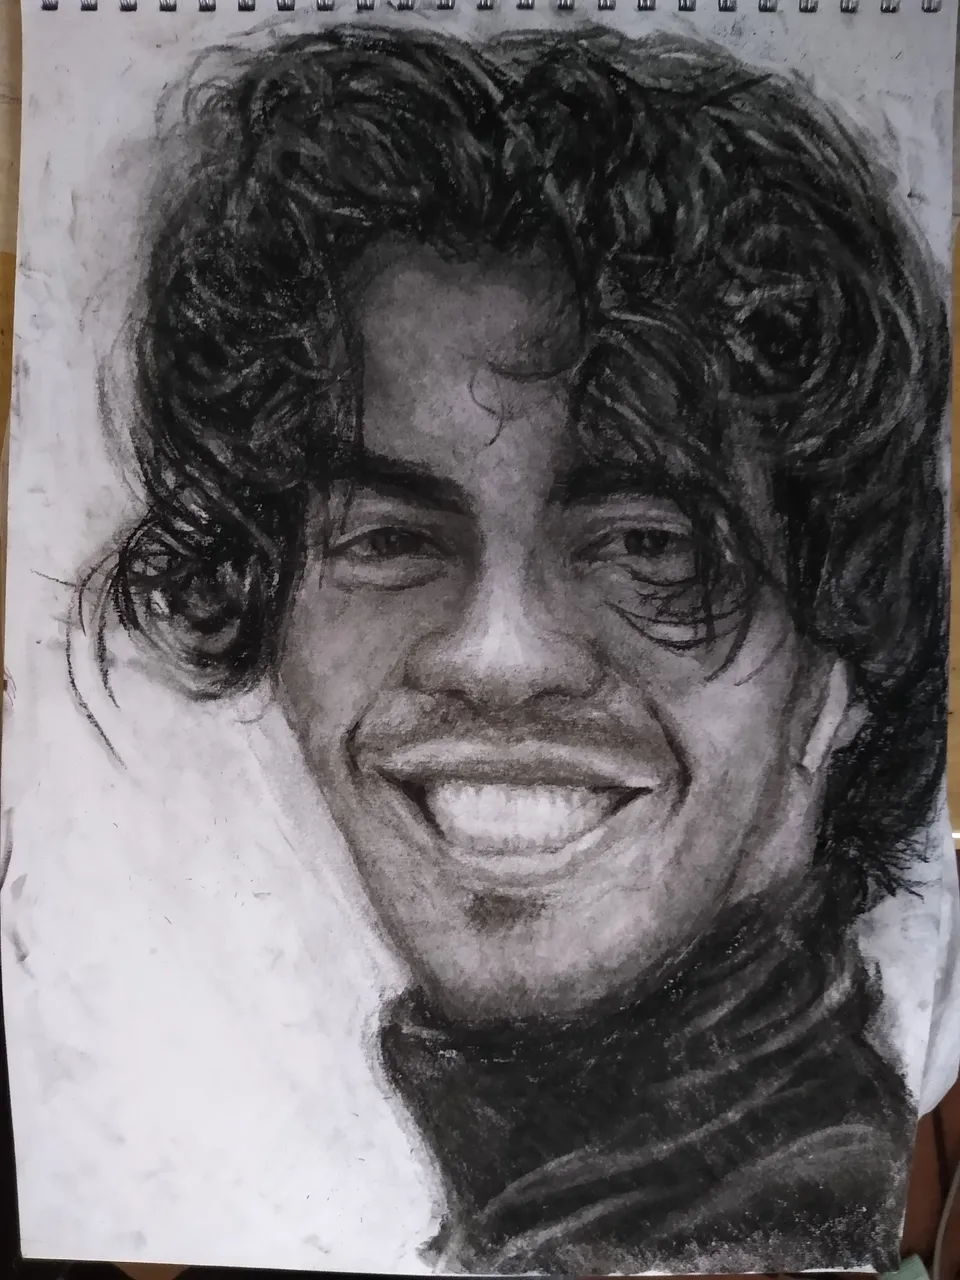
Next, I make some adjustments in proportions to make sure everything is as accurate as possible to the original reference image. I also use a blending stump to blend the tones. However, this then made the face too dark which I then used a putty rubber to lighten the skin tones.
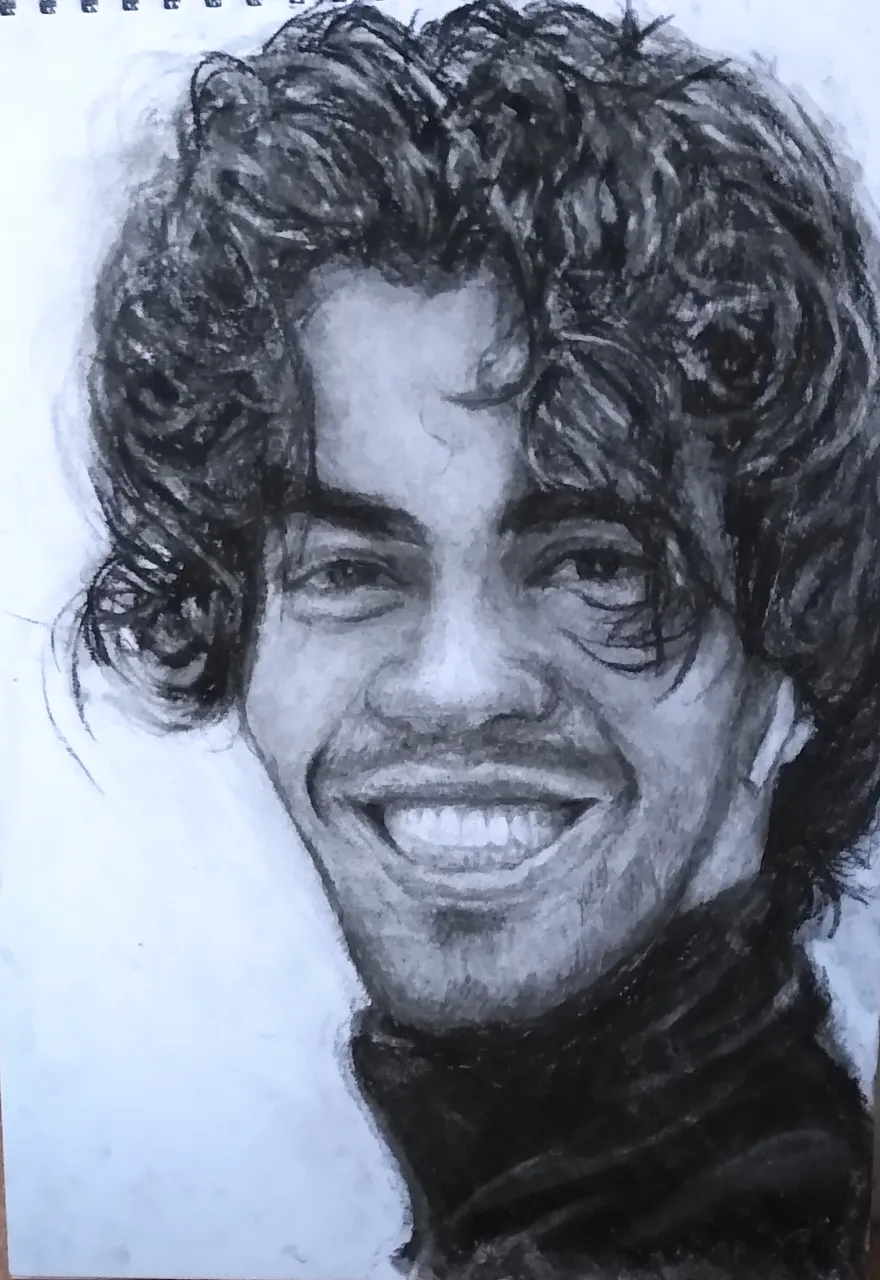
The final step involved smoothening the skin more as the rubber had left dotted marks and made final adjustments to the drawing that I may have missed. I find coming back to a drawing after a day or reflecting it in a mirror helps find any mistakes that I originally missed. I also add a slight bit of white charcoal in the pupils of the eyes to capture where light reflects of them and adds more life to the drawing.
Completed on A3 paper with charcoal pencils
Time: 5+ hours