(Below is the English version)
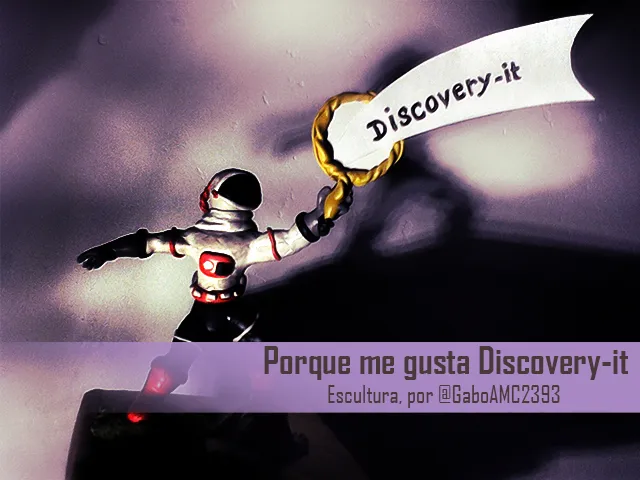
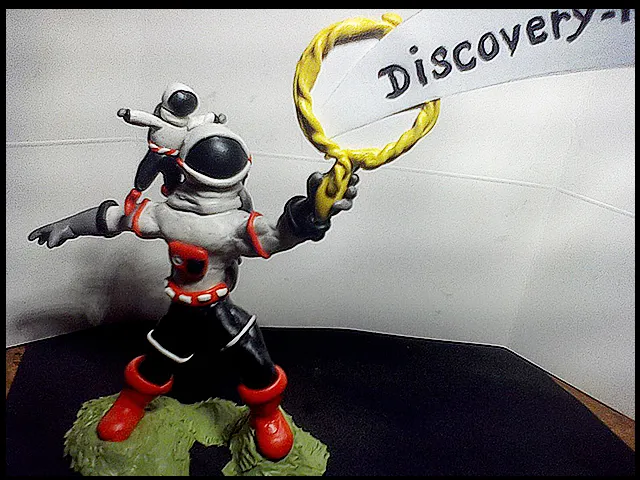
Saludos, comunidad de discovery-it. Esta publicación no tratará sobre el contenido que habitualmente publico, no; en esta ocasión les voy a mostrar la primera escultura que hago para Hive, específicamente para esta maravillosa comunidad discovery-it. Aunque antes había mencionado que era escultor, no había podido hacer ninguna escultura por carecer de materiales, pero encontré algo con lo cual podía hacer una escultura sencilla, pero muy bien lograda para la comunidad. Espero que les guste y les saque al menos una sonrisa, que eso es lo importante.
Últimamente le he agarrado el gusto a participar en concursos, no he ganado en muchos, por no decir ninguno, pero igual me divierto haciendo mis post de participación o los comentarios requeridos. Eso es lo importante, participar y disfrutar mientras lo haces. Fue por este gusto a los concursos que encontré el concurso de oscurity, ¿Por qué me gusta discovery-it?. Citando textualmente de su post, él dijo lo siguiente:
Muestranos tu talento, en eso se resume!!! crea un post en nuestra comunidad discovery-it puede ser: arte, musica, baile, fotografia, poema, escritura, DIY... Algo muy interesante original y que nos deje con la boca abierta!!!
Cuando leí eso me dije: "Gabo, tú eres escultor, eso es un arte. Compra algo con lo que puedas hacer una escultura y participa". Así que me decidí y aunque me tomó un par de días, vengo a dejar el paso a paso de esta sencilla, como ya dije, pero encantadora escultura. Esta será mi entrada al concurso y espero de corazón que la pequeña escultura les guste tanto como a mi. Dicho todo esto, comencemos.
Materiales
Hace mucho tiempo que no hacía esculturas, ya que normalmente usaba mucho alambre, pegamento y plastilina epóxica, masa flexible o cerámica fría, además de muchas pinturas y distintos materiales para que estas quedasen con un acabado profesional; lamentablemente, estos materiales son muy caros y no podía permitirme comprarlos, siendo honestos. Así que decidí usar un material mucho más sencillo: plastilina, sí, plastilina de toda la vida, la que usan los niños en la escuela.
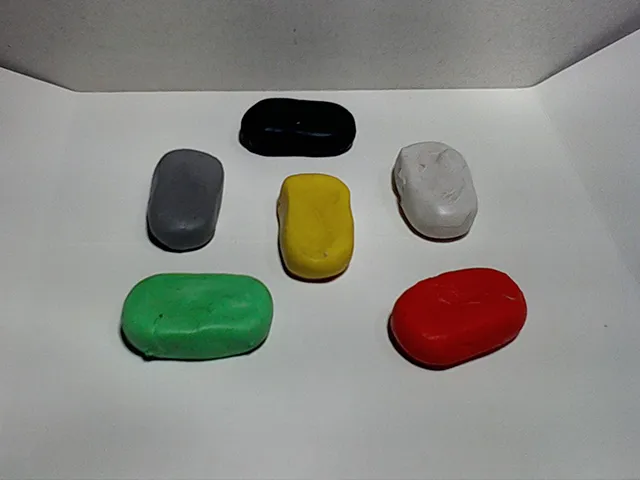
Tal vez alguien piense que es un material muy simple y que no se pueden hacer grandes cosas con esto, pero que va. Un escultor necesita simplemente dos cosas para hacer una escultura: el material a esculpir y sus herramientas; en mi caso, plastilina regular como material y mis manos como herramientas.
Escultura
La escultura se puede comparar, hasta cierto punto, a la construcción. Todo edificio debe llevar una base, se hace la construcción sobre esta base y se termina con los detalles. Teniendo esto en mente, lo primero que hice para este trabajo fue, desde luego, una base hecha de alambre dulce, o alambre suave de aluminio, el cual cubrí con papel y cinta adhesiva.
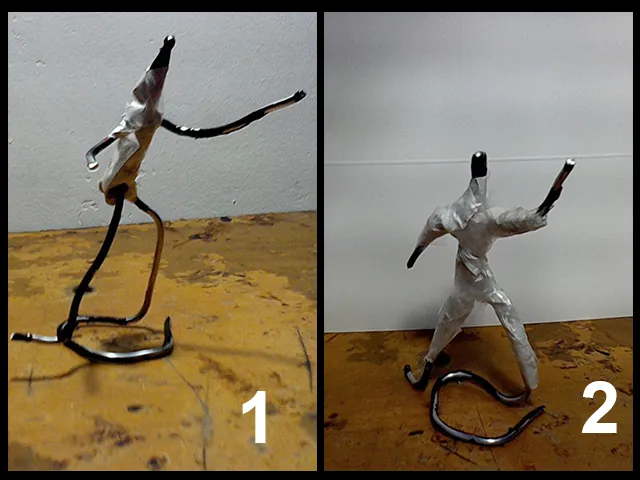
Sobre este esqueleto, por llamarlo de alguna manera, comencé a hacer el modelado. Acostumbro a comenzar por las piernas, así que esta no sería una excepción. Apliqué plastilina negra y luego moldeé con mucha paciencia hasta lograr las formas deseadas.

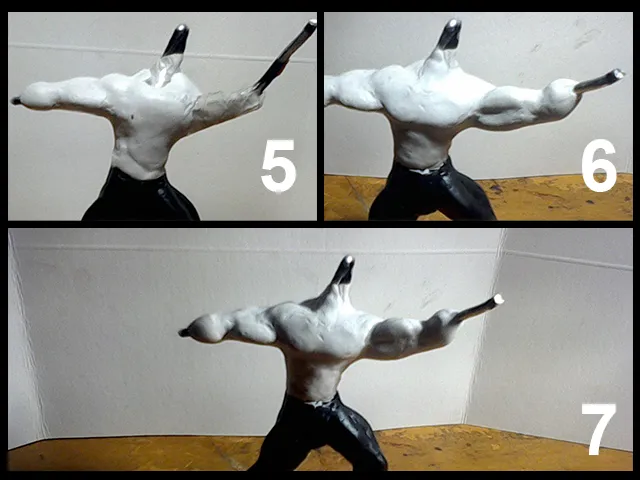
Lo siguiente fue el torso y los brazos. Primero apliqué una base blanca para definir la forma del torso (5), luego agregué más material para las extremidades (6) y finalmente moldeé hasta definir bien las formas del torso y los brazos (7).
Cuando vi el astronauta de la comunidad, vi que tenía un espejo, o algo así, en la mano. Debido a esto, tuve que agregar un poco más de alambre de cobre como base para el espejo.
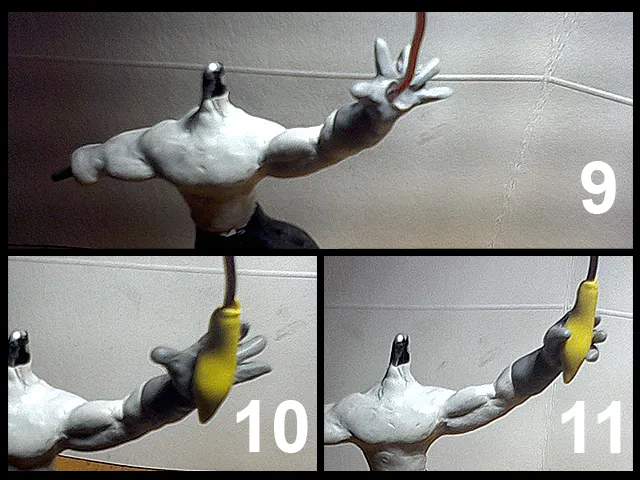
Sobre este alambre moldeé la mano derecha (9), luego el mango del espejo (10) y lo sujeté con los dedos de las manos (11).
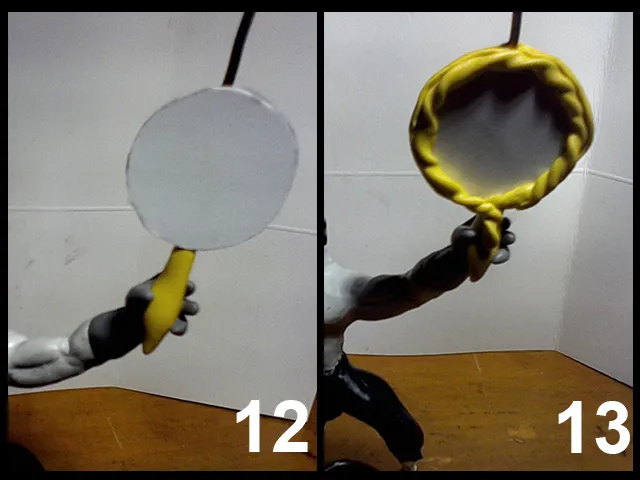
Con un poco de cartulina hice el cuerpo del espejo (12), luego el borde con cierto decorado (13).
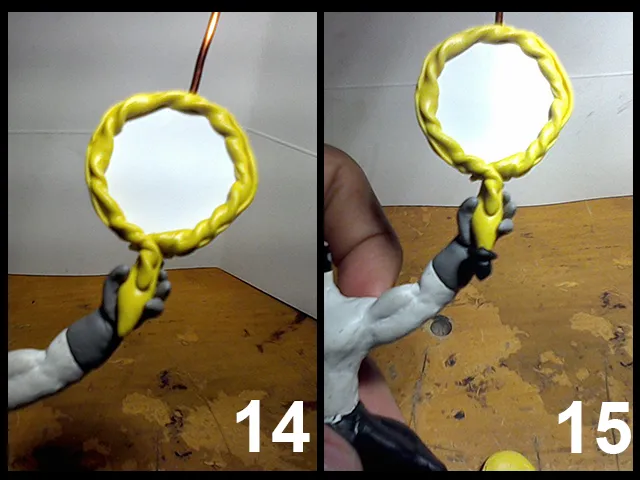
A continuación se observa como quedó tras haber terminado casi todo (14), sin olvidar el detalle en la parte de abajo del mango (15).
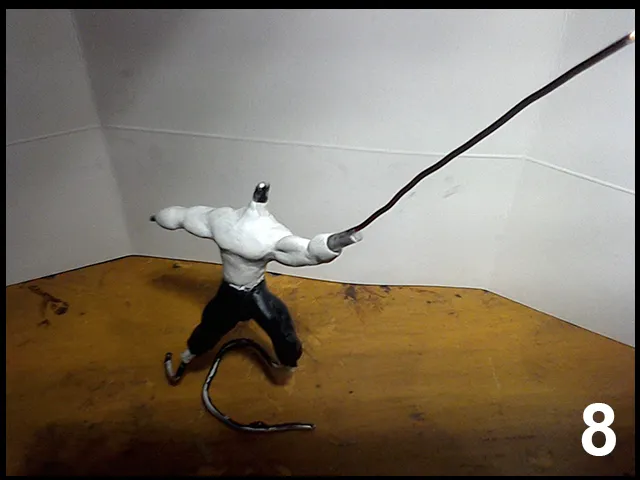
Tras haber hecho la mano izquierda, hice la mano derecha, con sus dedos separados.

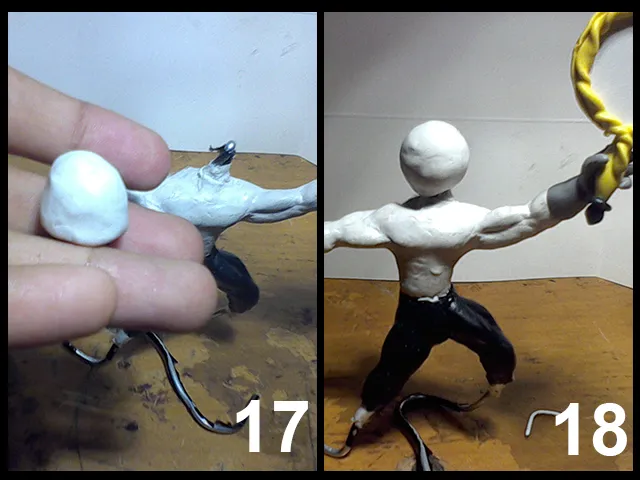
Acto seguido, comencé a trabajar con el casco. Simplemente hice una esfera de plastilina blanca (17) y la coloqué sobre el cuello de nuestro astronauta (18).
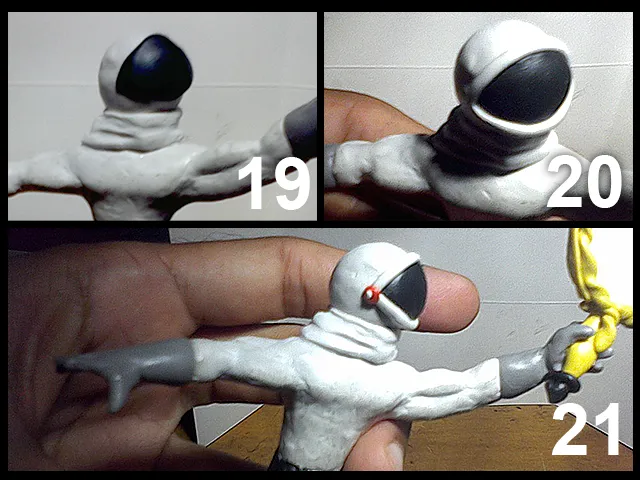
Acá debo mencionar que mientras hacía la escultura olvidé tomar fotos a un par de pasos para la realización del casco, así que pido disculpas. Sin embargo les contaré lo que hice. Como se observa en la imagen (19), el casco ya tiene el visor negro, el cual es una lamina de plastilina negra cortada a la medida; además, se observa el cuello del casco, que no es más que una tira de plastilina blanca moldeada alrededor del cuello de nuestro astronauta. Después de esto, le hice el borde al visor del casco (20) y las "visagras" que van en los laterales (21).
Terminada la parte superior, comencé con la inferior. Hice la bota izquierda (22), luego la derecha (23).
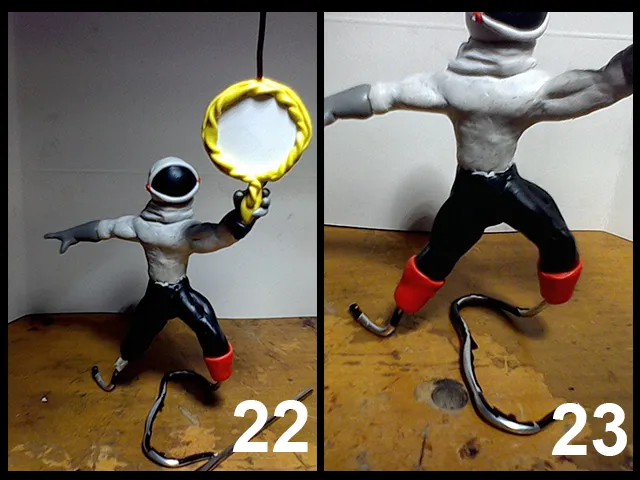
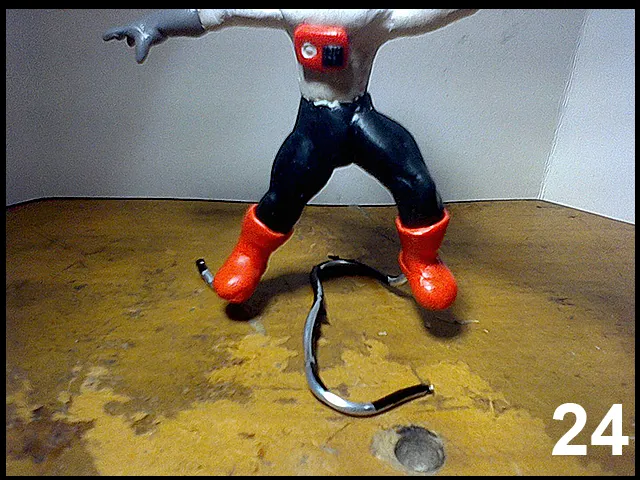
No es tan complicado, simplemente es agregar plastilina roja alrededor del alambre y moldear hasta lograr la forma deseada. Podemos valernos de palillos de dientes o herramientas similares si no no podemos con las manos; en cualquier caso, queda de la siguiente manera:
Listo el cuerpo de nuestro astronauta, ahora sigue su tanque de oxígeno. Hice unas cuantas placas que servirían como protectores de la espalda y el tanque con una suerte de manguera para conectarla con el casco.
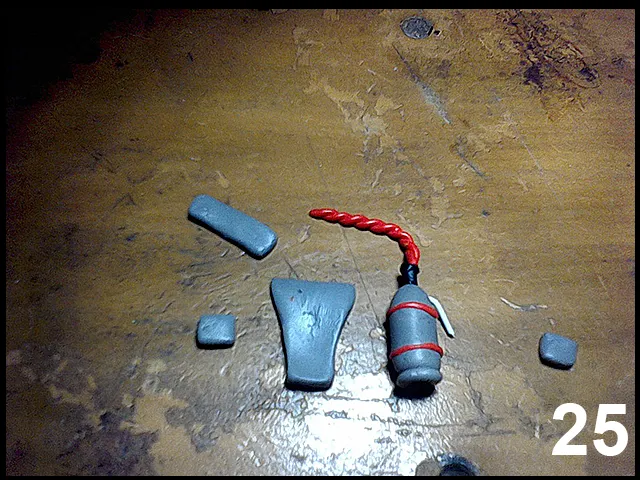
Todo puesto en su lugar, queda de la siguiente manera:
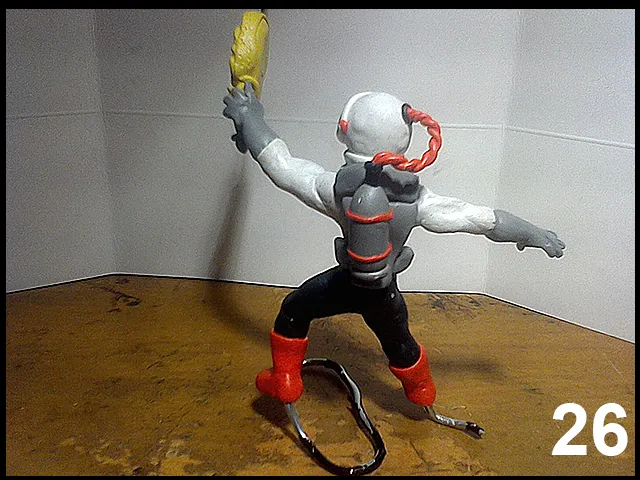
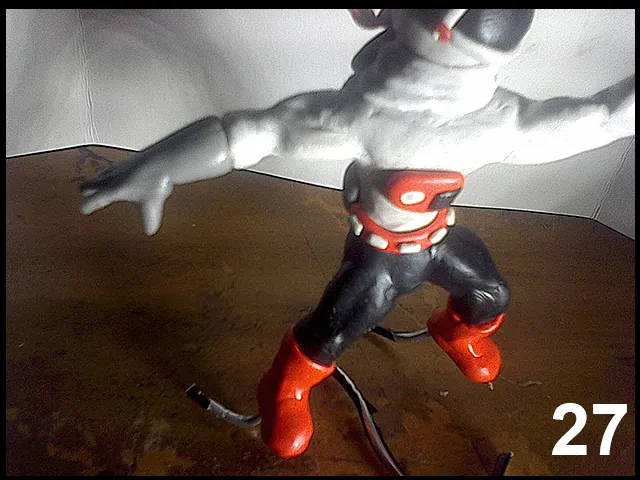
A continuación, hice el cinturón rojo con blanco que tiene el astronauta y el panel que lleva en el pecho.
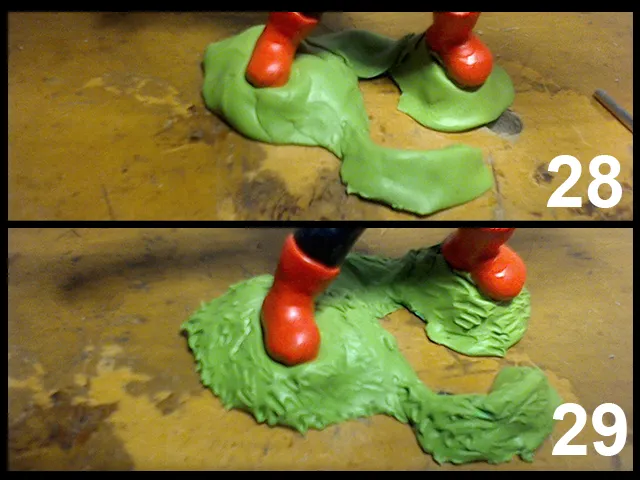
Listo el cuerpo, decidí hacerle una base verde, porque no tenía ningún otro color que se pareciese al suelo. Imaginemos que está en un pequeño planeta extraterrestre donde hay césped. Primero coloqué la plastilina, así así a lo bestia (28), luego la raspé con un palillo de dientes para simular el pasto (29).
Como último detalle, corté un trozo de papel donde escribí "Discovery-it" y lo pequé en el espejo, tal como está en el logo de la comunidad. También le agregué las cintas rojas en los brazos y las cintas blancas en las piernas, porque todo está en los detalles, ¿cierto? Si no me crees, mira como quedó nuestro simpático astronauta:
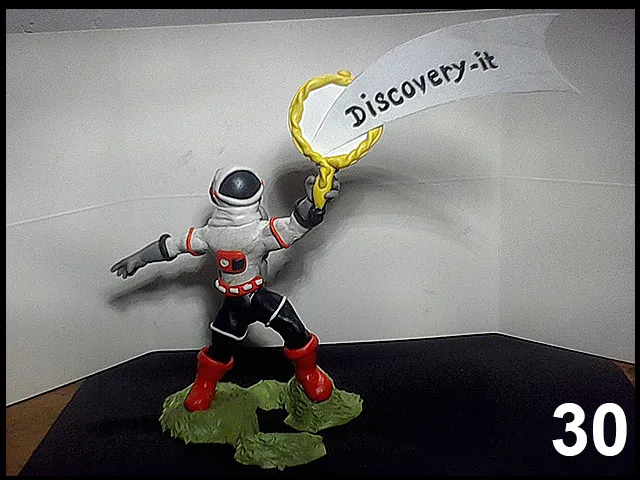
A mi me ha encantado como ha quedado, pero claro, porque yo lo hice. Es como cuando las madres dicen que sus hijos son bonitos, porque al fin y al cabo son sus hijos y para las madres sus hijos son lo más hermoso que tienen. Mi mamá decía que yo era el niño más bonito del mundo y yo le creo, aunque medio mundo diga lo contrario. Yo digo que este astronauta es el más bonito del mundo, y el astronauta va a tener que creerme...
Bien, ya que terminamos el paso a paso, vamos con unas fotos con más detalles de todo el resultado. Aquí se las dejo, para su disfrute:
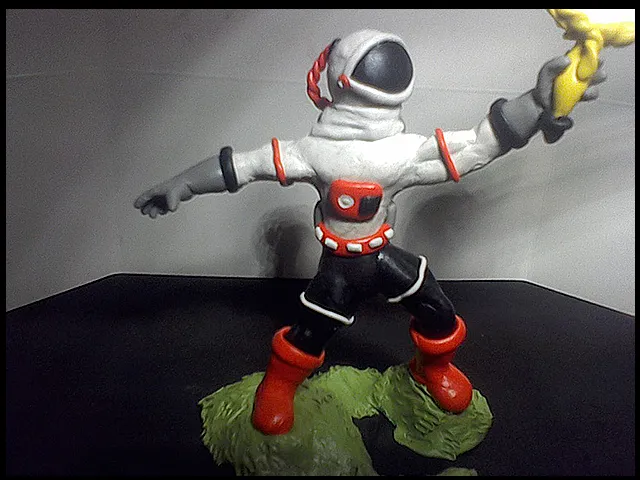
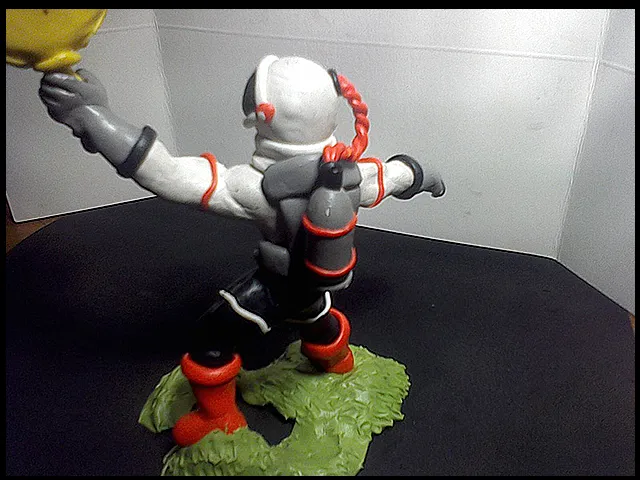

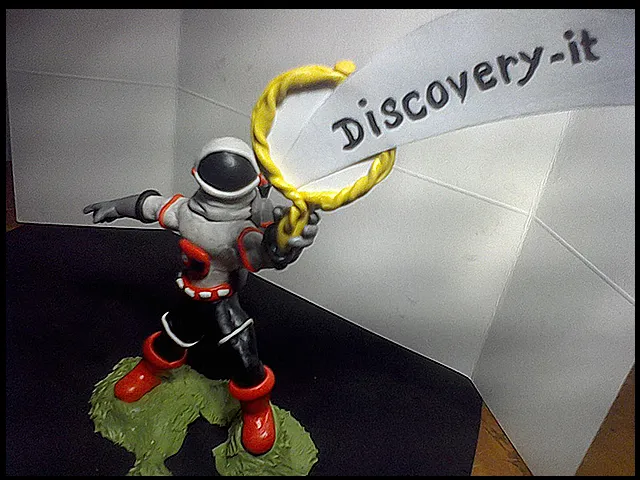
¡Ah! Seguro pensaron que me había olvidado de la versión original del astronauta, pero no, aquí está:

Mi versión tiene un poquito más de músculos e intenta ser una versión más estilizada y modernizada del astronauta, pero vamos, no hay que olvidarse del origen, así que ahí está, se las dejo para que vean lo contentos que se ven los dos, posando para la foto:
Una más...

Bien amigos, gracias por haber llegado hasta acá, hasta el final de la publicación. Espero te haya gustado este post, algo distinto pero que me ha gustado y trataré de hacer más seguido.
Me gustaría hacer mención de algunos usuarios a los que les comenté que estaría haciendo esta escultura, para que la vean con más detalle. Primero las damas: brittandjosie, thekittygirl, nioberojas y kellyrsa; ahora los caballeros: stayten, pranavinaction, josueprime, trippymane y como no, wesphilbin y su thoughtfuldailypost.
Un saludo también a oscurity , quien publicó este interesante concurso.
Bien amigos, espero que la publicación les haya gustado. Si desean dejar sus opiniones sobre la escultura, abajo están los comentarios para que lo hagan. Sin más me despido...
¡Hasta la próxima!
*****English Version*****

Greetings, discovery-it community. This post will not be about the content I usually publish, no; this time I'm going to show you the first sculpture I make for Hive, specifically for this wonderful community discovery-it. Although I had mentioned before that I was a sculptor, I had not been able to make any sculpture for lack of materials, but I found something with which I could make a simple sculpture, but very well achieved for the community. I hope you like it and it brings at least a smile to your faces, that's what's important.
Lately I've taken a liking to participate in contests, I haven't won many, if any, but I still have fun doing my participation posts or the required comments. That's the important thing, to participate and enjoy while you do it. It was because of this love of contests that I found oscurity's contest, Why do I like discovery-it?. Quoting verbatim from his post, he said the following:
Show us your talent, that's what it boils down to !!! create a post in our community discovery-it can be: art, music, dance, photography, poem, writing, DIY ... Something very interesting original and that leaves us with our mouths open!
When I read that I said to myself: "Gabo, you are a sculptor, that is an art. Buy something with which you can make a sculpture and participate". So I made up my mind and although it took me a couple of days, I come to leave the step by step of this simple, as I said, but lovely sculpture. This will be my entry to the contest and I sincerely hope you like the little sculpture as much as I do. Having said all that, let's get started.
Materials
It has been a long time since I did sculptures, since I usually used a lot of wire, glue and epoxy plasticine, flexible dough or cold ceramic, plus a lot of paints and different materials to make them with a professional finish; unfortunately, these materials are very expensive and I could not afford to buy them, to be honest. So I decided to use a much simpler material: plasticine, yes, the plasticine that children use at school.

Maybe someone thinks that it is a very simple material and that you can't do great things with it, but it's not. A sculptor simply needs two things to make a sculpture: the material to sculpt and his tools; in my case, regular plasticine as material and my hands as tools.
Sculpture
Sculpture can be compared, to a certain extent, to construction. Every building must have a base, the construction is made on this base and finished with the details. With this in mind, the first thing I did for this work was, of course, a base made of sweet wire, or soft aluminum wire, which I covered with paper and tape.

On this skeleton, so to speak, I started to do the modeling. I usually start with the legs, so this would be no exception. I applied black plasticine and then I molded with a lot of patience until I achieved the desired shapes.

Next was the torso and arms. First I applied a white base to define the shape of the torso (5), then I added more material for the extremities (6) and finally I molded until the shapes of the torso and arms were well defined (7).

When I saw the community astronaut, I saw that he was holding a mirror, or something like that, in his hand. Because of this, I had to add some more copper wire as a base for the mirror.

On this wire I molded the right hand (9), then the handle of the mirror (10) and held it with the fingers of my hands (11).

With some cardboard I made the body of the mirror (12), then the edge with some decoration (13).

Here is how it looked after almost everything was finished (14), without forgetting the detail at the bottom of the handle (15).

After having made the left hand, I made the right hand, with its fingers separated.

Next, I started working with the helmet. I simply made a white plasticine sphere (17) and placed it on the neck of our astronaut (18).

Here I should mention that while I was making the sculpture I forgot to take pictures of a couple of steps to make the helmet, so I apologize. However, I will tell you what I did. As you can see in the image (19), the helmet already has the black visor, which is a sheet of black plasticine cut to size; also, you can see the neck of the helmet, which is nothing more than a strip of white plasticine molded around the neck of our astronaut. After this, I made the edge of the helmet visor (20) and the "hinges" that go on the sides (21).

The upper part finished, I started with the lower part. I made the left boot (22), then the right boot (23).

It is not so complicated, just add red plasticine around the wire and mold it to the desired shape. We can use toothpicks or similar tools if we can't do it with our hands; in any case, it looks like this:

Ready the body of our astronaut, now follows his oxygen tank. I made a few plates that would serve as back protectors and the tank with a sort of hose to connect it to the helmet.

Everything put in its place, it is as follows:

Next, I made the red belt with white that the astronaut has and the panel he wears on his chest.

Ready the body, I decided to make it a green base, because it had no other color that resembled the ground. Let's imagine that it is on a small alien planet where there is grass. First I placed the plasticine, just like that (28), then I scraped it with a toothpick to simulate the grass (29).

As a last detail, I cut a piece of paper where I wrote "Discovery-it" and stuck it on the mirror, just as it is in the community logo. I also added the red ribbons on the arms and the white ribbons on the legs, because it's all in the details, right? If you don't believe me, look how our cute astronaut turned out:

I loved the way it turned out, but of course, because I made it. It's like when mothers say that their children are beautiful, because at the end of the day they are their children and for mothers their children are the most beautiful thing they have. My mom used to say that I was the most beautiful child in the world and I believe her, even though half the world says otherwise. I say that this astronaut is the most beautiful astronaut in the world, and the astronaut will have to believe me...
Well, since we finished the step by step, let's go with some photos with more details of the whole result. Here they are, for your enjoyment:


I'm sure you thought I had forgotten about the original version of the astronaut, but no, here it is (Here it is = Aquí está):

My version has a little more muscles and tries to be a more stylized and modernized version of the astronaut, but come on, let's not forget the origin, so there it is, I leave it for you to see how happy they both look, posing for the picture:

One more...

Well friends, thank you for having come this far, until the end of the publication. I hope you liked this post, something different but that I liked and I will try to do more often.
I'd like to mention some of the users I told that I would be making this sculpture, so they can see it in more detail. First the ladies: brittandjosie, thekittygirl, nioberojas and kellyrsa; now the gentlemen: stayten, pranavinaction, josueprime, trippymane and of course, wesphilbin and his thoughtfuldailypost.
A shout out also to oscurity , who posted this interesting contest.
I hope you liked the publication. If you want to leave your opinions about the sculpture, below are the comments for you to do so. Without further ado, I bid you farewell...
See you next time!

Fotografías tomadas con Tablet HP Stream 7
Imagen principal editada con Photoshop
Traducido con DeepL
Photographs taken with the HP Stream 7 Tablet
Main image edited with Photoshop
Translated with DeepL
Últimos tres post/Last three posts:
#LEARNANDEARN - My fitst month at Hive / Mi primer mes en Hive
Blanco y negro - Regla de los impares
A Sacred Book - Contest / Un libro sagrado - Concurso
