Making crafts is one thing I enjoy doing. I would like to call it a hobby but I'm not certain if I've reached the hobby-level yet. Few days ago, I was scrolling through the pinterest app a friend recently recommended to me. I wasn't looking for anything in particular but I found something that caught my interest and so, I decided to replicate it.
Edited on canva
Have you ever been to a person's house and all the interior decors are just very appealing and eye-catching? Interior decors are one very vital part of a house. It helps to add to the aesthetics but most of them are really pricey. Finding decor items that you resonate with can be really hard but there is always a way out; making them.
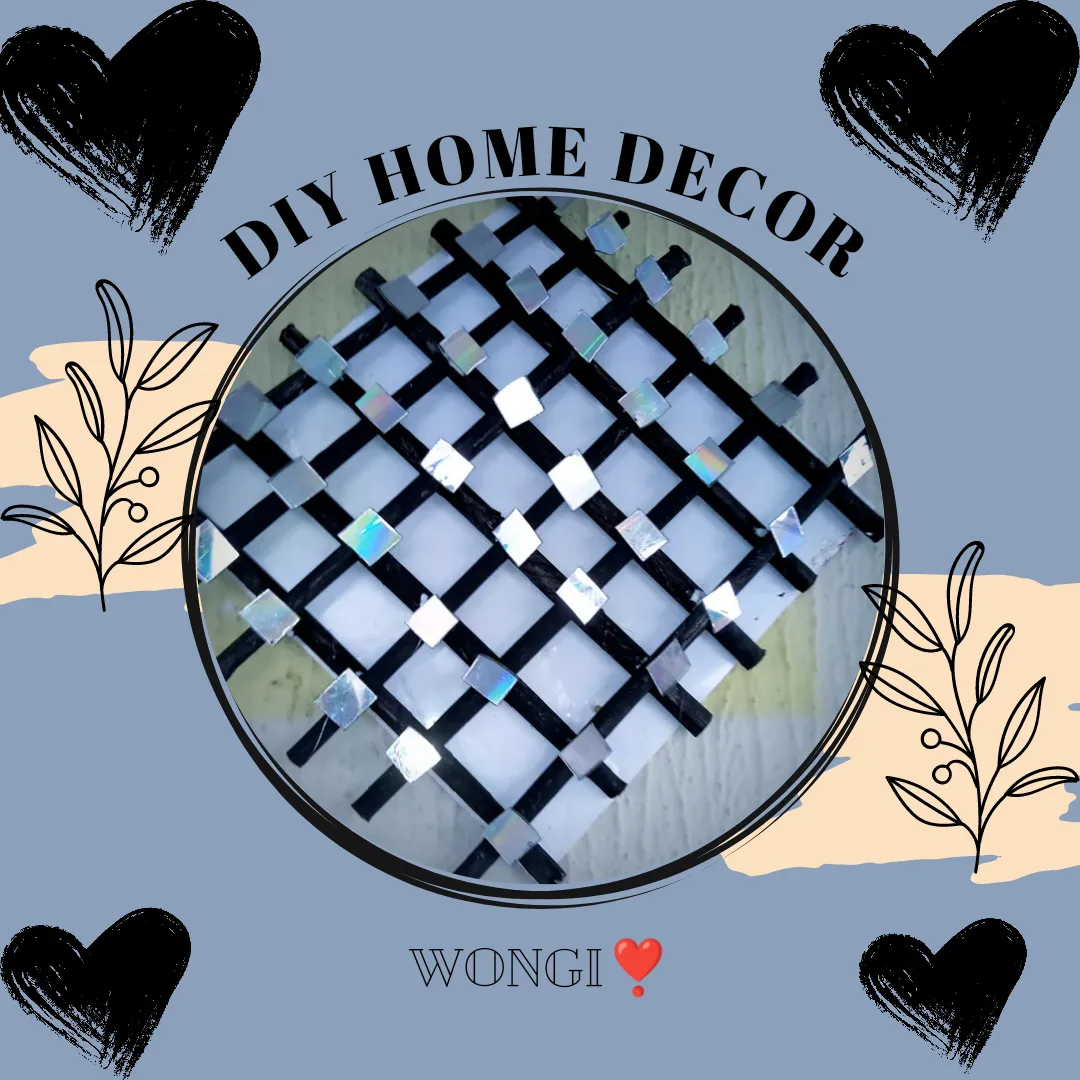
Homemade interior decorations have a very different and special feel because you made them yourself and as such, you can appreciate its beauty even more. I made this decor for the parlour and I can't afford to stop staring. The best part is that I made it using waste materials. With that, let me take you through the process of making this beauty.

Materials
- Old papers
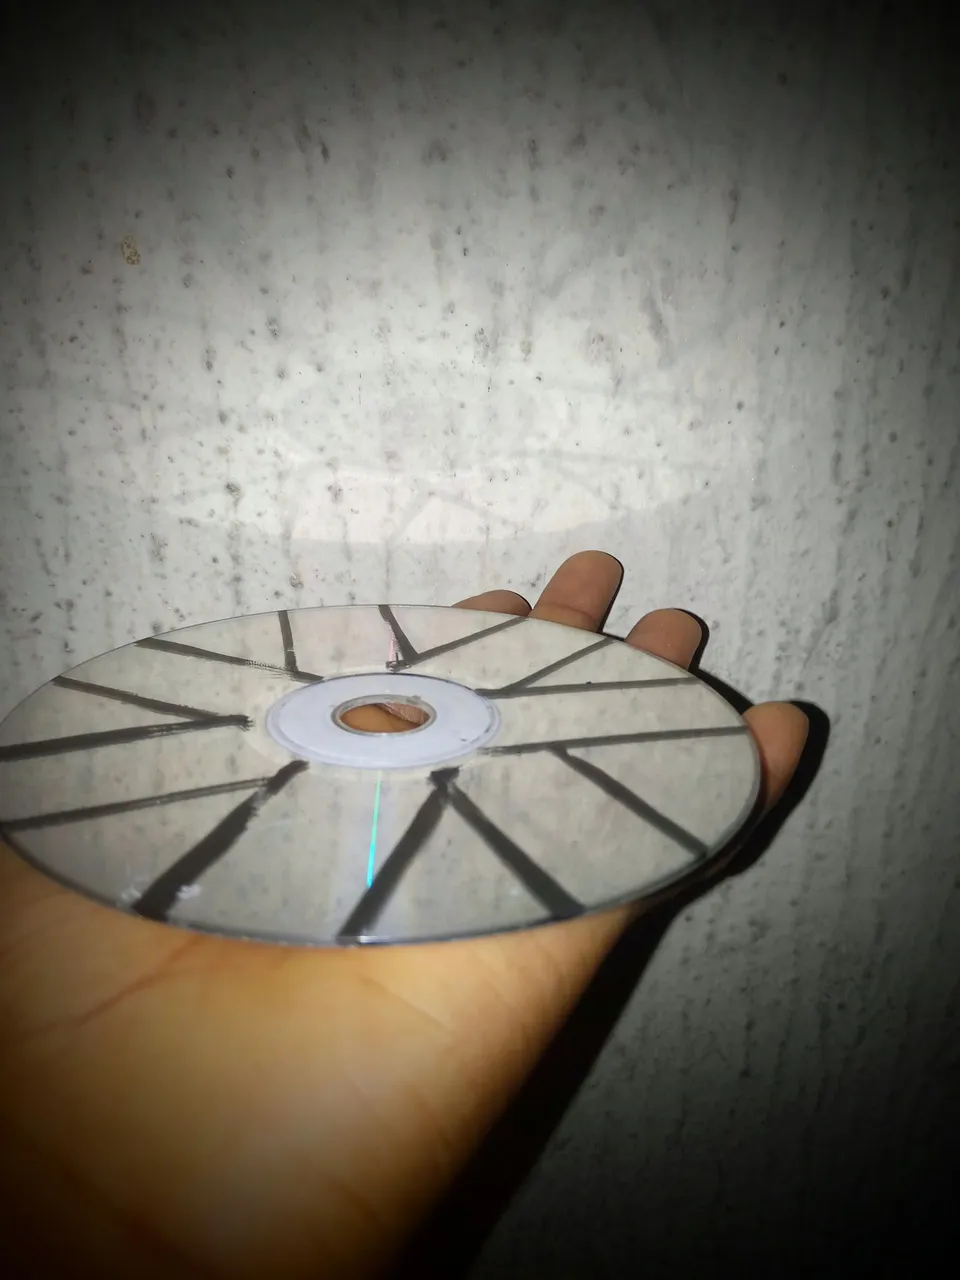
- Old cassettes (CDs)
- A pair of scissors
- Black poster colour
- Gum
- Ruler
- A little piece of cardboard
Procedure
I started by putting the CDs in hot water to remove the customised coating on them. After peeling off the coating, I made a 3cm by 3cm measurement on a little piece of cardboard.
With the measurement on the cardboard, I used the cardboard to mark out the same measurements on the cassettes.
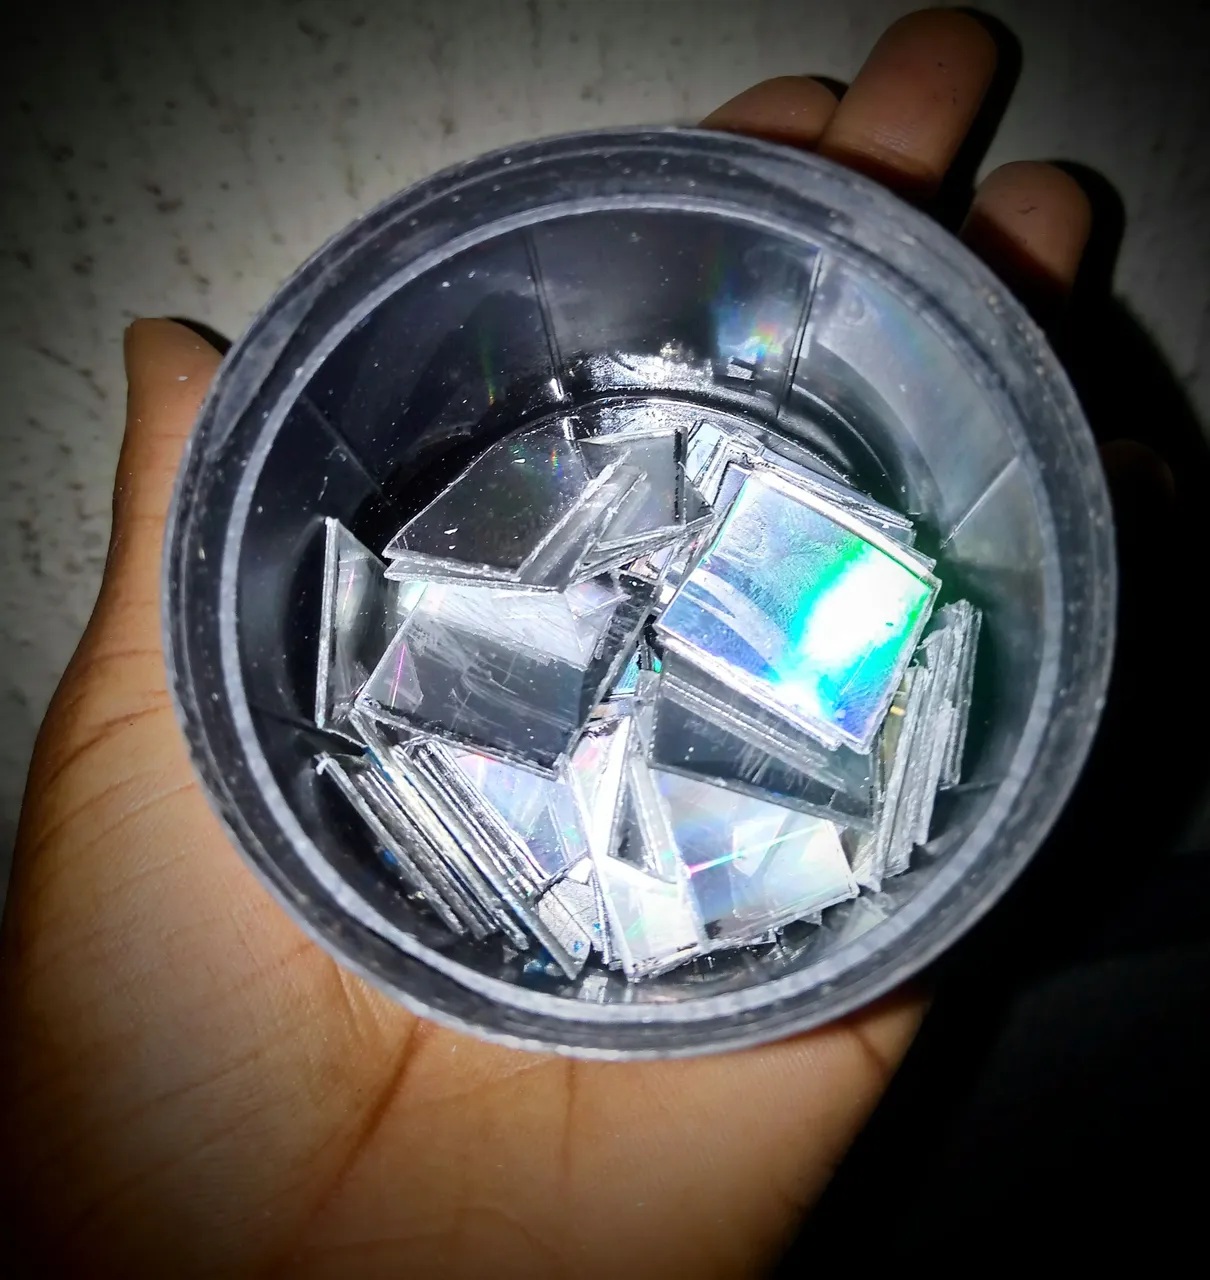
With this, I went ahead to cut them out judiciously. I would advise that one should be very careful at this point to avoid cuts or wounds.
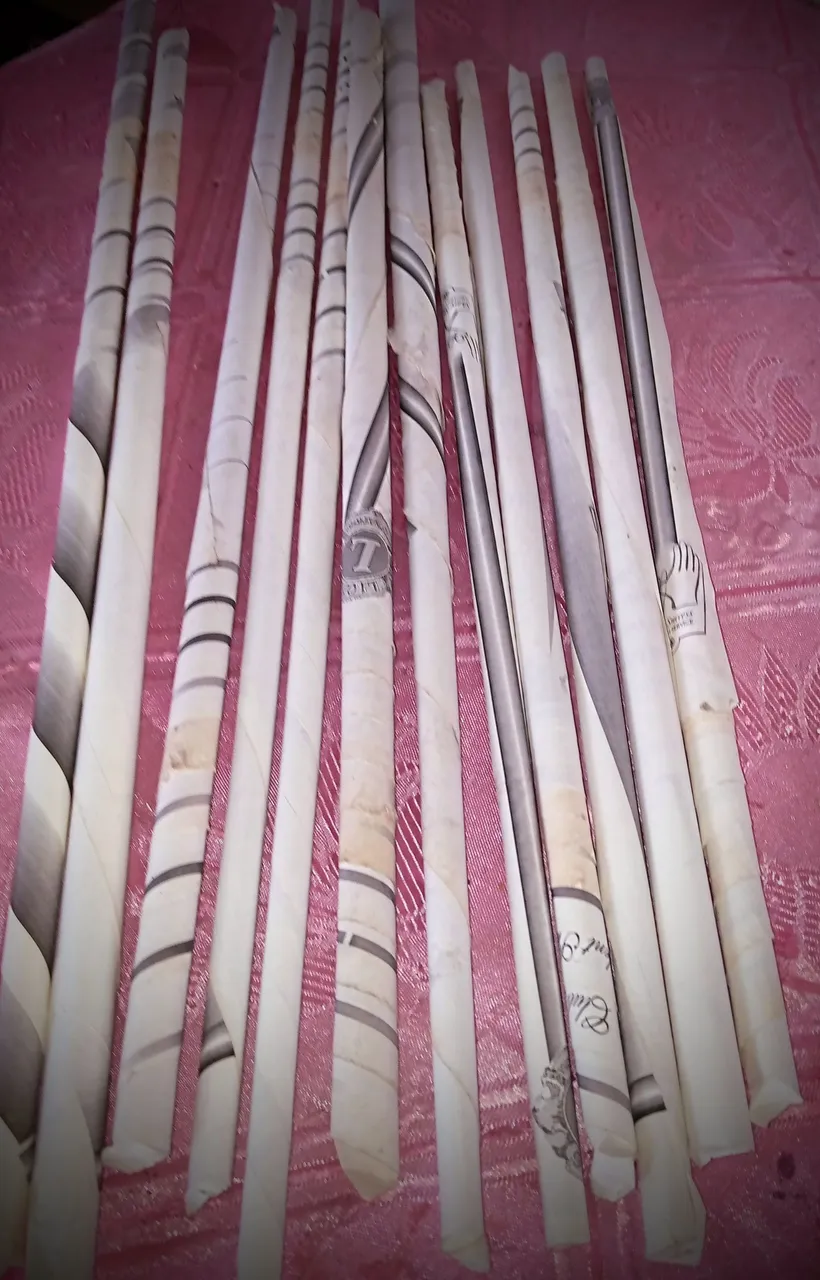
After cutting the cassettes into tiny pieces, I gathered twelve pieces of old papers. I folded the papers diagonally in a bid to make them longer.
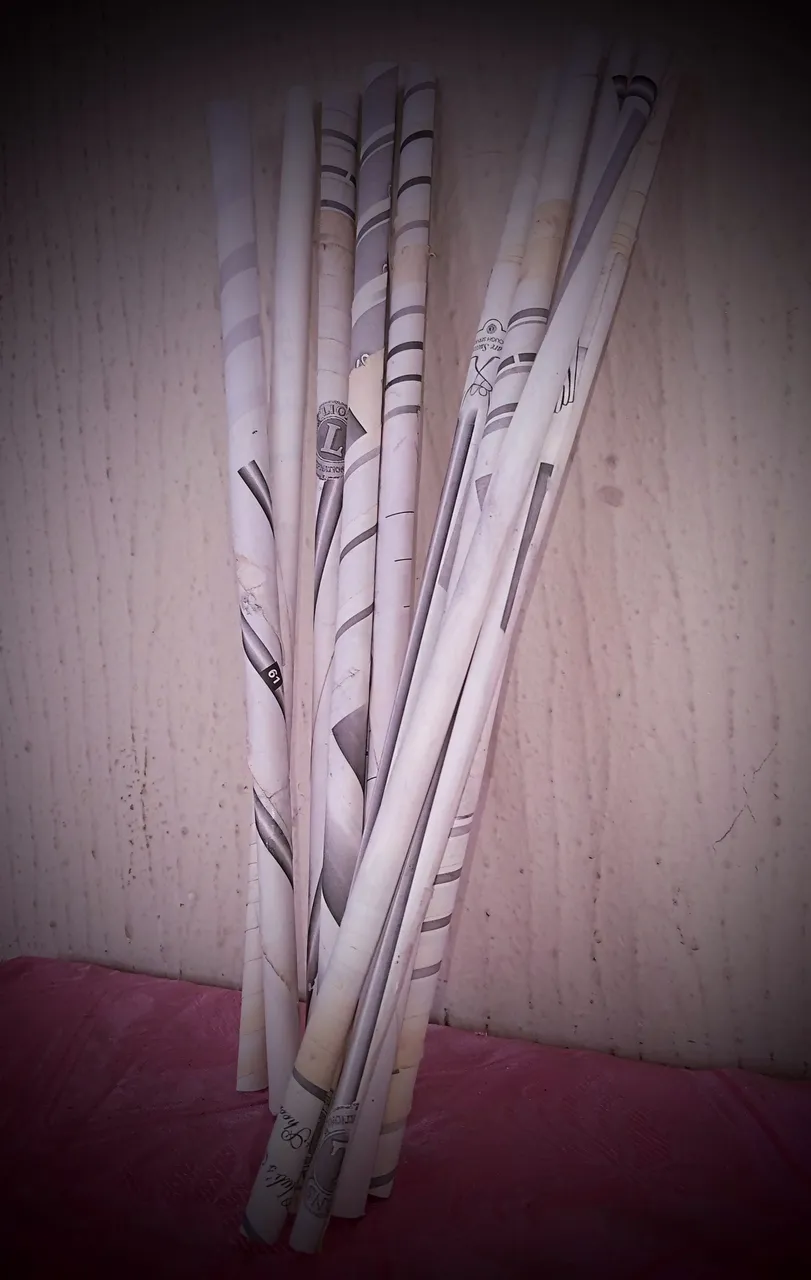
After folding the pieces of paper, they weren't the same height so I made a few amendments to the top and the bottom of the folded papers.
After that amendments, I painted all of the folded papers with black colour. I used poster colour because I had run out of spray paint. After some time, I was done painting.
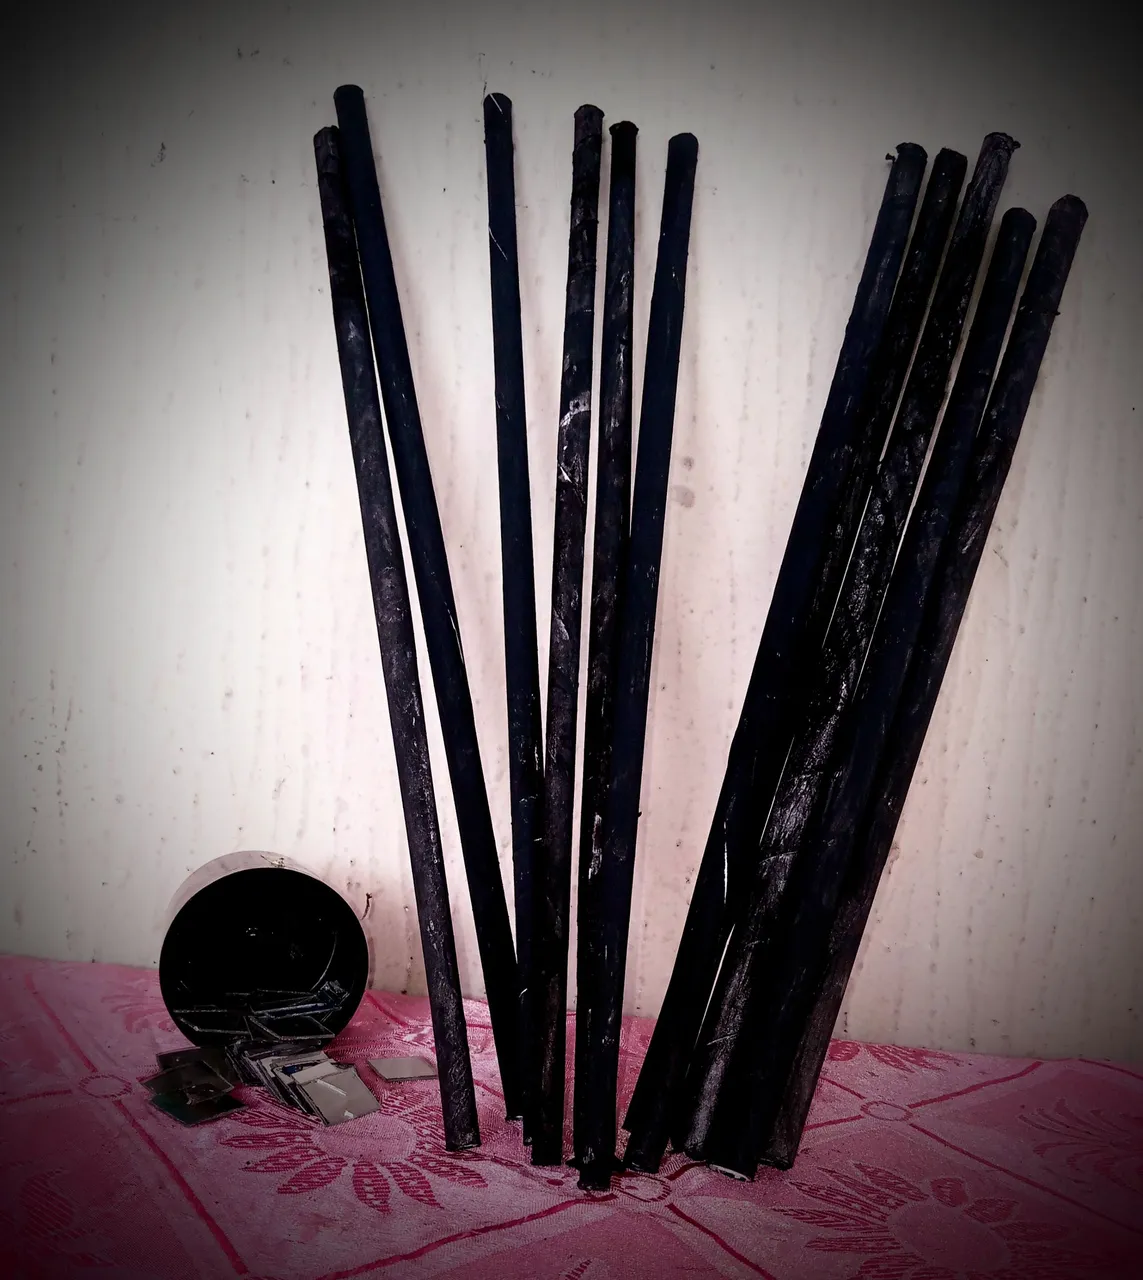
After painting, it was time to couple the parts together. I started by arranging the folded papers to form little boxes and I glued them together using gum. This step requires a lot of measurement and precision so that all the little boxes look even.
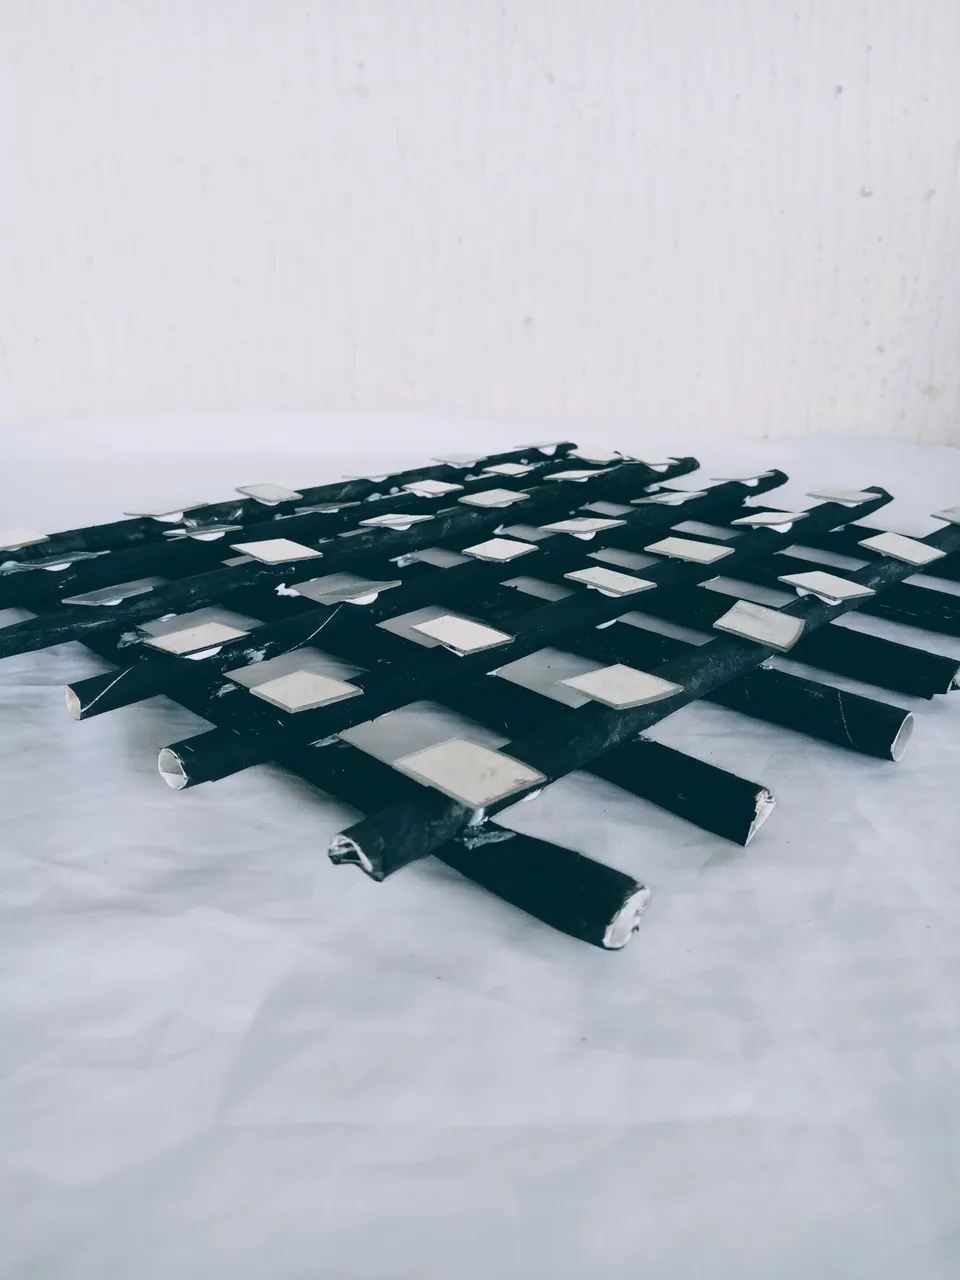
After arranging the folded paper,it was time to add the pieces of cassette to each corner. This was one part that I enjoyed doing.
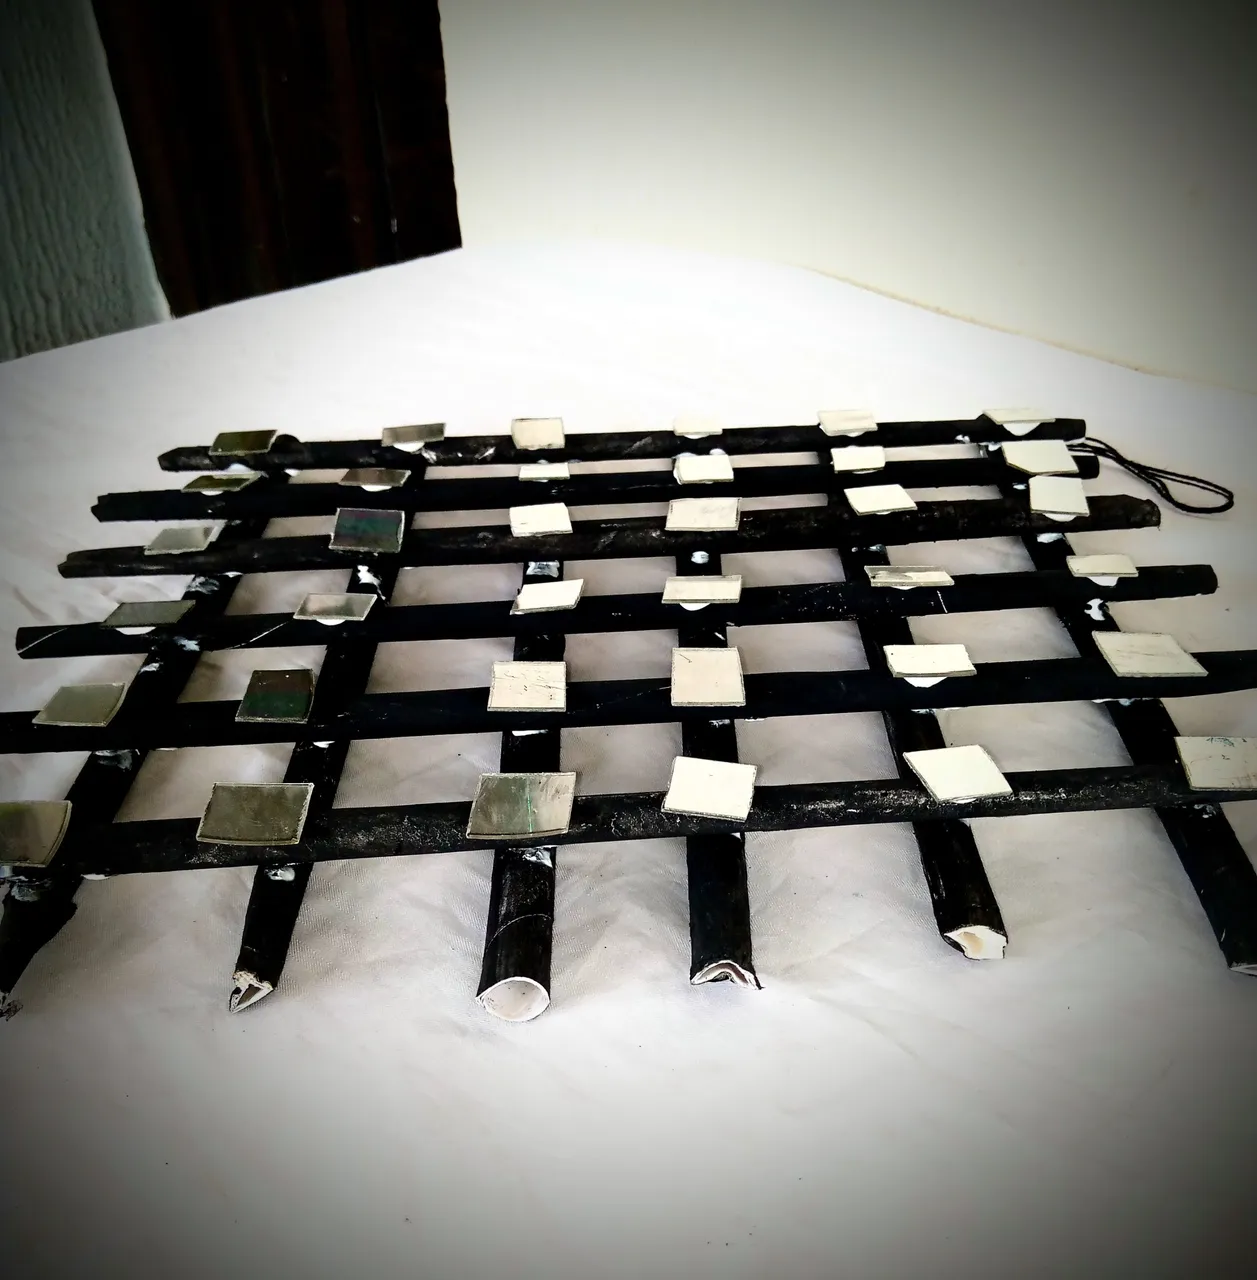
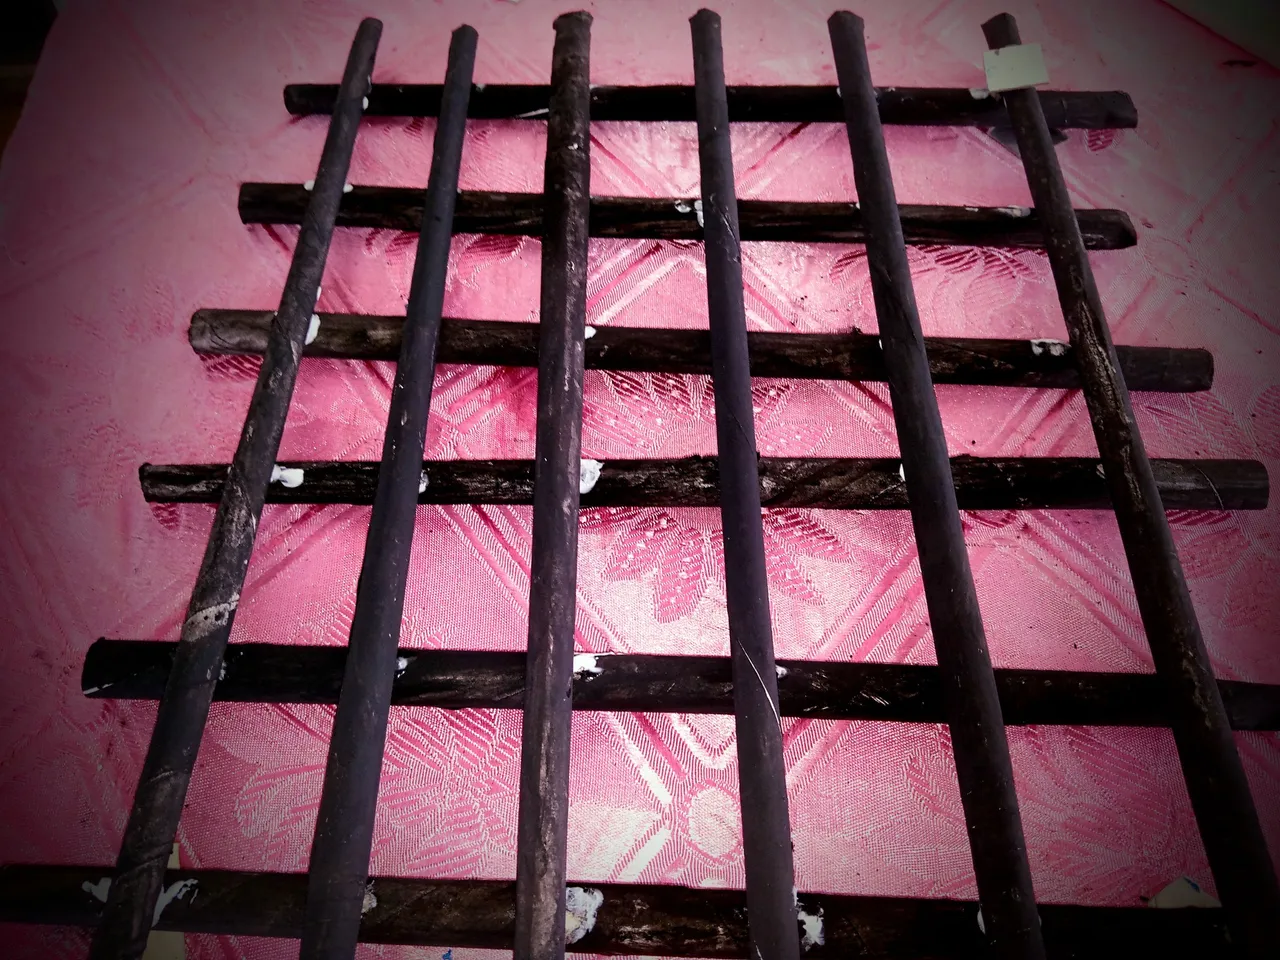
After adding the pieces of cassettes all round, I placed a little ribbon at the rear to aid easy hanging and the white base to prevent the art from falling apart.
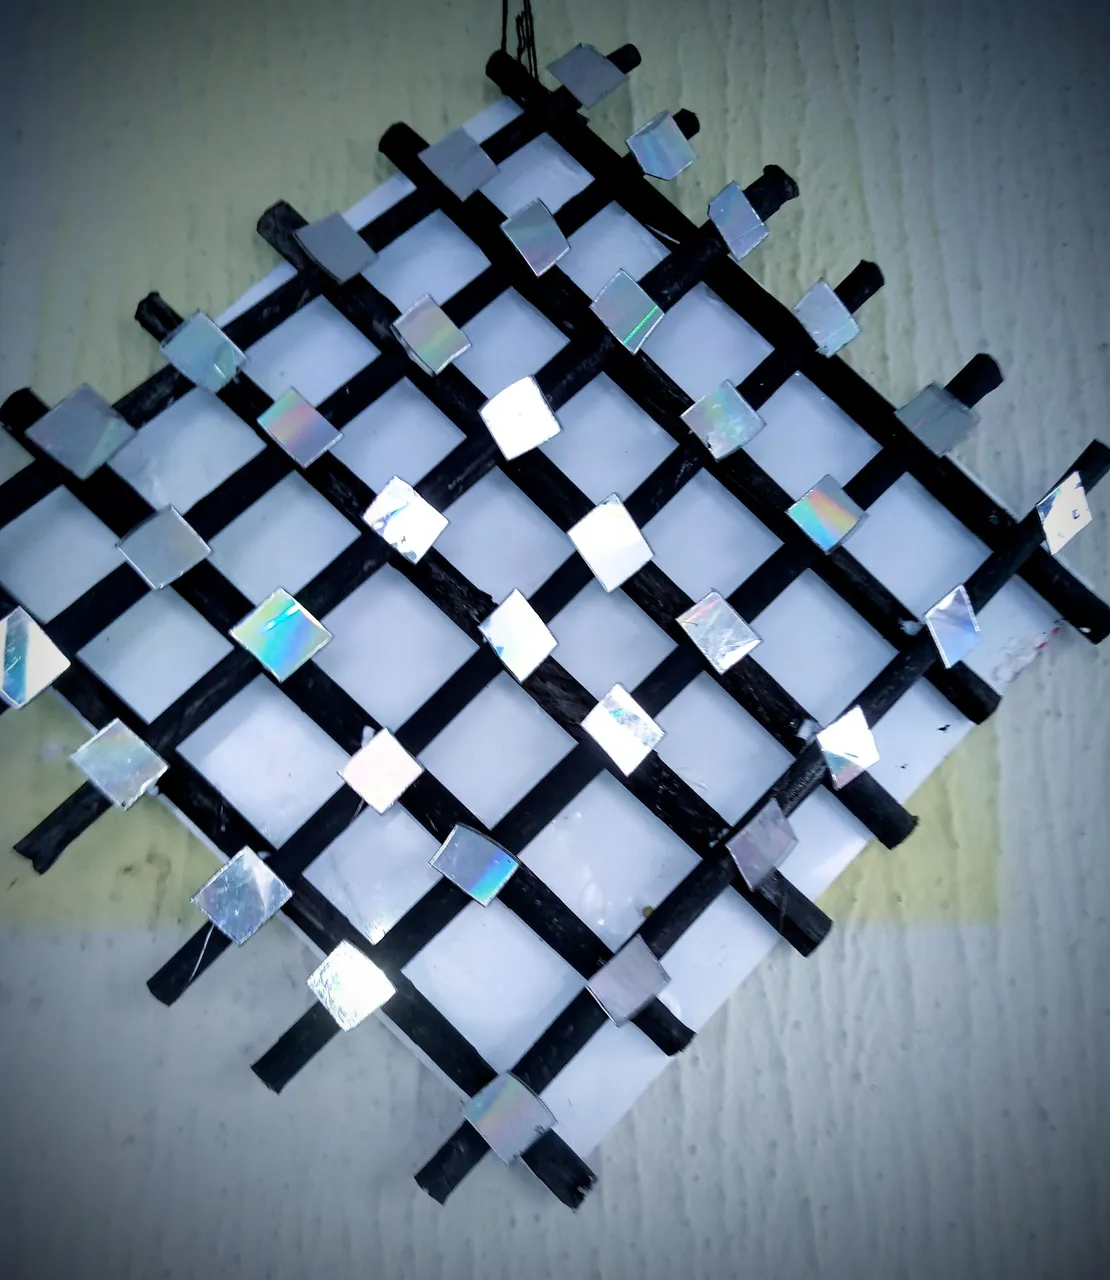
With that, I came to the end of my craft. This is my second craft using cassettes. In case you missed the first one, you can find it here. What do you think of this craft? I would totally love to hear your suggestions, corrections and recommendations.
I was really happy with the final result. Just in case you are wondering what to do with all the waste paper and old cassettes lying aimlessly at home and occupying space, you could try out this craft. I'm certain not was add a little more beauty to your home.
All images used belong to me except stated otherwise
With love, wongi ✨