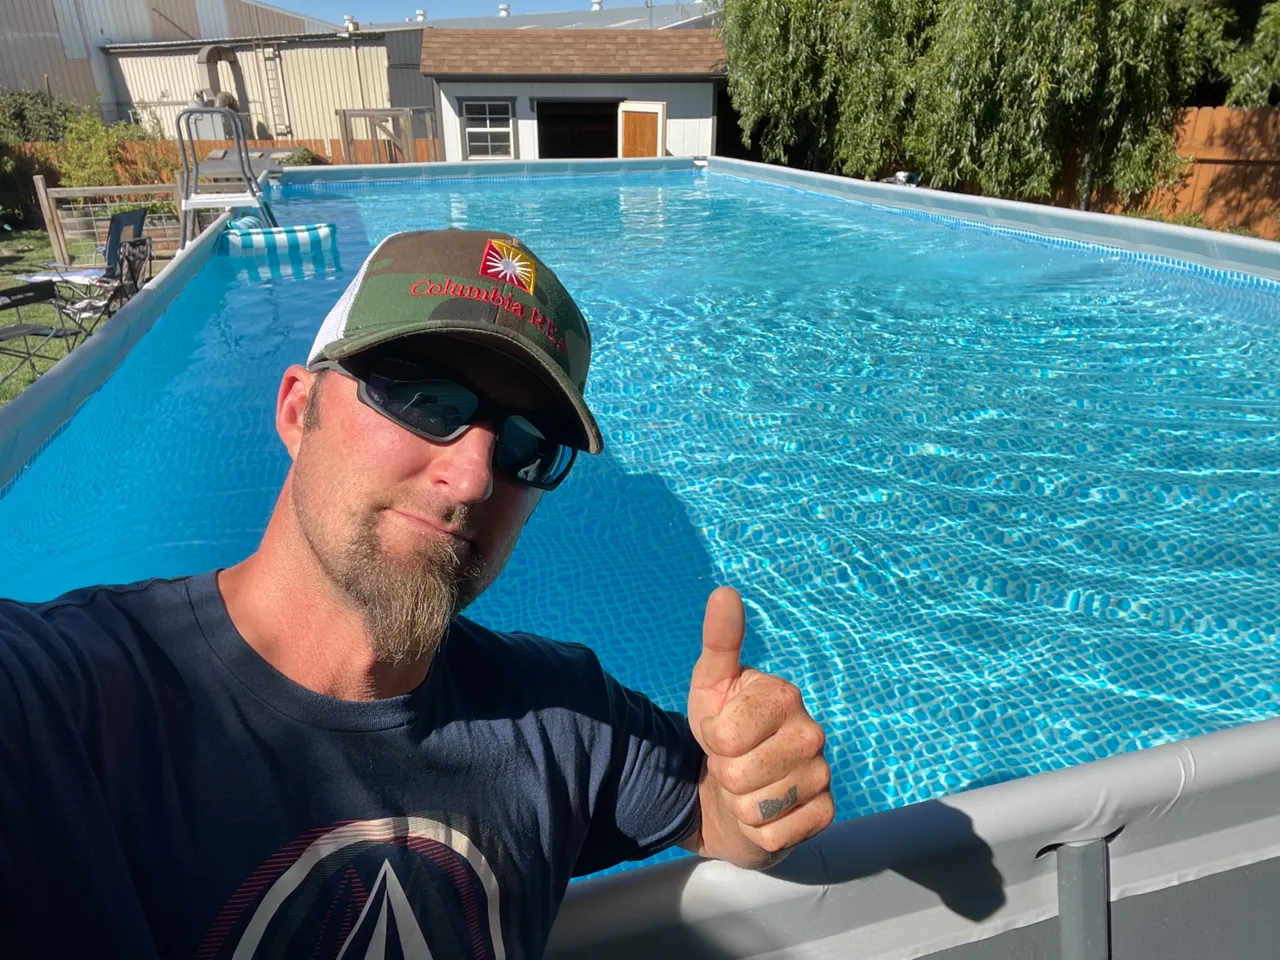
What’s up strangers? How has everyone been doing’? Fan-frikken-tastic I hope!! Dang, it’s been awhile since I cruised the Hive-O-sphere let alone make a DIY post or any post at that. I have been able to squeeze a Buzz in here or there… yes both kinds 😉😉. I spent Father’s Day weekend getting our new pool all setup. Let’s just say on Monday I went to work to rest… what a chore that was getting this monster setup! I’m just super thankful for access to a mini excavator and a 5 yard dump truck. That saved a ton of time and labor. Also a brother in law willing to come help.
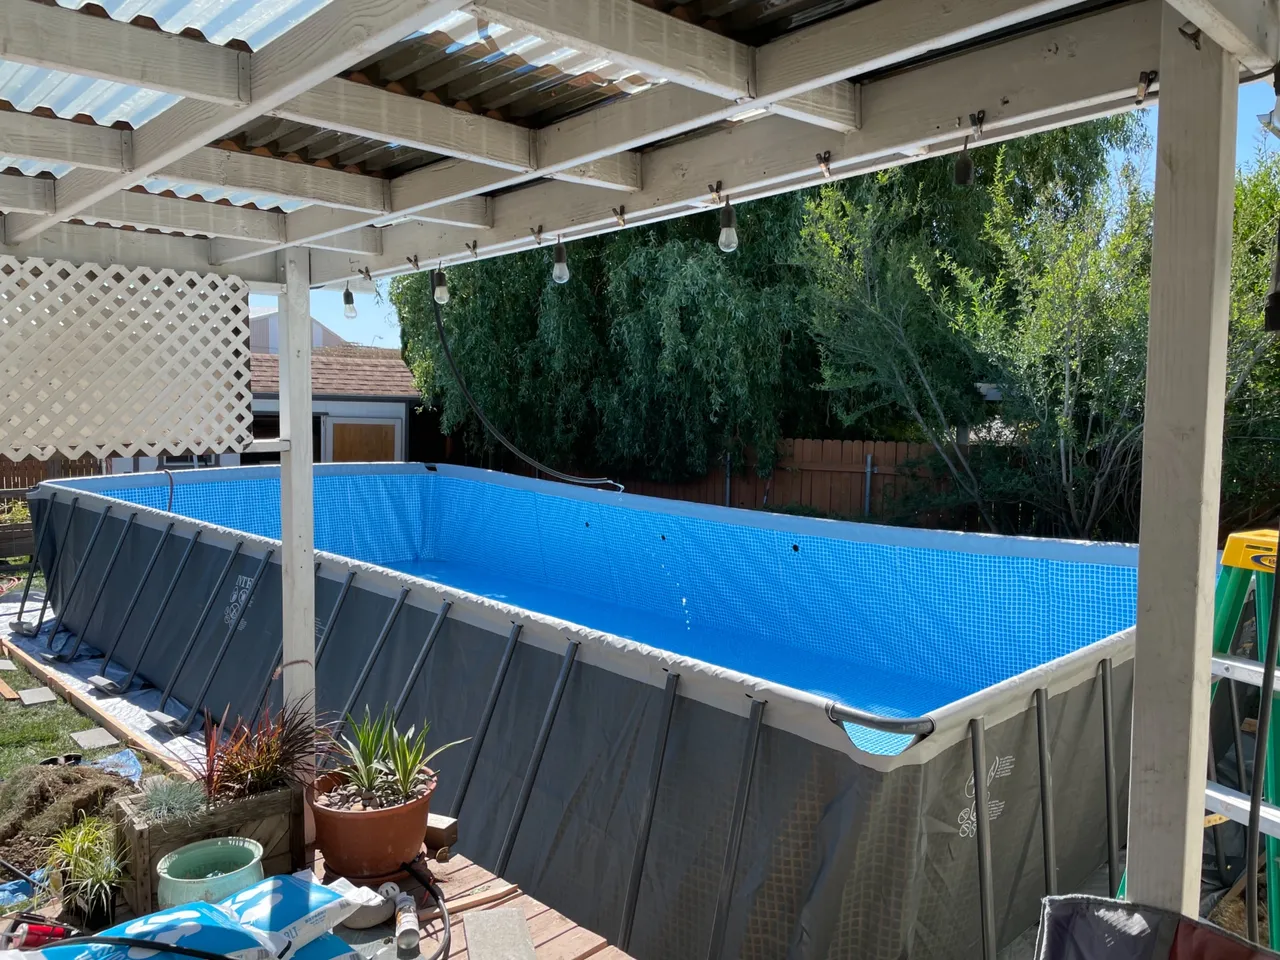
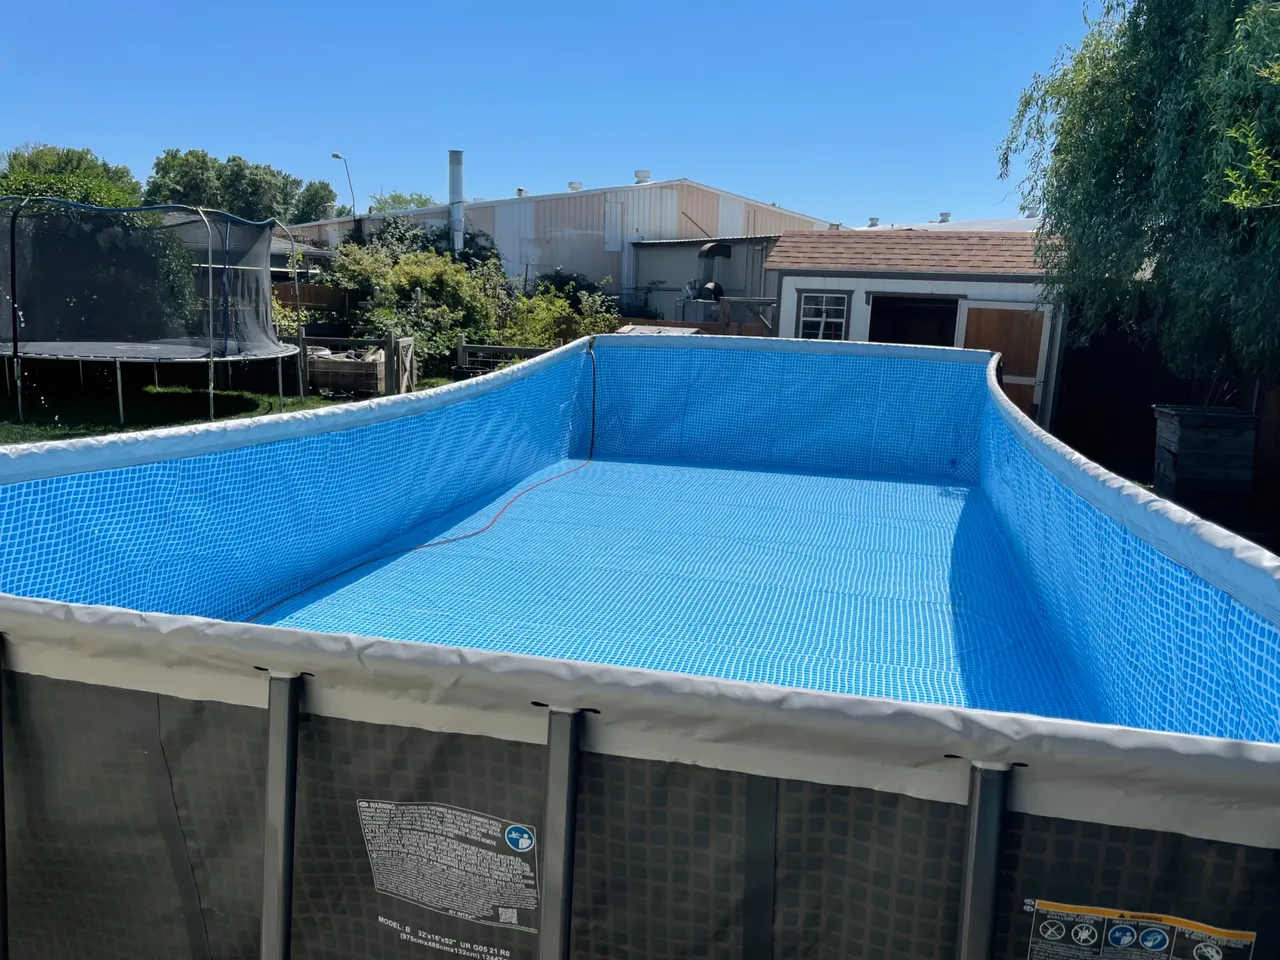
Our old pool was a 9’x18’x48” and it was just too small. With the 4 of us in there and the kids going nuts, how was Mama Splatts suppose to enjoy some floaty time??? Plus the main rails were rusting and crumbling into the pool… not good. So I turned to a classic motto, ”Go Big or Go Home”. The 12’x24’x52” didn’t seem much bigger when I marked it out in the grass. Then after checking the price difference between it and the 16’x32’x52” Intex above ground pool… it was a no brainer. So I went with the big one. Because… why not???
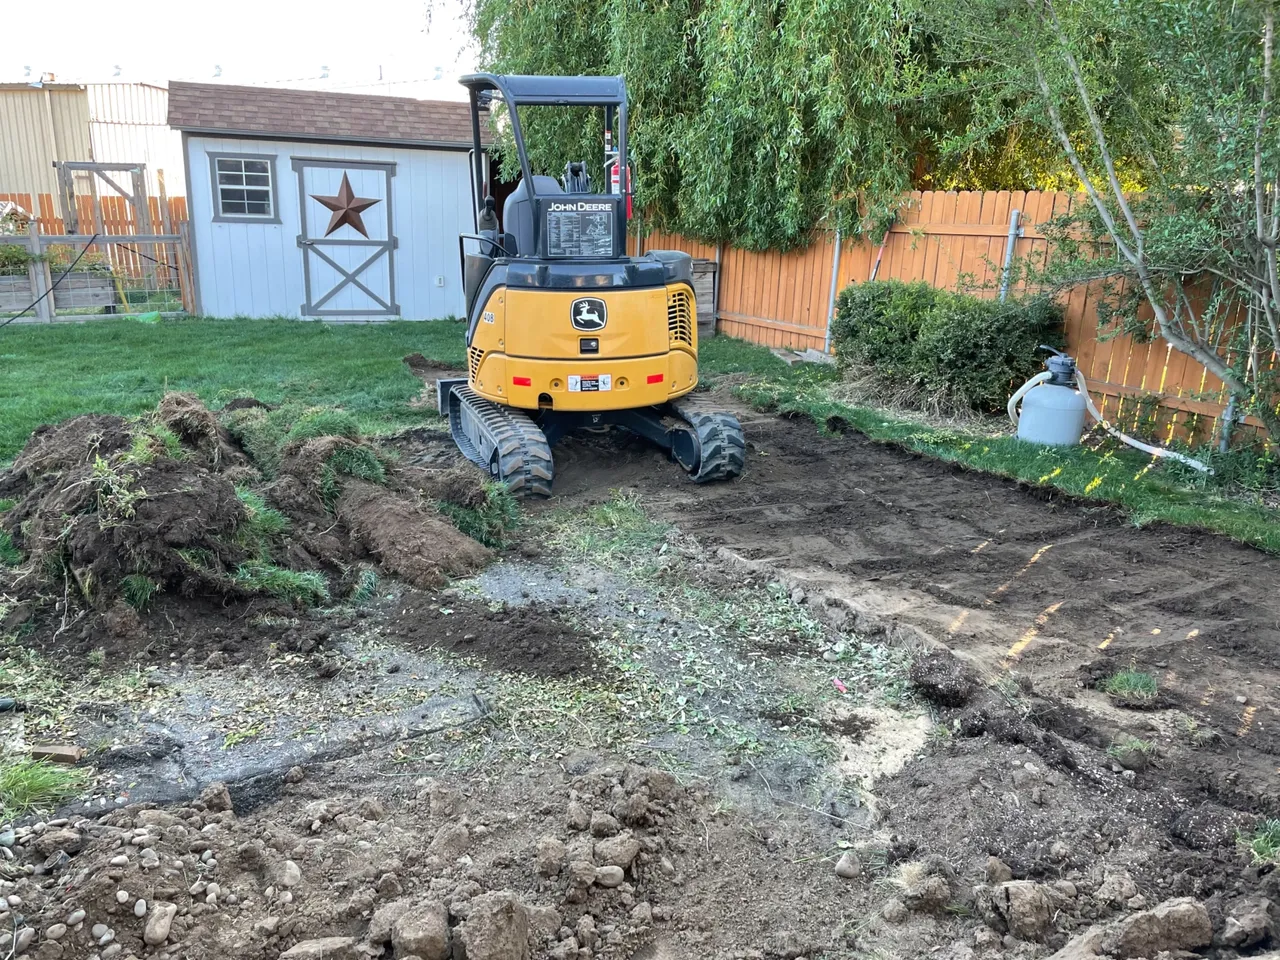
After getting the size of the pool marked out in the grass and parallel to the house, I had to rip out a bunch of grass.
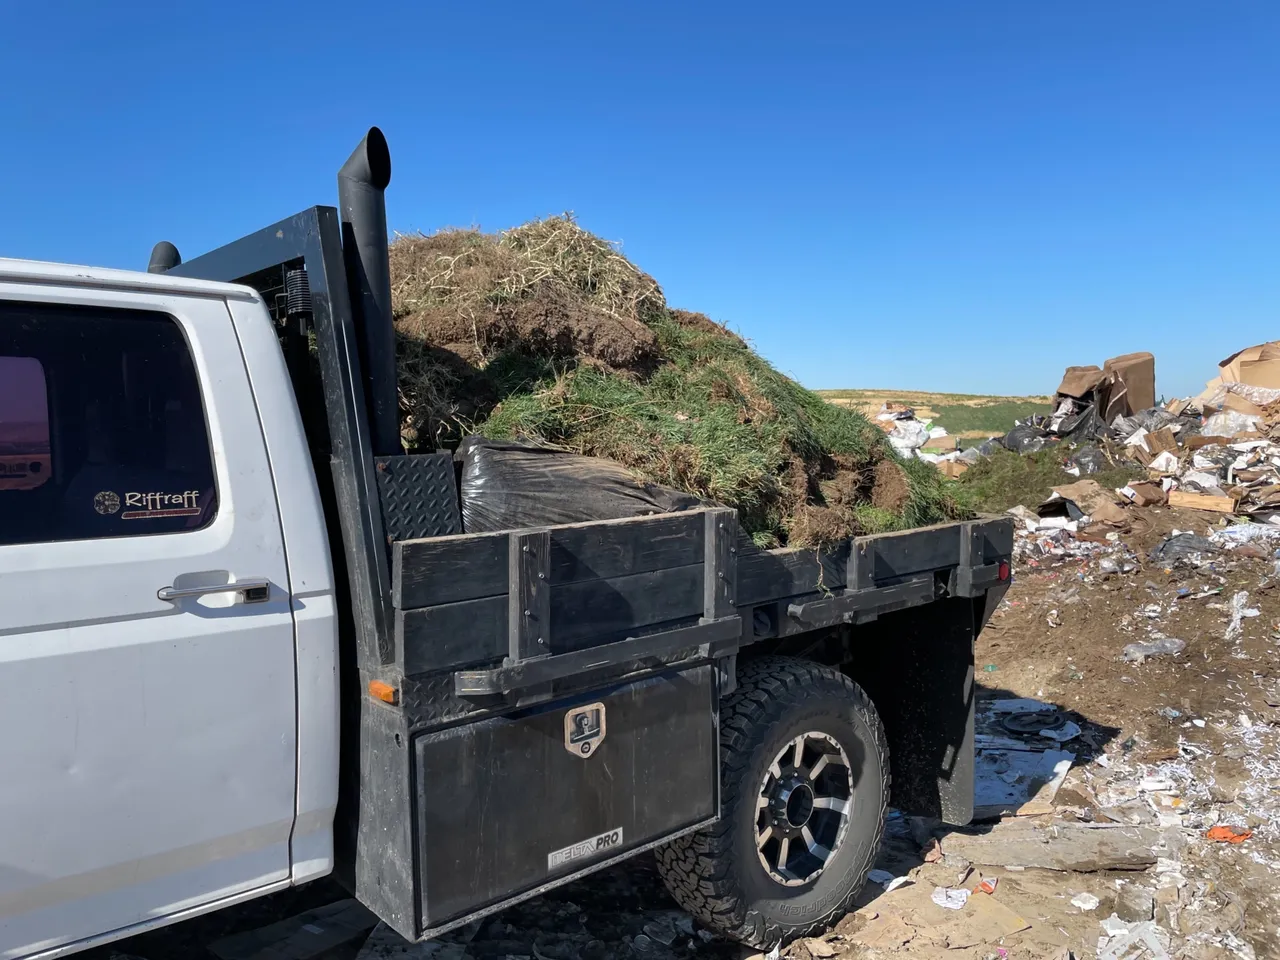
Then it was off to the city dump to get rid of it. There was 2,600 pounds of grass on the back of my truck. I had to hand load it on the truck because I didn’t want to tear up the grass in the back yard with the mini excavator. Driving back and forth across the yard repeatedly would destroy the grass.
Since the yard slopes away from the house I needed to pull some dirt towards the back of the yard in order to make it level. Using a laser and grading stick I checked all over the area to make sure I didn’t have any big bumps or holes. Then I went over the whole area with a compactor. I’m lacking some photos of the process because I was in Go-Mode. Just getting work done!!
After compacting, I used the laser to setup a perimeter that was perfectly level. The level of the sand will be at the bottom of the 2x4’s. So in order to ensure that the sand is level the whole length of the area, I used a 2x4 and attached chunks of wood on the ends. These chunks of wood will slide along the top of the rails.
Then my brother in law and I slid the 2x4 along perimeter rails leveling the salad all the way across. This sand sure tore our knees up. It’s called concrete sand and it’s more coarse than playground or beach sand. 6,000 pounds of sand were used to spread about a 2 inch layer over the area of the pool
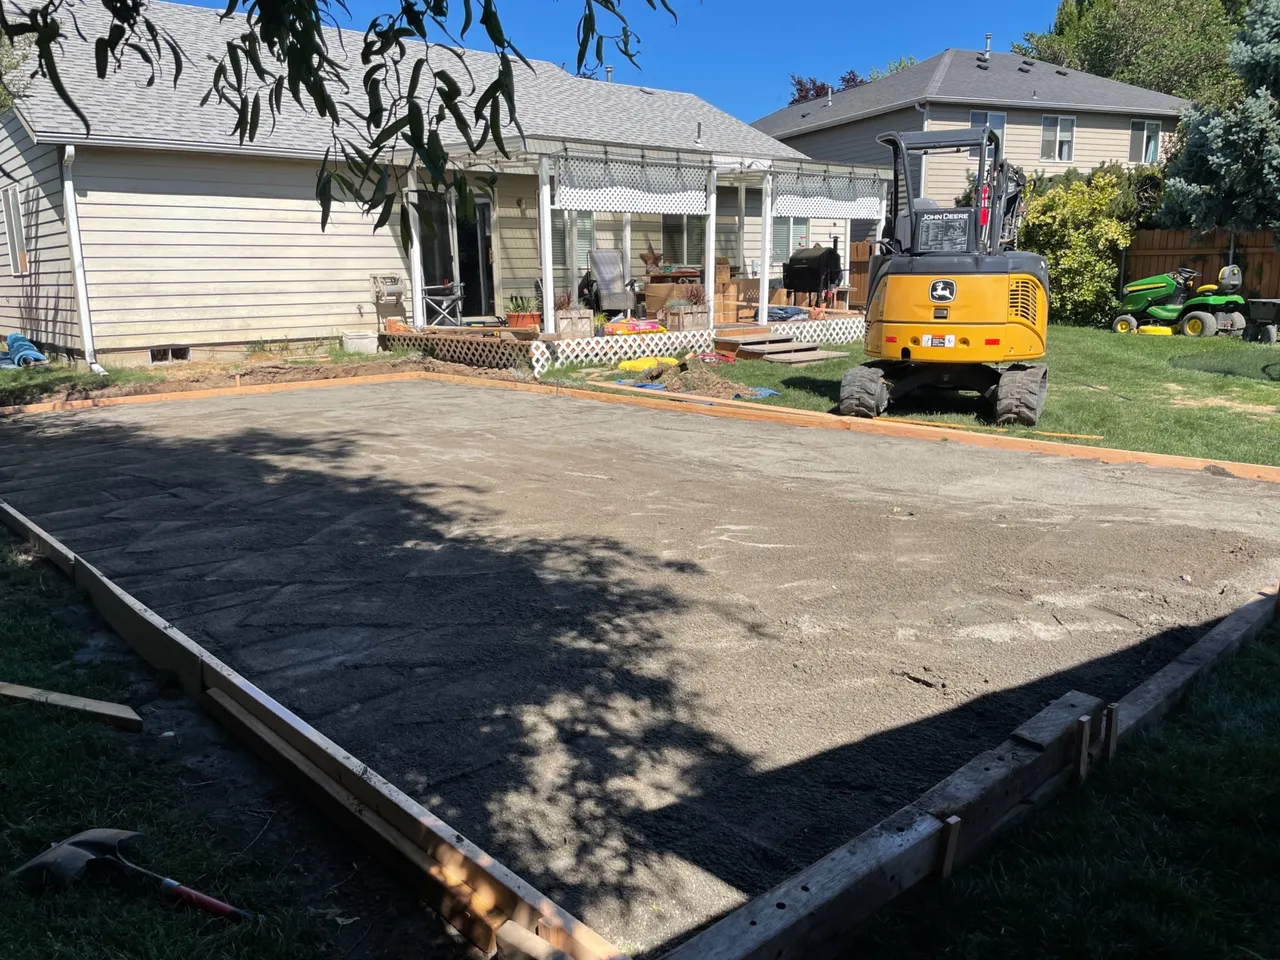
Then using a plate compactor, we went over the whole area 5-6 times. All the while spraying all the sand down with water. Adding a good amount of water is what makes for good compaction of the sand. We compacted the sand so good that you can walk all over it and not leave a foot print. Next was to assemble the pool. It was a pretty straight forward process and yes, we used the instructions… Then it was time to start adding water… 15,000 gallons to be exact. I’m sure glad I have a flat yearly rate for my water.
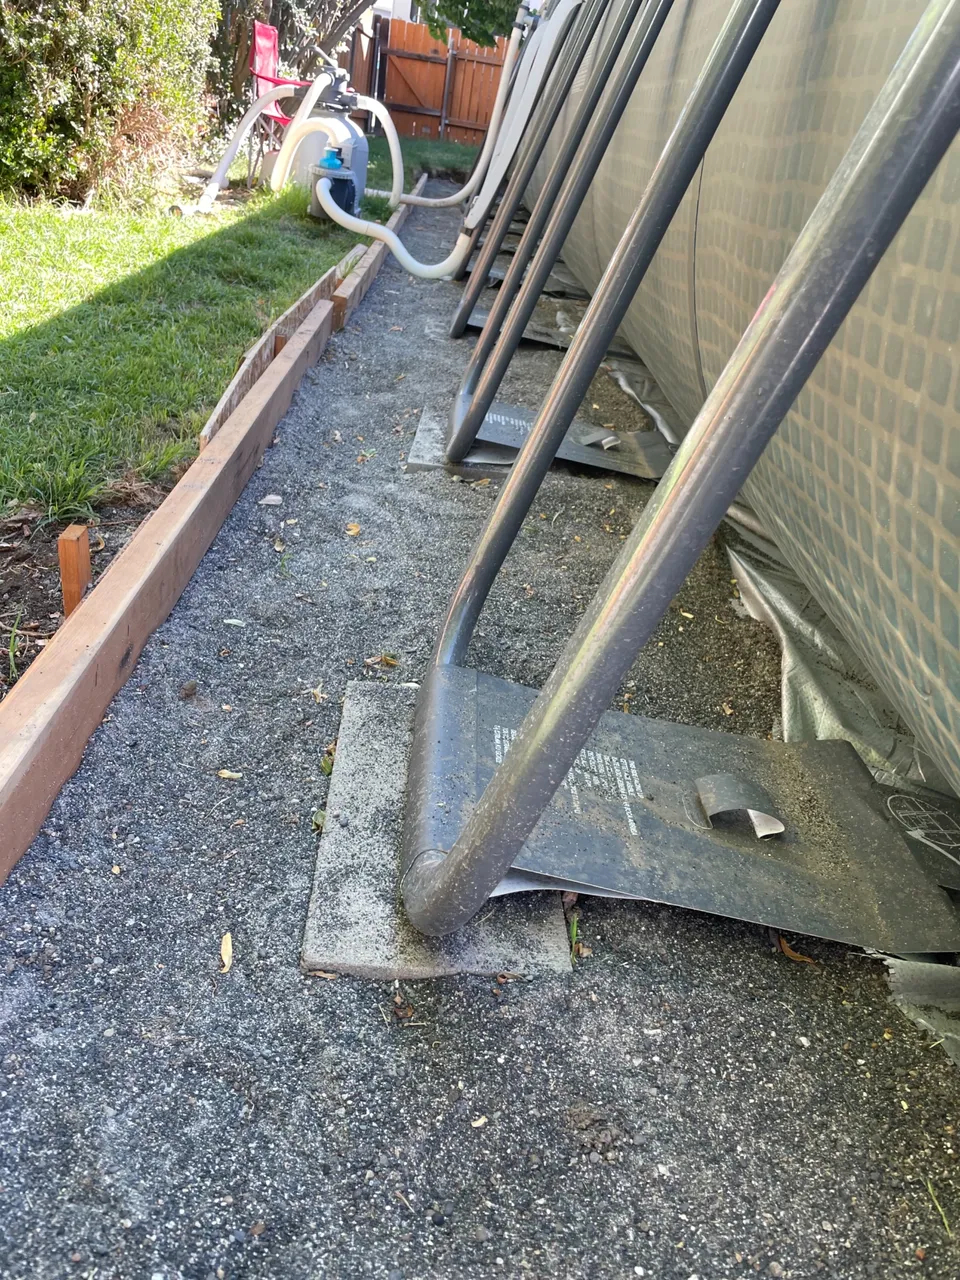
After getting around 6 inches of water in the pool, we pulled all the legs tight and smoothed out as many wrinkles as we could. The legs themselves need extra support and can’t just rest on the sand. Once the pool is filled and the kids start getting wild, the water sloshing around will wiggle the legs into the sand. So we had to go around to each leg and add a 9”x18” concrete blocks under each leg.
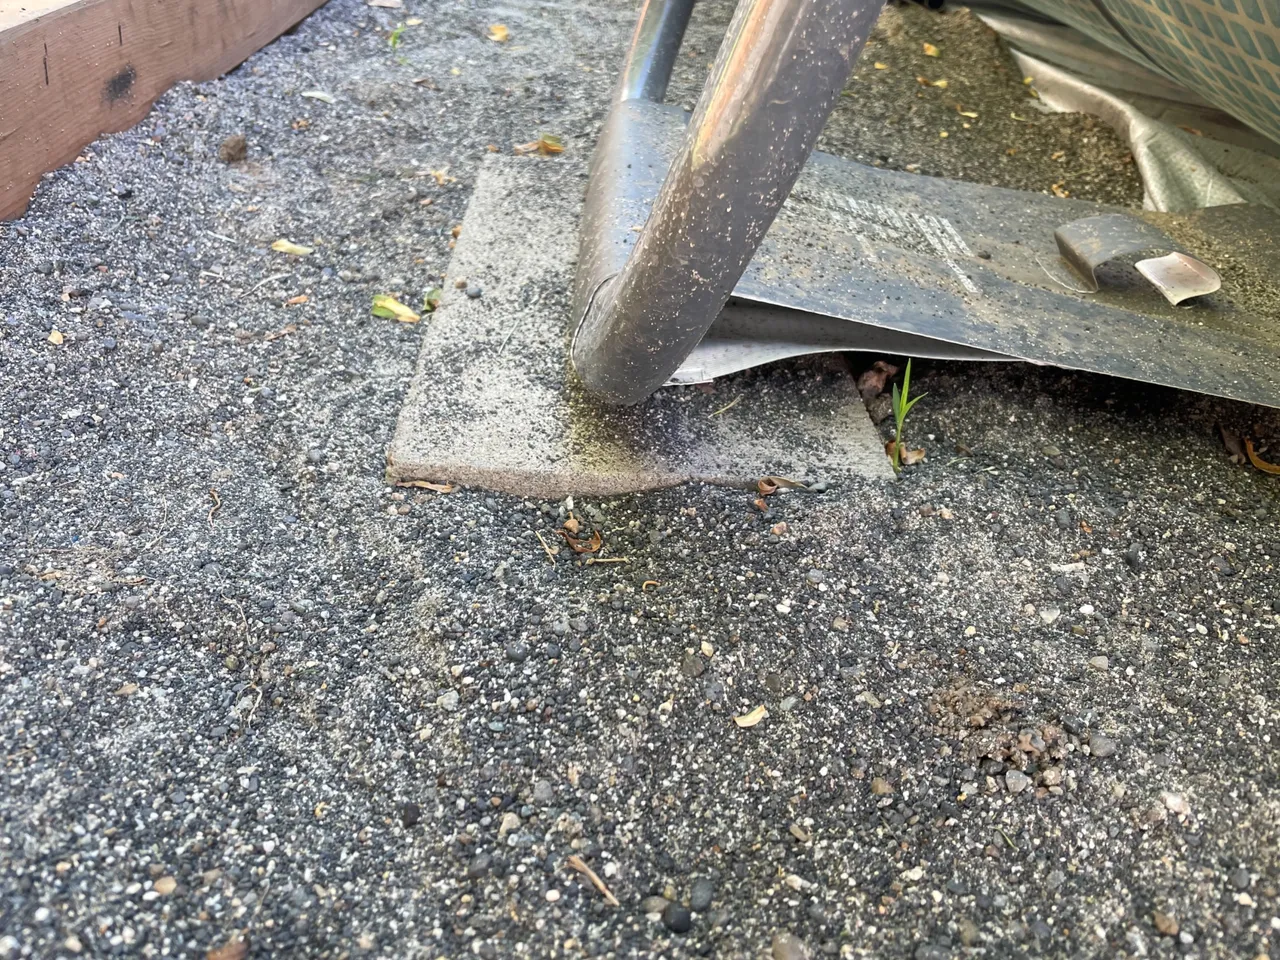
We started by digging enough sand out so the top of the block was level with the sand. Then we leveled out the block in both directions. One leg at a time we worked our way all the way around the pool. This seemed to take forever!!! One block at a time…
As I filled up the pool using the hose, I also used my DIY Solar water heater to add some 110F water to the pool. The water coming from the hose is right at 70F and on a 95F day I was getting around 110F water out of it. Granted it’s not a full flow of water coming through the heater but it still helps.
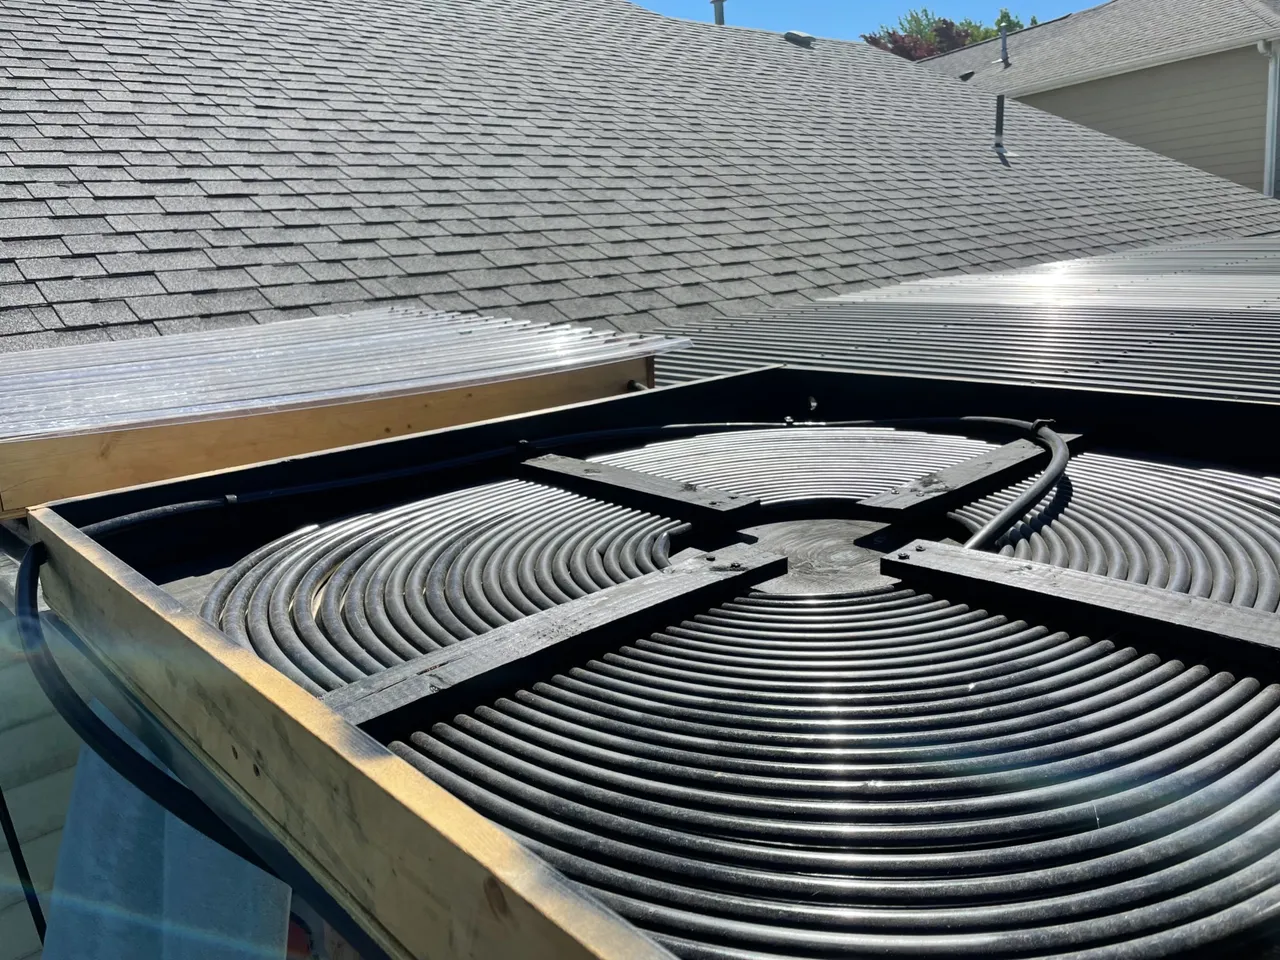
I need to cover the other one to help hold the heat in
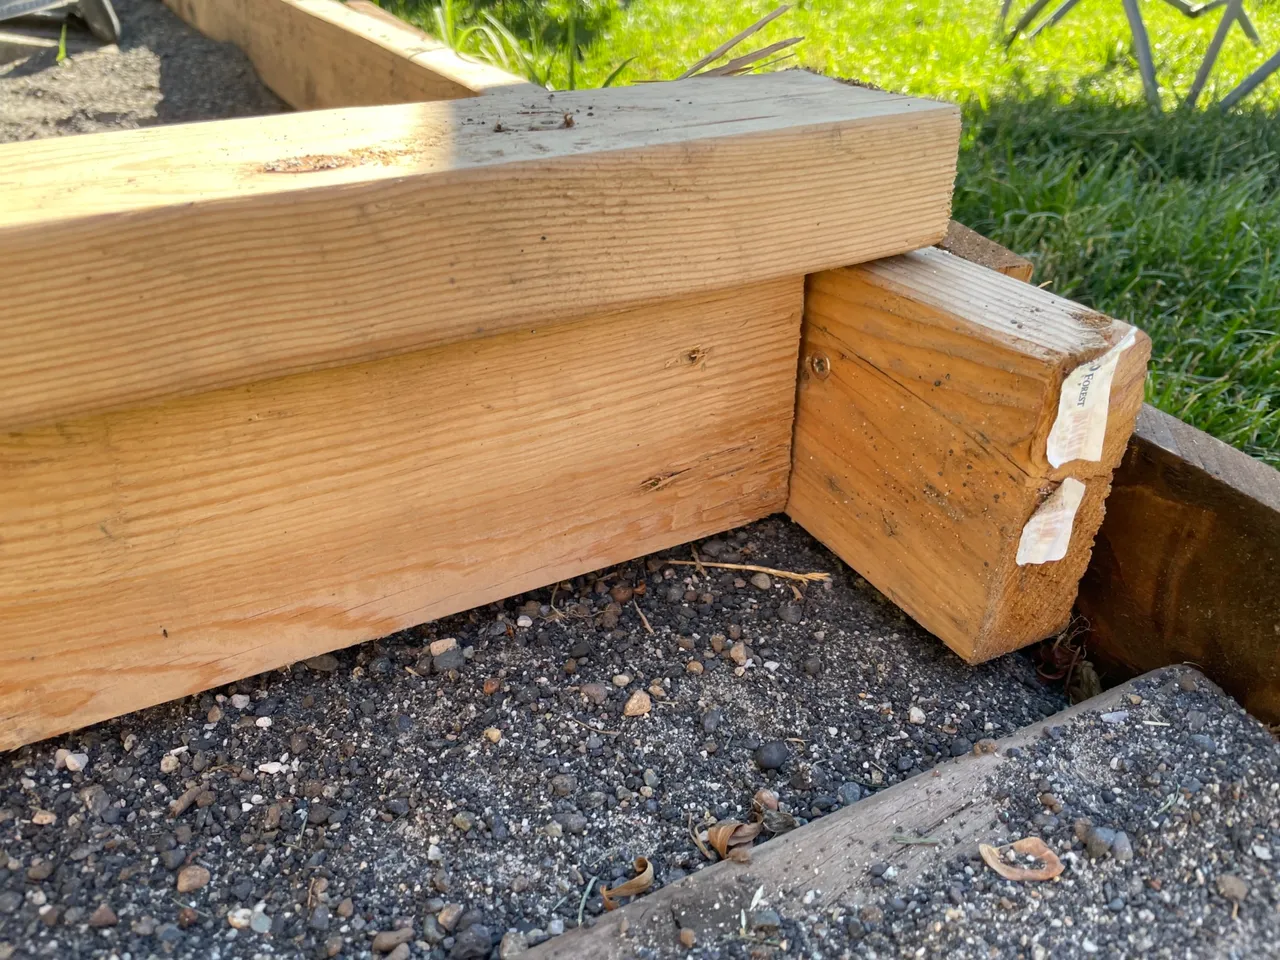
Last night the pool was 85F which made night swimming that much better. In the up coming weeks I am going to PVC pipe all the water lines from the pump and filer. I’m also going to add a way to circulate the pool water through the solar heater. That way I will be heating 80-85F water instead of 70F water. This should help prolong the summer fun in the pool. I also need to build some type of border around the pool to keep the sand in place. Then we plan on adding some river rock around the outside of the pool to make it look that much nicer. Plus it will keep sand from getting into the pool. So this project is still far from compete but at least we have a way to keep cool and have fun right in our backyard.

Your Random
Dose of...