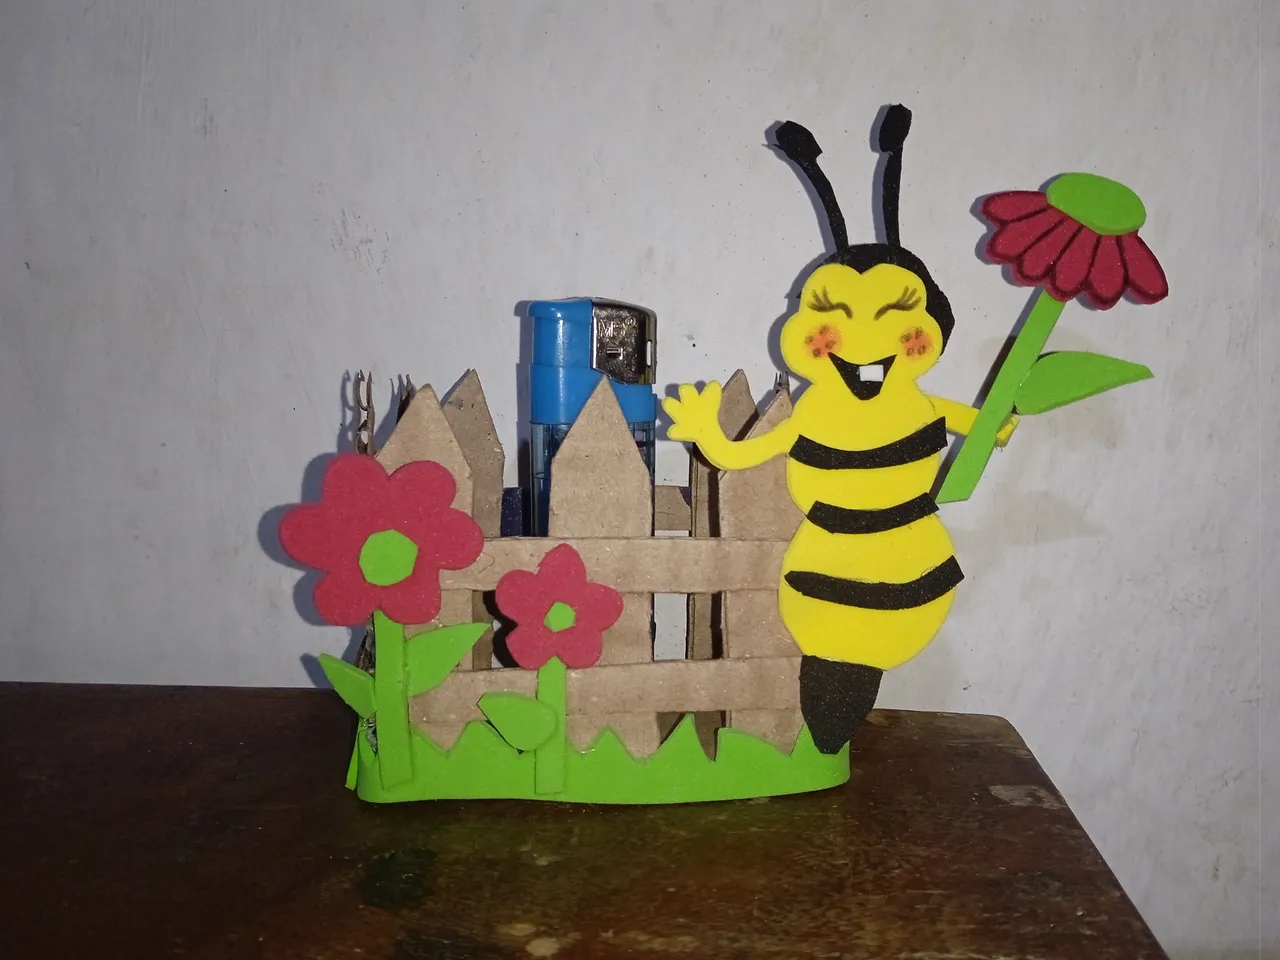
Hola buenos días , Dios les bendiga amigos de esta gran familia Hive , hoy les quiero compartir como elaborar un porta-encendedor de cocina con temática de abeja , así mismo formando parte de el nuevo concurso que nos brinda esta maravillosa comunidad cada mes ,en esta oportunidad el tema que tocó las abejas unos animales hermosos con dos colores que combinan a la perfección ,es mi primera vez concursando espero que sean muchos por venir , le hago la invitación a unas talentosas amigas que concursen en esta iniciativa para aprender de todos @yagelybr @margararivera @josdelmin
Hello good morning, God bless you friends of this great Hive family, today I want to share with you how to make a kitchen lighter holder with a bee theme, also being part of the new contest that gives us this wonderful community every month, this time the theme that touched the bees beautiful animals with two colors that combine perfectly, it is my first time competing I hope there are many to come, I invite some talented friends to compete in this initiative to learn from everyone @yagelysbr @margararivera @josdelmin
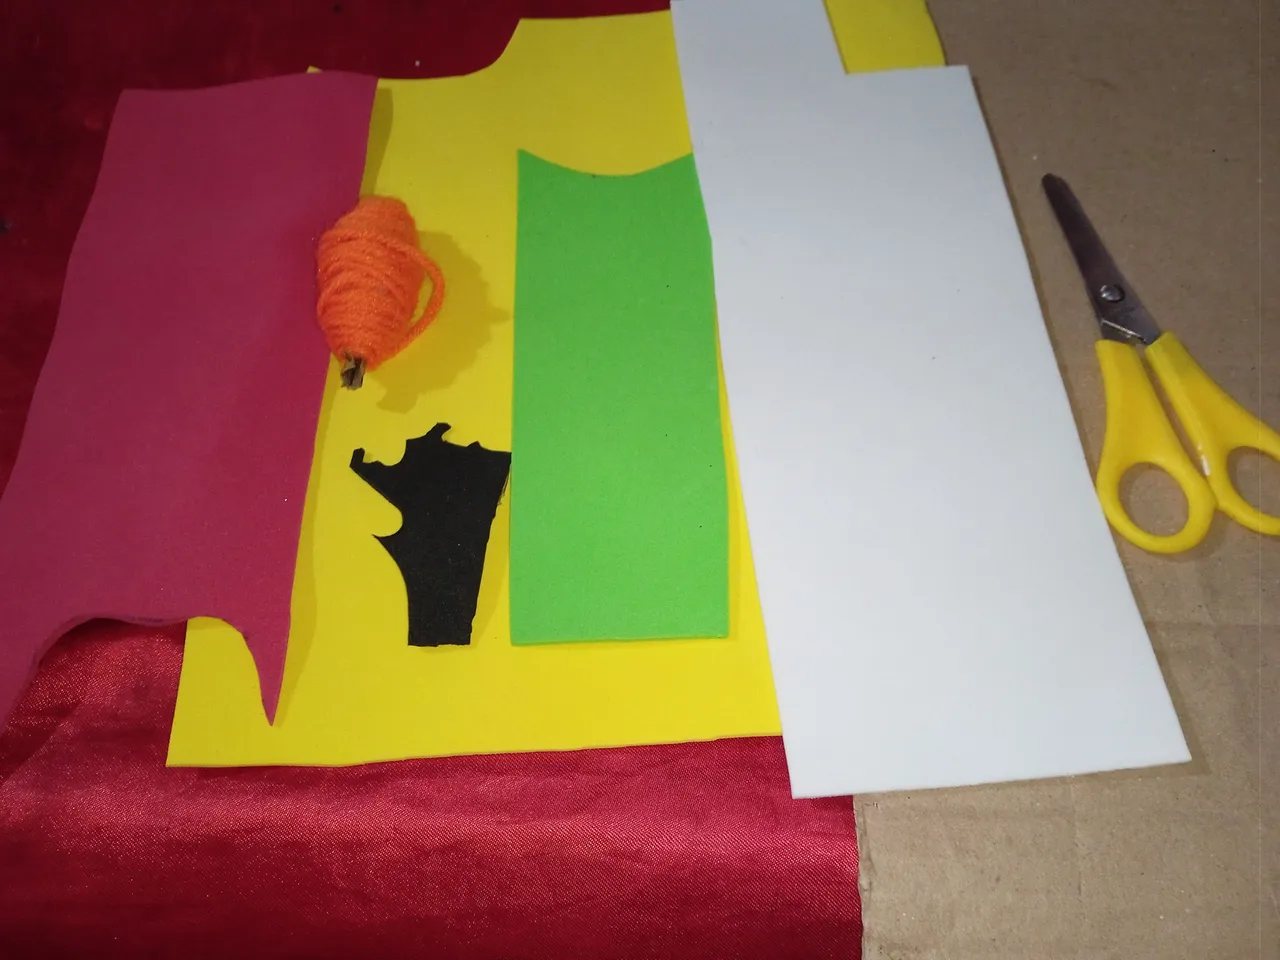
Materiales que utilice para mí porta-encendedor de cocina :
-Carton
-Foamis
-Tijera
-Silicon
Materials I used for my kitchen lighter holder :
-Carton
-Foamis
-Scissors
-Silicon
Pasos para realizar nuestro porta-encendedor de cocina :
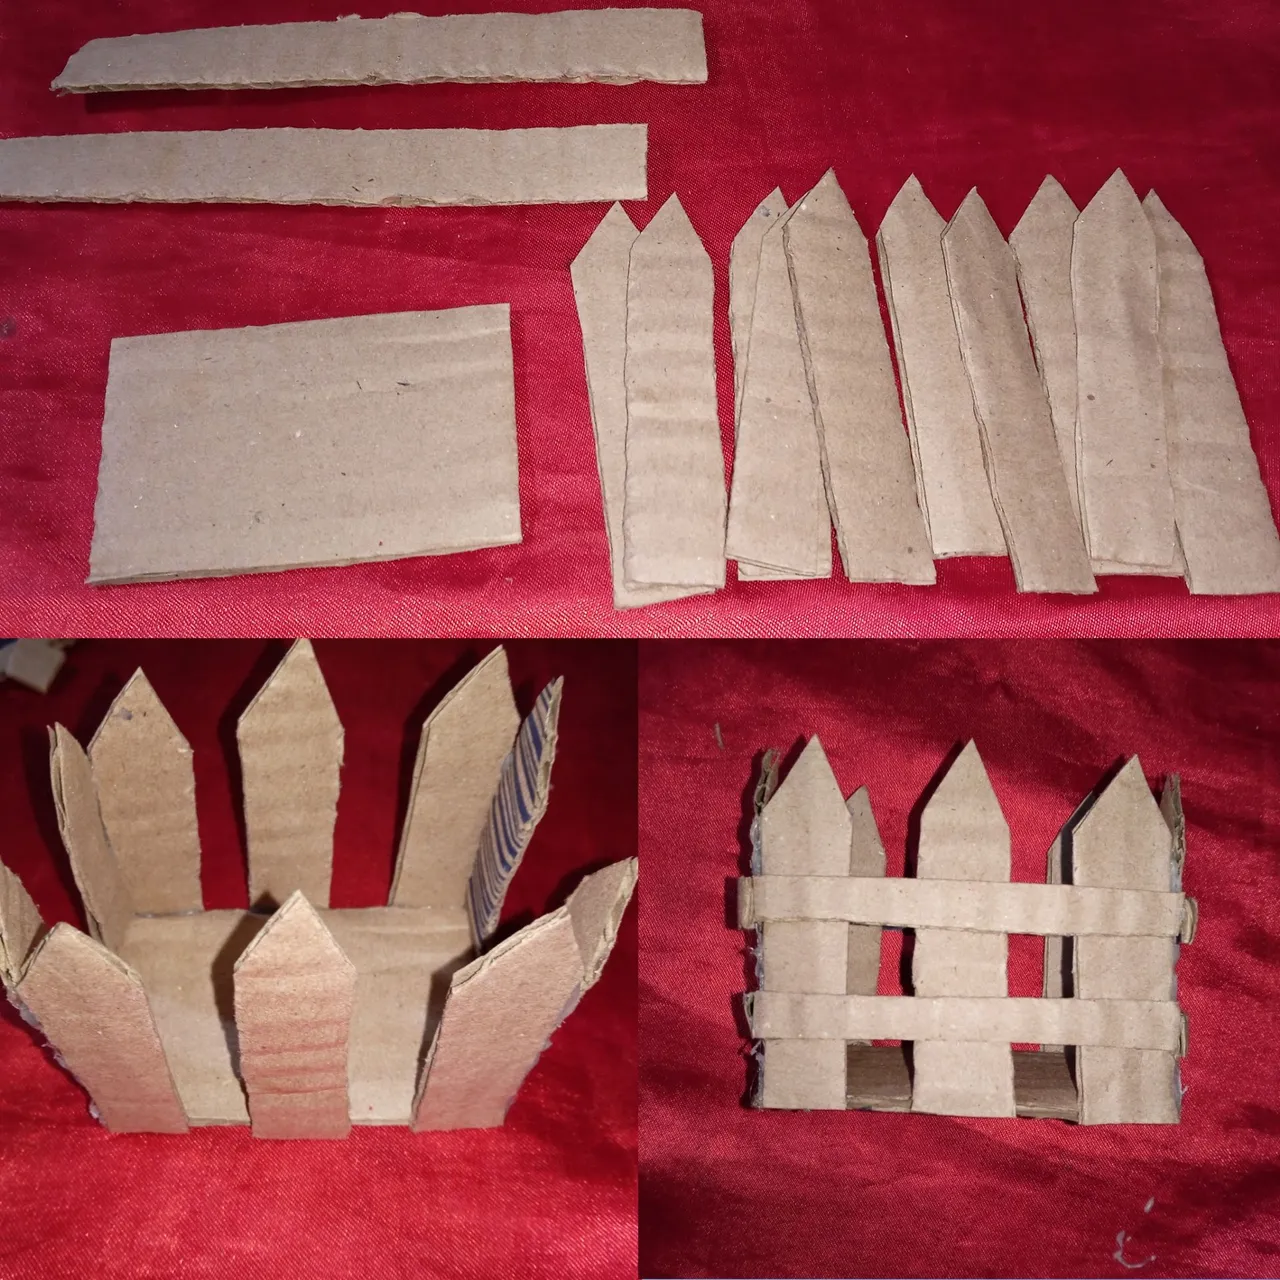
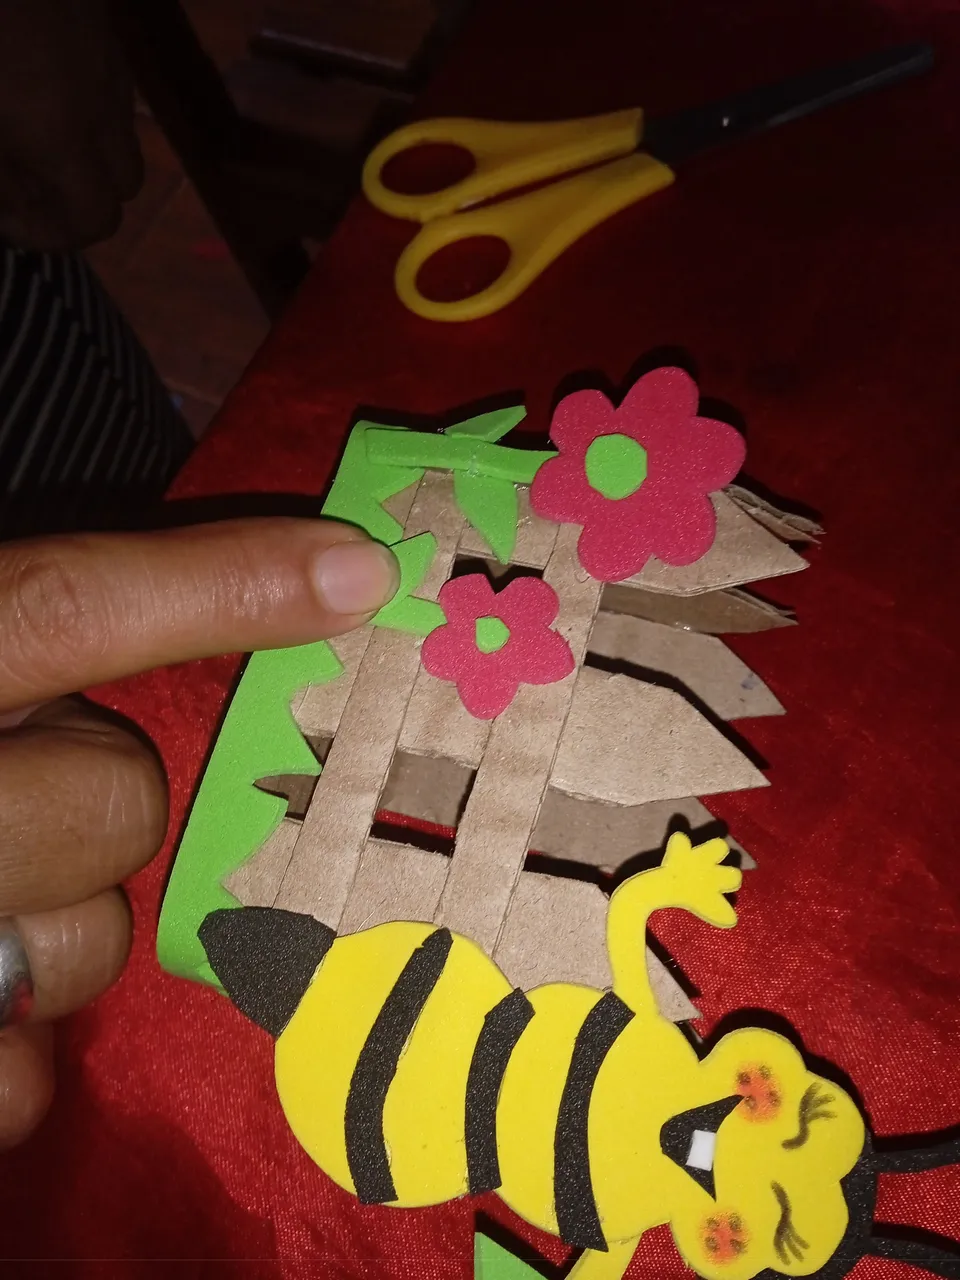
Paso número 1 : Comenzaremos realizando la base de nuestro porta-encendedor , para ello utilizaremos como material el cartón, recortaremos un cuadrado de tres centímetros de altura y cuatro de ancho , recortaremos varias tiras de un centímetro de ancho y cuatro de altura ah estás tiras en la parte de arriba la moldearemos puntiaguda ,luego continuaremos pegando una al lado de la otra semi separadas cubriendo todo el alrededor , luego para fortalecer nuestra base vamos a pegar unas tiras de forma horizontal hasta formar nuestra base para guardar en un lugar seguro y fijo nuestro encendedor
Steps to make our kitchen lighter holder:
Step number 1 : We will begin by making the base of our lighter holder, for this we will use cardboard as material, we will cut a square of three centimeters high and four centimeters wide, we will cut several strips of one centimeter wide and four centimeters high ah these strips at the top we will mold it pointed, then we will continue gluing one next to the other semi separated covering all around, then to strengthen our base we will paste some strips horizontally to form our base to keep in a safe place and fixed our lighter
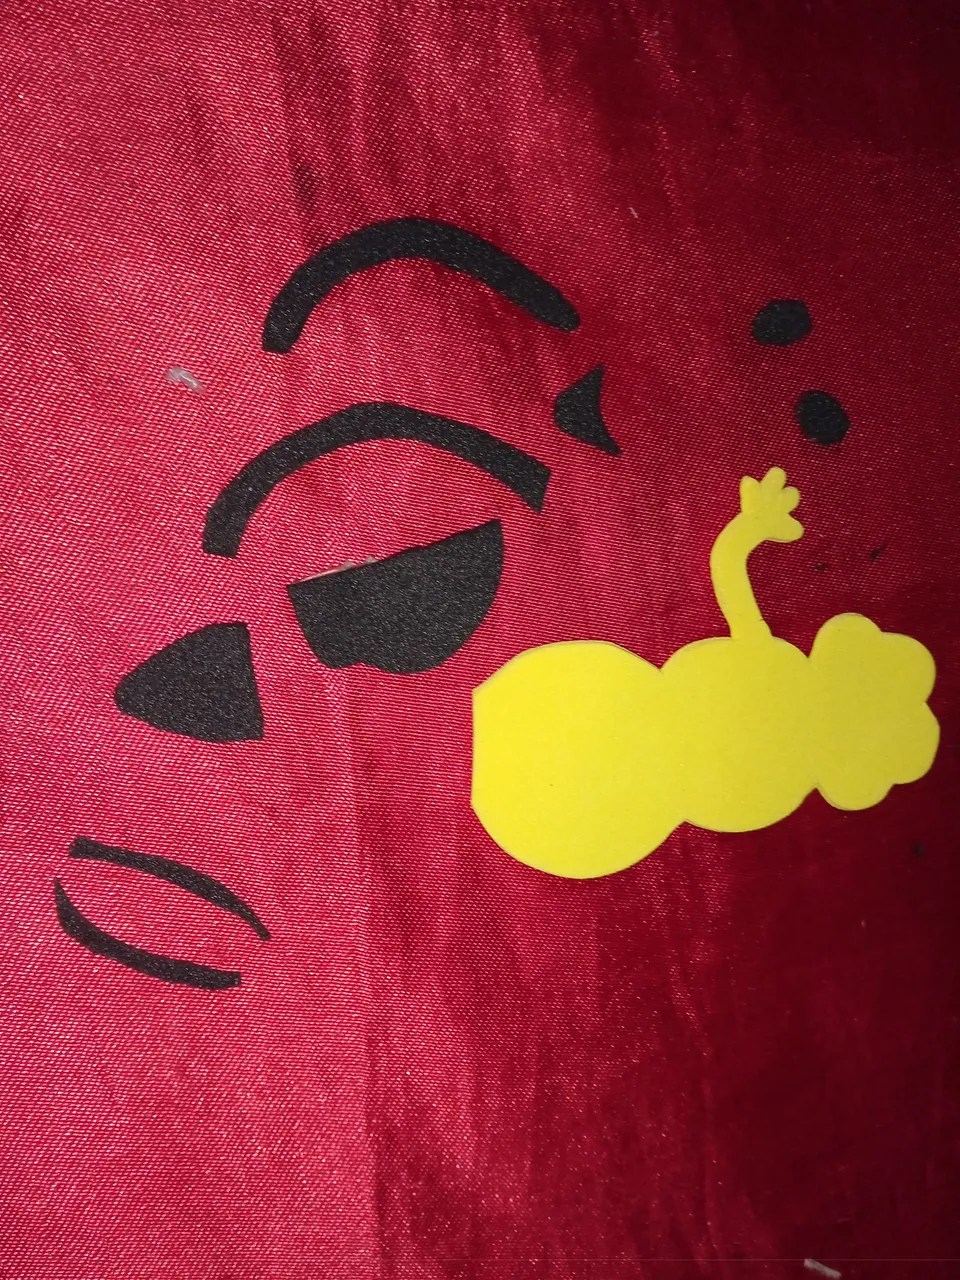
Paso número 2: Luego continuaremos recortando el cuerpo de nuestra abeja , esto incluirá sus líneas horizontales negra , una pieza negra que vaya en su cabeza ,sus antenas , parte de su rostro y al final una colita semi puntiaguda color negro también
Step number 2: Then we will continue cutting out the body of our bee, this will include its black horizontal lines, a black piece that goes on its head, its antennae, part of its face and at the end a little black semi-pointed tail as well.
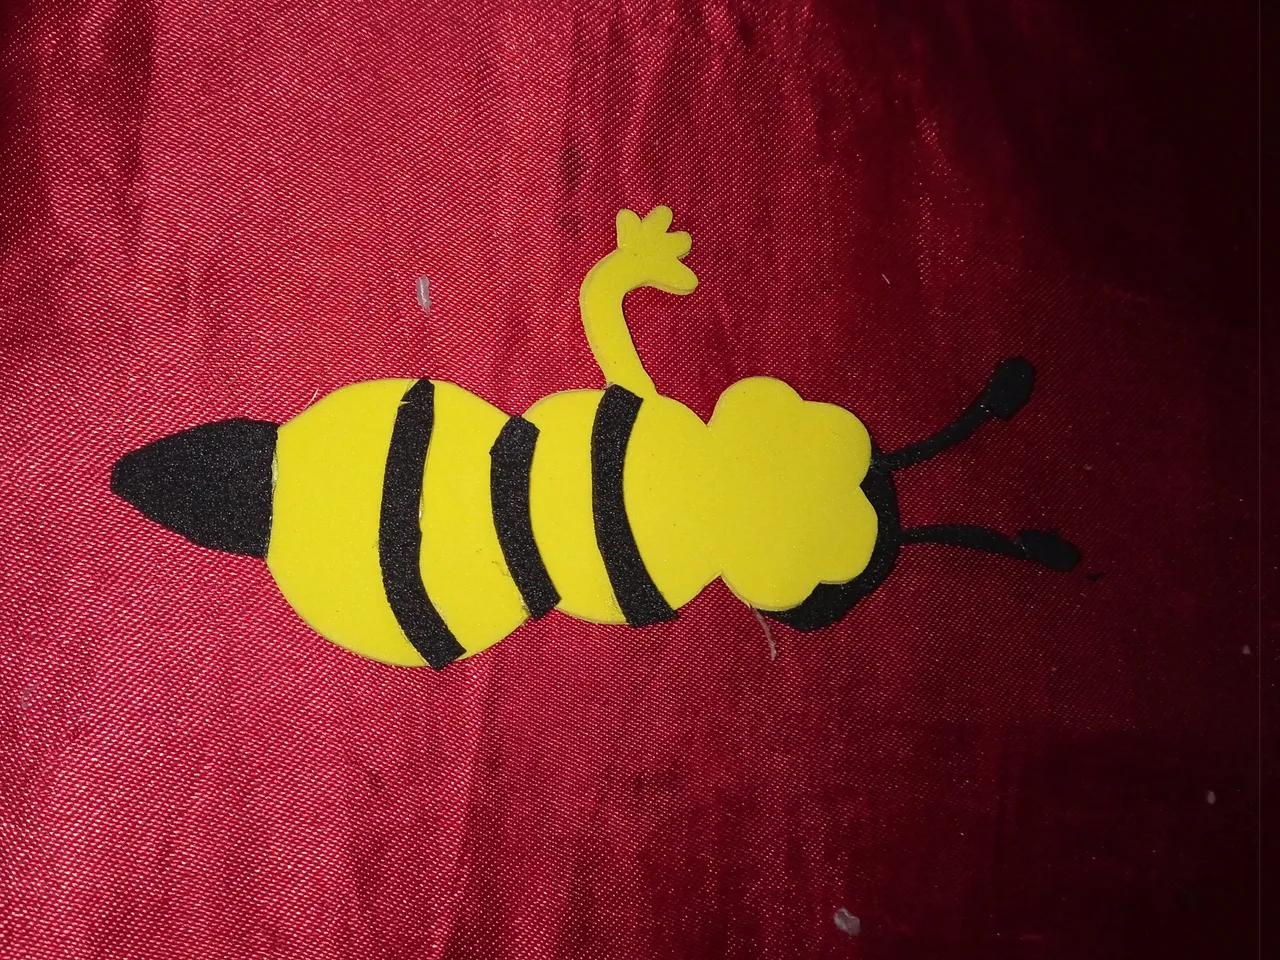
Paso número 3: a continuación vamos a tomar nuestras piezas y comenzaremos a realizar la abeja , primero comenzaremos pegando el lado negro de su cabeza , sus antenas , sus rayas y su colita puntiaguda
Step number 3: next we will take our pieces and start making the bee, first we will start by gluing the black side of its head, its antennae, its stripes and its pointed tail.
Paso número 4: acá en nuestro cuarto paso vamos a realizar el rostro de la abeja , un rostro sonriendo ,que demuestre felicidad plena , pegaremos su sonrisa con un pequeño diente ,pintamos sus cachetes y le realizamos al final unas pecas alrededor
Step number 4: here in our fourth step we are going to make the face of the bee, a smiling face, that shows full happiness, we will glue her smile with a small tooth, paint her cheeks and at the end we will make some freckles around it.

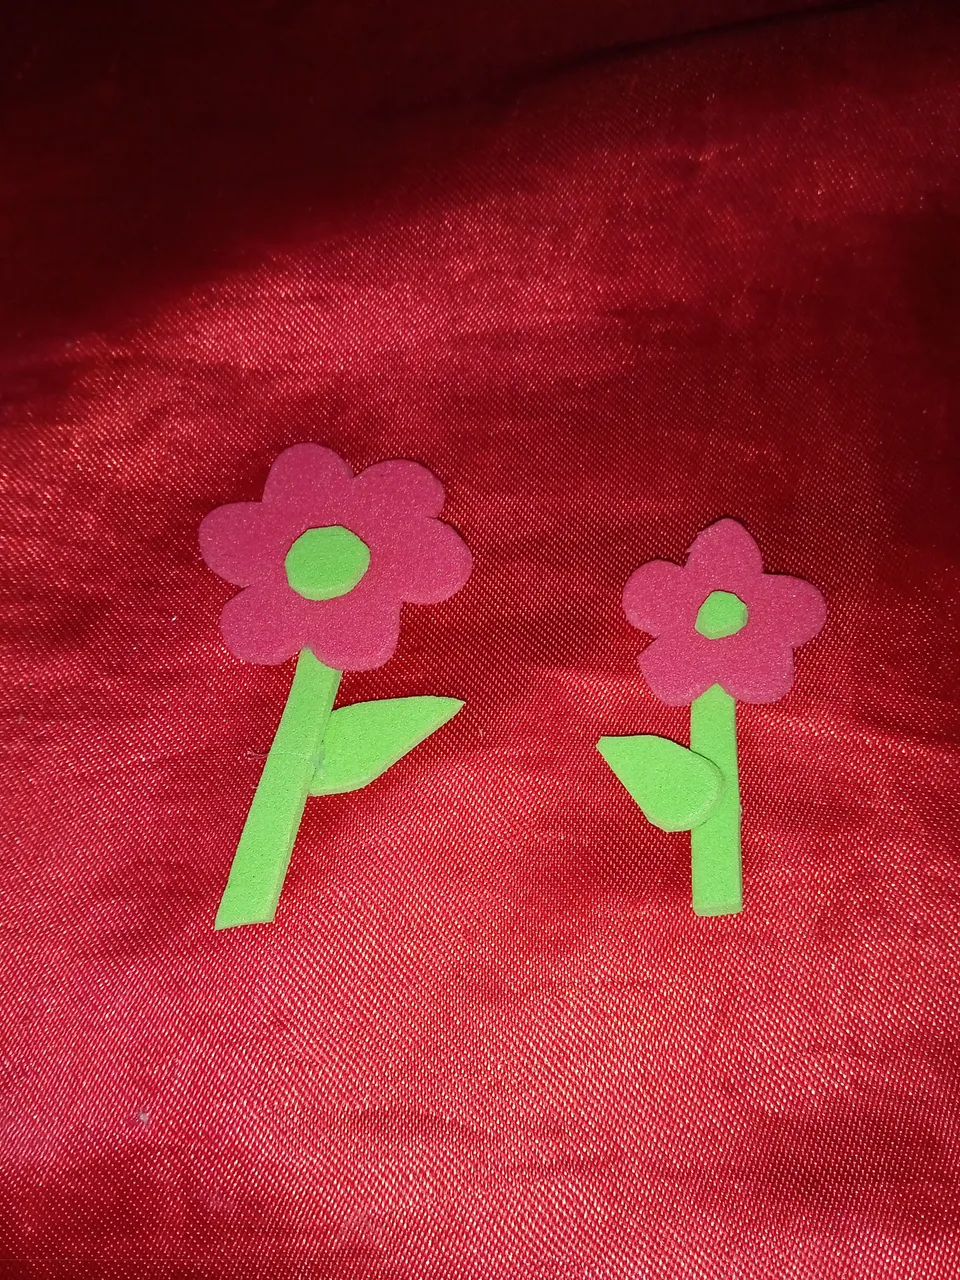
Paso número 5: a continuación vamos a realizar unas flores de foamis color rojo y verde , una tira verde vendrá siendo el tallo , un círculo verde será la semilla y una pequeña hoja , debemos ubicar el tallo en el centro de la flor en la parte de abajo y al igual que la semilla irá en el centro
Step number 5: next we are going to make some red and green foamis flowers, a green strip will be the stem, a green circle will be the seed and a small leaf, we must place the stem in the center of the flower at the bottom and the seed will go in the center.
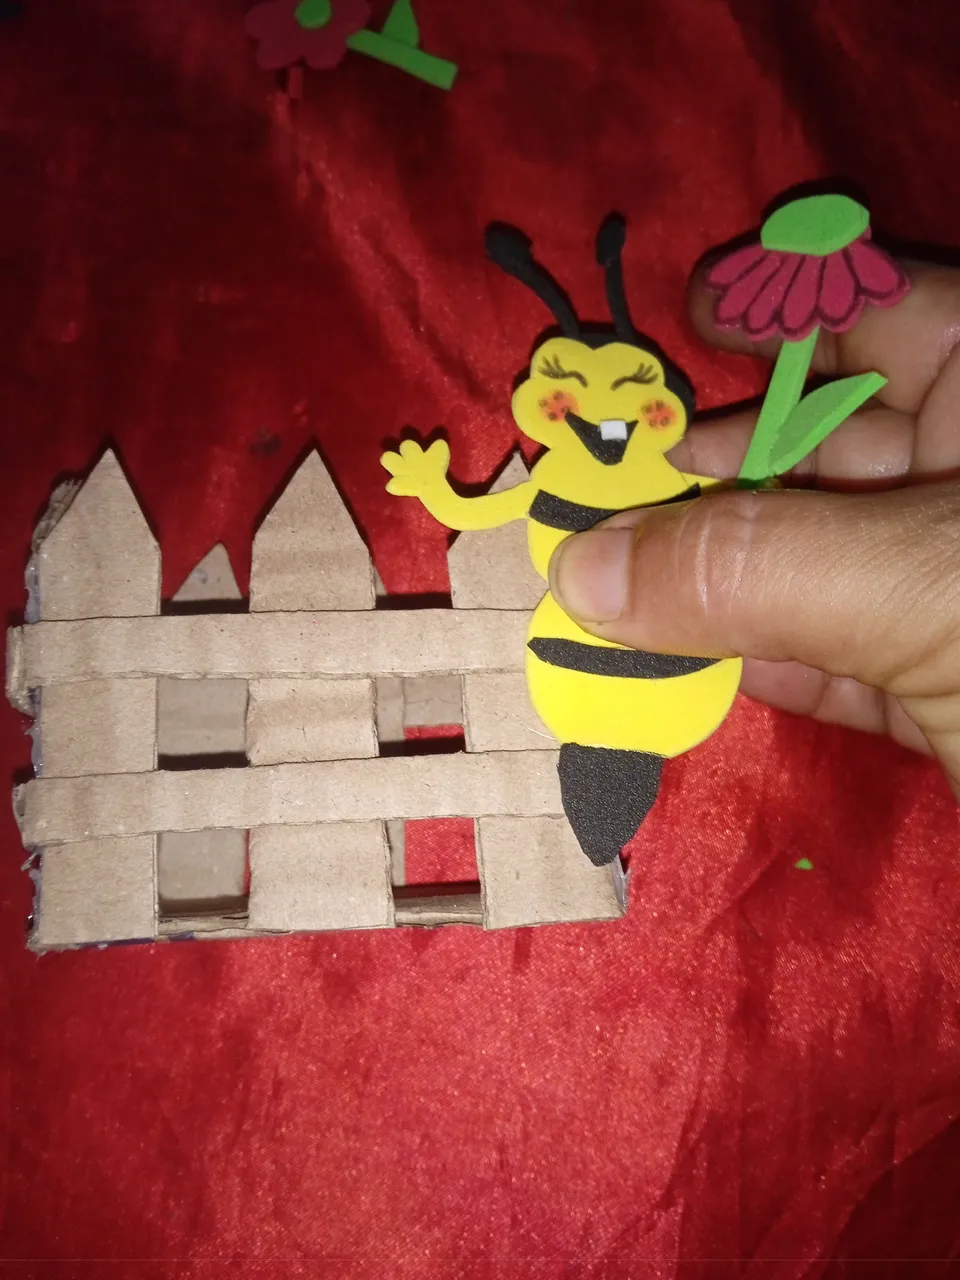
Paso número 6 : continuaremos tomando nuestra abeja con junto una flor y la pegaremos en una esquina de nuestra base de porta-encendedor ,este debe ir ubicado en la parte de adelante
Step number 6: we will continue taking our bee with a flower and we will glue it in a corner of our lighter holder base, this should be located in the front part.
Paso número 7: en nuestro séptimo paso vamos a colocar la parte ambiental a la naturaleza , tomaremos un foamis verde pegaremos un césped y lo pegaremos en la parte de abajo luego en la otra esquina pegaremos las dos pequeñas flores para terminar con la decoración
Step number 7: in our seventh step we will place the environmental part to the nature, we will take a green foamis we will paste a grass and we will paste it in the bottom part then in the other corner we will paste the two small flowers to finish with the decoration
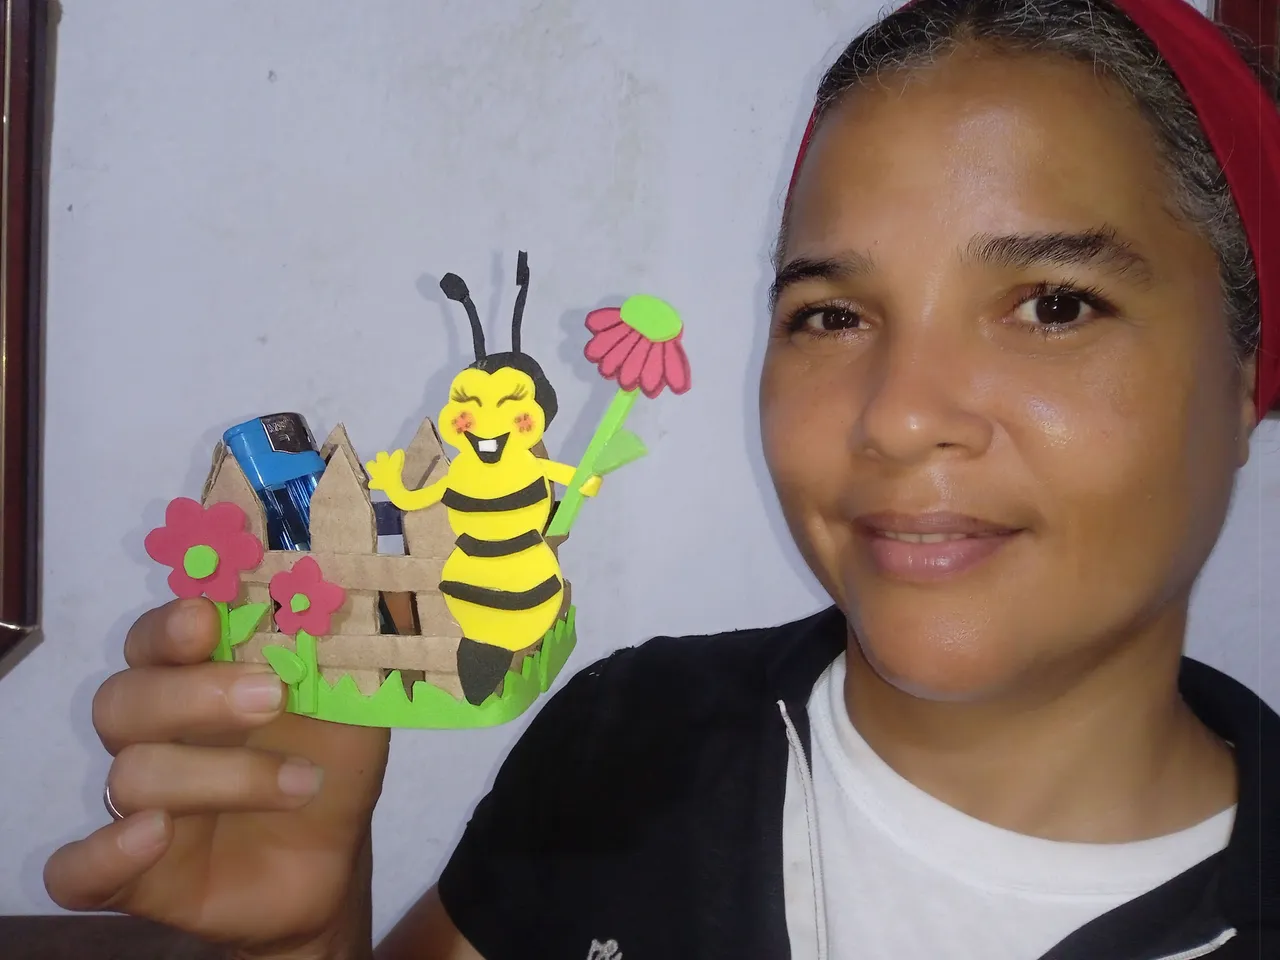
De esta manera pude realizar mi hermoso porta encendedor de cocina , con la finalidad de tener en un lugar seguro nuestros encendedores , ya que en ocasiones se nos extravían , gracias por su atención
In this way I was able to make my beautiful kitchen lighter holder, in order to have in a safe place our lighters, as sometimes we misplaced, thank you for your attention.