Versión en Español.
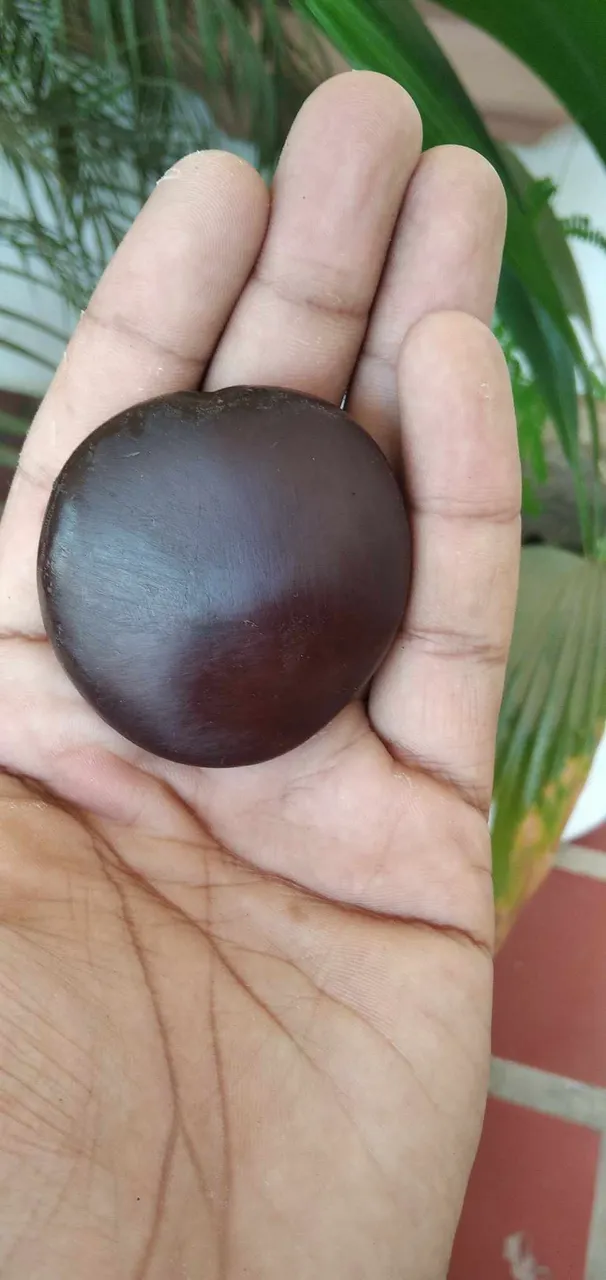
Esta semilla tiene la peculiaridad de tener una característica que la hacen muy llamativa debido a su forma, su color, textura y color, todos estos elementos sumados la hacen en su estado natural muy hermosa, trabajada para fines ornamentales potencia sus características haciendo que sea muy apreciada por la gente que le da muchos usos, ya sea para llaveros, collares, o portar una ya que se tiene la creencia que posee poderes místicos y espirituales para la lleva consigo.
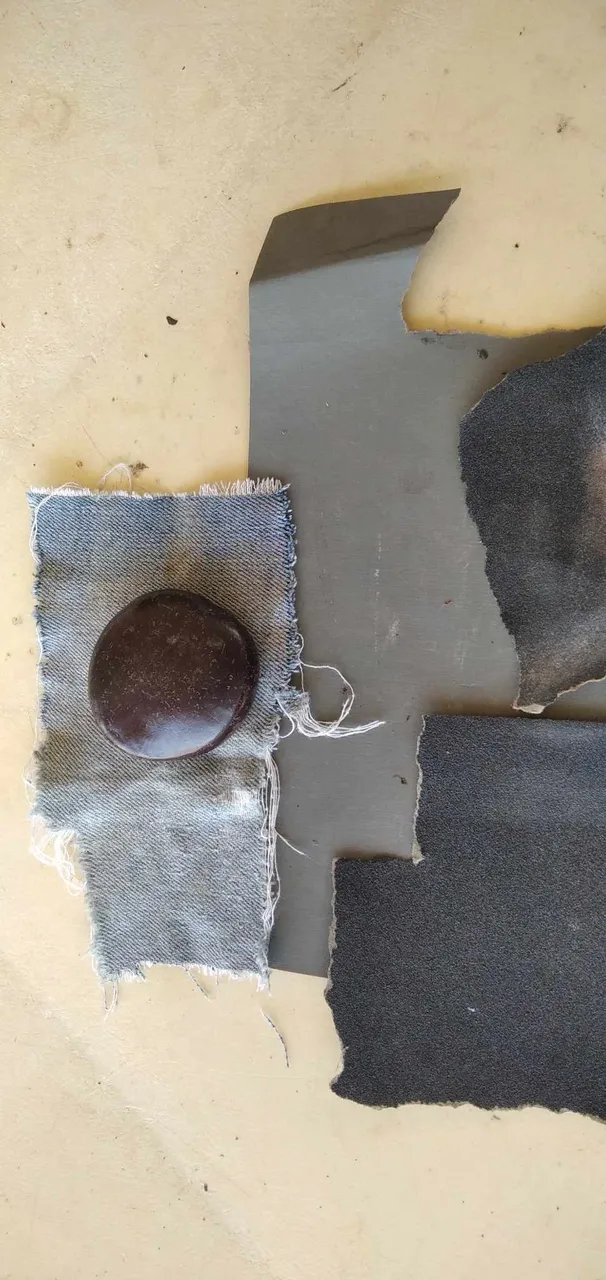
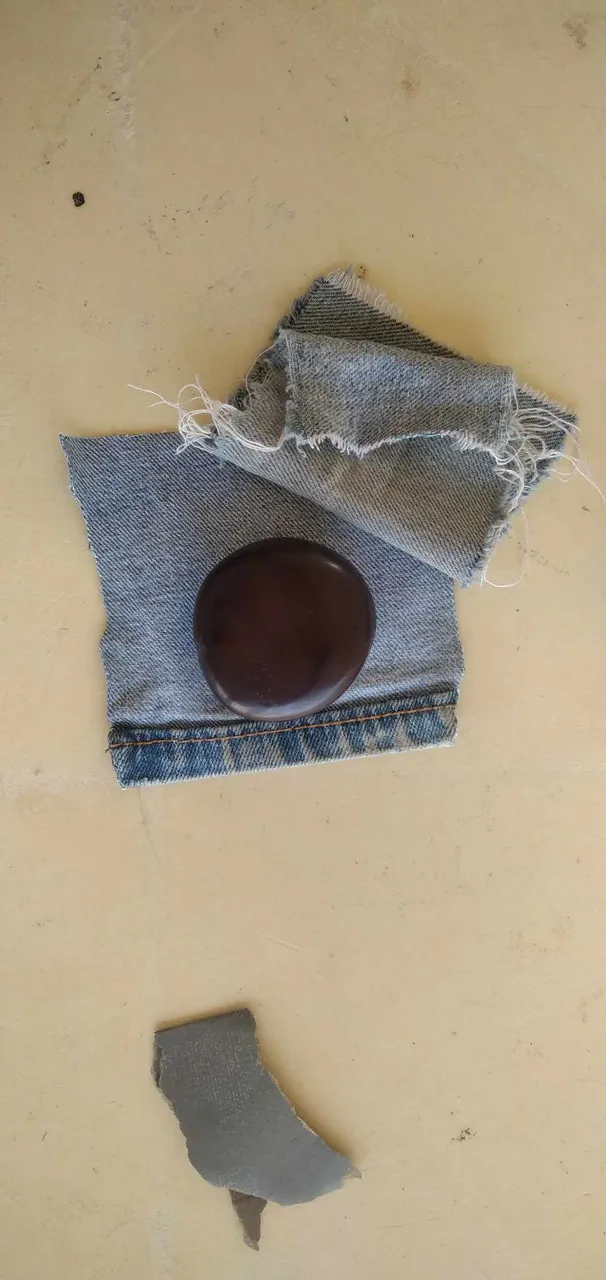
Para llevar a cabo este trabajo me basta con tener a la mano los siguientes elementos:
-Una semilla de corazón de changó.
-Una lámina de lija 400.
-Una lámina de lija 120.
-Dos trozos de tela 10cmx10cm de mezclilla también conocida como jean.
Paso 1: Lo primero que realicé es trabajar es estar estable de ánimos, hago mención ya que bajo estrés utilizar la lija número 120 con ahínco puede crear surcos que posteriormente serán costosos alisar, esto influirá negativamente en el acabado final de nuestra pieza, como he mencionado debemos comenzar usando trozos de láminas similar al tamaño de la pieza, se comienza a lijar en movimientos en dirección vertical en la primera tanda y posteriormente en de manera horizontal con la finalidad de quitar el esmalte natural de la semilla, con esto busco dejarla en una tonalidad mate.
Durante el paso 1 y 2, se debe trabajar teniendo la lija en una y en este caso la semilla posada en la otra, no es recomendable posarla sobre otra superficie debido a que se raya fácilmente o se le adhieren remanentes.
Paso2: una vez tenga una tonalidad mate procedo a usar trozos de láminas 400, esto con el fin de comenzar a suavizar la textura de la semilla provocada con la semilla, realizando los movimientos tal cual que en el paso 1, es frecuente que la semilla presente poros, la finalidad de pasar esta lija es quitar toda la porosidad, una vez logrado comienza a tornarse suave y comienza a alcanzar un brillo, logrado este cometido pasamos al siguiente paso.
Hasta los momentos, los primeros pasos toman poco tiempo y algo de delicadeza, también pericia, sin embargo a partir del paso numero 3 es el más complicado debido al tiempo que este demanda.
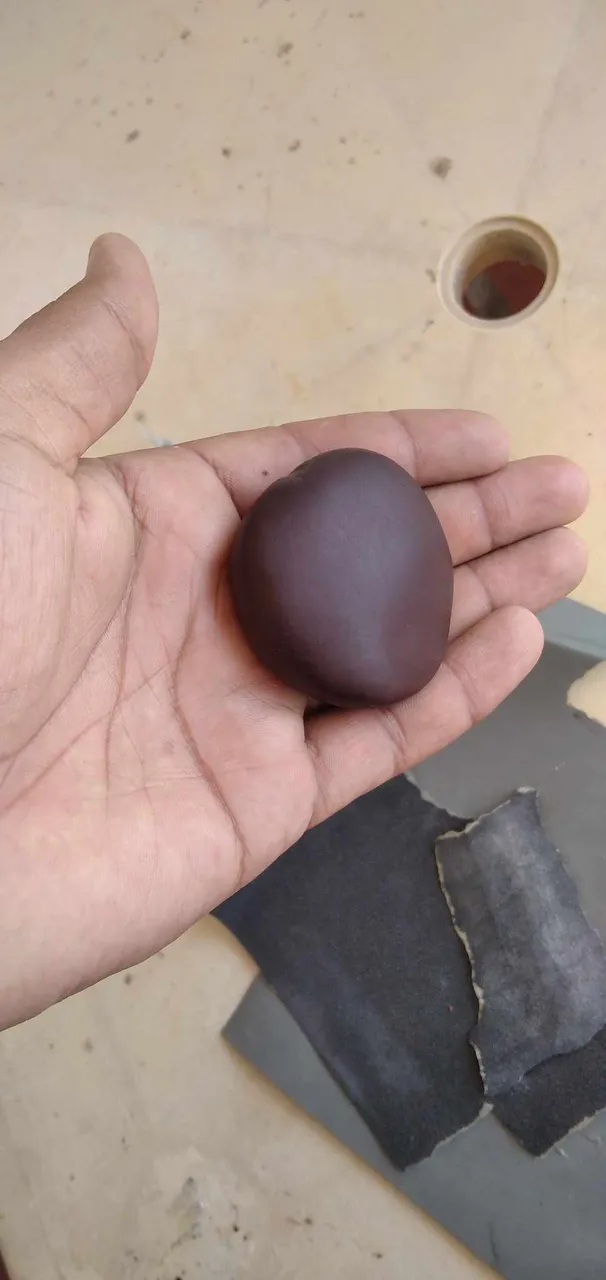
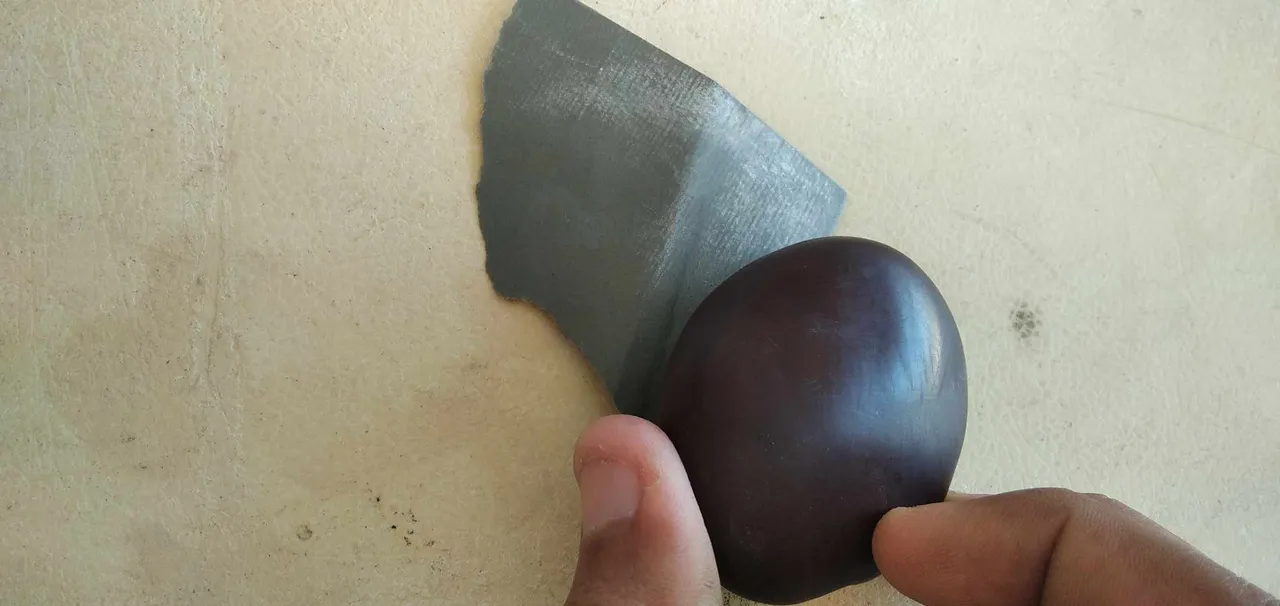
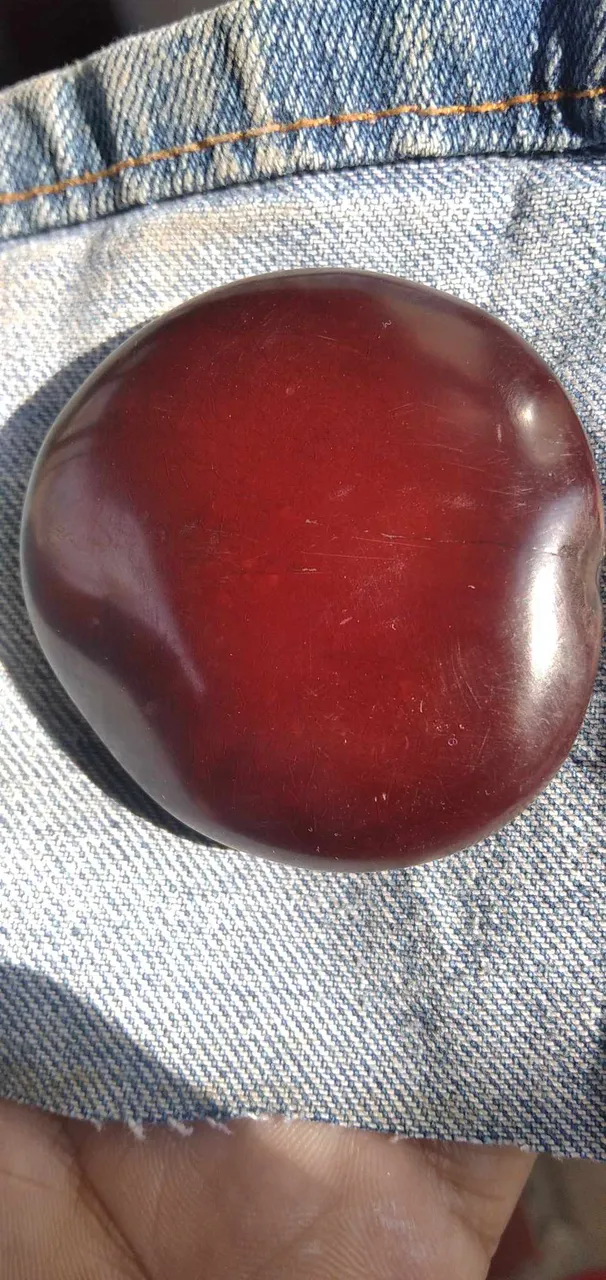
Paso 3: dejé de utilizar la lija 400 para ocupar los trozos de mezclilla, uno en dada mano, acto seguido apliqué la misma técnica de lijados anteriores, sobre toda la superficie de la semilla, lo hacía por segmentos hasta culminar pasando, cada vez que repitamos el proceso de acabado se tornará más brillante, los poros y ralladuras irán desapareciendo, y se comenzará a observar diferentes tonalidades dependiendo de la iluminación, el ángulo y el acabado que se le dé, que va desde negro, marrón, castaño oscuro y caoba, es frecuente que hayan marcas más oscuras en algunos segmentos, es natural eso la hace una pieza única.
Otra cosa muy importante es que pueden ayudar con el acabado final usando aceites con poca viscosidad, aceite de girasol, aceite de coco, afloja tuercas, la manera para aplicarse es directamente sobre la semilla, y esto además la ayuda a hidratarse, el comportamiento natural de esta semillas es ser muy sensible a su alrededor, de tal manera que en la naturaleza le sirve para poder germinar en su momento más favorable.
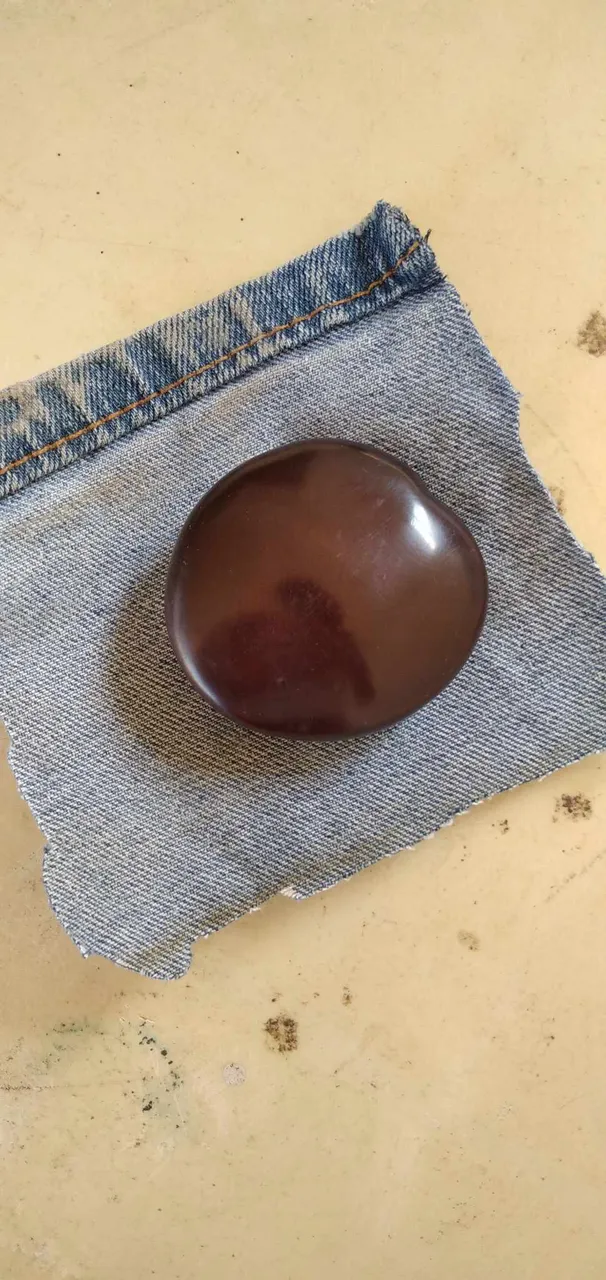
El resultado fina es el siguiente.

Espero que les haya gustado mi trabajo y el post en general, agradecido por tomarte tu tiempo de leerme, estoy presto a las interacciones con ustedes que conforman esta gran comunidad en la cual me estoy sintiendo parte.
English Version.
Hello diyhub community I hope you are well, it is a joy to share with you again, today I come to present a post on the occasion of the polishing process of a seed called amazon heart or changó heart.
This seed has the peculiarity of having a feature that make it very striking because of its shape, color, texture and color, all these elements together make it in its natural state very beautiful, worked for ornamental purposes enhances its characteristics making it very appreciated by people who give it many uses, either for key chains, necklaces, or carry one as it is believed that it has mystical and spiritual powers to carry it with you.
To carry out this work it is enough for me to have the following elements at hand:
- A changó heart seed.
- A sheet of sandpaper 400.
- A sheet of sandpaper 120.
- Two pieces of denim fabric 10cmx10cm also known as jean.
Step 1: The first thing I did is to work is to be stable mood, I mention that under stress using the sandpaper number 120 can create grooves that later will be expensive to smooth, this will negatively influence the final finish of our piece, as I mentioned we must start using pieces of sheets similar to the size of the piece, it begins to sand in movements in a vertical direction in the first batch and then horizontally in order to remove the natural enamel of the seed, with this I seek to leave it in a matte tone.
During step 1 and 2, you must work having the sandpaper on one and in this case the seed on the other, it is not advisable to put it on another surface because it scratches easily or remnants adhere to it.
Step 2: once I have a matte tone proceed to use pieces of 400 sheets, this in order to begin to soften the texture of the seed caused with the seed, making the movements as in step 1, it is common that the seed has pores, the purpose of passing this sandpaper is to remove all the porosity, once achieved begins to become smooth and begins to reach a brightness, achieved this task we move to the next step.
So far, the first steps take little time and some finesse, but step 3 is the most complicated due to the time it takes.
Step 3: I stopped using the sandpaper 400 to occupy the pieces of denim, one in each hand, then I applied the same technique of previous sanding, on the entire surface of the seed, I did it by segments until culminating passing, each time we repeat the finishing process will become brighter, the pores and scratches will disappear, and you will begin to see different shades depending on the lighting, the angle and the finish that is given, ranging from black, brown, dark brown and mahogany, it is common that there are darker marks in some segments, it is natural that makes it a unique piece.
Another very important thing is that they can help with the final finish using oils with low viscosity, sunflower oil, coconut oil, nut loosener, the way to apply is directly on the seed, and this also helps it to hydrate, the natural behavior of these seeds is to be very sensitive to their surroundings, so that in nature serves to germinate at its most favorable time.
El resultado fina es el siguiente.
I hope you liked my work and the post in general, thank you for taking the time to read me, I am looking forward to the interactions with you who make up this great community in which I am feeling part of.