Versión en Español.
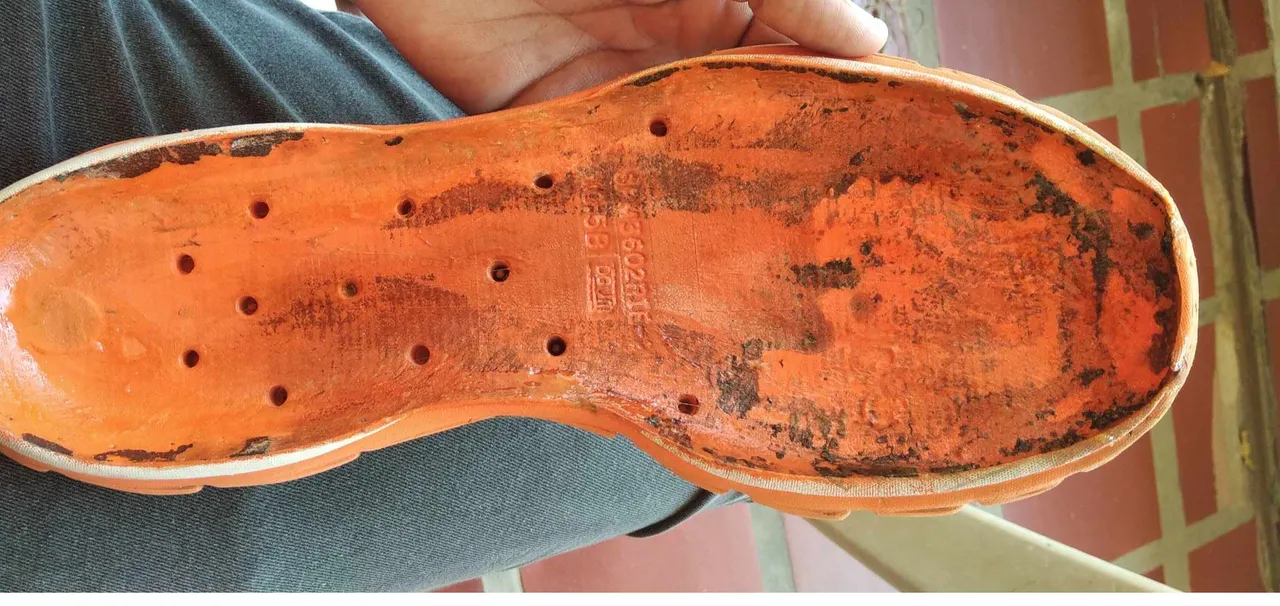
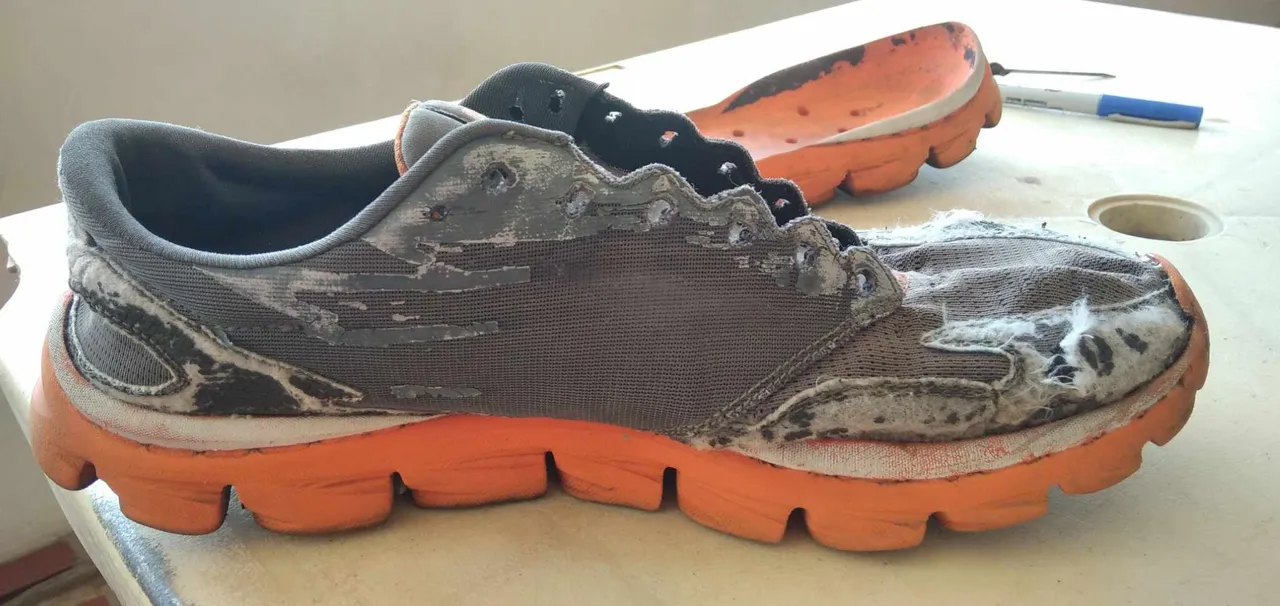
El calzado presentaba despegue en la suela, como se puede observar en la imagen de abajo, esto representaba un problema no solo por el riesgo de rotura total de la suela, sino por la cantidad de arena que se introduce en el lugar donde se presenta este problema.
-¼ pegamento de zapato.
-Una aguja para coser zapatos.
-2 metros de nylon.
-1 Cutter.

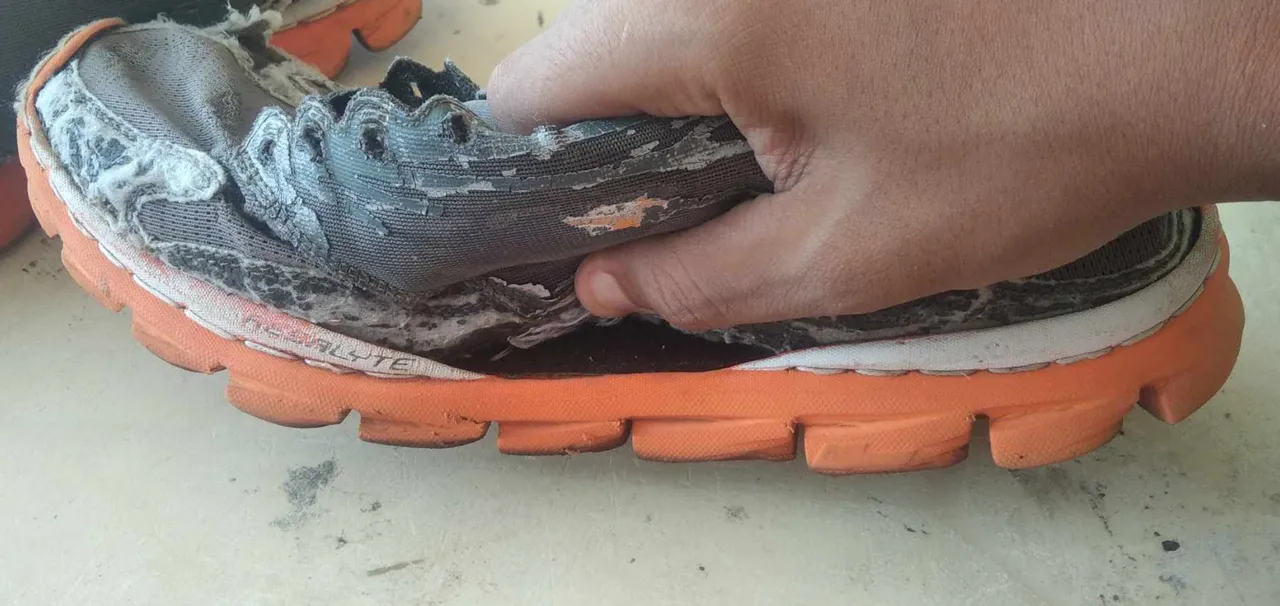
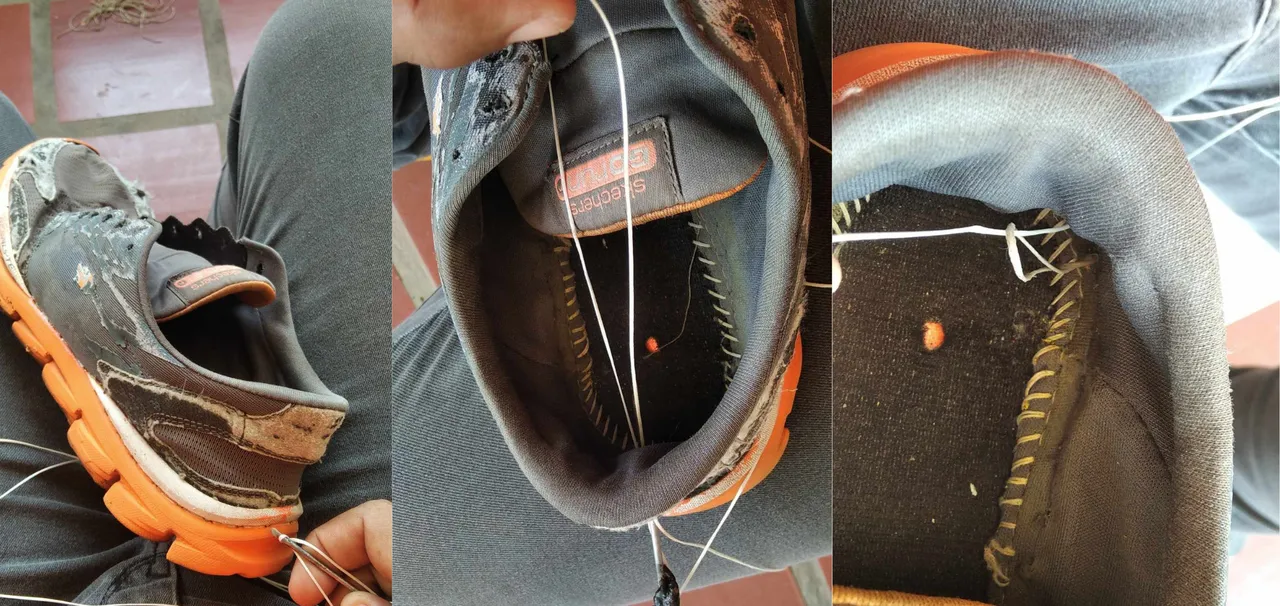
Paso 1: Descoser el calzado.
Con la ayuda del cutter empecé a quitar el nylon que sostenía el resto de la suela con la tela del calzado, este trabajo debe hacerse con mucha cautela y calma, ya que puede ocurrir un accidente como es cortarse con la herramienta, se empieza desde uno de los extremos hasta el otro.
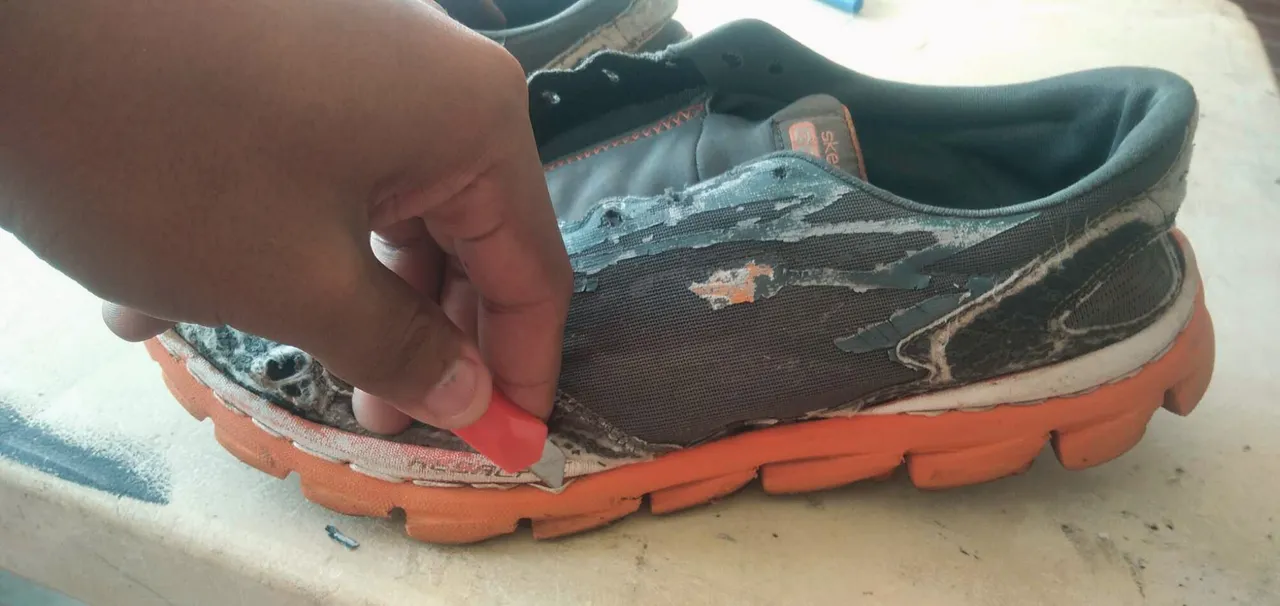
Paso 2: Despegue y pegue de la suela.
No me tomó mucho tiempo hacerlo, importante saber es que en este caso solo estaba unida la suela en una parte, a veces está más unido la suela con el resto del calzado, para ello se puede despegar haciéndolo con cierta delicadeza y no de manera abrupta, logrado este paso, se limpia la suela para quitar remanente de tierra y polvo, se vierte el pegamento de zapato, primero por las orillas y luego por el resto, se espera un minuto y se une la suela con el resto de la pieza, haciendo presión sobre la misma.

Paso 3: coser el calzado.
Ya unidos, me dediqué a coser el calzado utilizando la aguja, como pueden ver en la imagen, comencé desde atrás, la manera es metiendo la aguja en un inicio, dejando cerca de medio metro dentro, en la siguiente perforación el hilo externo deja un semicírculo en el cual por el medio van a pasar el hijo interno y hacen tensión, repitan este proceso hasta dar vuelta y quedar en el punto de inicio. Los intervalos de perforación yo lo hago utilizando el dedo índice como distancia.
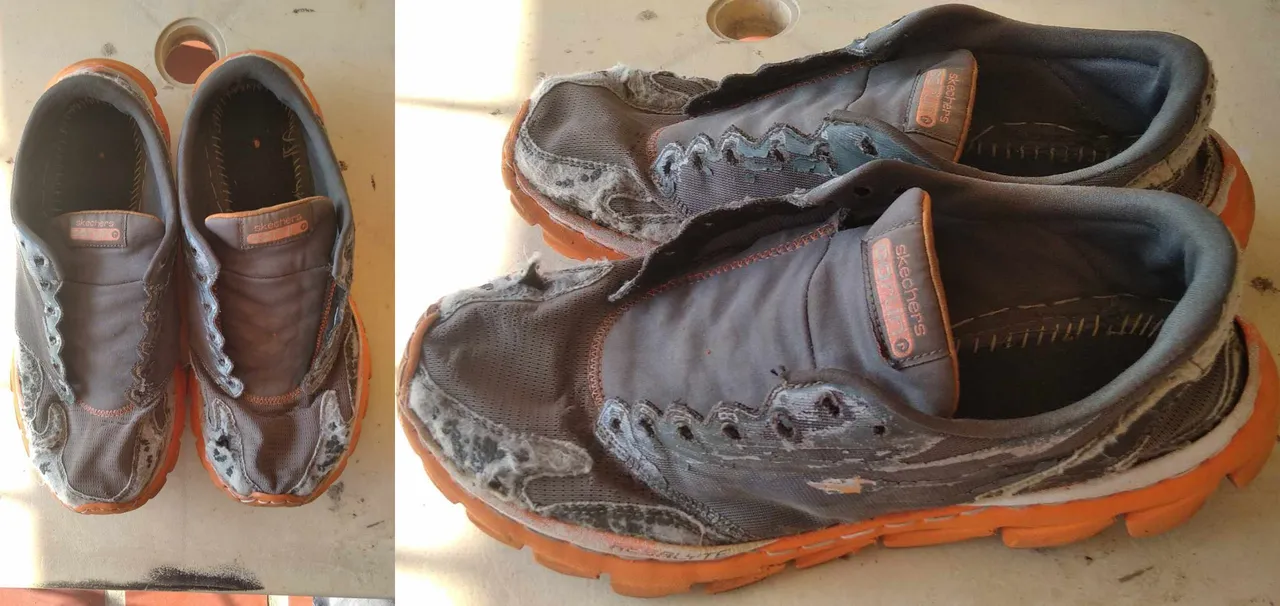
Resultado.
Espero que haya sido de utilidad esta información, si has llegado a esta parte del texto, te quisiera agradecer por tomarte tu tiempo en leer mi post, espero podamos coincidir pronto.
English Version.
Greetings Diyhub community I hope you are well, these days of the week has given me time to attend to several things, including repairing a shoe that had damaged, which is why I decided to make this post to share with you a few simple steps to give solution.
The shoe had a detachment on the sole, as you can see in the image below, this represented a problem not only because of the risk of total breakage of the sole, but also because of the amount of sand that is introduced in the place where this problem occurs.
What I needed to make this repair were the following materials:
- ¼ shoe glue.
- A needle for sewing shoes.
- 2 meters of nylon.
- 1 Cutter.
Step 1: Unpicking the shoe.
With the help of the cutter I started to remove the nylon that held the rest of the sole with the fabric of the shoe, this work must be done with great caution and calm, as an accident can occur as it is to cut yourself with the tool, start from one end to the other.
Step 2: Peel and glue from the sole.
It did not take me much time to do it, important to know is that in this case the sole was only attached in one part, sometimes the sole is more attached to the rest of the shoe, for this you can take off doing it with some delicacy and not abruptly, achieved this step, clean the sole to remove remaining dirt and dust, pour the shoe glue, first by the edges and then by the rest, wait a minute and joins the sole with the rest of the piece, pressing on it.
Step 3: sewing the shoes.
As you can see in the picture, I started from the back, the way is to put the needle at the beginning, leaving about half a meter inside, in the next perforation the external thread leaves a semicircle in the middle of which you will pass the internal thread and make tension, repeat this process until you turn around and stay at the starting point. The intervals of perforation I do it using the index finger as distance.
Result
I hope this information has been useful, if you have reached this part of the text, I would like to thank you for taking your time to read my post, I hope we can agree soon.