¡Saludos comunidad creativa! | ¡Greetings creative community!
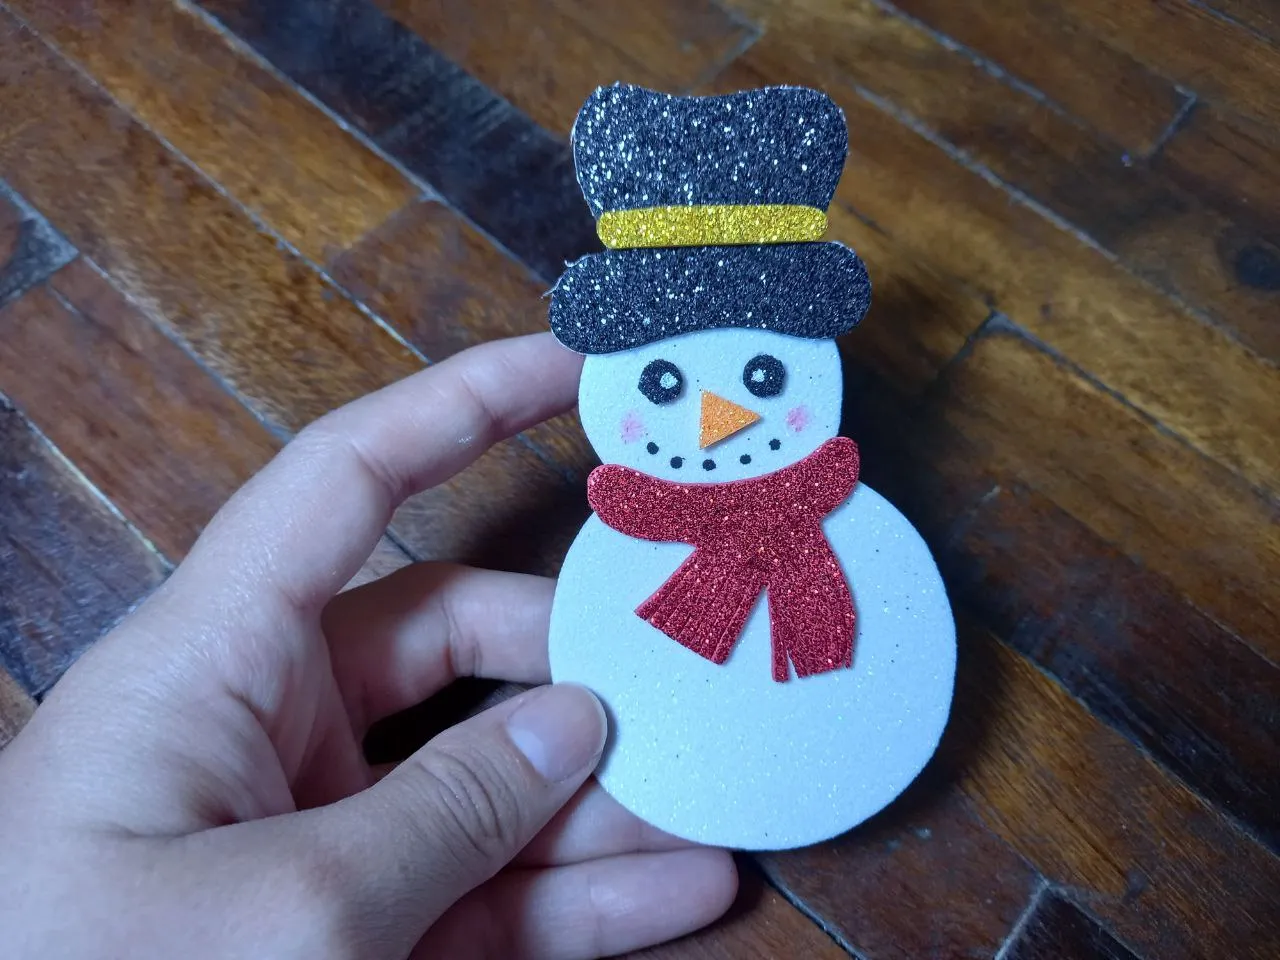
¡Feliz martes! Deseo que todos tengan una semana muy linda y productiva, yo inicio la mía compartiéndoles una linda manualidad navideña y se trata de un adorable muñeco de nieve en foami para colgar en el árbol de navidad, como ya he mencionado anteriormente este año decidí renovar mis adornos y como siempre los hice yo misma, uno de ellos es este que les muestro hoy y espero que les guste, sin más, ¡vamos a crear!
¡Happy tuesday! I wish you all have a very nice and productive week, I start mine by sharing a nice Christmas craft and it is an adorable foami snowman to hang on the Christmas tree, as I mentioned earlier this year I decided to renew my decorations and as always I made them myself, one of them is this one that I show you today and I hope you like it, without further ado, ¡let's create!


☃ Foami escarchado blanco, negro, rojo, dorado, marrón y naranja.
☃ Pintura negra.
☃ Silicón caliente.
☃ Corrector de tinta o pintura blanca.
☃ Abre huecos.
☃ Cinta o hilo dorado para colgar.
☃ Lápiz.
☃ Tijera.
☃ Rubor.
☃ Pincel.
☃ White, black, red, gold, brown and orange frosty foami.
☃ Black paint.
☃ Hot silicone.
☃ Ink concealer or white paint.
☃ Open holes.
☃ Ribbon or gold thread to hang.
☃ Pencil.
☃ Scissors.
☃ Blush.
☃ Brush.


☃ PASO 1. Lo primero es hacer las piezas en foami para formar a nuestro muñeco de nieve, hacemos el cuerpo en blanco, el sombrero en negro, los brazos en marrón y la bufanda en rojo (o del color que prefieran) y recortamos.
☃ STEP 1. The first thing is to make the pieces in foami to form our snowman, we make the body in white, the hat in black, the arms in brown and the scarf in red (or the color you prefer ) and cut.


☃ PASO 2. Tomamos la bufanda y le hacemos cortes finos en la parte inferior de manera vertical, esto ayudará a que tenga un mejor aspecto, luego la pegamos sobre el cuerpo del muñeco de nieve en la parte del cuello.
☃ STEP 2. We take the scarf and make fine cuts on the bottom vertically, this will help it look better, then we glue it on the body of the snowman in the neck part.


☃ PASO 3. Recortamos una delgada tira de foami escarchado dorado y la pegamos sobre el sombrero justo en la división de tamaños, luego pegamos el sombrero en la parte superior del muñeco de nieve.
☃ STEP 3. Cut a thin strip of gold frosted foam and glue it onto the hat right in the size division, then glue the hat on top of the snowman.


☃ PASO 4. Con el abre huecos sacamos 5 círculos de foami escarchado negro y adicional hacemos un pequeño triangulo de foami escarchado naranja, pegamos 2 círculos para los ojos y con el corrector de tinta les dibujamos un puntito blanco a cada uno, pegamos la nariz en el centro debajo de los ojos y debajo de esta dibujamos una sonrisa tomando un poco de pintura negra con el lápiz y haciendo puntitos en forma de “U”, para finalizar con el rostro dibujamos las mejillas con rubor.
☃ STEP 4. With the hole opener we take out 5 circles of black frosted foam and additionally we make a small triangle of orange frosted foam, we glue 2 circles for the eyes and with the ink corrector we draw a white dot on each one , we paste the nose in the center under the eyes and under it we draw a smile taking a little black paint with the pencil and making dots in the shape of a "U", to finish with the face we draw the cheeks with blush.


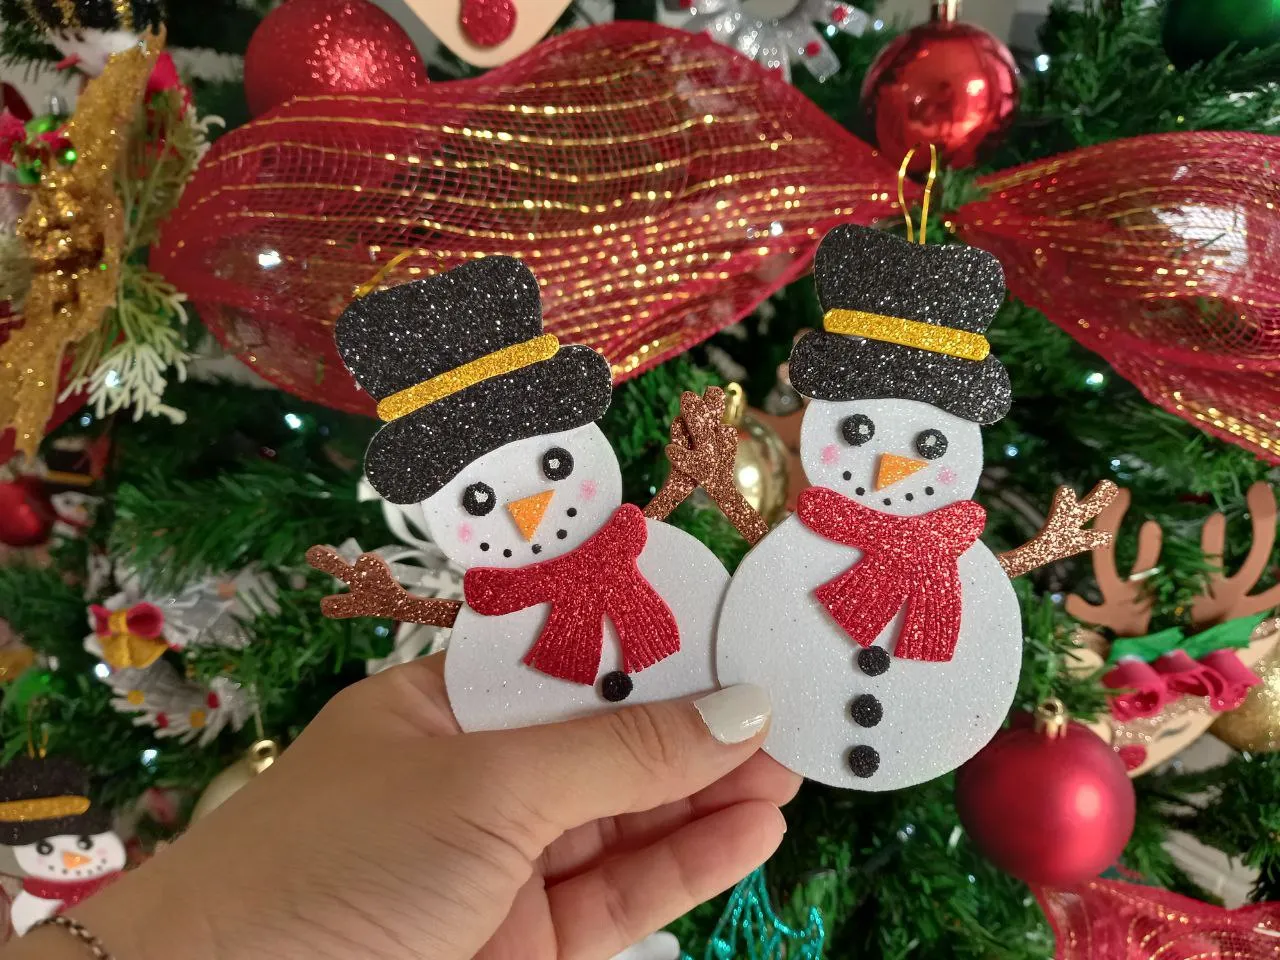
☃ PASO 5. Como último paso pegamos los brazos a los lados en la parte trasera del muñeco de nieve y en la parte superior justo en el centro pegamos una tira de cinta o hilo dorado para poder colgarlo en el arbolito.
☃ STEP 5. As a last step we glue the arms to the sides on the back of the snowman and at the top right in the center we glue a strip of ribbon or gold thread to hang it on the tree.


¡Y listo! De esta manera tan sencilla es como he elaborado unos hermosos muñecos de nieve en foami para colgar en el arbolito, su diseño es muy lindo y fácil de elaborar, lucen muy bien en el arbolito aunque también podemos hacerlos de cualquier tamaño para decorar otros espacios, espero que les haya gustado este pequeño tutorial y les pueda servir de guía para recrear este lindo adorno en casa, gracias por su visita, nos vemos pronto con un nuevo tutorial navideño.
And ready! In this simple way, I have made some beautiful foami snowmen to hang on the tree, their design is very cute and easy to make, they look great on the tree, although we can also make them of any size to decorate other spaces, I hope you liked this little tutorial and it can serve as a guide to recreate this beautiful decoration at home, thanks for your visit, see you soon with a new Christmas tutorial.


Todas las fotografías son de mi propiedad.
Fotografías capturadas con mi Samsung Galaxy A12
Separador de texto elaborado en Canva.
Nos vemos en mi próxima publicación.
¡Tengan un feliz día!
All photographs are my property.
Photos captured with my Samsung Galaxy A12
Text separator made in Canva.
See you in my next post.
¡Have a happy day!