Hello, community and all creators, and artists in this community greetings. I hope everybody is happy and healthy and most of you are busy making origami art.
It is very fun to do this. We had this activity during our school time We were making animals, flowers, different insects, or leaves. We didn't spend money to buy special papers we used old newspapers or magazines.
Since I read the announcement, I have been thinking about making something I made at my school time winning first prize years ago. Making art is very easy if you are devoted to the project But how to write it and explain it by writing is quite hard work in origami. I am trying my best to explain it. making the leaf just took around 10 minutes. But how to make tutorial this fold and that fold is quite complicated made several leaves to find out.
Plus unexpected snow rain and slippery road not easy to go out. we live in a small town where there is no hobby material shop. we have to drive to another town but we haven't changed the winter tires on the car. so I just used A4 copy paper.
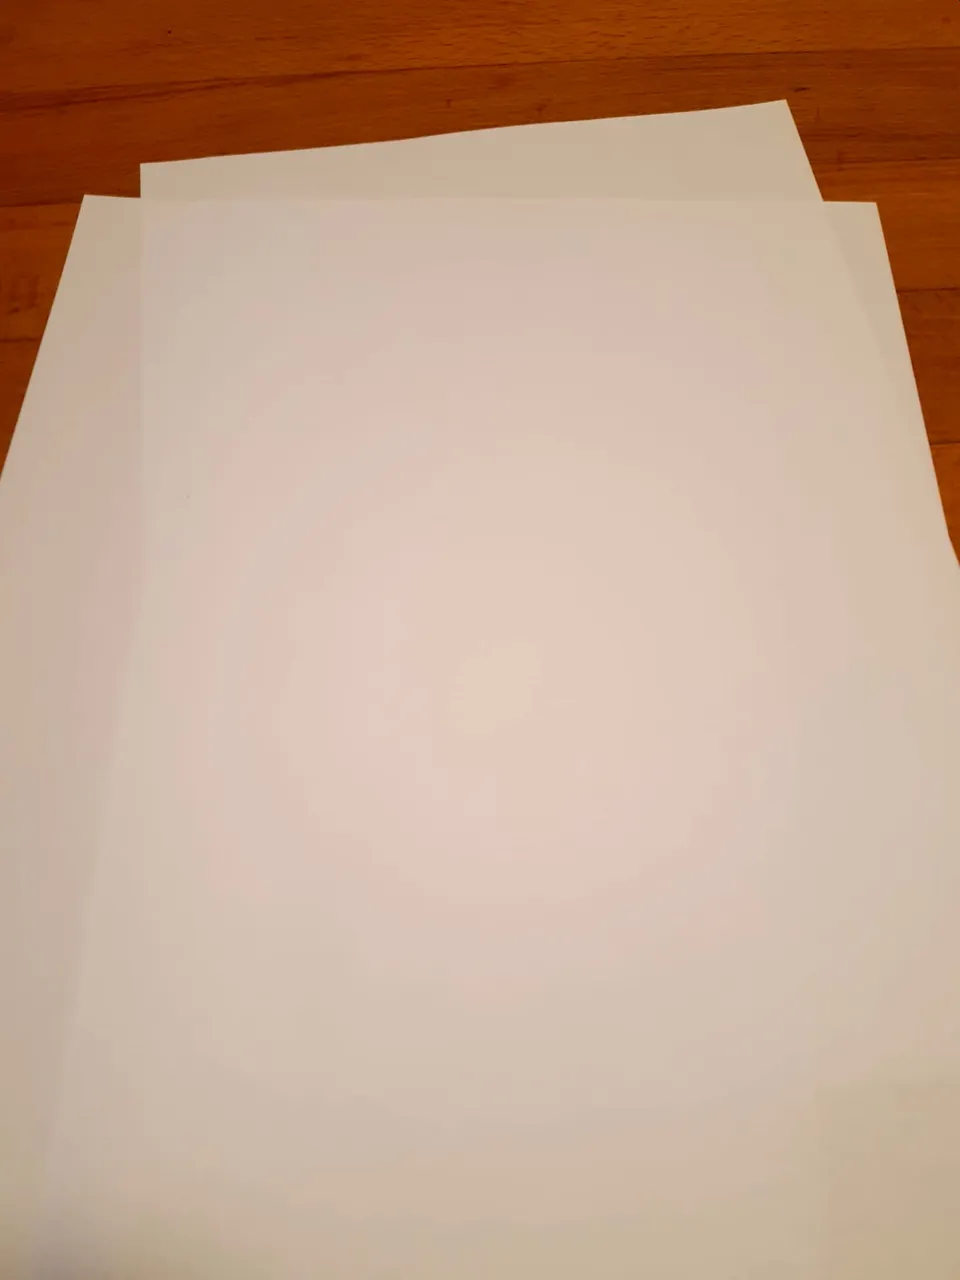
used material
2 pieces 4A white paper

natural colors from turmeric, pomegranate peels and kernels, beetroot powder, and green paint.
12 x 12 cm 1 piece of paper
10 x 10 cm 2 pieces of paper
8 x 8 cm 2 pieces of paper
 .
.
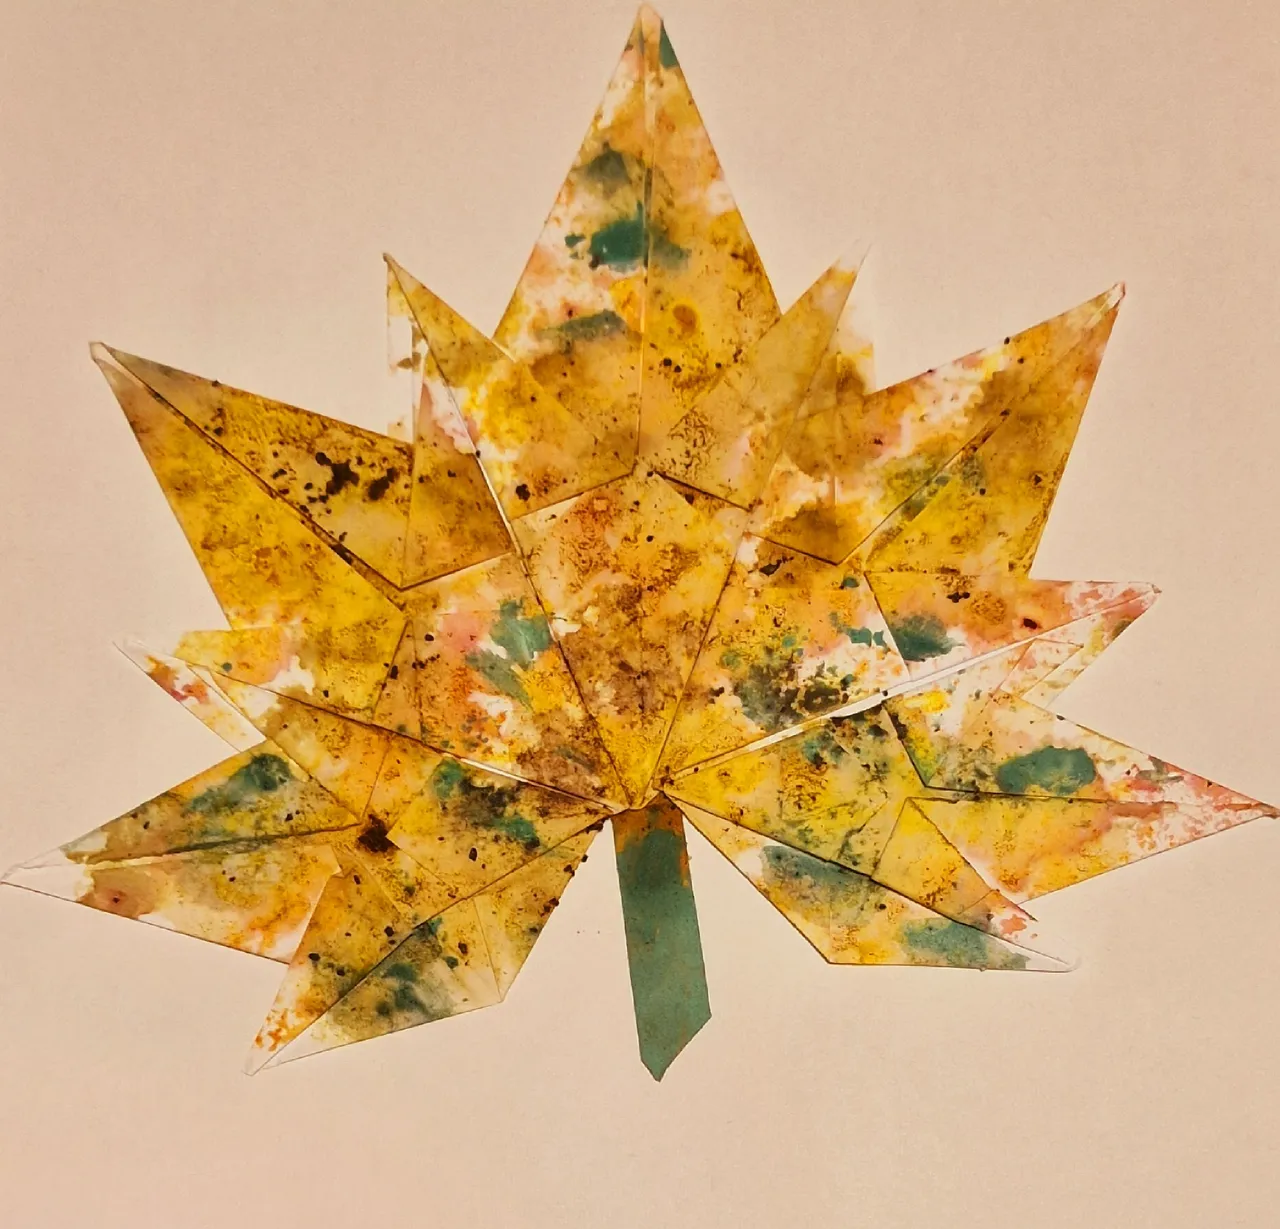
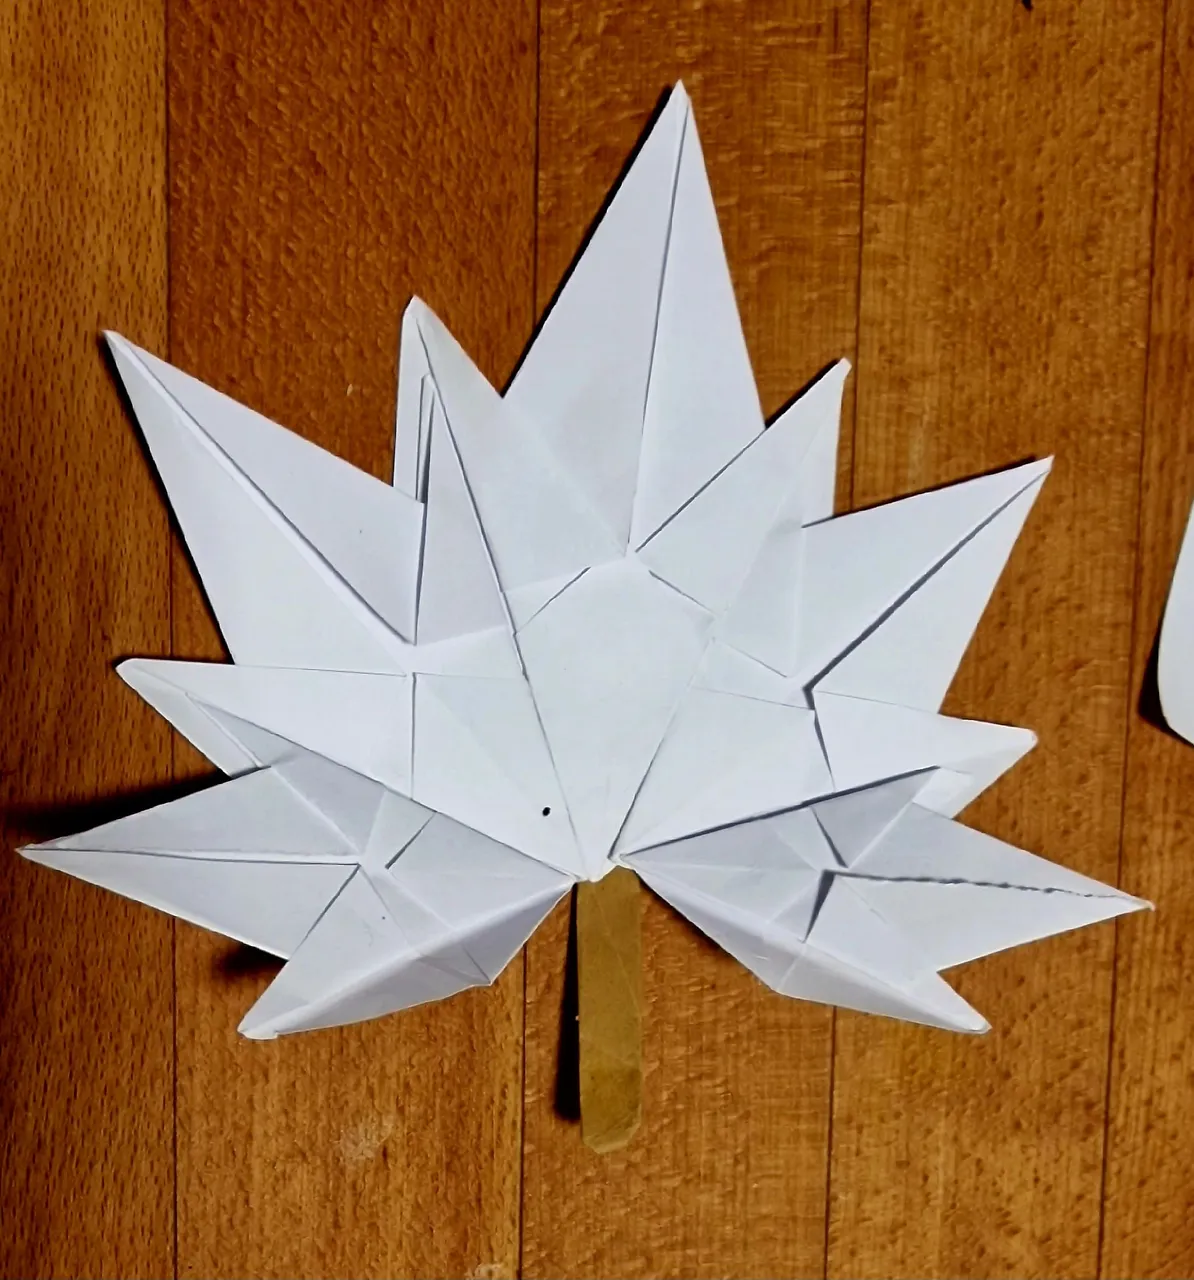
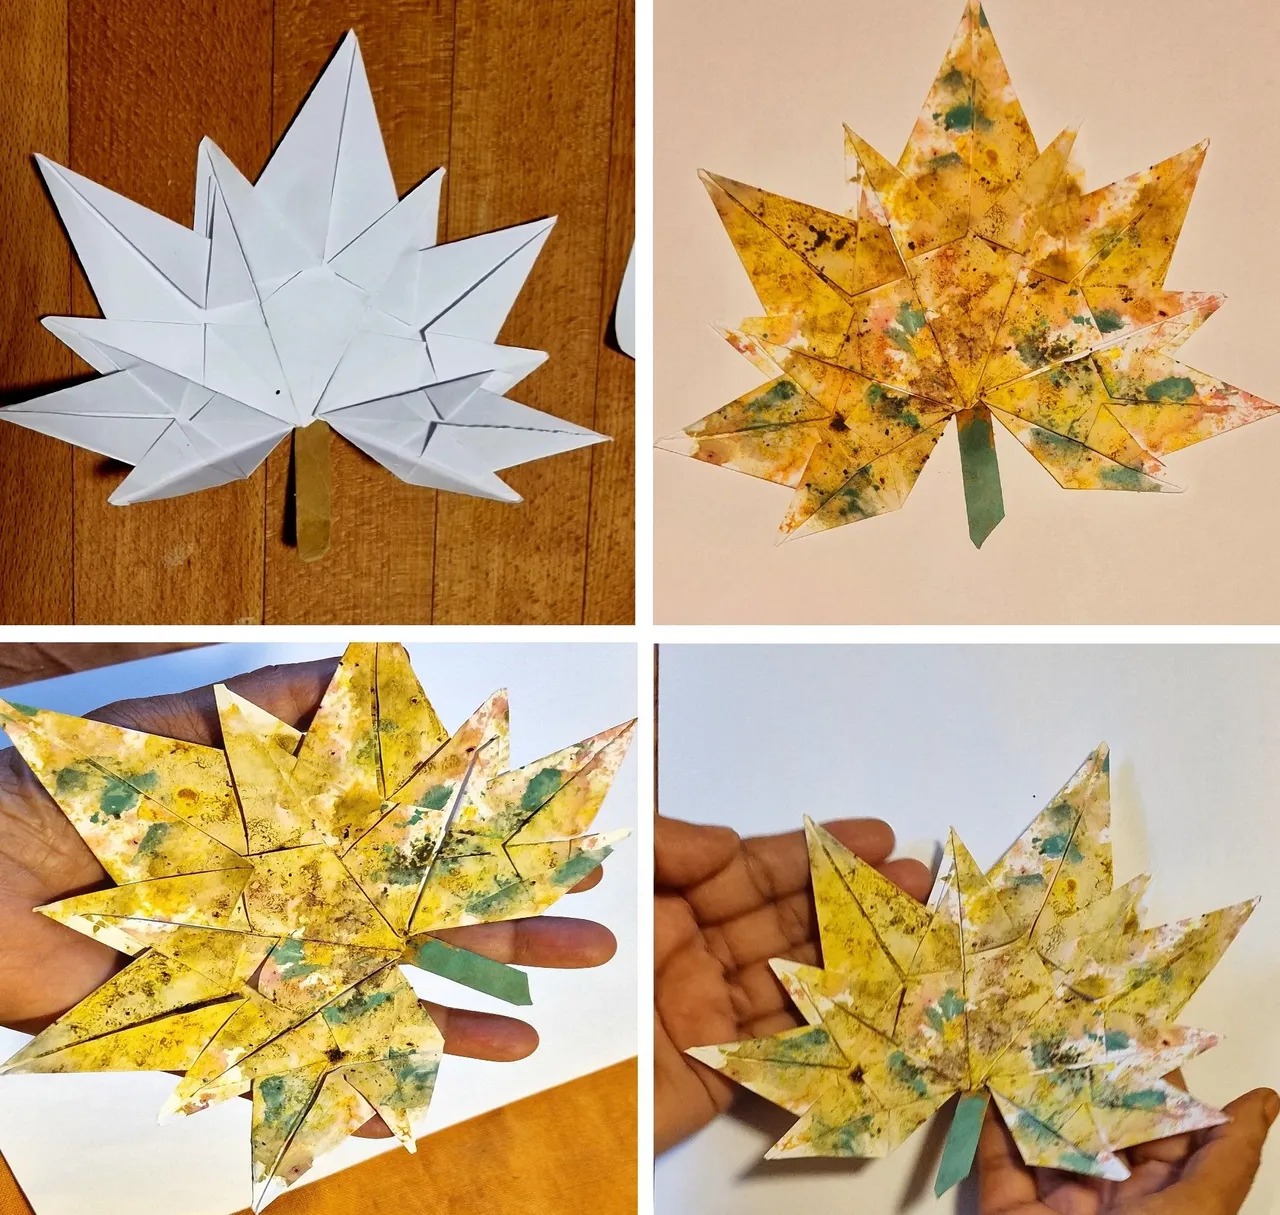
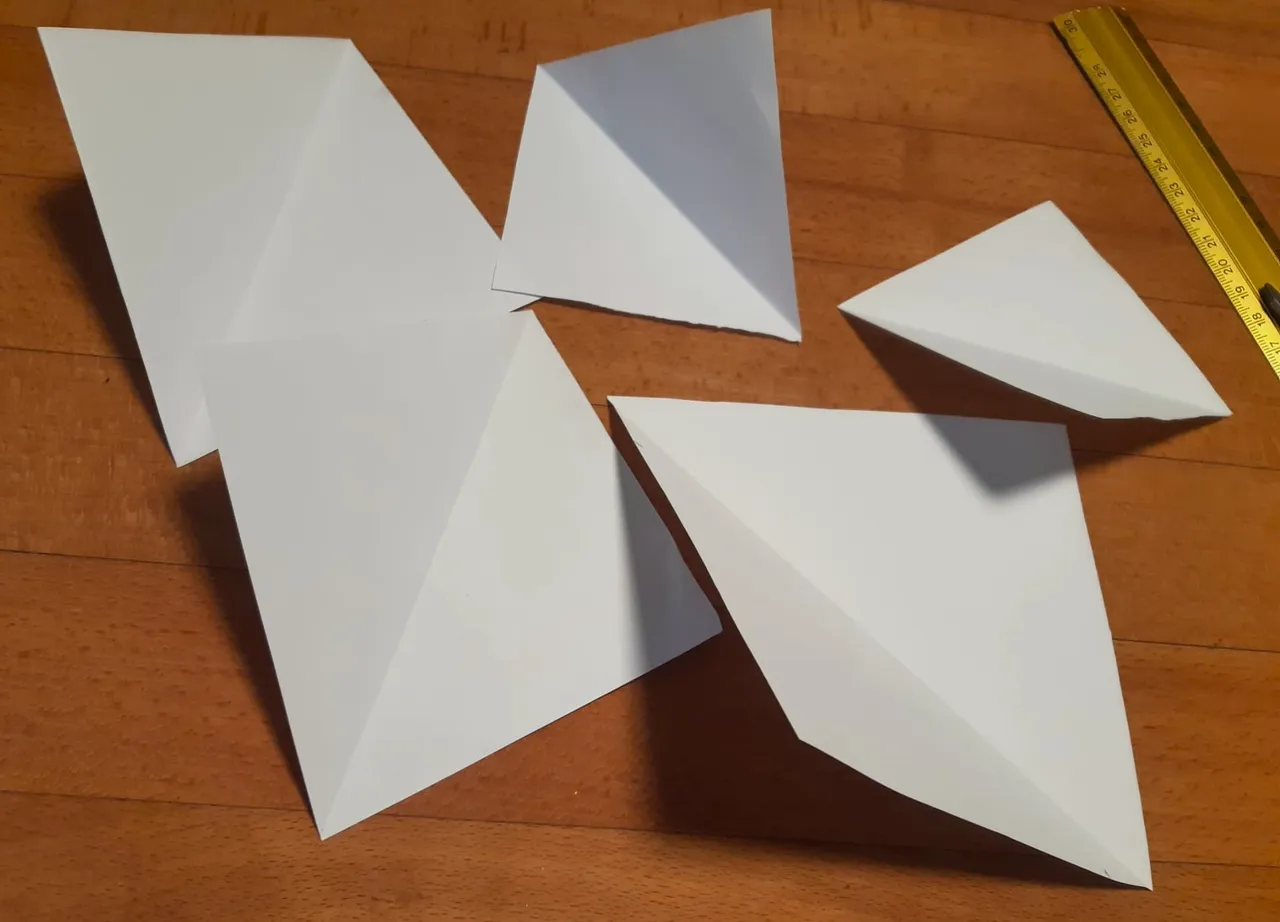
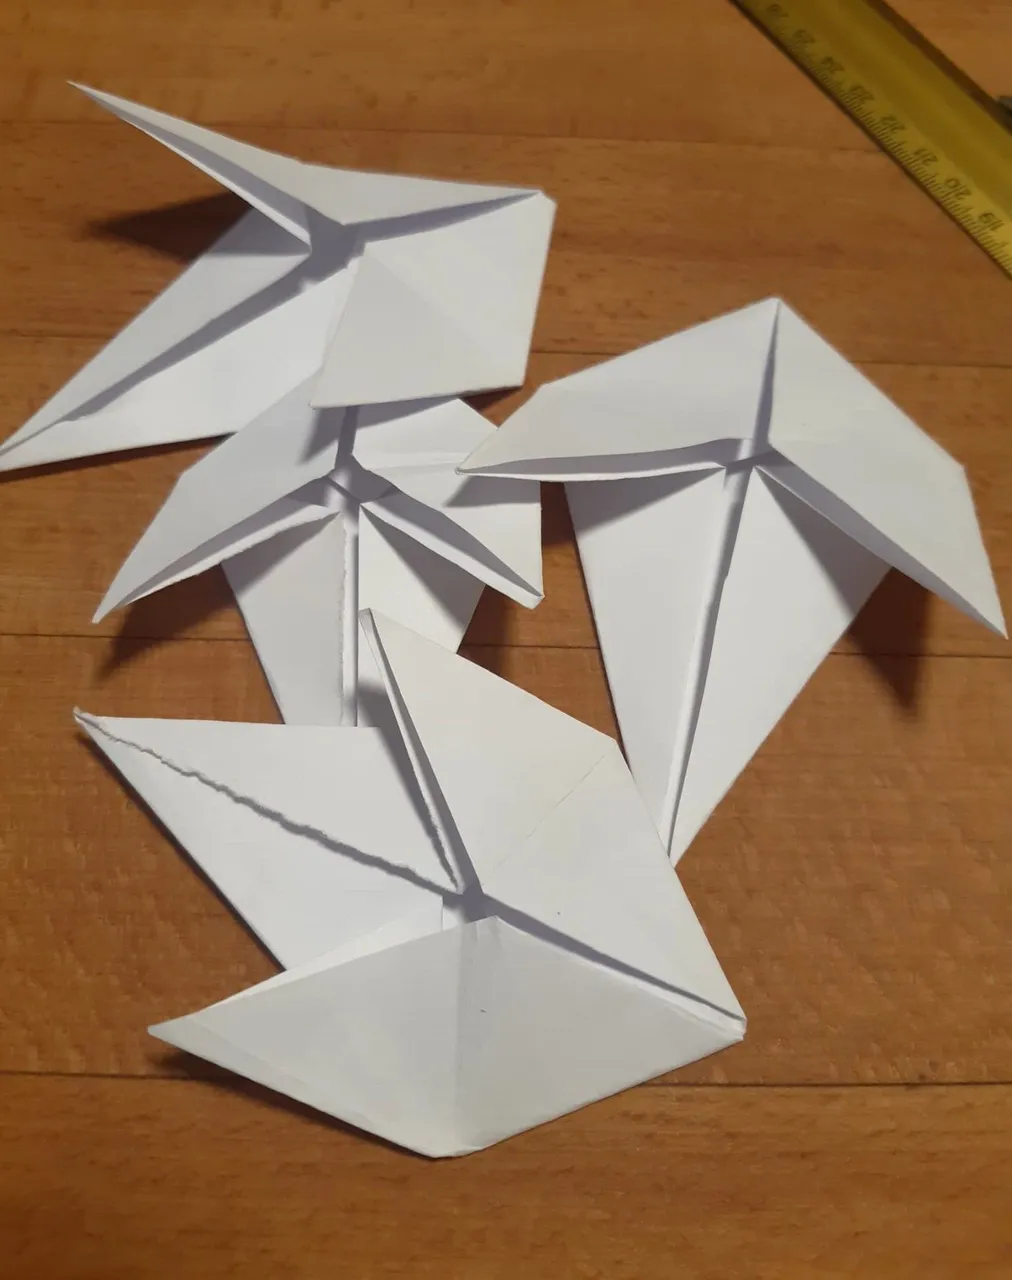
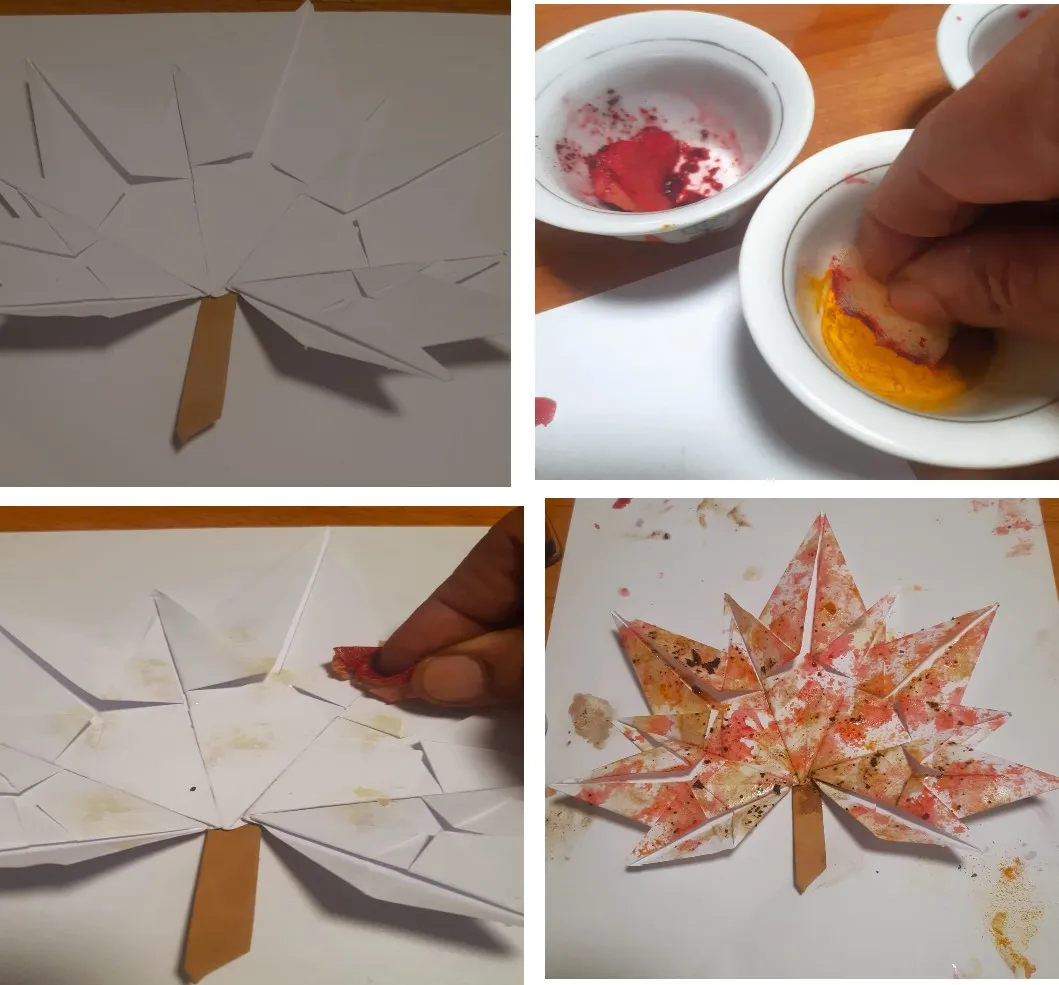
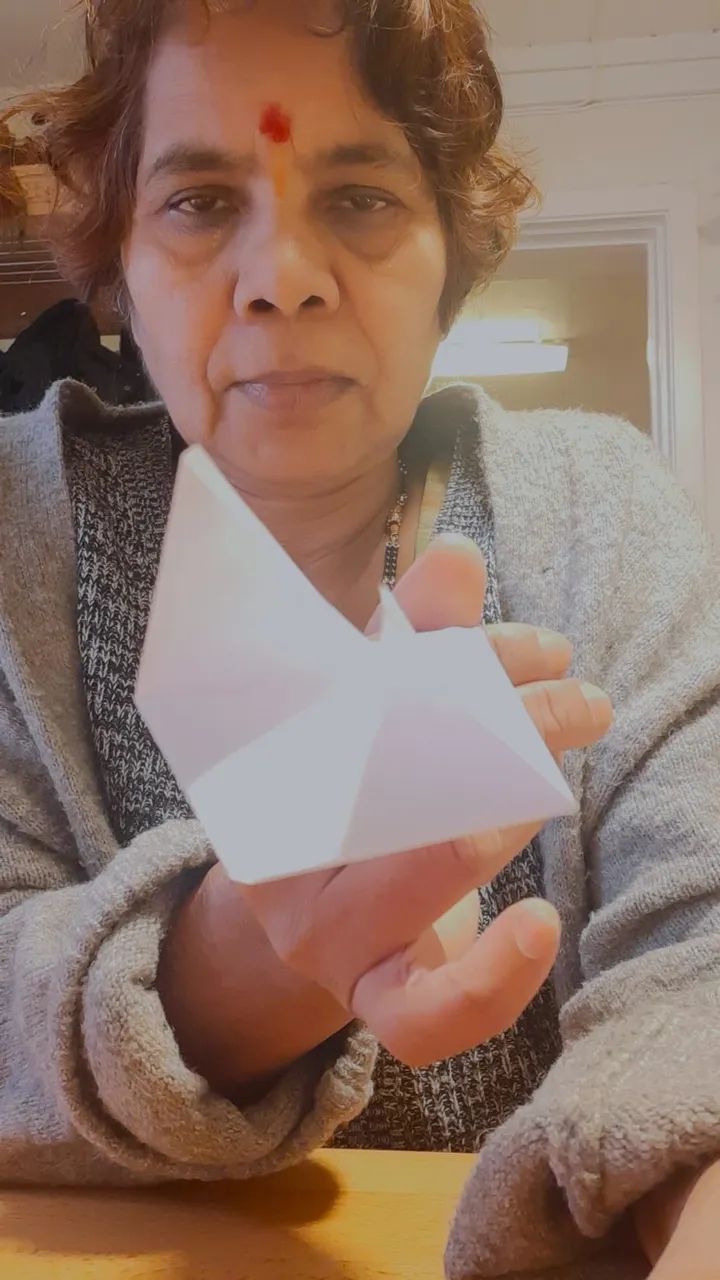
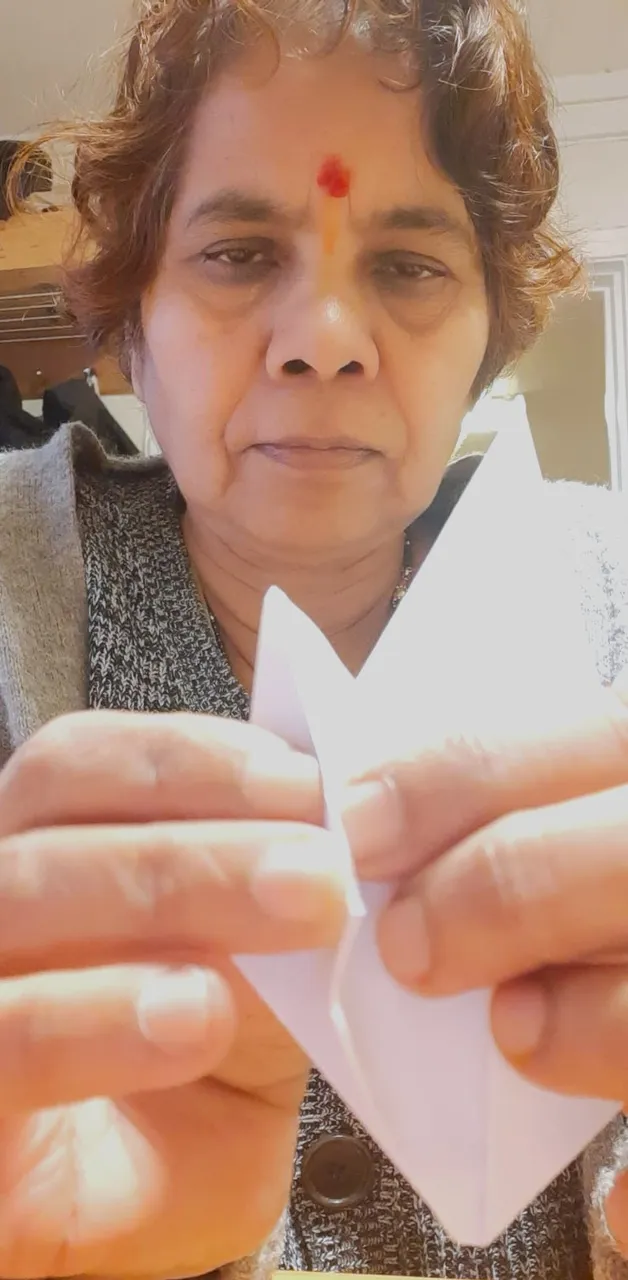
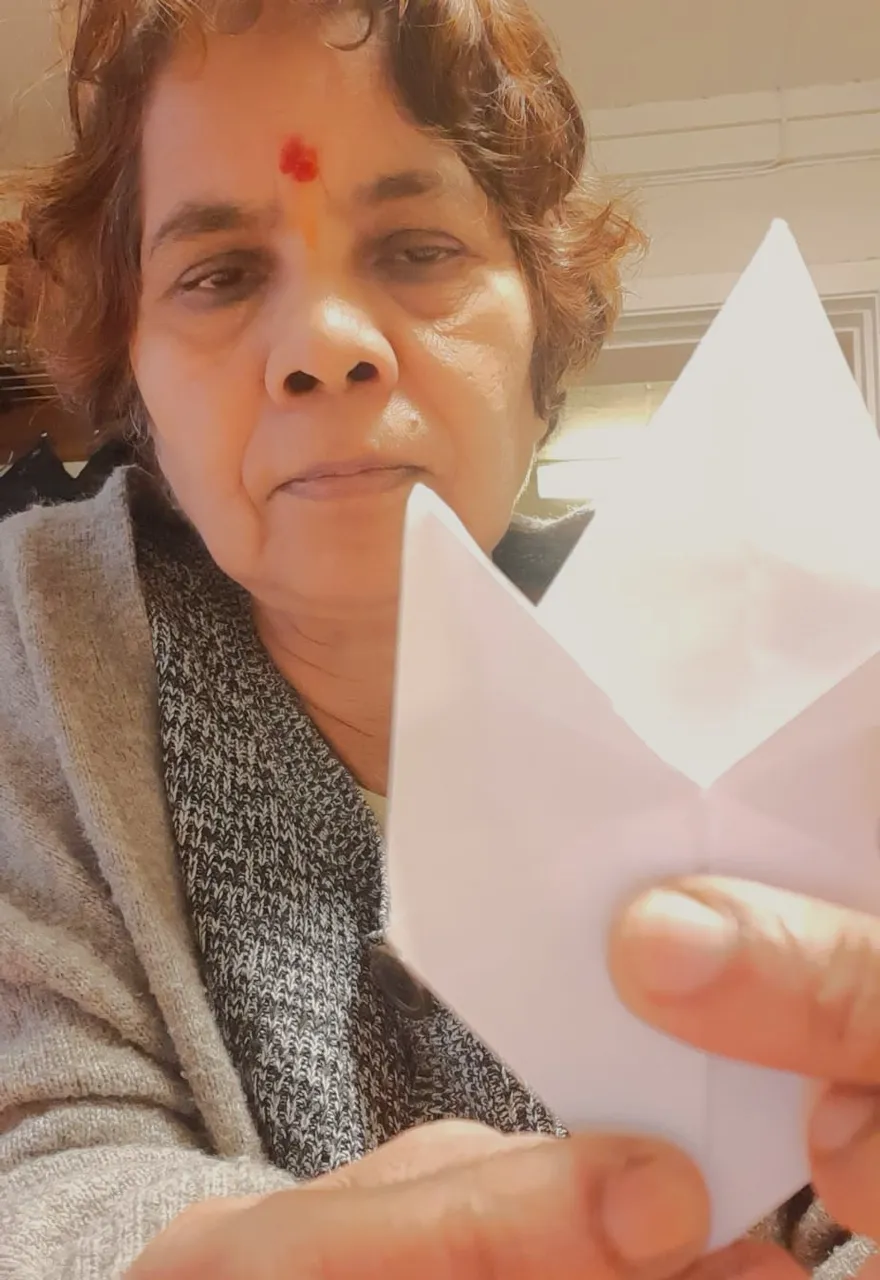
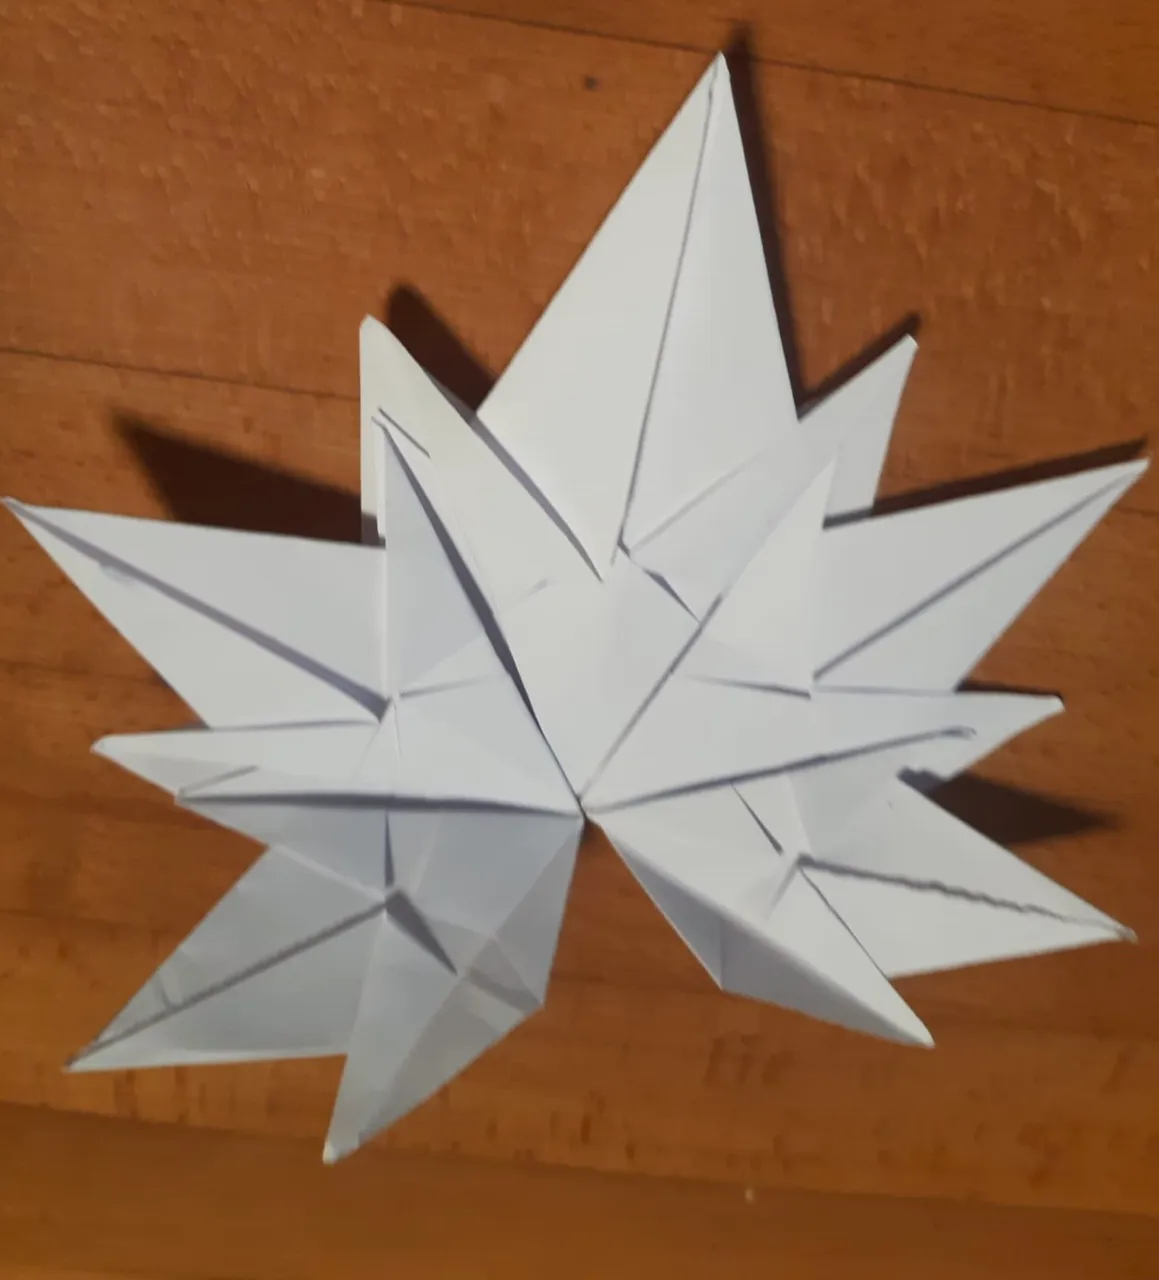
first, I am just showing what I did here. the tutorial comes afterward
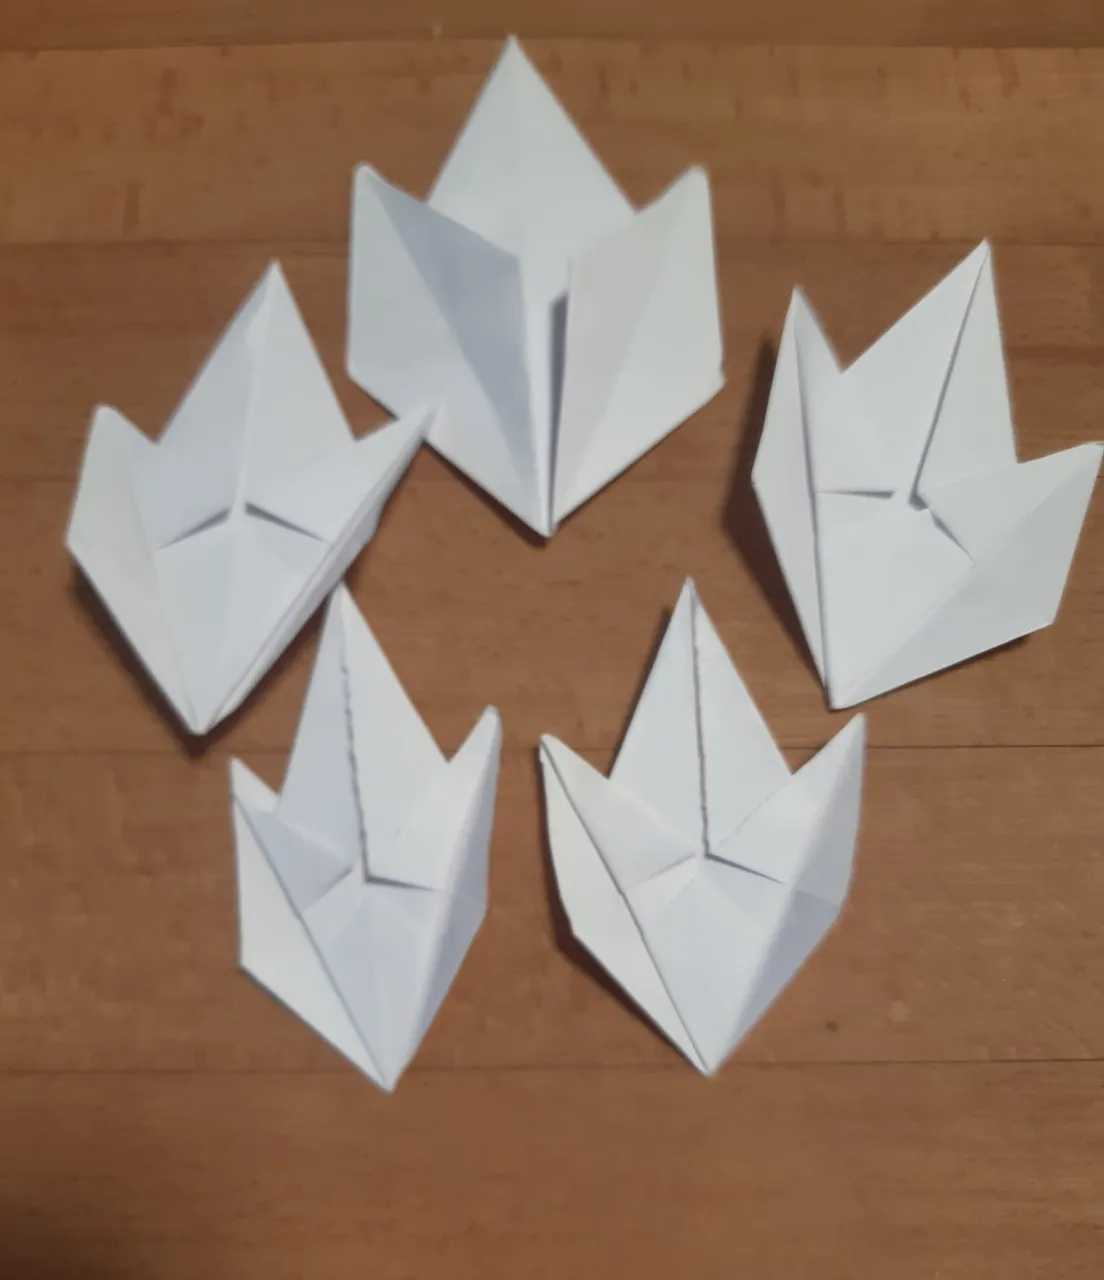
all 5 pieces of paper are folded in the same manner
Then I used some natural colors to make it look like an autumn leaf. 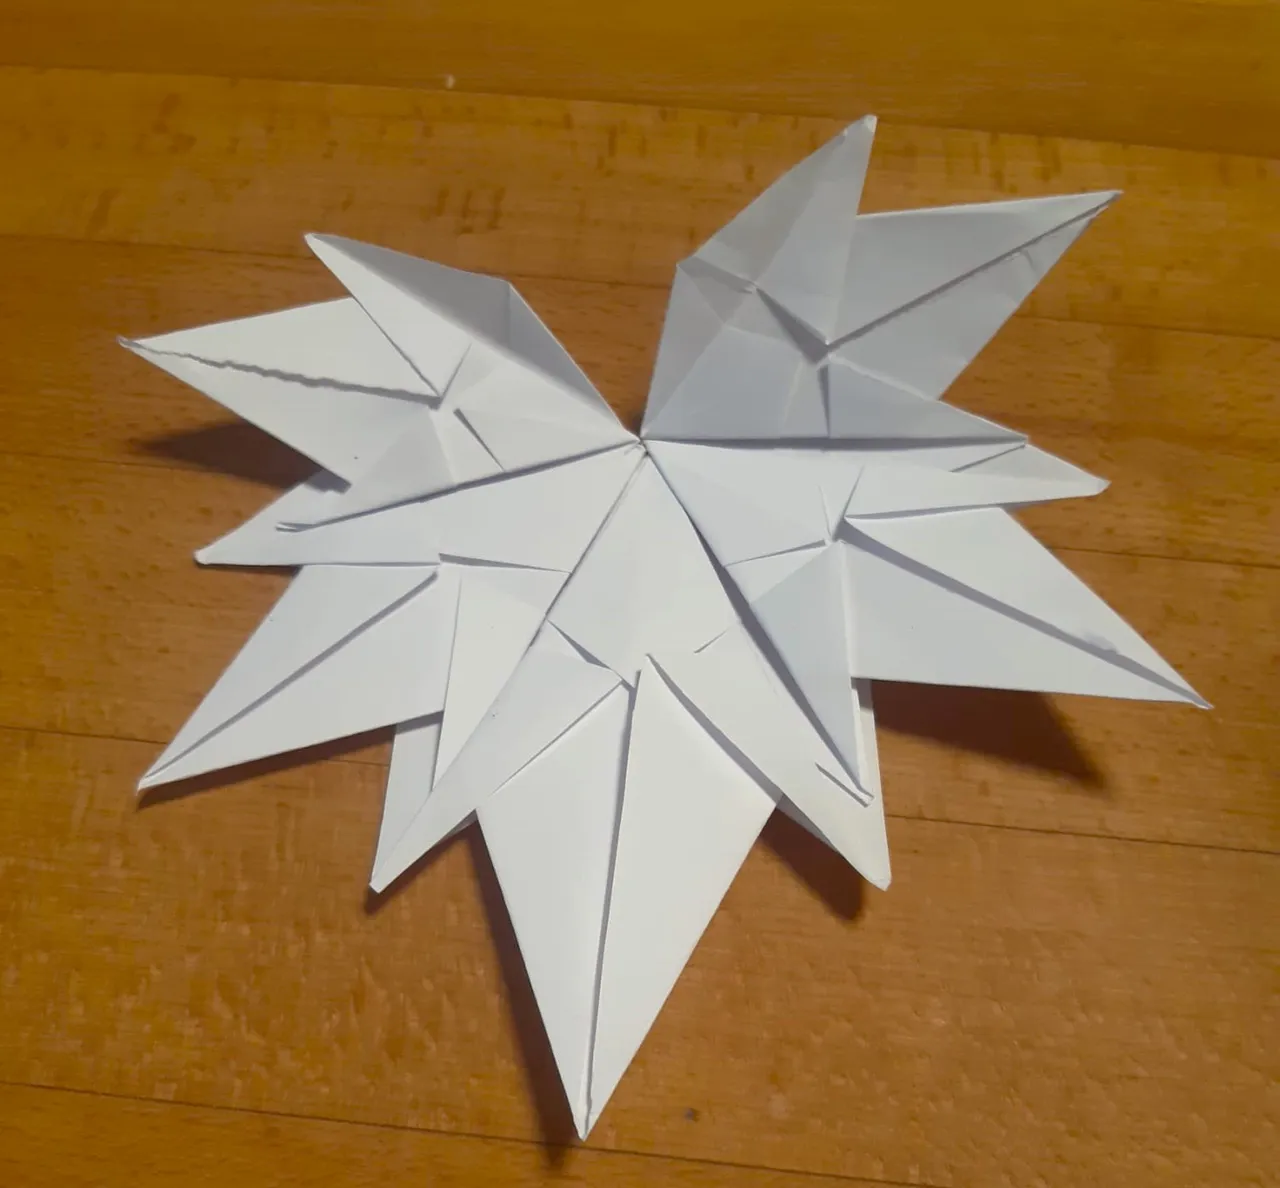
for 5 segments of a maple leaf, it took only 8 minutes, and painting 2 minutes. but writing the tutorial took me a whole day.
I tried my best to explain one segment step by step but all 5 are done in the same way
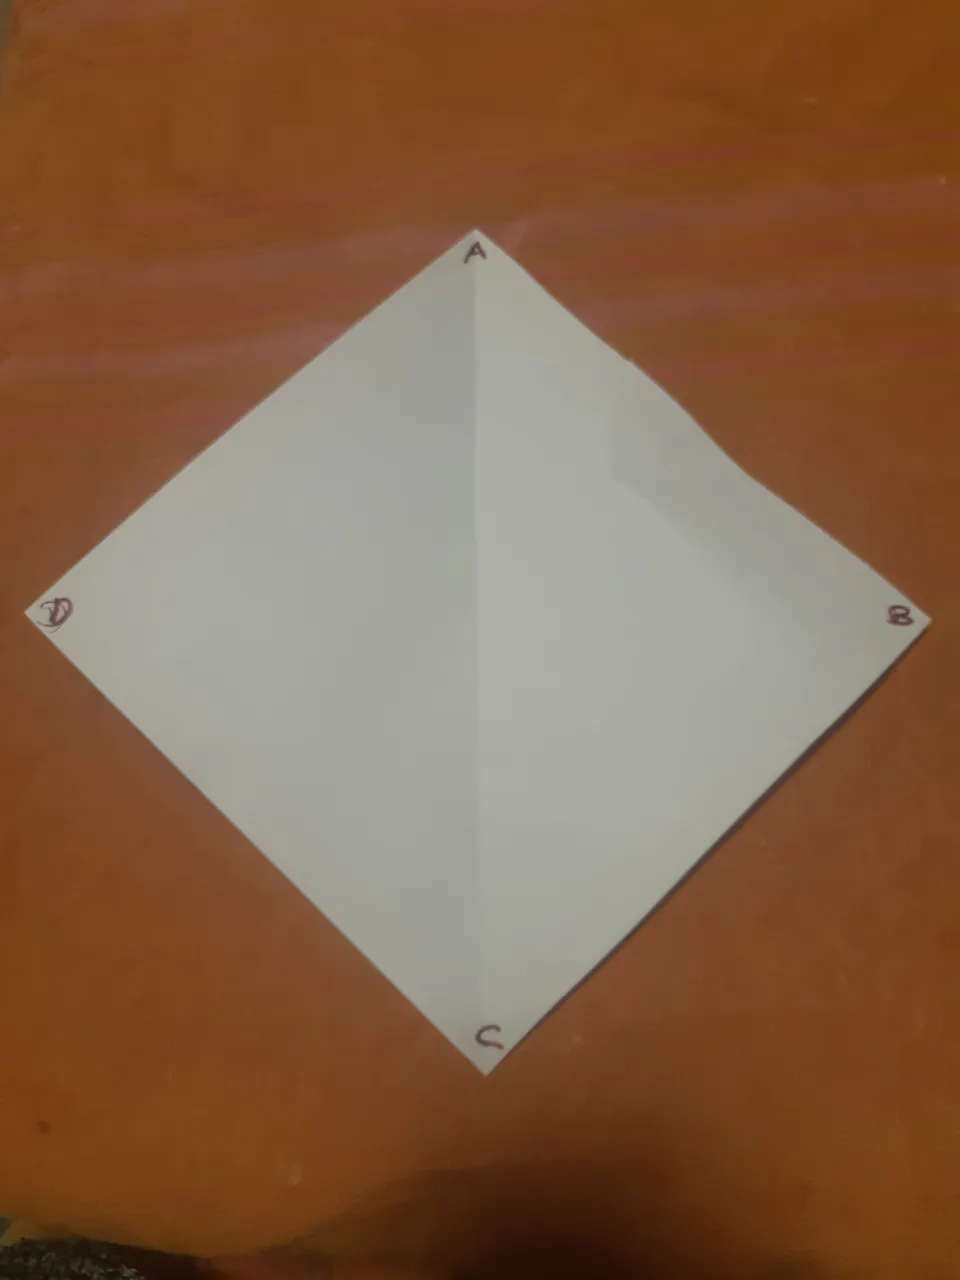
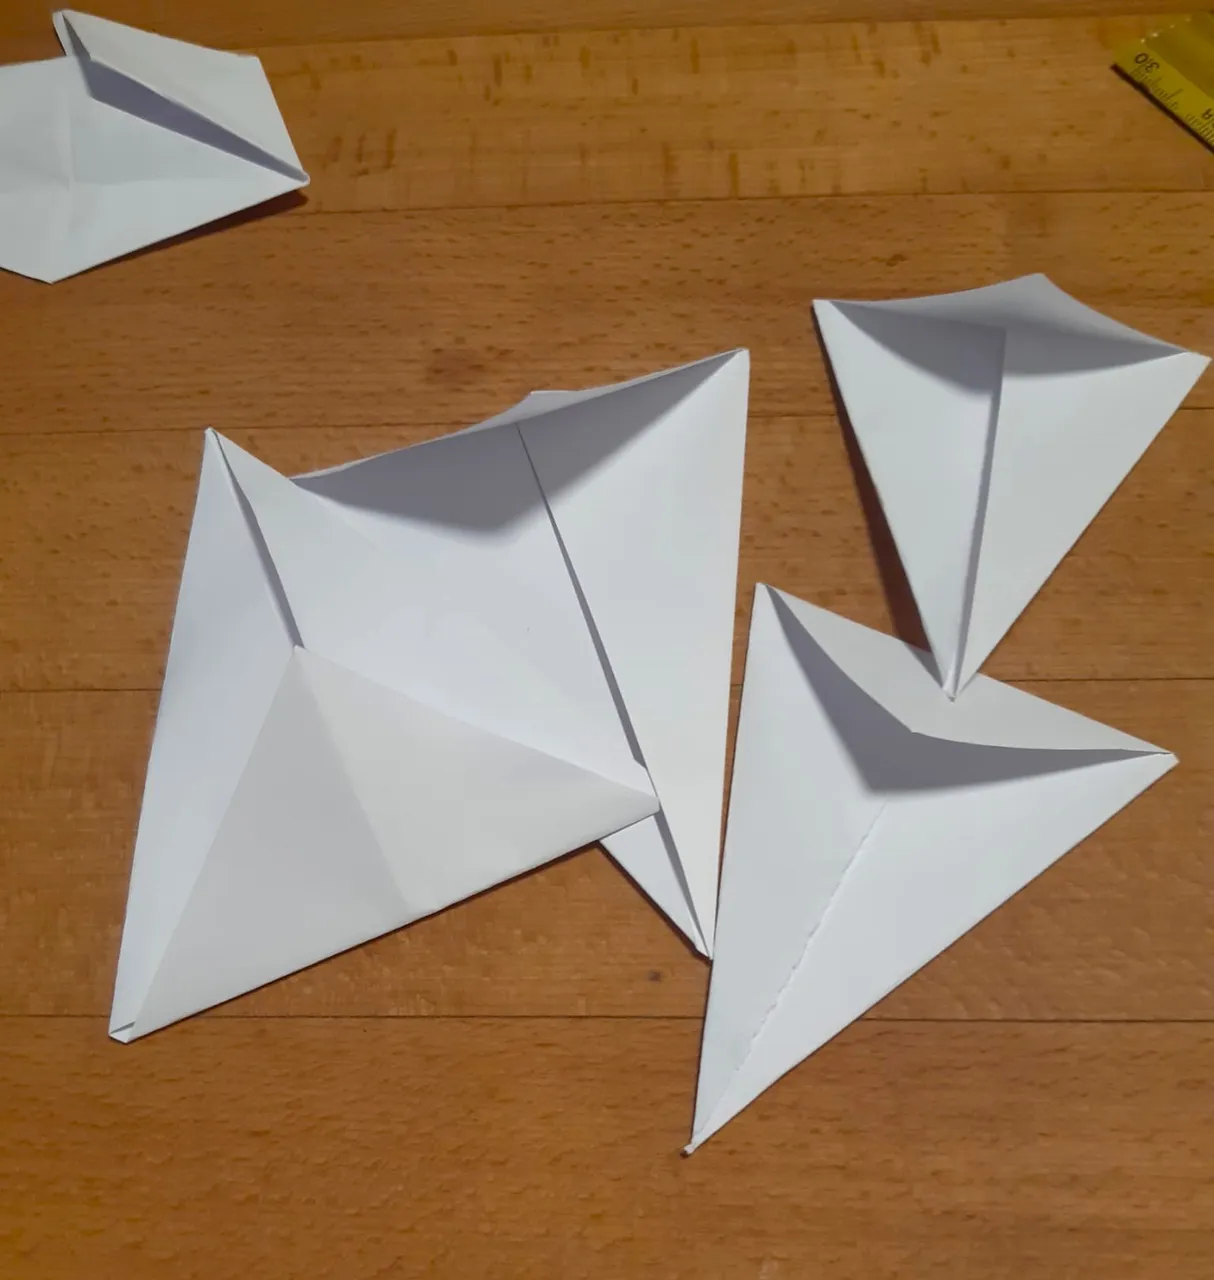
place the paper in a diamond position and mark each corner as ABCD.
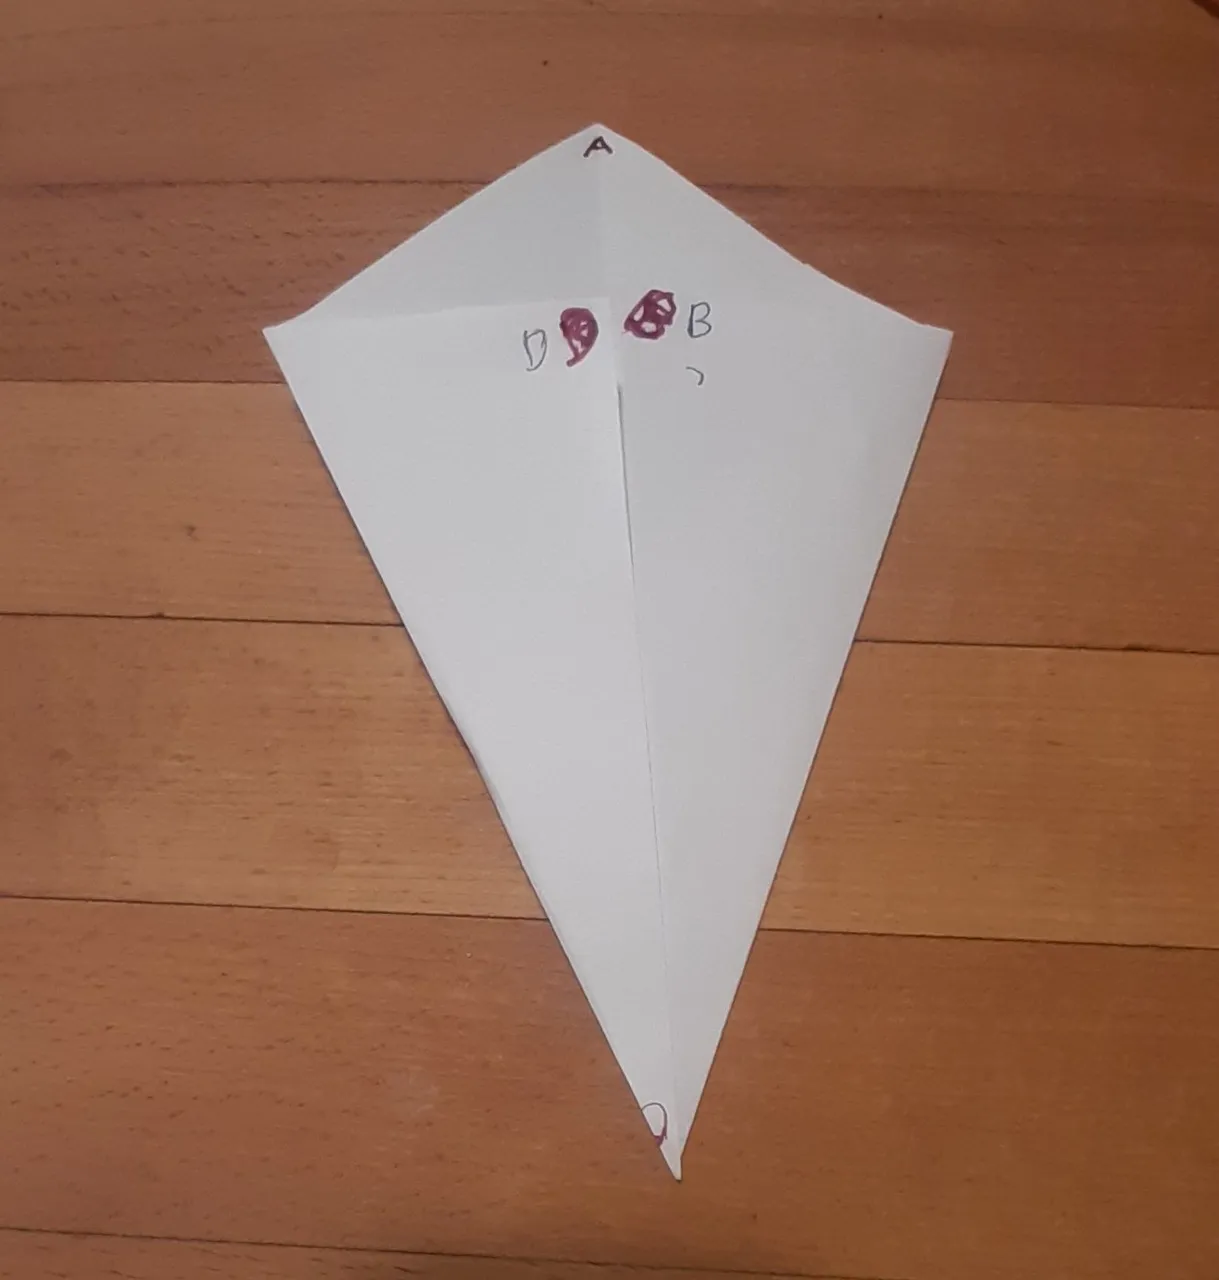
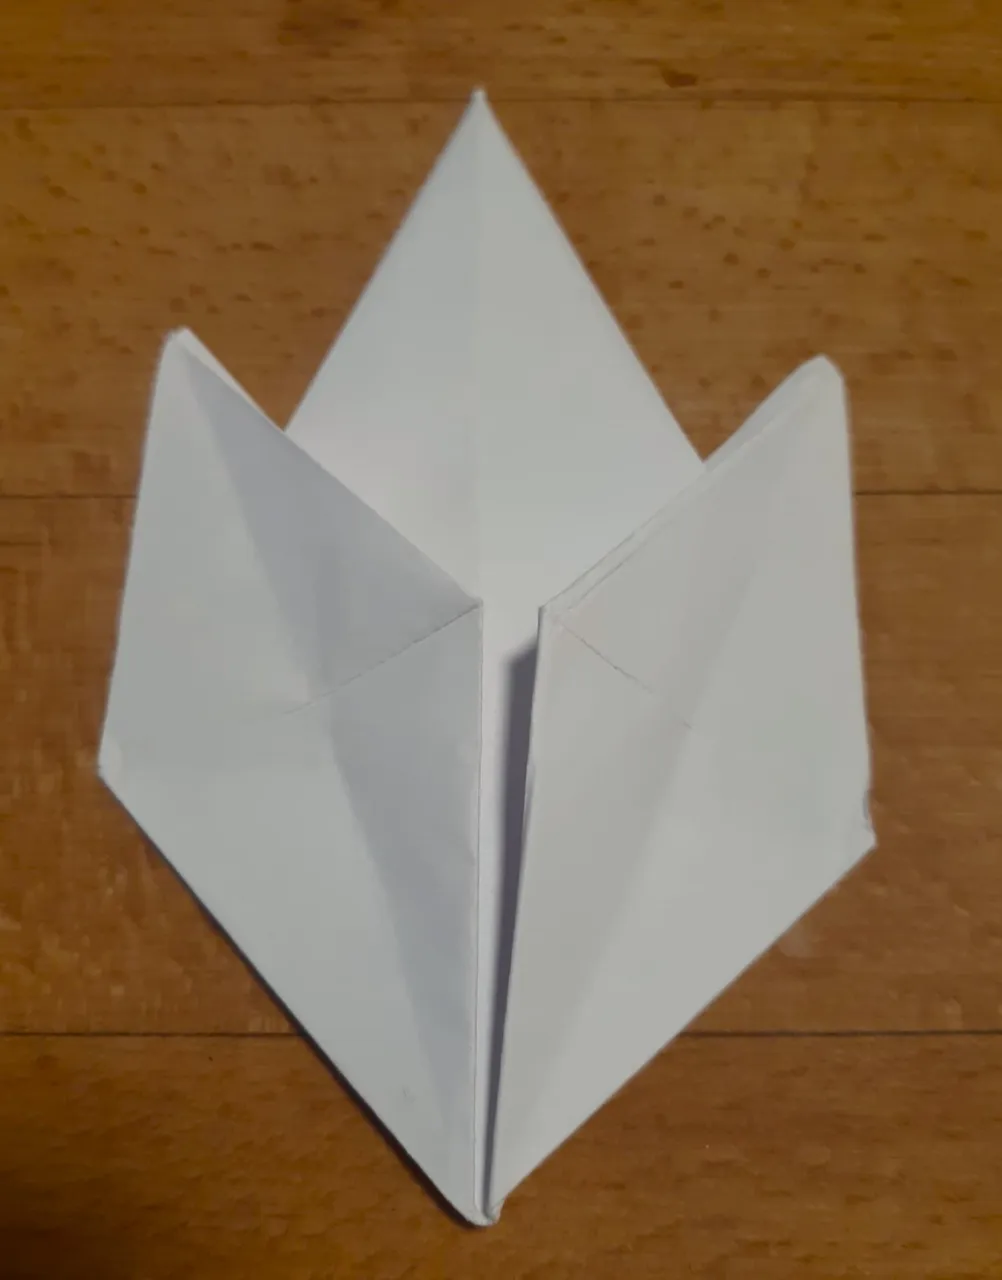
start folding the CD side to the middle AC line. then likewise BD side to the middle making a kite shape
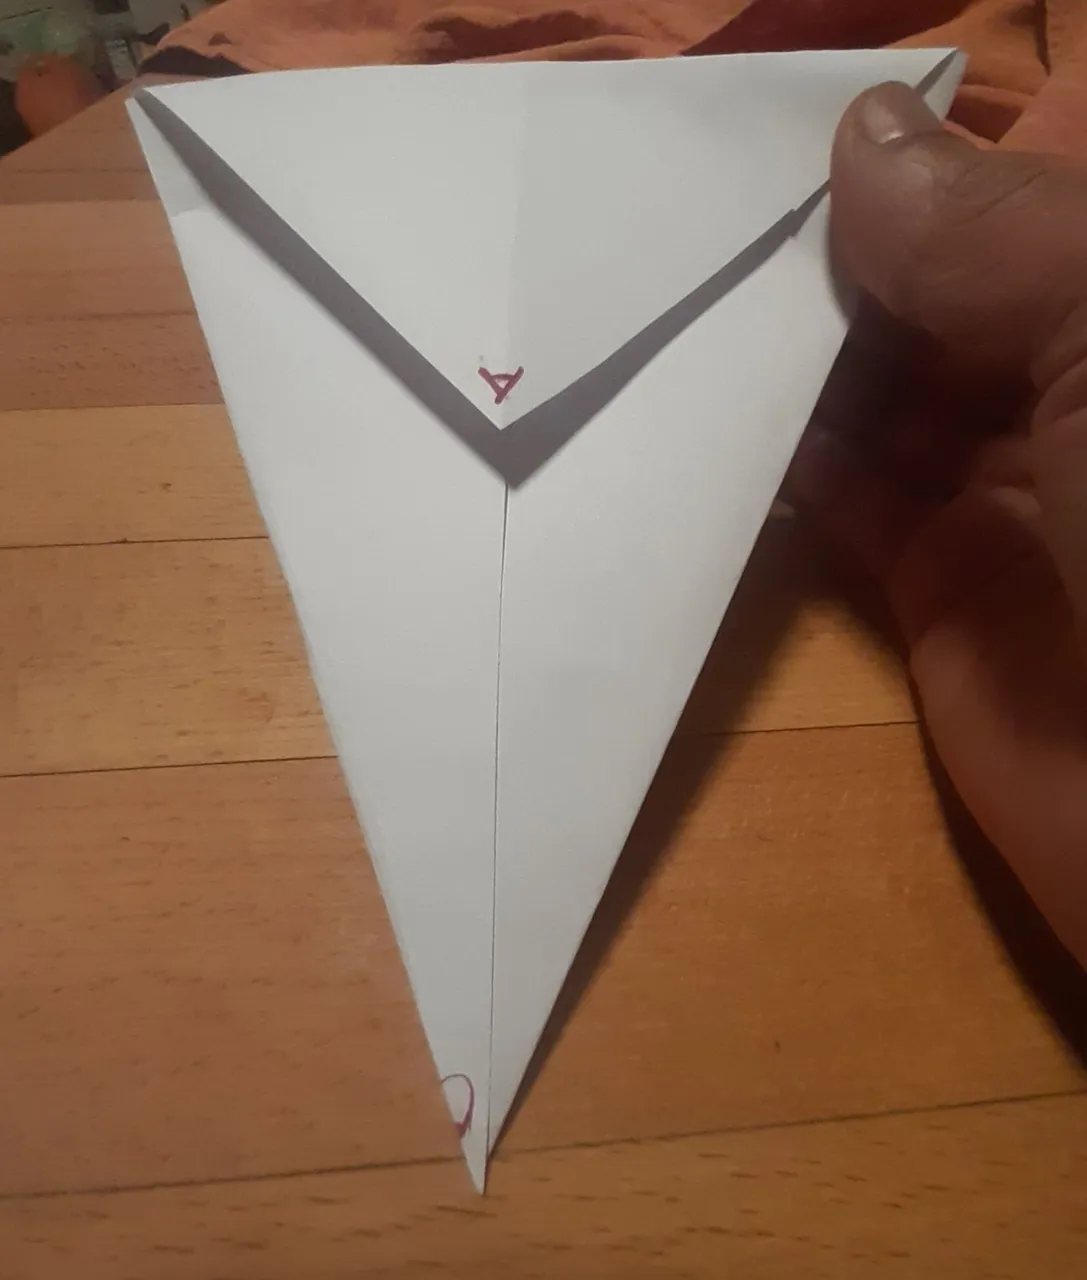
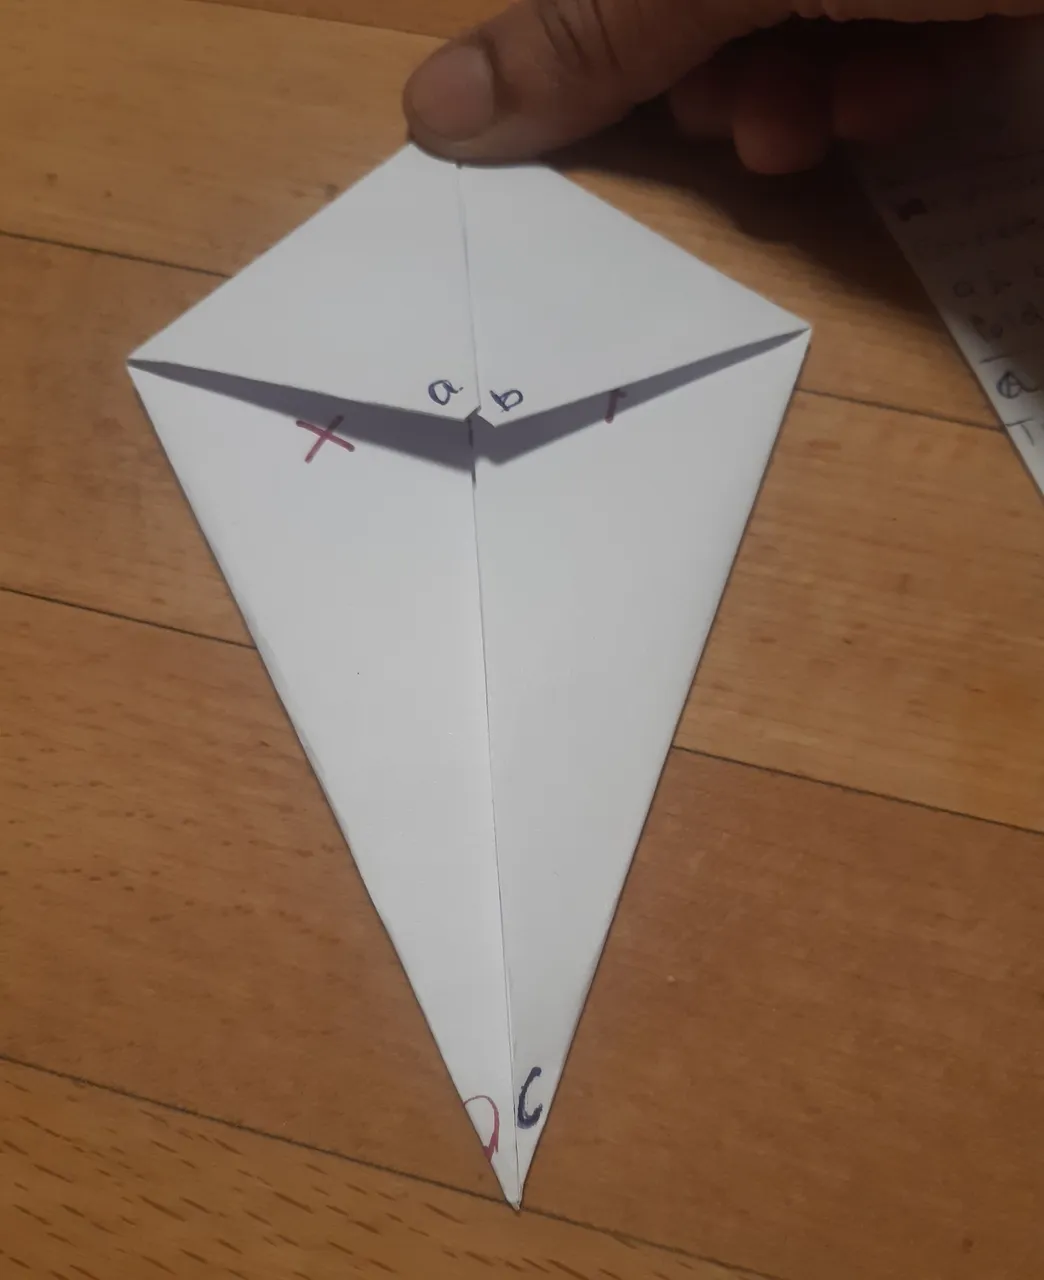
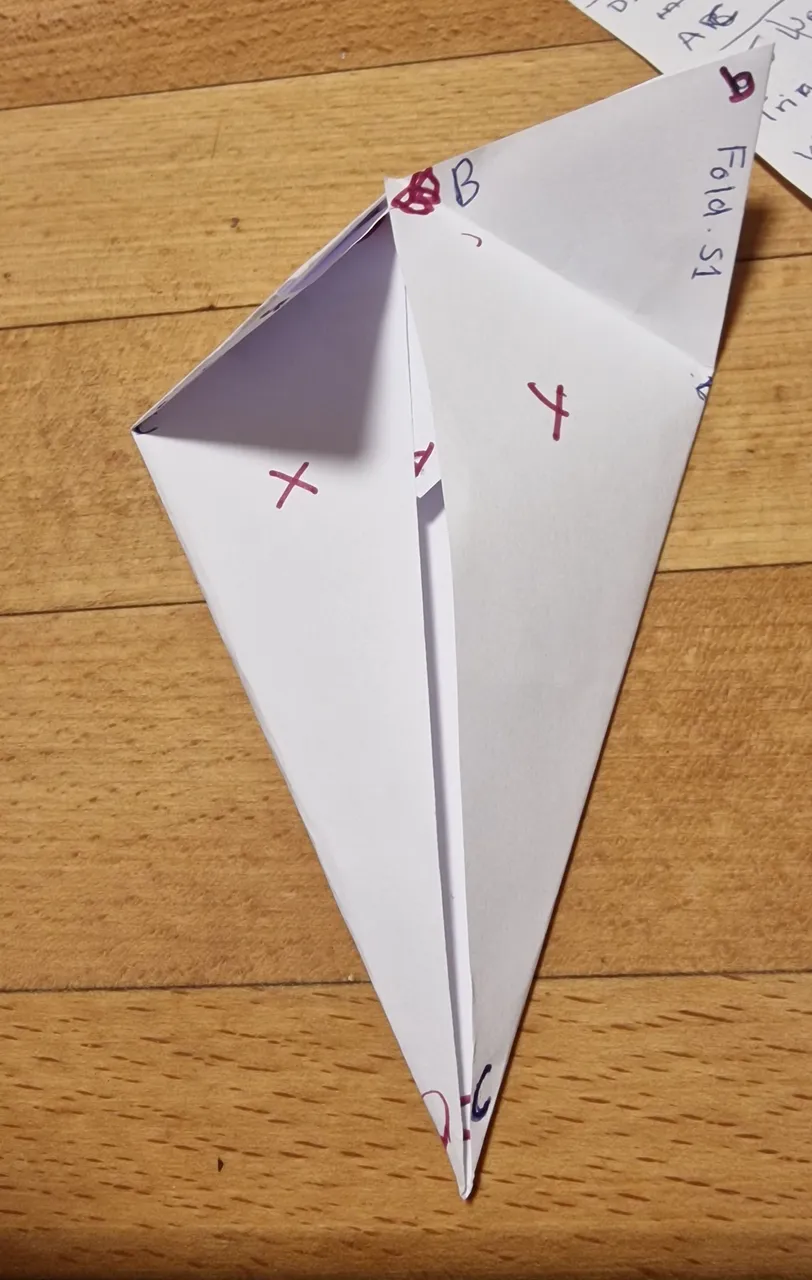
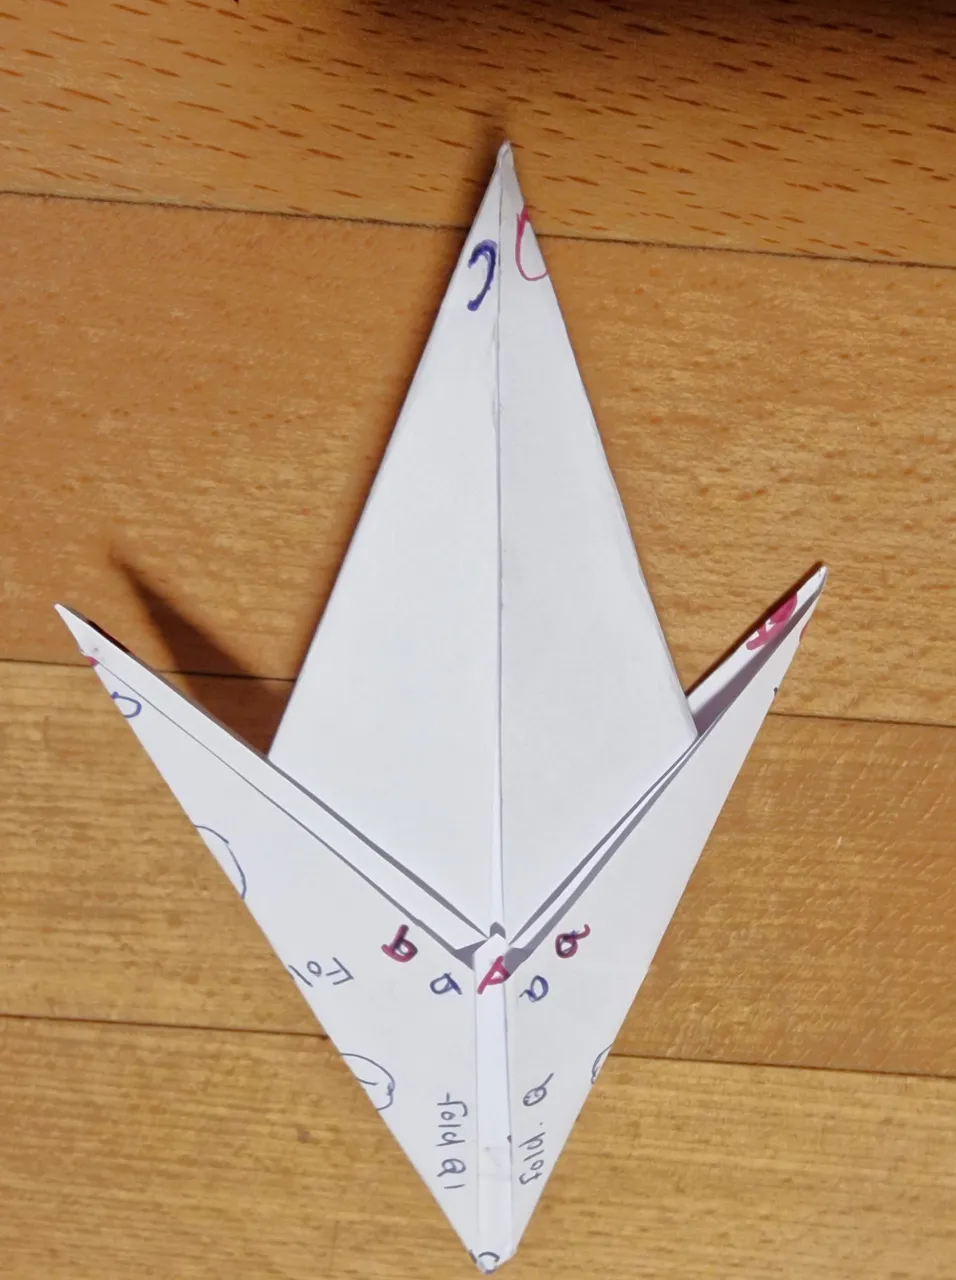
next, fold A point straight downward to make a triangle.
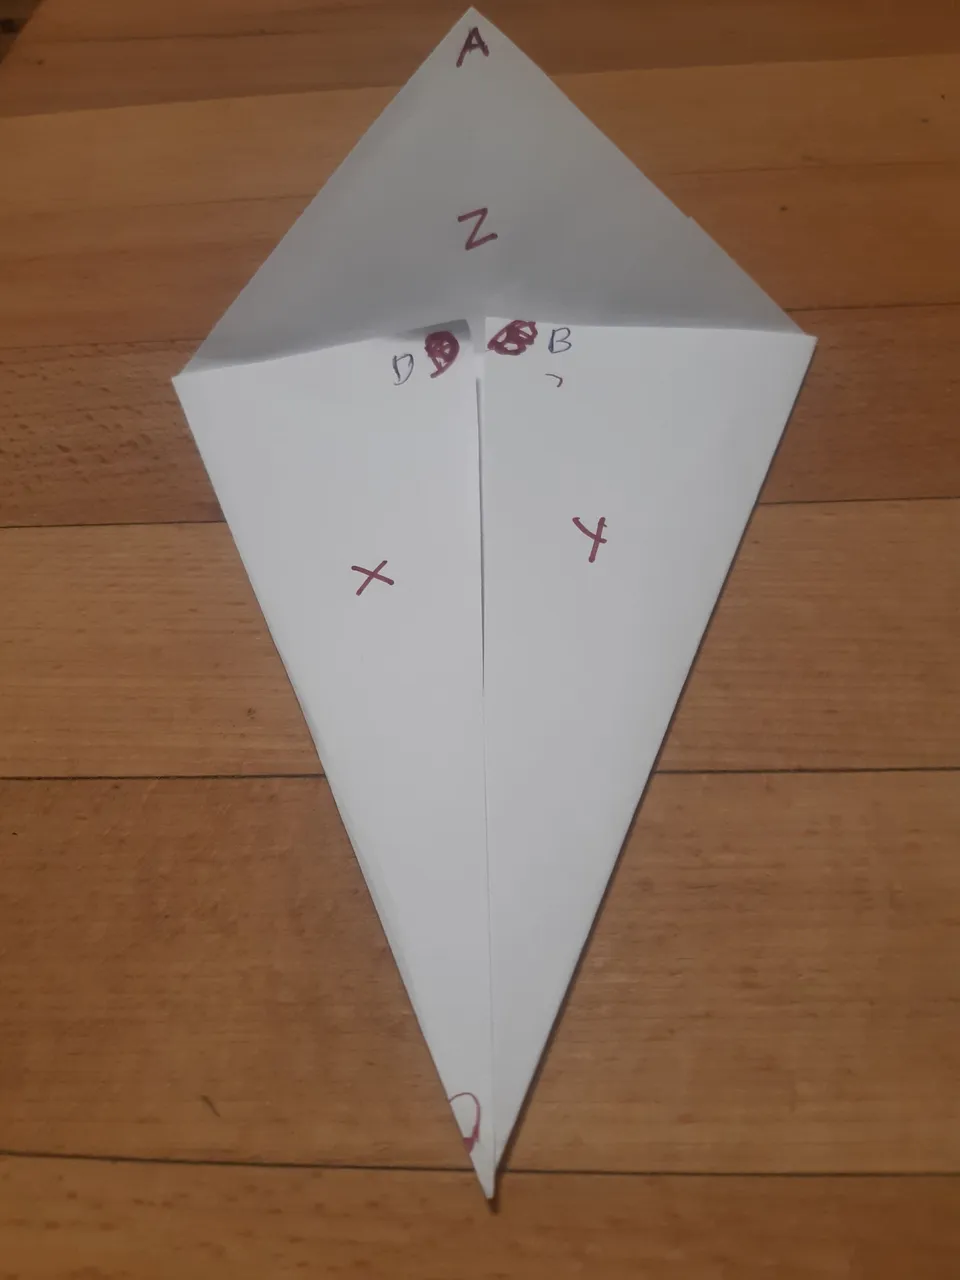
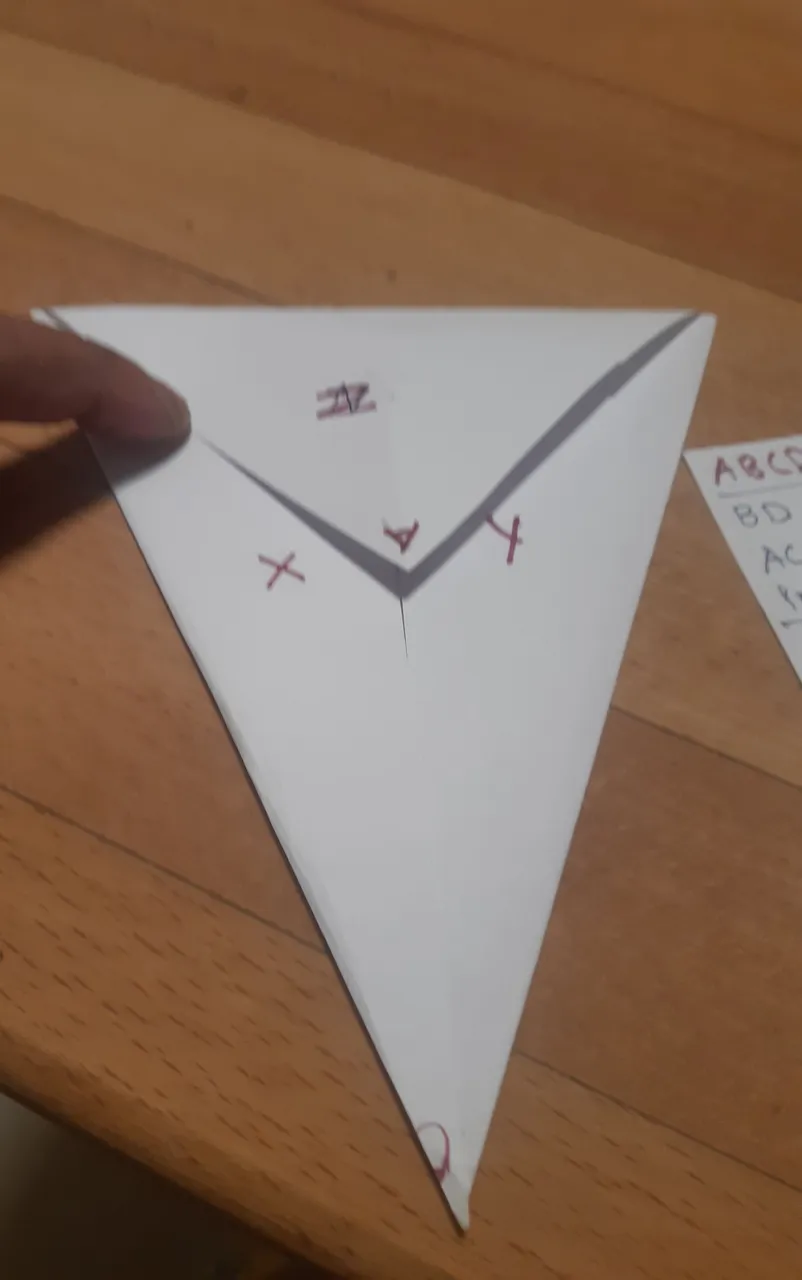
Now we have X Y and Z three triangles which make a kite shape.
Tuck the Z triangle under X and Y.
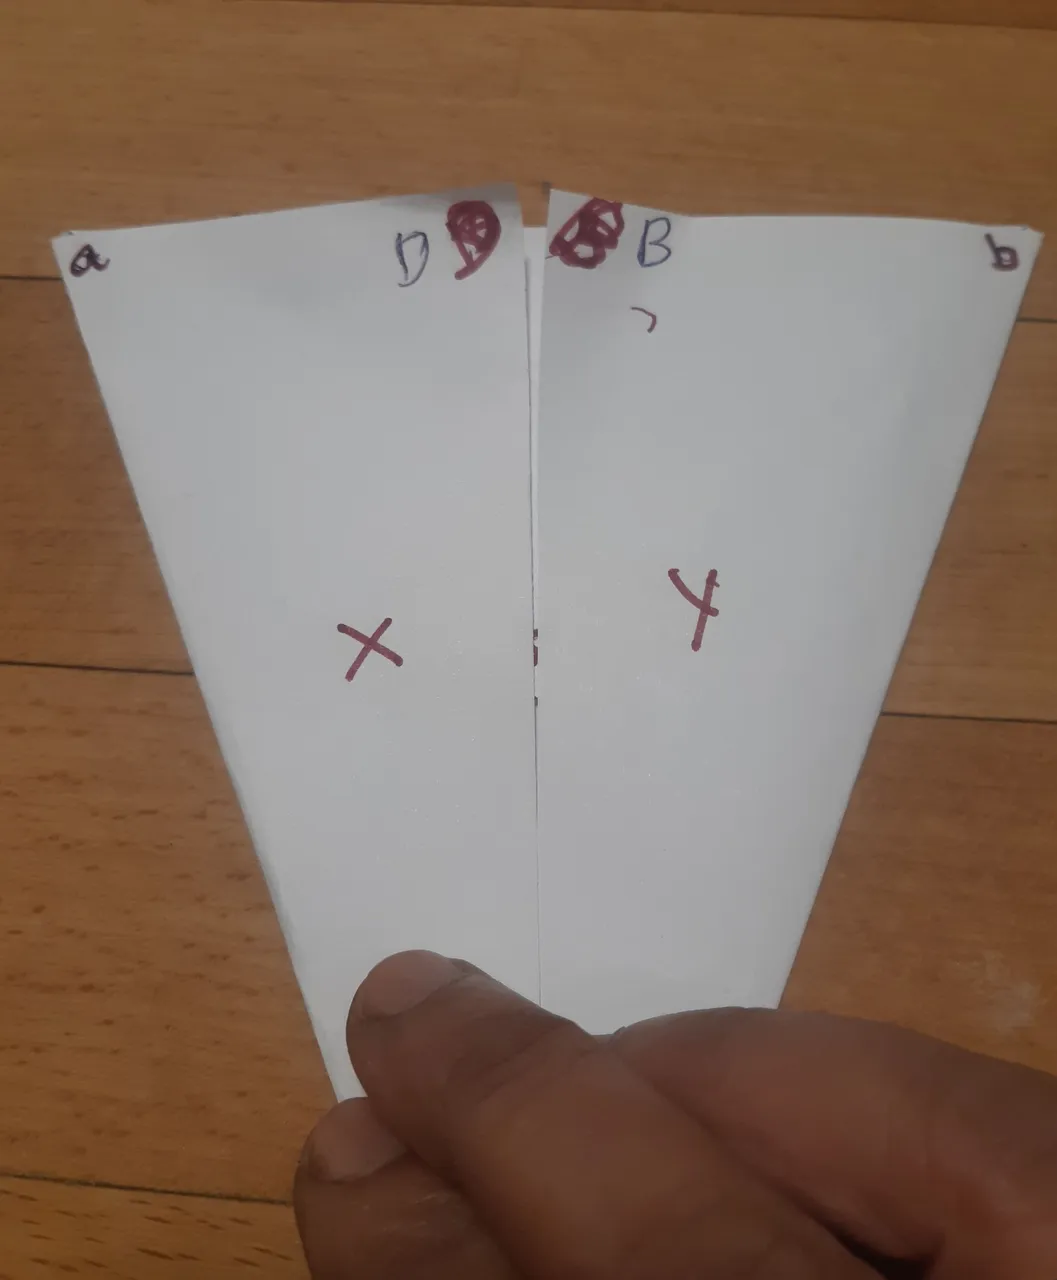
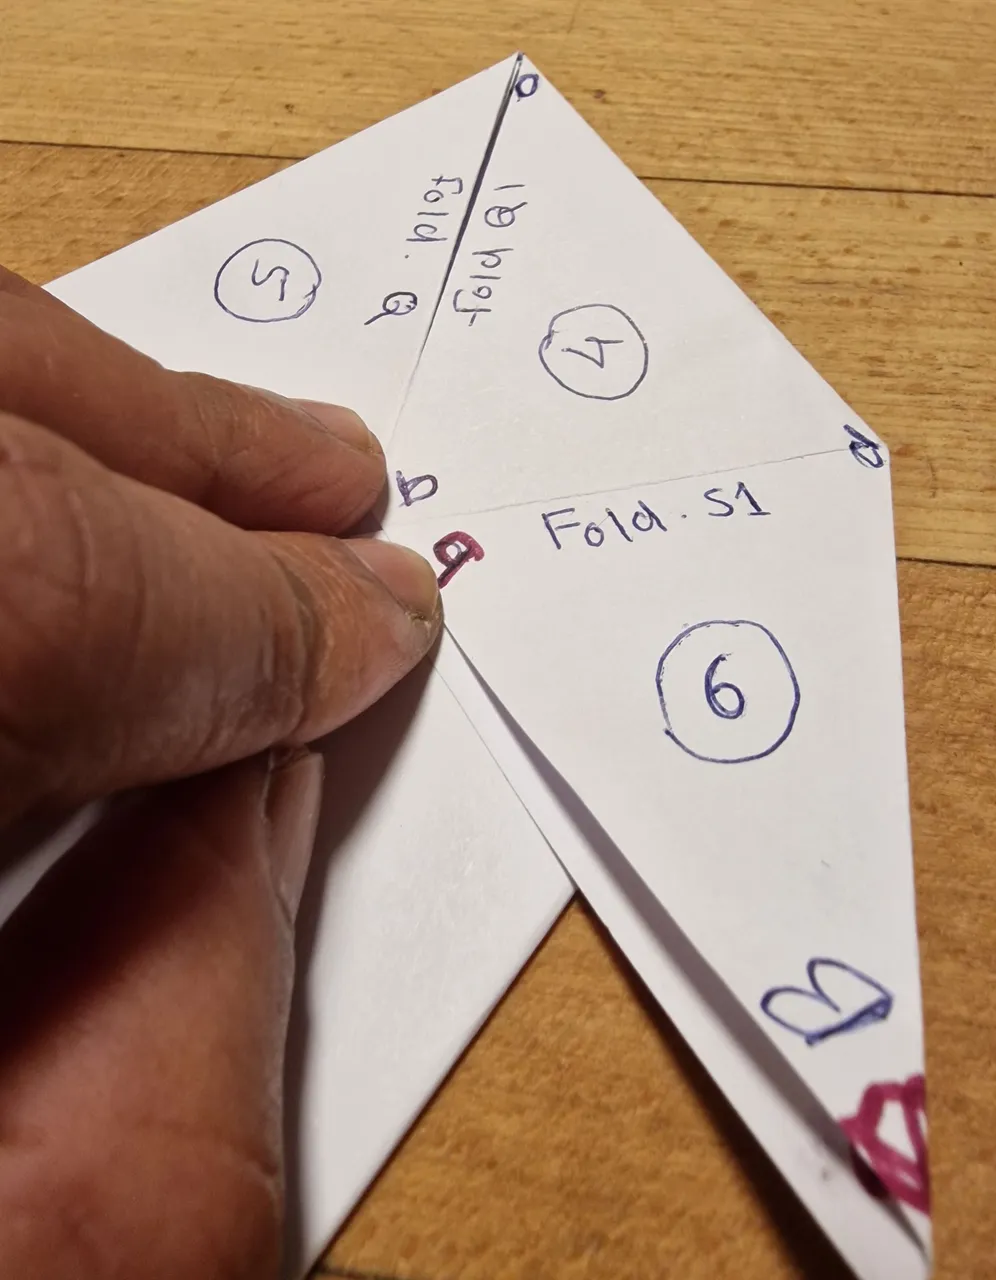
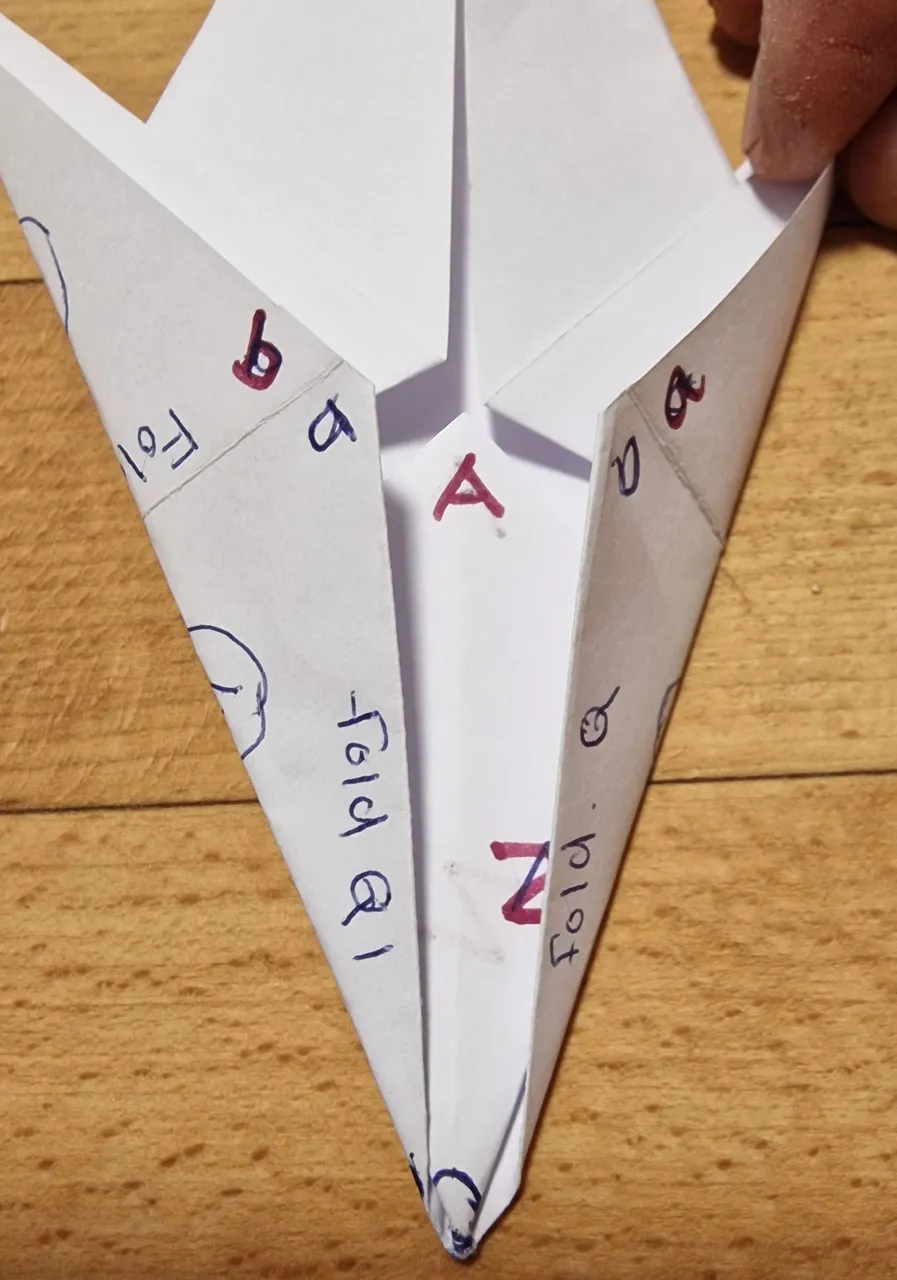
Mark a and b at the corners of the upper side of the triangle.
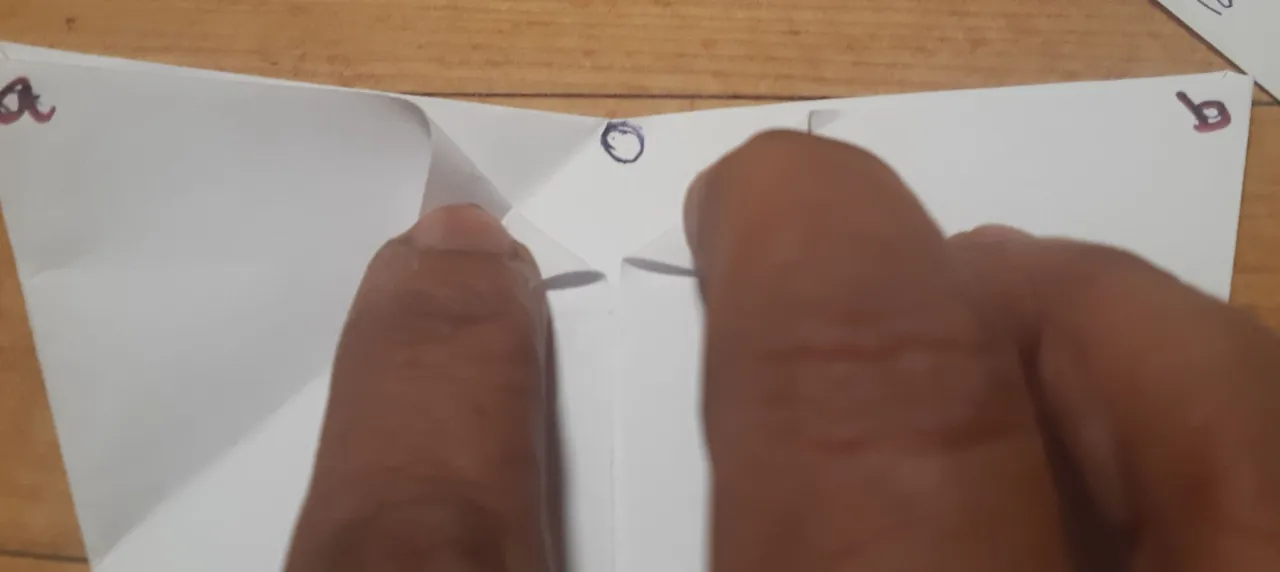
Where the D and B meet we mark that point as O.
Fold corners a and b to the middle line, now OC.
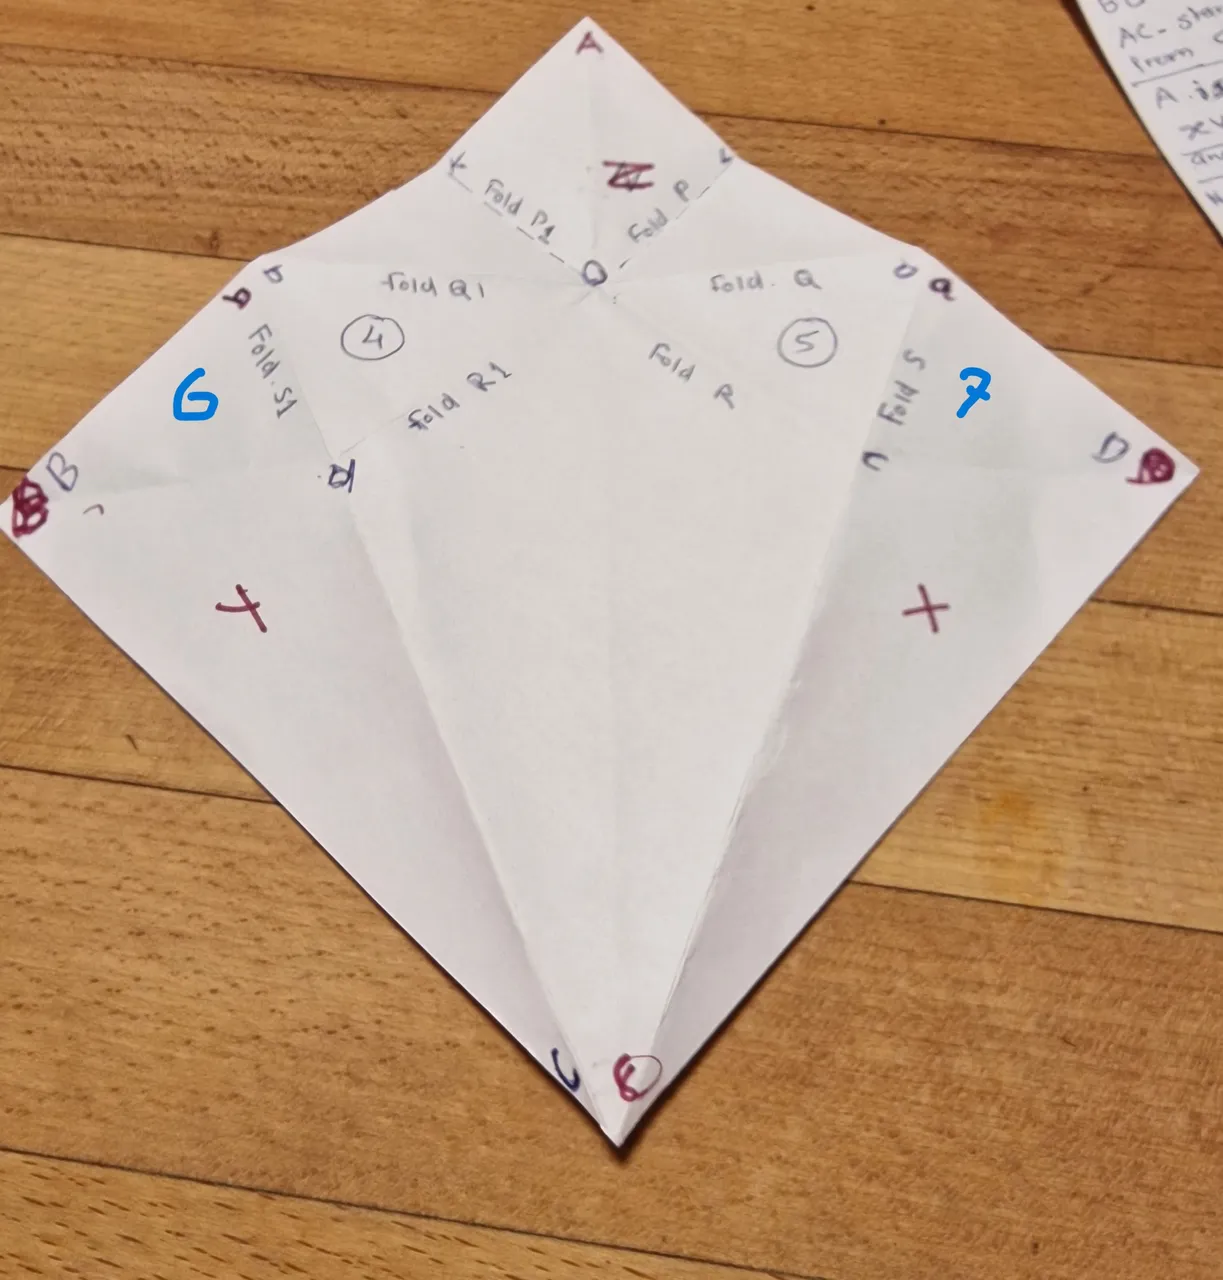
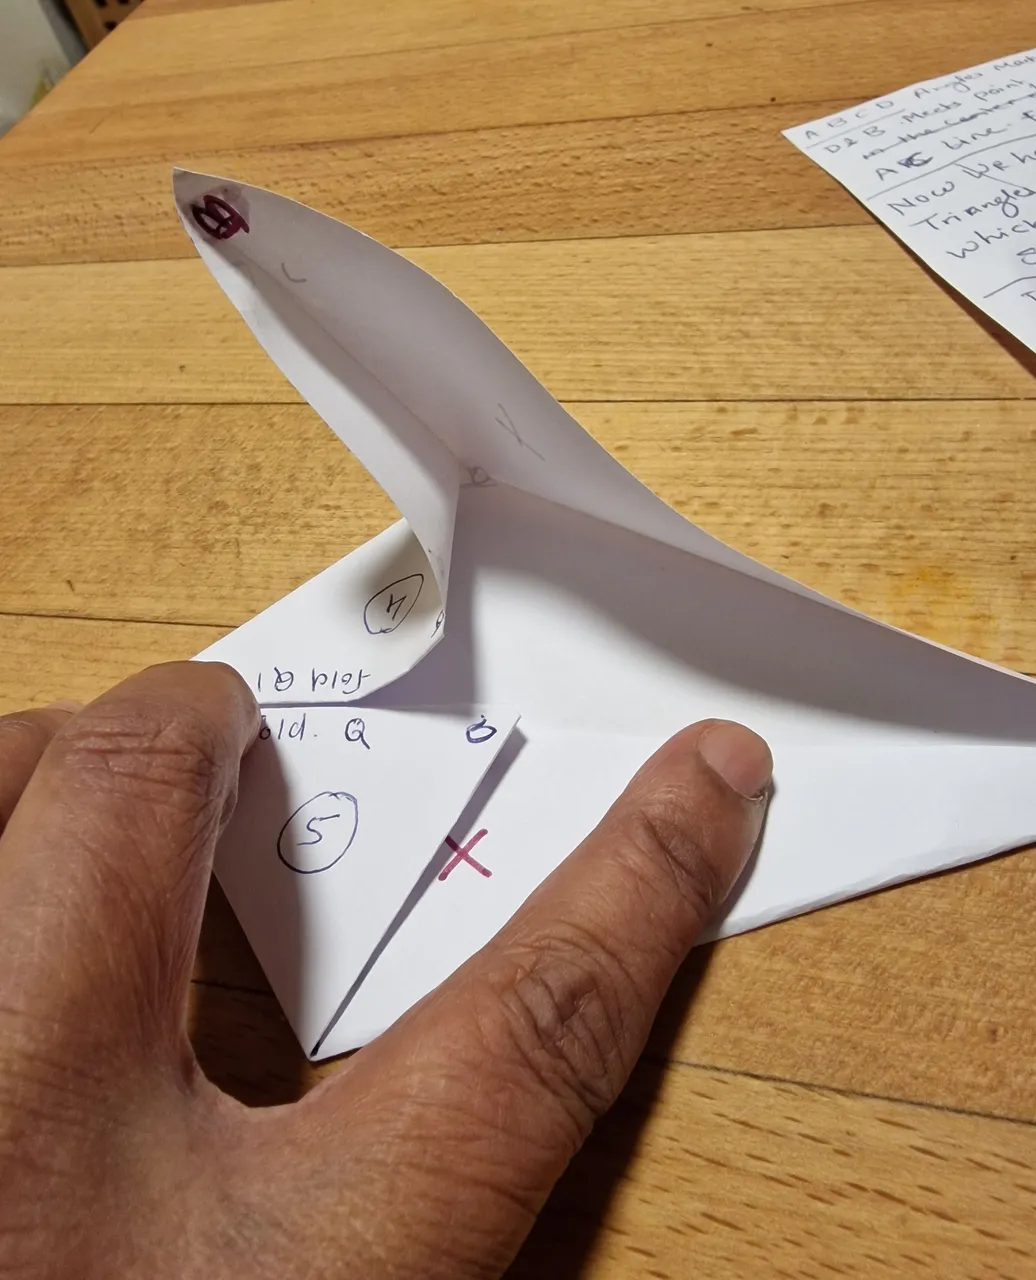
Unfold the whole paper and flip it on its backside. We can see the lines and marks and the Oda triangle marked no.4, and Oac triangle makes no.5. acD no.6 and Bad no.7
these triangles and all the essential points I am folding later.
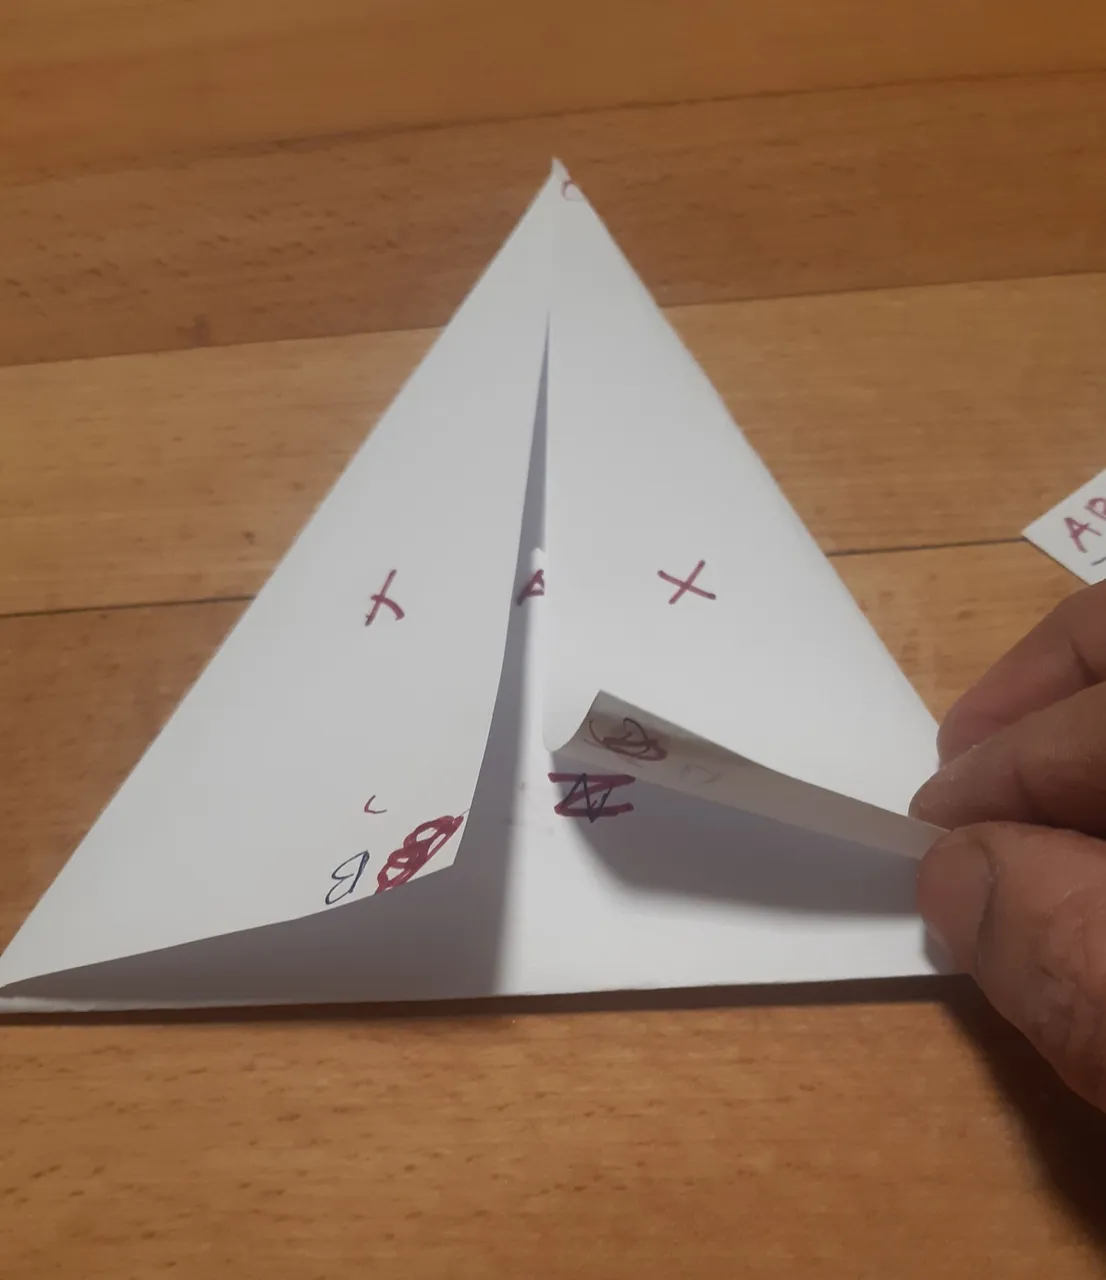
Flip the paper back to the original side and fold it again to the triangle abC like before. notice that triangle 4 is now on the right side and 5 on the left
open no.4 triangle
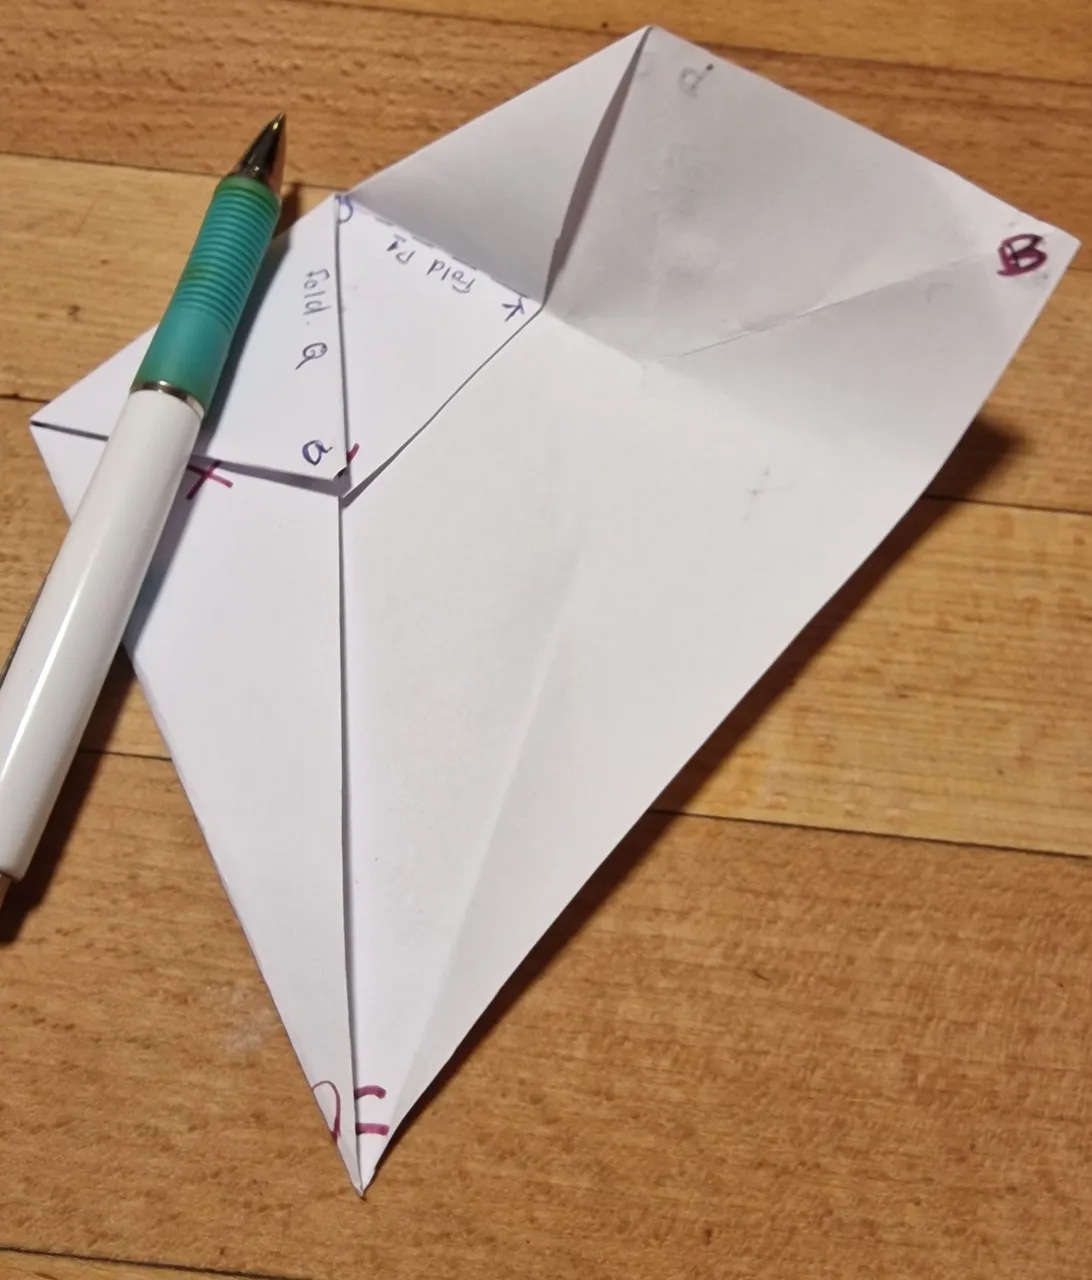
the fold p1 which I am folding now.
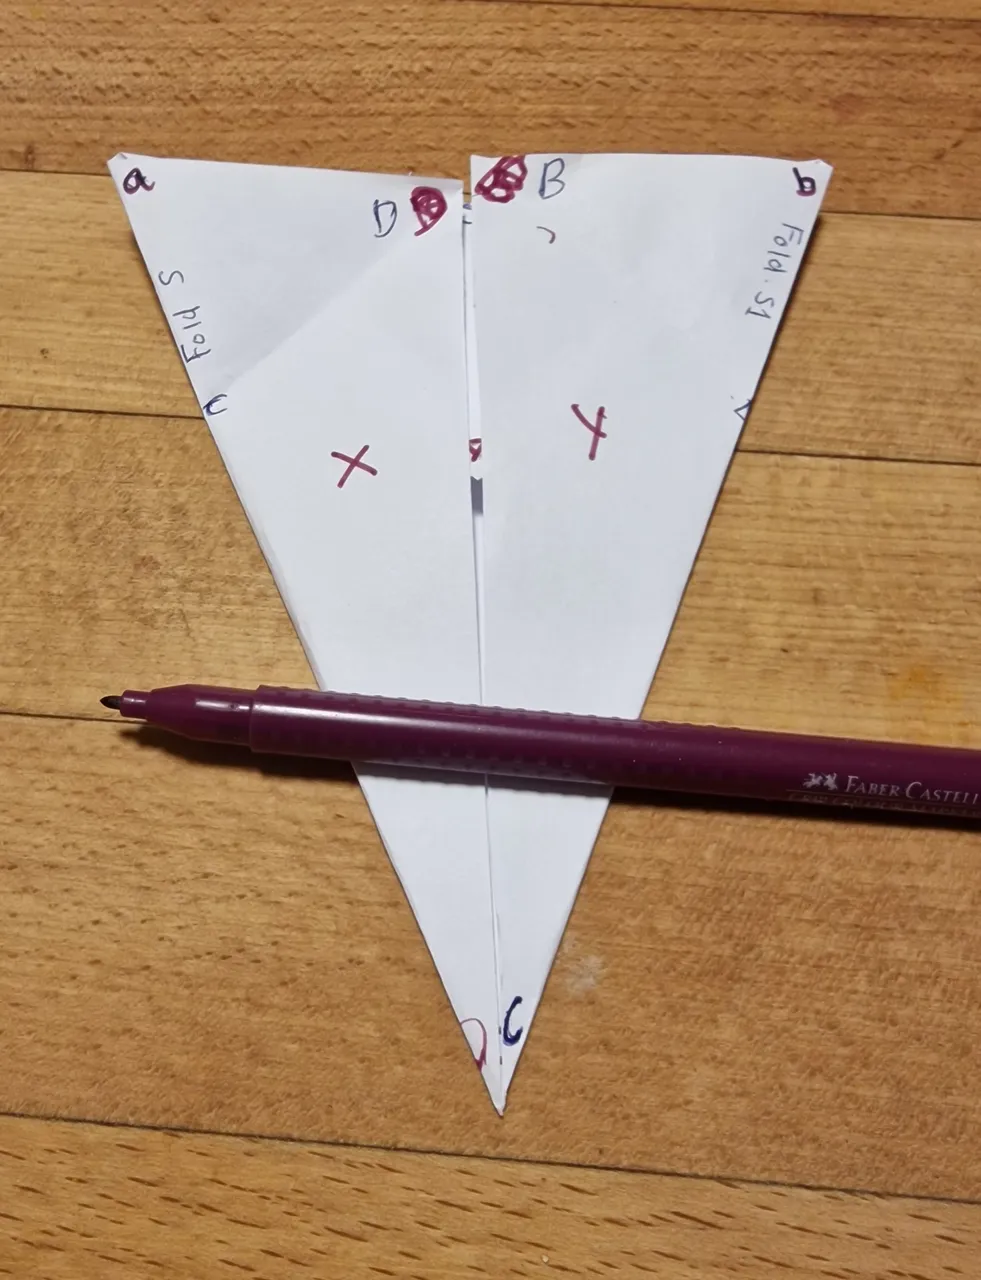
fold p1 done.
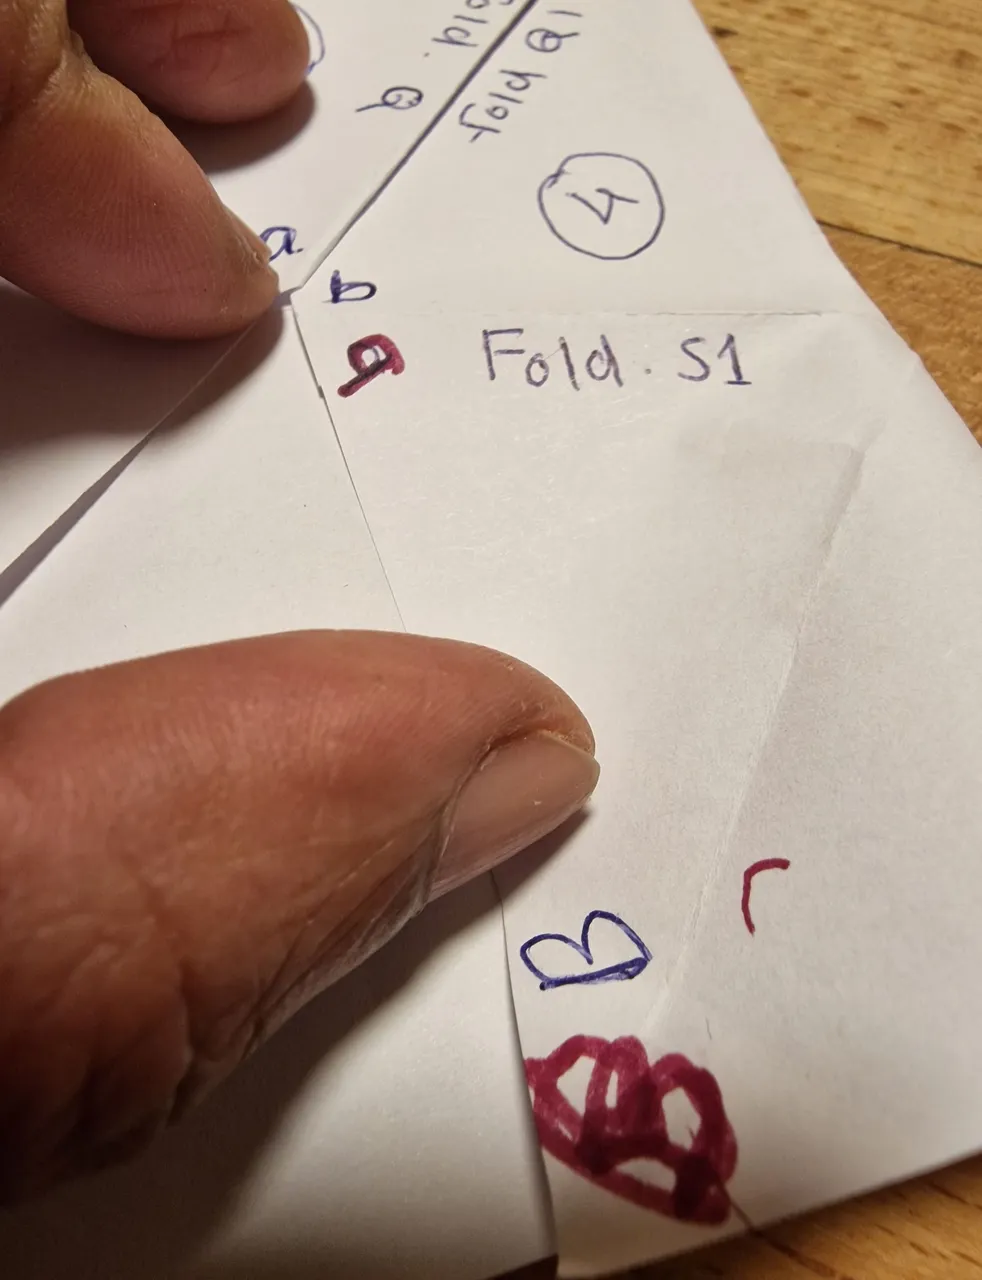
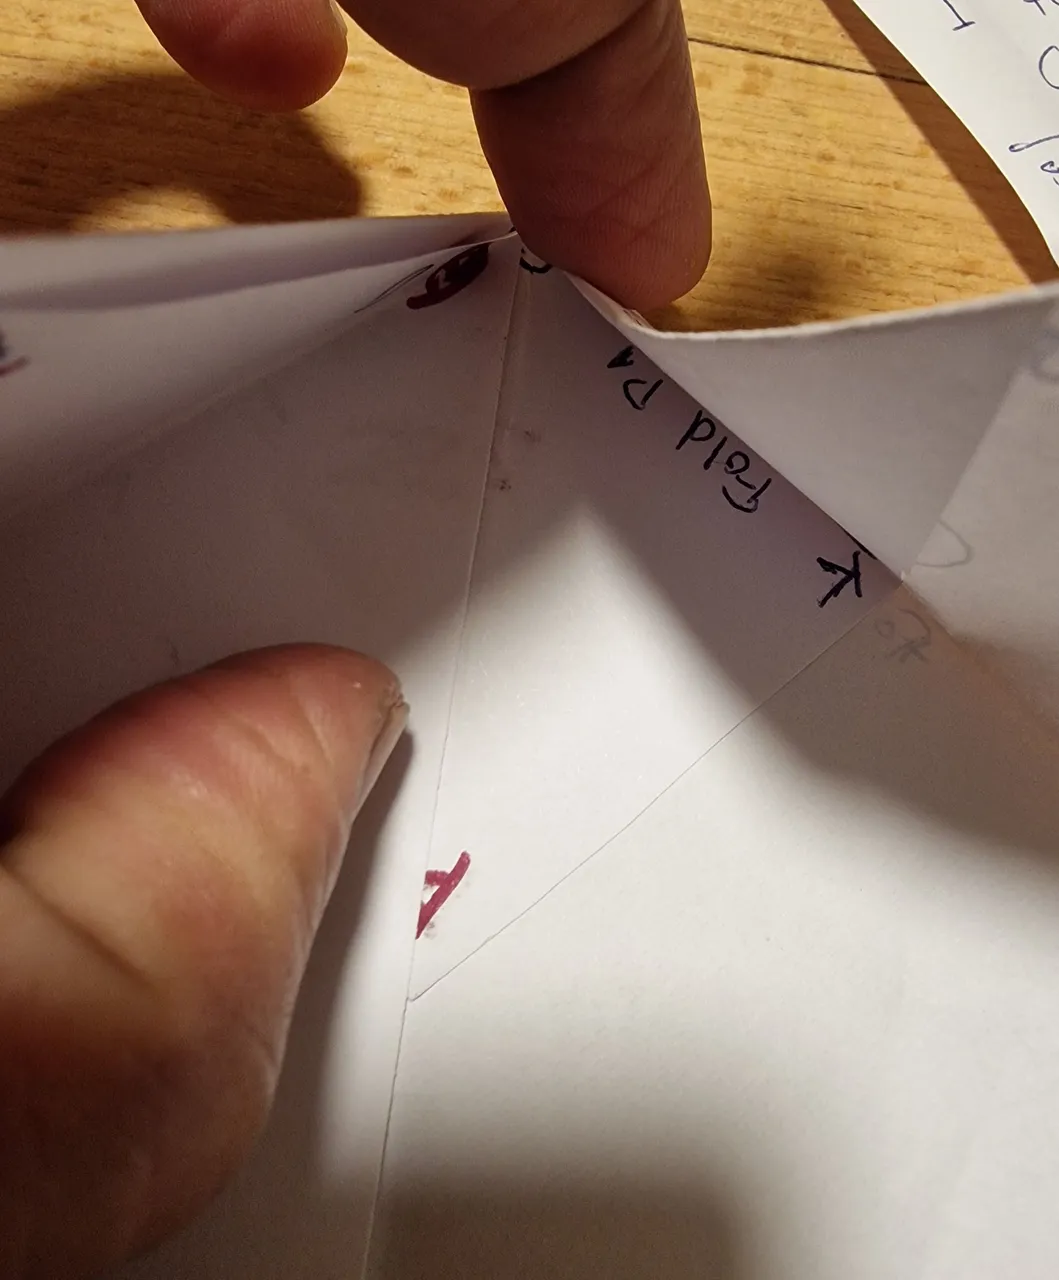
now the s1 fold is to be done. don't be confused by the 2 b's. it was the mark of one corner on both sides of the paper
after folding s1 line. Triangle 6 is now on top of no.4 triangle 7 is on top of the 5 triangle.
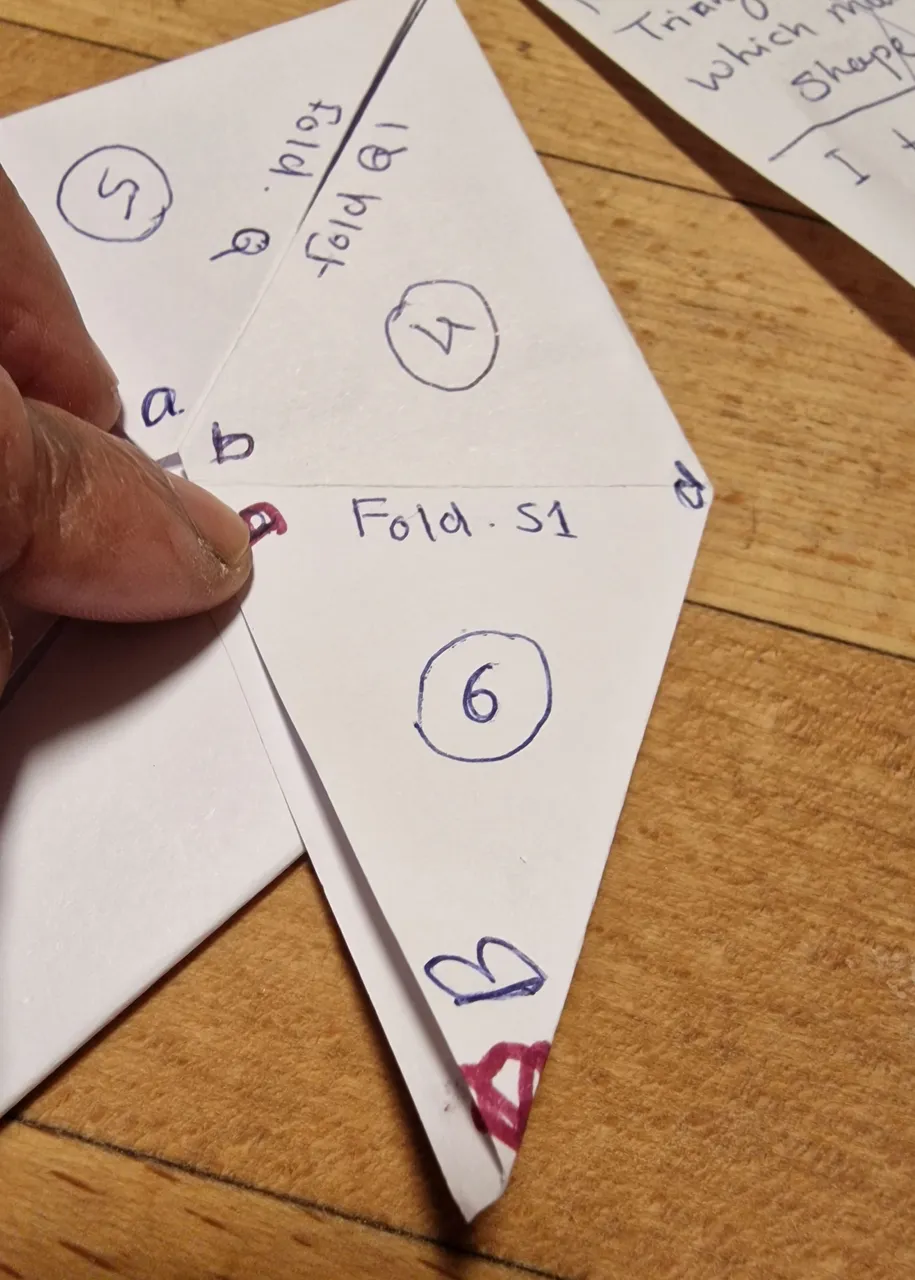
see the details then unfold s1. repeat for folds on the other side putting
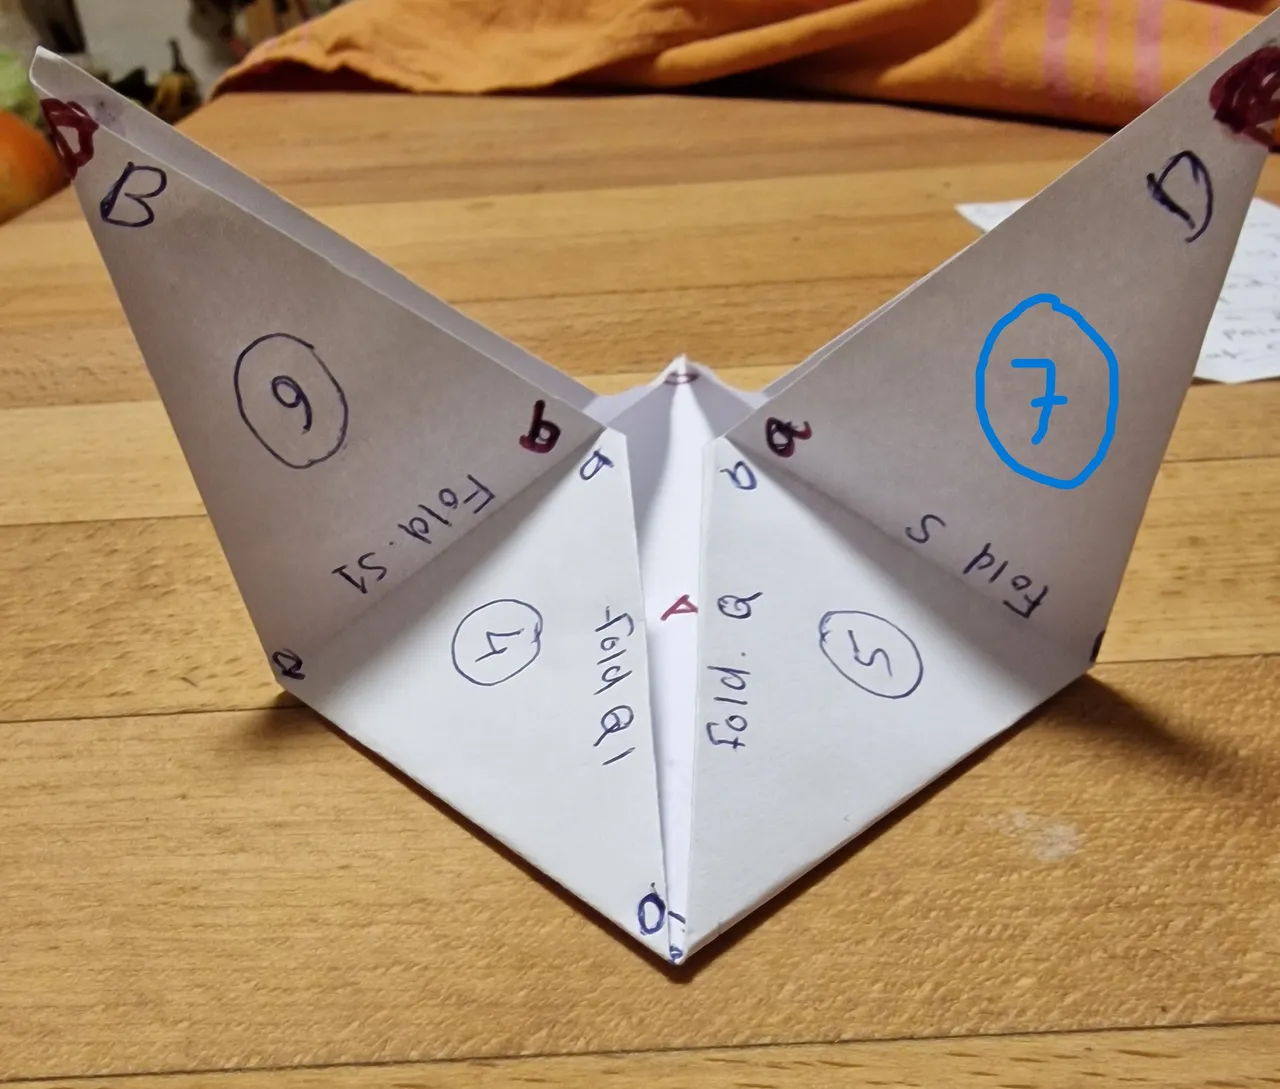
unfold s and s1 making a diamond shape of 4 and 6 likewise 5 and 7
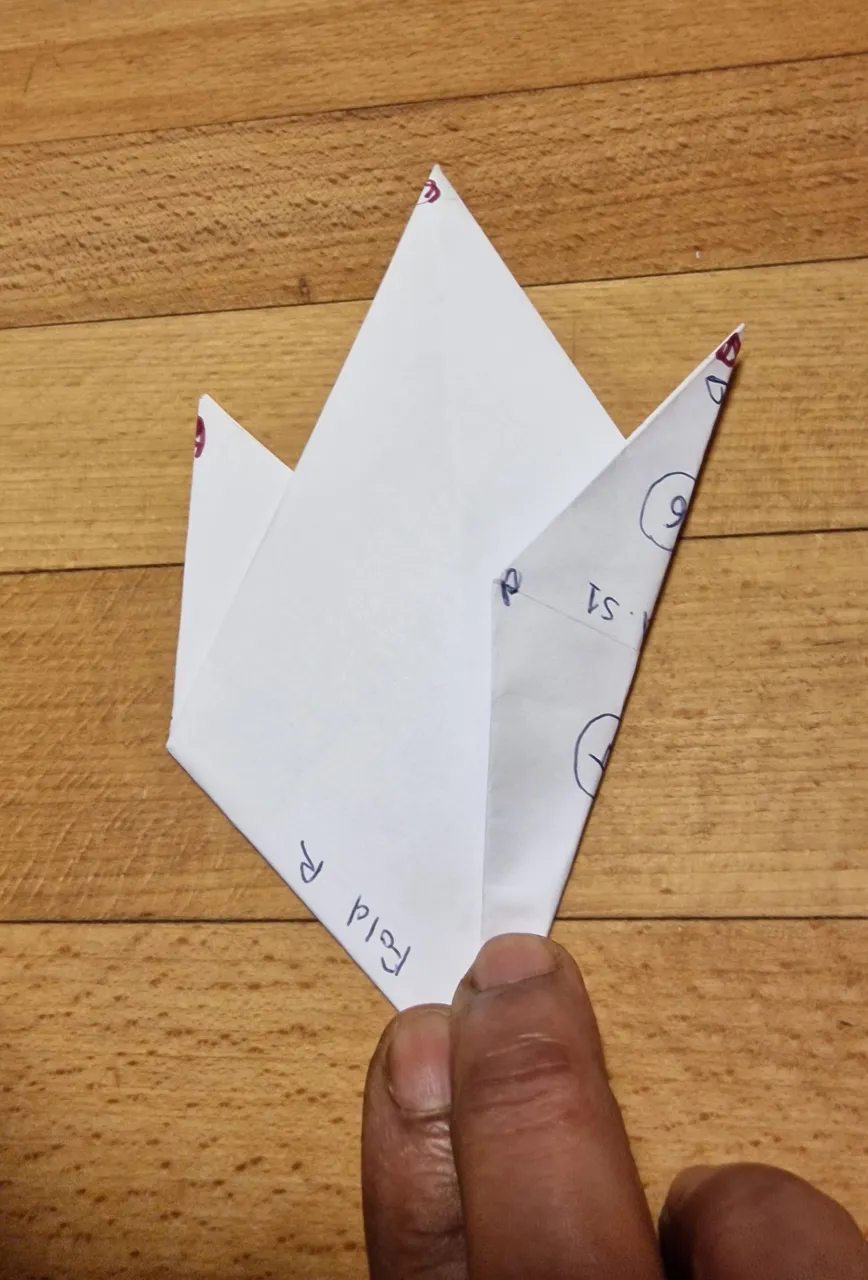
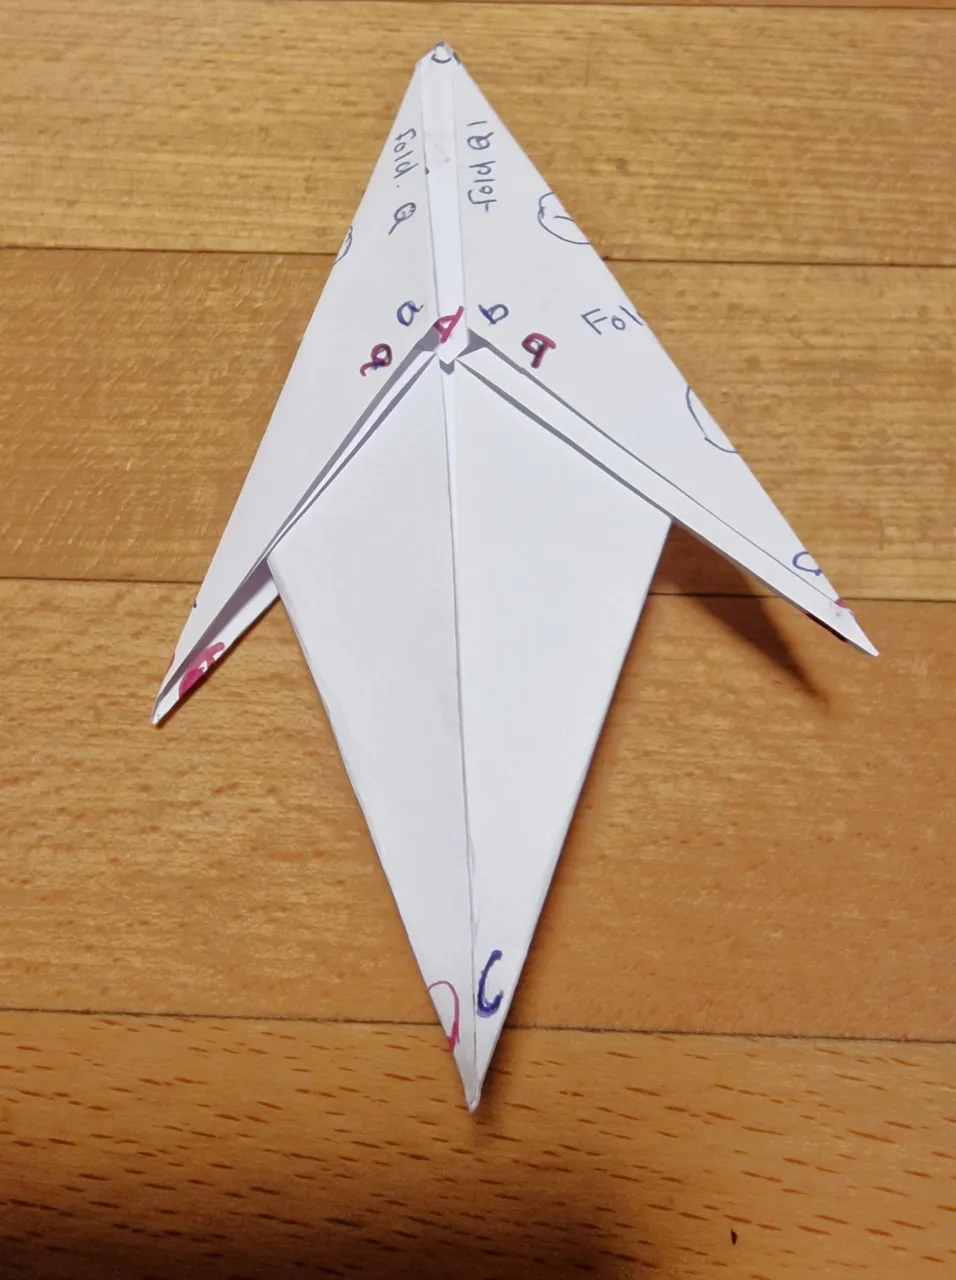
Flip the paper on its backside. note the corners of one diamond are ObBd and the long middle is OB Now fold along the OB line but fold underneath so d is now directly under b and the visible triangle is ObB. likewise for the other diamond OaDc c fold under an along-the-line OD
this is the view from the back side but we are not working on this side, it's only to show the folds
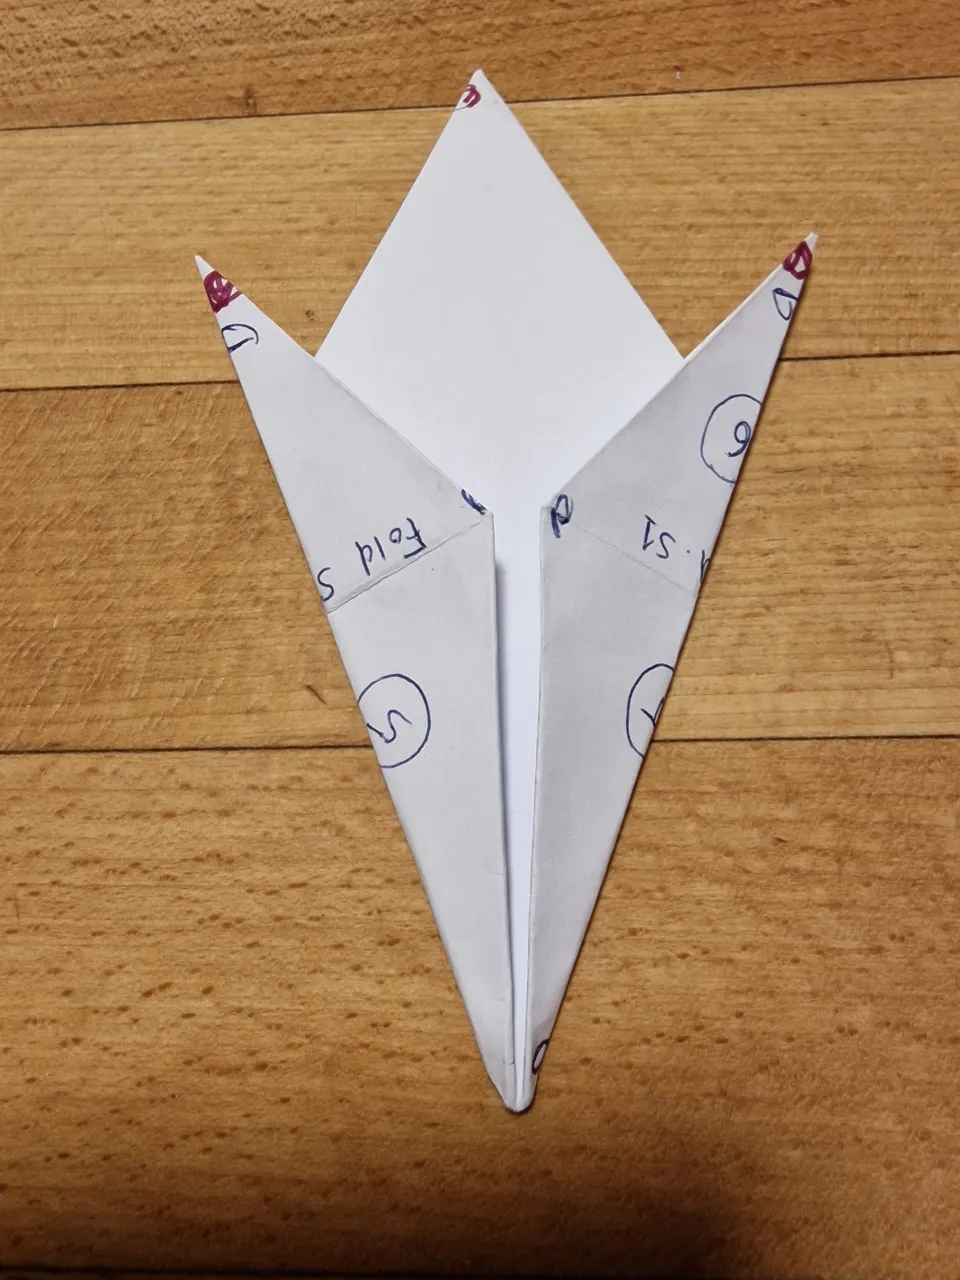
Turn the paper 180 degrees so C is now at the top. this is what the front side looks like.-
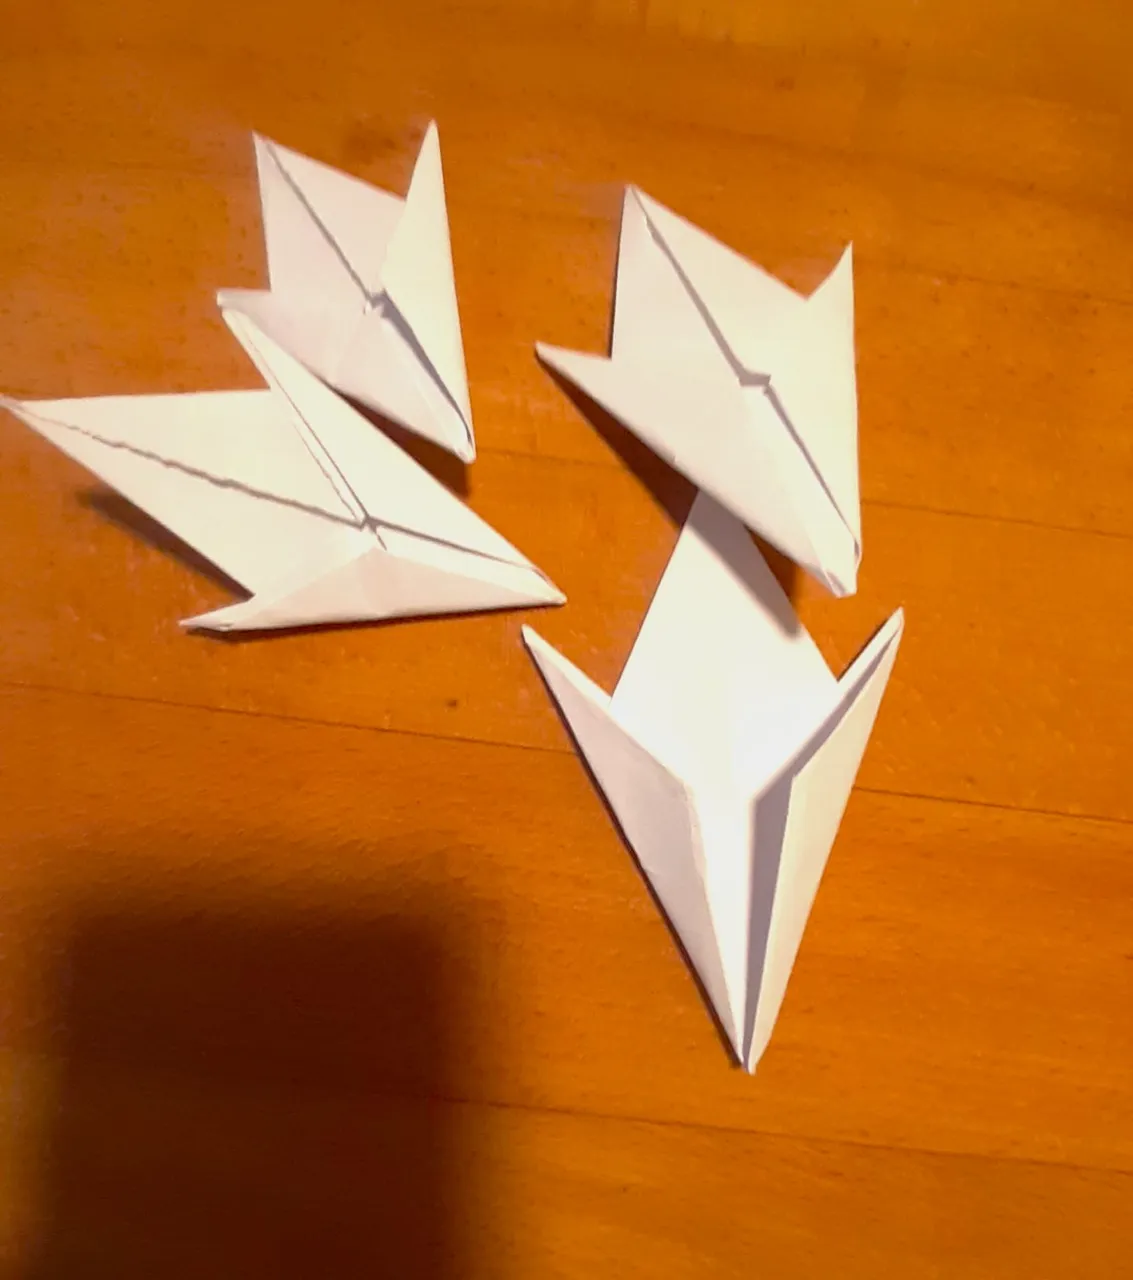
Now carefully unfold the OaD triangle on the right and the ObB on the left side.

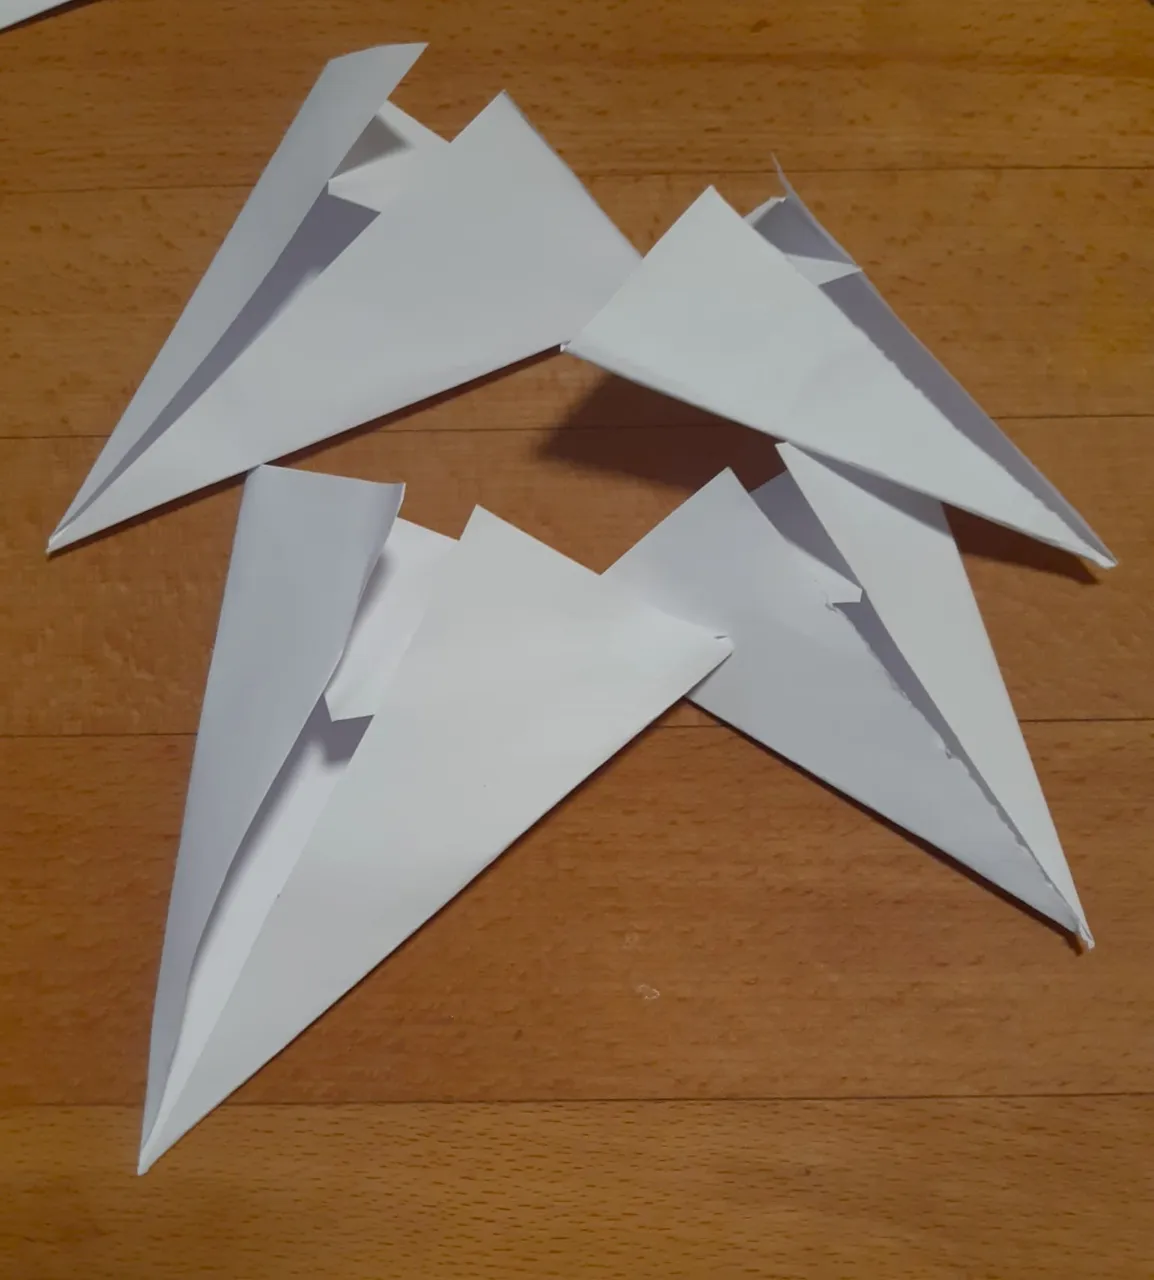
one segment is now done. repeat for the other 4 pieces of paper. it will be much easier the second time and by the fifth you will be an expert. maybe even do it blindfolded.
And this is the backside
.
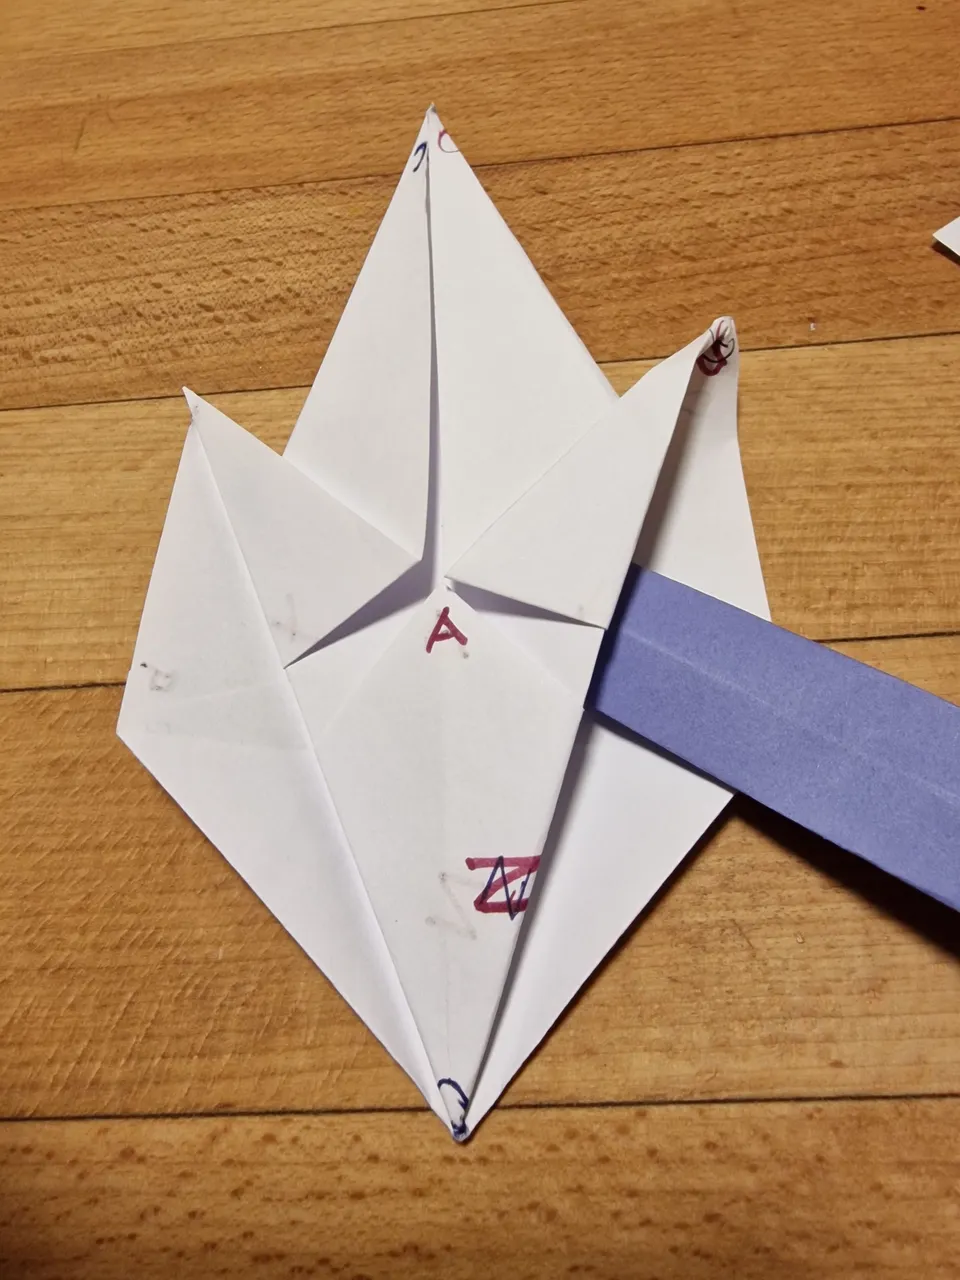
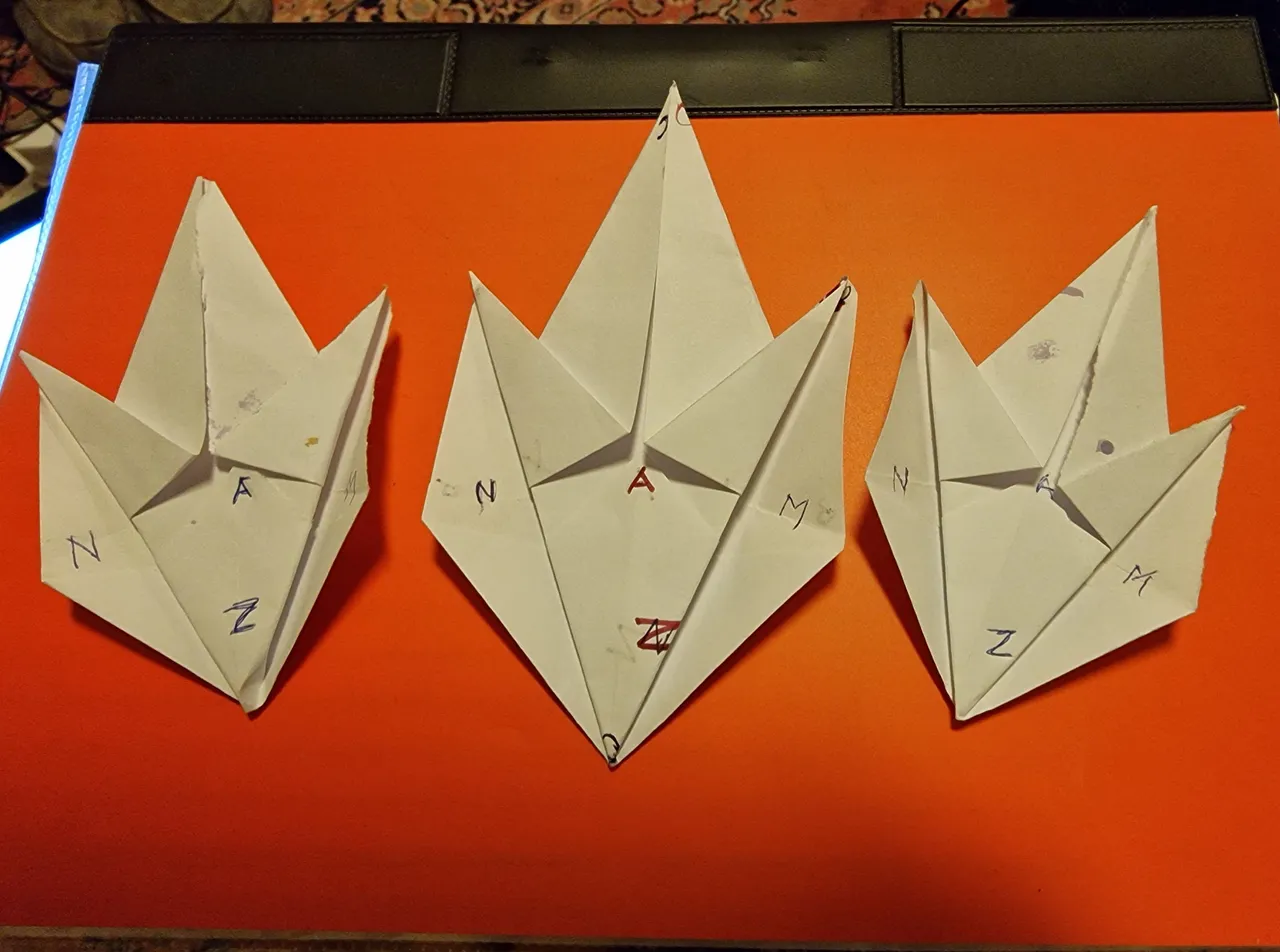
to join the segments there is a slot as shown by the blue paper. use the 12 cm paper for the middle section and slide the 10 cm paper into the slots on both sides of the middle piece then the 8 cm paper slides into the 10 cm for the outer parts.
How to join the segments
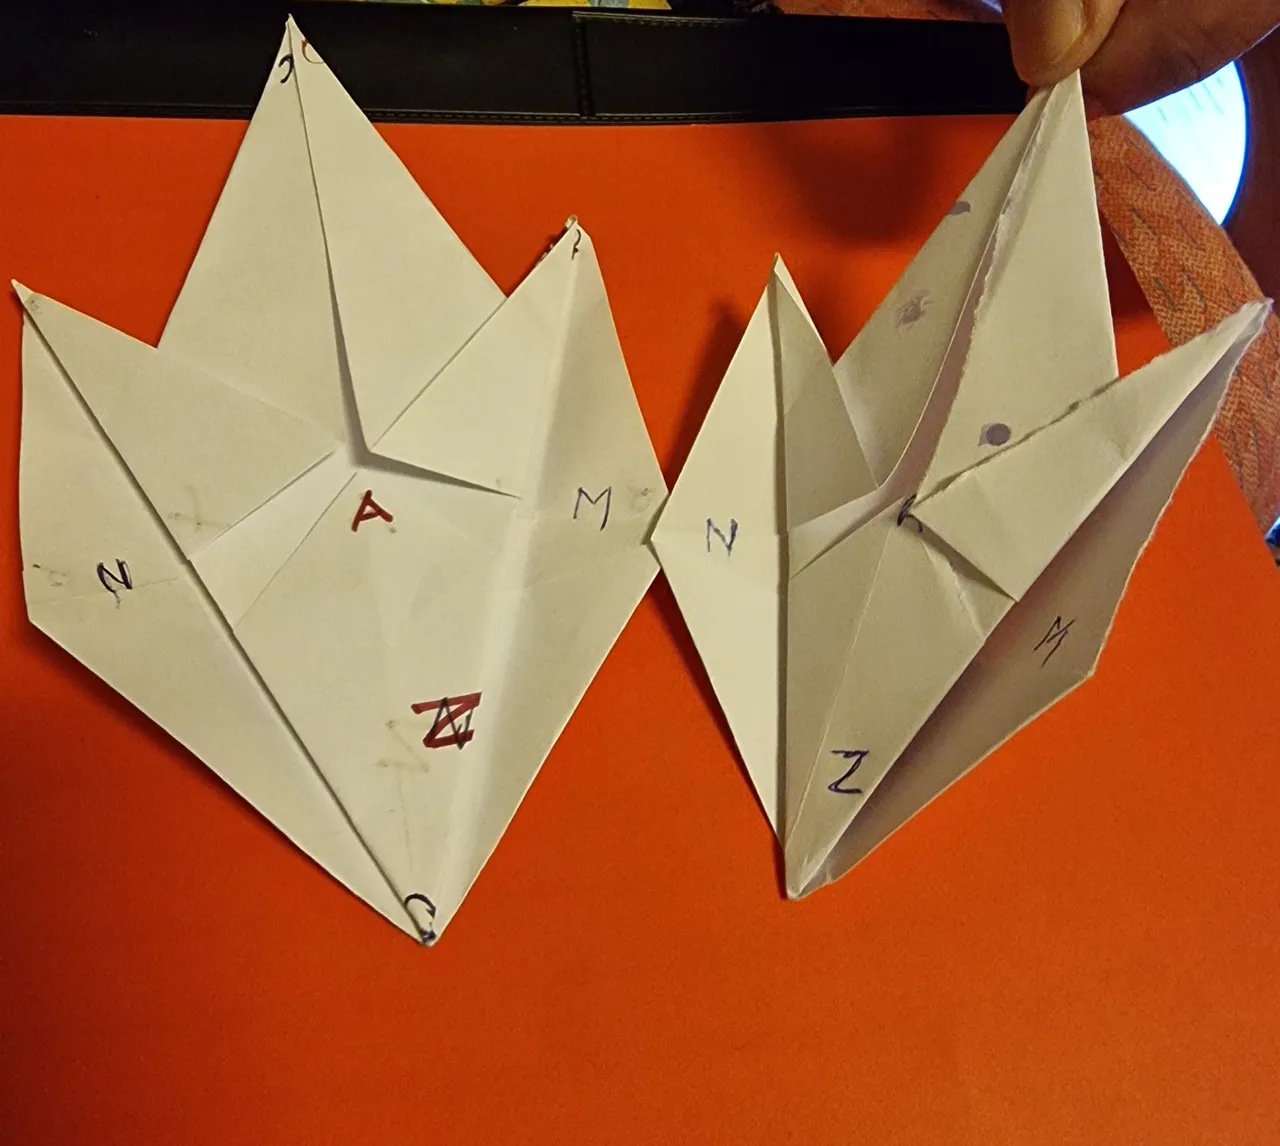
slide the N flap over the M and fully into the slot.
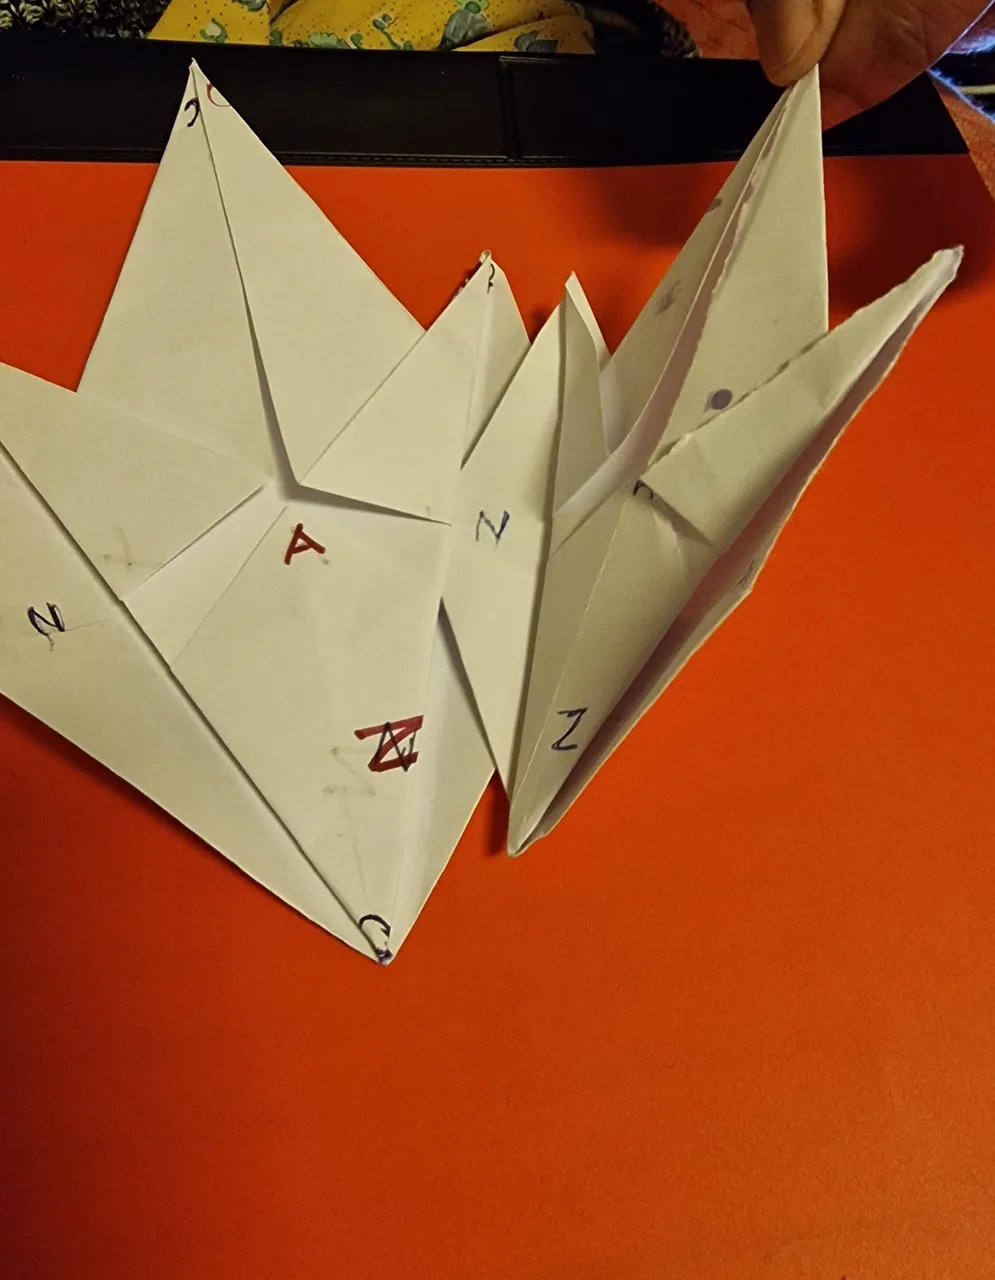

on the other side the M flap slides over the N and fully into that slot. continue with the 8 cm papers on the outer left and right sides
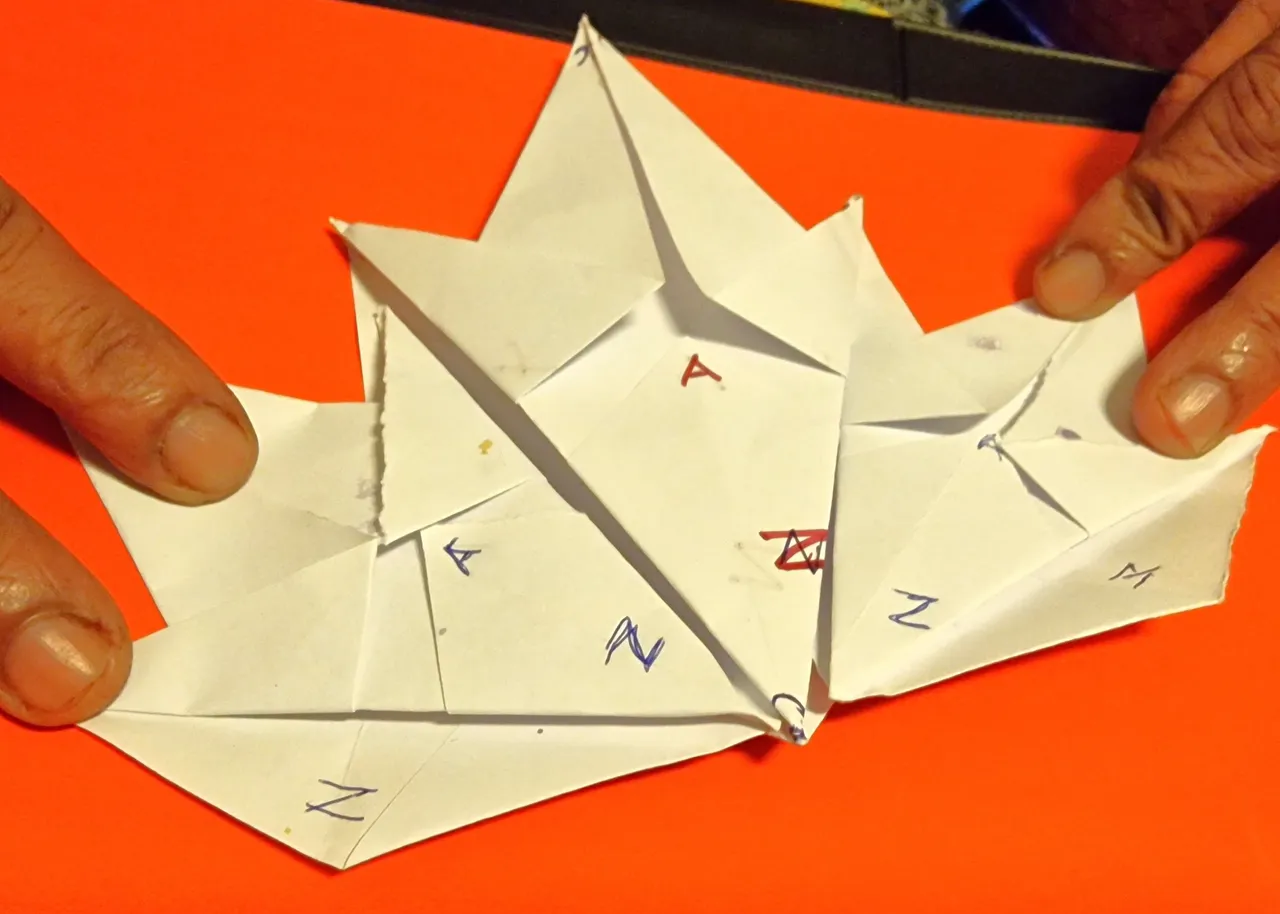
This is the way to attach all segments. Use paste or glue to attach them to each other.
Make a stem by cutting a suitably thin and long paper and paste or glue it to the backside
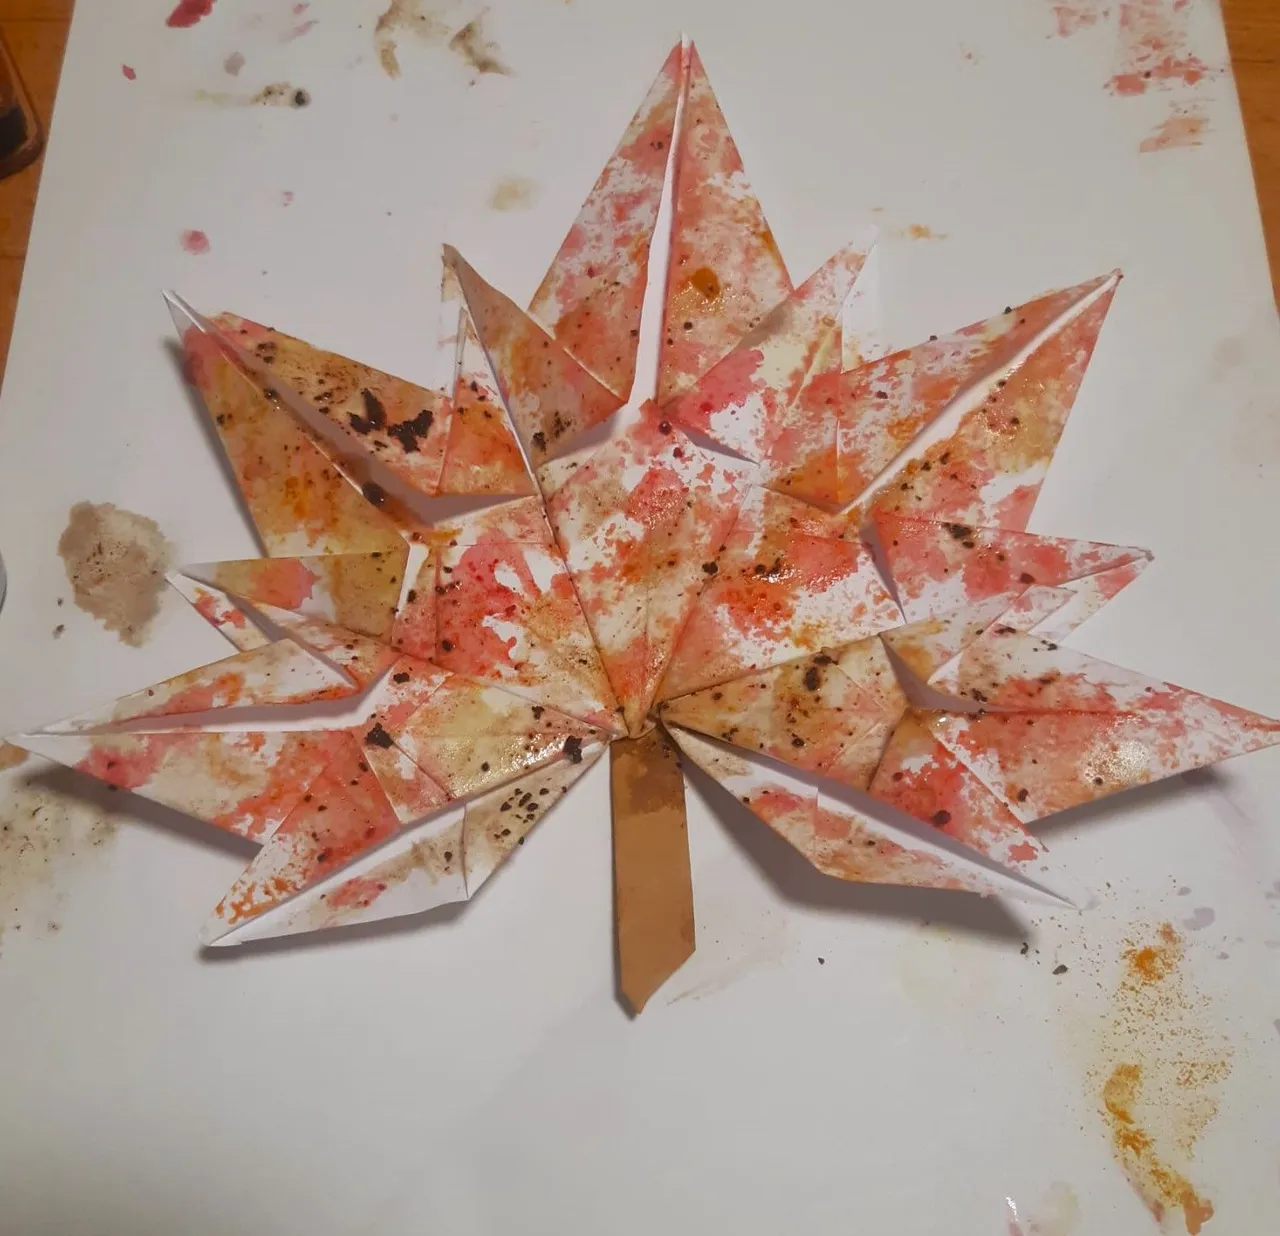
Using a sponge piece just spread some color on it.
once you know how to do it it should take less than 10 minutes to fold and join the papers. if you have origami paper all the easier, just be careful to be precise and make crisp folds

Thank you for stopping by.