
Hello everyone, and welcome to my blog. This would be my first DIY project this month, and I am excited that the result was awesome. The DIY project isn't much of a big deal, but you are definitely going to love it, so just enjoy reading to the end.

I did a small transformation on one of my shoe boxes and thought it would be nice to share the process with my friends on the Hive blockchain. I don't intend to use the box to do more than still keep my shoe, but this transformation makes this box fit for different things, including table decorations, depending on the size.
The materials I used for transforming this box are:

Evostick glue
Carton
Scissors
Shoe box
Glossy Paint
Ruler
Pen.
Let's get to the process.
I started by removing the first layer of the carton I needed to cover the shoe box.
| 1 | 2 |
|---|---|
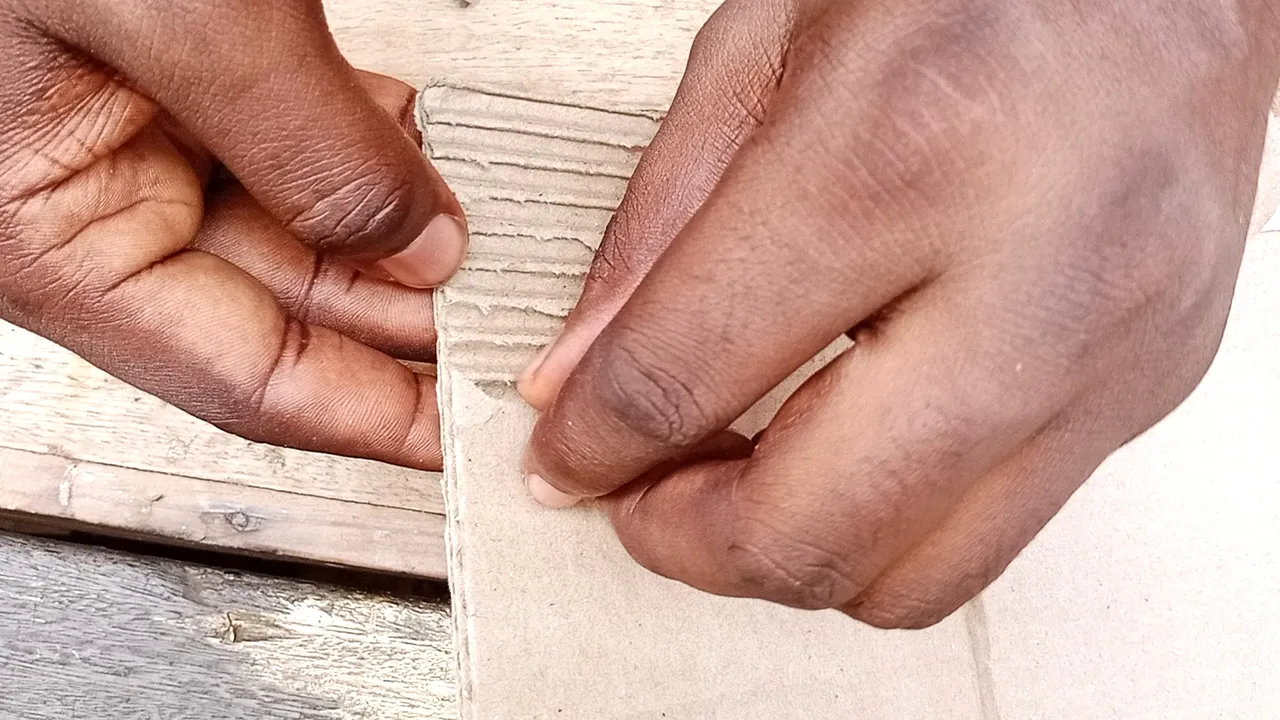 | 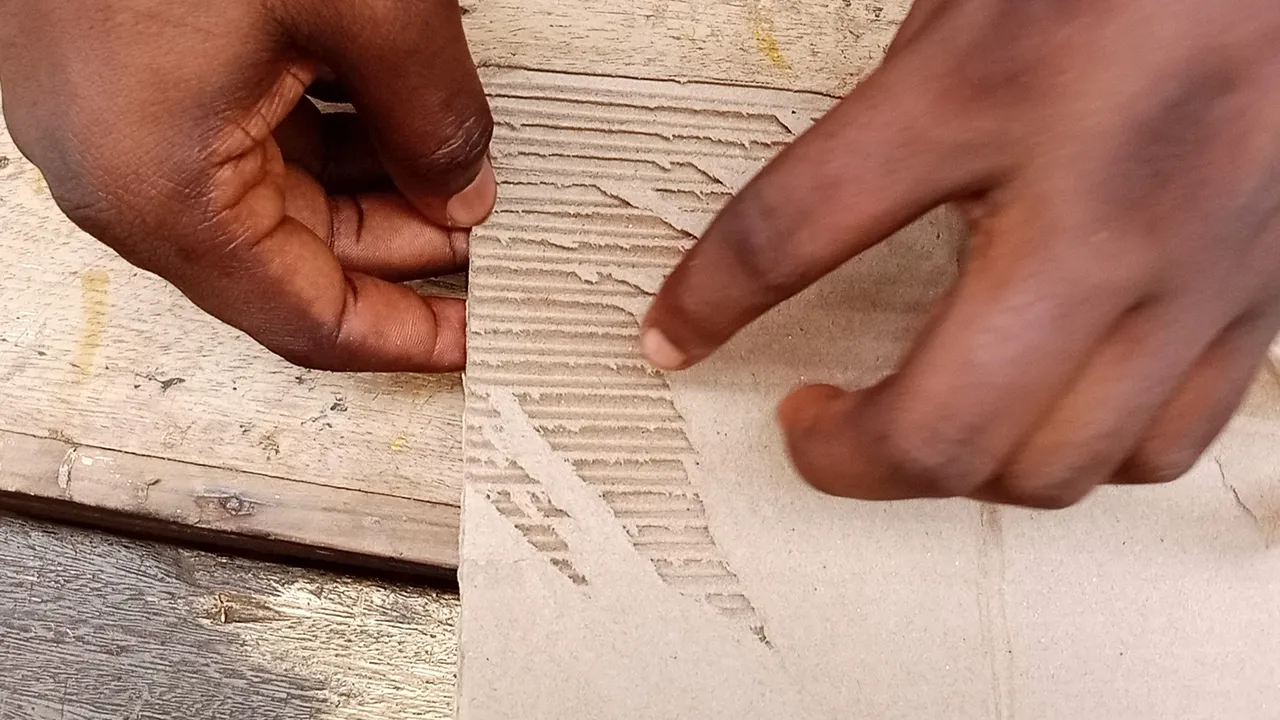 |
This process requires lots of calmness because it can be really annoying when the first layer doesn't peel off as it should.
After removing the first layer, the carton lines must be shown clearly and should be as neat as possible.
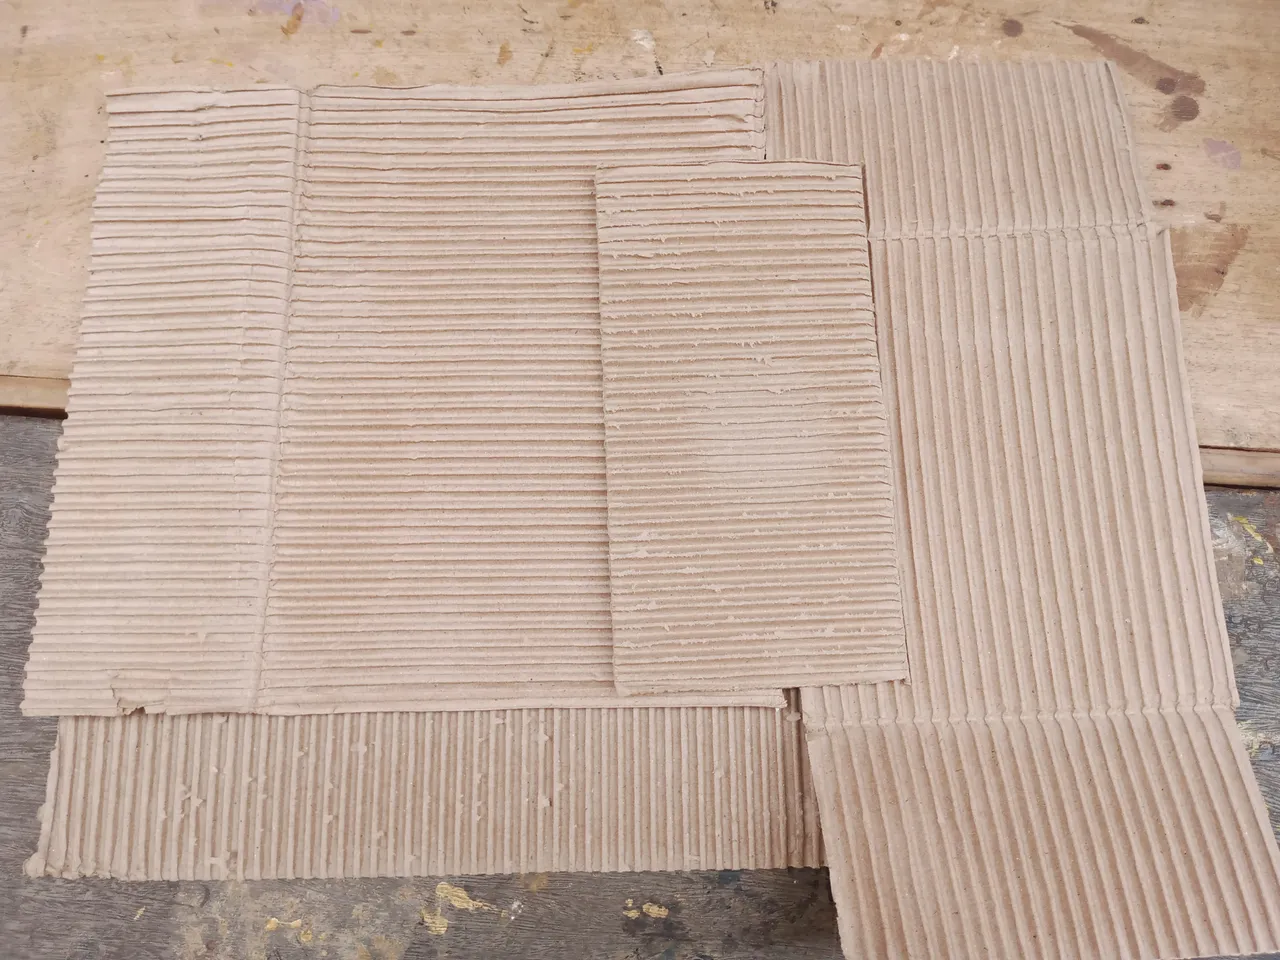
I finally cut out a lot of squares using 3.2 cm as the measurements from the carton.


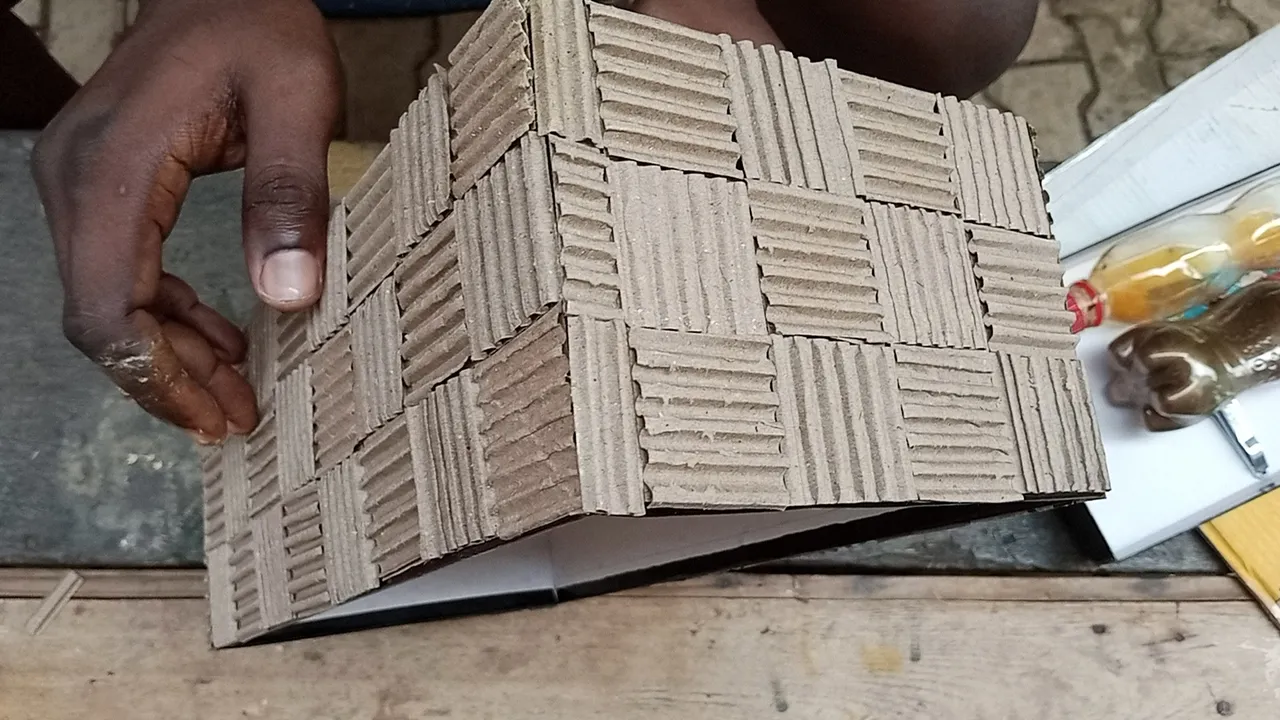
I moved on to gluing the squares on the shoe box, but it was done in a particular order.
If the first square is placed vertically, the square by the side and beneath it will be placed horizontally, and vice versa.
| 1 | 2 |
|---|---|
 |  |
It has to be arranged that way, or else the shoe box will only look like it was just covered with cartons and nothing more.
| 3 | 4 |
|---|---|
 |  |
I applied evostick glue behind each square and placed them as explained earlier.


I placed them one after the other until every part of the show box was covered with the square.
| 1 | 2 |
|---|---|
 |  |
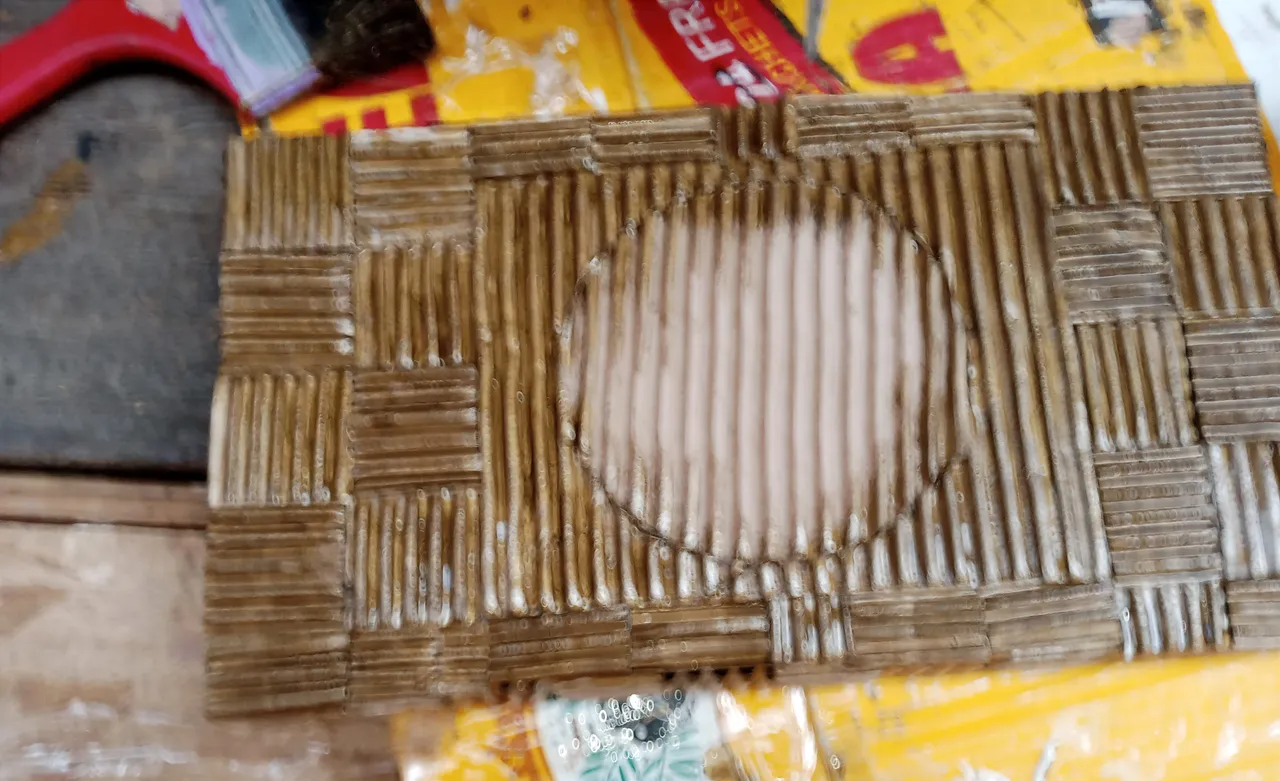
I moved on to the box cover, which has a Versace logo on it.

I didn't want to cover the logo since it would make the transformation look more beautiful.
I looked for a round piece of plastic that was exactly the size of the logo.
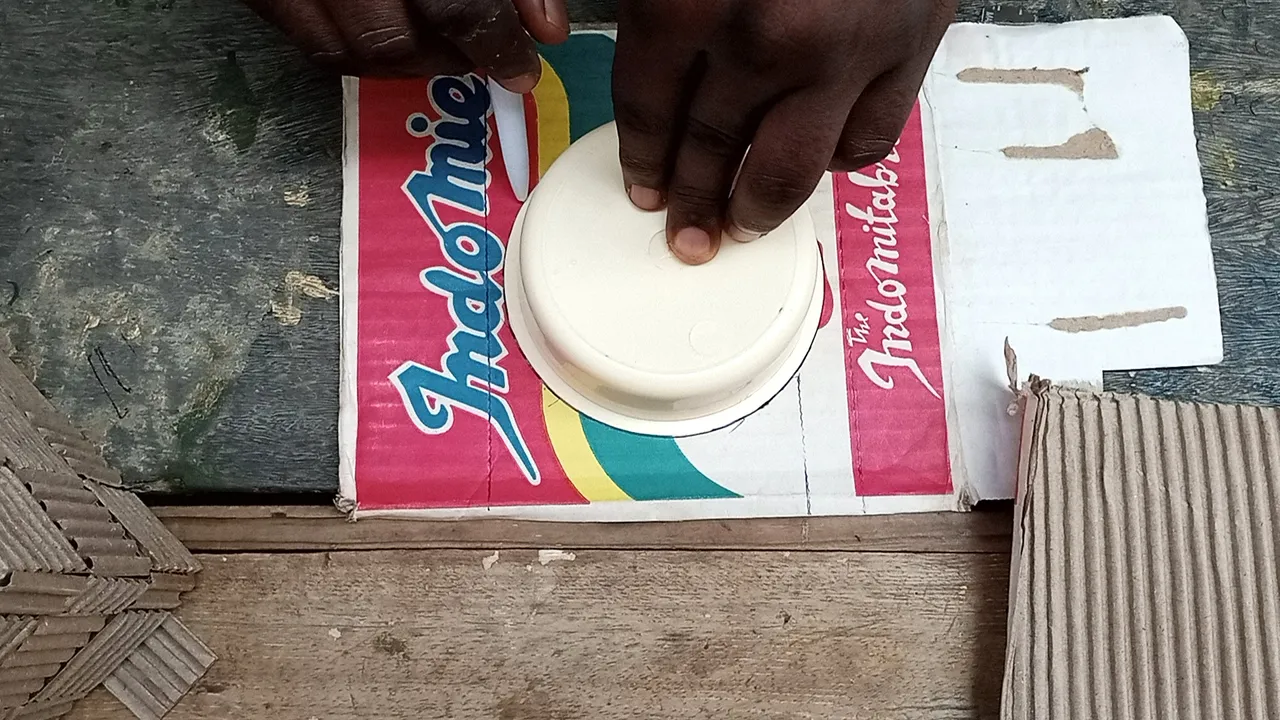
I peeled the first layer of another carton and cut out a rectangle bigger than the Versace logo.
I placed the plastic on the rectangular-shaped carton and drew a circle on it.
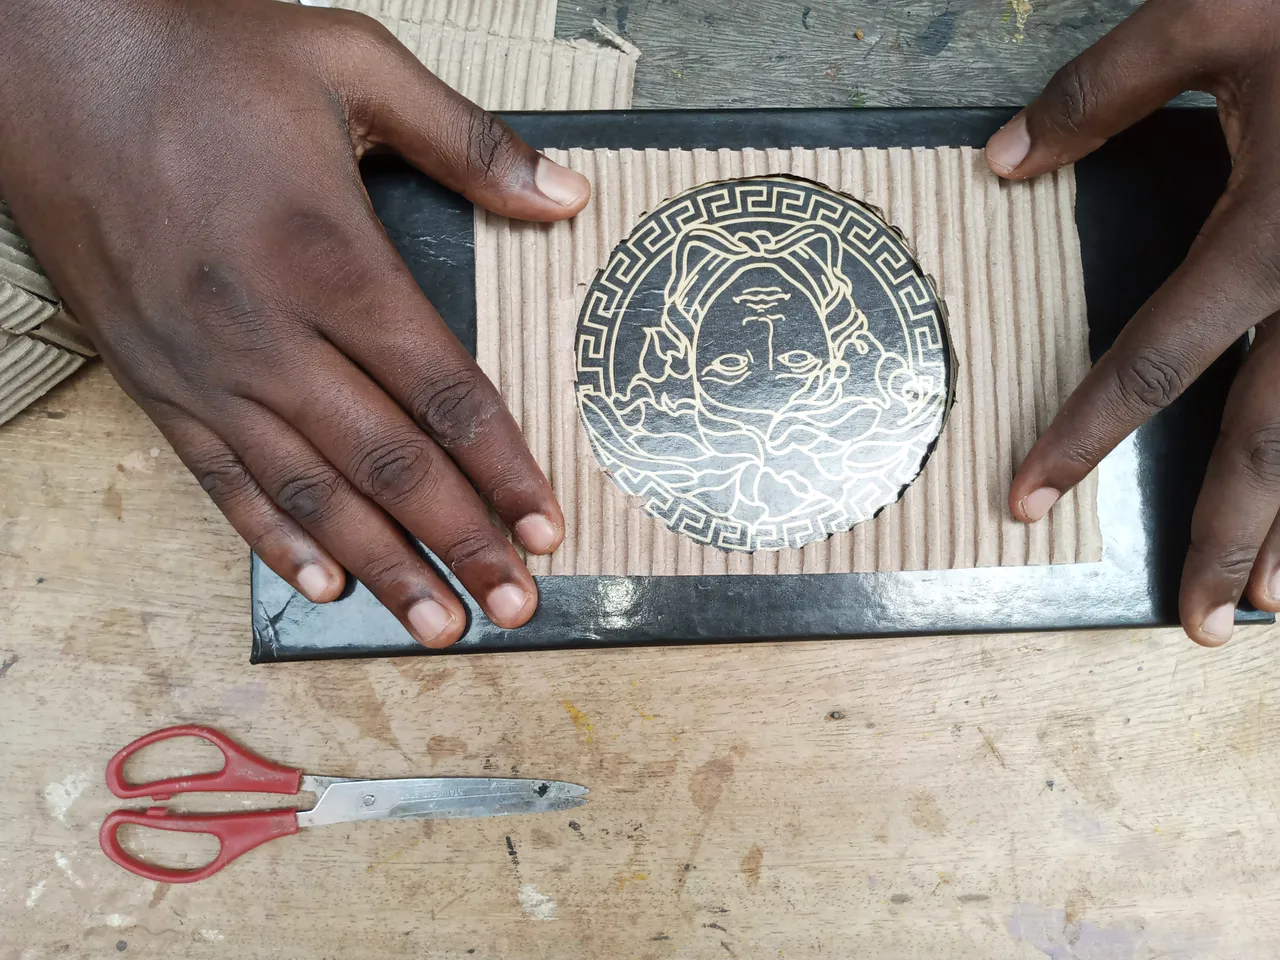
I cut out the circle and glued it to the cover, leaving the logo open.
| 1 | 2 |
|---|---|
 |  |
| 3 | 4 |
|---|---|
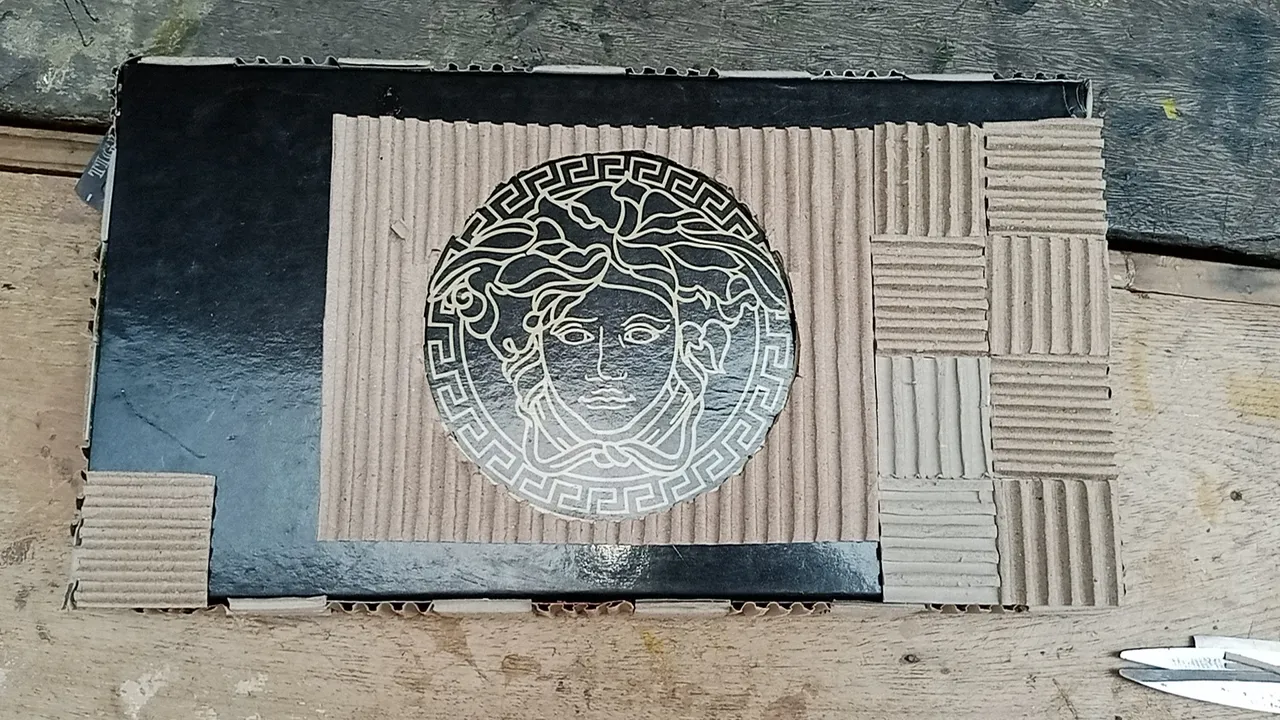 |  |

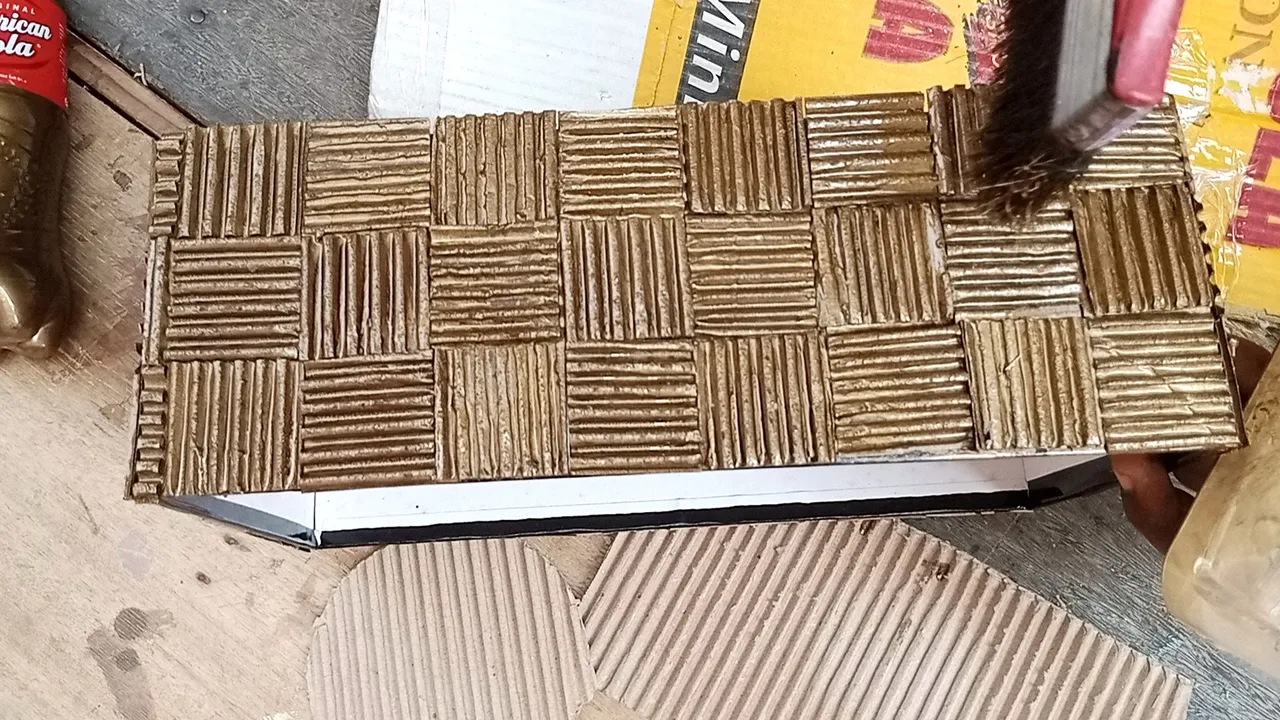
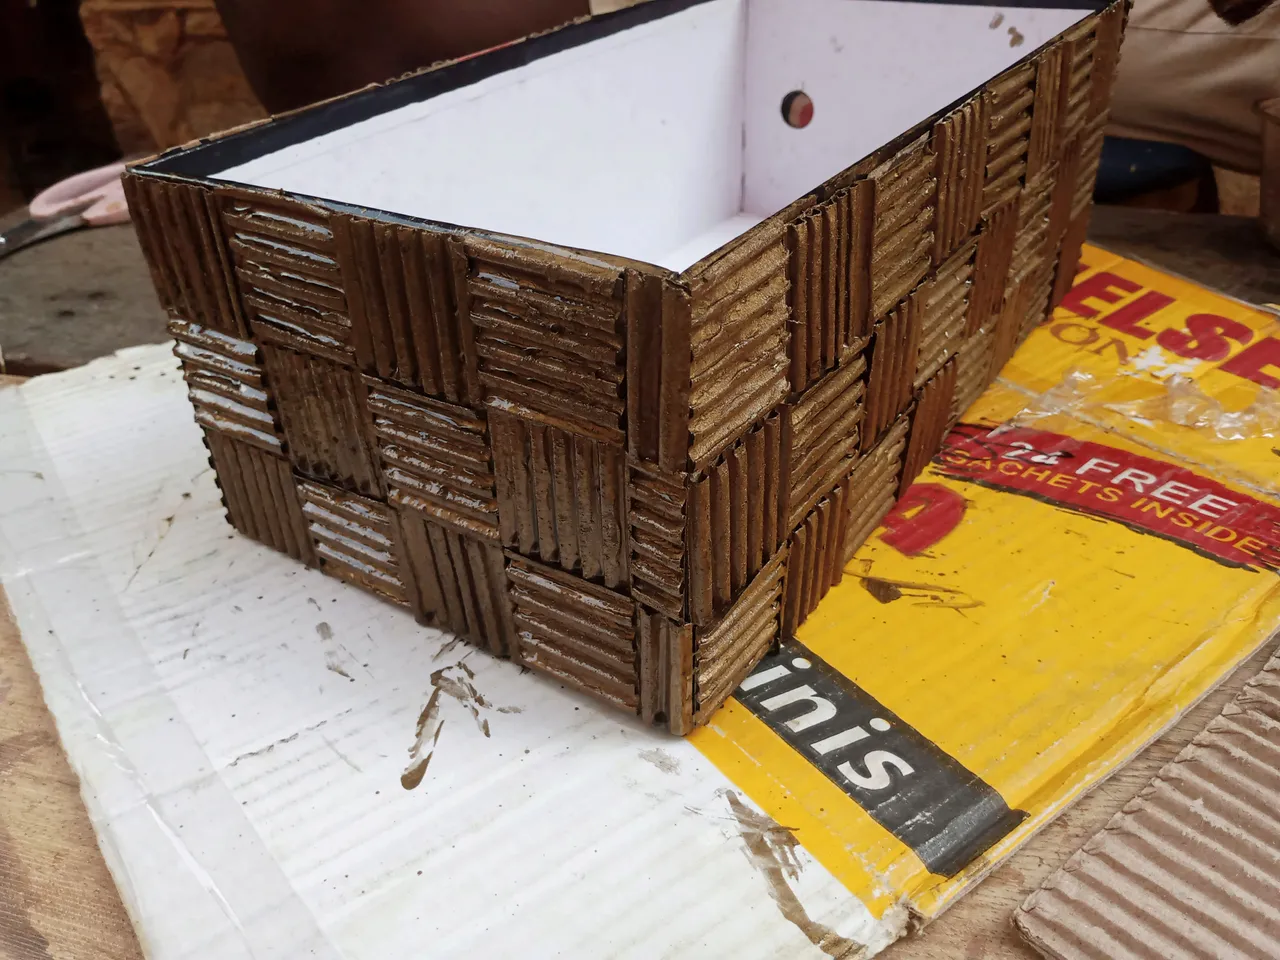
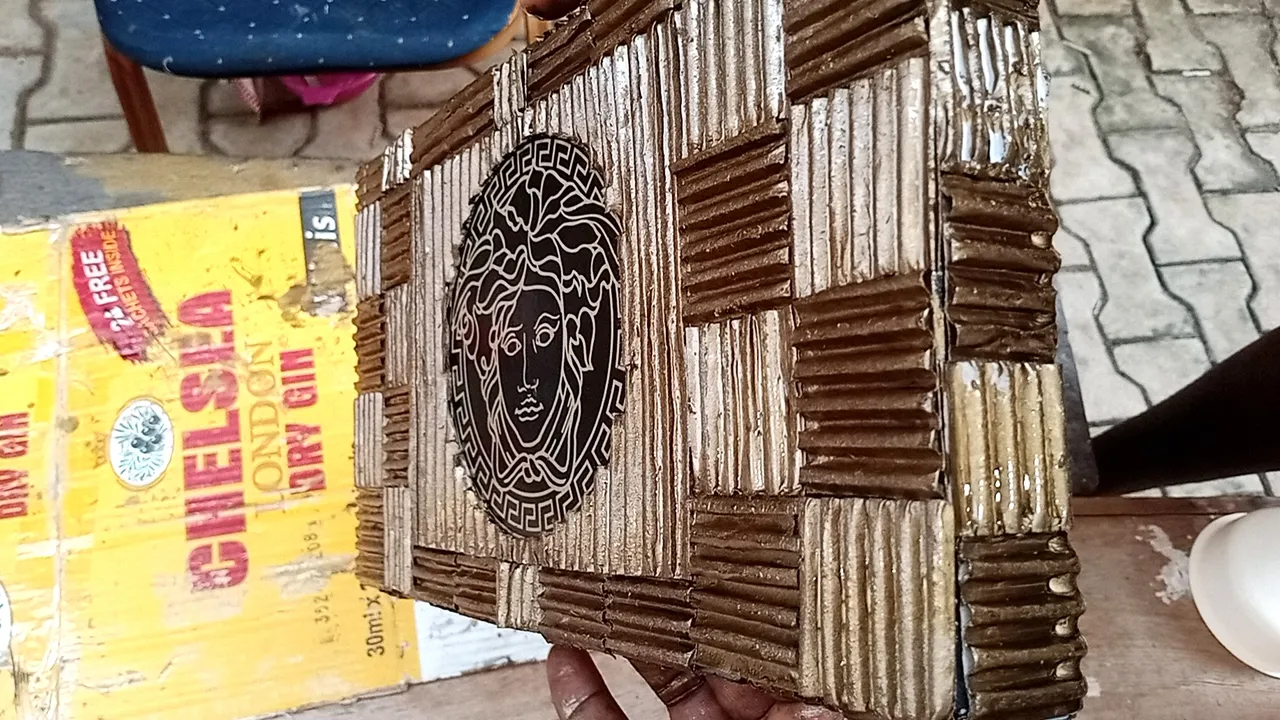
I covered the remaining parts of the carton with the squares, and the outcome was great already.
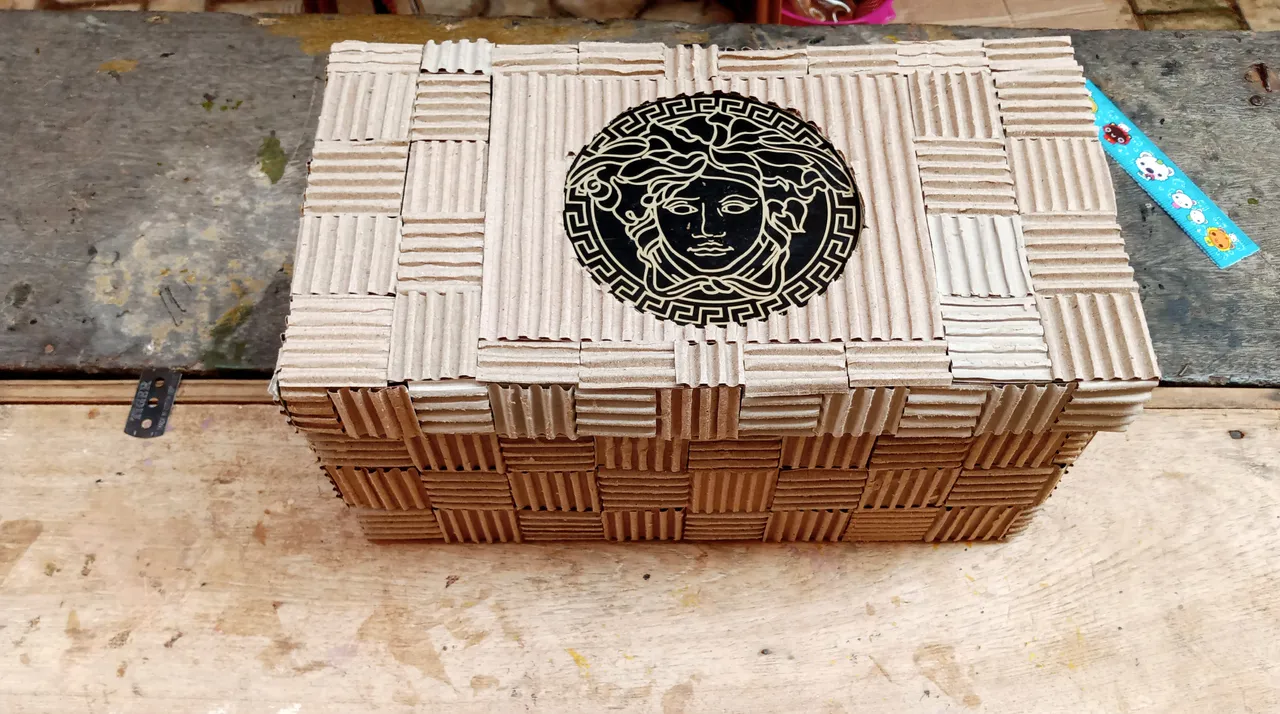
If you have been following my DIY projects, you should know by now that I love playing with colors and won't stop there. I went on to paint the box with glossy paint.
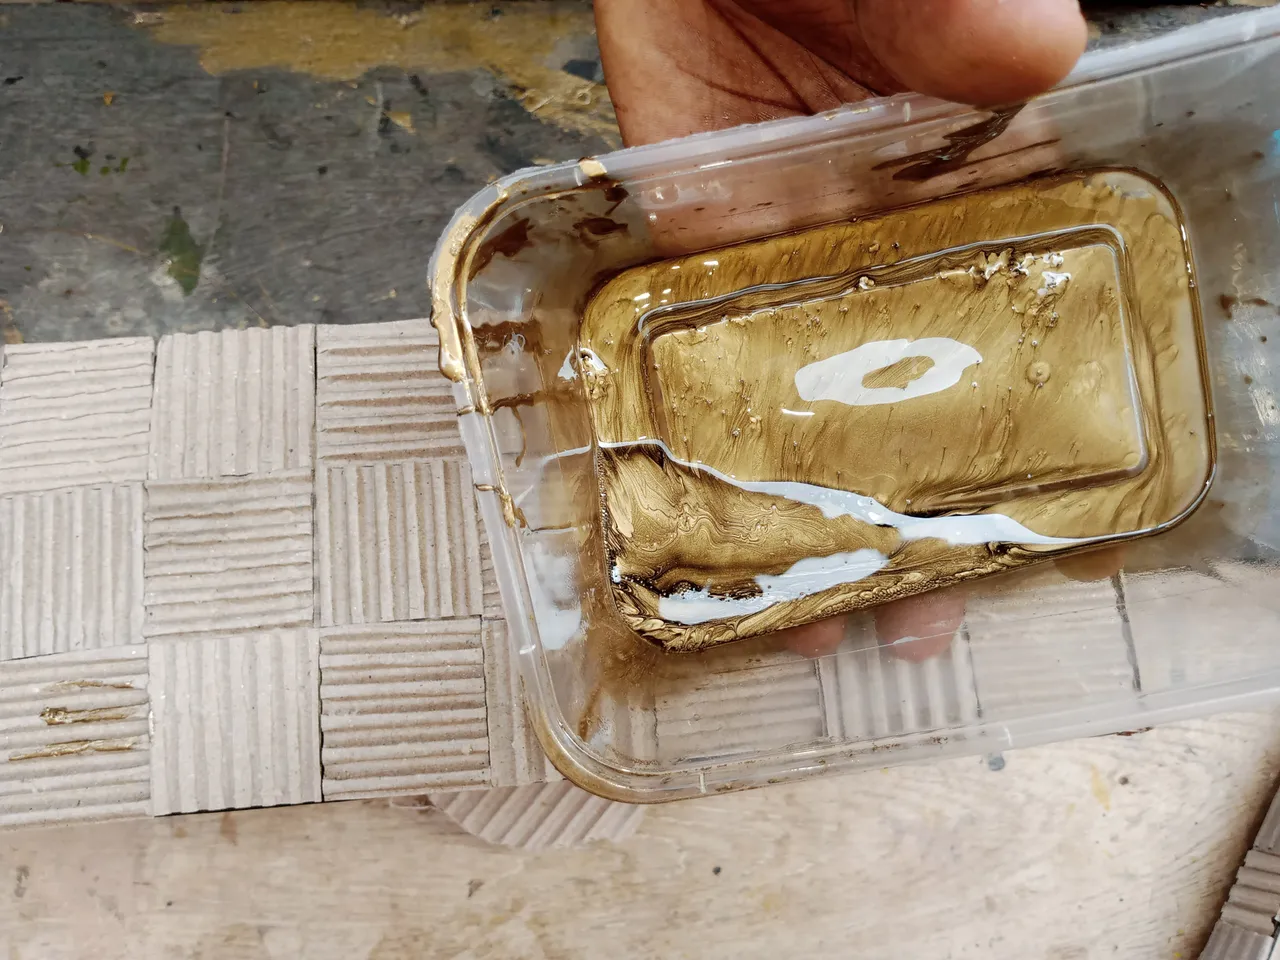
The first thing was to paint the box before the cover.
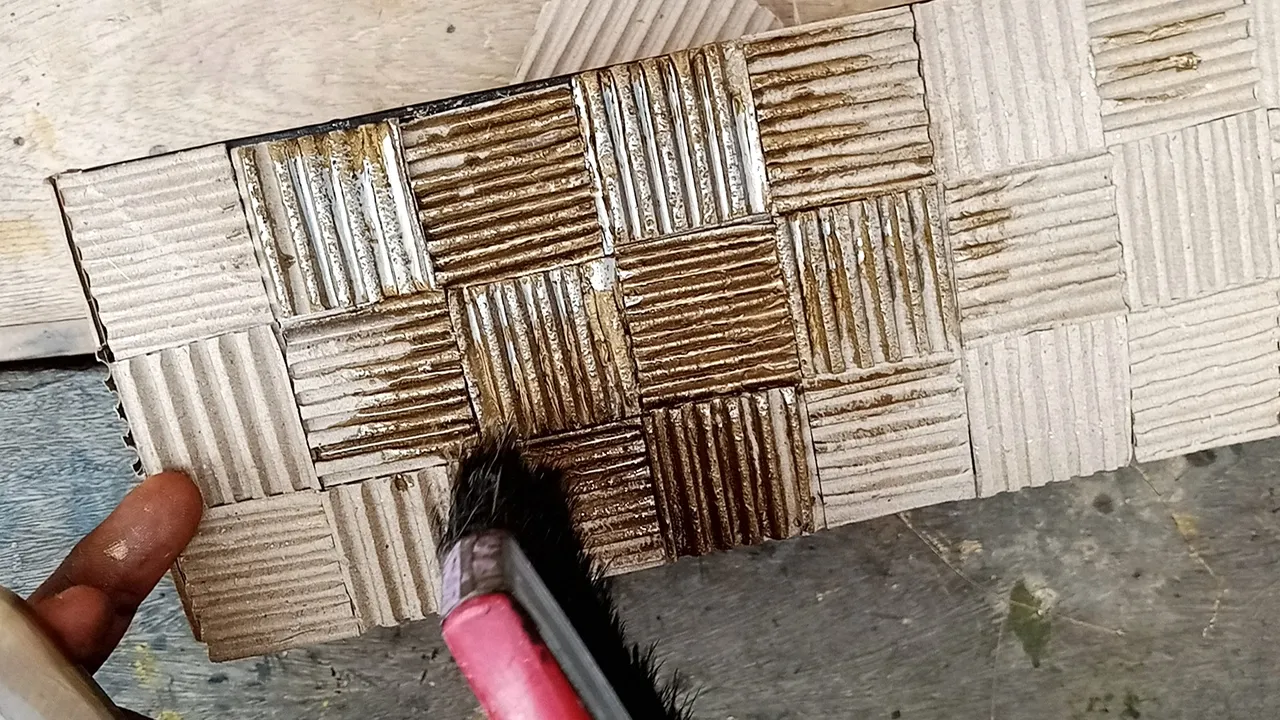
I painted the cover as well but covered the logo to prevent it from getting stained with glue.
| 1 | 2 |
|---|---|
 |  |
I removed the cover from the logo after painting, cleaned up the little stains, and kept it in the sun to dry.
| 3 | 4 |
|---|---|
 |  |
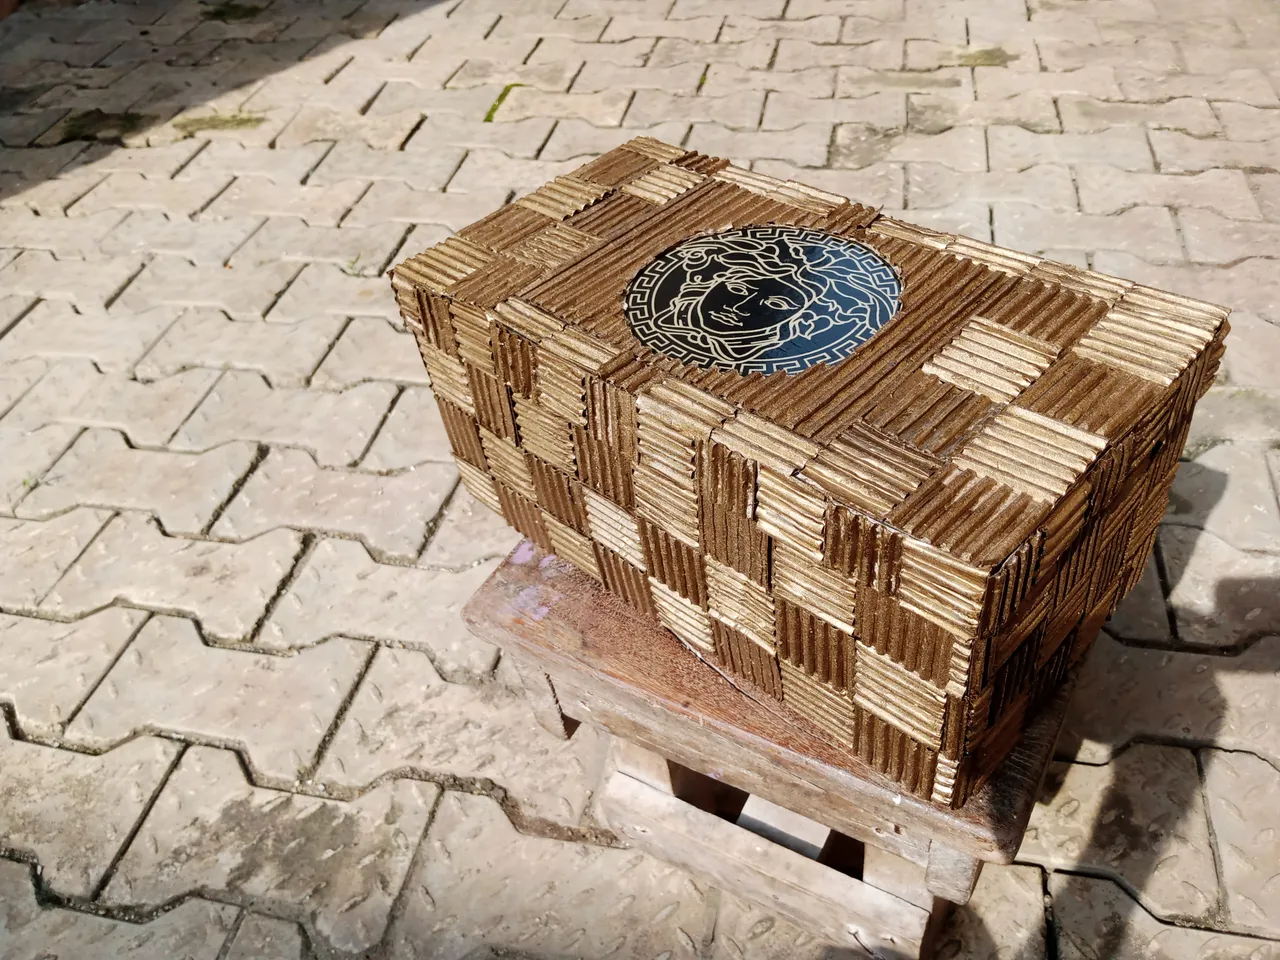
The end result was fantastic, and I felt like this box could be used to give presents as well. I had fun transforming the carton, and I hope you all love it as well.

Thanks for your time.
▶️ 3Speak
All Image In The Post Belong To Me.