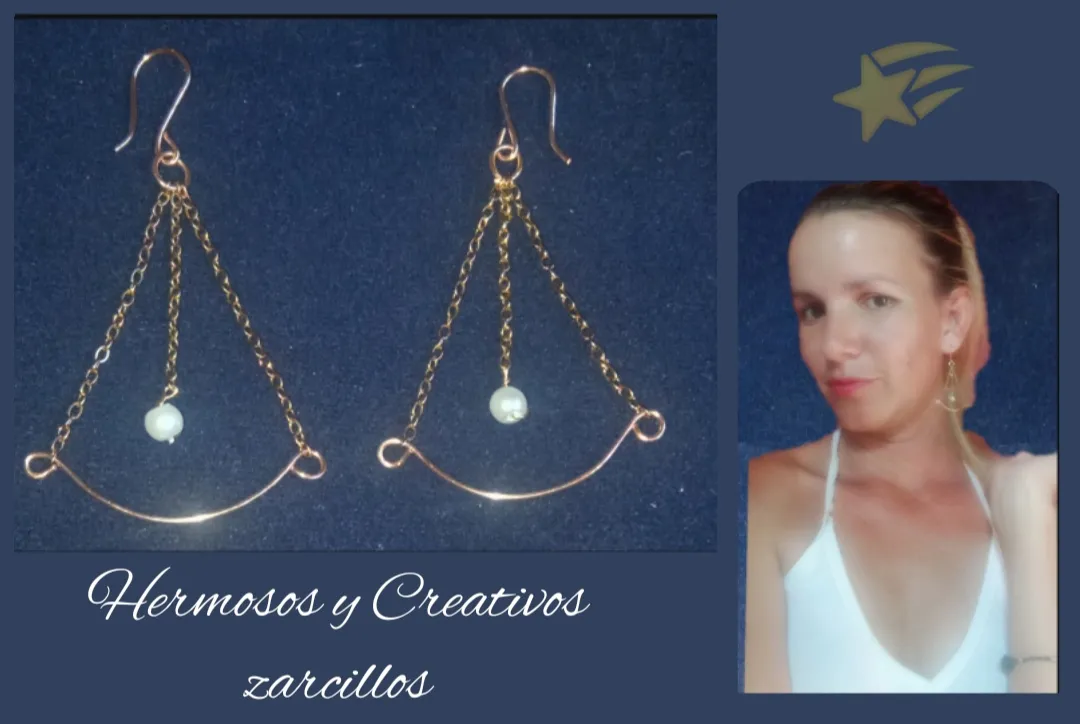
Feliz y bendecido día tengan todos, sean todos bienvenidos a mi blog, es un placer el día de hoy volver a compartir con ustedes una de mis más recientes creaciones, se trata de unos hermosos pendientes largos de gran elegancia ideales para lucir en cualquier ocasión especial. Es un diseño muy sencillo y fácil de elaborar, y con Muy pocos materiales, en mi caso recicle una cadena que se partió hace un tiempo.
Happy and blessed day everyone, welcome to my blog, it is a pleasure today to share with you one of my most recent creations, it is about beautiful long earrings of great elegance, ideal to wear in any special occasion.
It is a very simple design and easy to make, and with very few materials, in my case I recycled a chain that broke a while ago.
For all of you I created and wanted to share with you this very simple tutorial, hoping that it may be useful to you.
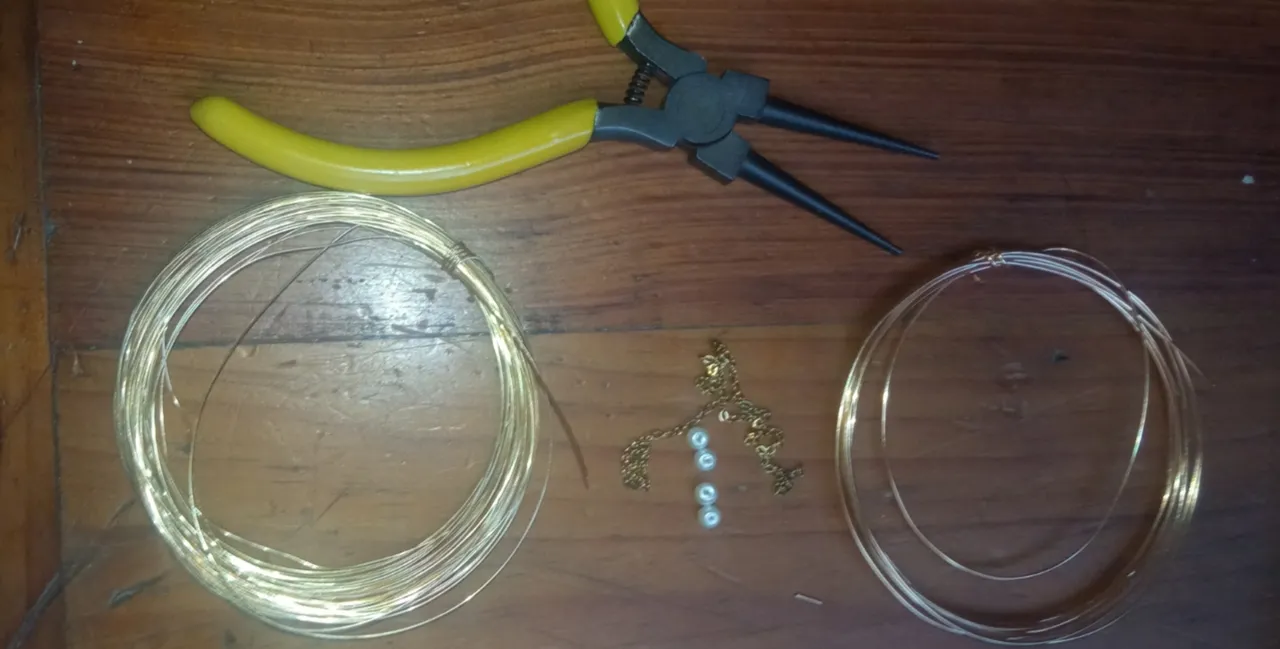
- 40cm de cadena delgada.
- Alambre de bisutería calibre 20.
- alambre de bisutería calibre 26.
- Piedra perlada blanca.
- pinza de bisutería
- 40cm of thin chain.
- 20 gauge jewelry wire.
- 26 gauge jewelry wire.
- White pearl stone.
- jewelry clip
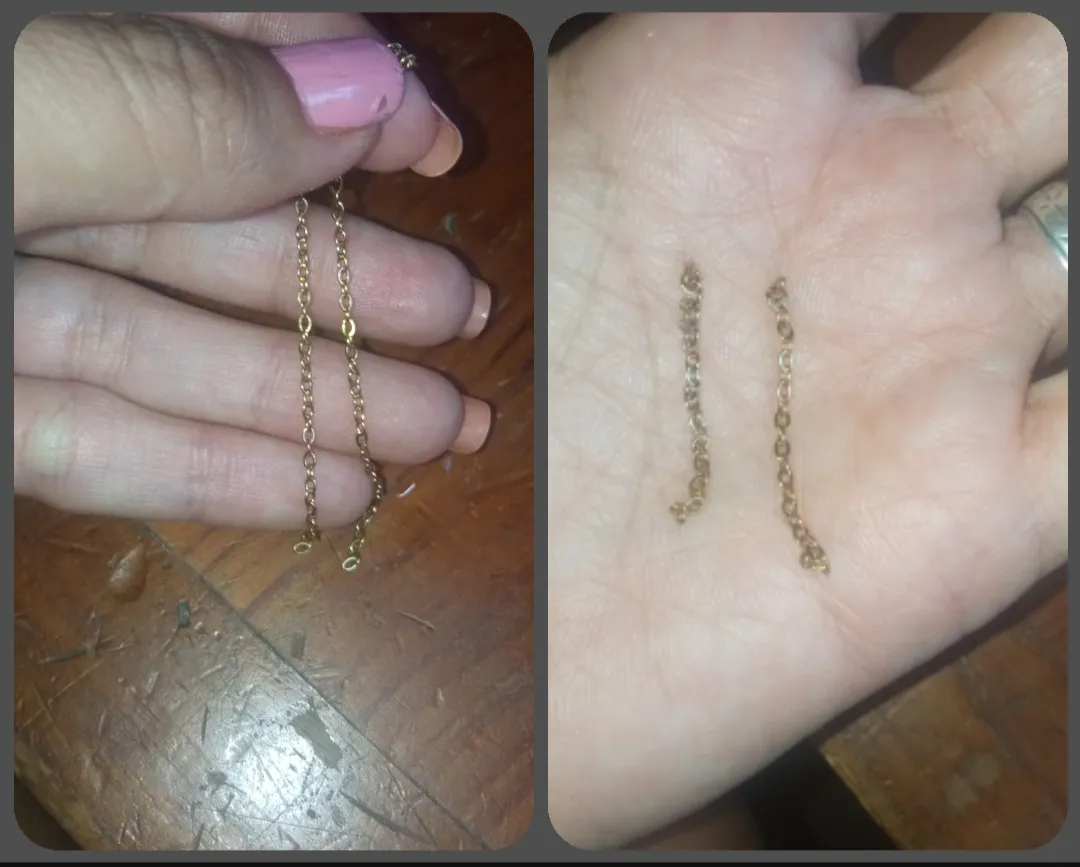
✴️ Paso 1: para iniciar la elaboración de nuestro hermoso diseño pueden observar que ya tengo la cadena por pedazos, pues como les comenté anteriormente estoy usando una cadena que se me partió en partes. Primeramente tome la primera parte que tenía un tamaño de 8cm y lo piqué a la mitad quedando dos pedazos de 4cm, y tome un pedacito más pequeño de 3cm y lo uni a estos, ahora tenemos tres pedazos (dos pedazos de 4cm y uno de 3cm)
✴️ Step 1: to start the elaboration of our beautiful design, you can see that I already have the chain in pieces, because as I mentioned before I am using a chain that broke into parts.
First, take the first part that had a size of 8cm and cut it in half, leaving two pieces of 4cm, and take a smaller piece of 3cm and join it to these, now we have three pieces (two pieces of 4cm and one of 3cm )
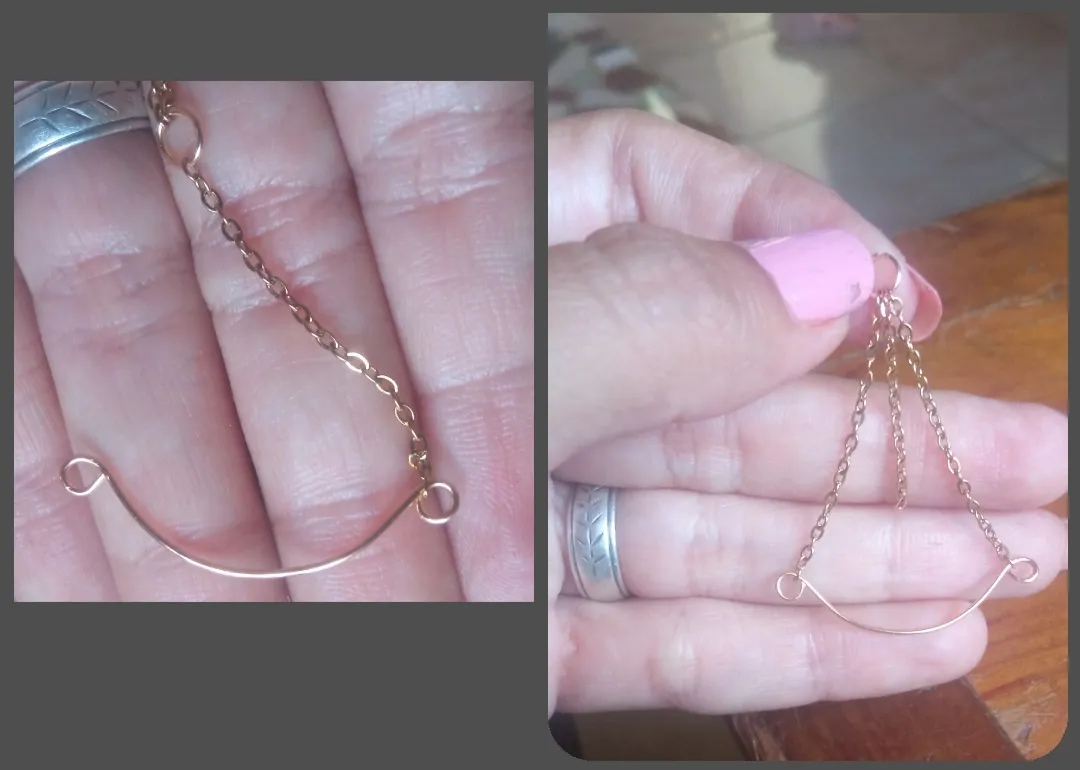
✴️ Step 2: to continue with a little piece of 20 gauge jewelry wire and the help of the pliers we will make a small circular ring, we will use this ring to join the chains, for this we will introduce the end of each piece of chain through this ring, We start with a 4cm one, then the 3cm one and finally the other 4cm piece and we close the ring.
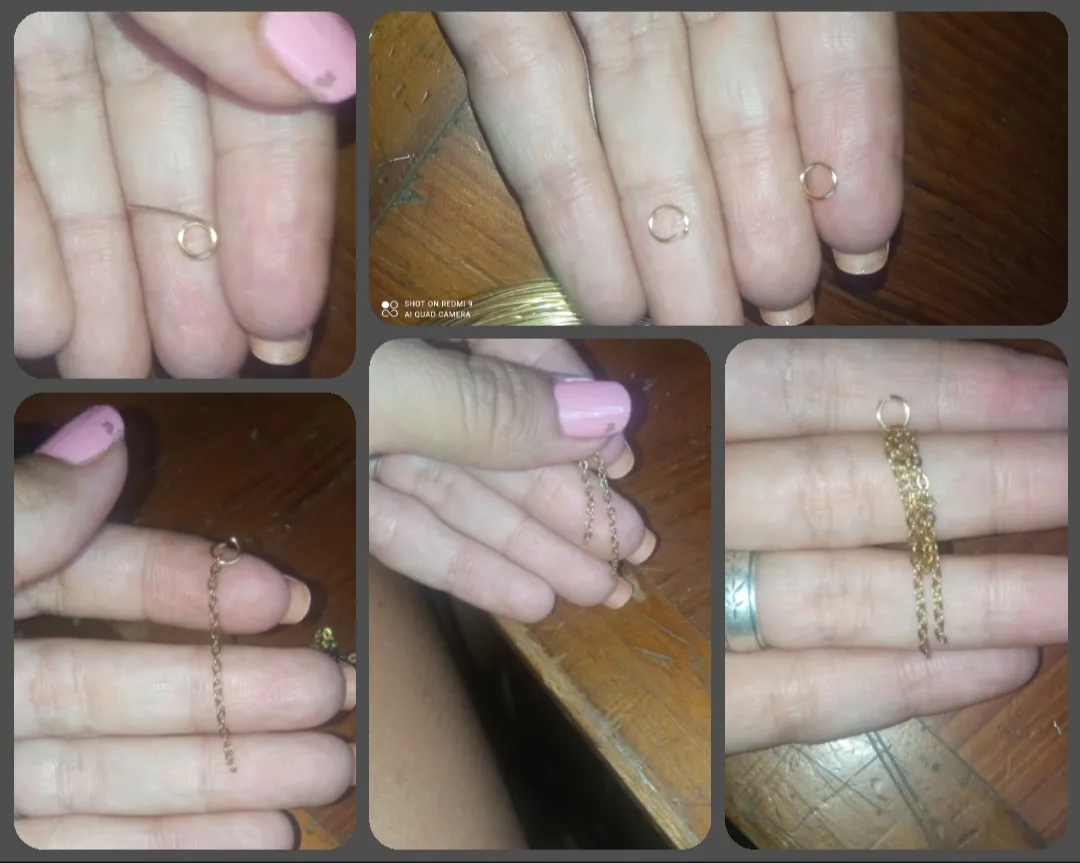
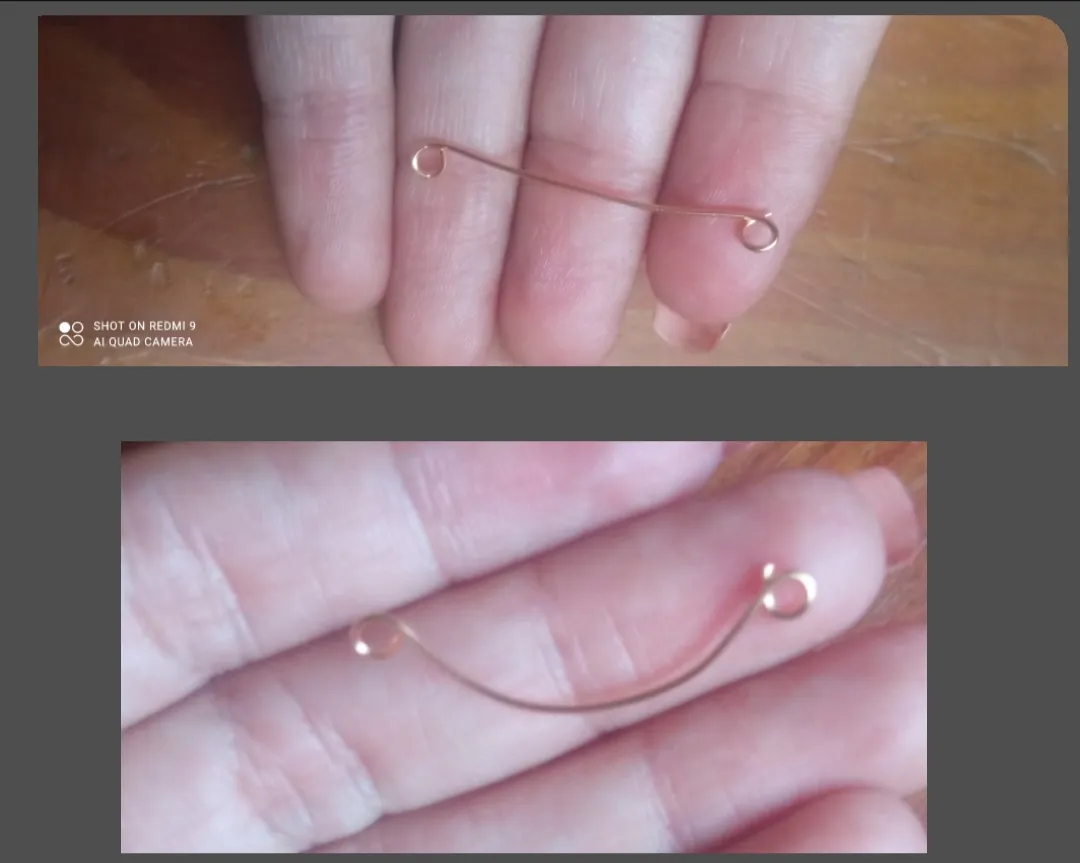
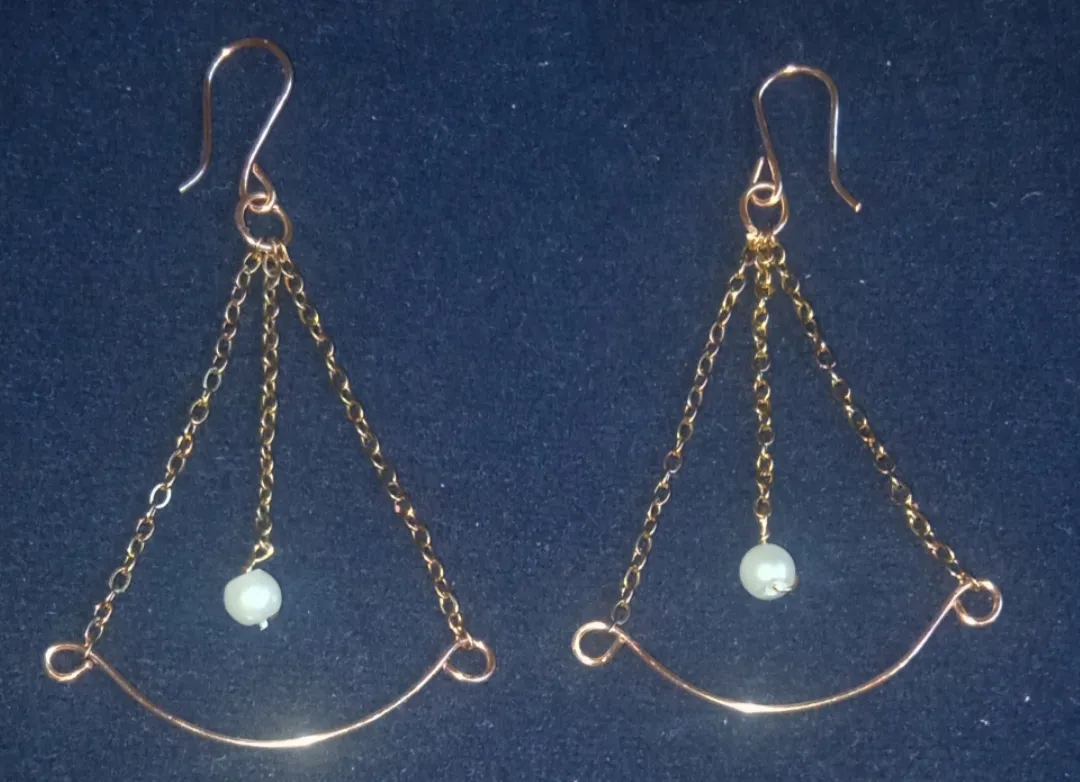
✴️ Paso 3: Seguidamente tomamos un pedazo de alambre de bisutería calibre 20 de 5cm y con la pinza realizamos un dobles tipo argolla en cada extremo y luego moldearemos esta pieza realizado una forma de onda. Está pieza la uniremos a los pedazos de cadena para ello Introduciremos la punta de la primera cadena (de 4cm) por uno de los dobles que realizamos en los extremos de esta última pieza, de igual manera Introducimos el último pedacito de cadena (de 4cm) por la parte final de esta pieza con forma de onda, y nos quedará tipo pirámide y la cadenita de 3cm en el centro.
✴️ Step 3: Next we take a piece of 20-gauge 5cm costume jewelry wire and with the pliers we make a double ring type at each end and then we will shape this piece into a wave shape.
We will join this piece to the pieces of chain. To do this, we will introduce the tip of the first chain (4cm) through one of the doubles that we make at the ends of this last piece, in the same way we will introduce the last bit of chain (4cm) for the final part of this wave-shaped piece, and we will have a pyramid type and the 3cm chain in the center.
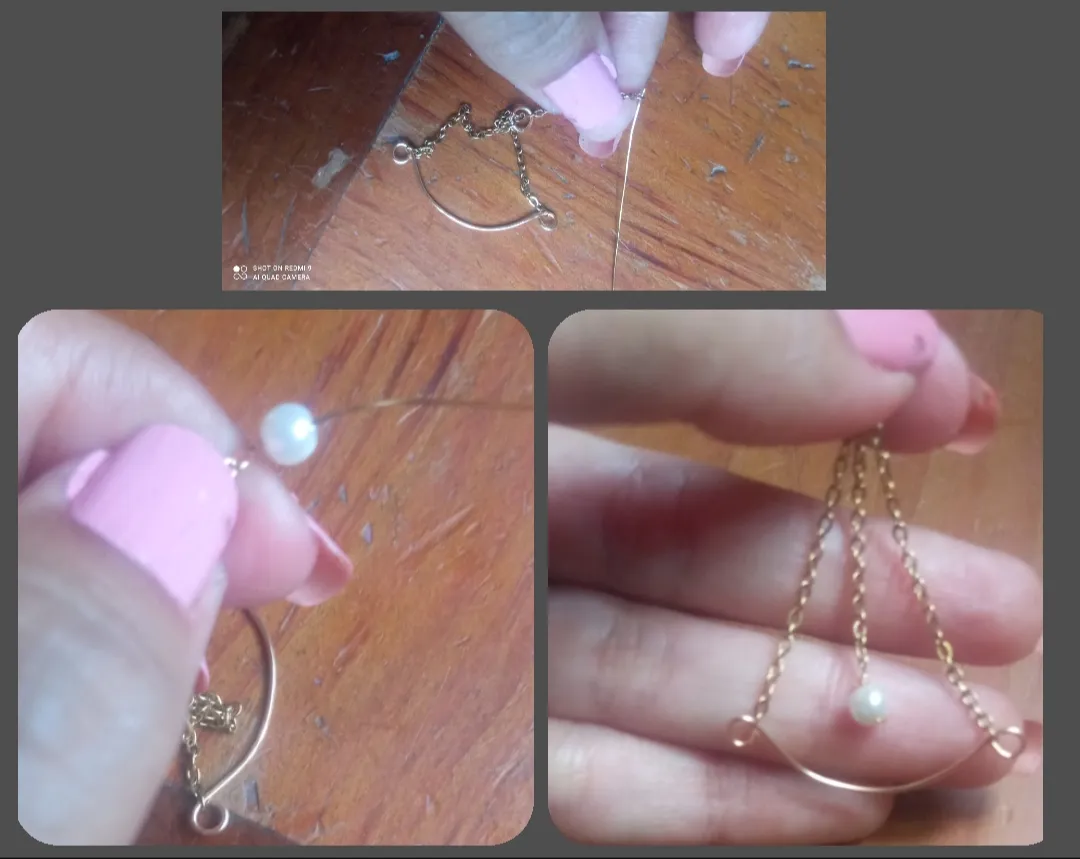
✴️ Paso 4: Luego tomaremos un pedazo de alambre de bisutería calibre 26 y lo sujetámos de la punta de esta cadenita de 3cm, por este alambre Introducimos una piedra perlada pequeña y doblamos el alambre hacia arriba para enrrollar en su parte superior para sujetar bien la piedra.
✴️ Step 4: Then we will take a piece of 26 gauge jewelry wire and we will hold it from the tip of this 3cm chain, through this wire we will introduce a small pearl stone and we will bend the wire upwards to wind it in its upper part to hold the stone well.
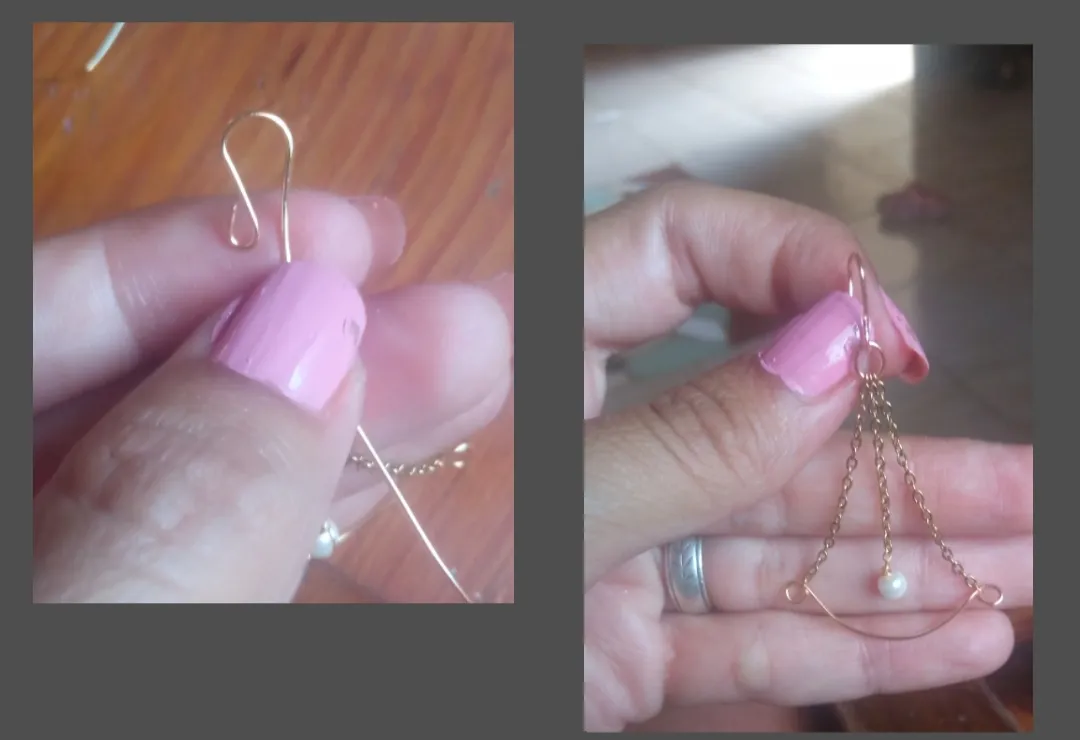
✴️ Paso 5: por último con un pedacito de alambre de bisutería calibre 20 realizaremos el anzuelo para zarcillos y lo uniremos a nuestra pieza sujetandolo por su argolla superior. Ya solo repetiremos el proceso para lograr realizar el par de estos zarcillos.
✴️ Step 5: finally, with a piece of 20-gauge costume jewelry wire, we will make the hook for tendrils and we will join it to our piece, holding it by its upper ring.
Now we will only repeat the process to achieve the pair of these tendrils.
Todas las Fotos son de mi autoría y fueron tomadas con mi Celular Redmi 9And so in a very simple and creative way we can recycle those pieces of chains and make a new accessory to look beautiful, if not we can also get the chain by the meter in jewelry stores, very cheap.
Dear friends, I say goodbye for this opportunity thanking you for your visit, it will be until a next opportunity.
Greetings and blessings.
All Photos are my authorship and were taken with my Redmi 9 Cellphone