This content was deleted by the author. You can see it from Blockchain History logs.
Concurso Diyhub (Abeja porta notas)Hecha con retazos de tela y cartón. ESP/ENG. Diyhub Contest (Bee note holder)Made with scraps of fabric and cardboard.


Buenas noches y bienvenidos sean todos a mi Blog!
Cómo están?
Yo muy contenta de poder participar en el Concurso dedicado a las Abejas, por eso hoy te compartiré mi tutorial y en el te mostraré como hacer con retacitos de telas, cartón y otros materiales fáciles de conseguir, una linda abejita decorativa a la cual le di utilidad, sí!, como lo ves, te servirá como porta notas, fotos, tarjetas o simplemente un adorno, igualmente puedes crear algo parecido o a tu gusto.
Entonces te invito a que me acompañes a ver como se hace y si te animas a realizar conmigo, ubiques lo siguiente:

| Retazos de: Tela, esponja, cartón y cartulinas | Relleno |
|---|
| Tronco | Alambres |
| Pinturas y pinceles | Flores |
| Silicón | Tijera |
| Limpia pipa | Cinta de tela |
| Dibujo | Tiza |
Comencemos:
Paso 1:

- Recorta el cuerpo de la abejita, luego marca todo el contorno del dibujo sobre el cartón y recorta, ahora recorta en la goma espuma la cabeza y el cuerpo separados, aplica silicón sobre el cartón y pega la goma espuma.
- Después recorta en tela la cabeza y cuerpo pero aumentando 1,5cm, aplica silicón eb la parte trasera del cuerpo y comienza a pegar halando la tela para que quede bien estirada, haciendo pequeños pliegues como se muestra en la foto.
Paso 2
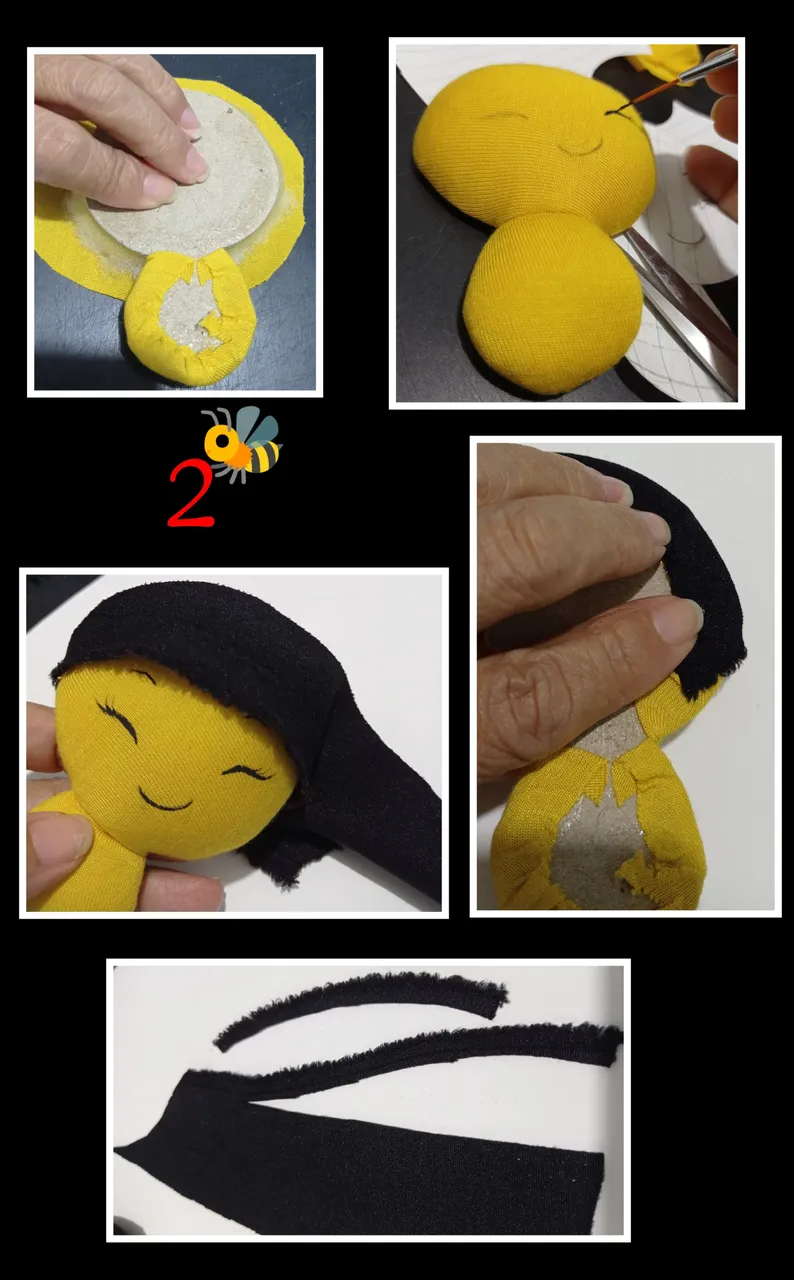
- Ahora repite el paso anterior y forra la cabeza.
- Con pincel 00, pinta los ojos, boca y deja secar.
- Coloca una tira de tela negra, si tiene orilla coloca en la frente para que semeje los pelos de la abejita, aplica silicón, pega y recorta el sobrante.
- Ahora recorta más orillas de la tela en tiras delgadas.
Paso 3:

- Aplica silicón en las tiras y pega en el cuerpo de la abejita.
- Aparte recorta alas doradas y 4 círculos, después con el limpia pipas da forma a las antenas y pega los círculos en los extremos por ambos lados.
- Pega en la parte trasera de la cabeza y marca el cuerpo en foami negro, recorta y pega para cubrir los detalles de imperfecciones.
- Arma un lazo de tela y pega para decorar, también pega las alas y pinta las mejillas.
Paso 4:
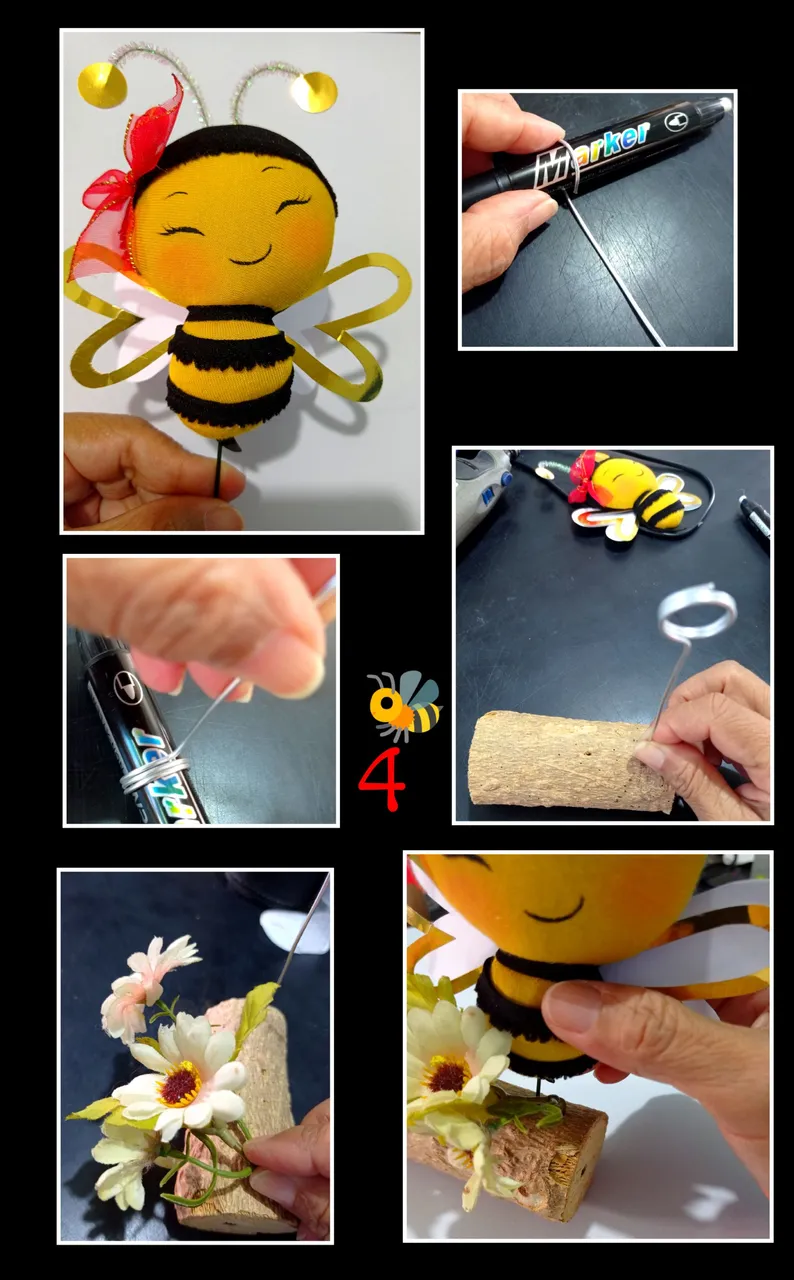
- Inserta en la parte de abajo de la abejita un alambre.
- Aparte enrolla un pedazo de alambre dando 3 vueltas a un marcador tratando que queden bien pegadas y del mismo tamaño.
- Recorta al tamaño deseado y luego con un clavito haz un pequeño orificio en el tronco e inserta aplicando un poco de silicón para que pegue bien.
- Luego pega las flores para decorar el tronco y luego inserta el alambre al tronco para fijar la abeja.
Paso 5:

- Termina pegando hojas o follaje.
- Por último escribe una nota en un papel.

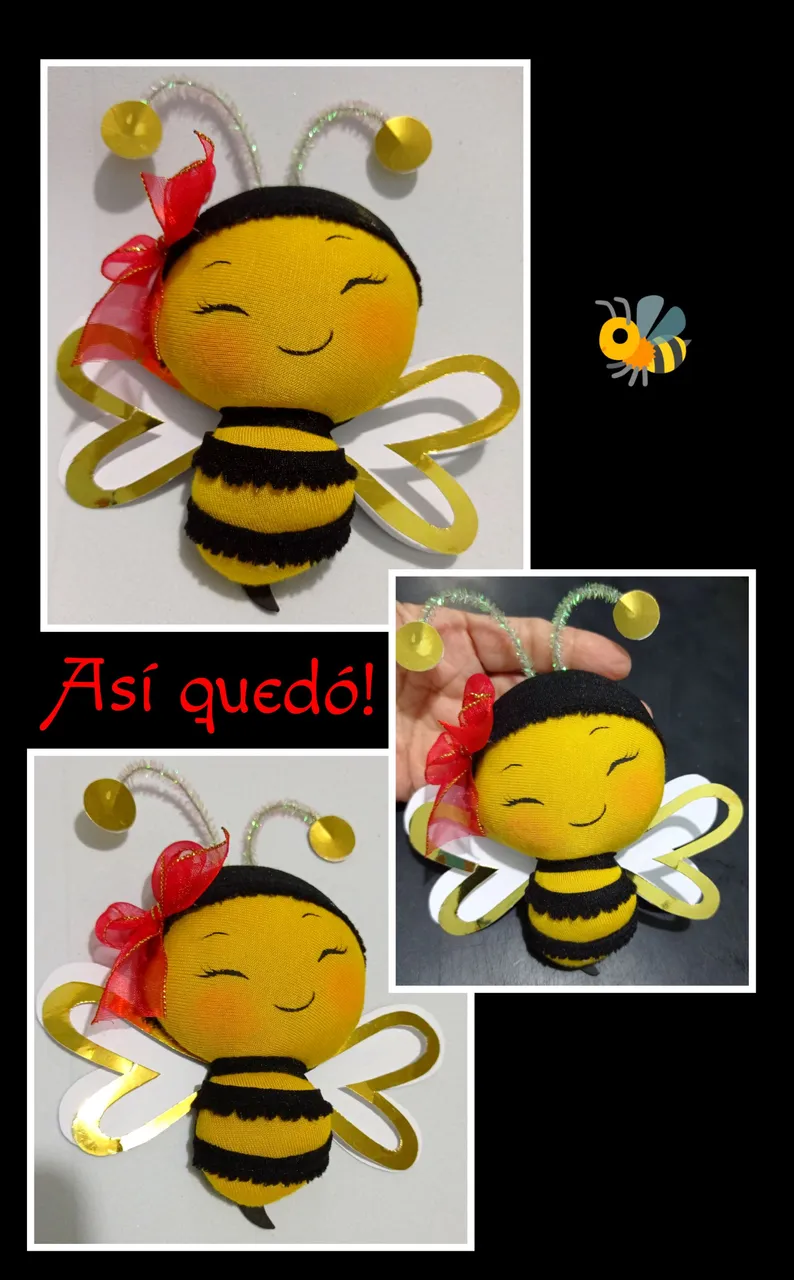
Así quedó listo nuestro trabajo, una Linda abejita Porta Notas.
Mi tutorial está traducido con DeepL.
Editado con Etiquetas HTML.
Teléfono: Redmi Note 9
Editor de fotos: GridArt.
Ahora te comparto otras fotos para que veas como se vé!
**
Y llegó la hora de despedirme no sin antes invitarlos a que se unan @belkiscabrera, @gladymar y participen en este Concurso dedicado a las abejas.
Cuidemos de ellas y de nuestro planeta, tomemos su ejemplo!
Gracias por tu apoyo y visita.
English:
Good evening and welcome to my Blog!
How are you?
I am very happy to be able to participate in the contest dedicated to bees, so today I will share with you my tutorial and in it I will show you how to make with scraps of fabric, cardboard and other easily available materials, a cute little decorative bee to which I gave a utility, yes, as you can see, it will serve as a note holder, photos, cards or just an ornament, you can also create something similar or to your liking.
Then I invite you to join me to see how it is done and if you dare to do it with me, locate the following:
| Pieces of: Cloth, sponge, cardboard and cardboard | Filling |
|---|
| Trunk | Wires |
| Paints and paintbrushes | Flowers |
| Silicone | Scissors |
| Pipe cleaner | Pipe cleaner | Cloth tape |
| Drawing | Chalk |
Let's begin:
Step 1:
- Cut out the body of the little bee, then mark all the outline of the drawing on the cardboard and cut it out, now cut the head and the body separately on the foam rubber, apply silicone on the cardboard and glue the foam rubber.
- Then cut the head and body out of the fabric, but increasing the size by 1.5 cm, apply silicone to the back of the body and start gluing by pulling the fabric so that it is well stretched, making small folds as shown in the photo.
Step 2
- Now repeat the previous step and line the head.
- With a 00 brush, paint the eyes, mouth and let dry.
- Place a strip of black fabric, if it has a border, place it on the forehead to resemble the bee's hair, apply silicone, glue and trim the excess.
- Now cut more fabric edges into thin strips.
Step 3:
- Apply silicone to the strips and glue to the body of the bumblebee.
- Cut out gold wings and 4 circles, then shape the antennae with the pipe cleaner and glue the circles at the ends on both sides.
- Glue on the back of the head and mark the body in black foami, cut out and glue to cover any imperfections.
- Assemble a fabric loop and glue to decorate, also glue the wings and paint the cheeks.
Step 4:
- Insert a wire at the bottom of the bee.
- Separately roll up a piece of wire giving 3 turns to a marker trying to get them well glued and the same size.
- Cut to the desired size and then with a small nail make a small hole in the trunk and insert it applying a little silicone so that it sticks well.
- Then glue the flowers to decorate the trunk and then insert the wire to the trunk to fix the bee.
Step 5:
- Finish by gluing leaves or foliage.
- Finally write a note on a piece of paper.
That's the end of our work, a cute little bee note holder.
My tutorial is translated with DeepL.
Edited with HTML Tags.
Phone: Redmi Note 9
Photo Editor: GridArt.
Now I share with you other photos so you can see how it looks like!
**
And it's time to say goodbye but not before inviting you to join @belkiscabrera, @gladymar and participate in this contest dedicated to the bees.
Let's take care of them and our planet, let's take their example!
Thanks for your support, visit and good luck!