Hello Hive family. I hope you are doing well, it is always a pleasure to greet you. To be able to give smiles to the people we love is undoubtedly one of the pleasures of life.
But also to be able to organize these gifts from simple materials is also an easy, economical and versatile way to give smiles.

Today I want to show you the step by step of a surprise box that I made for my niece on her birthday. I hope you like it!
I used a basic but nice shape to make this box.
Materials
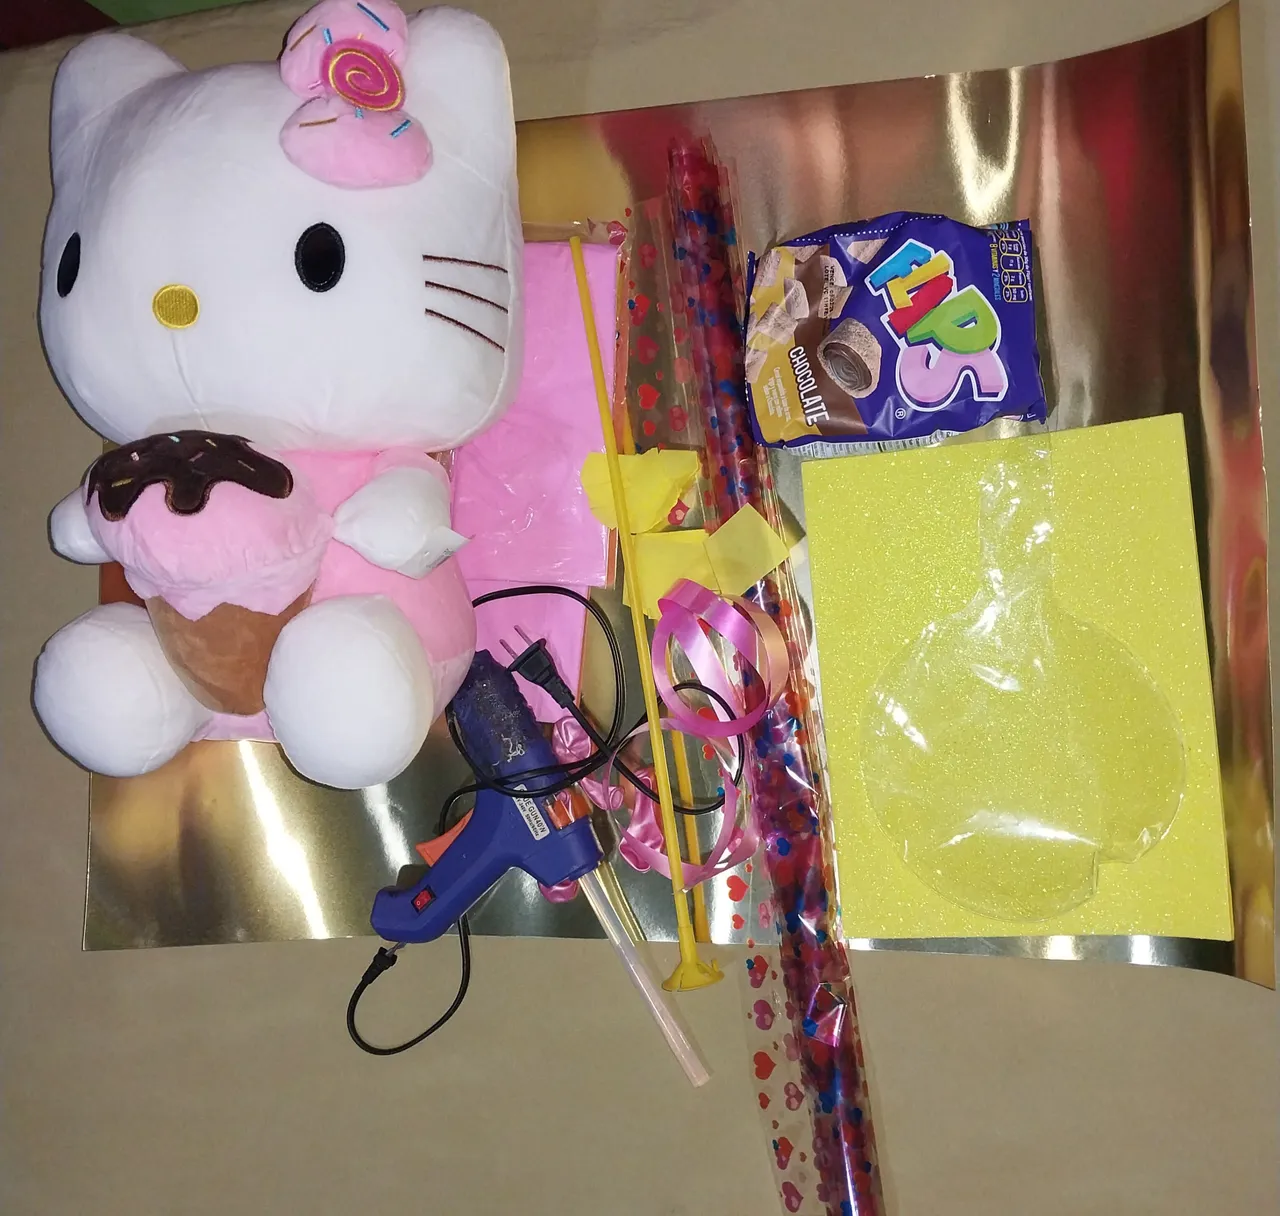
- 35 cm stuffed animal
- Metallic cardboard
- Silicon gun
- Scissors
- Ruler
- Yellow, green and pink grepé paper
- Height sticks
- Anime
- pink ribbon
- Wrapping paper
- Balloons
Step by Step
1
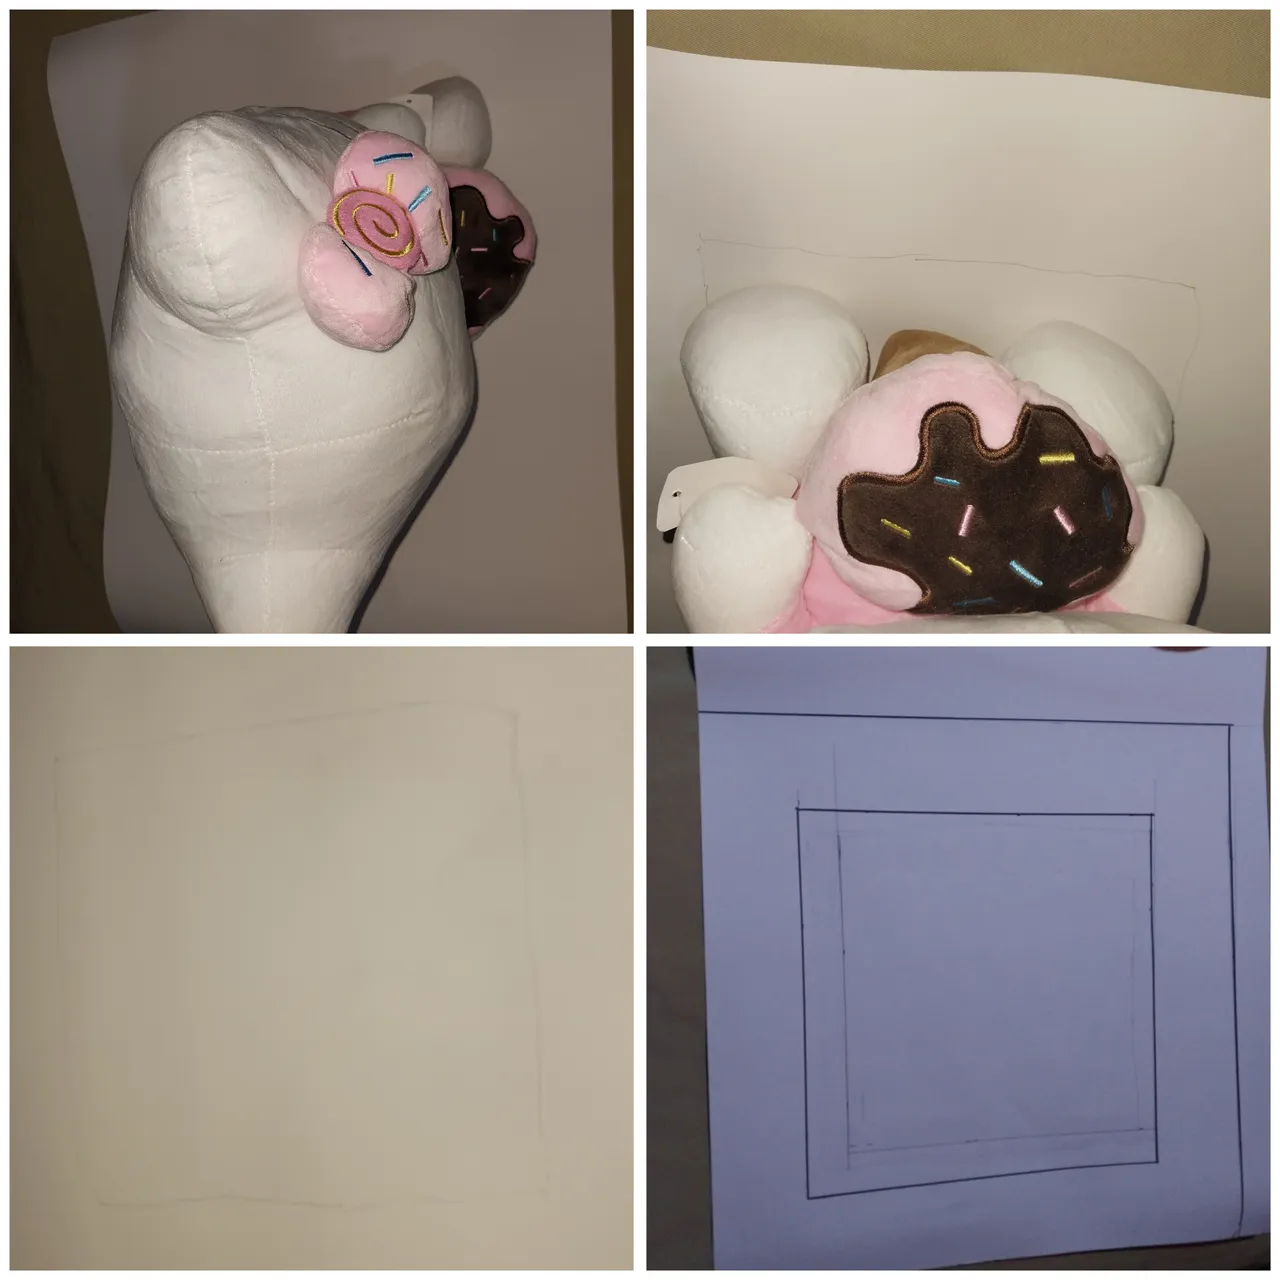
I started making the box, for this I placed the stuffed animal on the cardboard and proceeded to observe the dimensions that it occupied on the cardboard, also with the help of a pencil I drew a freehand picture of the proportion of the stuffed animal on the cardboard.
Then with the help of the ruler we make a perfect square, this square is 30 X 30 cm so that the stuffed animal fits perfectly and also the decorations and candies can fit comfortably in the box.
Then we draw a margin of 6 cm to the square.
2
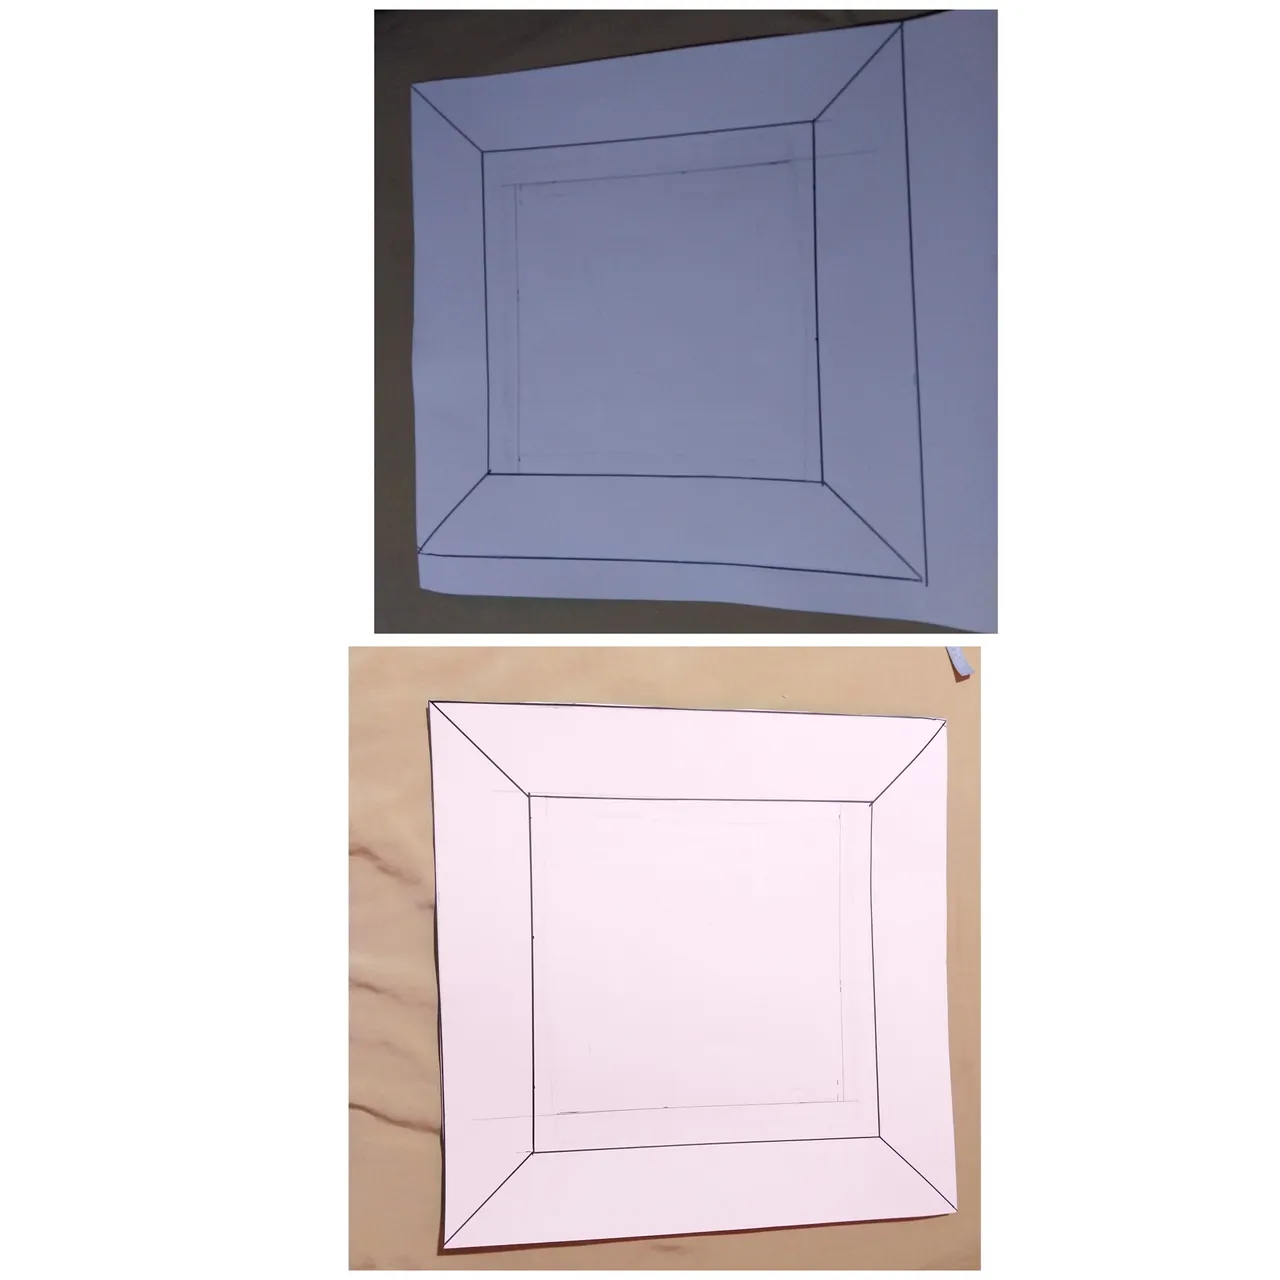
Then we join through a diagonal line the vertex of the square with the vertex of the margin. At its four points.
3
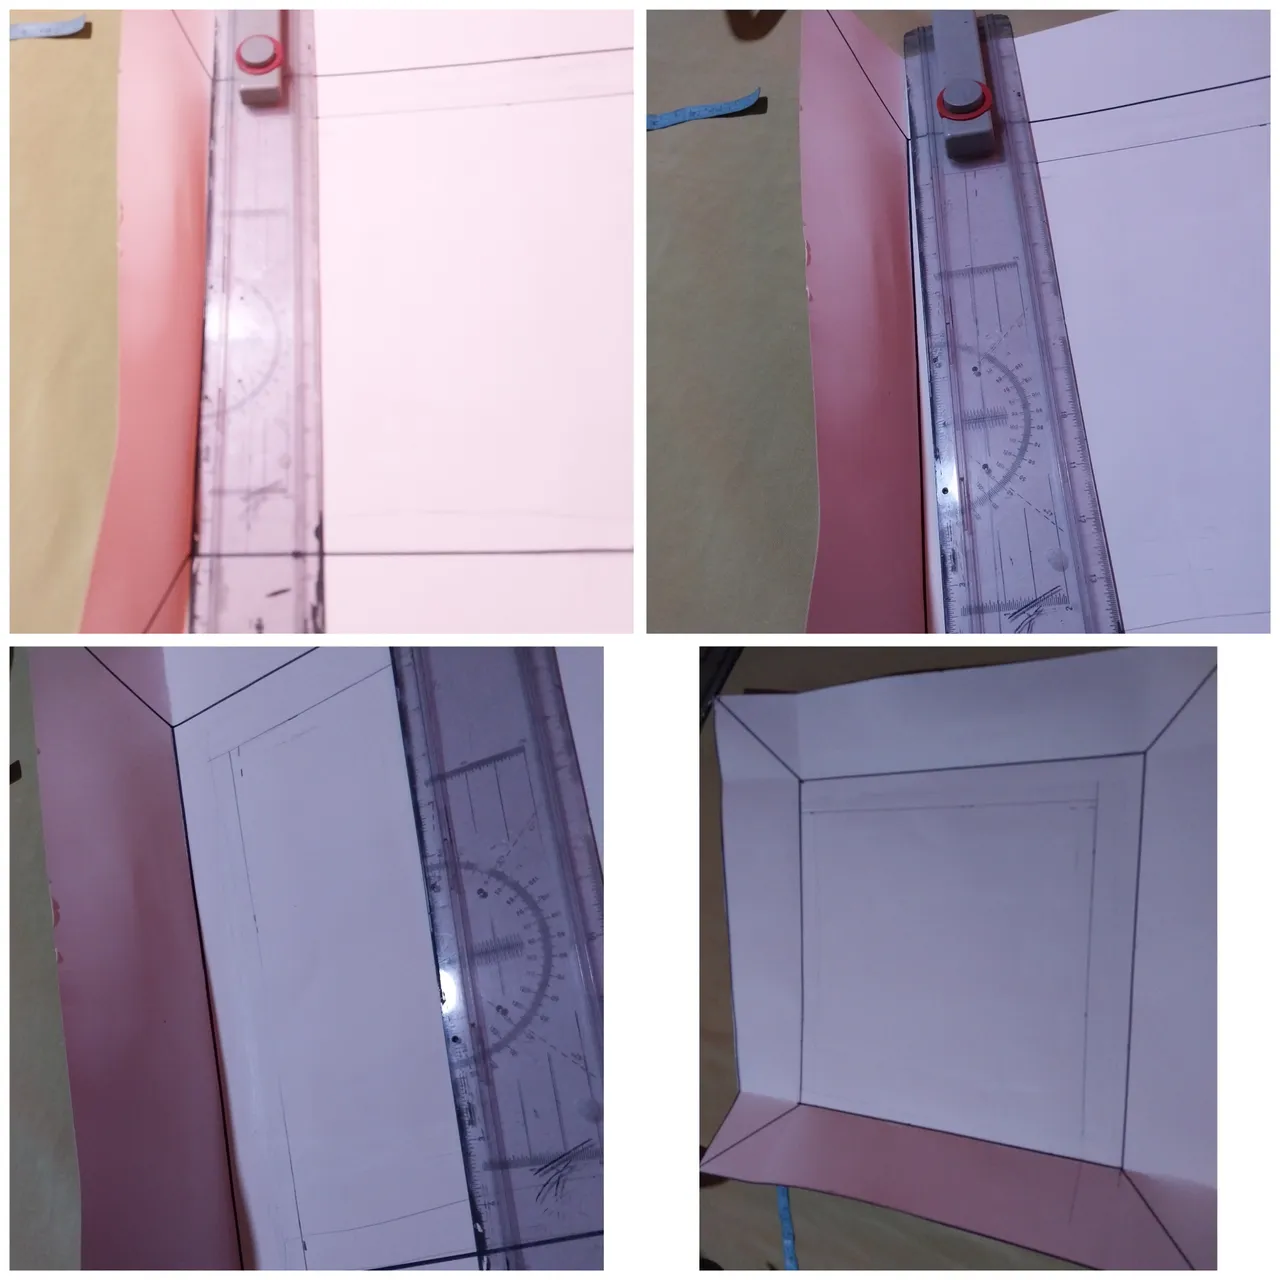
Then we take the ruler and proceed to bend the lines of the base square. In its 4 points we do the same
4
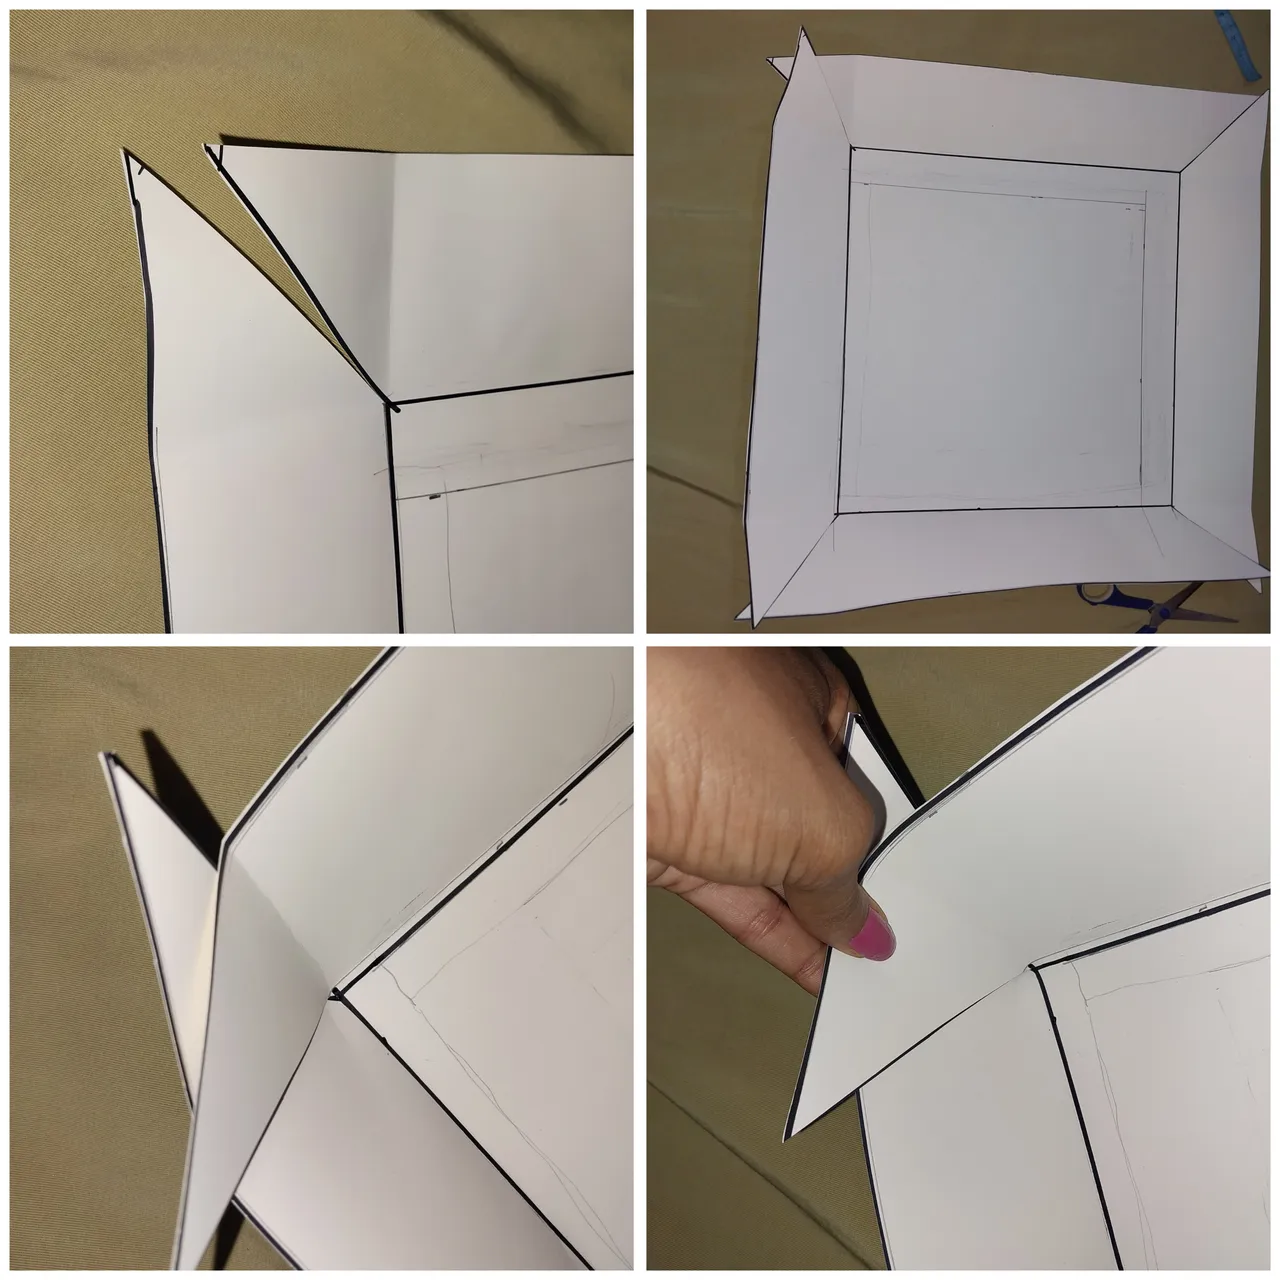
Then we must cut these lines at each of the tips to where the diagonal line ends.
Once we cut we would have triangular endings. We are going to superimpose these ends with the side of the other wall and with a little silicone we proceed to glue these.
5
This would be the result of the 4 ends glued one on the wall of the other would give us as a result a nice box.
6
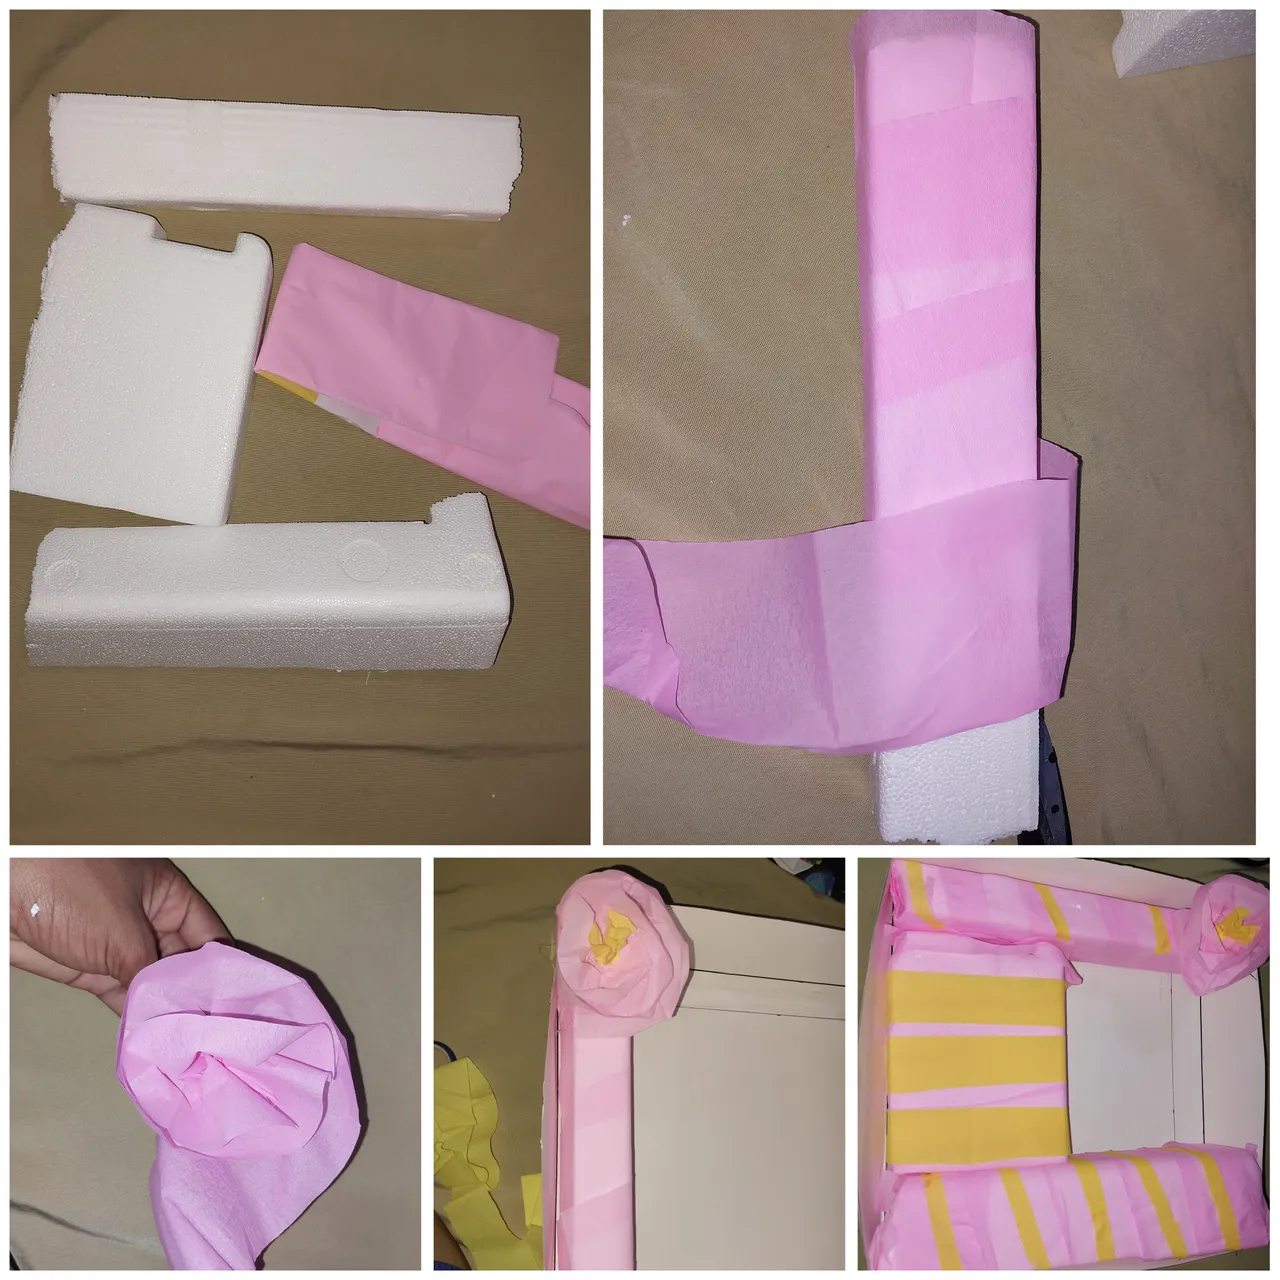
Next we use grepé paper ribbons to wrap some anime pieces. We used two pieces taking the measurements of the sides of the box lengthwise and with a width of 5 cm. Then we use a square of 12 cm X 12 cm to form the anime square. We also proceed to line it with the pink grepé paper. And we add ribbons of yellow pink paper interspersed with the pink color.
Also taking a pink grepe paper ribbon we proceed to roll and make a small pink flower. We glue it on the corners of the anime.
7
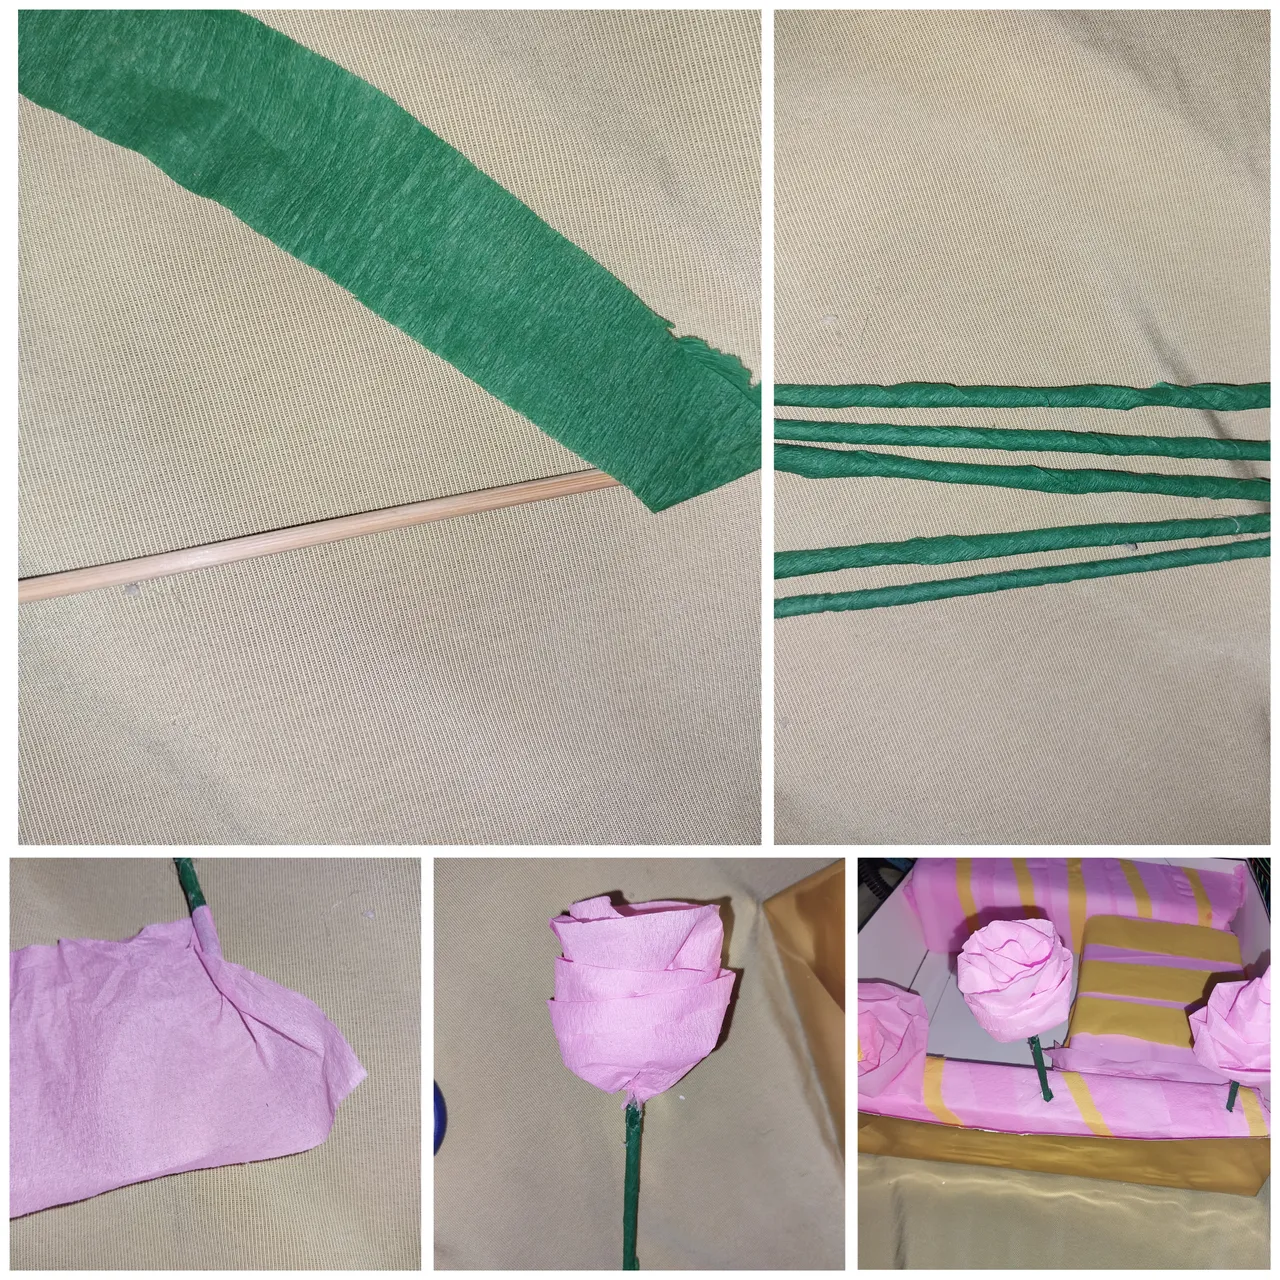
Then we line the height sticks with green grepe paper and then taking a grepe paper ribbon we make small roses.
8
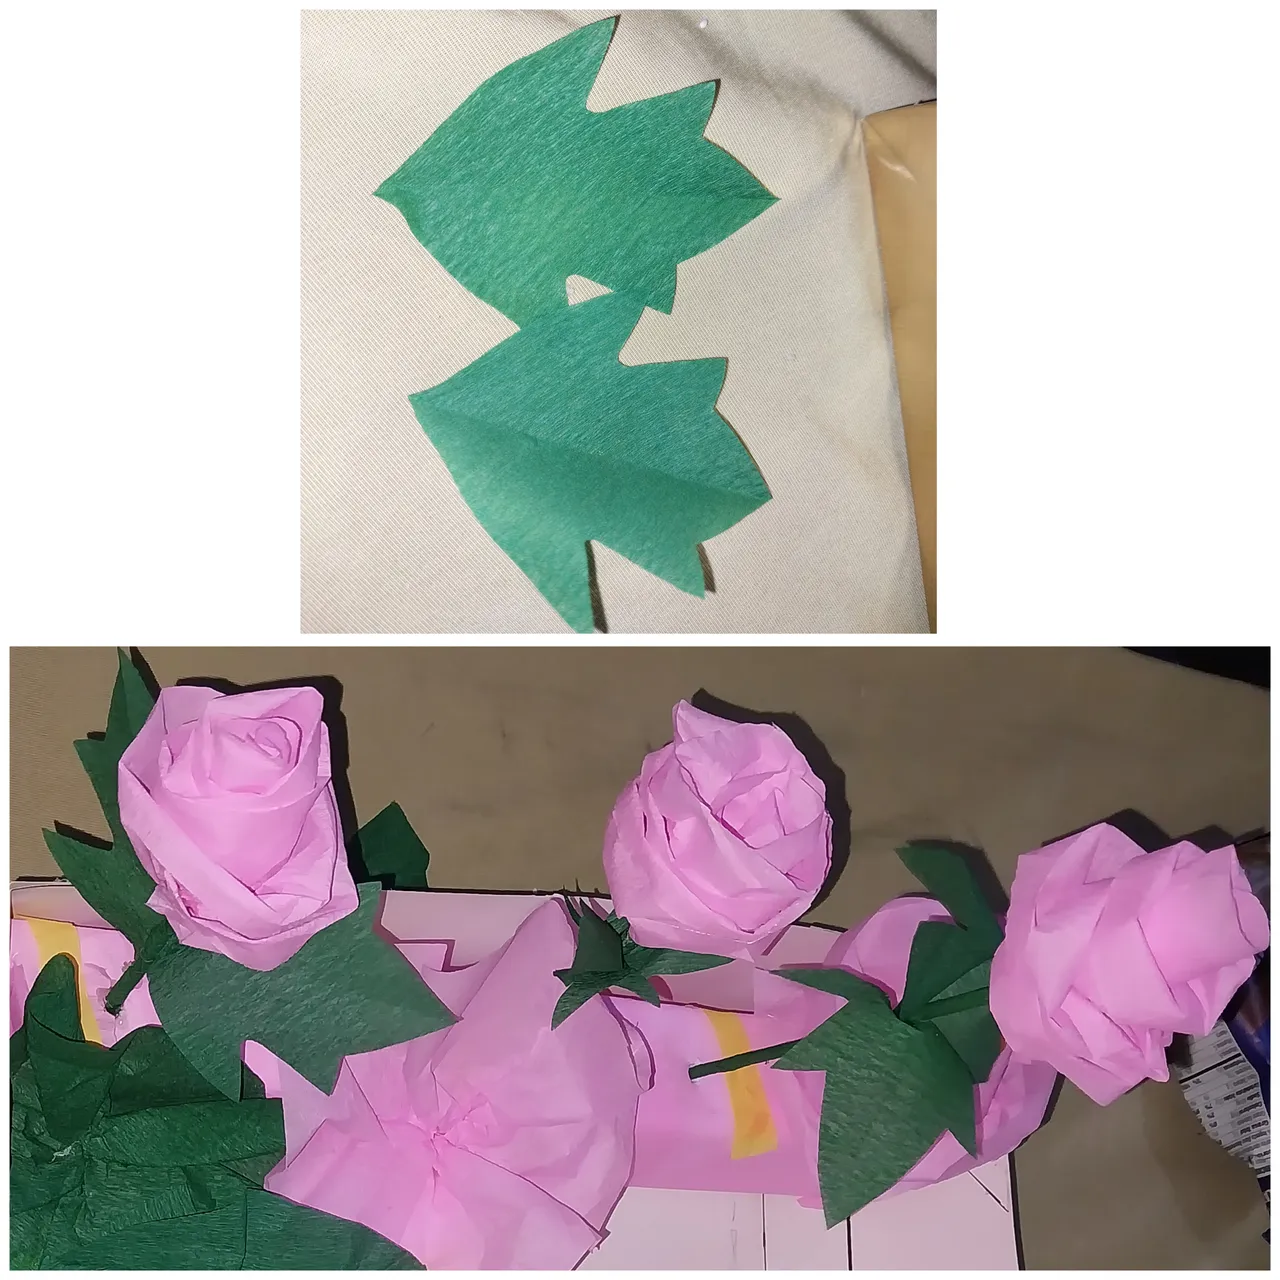
Then we make two green leaves and glue them on each height stick.
9
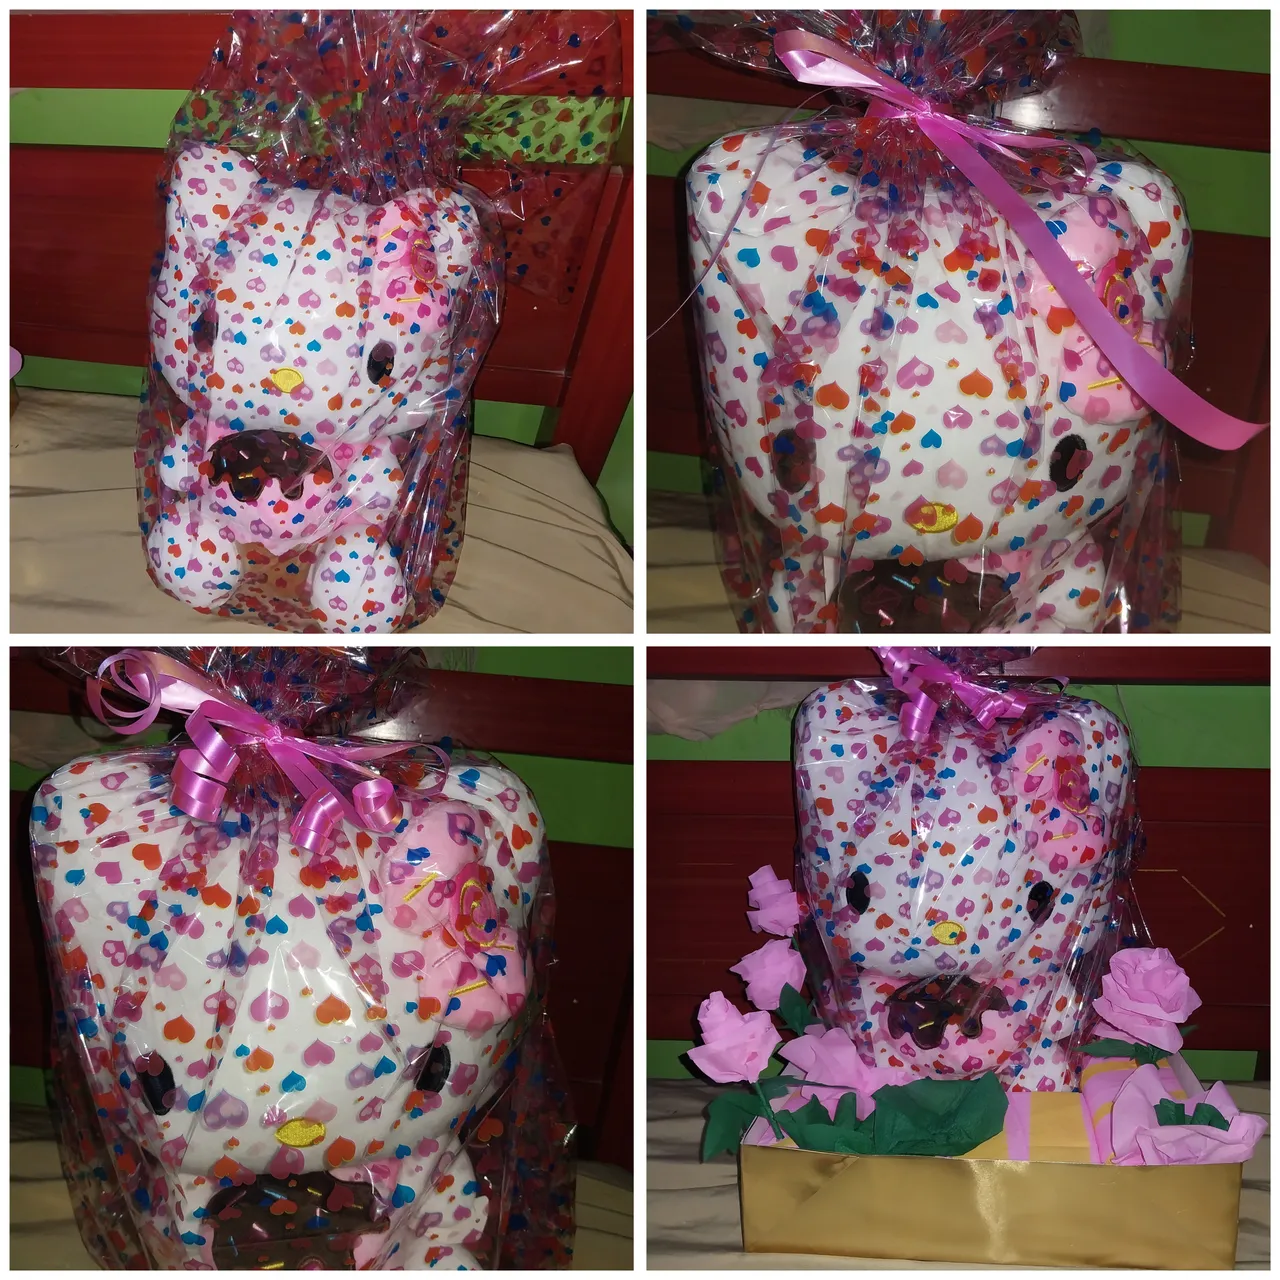
Finally we take the wrapping paper, in this case I used 2 meters to wrap the stuffed animal, we use tape to stick the paper and on the top we use the pink ribbon, we make a knot and proceed to make a bow.
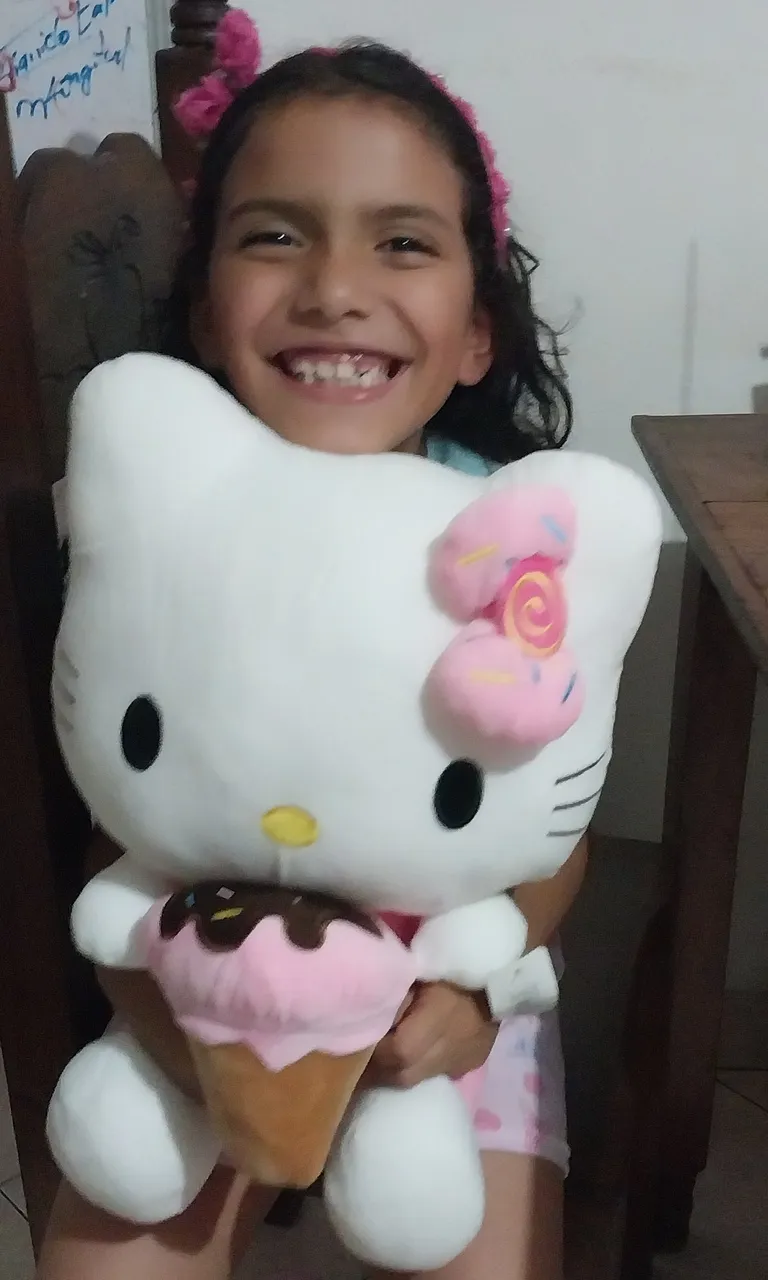
We place the stuffed animal in the basket or box just in the space we have left. And this is the result.
We can add candies, cookies, sweets, fruits, chocolates and any other element. Since the box is quite big.
I have chosen some candies and sweets plus some delicious apples. It would be nice to boost giving fruits to children in these gift baskets and decrease a bit the use of sweets and candies in children's food. So let's mix a little candy with a lot of fruit.
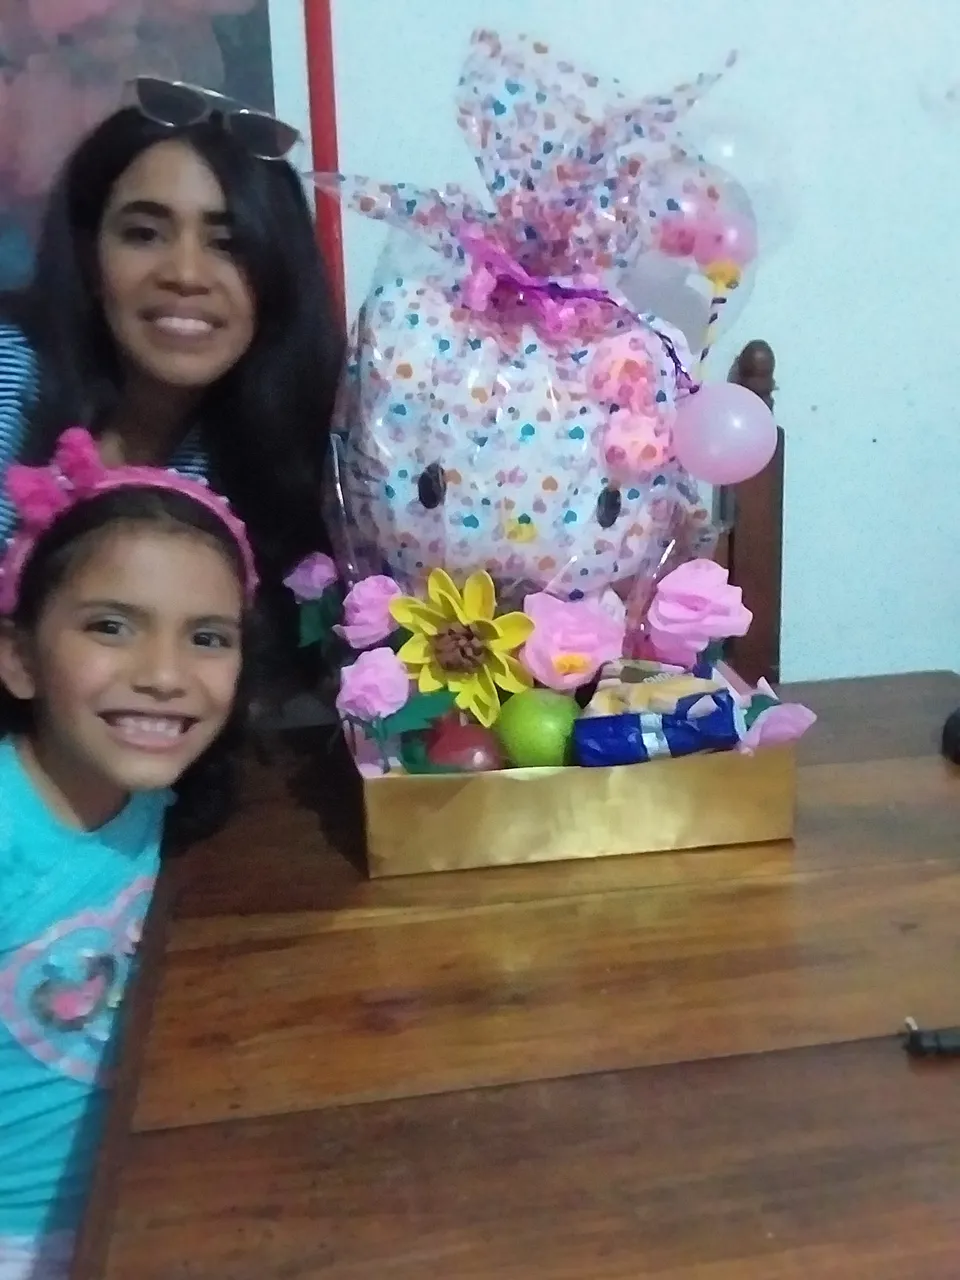
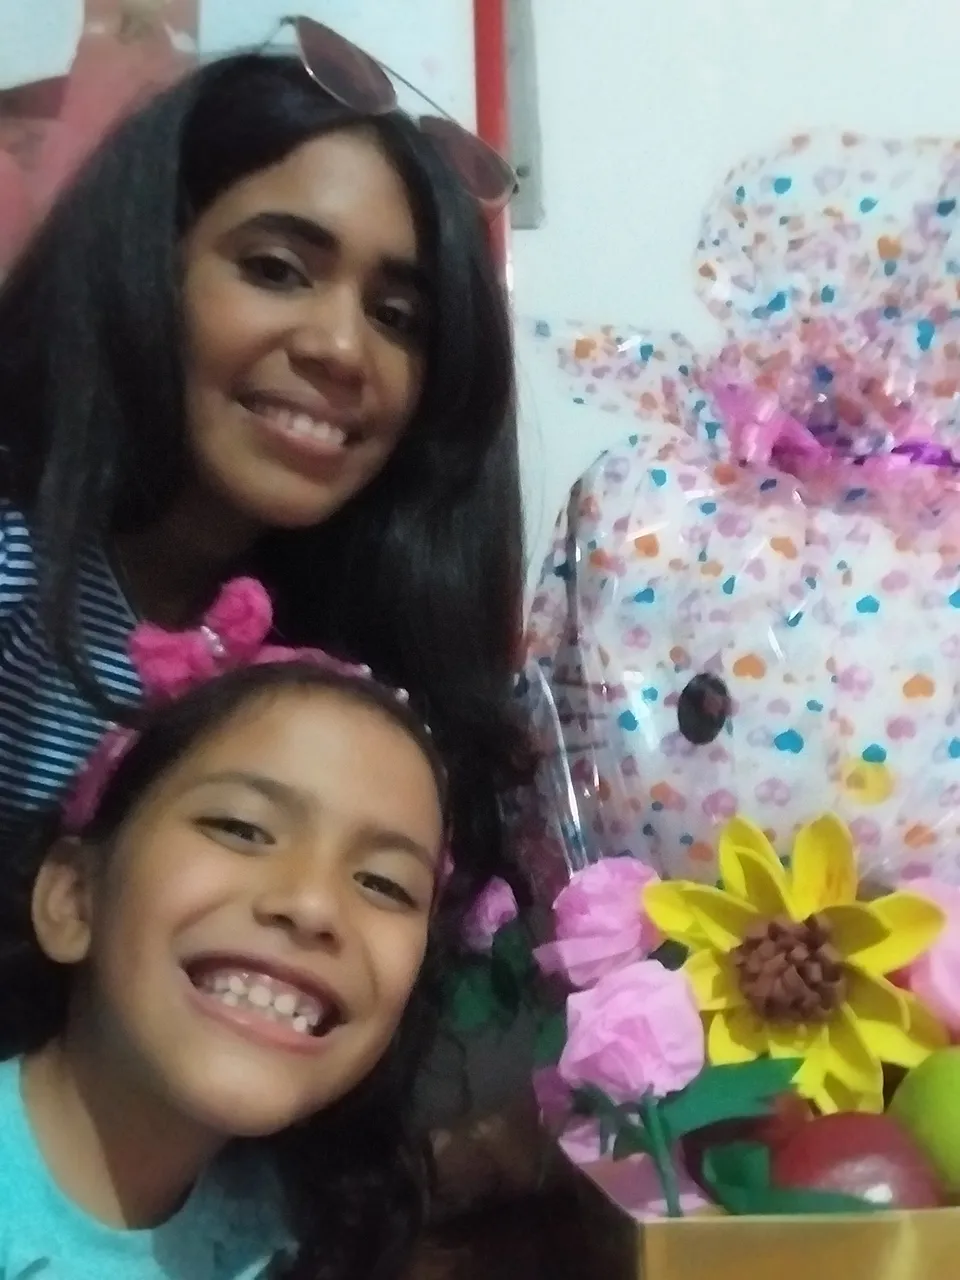
Here are some pictures of the surprise
surprise.
Thank you very much !
- Images belong to me
- Translator: Deepl Traslator
- Editing: Canva
Hola familia de Hive. Espero se encuentren muy bien, es un gusto saludarles siempre. Poder regalar sonrisas a las personas que amamos es sin duda alguna unos de los placeres de la vida.
Pero también poder organizar estos obsequios partiendo de materiales sencillos es también una forma fácil, económica y versátil de regalar sonrisas.
El día de hoy quiero presentarles el paso a paso de una caja sorpresa que he realizado a mi sobrina en su día de cumpleaños. Espero les guste!
Utilicé una forma básica pero bonita para armas esta caja.
Materiales
- Peluche de 35 cm
- Cartulina metalizada
- Pistola de Silicon
- Tijera
- Regla
- Papel grepé amarillo, verde y rosado
- Palitos de altura
- Anime
- cinta rosada
- Papel de regalo
- Globos
Paso a Paso
1
Inicié realizando la caja, para esto coloqué el Peluche sobre la cartulina y procedí a observar las dimensi9nes que este ocupaba sobre la cartulina, además con la ayuda de un lápiz dibujé un cuadro a mano alzada de la proporción del Peluche sobre la cartulina.
Luego con la ayuda de la regla hacemos un cuadrado perfecto, este cuadrado es de 30 X 30 cm de manera de que el Peluche entre perfectamente y que además las decoraciones y los dulces puedan introducirse cómodamente en la caja.
Trazamos luego un margen de 6 cm al cuadrado
2
Luego unimos a través de una línea diagonal el vértice.del cuadrado con el vértice del margen. En sus cuatro puntas.
3
Depues tomamos la regla y procedemos a doblar las líneas del cuadrado base. En sus 4 las hacemos lo mismo
4
Seguidamente debemos recortar estas líneas en cada una de las puntas hasta donde termina la línea diagonal.
Una vez que cortemos nos quedarías terminaciones triangulares. Estas terminaciones las vamos a sobreponer con el lado de la otra pared y con un poco de silicon procedemos a pegar estas.
5
Este sería el resultado de las 4 puntas pegadas una sobre la pared de la otra nos darías como.resultado una bonita caja.
6
Seguidamente utilizamos cintas de papel grepé para envolver algunas piezas de anime. Utilizamos dos piezas tomando las medidas de los lados de la caja a lo largo y con un ancho de 5 cm. Luego usamos un cuadrado de 12 cm X 12 cm para formar el cuadrado de anime. Este también lo procedemos a forrar con el papel grepé rosado. Y añadimos cintas de papel amarillo rosado intercalando el color rosado.
También tomando una cinta rosada de papel grepé procedemos a enrollar y hacer una flor rosada pequeña. Esta la pegamos en las esquinas del anime.
7
Luego forramos los palitos de altura con papel grepé verde y luego tomando una cinta de papel grepé hacemos rosas pequeñas.
8
Luego hacemos dos hojas verdes y la pegamos en cada palito de altura.
9
Finalmente tomamos el papel de regalo en este caso he utilizado 2 metros para envolver el Peluche, usamos cinta adhesiva para pegar el papel y en la parte superior usamos la cinta rosada, hacemos un nudo y procedemos en hacer un lazo.
Colocamos el Peluche en la cesta o la caja justo en el espacio que hemos dejado. Y este es el resultado.
Podemos añadir caramelos, galletas, dulces, frutos, chocolates y cualquier otro elemento. Ya que la caja es bastante grande.
He elegido algunos dulces y caramelos además de unas deliciosas manzanas. Sería bueno impulsar el regalar frutos a los niños en estas cestas de regalos y disminuir un poco el uso de los dulces y los caramelos en la alimentación de los niños. Así que mezclemos un poco de dulces con muchos frutos.
Aqui algunas fotos del regalo
sorpresa.
Muchas Gracias
- Las imágenes me pertenecen
- Traductor: Deelp traslator
- Edicion: Canva