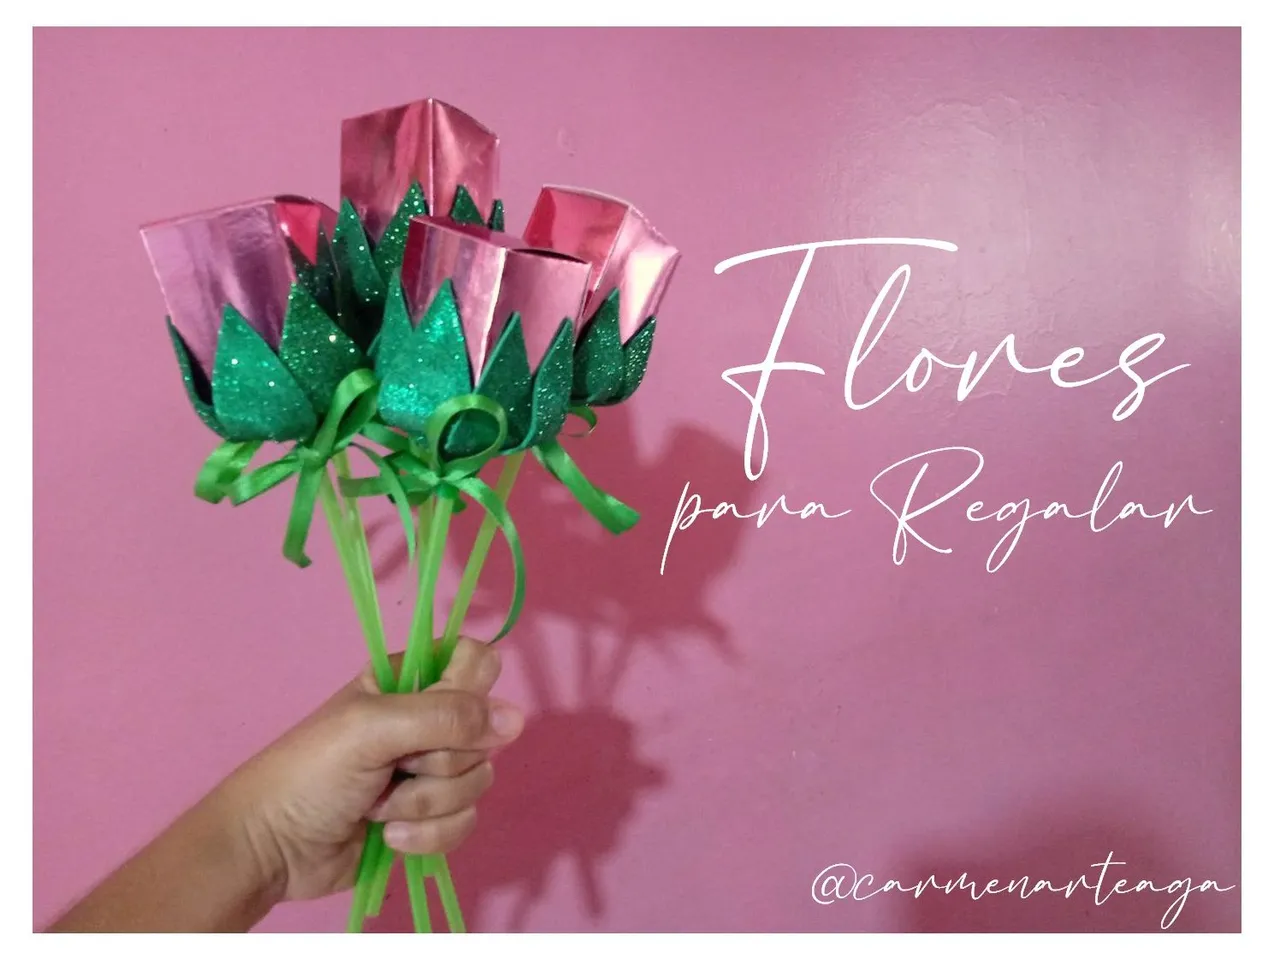
Hola todos, Feliz tarde, hoy les comparto el como elabore estas cajitas en forma de Rosas, ideales para obsequiar.
Les muestro el Proceso...🌷
Hello everyone, Happy afternoon, today I share with you how I made these little boxes in the shape of roses, ideal for gifts.I show you the process.🌷

- 🌷 Silicon de Barra.
- 🌷 2m de Cinta fina de color verde.
- 🌷 5 Palitos o Tubos de Plástico de 20cm de color verde con su porta globos.
- 🌷 1 Foami Escarchado de color verde.
- 🌷 1 Lamina de cartulina Rosada Metalizada.
- 🌷 Regla.
- 🌷 Tijera.
- 🌷Silicon by Barra.
- 🌷 2m of thin green tape.
- 🌷 5 Green 20cm Plastic Sticks or Tubes with their balloon holder.
- 🌷 1 Green Frosted Foami.
- 🌷 1 Metallic Pink Cardboard Sheet.
- 🌷 Rule.
- 🌷 Scissors.

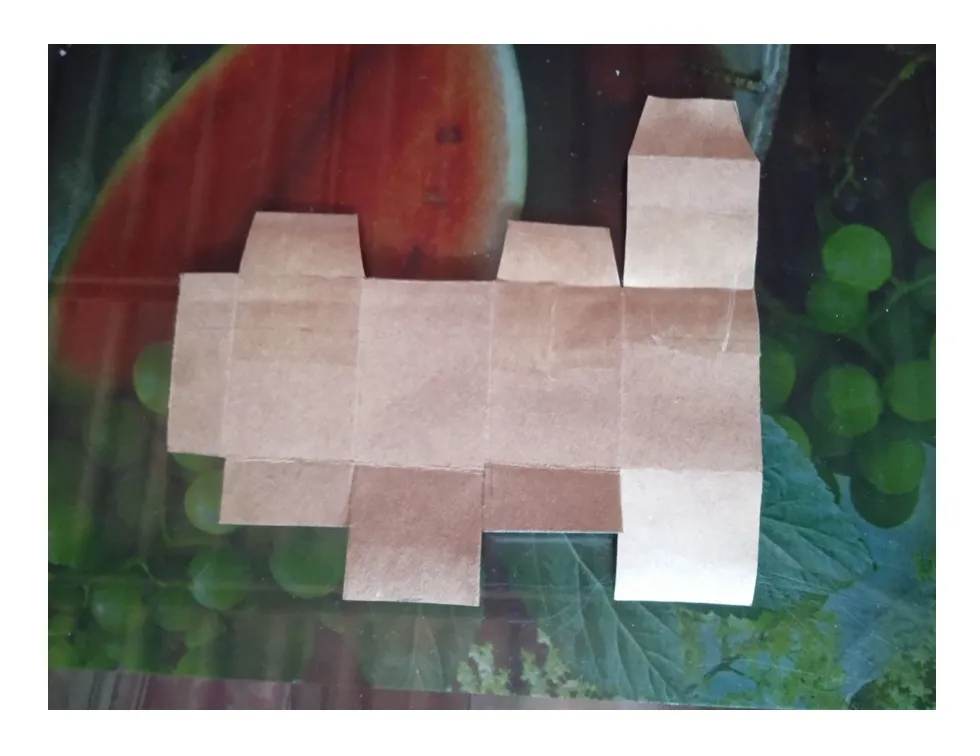
🌷 PASO 1: Con papel kraft elabore el patrón para la cajita que voy a necesitar con sus medidas.
🌷 STEP 1: With kraft paper, make the pattern for the box I will need with its measurements.
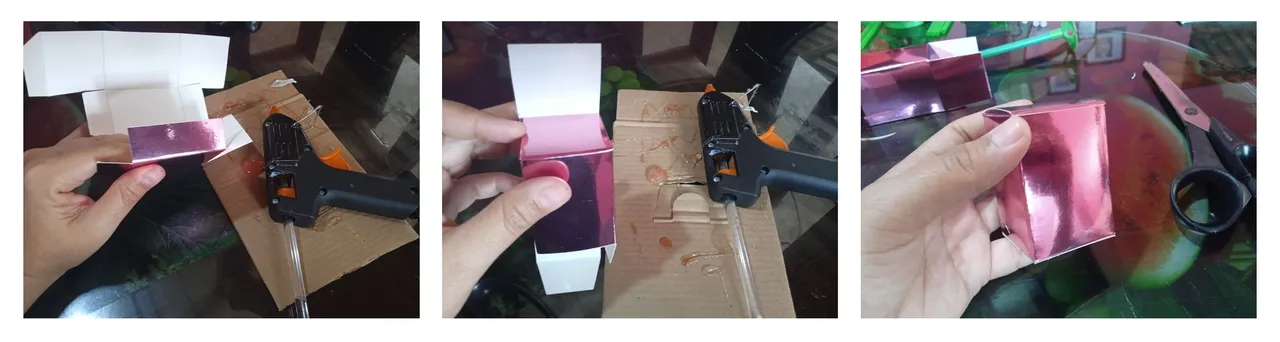
🌷 PASO 2: En la lamina de cartulina rosada y con ayuda de mi patrón dibuje y corte 5 cajitas.
🌷 STEP 2: On the pink cardboard sheet and with the help of my pattern, draw and cut 5 little boxes.
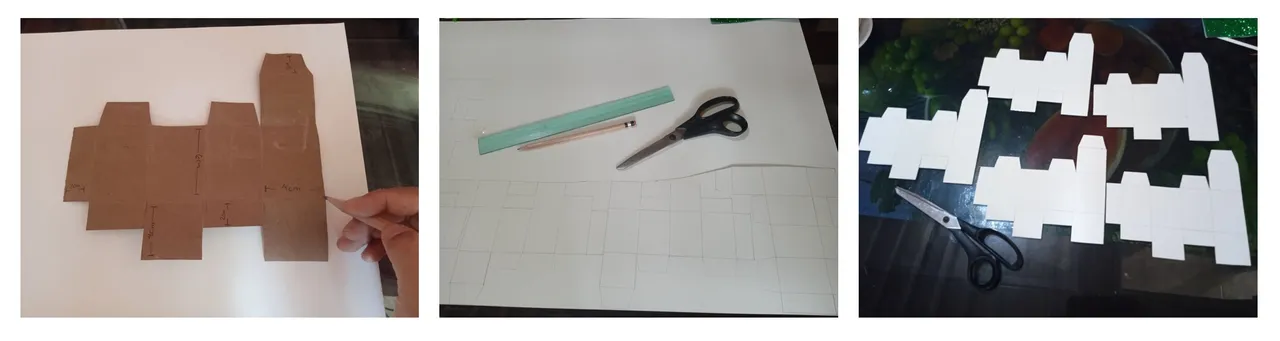
🌷 PASO 3: Una vez cortadas las cinco cajitas tome la regla y comencé a doblar todas mis líneas marcadas para darles así la forma que necesito.
🌷 STEP 3: Once the five boxes were cut, I took the ruler and started to bend all my marked lines to give them the shape I need.
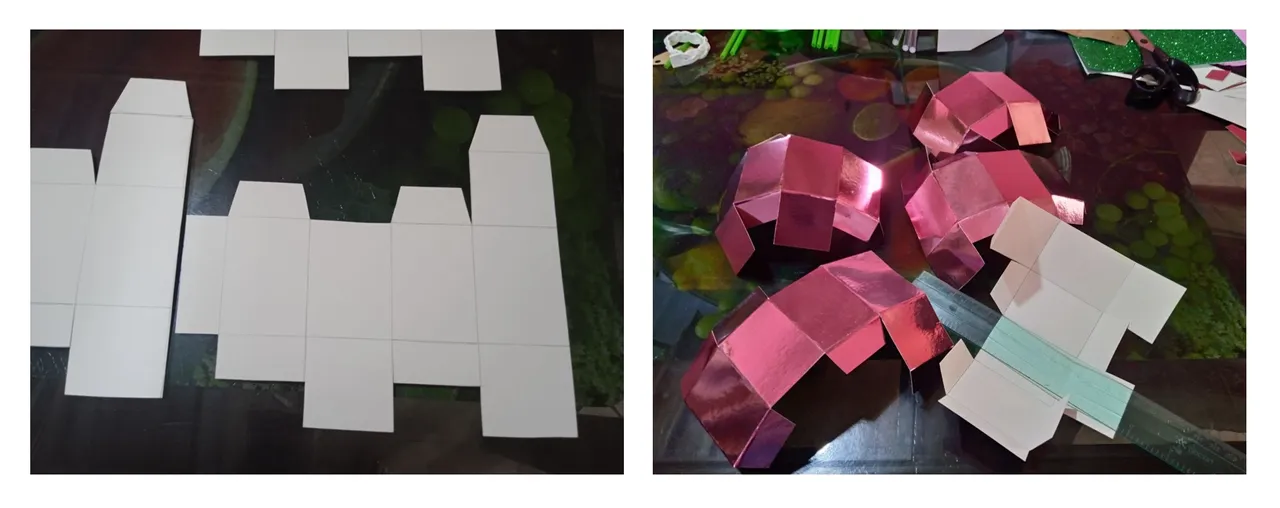
🌷 PASO 4: Tome cada una de las cajitas y las fui pegando, primero pegue un lado de la caja y la pestaña lateral, del mismo modo pegue la parte baja de las cajitas.
🌷 STEP 4: Take each of the boxes and glue them together, first glue one side of the box and the side flap, in the same way glue the bottom of the boxes.
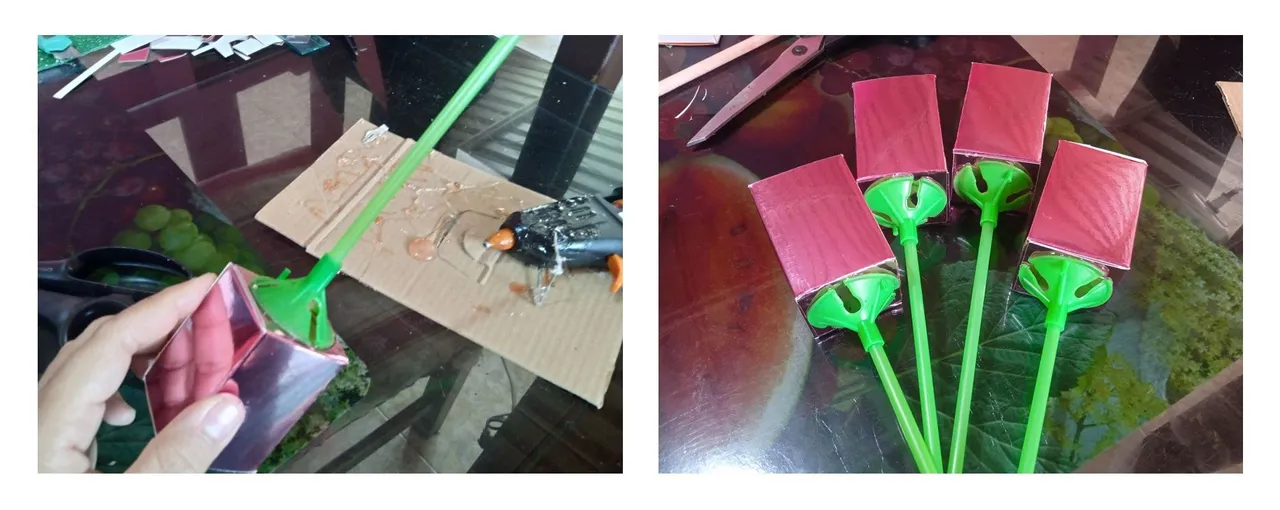
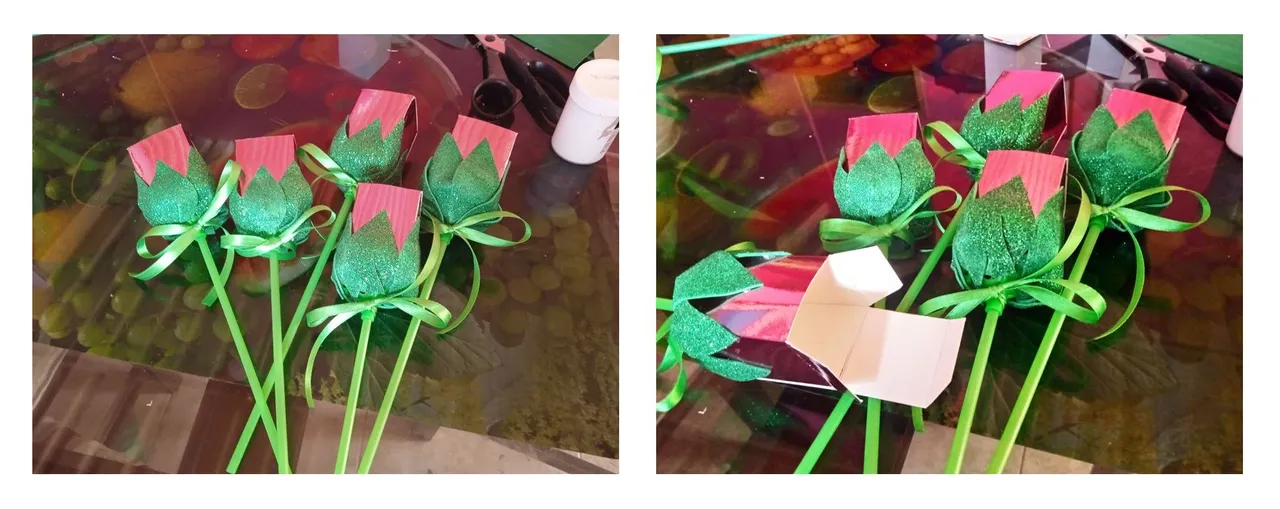
🌷 PASO 5: Tome los palitos y les puse su porta globos y los pegue cada palito en cada una de las cajitas.
🌷 STEP 5: Take the sticks and put the balloon holders on them and glue each stick to each of the boxes.
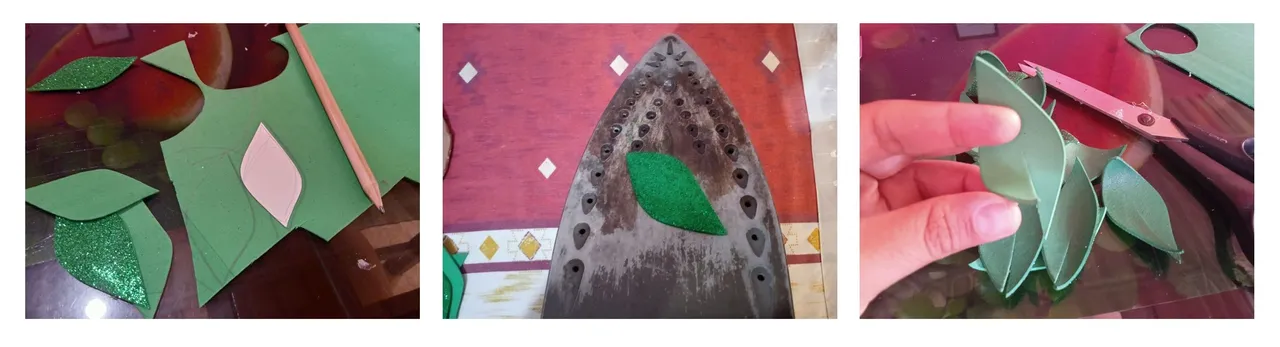
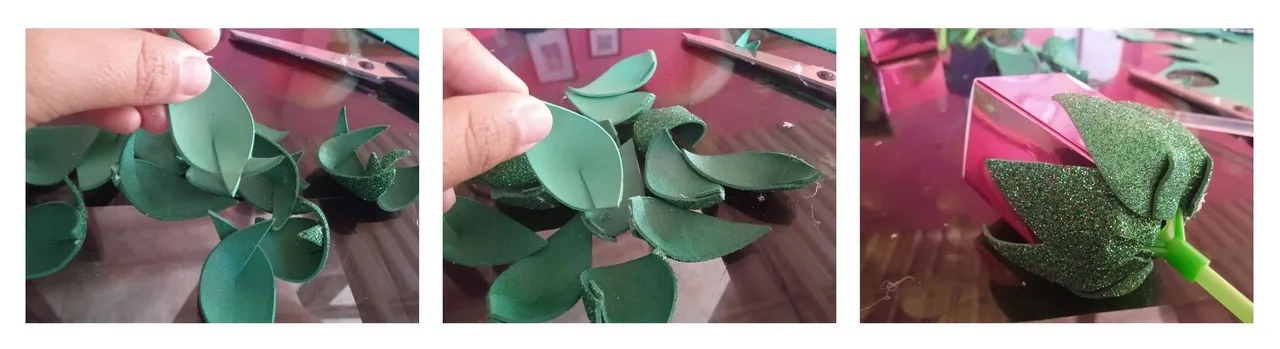
🌷 PASO 6: Con el foami verde escarchado dibuje y corte las hojitas siete hojas por cada cajita. las pase por la plancha para darles mejor forma, seguido les hice un pequeño corte a cada hoja y las fui pegando de forma cruzada, corte las puntas sobrantes y comencé a pegarlas a mis cajitas.
🌷 STEP 6: With the frosted green foami I drew and cut the leaves seven leaves for each box. I put them through the iron to give them a better shape, then I made a small cut on each leaf and glued them crosswise, cut the excess ends and began to glue them to my boxes.
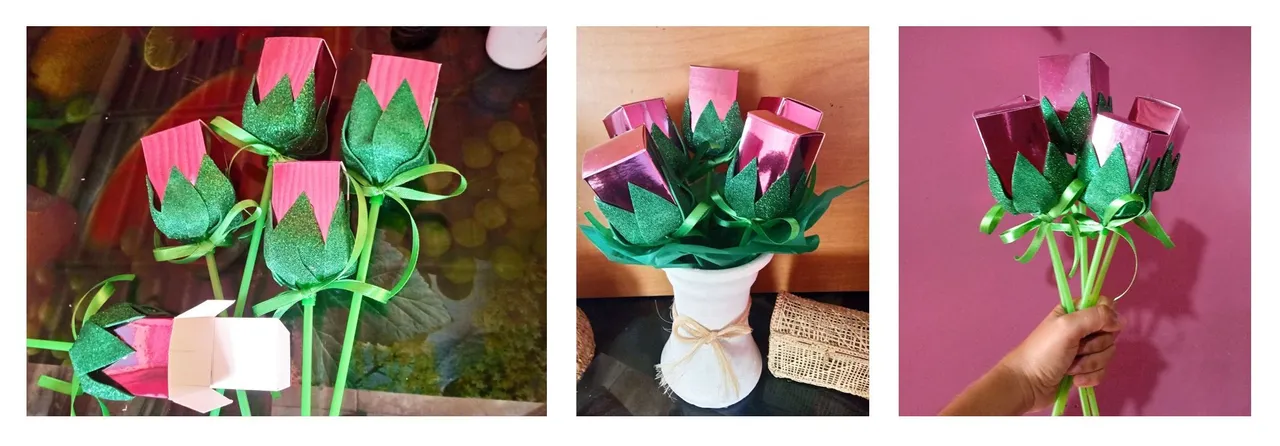
🌷 PASO 7: Una vez pegadas las hojas a cada cajita tome la cinta fina de color verde y corte tiras de 30cm de largo y se la coloque a cada cajita o rosa formando un lazo.
🌷 STEP 7: Once the leaves are attached to each box, take the thin green ribbon and cut strips of 30cm long and attach it to each box or rose forming a bow.
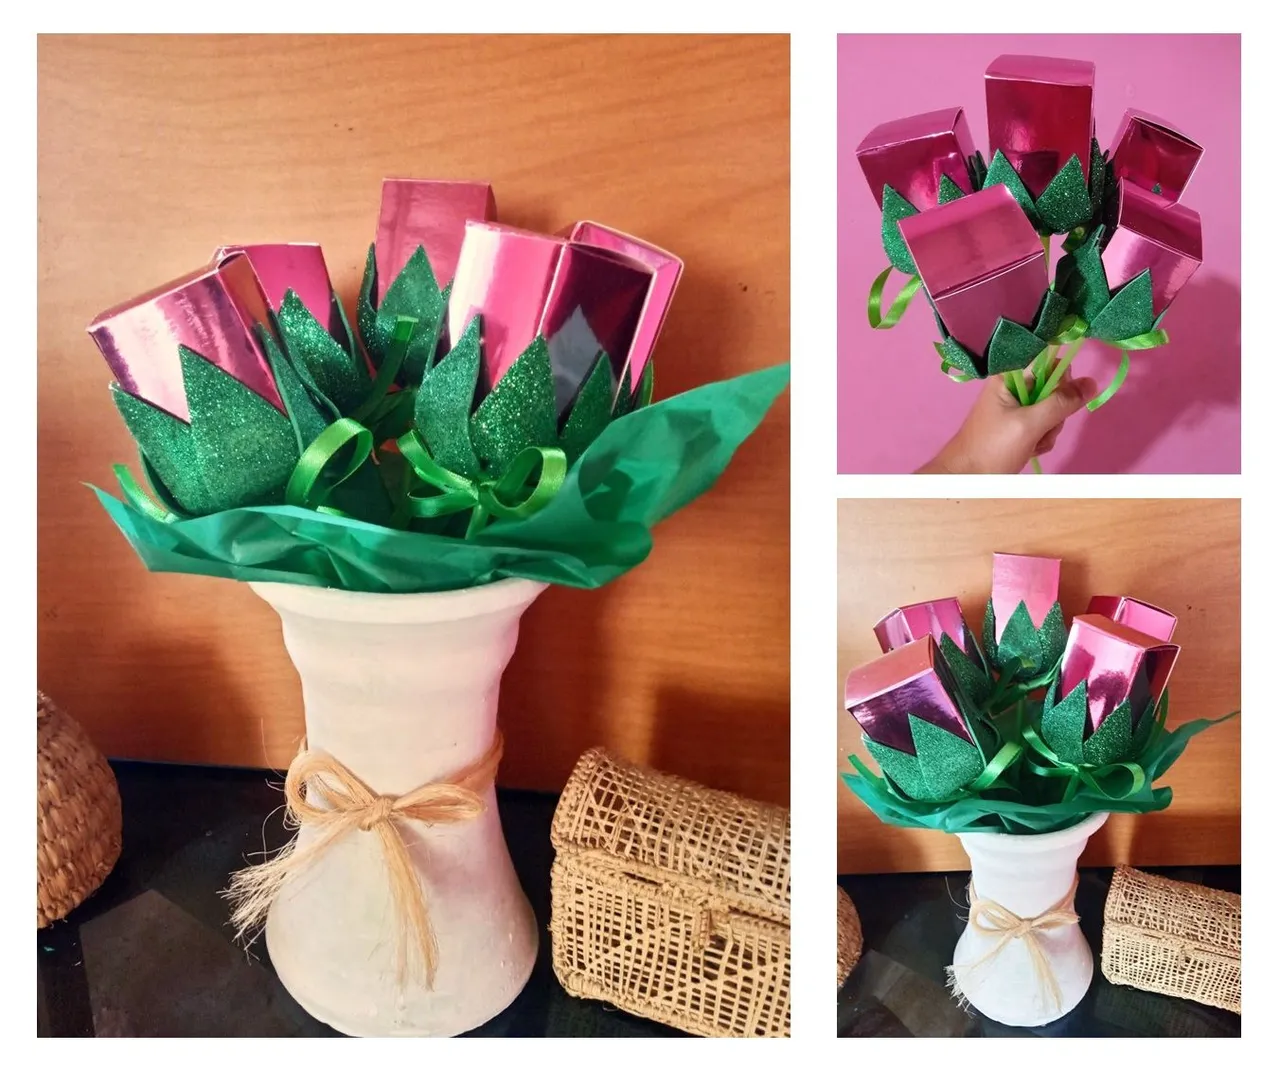
De esta manera quedaron estas cajitas en forma de Rosas que elabore...
This is how these little boxes in the shape of roses that I made for...
Gracias por leerme
Espero les guste...
Las Fotos son de mi Autoría.
Un Gran Abrazo...🌷
Thanks for reading I hope you like it... The Photos are my Author.A Big Hug...🌷
