Good day everyone.
I hope we all are doing well.
Today is the last day for DIY Hub Community monthly contest . I am delighted to be able to publish my post before the entry time closed 😂. Oh....! I was feeling like I wouldn’t be able to finish my crafting work. Thank God I made it.
So, here is what I prepared.
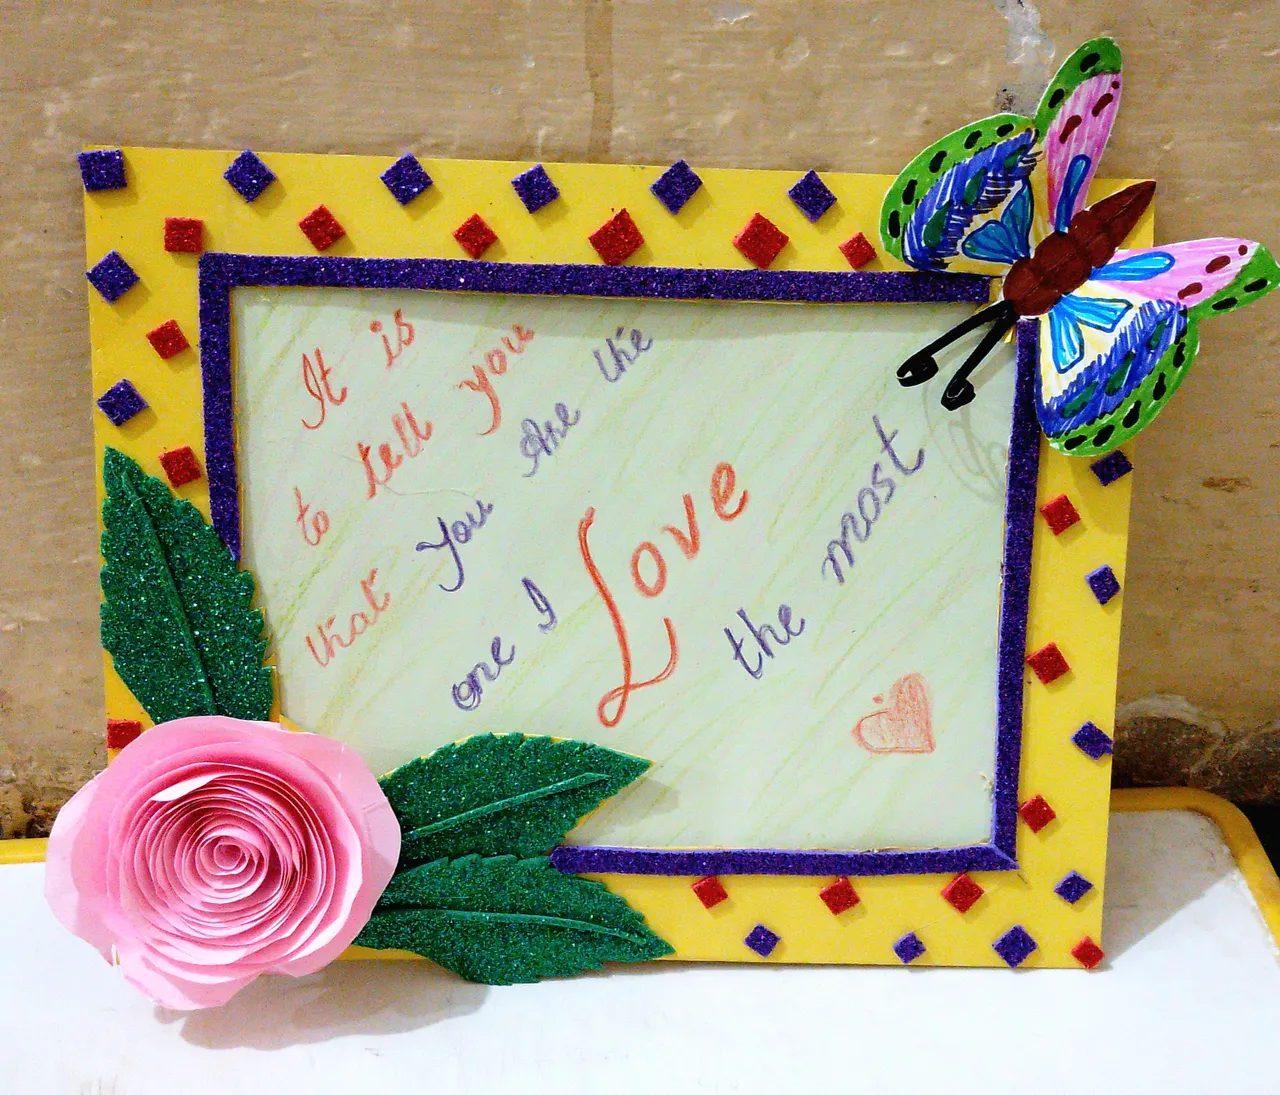
It is a greeting card cum photo frame. A photo can be placed in the center.
Without further ado, let me share how I prepared this piece.
MATERIAL NEEDED
• Card sheet (Yellow and white)
• Computer paper (Pink and light green)
• Glittered formic sheet (Green and purple)
• Coloured Markers
• Pencil, ruler, compass, scissors
• Glue
PROCEDURE
In the following text I would explain how I prepared different parts of the craft and then how I assembled them.
Because the theme is flower, let me begin with flower making.
Making Flower
• I took an A4 size pink coloured computer paper.
• With the help of compass I drew six circles with radius 1.5 , 3, 4.5, 6, 7.5 and 9 cm.

For drawing the circles I used pink color pencil instead of graphite pencil, so that if some marks are left, they won’t appear bad.
• Then I started drawing irregular curvy lines around the outermost circles.
• When the line would reach near the starting point, I bended the line towards the inner circle.

• Following the same fashion, the line was drawn till the last circle.

• After the lines were drawn, I cut the circles along the curvy lines.


• Then I started rolling the paper around itself starting from the outermost end.

• Rolled it down till the last circle. It took the shape of a rose flower.

• Then I applied some glue on the base (i.e. the last circle),and stuck the rolled paper on it.
The flower was ready.


Making Leaves
• The leaves were prepared with green glittered foamic sheet. I drew 3 leaves on the back side of the sheet

• Cut them.
• Cut very thin straight lines of the same sheet.

• Pasted the lines in the center of the leaves.

Making Butterfly
• For butterfly making, I used white card sheet.
Cut a piece of 4 × 4 cm.
Folded the sheet in the center and drew a butterfly on one side

• Then I cut the sheet along the outer lines of the butterfly.

• Opened it up and drew the similar pattern on the remaining half.
•Then I painted the butterfly with colour markers.
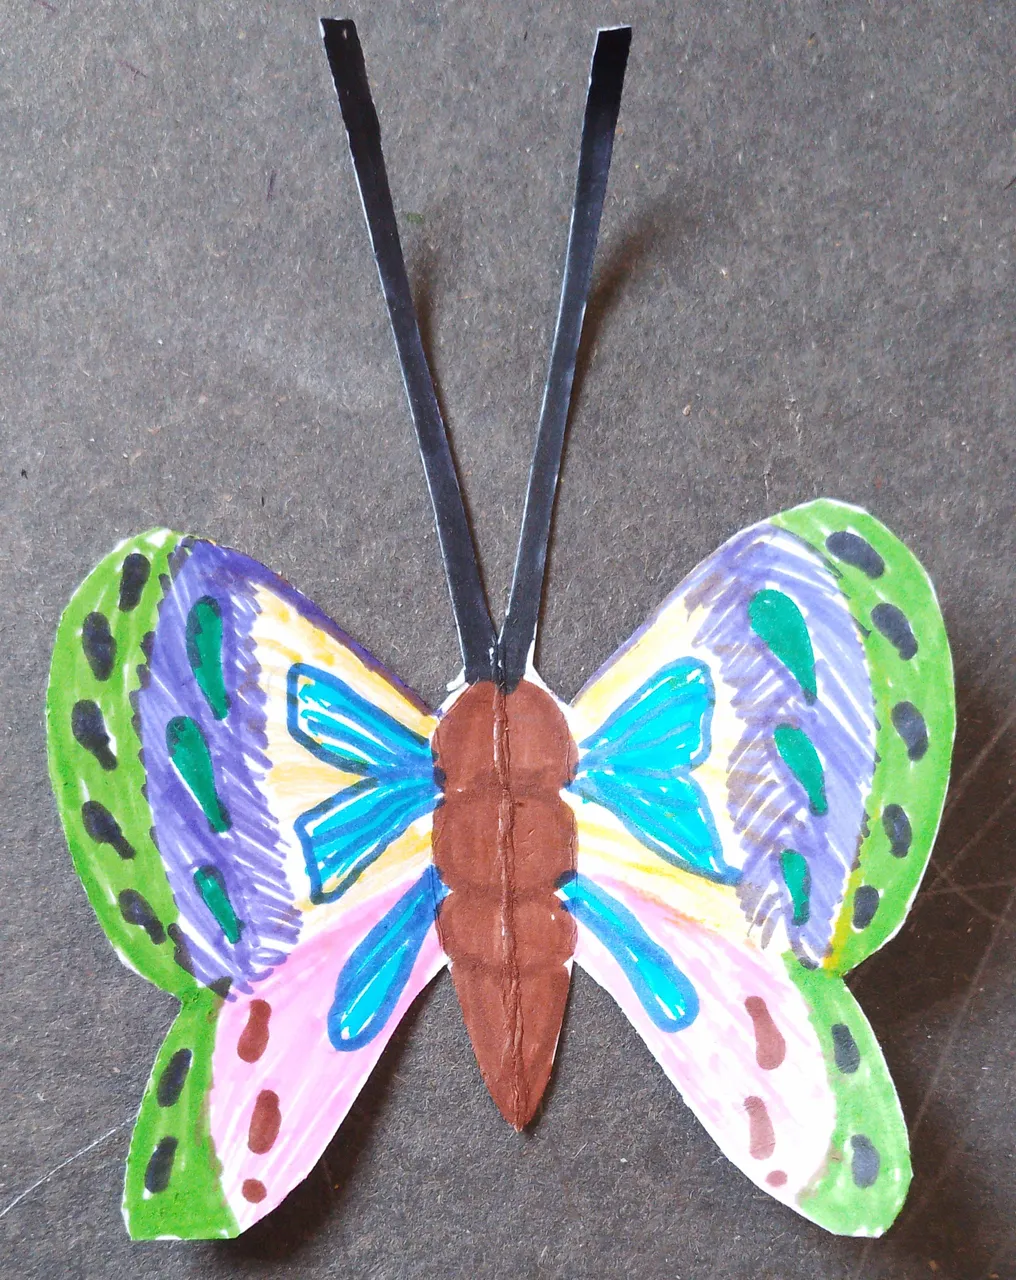
• Fold the antenna a little bit

• Also, fold the wings a little bit

Making Card
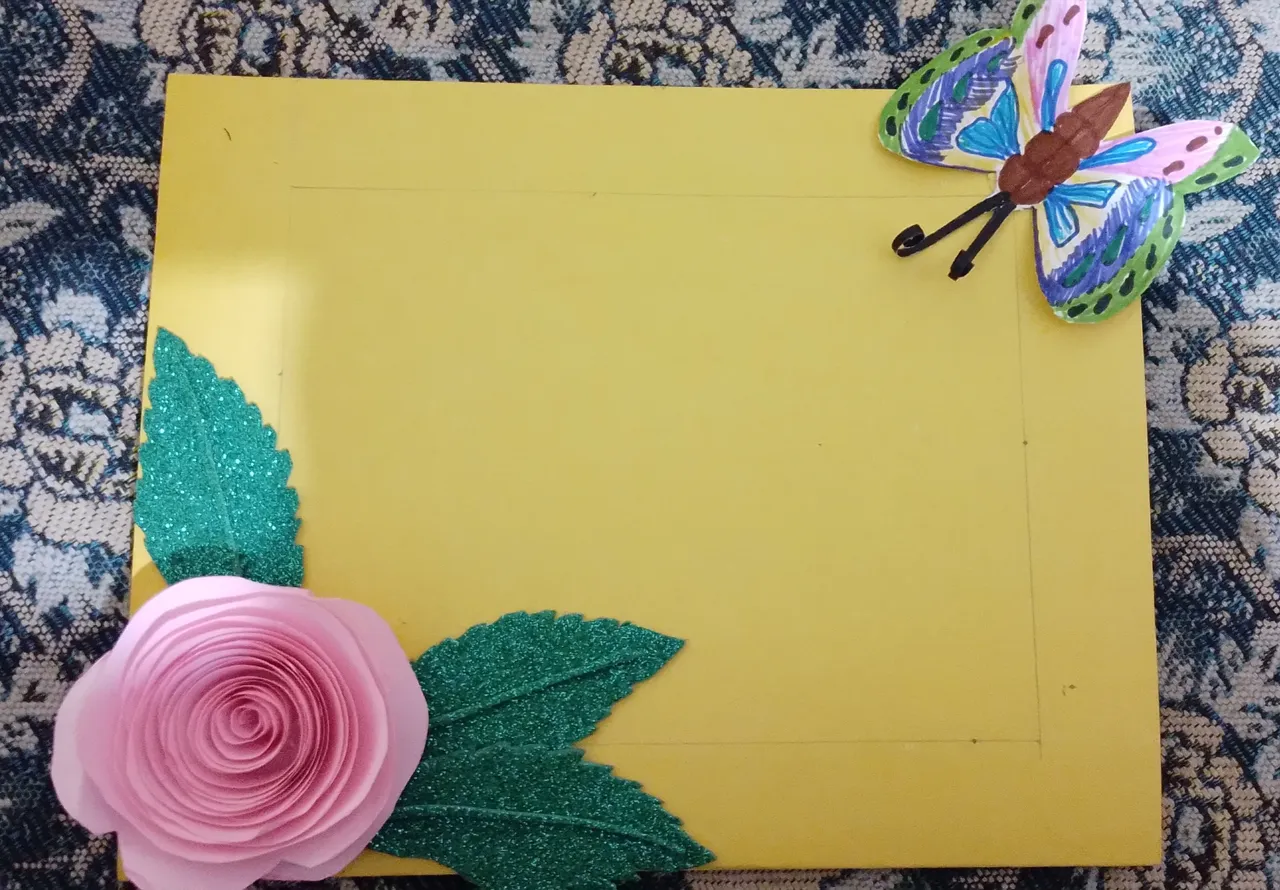
• I cut the yellow card sheet in size of 20×32cm. Then folded it (the lengthier side) in the center.

• I drew margins on all the four sides with width 2.5 cm

Combining Different Parts
• First I pasted leaves on the closed end of the folded card


• Then I pasted the flower on the leaves and the butterfly on the other top end of the card.
• After it I took purple coloured fomic sheet and cut its stripes with a width of 5 mm.
![]()
• Then I pasted them on the inner border.

• For further decoration, I cut small squares of purple and red fom8c sheet

• Pasted them on the borders.

Some More Steps
• I opened the card and cut the inner side of the border with the help of knife


• Then I joined the back and front end of the card at the right and left side.
Finalising the Card
• I took a green computer paper and cut it according to the size of inner frame.
• Then I decorated it with some words and colours.
• Then I slided in the paper inside the card using the opening on the upper side.

This is the place where a photo can be inserted.
All photos are tsken by me by my mobile camera.